
Related Manuals for AEMC 1050


Summary of Contents for AEMC 1050
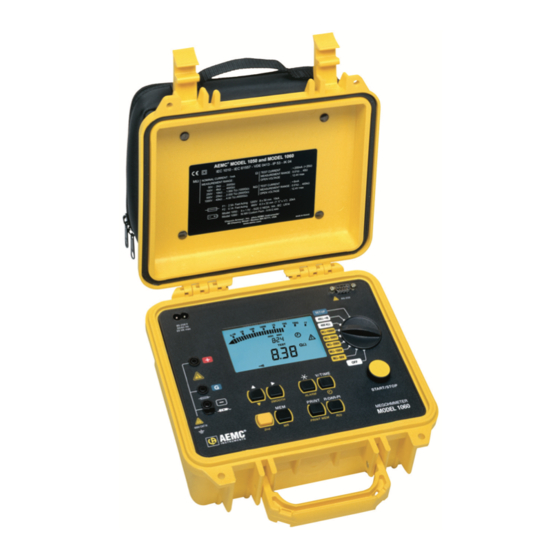
- Page 1 1050 MEGOHMMETER 1060 ShopAEMC www. .com 1.877.766.5412 Shop for AEMC products online at: E N G L I S H User Manual...
- Page 2 ShopAEMC www. .com 1.877.766.5412 Shop for AEMC products online at:...
- Page 3 Model #: 1050 / 1060 Please fill in the appropriate date as indicated: Date Received: _________________________________ _______________________ Date Calibration Due: Chauvin Arnoux , Inc. ® d.b.a AEMC Instruments ® www.aemc.com ShopAEMC www. .com 1.877.766.5412 Shop for AEMC products online at:...
-
Page 4: Table Of Contents
SET-UP Button (Configuring the Instrument) ......18 2.5.8 Clearing the Memory.............20 2.5.9 Communication Rate (RS-232) ..........20 2.5.10 Lead Resistance Compensation ...........20 2.5.11 Default Device Configuration ..........21 2.5.12 Blocking (Disabling) Test Voltages ........21 2.6 Measurement Functions..............22 2.6.1 AC/DC Voltage ..............22 2.6.2 Insulation Measurement............22 2.6.3 Continuity (40Ω ) / Resistance (400kΩ) ......23 ShopAEMC www. .com 1.877.766.5412 Shop for AEMC products online at: Megohmmeter Models 1050 /1060... - Page 5 5.3 Printing Measured Values ..............36 (PRINT button) .....37 5.4 Instantaneous Printing of Measurements (PRINT MEM button) ......38 5.5 Printing Data in Memory 5.6 Printing with the Serial-to-Parallel Adapter.........39 6. APPLICATION EXAMPLES ............. 40 6.1 Insulation Measurements on Electrical Installations .......40 6.2 Measurements on Electrical or Telecom Cable ........40 6.3 Insulation Measurements on Motors ..........41 ShopAEMC www. .com 1.877.766.5412 Shop for AEMC products online at: Megohmmeter Models 1050 /1060...
- Page 6 8. MAINTENANCE ................52 8.1 Battery Replacement (Model 1050) ...........52 8.2 Recharging the Battery (Model 1060) ..........52 8.3 Fuse Replacement ................53 8.4 Cleaning .....................53 8.5 Storage....................53 Repair and Calibration ..................54 Technical and Sales Assistance .................54 Limited Warranty ....................55 Warranty Repairs ....................55 ShopAEMC www. .com 1.877.766.5412 Shop for AEMC products online at: Megohmmeter Models 1050 /1060...
-
Page 7: Introduction
Risk of electric shock. The voltage at the parts marked with this symbol may be dangerous. In conformity with WEEE 2002/96/EC ShopAEMC www. .com 1.877.766.5412 Shop for AEMC products online at: Megohmmeter Models 1050 /1060... -
Page 8: Definition Of Measurement Categories
(black, red and blue) alligator clips, one black test probe; one RS-232 DB9 F/F 6 ft null modem cable, rechargeable battery, DataView software, US 120V power cord, ® spare fuses and a user manual. NOTE: Spare fuse and clip are located inside the instrument’s case. ShopAEMC www. .com 1.877.766.5412 Shop for AEMC products online at: Megohmmeter Models 1050 /1060... -
Page 9: Accessories And Replacement Parts
Lead, set of 3 Color-coded 10 ft Safety Leads .........Cat. #2951.70 Replacement 9.6V Rechargeable Battery Pack (Model 1060) ..Cat. #2960.21 115V Power Cord ................Cat. #5000.14 Order Accessories and Replacement Parts Directly Online Check our Storefront at www.aemc.com/store for availability 1.4.2 Accessory Information Remote Test Probe • The yellow test button generates the test voltage when pressed. -
Page 10: Product Features
• Fuse protection, with defective fuse detection and indication • Automatic discharge of residual high voltage on the tested device • Automatic shut-off to save the batteries • Battery level indicator (1050) or battery charge status indicator (1060) • Large easy-to-read back-lit LCD Additional Features (Model 1060 only): • Integral rechargeable battery • 128kB memory, real-time clock and serial interface • Control and programming of the instrument from a PC (with DataView software) ® ShopAEMC • Printing in RS-232 or Centronics mode www. .com 1.877.766.5412 Shop for AEMC products online at: Megohmmeter Models 1050 /1060... - Page 11 µA nA µF ALARM Ω MΩ -100V SMOOTH REMOTE MΩ - 50V V/TIME SMOOTH ALARM START/STOP PRINT R-DAR-PI 600V CAT III MEGOHMMETER PRINT MEM R(t) MODEL 1060 ShopAEMC www. .com 1.877.766.5412 Shop for AEMC products online at: Megohmmeter Models 1050 /1060...
-
Page 12: Control Features
• - Selects a parameter to be modified • SMOOTH - Stops/Starts smoothing of displayed values during insulation testing ShopAEMC • - Increases the flashing parameter being displayed. To move www. .com 1.877.766.5412 Shop for AEMC products online at: about the list of interval insulation measurements, in the R(t) function. Megohmmeter Models 1050 /1060... -
Page 13: Digital Display Features
• Insulation measurement (resistance, DAR and PI, capacitance) • Continuity measurement • Resistance measurement Small Display Indicates: • Voltage measured or applied by the instrument • Elapsed time or the output voltage, during insulation measurement After recording data (1060), the small display also indicates the time and date in MR (memory recall) mode, and the memory address with the OBJ : TEST number. 2.3 Bargraph • Active during insulation measurement (0.1MΩ to 1TΩ). • Indicates the battery charge at start-up. • Indicates free memory space - one segment representing approximately 100 groups of saved values, with each group holding approximately 50 ShopAEMC www. .com 1.877.766.5412 Shop for AEMC products online at: recordings (1 OBJ and 1 TEST). Megohmmeter Models 1050 /1060... -
Page 14: Symbols
REMOTE: Remote control via an interface (1060). In this mode, all the buttons and the rotary switch on the instrument are non-functional, except for the OFF position. FUSE HI: Flashes if the “+” input fuse is defective. FUSE -G-: Flashes if the “G” input fuse is defective. ShopAEMC www. .com 1.877.766.5412 Shop for AEMC products online at: Megohmmeter Models 1050 /1060... -
Page 15: Button Functions
NOTE: If the selector switch’s position is altered, or if the STOP button is pressed during measurement, the measurement is interrupted. ShopAEMC www. .com 1.877.766.5412 Shop for AEMC products online at: This function is only active for insulation measurement. Megohmmeter Models 1050 /1060... -
Page 16: R-Dar-Pi / R(T) Button
During or after measurement, the R-DAR-PI button allows you to scroll through the following values: • DAR (for measurements lasting >1 min). • PI (for measurements lasting >10 min). • Capacitance in µF (only after the measurement has stopped and the cir- cuit has been discharged). • Insulation resistance in MΩ, GΩ or TΩ. Automatic Measurement of DAR or PI: • If the button is pressed when in voltage measurement mode before pro- ceeding with a measurement, the following is displayed: MΩ ShopAEMC www. .com 1.877.766.5412 Shop for AEMC products online at: Megohmmeter Models 1050 /1060... - Page 17 Second Function - R(t) Used to access the interval insulation resistance values as a function of time after a measurement in “time-controlled test” mode (see § 2.5.2). The time between each saved sample is programmed in the SET-UP menu. This function is also available on the Model 1050, which has neither a read-write memory for saving measured data, nor an interface for data retrieval from the instrument by a PC. Model 1050: Up to 20 samples can be recorded during measurement at the sample rate chosen in SET-UP (the default value is 30 seconds). It is possible to save more than 20 ShopAEMC www. .com 1.877.766.5412 samples depending on available memory. Shop for AEMC products online at: Megohmmeter Models 1050 /1060...
-
Page 18: Alarm Button
Activating the Alarm Indication before a Test To activate the Alarm Indication before performing a test you must go through the following steps: • Program the Alarm Set Point Resistance Value for the Test Voltage you will be using. • Turn the Rotary switch to the Setup position. • Press the Yellow 2 button and then the Alarm button to set Alarms. The first time you press 2 & Alarm you will see the alarm setting for 50 volt tests. Press 2 & Alarm buttons repeatedly until you see the test you wish to set • ShopAEMC alarms for in the top line of the display. The sequencing will be 50, 100, www. .com 1.877.766.5412 Shop for AEMC products online at: 250, 500, 1000, Res and Cont. Megohmmeter Models 1050 /1060... -
Page 19: Smooth Button
First Function - Selects the desired parameter to be modified - the selected parameter flashes. It is modified using the button (see § 2.5.6). Second Function - SMOOTH Activates a digital filter for insulation measurement. It only has an effect on the displayed values (which are smoothed) and not the actual measurements. For example, this function is useful when the displayed insulation values are highly unstable, brought about due to a capacitive component in the tested element. ShopAEMC www. .com 1.877.766.5412 Shop for AEMC products online at: Megohmmeter Models 1050 /1060... -
Page 20: Button
The SET-UP function is used to directly access the parameters to be pro- grammed, by pressing the corresponding button: • After having pressed a button, the corresponding figures or symbols appear on the screen • The figures or the symbols that can be modified flash on the screen • Use the buttons • All the parameters are immediately and permanently saved ShopAEMC www. .com 1.877.766.5412 Shop for AEMC products online at: Megohmmeter Models 1050 /1060... - Page 21 The values shown on this table, in the “Display/main” and “Display/small” columns, are the factory default ShopAEMC values. In case they are accidentally changed, it is possible to get them back (see § 2.5.11). www. .com 1.877.766.5412 Shop for AEMC products online at: Megohmmeter Models 1050 /1060...
-
Page 22: Clearing The Memory
2.5.10 Lead Resistance Compensation In SET-UP, press the button three times. The symbol and ON appears in the small display. OFF can be selected with the button. In this instance, the lead resistance will not be subtracted during continuity measurement. To store the lead resistance: • Connect them together and press START (in SET-UP position • The resistance of the leads will be stored and indicated on the main display NOTE: • This value is stored in memory, even when the instrument is switched OFF. • The lead compensation only comes into effect when performing continu- ShopAEMC ity measurements. www. .com 1.877.766.5412 Shop for AEMC products online at: Megohmmeter Models 1050 /1060... -
Page 23: Default Device Configuration
• “DFLt” appears in the main display Press START to select the default configuration settings (see the previous table). 2.5.12 Blocking (Disabling) Test Voltages This function prevents insulation measurements from being carried out at selected test voltages. This makes it possible to use the instrument for specific applications and avoid improper voltages. In SET-UP, press the button 5 times or more (depending on the voltage to be disabled): • The test voltages appear in order on the small display with the symbol and ON/OFF on the main display. • Choose ON or OFF using the button for each test voltage you wish to disable (OFF) or to reinstate (ON) for use during insulation tests at these voltages. ShopAEMC www. .com 1.877.766.5412 Shop for AEMC products online at: Megohmmeter Models 1050 /1060... -
Page 24: Measurement Functions
The symbol flashes and the voltage value is indicated on the small digital display. If the measurements fluctuate greatly, the SMOOTH function can be enabled (see § 2.5.5). By pressing the V/TIME button during measurement, you can alternate between ShopAEMC displaying the duration of the voltage measurement and the exact voltage gener- www. .com 1.877.766.5412 Shop for AEMC products online at: ated on the small display (see § 2.5.2). Megohmmeter Models 1050 /1060... -
Page 25: Continuity
The instrument then goes back to its normal voltage measurement. If the voltage is <3V and the START/STOP button is pressed, the measure- ment proceeds. ShopAEMC www. .com 1.877.766.5412 Shop for AEMC products online at: Megohmmeter Models 1050 /1060... -
Page 26: Shopaemc .Com 1.877.766.5412
If the ALARM function is activated, a buzzer is triggered as soon as the measure- ment crosses the threshold programmed in the SET-UP configuration menu. ShopAEMC www. .com 1.877.766.5412 Shop for AEMC products online at: Megohmmeter Models 1050 /1060... -
Page 27: Specifications
AC/DC “-” terminals. 660V between the “G” and “-” or “G” and “+” terminals. AC/DC Measurement Ranges: 50V: 2kΩ to 200GΩ 100V: 4kΩ to 400GΩ 250V: 10kΩ to 1TΩ ShopAEMC 500V: 20kΩ to 2TΩ www. .com 1.877.766.5412 Shop for AEMC products online at: 1000V: 40kΩ to 4TΩ Megohmmeter Models 1050 /1060... - Page 28 Capacitance Measurement (following the discharging of test object): • Range: 0.005 to 4.999µF • Resolution: 1nF • Accuracy: ±10% ± 1ct Graphs showing the typical changes in test voltage as a function of the load: 50V Test Voltage Resistance (kΩ) ShopAEMC www. .com 1.877.766.5412 Shop for AEMC products online at: Megohmmeter Models 1050 /1060...
- Page 29 100V Test Voltage Resistance (kΩ) 250V Test Voltage Resistance (kΩ) 500V Test Voltage ShopAEMC www. .com 1.877.766.5412 Shop for AEMC products online at: Resistance (kΩ) Megohmmeter Models 1050 /1060...
- Page 30 25V: Initial Voltage Discharge Time 1000V 2.8s 500V 2.2s 250V 1.7s 100V 0.5s Range of DAR and PI Ratios: 0.000 to 9.999 Accuracy: ± 5% ShopAEMC www. .com 1.877.766.5412 Shop for AEMC products online at: Megohmmeter Models 1050 /1060...
-
Page 31: Continuity
AC/DC 3.5 Resistance Method: Voltage-current measurement Open-circuit Voltage: Max. 12.4V (<15V with external supply) Short-circuit Current: < 6mA Max. Voltage Surge: 1200V for 10 seconds between the “+” and “-” terminals AC/DC 660V between the “G” and “-” or “G” and “+” terminals AC/DC Max Serial Mode Voltage: ; measurement is prohibited above this value AC/DC ShopAEMC www. .com 1.877.766.5412 Shop for AEMC products online at: Megohmmeter Models 1050 /1060... -
Page 32: Power Supply
*Assuming that a 10 minute long PI measurement is made 5 times a day, the operating time will be 16 days (2.5 weeks or 0.5 months). Recharging Time (1060) 4.5 hours to reach 100% of its capacity (max recharge time: 6 hours) 0.5 hours to reach 10% of its capacity (operating radius: 1 day approx) ShopAEMC www. .com 1.877.766.5412 Shop for AEMC products online at: Megohmmeter Models 1050 /1060... -
Page 33: Mechanical Specifications
Altitude: < 2000m 3.9 Safety Specifications Electrical safety according to EN 61010-1 + A2 (ed. 95), EN 61557 (ed. 97) Double Insulation: 600V Cat. III Pollution Degree 2 Electromagnetic Compatibility: Emission: NF EN 55 081 -1 (June 92) Immunity: NF EN 55 082 -1 (June 95) Mechanical Protection: IP 54 according to NF EN 60529 (Oct 92) IK 04 according to NF EN 50102 (June 95) *All specifications are subject to change without notice. ShopAEMC www. .com 1.877.766.5412 Shop for AEMC products online at: Megohmmeter Models 1050 /1060... -
Page 34: Operation
25V at all the other test voltages, then measurement is prohibited. Scroll through the results on the main display with the R-DAR-PI button, or on the small display with the V/TIME button. ShopAEMC www. .com 1.877.766.5412 Use R(t) when carrying out a ‘time-controlled test’ to scroll through the interval Shop for AEMC products online at: measurement values saved at the sampling rate specified in SET-UP. Megohmmeter Models 1050 /1060... -
Page 35: Continuity Measurement
• If the voltage present is > 3V, then measurement is prohibited. • Start the measurement and read the results. During measurement, the potential difference at the input is indicated on the small display (useful for measurement of multi-junction components: thyristors, high volt- age diodes, etc). The open circuit voltage is equal to the voltage of the instrument’s battery. NOTE: The R-DAR-PI and V/TIME buttons are not active for this function. 4.5 Capacitance Measurement Capacitance measurement is automatically carried out during insulation measure- ShopAEMC www. .com 1.877.766.5412 ment. It is displayed after the measurement is stopped and the circuit is discharged, Shop for AEMC products online at: using the R-DAR-PI button. Megohmmeter Models 1050 /1060... -
Page 36: (Model 1060)
To be able to save your measurements, you will need to do the following: Set the instrument to SET-UP and press the MEM button (the display shows “MEM All clr”). Press the MEM button for 2s (the display shows “MEM ALL FrEE”). Mea- surements are now ready to be saved. First Function - MEM (Save) Results can be recorded in the instrument’s memory and stored along with addresses defined by an object number (OBJ) and a test number (TEST). An object represents a ‘box’ into which we can place 99 tests. Thus, an object can ShopAEMC represent a machine or an installation upon which a certain number of measure- www. .com 1.877.766.5412 Shop for AEMC products online at: ments (insulation, resistance and continuity) are carried out. Megohmmeter Models 1050 /1060... - Page 37 26 bytes. Therefore, it is possible to record about 1500 insulation measurements or about 4000 resistance or continuity tests. Free Memory Space This function is automatically activated when a result is saved. Press MEM once to get the following free OBJ : TEST number; the bargraph dis- played corresponds to the available free memory space. • If the entire memory is free, all of the bargraph segments appear. • If the entire memory is full, the arrow to the left of the bargraph flashes. • As soon as the storage is complete, the bargraph disappears. Each segment of the bargraph equals approximately 50 recordings. ShopAEMC www. .com 1.877.766.5412 Shop for AEMC products online at: Megohmmeter Models 1050 /1060...
-
Page 38: Printing Measured Values
If the data transmission to the printer is successful, the COM symbol flashes once on the screen. If a problem has occurred, the COM symbol remains on the LCD screen without flashing. ShopAEMC www. .com 1.877.766.5412 Shop for AEMC products online at: Megohmmeter Models 1050 /1060... -
Page 39: Instantaneous Printing Of Measurements (Print Button)
0 0 : 30 35.94 GOhm 1005V 0 1 : 00 42.00 GOhm 1005V 0 1 : 30 43.50 GOhm 1005V etc... A space for the operator’s signature is available at the end of the printout. ShopAEMC www. .com 1.877.766.5412 Shop for AEMC products online at: Megohmmeter Models 1050 /1060... -
Page 40: Printing Data In Memory (Print Mem Button)
• To exit without printing, alter the position of the selector switch. • To proceed with printing, press the PRINT button once more. • To stop printing, alter the position of the selector switch. Only the main results are printed out. Example : AEMC Instruments Model 1060 ® Instrument number: 000 001 CONTINUITY TEST OBJECT: 01 ........TEST: 01 Date: ..........03.31.2001 Start time: ..........14:55 ShopAEMC Continuity: ..........0.45Ω www. .com 1.877.766.5412 Shop for AEMC products online at: Megohmmeter Models 1050 /1060... -
Page 41: Printing With The Serial-To-Parallel Adapter
• Turn on the Model 1060. • To start printing out values that haven’t been saved (immediate printing), press PRINT after a measurement. • To start printing out saved measurements, press the PRINT MEM button WARNING: This adapter is designed exclusively for use with the Model 1060 and is not suitable for any other application. ShopAEMC www. .com 1.877.766.5412 Shop for AEMC products online at: Megohmmeter Models 1050 /1060... -
Page 42: Application Examples
CHAPTER 6 APPLICATION EXAMPLES 6.1 Insulation Measurements on Electrical Installations The measurements are performed between conductors or between all the con- ductors and the earth . 6.2 Measurements on Electrical or Telecom Cable Braid Insulator Guard Cable ShopAEMC www. .com 1.877.766.5412 Shop for AEMC products online at: Insulation between wires or between each wire and the earth. Megohmmeter Models 1050 /1060... -
Page 43: Insulation Measurements On Motors
6.3 Insulation Measurements on Motors Motor Motor coils ShopAEMC www. .com 1.877.766.5412 Shop for AEMC products online at: Megohmmeter Models 1050 /1060... -
Page 44: Using Dataview
NOTE: When installing, the user must have Administrative access rights during the installation. The users access rights can be changed after the installation is complete. DataView must be reinstalled for each user in a multi-user system. ® USB Flash Drive Install 1. Insert the USB stick into an available USB port (wait for driver to be installed). 2. If Autorun is enabled then an AutoPlay window should appear as shown. ShopAEMC www. .com 1.877.766.5412 Shop for AEMC products online at: Megohmmeter Models 1050 /1060... - Page 45 ® viewing PDF documents supplied with DataView ® • *DataView Updates - Links to the online DataView software updates to ® check for new software version releases. ShopAEMC www. .com 1.877.766.5412 • *Firmware Upgrades - Links to the online firmware updates to check for Shop for AEMC products online at: new firmware version releases. Megohmmeter Models 1050 /1060...
- Page 46 DataView ® Figure 7-2 12. In the Ready to Install the Program window, click on Install. 13. If the instrument selected for installation requires the use of a USB port, a warning box will appear, similar to Figure 7-3. Click OK. ShopAEMC www. .com 1.877.766.5412 Shop for AEMC products online at: Megohmmeter Models 1050 /1060...
- Page 47 NOTE: If you connected your instrument to the computer before installing the software and drivers, you may need to use the Add/Remove Hardware utility to remove the instrument driver before repeating the process. ShopAEMC www. .com 1.877.766.5412 Shop for AEMC products online at: Megohmmeter Models 1050 /1060...
-
Page 48: Connecting The Model 1060 To Your Computer
Using the DataView Icon • Double-click the DataView Icon that was created during installation, located on the desktop. • DataView will open and display the DataView Quick Start window ® (see Figure 7-4). • Click the Configure Instrument button and the Connection window will appear (see Figure 7-5). ShopAEMC www. .com 1.877.766.5412 Shop for AEMC products online at: Megohmmeter Models 1050 /1060... -
Page 49: Configuring The Instrument
1. Click the Configure Instrument button. A dialog box will open, allowing you to select the Communication Rate and the Serial Port for communicating with the Model 1060. Figure 7-5 Make sure that the serial port displayed in the dialog box matches the port you plugged the serial cable into. If the correct serial port is not selected, click on the drop down arrow and select the proper one. 3. The Communication Rate will default to 9600 and should be acceptable to any computer. This is also the default rate for the Model 1060. You may select ShopAEMC a different rate by clicking on the Communication Rate drop-down menu and www. .com 1.877.766.5412 Shop for AEMC products online at: selecting from the available values. Megohmmeter Models 1050 /1060... - Page 50 Each field in the dialog box is identical to the programmable features available from the instrument front panel itself. Refer to § 2.5 for a complete description of each configurable function. Several of the functions are configured by typing the appropriate value in the field provided, such as test run time, which may be programmed from a value of one minute to 59 minutes 59 seconds. Others are configured by clicking on the appropriate radio button, such as, activat- ing or deactivating the buzzer by either selecting ON or OFF. The right hand side of this setup dialog box contains nine command buttons: Close: Closes the Configuration dialog box and brings up the Control • Panel. ShopAEMC www. .com 1.877.766.5412 Shop for AEMC products online at: • Write to Inst: Programs the megohmmeter using the current settings. Megohmmeter Models 1050 /1060...
-
Page 51: Running The Test
You can select the Megohmmeter Control Panel via the Windows taskbar at the bottom of your screen. 7.3.2 Running the Test After configuring the instrument, the Control Panel will automatically open. The Control Panel is used to initiate a timed test from the computer. The Control Panel dialog box consists of five command buttons: ShopAEMC www. .com 1.877.766.5412 Shop for AEMC products online at: • Start: This button begins a timed test. Megohmmeter Models 1050 /1060... - Page 52 Figure 7-7 To run a timed test, perform the following steps: 1. Select the appropriate voltage for the test by clicking on the radio button next to the desired selection. 2. Press the Start button. This will run the test at the selected voltage. As the test is running, all other buttons are grayed out and the Start button becomes a Stop button. Once the test has started, a graph will begin to appear and build on the right side of the Control Panel (see Figure 7-7). The statistical data for the time of the test, DAR, PI, resistance value and other information will appear as they are completed on the lower left side of the Control Panel. The test will stop automatically at the end of the programmed run time. You may also stop the test at any time by pressing the Stop button. ShopAEMC www. .com 1.877.766.5412 3. Once the test has been completed press the Save to Disk button to save the Shop for AEMC products online at: results of the test just completed to a disk drive in your computer. Megohmmeter Models 1050 /1060...
- Page 53 8. In the Groups window of this dialog box, click on “megohmmeter” and in the Templates window click on “Megohmmeter 1060 Summary Report”. 9. In the Step 2: Specify Database(s) window, the file you just saved and named should be visible. If this is the file you wish to generate a report from, click the OK button. The report will now be available on the screen including graph, individual data points and all statistical data. 10. To print this report, either click on the Print icon or click on the File command and then Print. This completes the process of configuring, running, retrieving data, and printing a report using DataView with your Model 1060 megohmmeter. ® ShopAEMC www. .com 1.877.766.5412 Shop for AEMC products online at: Megohmmeter Models 1050 /1060...
-
Page 54: Maintenance
8.2 Recharging the Battery (Model 1060) If the symbol is flashing, then it is necessary to recharge the battery. Con- nect the instrument to the 120V power cord via the connector, charging starts automatically: • bAt on the small display and CHrG on the main display, signifies fast charging in progress. ShopAEMC • bAt on the small display and CHrG flashing on the main display, signifies slow www. .com 1.877.766.5412 Shop for AEMC products online at: charging (starts off with fast charge, temperature conditions permitting). Megohmmeter Models 1050 /1060... -
Page 55: Fuse Replacement
OFF before opening up the case. Using only the types of fuses shown on the sticker in battery compartment: • “+” terminal fuse F1 (FUS HI): F 2.5A time delayed fuse - 1.2kV - 8 x 50mm - 15kA • “G” terminal fuse F2 (FUS G): F 0.1A fast fuse - 660V - 6.3 x 32mm - 20kA 8.4 Cleaning Disconnect the instrument from any source of electricity. Use a soft cloth lightly dampened with soapy water. Rinse with a wet cloth and then dry with a dry cloth. Do not use alcohol, solvents or hydrocarbons. 8.5 Storage If the instrument is not used for an extended time period (longer than two months), remove the battery and store separately (Model 1050). ShopAEMC www. .com 1.877.766.5412 Shop for AEMC products online at: Megohmmeter Models 1050 /1060... -
Page 56: Repair And Calibration
Chauvin Arnoux , Inc. d.b.a. AEMC Instruments ® ® 200 Foxborough Boulevard Foxborough, MA 02035 USA Phone: (800) 343-1391 (508) 698-2115 Fax: (508) 698-2118 E-mail: techsupport@aemc.com www.aemc.com NOTE: Do not ship Instruments to our Foxborough, MA address. ShopAEMC www. .com 1.877.766.5412 Shop for AEMC products online at: Megohmmeter Models 1050 /1060... -
Page 57: Limited Warranty
Fax: (603) 742-2346 or (603) 749-6309 E-mail: repair@aemc.com Caution: To protect yourself against in-transit loss, we recommend you insure your returned material. NOTE: You must obtain a CSA# before returning any instrument. ShopAEMC www. .com 1.877.766.5412 Shop for AEMC products online at: Megohmmeter Models 1050 /1060... - Page 58 Notes: ShopAEMC www. .com 1.877.766.5412 Shop for AEMC products online at: Megohmmeter Models 1050 /1060...
- Page 59 ShopAEMC www. .com 1.877.766.5412 Shop for AEMC products online at:...
- Page 60 02/13 99-MAN 100237 v25 ShopAEMC Chauvin Arnoux , Inc. d.b.a. AEMC Instruments ® ® www. .com 1.877.766.5412 Shop for AEMC products online at: 15 Faraday Drive • Dover, NH 03820 USA • Phone: (603) 749-6434 • Fax: (603) 742-2346 www.aemc.com...
Need help?
Do you have a question about the 1050 and is the answer not in the manual?
Questions and answers