Table of Contents
Advertisement
Quick Links
Advertisement
Table of Contents

Related Manuals for Digisol DG-BG1100U


Summary of Contents for Digisol DG-BG1100U
- Page 1 DG-BG1100U ADSL2/2+ Combo Broadband Router User Manual V1.1 2011-07-25...
- Page 2 Trademarks: DIGISOL™ is a trademark of Smartlink Network Systems Ltd. All other trademarks are the property of the respective manufacturers. Safety This equipment is designed with the utmost care for the safety of those who install and use it.
-
Page 3: Table Of Contents
DG-BG1100U User Manual Index 1. Safety Precautions ......................5 2............................6 2.1 Application ........................ 8 2.2 Environment ......................8 2.3 System Requirements ....................8 2.4 LED Status ........................ 8 2.4.1 Front Panel ......................9 2.4.2 Rear panel ......................9 3. - Page 4 DG-BG1100U User Manual 4.4.4 Security ......................53 4.4.4.1 Outgoing IP Filtering Setup ..............54 4.4.4.2 Incoming IP Filtering Setup ..............58 4.4.4.3 Parental Control ..................61 4.4.5 Quality of Service .................... 62 4.4.5.1 Enabling QoS .................... 62 4.4.5.2 QoS - Queue Configuration ..............63 4.4.5.3 QoS - QoS Classification .................
-
Page 5: Safety Precautions
DG-BG1100U User Manual 1. Safety Precautions • Use volume labels to mark the type of power. • Use the power adapter which is packed within the device package. • Pay attention to the power load of the outlet or prolonged lines. An overburden power outlet or damaged lines and plugs may cause electric shock or fire accident. - Page 6 DG-BG1100U User Manual 1. Safety Precautions......................5 2............................6 2.1 Application........................8 2.2 Environment......................8 2.3 System Requirements....................8 2.4 LED Status........................8 2.4.1 Front Panel......................9 2.4.2 Rear panel......................9 3. Hardware Installation....................10 3.1 ADSL Connection of Router..................10 3.2 USB Installation......................11 4. Web Configuration Management..................12 4.1 Logging In to the Router..................12 4.2 Quick Setup –...
- Page 7 DG-BG1100U User Manual 4.4.3 NAT.........................48 4.4.3.1 Virtual Servers..................49 4.4.3.2 Port Triggering..................51 4.4.3.3 DMZ Host....................52 4.4.4 Security......................53 4.4.4.1 Outgoing IP Filtering Setup..............54 4.4.4.2 Incoming IP Filtering Setup..............58 4.4.4.3 Parental Control..................61 4.4.5 Quality of Service....................62 4.4.5.1 Enabling QoS....................62 4.4.5.2 QoS - Queue Configuration..............63 4.4.5.3 QoS - QoS Classification.................64...
-
Page 8: Application
DG-BG1100U User Manual single global IP address. The advanced security enhancements, packet filtering and port redirection is able to protect your network from potentially devastating intrusions by malicious agents. You can access the web-based management interface to realize network and router management by using any web browser. -
Page 9: Front Panel
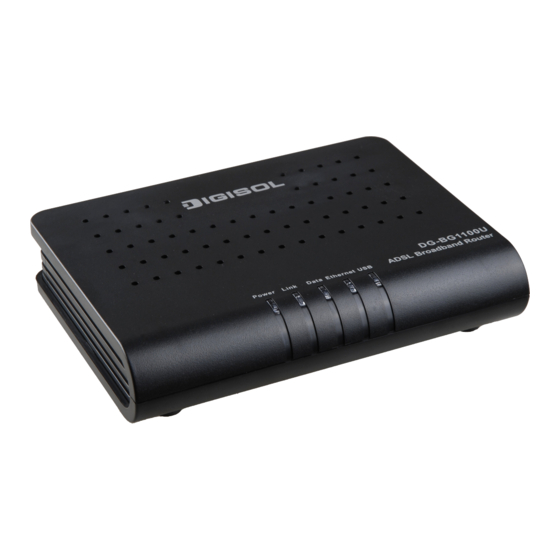
DG-BG1100U User Manual 2.4.1 Front Panel Status Description Power is off. Power Power is on and the device operates normally. No signal is detected. Link Blink DSL line training is in progress. DSL line connection is up. Data Blink Traffic is in progress. -
Page 10: Hardware Installation
DG-BG1100U User Manual Interface Description RJ-45 port, for connecting the router to a PC or other network Ethernet devices through Ethernet cable. To restore the factory default, keep the device powered on, push a Reset needle into the hole for about 1 second, and then release. -
Page 11: Usb Installation
DG-BG1100U User Manual The splitter has three ports: • LINE: Connect to a wall phone jack (RJ-11 jack) Modem: Connect to the Line interface of the router • • PHONE: Connect to a telephone set 2. Connect the Ethernet port of the router to the network card of the PC through an Ethernet line. -
Page 12: Web Configuration Management
DG-BG1100U User Manual Then, the Found New Hardware Wizard dialog box pops up. Select Install the software automatically (Recommended) and insert the Driver CD-ROM. Click Next. The system searches CD-ROM for the best USB driver. Then you can install the USB driver according to the instructions. -
Page 13: Quick Setup - Pppoe Configuration
DG-BG1100U User Manual After logging in the router as a super user, you can query, configure, and modify all configurations of the router. You can also diagnose the router system. 4.2 Quick Setup – PPPoE Configuration After finishing logging, the Quick Setup page appears shown as the following figure, if you do not configure the PVC of WAN connection. - Page 14 DG-BG1100U User Manual Click Next and select the type of network protocol and encapsulation Step 2 that your ISP instructs you to use.
- Page 15 DG-BG1100U User Manual After proper configuration, click Next, and the following page Step 3 appears. In this page, you can modify the PPP user name, PPP password, authentication method and so on.
- Page 16 DG-BG1100U User Manual PPP Username: The correct user name that your ISP provides to you. • PPP Password: The correct password that your ISP provides to you. • PPPoE Service Name: If your ISP provides it to you, please enter it. If not, do not •...
- Page 17 DG-BG1100U User Manual Click next and the following page appears. In this page, you can set the IP Step 5 Address and Subnet Mask of DSL Router for LAN interface. Usually, you can use the default configurations. Click Next and ensure that the below settings match the settings Step 6 provided by your ISP.
-
Page 18: Dsl Router Device Information
DG-BG1100U User Manual Click Save/Reboot to save your configurations. The setting for PPPoE is Step 7 complete. Note: After the Quick Setup is completed, you can add the new WAN configuration in Advanced Setup. Select Advanced Setup > WAN, the following figure appears, you can click Add to add WAN configuration. -
Page 19: Wan Interface Information
DG-BG1100U User Manual DNS Server: In the PPPoE/PPPoA mode, it is obtained from the uplink equipment. • In the bridging mode, there is no DNS Server address and you can manually enter the information 4.3.2 WAN Interface Information Click WAN and the following page appears. The WAN Info page displays the status and the connect or disconnect button, depending on the selected connection mode. -
Page 20: Statistics
DG-BG1100U User Manual 4.3.3 Statistics This page contains the following four parts: Statistics of LAN • Statistics of WAN • Statistics of ATM • Statistics of ADSL • Figure 1 Statistics of LAN Figure 2 Statistics of WAN Figure 3 Statistics of ATM... - Page 21 DG-BG1100U User Manual Figure 4 Statistics of ADSL Click Reset Statistics to restore the values to zero and recount them.
-
Page 22: Adsl Ber Test
DG-BG1100U User Manual 4.3.3.1 ADSL BER Test In the ADSL Statistics page, click ADSL BER Test to perform a bit error rate (BER) test on the DSL line. The test page is as follows: Figure 5 ADSL BER test The Tested Time (sec) can be 1, 5, 10, 20, 60, 120, 180, 240, 300, or 360. Select a time and click Start. -
Page 23: Route Table Information
DG-BG1100U User Manual Figure 7 ADSL BER test result Note: If the BER reaches e-5, you cannot access the Internet. 4.3.4 Route Table Information Click Route and the following page appears. You can view the following information of each route in the route table:... -
Page 24: Arp Table Information
DG-BG1100U User Manual 4.3.5 ARP Table Information Click ARP and the following page appears. You can query the MAC and IP address information of the equipment attached to the modem and the information includes the following: 4.3.6 DHCP IP Lease Information Click DHCP and the following page appears. -
Page 25: Advanced Setup
DG-BG1100U User Manual 4.4 Advanced Setup 4.4.1 WAN Configuration Choose Advance Setup > WAN, the following page appears. To modify the parameters of existing PVC, click Edit. • To add an ATM PVC, click Add. • To delete PVC, select the Remove check box in the table and click Remove. -
Page 26: Adding A Pppoe Pvc
DG-BG1100U User Manual 4.4.1.1 Adding a PPPoE PVC This section describes the procedure for adding PVC 8/35 (PPPoE mode). In the Wide Area Network (WAN) Service Setup page, click the Add button to display the following page. In this page, you can modify VPI/VCI, service categories, and QoS. - Page 27 DG-BG1100U User Manual Change the connection type of PVC 8/35 to PPP over Ethernet (PPPoE) and set the Encapsulation Mode to LLC/SNAP-BRIDGING (according to the uplink equipment). Click Next and the following page appears.
- Page 28 DG-BG1100U User Manual In this page, you can modify the PPP user name, PPP password, authentication method and so on. PPP Username: The correct user name that your ISP provides to you. • PPP Password: The correct password that your ISP provides to you.
- Page 29 DG-BG1100U User Manual PC). From the aspect of the router (at this time, the router connects to only one the PC user, the PC dials up to obtain an IP address. But actually, the dial-up is done by the router.
-
Page 30: Adding A Pppoa Pvc
DG-BG1100U User Manual To save the settings, click Save. To make any modifications, click Back. Note: You need to reboot the router to activate this WAN interface and further configure services in this interface. 4.4.1.2 Adding a PPPoA PVC This section describes the procedure for adding PVC 8/35 (PPPoA mode). - Page 31 DG-BG1100U User Manual VPI: Virtual path between two points in an ATM network. Its valid value range is from 0 to 255. VCI: Virtual channel between two points in an ATM network. Its valid value range is from 32 to 65535 (1 to 31 are reserved for known protocols).
- Page 32 DG-BG1100U User Manual Click Next and the following page appears. In this page, you can modify the PPP user name, PPP password, authentication method and so on. PPP Username: The correct user name that your ISP provides to you. •...
- Page 33 DG-BG1100U User Manual Use Static IP Address: If this function is disabled, the router obtains an IP address • assigned by an uplink equipment such as BAS, through PPPoA dial-up. If this function is enabled, the router uses this IP address as the WAN IP address.
-
Page 34: Adding An Mer Pvc
DG-BG1100U User Manual To save the settings, click Save. To make any modifications, click Back. Note: You need to reboot the router to activate this WAN interface and further configure services in this interface. 4.4.1.3 Adding an MER PVC This section describes the procedure for adding PVC 8/35 (MER mode). - Page 35 DG-BG1100U User Manual VPI: The virtual path between two points in an ATM network, and its valid value is from 0 to 255. VCI: Virtual channel between two points in an ATM network. Its valid value range is from 32 to 65535 (1 to 31 are reserved for known protocols).
- Page 36 DG-BG1100U User Manual Change the connection type of PVC 8/35 to MAC Encapsulation Routing (MER) and set the Encapsulation Mode to LLC/SNAP-BRIDGING (according to the uplink equipment). Click Next and the following page appears. In this page, you can modify the WAN IP address, default gateway, and DNS server...
- Page 37 DG-BG1100U User Manual Obtain an IP address automatically: The router obtains a WAN IP address automatically and at this time it enables DHCP client functions. The WAN IP address is obtained from the uplink equipment like BAS and the uplink equipment is required to enable the DHCP server functions.
-
Page 38: Adding An Ipoa Pvc
DG-BG1100U User Manual Enable NAT: Select it to enable the NAT functions of the router. If you do not want to enable NAT and wish the router user to access the Internet normally, you must add a route on the uplink equipment. Otherwise, the access to the Internet fails. Normally, NAT should be enabled. - Page 39 DG-BG1100U User Manual Click Add and the following page appears. In this page, you can modify VPI/VCIs, service categories, and QoS. VPI: Virtual path between two points in an ATM network. Its valid value range is from 0 to 255.
- Page 40 DG-BG1100U User Manual Change the connection type of PVC 8/35 to IP over ATM (IPoA) and set the Encapsulation Mode to LLC/SNAP-ROUTING (according to the uplink equipment). Click Next and the following page appears. In this page, you can modify the WAN IP, default gateway, and DNS server settings.
- Page 41 DG-BG1100U User Manual Use the following Default Gateway: If you want to manually enter the IP address of the default gateway, select this check box and enter the information in the fields. Use IP Address: Enter the gateway of the WAN interface provided by your ISP.
-
Page 42: Adding A Bridge Pvc
DG-BG1100U User Manual Click Next and the following page appears. This page shows all the configuration. To save the settings, click Save. To make any modifications, click Back. Note: You need to reboot to the router to activate this WAN interface and further configure services in this interface. - Page 43 DG-BG1100U User Manual Click Add and the following page appears. In this page, you can modify VPI/VCIs, service categories, and QoS. VPI (Virtual Path Identifier): Virtual path between two points in an ATM network. Its valid value range is from 0 to 255.
- Page 44 DG-BG1100U User Manual Click Next and the following page appears. In this page, you can modify the service name. WAN Service: Enable it, unless you do not want to active the PVC. Click Next and the following page appears. This page shows all the configuration.
-
Page 45: Lan Configuration
DG-BG1100U User Manual 4.4.2 LAN Configuration You can use the LAN configuration to define an IP address for the DSL Router and configure the DHCP server. - Page 46 DG-BG1100U User Manual...
-
Page 47: Defining The Private Ip Address For The Dsl Router
DG-BG1100U User Manual 4.4.2.1 Defining the Private IP Address for the DSL Router In this page, you can change the IP address of the device. The preset IP address is 192.168.1.1. This is the private IP address of the DSL Router, under which the device can be reached in the local network. -
Page 48: Reserve Ip Address
DG-BG1100U User Manual Note: If the DHCP server for the DSL Router is activated, you can configure the network • setting on the PC so that the option ‘Obtain an IP address automatically’ is set up. If you deactivate the DHCP server, you need to assign a static IP address for the •... -
Page 49: Virtual Servers
DG-BG1100U User Manual 4.4.3.1 Virtual Servers Firewall can prevent unexpected traffic on the Internet from your host on the LAN. The virtual server can create a channel that can pass through the firewall. In that case, the host on the Internet can communicate with a host on your LAN within certain port range. -
Page 50: Port Triggering
DG-BG1100U User Manual Select a Service: Select a proper service in the drop-down list. • Custom Server: Enter a new service name to establish a user service type. • Server IP Address: Assign an IP address to virtual server. •... -
Page 51: Port Triggering
DG-BG1100U User Manual Choose Advanced Settings > NAT > Port Triggering, and the following page appears. In this page, you may add or delete an entry of port triggering. Click the Add button to display the following page. Select an application: Select a proper application in the drop-down list. -
Page 52: Dmz Host
DG-BG1100U User Manual Open Port End: The end port number that is opened to WAN. • Open Protocol: Select the proper protocol that is opened to WAN. You may select • TCP/UDP, TCP, or UDP. After finishing setting, click Save/Apply to apply the settings. -
Page 53: Security
DG-BG1100U User Manual 4.4.4 Security Security is an important function of DSL. It protects resources of a private network from users from other networks, and prevents unauthorized Internet users from accessing private networks connected to the Internet. All messages entering or leaving the... -
Page 54: Outgoing Ip Filtering Setup
DG-BG1100U User Manual 4.4.4.1 Outgoing IP Filtering Setup When setup of outgoing IP filtering rules is enabled on the router, various security functions for the local network are enabled at the same time. You can protect the network against hacker attacks and block access of individual PC to selected services or Internet websites. - Page 55 DG-BG1100U User Manual Filter Name: Enter the name of outgoing filter rule. • Protocol: Select one from TCP/UDP, TCP, UDP, and ICMP protocols. • Source IP address: Enter an IP address. After you set the IP address, outgoing • packets (protocol selected packets) are blocked.
- Page 56 DG-BG1100U User Manual The topology is as follows: Request I need to block PC1 whose IP address is 192.168.1.10. All outgoing UDP/TCP • packet from that PC1 (192.168.1.10) is not allowed. • Allow all outgoing traffic packet from PC2 (192.168.1.11).
- Page 57 DG-BG1100U User Manual Step 2 Click Save/Apply and the following page appears:...
-
Page 58: Incoming Ip Filtering Setup
DG-BG1100U User Manual 4.4.4.2 Incoming IP Filtering Setup The incoming IP filter is used to block and permit IP packet transmisstion from internet. By default incoming IP filter block all incoming packet from Internet. When incoming IP filtering rules setup being enable on the router, you can permit remote individual PC to access various local network service. - Page 59 DG-BG1100U User Manual Filter Name: Enter the name of incoming filter rule. • Protocol: Select one from TCP/UDP, TCP, UDP, and ICMP protocols. • Source IP address: Enter an IP address. After you set the IP address, the • incoming packets (protocol selected packets) are allowed.
- Page 60 DG-BG1100U User Manual Configuration Step 1 By default, all incoming IP traffic from Internet is blocked. Hence, all incoming packets from other PCS except PC (10.10.10.10) are blocked. Step 2 The detailed configuration steps are as follows: Step 3 Click Save/Apply and the following page appears:...
-
Page 61: Parental Control
DG-BG1100U User Manual 4.4.4.3 Parental Control If you allow your children to access to the Internet in the specific time, add the schedule with the LAN MAC address of the device. Choose Security > Parental Control and the following page appears. -
Page 62: Quality Of Service
DG-BG1100U User Manual 4.4.5 Quality of Service Many communication and multimedia applications require large, high speed bandwidths to transfer data between the local network and the Internet. However, for many applications there is often only one Internet connection available with limited capacity. -
Page 63: Qos - Queue Configuration
DG-BG1100U User Manual 4.4.5.2 QoS - Queue Configuration The queuing in packet QoS becomes effective only when packet is forwarded to QoS- enabled PVC. Packet forwarding is determined by IP routing or bridging, not under control of the packet QoS. -
Page 64: Qos - Qos Classification
DG-BG1100U User Manual 4.4.5.3 QoS - QoS Classification Some applications require specific bandwidth to ensure their data be forwarded in time. QoS classification can creates traffic class rule to classify the upstream traffic. Assign queue which defines the precedence and the interface and optionally overwrite the IP header DSCP byte. - Page 65 DG-BG1100U User Manual Traffic Class Name: Enter a name of the class. • Rule Order: Select order for queue. • Rule Status: Enable or disable this traffic class rule. • Assign Classification Queue: Select a classification queue. • Assign Differentiated Service Code Point (DSCP) Mark: Select a mark service •...
-
Page 66: Routing
DG-BG1100U User Manual 4.4.6 Routing 4.4.6.1 Routing – Default Gateway In this page, you can modify the Default Gateway settings. If the Enable Automatic Assigned Default Gateway checkbox is selected, this router accepts the first received default gateway assignment from one of the PPPoA, PPPoE or MER/DHCP enabled PVC(s). -
Page 67: Static Routes
DG-BG1100U User Manual 4.4.6.2 Static Routes Networking devices forward packets using route information that is either manually configured or dynamically learned using a routing protocol. Static routes are manually configured and define an explicit path between two networking devices. Unlike a dynamic routing protocol, static routes are not automatically updated and must be manually reconfigured if the network topology changes. -
Page 68: Dns
DG-BG1100U User Manual 4.4.7 DNS Note: If the connection is Bridge PVC, you can not view the DNS item. Click Advanced Setup > DNS, and the following page appears. Choose the item to do relative configurations 4.4.7.1 DNS Server In this interface, you can modify the DNS server settings. -
Page 69: Dynamic Domain Name Service (Ddns)
DG-BG1100U User Manual Click Save to save the new configuration. Caution: You must reboot the router to make the new configuration effective. 4.4.7.2 Dynamic Domain Name Service (DDNS) Overview Dynamic DNS allows binding of domain names to hosts with dynamically assigned IP addresses by a Dynamic Host Control Protocol (DHCP) server and updates the name server with the new information about the host or the network. - Page 70 DG-BG1100U User Manual You can configure in the menu to support the DDNS feature in Linux reference software. After the software support is built for a profile, you can choose Advanced Setup > DNS > Dynamic DNS and configure the feature in the following page Click Add to configure the information of a new host.
-
Page 71: Dsl
DG-BG1100U User Manual 4.4.8 DSL In this interface, you can view the DSL settings. Normally, you can keep the factory default settings. The router support these modulations: G.Dmt, G.lite, T1.413, ADSL2, AnnexL, ADSL2+ and AnnexM. The router negotiates the modulation mode with the DSLAM. -
Page 72: Diagnostics
DG-BG1100U User Manual 4.5 Diagnostics Click Diagnostics, and the following page appears. Your router is capable of testing your DSL connection. The individual tests are listed above. If a test displays a fail status, click Rerun Diagnostic Tests at the bottom of this page to make sure the fail status is consistent. -
Page 73: Management
DG-BG1100U User Manual 4.6 Management 4.6.1 Setting Settings - Backup Select the “Backup” to show the following interface. In the interface, you can backup the DSL router configurations Settings - Update Select the “Update” to show the following interface. Click the “Browsing...” button to select the correct update configure settings file. -
Page 74: System Log
DG-BG1100U User Manual 4.6.2 System Log Click Management > System Log, and the following page appears. The system log dialog allows you to view the system log and configure the system log options. Click “Configure System Log” to show the following interface. You can enable or disable the system log and then select the log level, display level and mode, and click “Apply”... -
Page 75: Snmp Agent
DG-BG1100U User Manual After operations under “System Log”, click “View System Log” to query the system logs. Note: The log and display of the system events are above the set level. If you intend to record all information, you need to set the levels as “Debugging”. -
Page 76: Internet Time
DG-BG1100U User Manual 4.6.4 Internet Time Click Management > Internet Time, and the following page appears. In this page, the router can synchronize with Internet time servers. After enable Automatically synchronize with Internet time servers, the interface show below. Enter proper configurations and click Save/Apply... -
Page 77: Access Control
DG-BG1100U User Manual 4.6.5 Access Control Access Control – Services Select “Access Control”-->”Services” to show the following interface. In the interface, you can enable/disable the FTP, HTTP, ICMP, SNMP, TELNET and TFTP services. And the LAN side and WAN side show different configurations. - Page 78 DG-BG1100U User Manual Click the Add button to display the following page. In this page, enter the IP address of the management station permitted to access the local management services, and then click Save/Apply. Access Control – Passwords Click “Access Control”-->”Passwords” to show the following interface. In the interface,...
-
Page 79: Update Software
DG-BG1100U User Manual 4.6.6 Update Software Click “Update Software” to show the following interface. In this interface, you can update the router software. Click the “Browse...” button to find the right version file and press “Update Software” to do the update. -
Page 80: Q&A
DG-BG1100U User Manual 5. Q&A Q: Why all the indicators are off? Check the following: The connection between the power adaptor and the power socket. • The status of the power switch. • Q: Why the Ethernet indicator is off? A: Check the following The connection between the ADSL router and your computer, hub, or switch.
Need help?
Do you have a question about the DG-BG1100U and is the answer not in the manual?
Questions and answers