Table of Contents
Advertisement
Quick Links
Download this manual
See also:
User Manual
Advertisement
Table of Contents

Subscribe to Our Youtube Channel
Related Manuals for Digisol DG-BG1100U


Summary of Contents for Digisol DG-BG1100U
- Page 1 DG-BG1100U ADSL2/2+ Broadband Router Quick In stallation Guide V1.1 2010-09-15...
-
Page 2: Fcc Warning
Please check with your local distributors for the latest information. No part of this document can be copied or reproduced in any form without written consent from the company. Trademarks: DIGISOL is a trademark of Smartlink Network Systems Ltd. All other trademarks are the property of the respective manufacturers. -
Page 3: Product Overview
24Mbps and upload speed up to 1Mbps. The DG-BG1100U is a combo router providing one RJ-11 interface for ADSL link, one RJ- 45 Ethernet / USB interface for connecting to a notebook/desktop computer. The DG- BG1100U ADSL2/2+ router can be used for sharing Internet among LAN users by connecting the Ethernet interface to a switch. -
Page 4: System Requirements
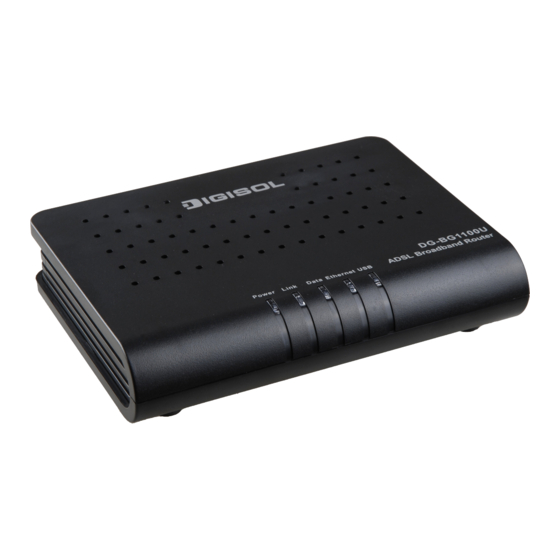
Web browser. AC power socket (100 - 240V, 50/60Hz). Front View The DG-BG1100U has one Ethernet/USB interface for connection to a notebook /desktop computer. The Ethernet interface can be connected to a switch or an Access Point for sharing the Internet. -
Page 5: Rear View
After installing the broadband router, you can verify its status from the LED indicators on the front panel as shown below. Status Description Name Power is off. Power Power is ON and the device operates normally. No signal is detected. Link Blink DSL line training is in progress. -
Page 6: Usb Driver Installation
USB Driver Installation To connect the ADSL router to the USB port of PC, perform the following steps: Connect the USB cable to the USB port on the ADSL router. The cable has two different type of connectors at two different ends. Connect the appropriate connector to the USB port of the ADSL router as required. -
Page 7: Router Installation
192.168.1.X. For example, assign the IP address 192.168.1.10, subnet mask 255.255.255.0 and default gateway 192.168.1.1. Insert the Software Installation CD provided with your DG-BG1100U in the CD- ROM of your computer. The following screen will appear. To get more information on configuration of router click ‘User manual’, else click ‘Start’ to proceed with the router configuration. - Page 8 Power ON the router, then click ‘Next’, to continue with the configuration. Connect one end of the RJ-45 Ethernet cable to Ethernet port on the router and the other end to the LAN card of your system, then click ‘Next’, to continue with the configuration.
- Page 9 In the following screen, you can view the description of LED indicators. Click ‘Next’ to continue with the configuration. The Quick Setup Utility will try to detect the router. This may take some time to detect the router.
- Page 10 Once the router is detected by the utility, we will get the following screen. Here you can configure the ADSL settings essential for Internet connection, then click ‘Next’ to continue. Select the country and service provider from the drop-down list. You can change the default VPI/VCI as instructed by your ISP .
- Page 11 Select the protocol for WAN interface, then click ‘Next’, to continue with the configuration. You can select the encapsulation mode from the drop-down list. MER : If you select MER as the network protocol, the router obtains an IP address automatically.
- Page 12 If you select the WAN protocol as PPPoE or PPPoA then we will get the following screen. In this page enter the correct username and password provided by your Internet service provider, then click ‘Next’ to continue. If you select the ‘Connect on Demand’ check box and enter the time, the router will disconnect from internet automatically if it was not in use for the specified ‘Max Idle Time’.
- Page 13 The following screen gives details about the running status of the router. Note: If the IP address appears 0.0.0.0, then click Refresh button to retry the connection to Internet. If a valid IP address appears, other than 0.0.0.0, then click ‘Finish’ to complete the configuration. Congratulations! Your router configuration is now finished.
- Page 14 Web management of the router To access the web management of the router, assign a static IP address to your notebook/desktop computer in the subnet 192.168.1.X. For example, assign the IP address 192.168.1.10, subnet mask 255.255.255.0 and default gateway 192.168.1.1 Open a web browser and enter “http://192.168.1.1”...
- Page 15 192.168.1.1 and 255.255.255.0 respectively. - User/password of super user: admin/admin. - User/password of common user: user/user This product comes with Lifetime Warranty. For further details about warranty policy and Product Registration, please visit support section of www.digisol.com...
- Page 16 1800-209-3444 (Toll Free) helpdesk@digisol.com sales@digisol.com www.digisol.com...
Need help?
Do you have a question about the DG-BG1100U and is the answer not in the manual?
Questions and answers