Table of Contents
Advertisement
Quick Links
Advertisement
Table of Contents

Related Manuals for Allnet ALL-VPN10


Summary of Contents for Allnet ALL-VPN10
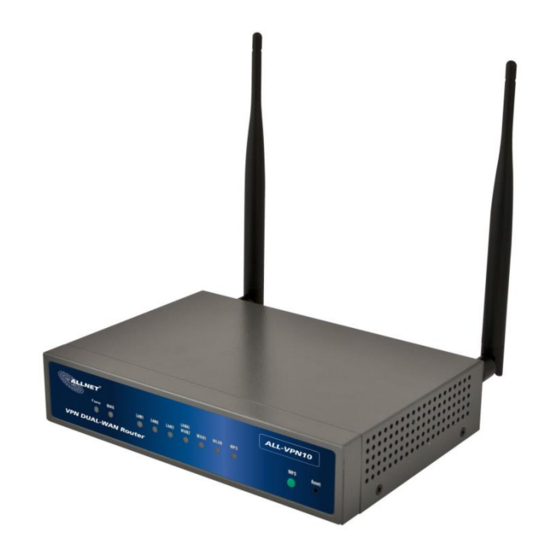
- Page 1 ALL-VPN10 VPN/Firewall WLAN-N WAN Router User´s Manual...
-
Page 2: Table Of Contents
8.1 Basic Configuration ............................61 8.2 Security Setting ..............................63 8.3 Station List ................................ 71 QoS (Quality of Service)......................72 Bandwidth Management ..........................73 9.1.1 The Maximum Bandwidth provided by ISP ..................74 © ALLNET GmbH München 2013 - All rights reserved... - Page 3 12.2 Firmware Upgrade ............................157 12.3 Configuration Backup ............................ 158 12.4 SNMP ................................159 12.5 System Recover ............................. 161 Log ............................ 163 13.1 System Log ..............................163 13.2 System Statistic ............................. 166 © ALLNET GmbH München 2013 - All rights reserved...
- Page 4 13.3 Traffic Statistic ............................... 168 13.4 IP/ Port Statistic ............................. 168 XVI. Log out ..........................170 Appendix I: Technical Support Information ..................171 Appendix II Federal Communication Commission Interference Statement ........... 172 © ALLNET GmbH München 2013 - All rights reserved...
-
Page 5: Introduction
It also reinforces the management of network access rules, VPN, and all other network services. VPN Router fully protects the safety of communication between all offices and branches of an organization. © ALLNET GmbH München 2013 - All rights reserved... - Page 6 VPN Router setting up and management can be carried out through web browsers, such as IE, Netscape, etc. © ALLNET GmbH München 2013 - All rights reserved...
-
Page 7: Multi- Wan Vpn Router Installation
2.2 Setting Flow Chart Below is the description for each setting process, and the crospondent contents and purposes. For detailed functions, please refer to Appendix I: Setting Inferface and Chapter Index. © ALLNET GmbH München 2013 - All rights reserved... - Page 8 Monitor VPN Router Administrators can look up system log and monitor Management and working status and system status and inbound/outbound flow in real maintenance settings: configuration backup. time. Syslog, SNMP, and configuration backup © ALLNET GmbH München 2013 - All rights reserved...
- Page 9 VPN Virtual Private application environment. Network Logout Close configuration Logout VPN Router web- based UI. window. We will follow the process flow to complete the network setting in the following chapters. © ALLNET GmbH München 2013 - All rights reserved...
-
Page 10: Hardware Installation
The Router has two wall-mount slots on its bottom panel. When mounting the device on a wall, please ensure that the heat dissipation holes are facing sideways as shown in the following picture for safety reasons. is not responsible for damages incurred by insecure wall-mounting hardware. © ALLNET GmbH München 2013 - All rights reserved... - Page 11 0ºC to 40ºC (32ºF to 104ºF) Storage Temp. -20ºC to 70ºC (-4ºF to 158ºF) Operating Humidity 10% to 85% non-condensing Storage Humidity 5% to 90% non-condensing Power Supply External Power Adapter 12V1A Weight 715g Dimensions 190x130x40mm © ALLNET GmbH München 2013 - All rights reserved...
-
Page 12: Vpn Router Network Connection
DMZ : The DMZ port can be connected to servers that have legal IP addresses, such as Web servers, mail servers, etc. Please use only the power supply unit that is delivered with the device. © ALLNET GmbH München 2013 - All rights reserved... -
Page 13: Login
When not getting IP address and default gateway by using “ipconfig”, or the received IP address is 0.0.0.0 and 169.X.X.X, we recommend that users should check if there is any problem with the circuits or the computer network card is connected nicely. © ALLNET GmbH München 2013 - All rights reserved... - Page 14 For security, we strongly suggest that users must change password after login. Please keep the password safe, or you can not login to the device. Press Reset button for more than 10 sec, all the setting will return to default. © ALLNET GmbH München 2013 - All rights reserved...
-
Page 15: Device Spec Verification, Status Display And Login Password And Time Setting
When “Obtain an IP automatically” is selected, two buttons (Release and Renew) will appear. If a WAN connection, such as PPPoE or PPTP, is selected, “Disconnect” and “Connect” will appear. DMZ IP Address: Indicates the current DMZ IP address. © ALLNET GmbH München 2013 - All rights reserved... -
Page 16: Physical Port Status
Disabled), priority (high or normal), speed status (10Mbps or 100Mbps), duplex status (Half/ Full), auto negotiation (Enabled or Disabled). The tabble also shows statistics of Receive/ Transmit Packets, Receive/Transmit Packets Byte Count as well as Error Packets Count. © ALLNET GmbH München 2013 - All rights reserved... -
Page 17: System Information
Block WAN Request:Indicates that denying the connection from Internet is activated. The default configuration is “On”. Prevent ARP Virus Attack:Indicates that preventing Arp virus attack is acitvated. The default configuration is “Off”. © ALLNET GmbH München 2013 - All rights reserved... - Page 18 Remote Management: Indicates if remote management is activated (on or off). Click the hyperlink to enter and manage the configuration. The default configuration is “Off”. Access Rule:Indicates the number of access rule applied in the device. © ALLNET GmbH München 2013 - All rights reserved...
-
Page 19: Change And Set Login Password And Time
Input the new password again for verification. Apply: Click “Apply” to save the configuration. Cancel: Click “Cancel" to leave without making any change. This action will be effective before ”Apply” to save the configuration. © ALLNET GmbH München 2013 - All rights reserved... -
Page 20: Time
Click “Cancel" to leave without making any change. This action will be effective before ”Apply” to save the configuration. Select the Local Time Manually: Input the correct time, date, and year in the boxes. © ALLNET GmbH München 2013 - All rights reserved... - Page 21 VPN/Firewall WLAN-N WAN Router After the changes are completed, click “Apply” to save the configuration. Click “Cancel" to leave without making any change. This action will be effective before ”Apply” to save the configuration. © ALLNET GmbH München 2013 - All rights reserved...
-
Page 22: Network
6.1 Network Connection 6.1.1 Host Name and Domain Name Device name and domain name can be input in the two boxes. Though this configuration is not necessary in © ALLNET GmbH München 2013 - All rights reserved... -
Page 23: Lan Setting
Click “Unified IP Management” to enter the configuration page, as shown in the following figure. Input the respective IP addresses and subnet masks. This function enables users to input IP segments that differ from the router network segment to the multi-net © ALLNET GmbH München 2013 - All rights reserved... -
Page 24: Wan Settings
Users can also set up their own DNS IP address. Check the options and input the user-defined DNS IP addresses. © ALLNET GmbH München 2013 - All rights reserved... - Page 25 Select another WAN port as link backup when port binding is configured. Users should select the port that employs the same ISP. After the changes are completed, click “Apply” to save the configuration, or click “Cancel" to leave without making any changes. © ALLNET GmbH München 2013 - All rights reserved...
- Page 26 As for optical fiber users, please input the optical fiber switching IP. Input the DNS IP address issued by ISP. At least one IP group should be input. The DNS Server maximum acceptable is two IP groups. © ALLNET GmbH München 2013 - All rights reserved...
- Page 27 ISP. Then use the PPP Over-Ethernet software built into the device to connect with the Internet. If the PC has been installed with the PPPoE dialing software provided by ISP, remove it. This software will no longer be used for network connection. © ALLNET GmbH München 2013 - All rights reserved...
- Page 28 This function enables the PPPoE dial connection to keep connected, and to Keep Alive automatically redial if the line is disconnected. It also enables a user to set up a time for redialing. The default is 30 seconds. © ALLNET GmbH München 2013 - All rights reserved...
- Page 29 PPTP This option is for the PPTP time counting system. Input the user’s connection name and password issued by ISP, and use the built-in PPTP software to connect with the Internet. © ALLNET GmbH München 2013 - All rights reserved...
- Page 30 Input the default gateway of the static IP address issued by ISP. For ADSL users, it Address is usually an ATU-R IP address. User Name Input the user name issued by ISP. Password Input the password issued by ISP. © ALLNET GmbH München 2013 - All rights reserved...
- Page 31 Select the Transparent Bridge mode for the WAN connection mode. In this way, users will be able to connect normally with the Internet while keeping the original Internet IP addresses in Intranet IP configuration. © ALLNET GmbH München 2013 - All rights reserved...
- Page 32 Input the available IP range issued by ISP. If ISP issued two discontinuous Internal LAN IP Range IP address ranges, users can input them into Internal LAN IP Range 1 and Internal LAN IP Range 2 respectively. © ALLNET GmbH München 2013 - All rights reserved...
- Page 33 Select another WAN port as link backup when port binding is configured. Users should select the port that employs the same ISP. After the changes are completed, click “Apply” to save the configuration, or click “Cancel" to leave without making any changes. © ALLNET GmbH München 2013 - All rights reserved...
-
Page 34: Multi- Wan Setting
6.2 Multi- WAN Setting When you have multiple WAN gateways, you can use Traffic Management and Protocol Binding function to fulfill WAN road balancing, so that we can have highest network bandwidth efficiency. © ALLNET GmbH München 2013 - All rights reserved... -
Page 35: Load Balance Mode
Auto Load Balance system. © ALLNET GmbH München 2013 - All rights reserved... - Page 36 Netcom through that WAN to connect with the Internet and dispatch traffic for Telecom to go through the WAN connected with Telecom to the Internet accordingly. In this way, the traffic for Netcom and Telecom can be divided. © ALLNET GmbH München 2013 - All rights reserved...
- Page 37 A division of traffic policy can be defined by users too. In the “Import Strategy” window, select the WAN or WAN group (ex. WAN 1) to be assigned and click the “Import IP Range” button; the dialogue box for document importation © ALLNET GmbH München 2013 - All rights reserved...
- Page 38 China Netcom strategy and self-defined strategy can coexist. However, if a destination IP is assigned by both China Netcom strategy and self-defined strategy, China Netcom strategy will take priority. In other words, traffic to that destination IP will be transmitted through the WAN © ALLNET GmbH München 2013 - All rights reserved...
-
Page 39: Network Service Detection
WAN to the destination IP cannot shift to another WAN to reach the destination. For example, if users want the traffic to 10.0.0.1 ~ 10.254.254.254 to go only through WAN1, while © ALLNET GmbH München 2013 - All rights reserved... - Page 40 This is the detect location for DNS. (Only a web address such as www.hinet.net is acceptable here. Do not input an IP address.) In addition, do not input the same web address in this box for two different WANs. Note! © ALLNET GmbH München 2013 - All rights reserved...
-
Page 41: Protocol Binding
In the load balance mode of Assigned Routing, the first WAN (WAN1) cannot be assigned. It is to be saved for the IP addresses and the application Service Ports that are not assigned to other WANs (WAN2) for external © ALLNET GmbH München 2013 - All rights reserved... - Page 42 IP address 210.11.1.1 are to be restricted to WAN1, the external static IP address 210.1.1.1 ~ 210.1.1.1 should be input. If a range of destinations is to be assigned, input the range such as 210.11.1.1 ~ 210.11.255.254. This means the © ALLNET GmbH München 2013 - All rights reserved...
- Page 43 Note! The rules configured in Protocol Binding will be executed by the device according to their priorities too. The higher up on the list, the higher the priority of execution. © ALLNET GmbH München 2013 - All rights reserved...
- Page 44 Add To List: Click the button to add the configuration into the Services List. Users can add up to 100 services into the list. Delete selected service: To remove the selected activated Services. © ALLNET GmbH München 2013 - All rights reserved...
- Page 45 “Destination IP” (which means to include all Internet IP addresses). Select WAN2 from the pull-down option list “Interface”, and then click “Enable”. Finally, click “Add New” and the rule will be added to the mode. © ALLNET GmbH München 2013 - All rights reserved...
- Page 46 [TCP&UDP/1~65535]” from the pull-down option list “Service”, and then input “192.168.1.2 ~ 254” in the boxes of “Source IP”. Retain the original numbers “0.0.0.0” in the boxes of “Destination IP” (which means to include © ALLNET GmbH München 2013 - All rights reserved...
- Page 47 Internet IP addresses). Select WAN1 from the pull-down option list “Interface”, and then click “Enable”. Finally, click “Add New” and the rule will be added to the mode. The device will transmit packets that are not going to Port 80 to the Internet through WAN1. © ALLNET GmbH München 2013 - All rights reserved...
- Page 48 After the rule is set up, only packets that go to Port 80 will be transmitted through WAN2, while other traffics will be transmitted through WAN1. © ALLNET GmbH München 2013 - All rights reserved...
- Page 49 Finally, click “Add New”, and the rule will be added to the mode. After the rule has been set up, all traffic that is not going to the assigned destinations will only be transmitted through WAN1. © ALLNET GmbH München 2013 - All rights reserved...
- Page 50 ALL-VPN10 VPN/Firewall WLAN-N WAN Router © ALLNET GmbH München 2013 - All rights reserved...
-
Page 51: Intranet Configuration
The packet data of this specific port will be displayed. Data include receive/ transmit packet count, receive/ transmit packet Byte count and error packet count. Users may press the refresh button to update all real-time messages. © ALLNET GmbH München 2013 - All rights reserved... -
Page 52: Ip/ Dhcp
IP addresses for each PC respectively. When a computer is turned on, it will acquire an IP address from the device automatically. This function is to make management easier. © ALLNET GmbH München 2013 - All rights reserved... - Page 53 If there is a WIN server in the network, users can input the IP address of that server directly. WINS Server: Input the IP address of WINS. Apply: Click “Apply” to save the network configuration modification. Cancel: Click “Cancel" to leave without making any changes. © ALLNET GmbH München 2013 - All rights reserved...
-
Page 54: Dhcp Status
DHCP Available: The amount of IP still available in the DHCP server. Total: The total IP which the DHCP server is configured to lease. Host Name: The name of the current computer. © ALLNET GmbH München 2013 - All rights reserved... - Page 55 MAC Address: The actual MAC network location of the current computer. Client Lease Time: The lease time of the IP released by DHCP. Delete: Remove a record of an IP lease. © ALLNET GmbH München 2013 - All rights reserved...
-
Page 56: Ip & Mac Binding
7.4 IP & MAC Binding Administrators can apply IP & MAC Binding function to make sure that users can not add extra PCs for Internet access or change private IP addresses. © ALLNET GmbH München 2013 - All rights reserved... - Page 57 This method only allows MAC addresses on the list to receive IP addresses from DHCP and have Internet access. When this method is applied, please fill out Static IP with 0.0.0.0, as the figure below: © ALLNET GmbH München 2013 - All rights reserved...
- Page 58 The maximum acceptable characters are 12. Enabled: Activate this configuration. Add to list: Add the configuration or modification to the list. Delete selected item: Remove the selected binding from the list. © ALLNET GmbH München 2013 - All rights reserved...
- Page 59 12. Enabled: Choose the item to be bound. Apply: Activate the configuration. Select All: Choose all items on the list for binding. Refresh: Refresh the list. Close: Close the list. © ALLNET GmbH München 2013 - All rights reserved...
-
Page 60: Wireless Network
VIII. Wireless Network Wireless function is enabled by default. The WLAN LED will be on after system booting. Client device can find SSID as _AP_1. Please refer to following illustrations to change configuration. © ALLNET GmbH München 2013 - All rights reserved... -
Page 61: Basic Configuration
APSD is an enhancement over the power-save mechanisms supported by Wi-Fi networks. It allows devices to take more time in sleeping state and consume less power to improve the performance by minimizing transmission latency. Direct Link Setup(DLS) © ALLNET GmbH München 2013 - All rights reserved... - Page 62 20/40 – the router will use 20Mhz or 40Mhz for data transmission and receiving according to the station capability. SSID Summary The status of every SSID will be shown here. Click “Edit” to enter configuration page. © ALLNET GmbH München 2013 - All rights reserved...
-
Page 63: Security Setting
ALL-VPN10 VPN/Firewall WLAN-N WAN Router 8.2 Security Setting © ALLNET GmbH München 2013 - All rights reserved... - Page 64 1. WEP mode Open WEP Shared WEP WEP Auto If “Open WEP” or “Shared WEP” is checked, client users need to select the same mode to connect to AP. © ALLNET GmbH München 2013 - All rights reserved...
- Page 65 WPA/WPA2-PSK will rekey in a fixed interval. The interval can be configured. 3. Enterprise Mode RADIUS server is necessary to use WPA/WPA2 enterprise mode. WPA Enterprise WPA2 Enterprise WPA/WPA2 Enterprise Mixed mode © ALLNET GmbH München 2013 - All rights reserved...
- Page 66 Input a maximum idle time. If the link idles over time, the connection will be terminated. 4. 802.1x Mode RADIUS server is needed while 802.1x mode is enabled. IP Address Input RADIUS server IP. © ALLNET GmbH München 2013 - All rights reserved...
- Page 67 (3) Check if WPS connection is established successfully on client device. 8.2.4 WDS Config WDS is the abbreviation of Wireless Distribution System. The system will transmit packets to other WDS devices in the wireless network to extand covering range.. © ALLNET GmbH München 2013 - All rights reserved...
- Page 68 WDS should be enabled on both devices. MACs of each other should be inputed on both sides. There could be variation on the quanity of AP supported on different devices. (1) Input AP MAC into blank. © ALLNET GmbH München 2013 - All rights reserved...
- Page 69 ※ If WEP mode is enabled, system will arrange 4 sets of key for those MACs. Make sure the order is correct. (2) Or check “Scanning”to select existing AP and then click “Submit”. © ALLNET GmbH München 2013 - All rights reserved...
- Page 70 Allow: Only MAC listed in “Enabled”list can establish connection. Add Station MAC MAC Address: Input MAC into the policy. Users can find MAC address such as “00:11:22:33:44:55” from client device and input into the blanks. © ALLNET GmbH München 2013 - All rights reserved...
-
Page 71: Station List
The MAC address of client device. DHCP IP The IP address allocated from system. Host Name The host name of client device. SSID SSID of client device. Rate The quality of Wifi signal (%). © ALLNET GmbH München 2013 - All rights reserved... -
Page 72: Qos (Quality Of Service)
© ALLNET GmbH München 2013 - All rights reserved... -
Page 73: Bandwidth Management
ALL-VPN10 VPN/Firewall WLAN-N WAN Router 9.1 Bandwidth Management © ALLNET GmbH München 2013 - All rights reserved... -
Page 74: The Maximum Bandwidth Provided By Isp
The network administrator can also set bandwidth control for certain Service Ports. A guarantee bandwidth control for external connections can also be configured if there is an internal server. © ALLNET GmbH München 2013 - All rights reserved... - Page 75 If all Intranet users that connect with the device are to be controlled, input “0” in the boxes of IP address. This means all Intranet IP addresses will be restricted. QoS can also control the range of Class C. © ALLNET GmbH München 2013 - All rights reserved...
- Page 76 “Share-Bandwidth Mode”, so that no matter how much users use FTPs to download information, the total occupied bandwidth is fixed. Enable: Activate the rule. Add to list: Add this rule to the list. © ALLNET GmbH München 2013 - All rights reserved...
- Page 77 IP addresses” in “Bandwidth sharing” method, which means that the whole LAN users share a maximum 50Kbits/Sec download speed on the FTP protocol no matter how many users are using in intranet. Click “Enable” and “Add to list”, then this rule is successfully added. © ALLNET GmbH München 2013 - All rights reserved...
- Page 78 ALL-VPN10 VPN/Firewall WLAN-N WAN Router © ALLNET GmbH München 2013 - All rights reserved...
- Page 79 Attention! The action rule priority of the QoS bandwidth management is from the bottom to the top rule, therefore you have to remove the rule what you want to implement first to the bottom. © ALLNET GmbH München 2013 - All rights reserved...
-
Page 80: Session Control
BT or P2P is being used to download information and the sessions exceed the limit, the user will be unable to connect with other services until either BT or P2P is closed. © ALLNET GmbH München 2013 - All rights reserved... - Page 81 Apply: Click “Apply” to save the configuration. Cancel: Click “Cancel" to leave without making any change. Exempted Service Port or IP Address Service Port: Choose the service port. © ALLNET GmbH München 2013 - All rights reserved...
- Page 82 Add this rule to the list. Delete seleted item: Remove the rules selected from the Service List. Apply: Click “Apply” to save the configuration. Cancel: Click “Cancel" to leave without making any change. © ALLNET GmbH München 2013 - All rights reserved...
-
Page 83: Smart Qos
Show Penalty IP: The IPs which are under penalty mechanism will be shown on the list. © ALLNET GmbH München 2013 - All rights reserved... - Page 84 If “From…” is selected, the rule will be executed according to the configured time range. For example, if the time control is from Monday to Friday, 8:00am to 6:00pm, users can refer to the following figure to set up the rule. © ALLNET GmbH München 2013 - All rights reserved...
-
Page 85: Firewall
If users try to ping the WAN IP from the external, this will not work because the default value is set as activated in order to decline the outbound responses. © ALLNET GmbH München 2013 - All rights reserved... - Page 86 It supports the block that is connected through: Java, Cookies, Active X, and HTTP Proxy access. Apply: Click “Apply” to save the configuration. Cancel: Click “Cancel" to leave without making any change. © ALLNET GmbH München 2013 - All rights reserved...
-
Page 87: Access Rule
The device will follow the rule priorities one by one, so please make sure the priority for all the rules can suit the setting rules. Edit: Define the network access rule item © ALLNET GmbH München 2013 - All rights reserved... -
Page 88: Add New Access Rule
Source IP: Select the source IP range (for example: Any, Single, Range, or preset IP group name). If Single or Range is selected, please enter a single IP address or an IP © ALLNET GmbH München 2013 - All rights reserved... - Page 89 Source IP:ANY (Meaning to block all traffic from intranet to internet and all attack from internet to intranet through the service port.) Dest. IP : ANY (Meaning to block all traffic from intranet to internet and all attack from internet to intranet through the service port.) © ALLNET GmbH München 2013 - All rights reserved...
- Page 90 Source Interface:LAN (Meaning to service port 80 which blocks the traffic from intranet to internet.) Source IP:192.168.1.200~192.168.1.230 Dest. IP:ANY (Meaning to any service port 80 which blocks the traffic from intranet to internet among 192.168.1.200~230.) © ALLNET GmbH München 2013 - All rights reserved...
-
Page 91: Content Filter
Only one of these two modes can be selected. Block Forbidden Domain Fill in the complete website such as www.sex.com to have it blocked. © ALLNET GmbH München 2013 - All rights reserved... - Page 92 Delete the service item content from the list Delete selected item: Click “Apply” to save the modified parameters. Apply: Click “Cancel” to cancel all the changes made to the parameters. Cancel: © ALLNET GmbH München 2013 - All rights reserved...
- Page 93 Enabled: Input the allowed domain name, etc. www.google.com Add: Add the rule to list. Add to list: Users can select one or more rules and click to delete. Delete selected item: © ALLNET GmbH München 2013 - All rights reserved...
- Page 94 If “From” is selected, the activation time is introduced as below Day Control: This control rule has time limitation. The setting method is in 24-hour format, such as 08:00 ~ 18:00 (8 a.m. to 6 p.m.) © ALLNET GmbH München 2013 - All rights reserved...
-
Page 95: L7 Management
ALL-VPN10 VPN/Firewall WLAN-N WAN Router XI. L7 Management 11.1 L7 Filter (1) Rule list: © ALLNET GmbH München 2013 - All rights reserved... - Page 96 ALL-VPN10 VPN/Firewall WLAN-N WAN Router (2) Add new rule: click © ALLNET GmbH München 2013 - All rights reserved...
- Page 97 Step 3: Make sure the time setting is correct to make the rule in effective only during the set time. All time is set as the default. The time frame could be modified in the following settings. © ALLNET GmbH München 2013 - All rights reserved...
- Page 98 For example, if there is a Google Talk rule with no exceptional IP, when adding a new Google Talk rule with the exceptional IP 192.168.1.100, 192.168.1.100 could use Google Talk anyway no matter applied to the original rule or the new rule. Step 5: Click to save the rule setting. © ALLNET GmbH München 2013 - All rights reserved...
-
Page 99: L7 Vip Priority Channel
ALL-VPN10 VPN/Firewall WLAN-N WAN Router 11.2 L7 VIP Priority Channel (1) Rule List: (2) Add New Rule: Click © ALLNET GmbH München 2013 - All rights reserved... - Page 100 Select one WAN as VIP. For example, only the traffic of president room on WAN1 and WAN2 is VIP, traffic on other WAN ports is not VIP. Hint: If users want traffic only run on VIP WAN, users can also configure “L7 Application Binding”. © ALLNET GmbH München 2013 - All rights reserved...
- Page 101 VIP bandwidth. But VIP bandwidth will not allowed when they use other network service. © ALLNET GmbH München 2013 - All rights reserved...
- Page 102 Step 3: Make sure the time setting is correct to make the rule in effective only during the set time. Always is set as the default. The time frame could be modified in the following settings. © ALLNET GmbH München 2013 - All rights reserved...
- Page 103 ALL-VPN10 VPN/Firewall WLAN-N WAN Router Step 4: Click to save the rules. © ALLNET GmbH München 2013 - All rights reserved...
-
Page 104: L7 Qos
ALL-VPN10 VPN/Firewall WLAN-N WAN Router 11.3 L7 QoS (1) Rule List: © ALLNET GmbH München 2013 - All rights reserved... - Page 105 QoS Policy is over the WAN bandwidth. :Display the QoS Policy, including the L7 QoS and general QoS. The L7 QoS has a higher priority then the general QoS if both overlapping. © ALLNET GmbH München 2013 - All rights reserved...
- Page 106 Step 1: Name the rule The name of the rule will be shown on the list, so administrator could name the rule by users or usages. Step 2: Choose the application © ALLNET GmbH München 2013 - All rights reserved...
- Page 107 Click [Choose All] to put all applications into effective, and click unnecessary items for cancel. Items could be chosen in multiple categories. Click to drop the applications into the right column. © ALLNET GmbH München 2013 - All rights reserved...
- Page 108 For example, if users do not want an FTP to occupy too much bandwidth, users can select the “Share-Bandwidth Mode”, so that no matter how much users use FTPs to download information, the total occupied bandwidth is fixed. © ALLNET GmbH München 2013 - All rights reserved...
- Page 109 Step 4: Make sure the time setting is correct to make the rule in effective only during the set time. All time is set as the default. The time frame could be modified in the following settings. Step 5: Click to save the rule setting. © ALLNET GmbH München 2013 - All rights reserved...
-
Page 110: Application Define
※Figures are used for reference. Please visit the official website for the actual application support list. ※Each function of L7 Management APP List ※Figures are used for reference. Please visit the official website for the actual application support list. © ALLNET GmbH München 2013 - All rights reserved... -
Page 111: Applicatios Status
L7 application to the list right side to finish the setting. Step 4: Apply your own application to the L7 management; you can see your own L7 application on the 'Application Define'. 11.5 Applicatios Status © ALLNET GmbH München 2013 - All rights reserved... - Page 112 Sorting the applications or ordering the applications by the name. applications Jump to the specific page. Identify the lines in one page. L7 VIP Priority Channel Display policy which made by the application, presses the ID to edit the policy. © ALLNET GmbH München 2013 - All rights reserved...
-
Page 113: Vpn (Virtual Private Network)
ALL-VPN10 VPN/Firewall WLAN-N WAN Router XII. VPN (Virtual Private Network) 10.1. VPN © ALLNET GmbH München 2013 - All rights reserved... -
Page 114: Add A New Vpn Tunnel
Gateway to Gateway or Client to Gateway will be displayed. Gateway to Gateway: Click “Add” to enter the setting page of Gateway to Gateway. Client to Gateway: Click “Add” to enter the setting page of Client to Gateway. © ALLNET GmbH München 2013 - All rights reserved... - Page 115 This Local Security Gateway Type must be identical with that of the remote type (Remote Security Gateway Type). Local Security GatewayType: This local gateway authentication type comes with five operation modes, which are: IP only IP + Domain Name (FQDN) Authentication © ALLNET GmbH München 2013 - All rights reserved...
- Page 116 If users use dynamic IP address to connect to the device, users may select this option to link to VPN. If the remote VPN gateway requires connection to the device for VPN connection, this device will start authentication and © ALLNET GmbH München 2013 - All rights reserved...
- Page 117 This option allows local computers in this subnet can be connected to the VPN tunnel. Reference: When this VPN tunnel is connected, only computers with the session of 192.168.1.0 and with subnet mask as 255.255.255.0 can connect with remote VPN. © ALLNET GmbH München 2013 - All rights reserved...
- Page 118 IP address will be displayed under the remote gateway of Summary. (2) IP + Domain Name(FQDN) Authentication: If users select IP + domain name, please enter IP address and the domain © ALLNET GmbH München 2013 - All rights reserved...
- Page 119 (4) Dynamic IP + Domain Name(FQDN) Authentication: If users use dynamic IP address to connect with the device, users may select the combination of the dynamic IP address, host name and domain © ALLNET GmbH München 2013 - All rights reserved...
- Page 120 This option allows local computers in this subnet can be connected to the VPN tunnel. Reference: When this VPN tunnel is connected, only computers with the session of 192.168.2.0 and with subnet mask as 255.255.255.0 can connect with remote VPN. © ALLNET GmbH München 2013 - All rights reserved...
- Page 121 Perfect Forward Secrecy: When users check the PFS option, don't forget to activate the PFS function of the VPN device and the VPN Client as well. Phase 1/ Phase 2 DH Group: This option allows users to select Diffie-Hellman groups: Group 1/ Group 2/ Group 5. © ALLNET GmbH München 2013 - All rights reserved...
- Page 122 The advanced settings include Main Mode and Aggressive mode. For the Main mode, the default setting is set to VPN operation mode. The connection is the same to most of the VPN devices. © ALLNET GmbH München 2013 - All rights reserved...
- Page 123 ICMP echo request in every 30 seconds after the VPN tunnel is established. Retry The default retry times are 5. The system will terminate the VPN tunnel if the © ALLNET GmbH München 2013 - All rights reserved...
- Page 124 With the Heart Beat detection, we can monitor the VPN tunnel and make sure whether the tunnel exists and smooth or not. However, with the DPD feature, it is only available under the IPSec protocol. © ALLNET GmbH München 2013 - All rights reserved...
- Page 125 VPN connections. Enabled: Click to Enable to activate the VPN tunnel. This option is set to Enable by default. After users set up, users may select to activate this tunnel feature. © ALLNET GmbH München 2013 - All rights reserved...
- Page 126 If users select IP address and E-mail, enter the IP address and E-mail address to gain access to this tunnel and the WAN IP address will be automatically filled into this space. Users don't need to do further © ALLNET GmbH München 2013 - All rights reserved...
- Page 127 1. IP address This option allows the only IP address which is entered to build the VPN tunnel. Reference: When this VPN tunnel is connected, computers with the IP © ALLNET GmbH München 2013 - All rights reserved...
- Page 128 This option allows local computers in this subnet to be connected to the VPN tunnel. Reference: When this VPN tunnel is connected, only computers with the session of 192.168.1.0 and with subnet mask as 255.255.255.0 can connect with remote VPN. © ALLNET GmbH München 2013 - All rights reserved...
- Page 129 Internet, i.e. vpn.server.com. This IP address and domain name must be identical to those of the VPN secure gateway setting type to establish successful connection. © ALLNET GmbH München 2013 - All rights reserved...
- Page 130 Gateway requires for VPN connection, the device will start authentication and respond to VPN tunnel connection; if users select this option to link to VPN, enter E-Mail address to the empty field for E-Mail authentication. © ALLNET GmbH München 2013 - All rights reserved...
- Page 131 Phase 2 key in such a short period of time. Perfect Forward Secrecy: When users check the PFS option, don't forget to activate the PFS function of the VPN device and the VPN Client as well. © ALLNET GmbH München 2013 - All rights reserved...
- Page 132 VPN tunnel connection. This exchange password can be made up of up to 30 characters. Advanced Setting- for IKE Protocol Only © ALLNET GmbH München 2013 - All rights reserved...
- Page 133 Heart Beat detection. Interval The default time for the Heart Beat interval is 30 seconds. The system will send back an ICMP echo request in every 30 seconds after the VPN tunnel is © ALLNET GmbH München 2013 - All rights reserved...
-
Page 134: Pptp Server
However, with the DPD feature, it is only available under the IPSec protocol. 10.1.2. PPTP Server It supports the PPTP of Window XP/ 2000 to create point-to-point tunnel protocol for single- device users to create VPN connection. © ALLNET GmbH München 2013 - All rights reserved... - Page 135 IP into the local network. Enter Range Start: Enter the value into the last field. Enter Range End: Enter the value into the last field. Please enter the name of the remote user. User name: © ALLNET GmbH München 2013 - All rights reserved...
-
Page 136: Vpn Pass Through
L2TP Pass Through: packet to pass in order to connect with external VPN device. After modification, push “Apply” button to save the network setting or push “Cancel” to keep the settings unchanged. © ALLNET GmbH München 2013 - All rights reserved... -
Page 137: Qvm Vpn Function Setup
3. VPN Disconnection Backup: Solves data transmission problem arising from failed ISP connection with remote ends or the branches. Select QVM feature as Client mode: © ALLNET GmbH München 2013 - All rights reserved... - Page 138 Forwarding. To avoid the conflict with QVM, QVM port can be Change QVM Client’s Service changed to other encryption ports, such as 10443. Port: After modification, press “Apply” to save the network setting or press “Cancel” to keep the settings unchanged. © ALLNET GmbH München 2013 - All rights reserved...
-
Page 139: Advanced Function
WWW, FTP, Mail, etc) is contained in the network, we recommend that users use the firewall function to set up the host as a virtual host, and then convert the actual IP addresses (the Internet IP addresses) © ALLNET GmbH München 2013 - All rights reserved... - Page 140 Add or remove service ports from the list of service ports. Add to list: Add to the active service content. Service Port Management The services in the list mentioned above are frequently used services. If the service users want to activate © ALLNET GmbH München 2013 - All rights reserved...
- Page 141 To remove the selected services. Apply: Click the “Apply” button to save the modification. Cancel: Click the “Cancel” button to cancel the modification. This only works before “Apply” is clicked. Close: Quit this configuration window. © ALLNET GmbH München 2013 - All rights reserved...
-
Page 142: Upnp
Show Table: This is a list which displays the current active UPnP functions. Apply: Click “Apply” to save the network configuration modification. Cancel: Click “Cancel" to leave without making any change. © ALLNET GmbH München 2013 - All rights reserved... -
Page 143: Routing
Static routing enables different network nodes to seek necessary paths automatically. It also enables different network nodes to access each other. Click the button “Show Routing Table” (as in the figure) to display the current routing list. © ALLNET GmbH München 2013 - All rights reserved... - Page 144 Remove the selected routing rule from the list. Show Table: Show current routing table. Apply: Click “Apply” to save the network configuration modification Cancel: Click “Cancel" to leave without making any changes. © ALLNET GmbH München 2013 - All rights reserved...
-
Page 145: One To One Nat
IP for WAN, and is used in NAT. Users can respectively configure the other four real IP addresses for Multi-DMZ, as follows: 210.11.1.2 192.168.1.3 210.11.1.3 192.168.1.4 210.11.1.4 192.168.1.5 210.11.1.5 192.168.1.6 Attention! The device WAN IP address can not be contained in the One-to-One NAT IP configuration. © ALLNET GmbH München 2013 - All rights reserved... - Page 146 IP server or PC which is mapped with a LAN port will be exposed on the Internet. To prevent Internet users from actively connecting with the One-on-One NAT server or PC, please set up a proper denial rule for access, as © ALLNET GmbH München 2013 - All rights reserved...
-
Page 147: Ddns- Dynamic Domain Name Service
* The UI might vary from model to model, depending on different product lines. Select the WAN port to which the configuration is to be edited, for example, WAN 1. Click the hyperlink to enter and edit the settings. © ALLNET GmbH München 2013 - All rights reserved... - Page 148 An indication of the status of the current IP function refreshed by DDNS. Apply After the changes are completed, click “Apply” to save the network configuration modification. Cancel Click “Cancel" to leave without making any changes. © ALLNET GmbH München 2013 - All rights reserved...
-
Page 149: Mac Clone
Select the WAN port to which the configuration is to be edited; click the hyperlink to enter and edit its configuration. Users can input the MAC address manually. Press “Apply” to save the setting, and press “Cancel” to remove the setting. Default MAC address is the WAN MAC address. © ALLNET GmbH München 2013 - All rights reserved... -
Page 150: Usb Storage
Please use an FTP Client software to use the service. The FTP Server IP is the same as the Router IP. The default service port is 21. (1) User Account setup © ALLNET GmbH München 2013 - All rights reserved... - Page 151 The default setting for this function is disabled. There are only two permissions for this function. read only:Users can only read from the storage device. read-write:Users can add, read, or delete the files stored in the device. © ALLNET GmbH München 2013 - All rights reserved...
- Page 152 Simultaneous FTP Connection:Total number of client connections the FTP Server can accept at the same time. FTP Service Charset:FTP Server Character set, the selections are UFT8, GB2312 and BIG5. © ALLNET GmbH München 2013 - All rights reserved...
- Page 153 Guest Access is for providing guests (username: Guest) access to the files within the USB Storage without requiring a password. The default setting for this function is disabled. There are only two permissions for this function. © ALLNET GmbH München 2013 - All rights reserved...
- Page 154 (3) Advanced Settings Host Name:The name for the router. Work Group:The name of the workgroup to join or show in the network. © ALLNET GmbH München 2013 - All rights reserved...
-
Page 155: System Tool
On this test screen, please enter the host name of the network users want to test. For example, users may enter www.abc.com and press "Go" to start the test. The result will be displayed on this page. © ALLNET GmbH München 2013 - All rights reserved... - Page 156 On this test screen, please enter the host IP that users want to test such as 192.168.5.20. Press "Go" to start the test. The result will be displayed on this screen. © ALLNET GmbH München 2013 - All rights reserved...
-
Page 157: Firmware Upgrade
Upgrade Right Now" to complete the upgrade of the designated file. Note! Please read the warning before firmware upgrade. Users must not exit this screen during upgrade. Otherwise, the upgrade may fail. © ALLNET GmbH München 2013 - All rights reserved... -
Page 158: Configuration Backup
"Import" to import the file. Export Configuration File: This feature allows users to backup all parameter settings. Click "Export" and select the location to save the "config.exp" file. © ALLNET GmbH München 2013 - All rights reserved... -
Page 159: Snmp
The device supports standard SNMP v1/v2c and is consistent with SNMP network management software so as to get hold on to the operation of the online devices and the real-time network information. * The UI might vary from model to model, depending on different product lines. © ALLNET GmbH München 2013 - All rights reserved... - Page 160 Set one IP address or Domain Name for the Trap-receiving host computer. Send SNMP Trap to: Apply: Press “Apply” to save the settings. Cancel: Press “Cancel” to keep the settings unchanged. © ALLNET GmbH München 2013 - All rights reserved...
-
Page 161: System Recover
Users can restart the device with System Recover button. System Recover As the figure below, if clicking “Restart Router” button, the dialog block will pop out, confirming if users would like to restart the device. © ALLNET GmbH München 2013 - All rights reserved... - Page 162 ALL-VPN10 VPN/Firewall WLAN-N WAN Router Return to Factory Default Setting If clicking “Return to Factory Default Setting, the dialog block will pop out, if the device will return to factory default. © ALLNET GmbH München 2013 - All rights reserved...
-
Page 163: Log
From the log management and look up, we can see the relevant operation status, which is convenient for us to facilitate the setup and operation. 13.1 System Log Its system log offers three options: system log, E-mail alert, and log setting. © ALLNET GmbH München 2013 - All rights reserved... - Page 164 The system fails because the sent data exceeds the maximum packet that can be handled by the IP protocol. Unauthorized Login: If intruders into the device are identified, the message will be sent to the system log. © ALLNET GmbH München 2013 - All rights reserved...
- Page 165 This option allows users to view system log. The message content can be read online via the device. They include All Log, System Log, Access Log, and Firewall Log, which is illustrated as below. © ALLNET GmbH München 2013 - All rights reserved...
-
Page 166: System Statistic
Received and Sent Bytes/Sec., total number of error packets received, total number of the packets dropped, number of session, number of the new Session/Sec., and upstream as well as downstream broadband usage (%). © ALLNET GmbH München 2013 - All rights reserved... - Page 167 ALL-VPN10 VPN/Firewall WLAN-N WAN Router © ALLNET GmbH München 2013 - All rights reserved...
-
Page 168: Traffic Statistic
IP address of this specific software server port may apply this feature. Moreover, to find out BT or P2P software, users may select this feature to inquire users from the port. © ALLNET GmbH München 2013 - All rights reserved... - Page 169 Specific Port Status: Enter the service port number in the field and IP that are currently used by this port will be displayed. © ALLNET GmbH München 2013 - All rights reserved...
-
Page 170: Log Out
On the top right corner of the web- based UI, there is a Logout button. Click on it to log out of the web- based UI. To enter next time, open the Web browser and enter the IP address, user name and password to log © ALLNET GmbH München 2013 - All rights reserved... -
Page 171: Appendix I: Technical Support Information
ALL-VPN10 VPN/Firewall WLAN-N WAN Router Appendix I: Technical Support Information Official Website http://www.allnet.de Support: mail:support@allnet.de © ALLNET GmbH München 2013 - All rights reserved... -
Page 172: Appendix Ii Federal Communication Commission Interference Statement
Note: The country code selection is for non-US model only and is not available to all US model. Per FCC regulation, all WiFi product marketed in US must fixed to US operation channels only. Europe – EU Declaration of Conformity © ALLNET GmbH München 2013 - All rights reserved... - Page 173 In Italy the end-user should apply for a license at the national spectrum authorities in order to obtain authorization to use the device for setting up outdoor radio links and/or for supplying public access to telecommunications and/or network services. © ALLNET GmbH München 2013 - All rights reserved...
- Page 174 Written offer for GPL and LGPL source code Where such specific license terms entitle you to the source code of such software, ALLNET will provide upon written request via e-mail and/or traditional paper mail the applicable GPL and LGPL source code files via CD-ROM for a nominal cost to cover shipping and media charges as allowed under the GPL and LGPL.
- Page 175 The safety advice in the documentation accompanying the products shall be obeyed. The conformity to the above directive is indicated by the CE sign on the device. The Allnet ALL-VPN10 conforms to the Council Directives of 2004/108/EC. This equipment meets the following conformance standards: EN301489-1 V1.9.2 (2011-09)
Need help?
Do you have a question about the ALL-VPN10 and is the answer not in the manual?
Questions and answers