Table of Contents
Advertisement
Quick Links
Advertisement
Table of Contents

Related Manuals for Allnet ALL126AS3


Summary of Contents for Allnet ALL126AS3
- Page 1 ALL126AS3 VDSL2 100 Mbit Slave/Bridge Vectoring...
-
Page 2: Foreword: Vdsl2 Router Solution
VDSL2. Caution: The ALL126AS3 is for indoor applications only. This product does not have waterproof protection, please do not use in outdoor applications. -
Page 3: Safety Warnings
Use ONLY the dedicated power supply for your device. Connect the power to the right supply voltage (110V AC used for North America and 230V AC used for Europe. ALL126AS3 supports 12 VDC power input). Place connecting cables carefully so that no one will step on them or stumble over them. DO NOT allow anything to rest on the power cord and do NOT locate the product where anyone can work on the power cord. -
Page 4: Table Of Contents
..........................................13 PPLICATION CHAPTER 3. HARDWARE DESCRIPTION ....................................15 3.1 F ............................................16 RONT ANEL 3.2 F ..........................................16 RONT NDICATORS 3.3 R ............................................17 ANEL CHAPTER 4. CONFIGURE THE ALL126AS3 VIA WEB BROWSER ............................20 4.1 L ..............................................21 OGIN... - Page 5 ALL126AS3 USER’S MANUAL 4.1.1 Home ............................................. 22 4.1.2 Quick Setup ........................................... 24 4.2 S ........................................30 ELECT THE EVEL “SYSTEM” ..........................................31 4.3 S ELECT 4.3.1 Host Name Config ......................................... 32 4.3.2 System Time ..........................................33 4.3.3 Administrator Settings ........................................35 4.3.4 Web Settings ..........................................
- Page 6 ALL126AS3 USER’S MANUAL 4.6.4 VLAN Channel confg ........................................70 4.6.5 WAN Setting ..........................................73 4.6.6 WAN Status ........................................... 88 4.6.7 DNS ............................................... 92 4.6.8 DDNS ............................................94 4.6.9 OAM Configuration ........................................96 “LAN” ............................................100 4.7 S ELECT 4.7.1 LAN ARP List..........................................101 4.7.2 LAN Settings..........................................
- Page 7 ALL126AS3 USER’S MANUAL 4.9.6 Application Server Settings ......................................150 4.9.7 Access Control List (ACL) ......................................152 4.10 NAT ..............................................154 4.10.1 NAT Settings ........................................... 155 4.10.2 Virtual Server .......................................... 157 4.10.3 Port Triggering ........................................161 4.10.4 DMZ ............................................165 4.11 Q S ..............................................
- Page 8 APPENDIX A: CABLE REQUIREMENTS ..................................... 203 APPENDIX B: PRODUCT SPECIFICATION ....................................206 APPENDIX C: ROUTER MODE SELECT ....................................209 APPENDIX D: NV-600L & ALL126AS3/W COMPATIBILITY TABLE ............................212 APPENDIX E: TROUBLESHOOTING ......................................214 APPENDIX F: COMPLIANCE INFORMATION ..................................... 222 CE DECLARATION ............................................
-
Page 9: Check List
3. Do not use sub-standard power supply. Before connecting the power supply to the device, be sure to check compliance with the specifications. The ALL126AS3 uses a DC12V/1A power supply. 4. The power supply included in the package is commercial-grade. Do not use in industrial-grade applications. -
Page 10: Chapter 2. Installing The Router
Do not install phone lines strapped together with AC power lines, or telephone office line with voice signal. Avoid installing this device with radio amplifying stations nearby or transformer stations nearby. Please note that the voice spectrum allowed by the ALL126AS3 internal splitter is 0 KHz ~ 120 KHz. -
Page 11: General Rules
ALL126AS3 USER’S MANUAL 2.3 General Rules Before making any connections to the router, please note the following rules: Ethernet Port (RJ-45) All network connections to the router Ethernet port must be made using Category 5 UTP/STP or above for 100 Mbps, Category 3, 4 UTP for 10Mbps. -
Page 12: Connecting The Router
ALL126AS3 USER’S MANUAL 2.4 Connecting the Router The router has four Ethernet ports which support connection to Ethernet operation. The devices attached to these ports must support auto-negotiation /10Base-T / 100Base-TX / 1000Base-TX unless they will always operate at half duplex. -
Page 13: Connecting The Rj-11 / Rj-45 Ports
The line port has 2 connectors: RJ-11 and terminal block. It is used to connect with NV-600L(CO) using a single pair phone cable to ALL126AS3(CPE) bridge side (point to point solution). Take note that ALL126AS3 line port cannot be used at the same time. -
Page 14: Vdsl2 Application
ALL126AS3 USER’S MANUAL 2.6 VDSL2 Application The router’s line port supports 100Mbps/0.3km for data service across existing phone wiring. It is easy-to-use which do not require installation of additional wiring. Every modular phone jack in the home can become a port on the LAN. Networking devices can be... - Page 15 2.6.1 Connect the NV-600L and the ALL126AS3 to the Line The objective for VDSL2 is to pass high speed data over a twisted pair cable. In the setup, connect NV-600L to ALL126AS3 through phone wire(24~26 AWG) or line simulator or any other hardware representation of a cable network, with or without noise injection and crosstalk simulations.
-
Page 16: Chapter 3. Hardware Description
ALL126AS3 USER’S MANUAL Chapter 3. Hardware Description This section describes the important parts of the vdsl2 router. It features the front panel and rear panel. ALL126AS3 Outward... -
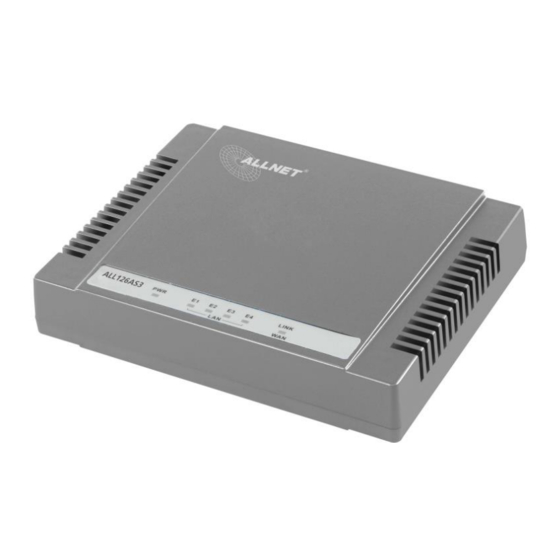
Page 17: Front Panel
ALL126AS3 USER’S MANUAL 3.1 Front Panel The figure shows the front panel. (Figure 3.1) Figure 3.1 Front Panel(ALL126AS3) 3.2 Front Indicators The router has LED indicators. The following Table shows the description. (Table 3-1) Table 3-1 LED Indicators Description and Operation... -
Page 18: Rear Panel
ALL126AS3 USER’S MANUAL Note: It is normal for the connection between two Routers to take up to 3 minutes, due to NV-600L/A to establish a link mechanism in auto-negotiation, with detects and calculates CO and CPE both PBO and PSD level, noise levels and other arguments for getting a better connection. - Page 19 ALL126AS3 USER’S MANUAL And the table shows the description. (Table 3-2) Table 3-2 Description of the router rear connectors Connectors Type Description The reset buttons allows users to reboot the VDSL2 or load the default settings. Reset Tact switch Button...
- Page 20 ALL126AS3 USER’S MANUAL Before user installed power and device, please read and follow these essentials: Use separate paths to route wiring for power and devices. If power wiring and device wiring paths must cross, make sure the wires are perpendicular at the intersection point.
-
Page 21: Chapter 4. Configure The All126As3 Via Web Browser
Chapter 4. Configure the ALL126AS3 Via Web Browser The ALL126AS3 provides a built-in HTML based management interface that allow user configure the ALL126AS3 via Internet Browser. Best viewed at using the Chrome or Firefox. In order to use the web browser to configure the device, you may need to allow: ... -
Page 22: Login
ALL126AS3 USER’S MANUAL 4.1 Login admin admin The default username is “ “ and password is “ “, too. The password is changeable in Administrator Settings. It is advisable to change the administrator password for the security of your network. -
Page 23: Home
4.1.1 Home After successful login using the username admin, the home page of ALL126AS3 is loaded in web browser for ALL126AS3. Uesr can aslo click the “Home” on the left navigation bar. The home page displays the information screen as shown in... - Page 24 Field Description Version Information Software Version Shows the current version of ALL126AS3 Software loaded on the device. DSL Firmware version Shows the current version of xDSL firmware loaded on the device. Applicable only for DSL platforms. xDSL Information Connected Standard The DSL Standard which is being used currently between DSL CPE and DSLAM.
-
Page 25: Quick Setup
ALL126AS3 USER’S MANUAL PORT-1 ~PORT-4 Shows the status of first to fourth ethernet port of CPE device. 4.1.2 Quick Setup The Quick Setup is located on the left side of the screen. Quick Setup provides a simple and easy step for applying minimal configuration to CPE device, for making it ready to use. - Page 26 ALL126AS3 USER’S MANUAL to configure the default WAN connection. The user has to supply fields and the CPE device will take all necessary actions to ensure the default WAN is configured. In case, the WAN connection is already existing in CPE device, the same gets re-created with newly supplied attributes from the user.
- Page 27 ALL126AS3 USER’S MANUAL Click Configure to configure the default WAN connection setup. Figure 4.1.2.2 WAN setup Dynamic IP The screen contains the following details: Fields in WAN setup Dynamic IP Field Description Channel VlanId Specify VLAN ID. Connection Type...
- Page 28 ALL126AS3 USER’S MANUAL Click Configure to configure the selected WAN connection setup. Figure 4.1.2.3 WAN setup PPPoE The screen contains the following details: Fields in WAN setup PPPoE Field Description...
- Page 29 ALL126AS3 USER’S MANUAL Channel VlanId Specify VLAN ID. Connection Type Specify the Connection Type from the dropdown. Username Enter a valid Username. Password Enter a valid Password. Click Configure to configure the selected WAN connection setup. Figure 4.1.2.4 WAN setup Static IP...
- Page 30 Channel VlanId Specify VLAN ID. Connection Type Specify the Connection Type from the dropdown. Specify the IP Address of ALL126AS3 CPE’s WAN link. IP Address Specify the Subnet Mask of ALL126AS3 CPE’s WAN link. Subnet Mask Specify the Gateway address of the ALL126AS3 CPE’s WAN.
-
Page 31: Select The Menu Level
ALL126AS3 USER’S MANUAL 4.2 Select the Menu Level There is an easy Setup for end users at the setup of ALL126AS3 with SYSTEM, Statistics, xDSL, WAN, LAN, Route, FIREWALL, NAT, , Multicast, Ipsec , IPv6, Diagonstics, Quick Setup, Home, Logout for more detail configurations. -
Page 32: Select "System
ALL126AS3 USER’S MANUAL Figure 4.2 Select the Menu Level (ALL126AS3) 4.3 Select “SYSTEM” Select the “SYSTEM”. The menu below will be used frequently. It includes the sub-menus of Host Name Config、 System Log 、SSL Certificate System Time、Administrator Settings、Web Settings、Software/Firmware Upgrade、... -
Page 33: Host Name Config
4.3.1 Host Name Config To configure the host name of ALL126AS3, you have to enter host and domain name. Click the Host Name Config link (System > Host Name Config) on the left navigation bar. A screen is displayed as shown in Figure 4.3.1. -
Page 34: System Time
ALL126AS3 USER’S MANUAL Click Apply at any time during configuration to save the information that you have entered. Click Cancel to exit from this page without saving the changes. 4.3.2 System Time You can set System Time by connecting to a Simple Network Time Protocol (SNTP) server allows the Modem to synchronize the system clock to the global Internet. - Page 35 ALL126AS3 USER’S MANUAL Fields in System Time Field Description Current System Time Current Time in System shown in Day, Date and Time of day. Set Time Zone Select the time zone form the list of worldwide time zones in pull-down options.
-
Page 36: Administrator Settings
ALL126AS3 USER’S MANUAL 4.3.3 Administrator Settings To change the password for the administrator, click the Administrator Settings link (System > AdministratorSettings) in the left navigation bar. A screen is displayed as shown in Figure 4.3.3. This page allows the user to change the login password. - Page 37 ALL126AS3 USER’S MANUAL Field Description Disable Administrator Password Select this to disable the web prompts for user login password. Select User Select user type.The available options are Admin and support_user. Current Password The user should specify the current login password.
-
Page 38: Web Settings
ALL126AS3 USER’S MANUAL 4.3.4 Web Settings This page shows the details of Web login timeout settings for the CPE device in seconds. Click the Web Settings link (System > Web Settings) on the left navigation bar and a screen is displayed as shown in Figure 4.3.4... -
Page 39: Software/Firmware Upgrade
4.3.5 Software/Firmware Upgrade To update the system firmware, click the Software/Firmware Upgrade link (System > Software/Firmware Upgrade) on the left navigation bar. A screen displays the current version of ALL126AS3 Software running on the device as shown in Figure 4.3.5... -
Page 40: Configuration Settings
ALL126AS3 USER’S MANUAL Click Browse to specify the software image file from host, to be upgraded in system. Click Apply to start the software upgrade process. Note: You can click Home on the left navigation bar to view the current software version. - Page 41 ALL126AS3 USER’S MANUAL Fields in Configuration Settings Field Description Backup to local host This will backup the current active configuration of CPE in Host machine. Restore from local host This will load the user supplied configuration to CPE from Host machine.
- Page 42 ALL126AS3 USER’S MANUAL Figure 4.3.6.1 Configuration Backup When you click Backup button as shown in Figure 4.3.6.1, it will backup the config settings of CPE in connected PC from where Web UI is being accessed. Restore Previous Backed-up Configuration As mentioned before this option allows user to restore the earlier backed up configuration in router system.
-
Page 43: System Log
ALL126AS3 USER’S MANUAL Figure 4.3.6.2 Configuration Restore Click Apply button to restore the config settings. 4.3.7 System Log To view the logs produced in system, click the System Log link (System > System Log) on the left navigation bar. A screen is displayed as shown in Figure 4.3.7... - Page 44 ALL126AS3 USER’S MANUAL Figure 4.3.7 System Log This page allows to manage logging options in CPE device. If "Local" is selected, the events are logged locally in the system. If "Remote" is selected, the messages are logged to a remote server.
- Page 45 ALL126AS3 USER’S MANUAL Remote Mode: Specify the IP address and UDP port number for log transfer using syslog. Local and Remote Mode: This supports both options mentioned above. The user can apply one of the following filters to record logging above the specified level. Click on <SAVE CHANGES>...
- Page 46 ALL126AS3 USER’S MANUAL Figure 4.3.7.1 View System Log For the ease of readability, the log messages of different levels are using different colors. For example: all the debug messages are shown in green colored text. Click Download to save the file in Host Computer.
-
Page 47: Ssl Certificate
ALL126AS3 USER’S MANUAL 4.3.8 SSL Certificate To install a SSL Certificate for SSL tunnel, click the SSL Certificate link (System > SSL Certificate) on the left navigation bar. A screen is displayed as shown in Figure 4.3.8 Figure 4.3.8 SSL Certificate ... -
Page 48: Reset
ALL126AS3 USER’S MANUAL 4.3.9 Reset To reboot the system, click Reset link (System > Reset) on the left navigation bar. A screen is displayed as shown in Figure 4.3.9 Figure 4.3.9 Reset Click Reset to reboot the system. This does not change the configurations existing in system. -
Page 49: Select "Statistics
ALL126AS3 USER’S MANUAL Click Ok to perform the operation on CPE. Click cancel to exit from this page. 4.4 Select “Statistics” Select the “Statistics” link on left navigation menu. The menu below includes the sub-menus of and WAN. A screen is displayed as shown in Figure 4.4. -
Page 50: Lan
ALL126AS3 USER’S MANUAL 4.4.1 LAN To get the LAN Statistics, click the LAN link (Statistics > LAN) on the left navigation bar. A screen is displayed as shown in Figure 4.4.1 Figure 4.4.1 LAN Statistics... - Page 51 ALL126AS3 USER’S MANUAL The screen contains the following details: Fields in LAN Statistics: Field Description Interface Name of LAN Interface (e.g. eth0, usb0 etc.) Transmit Counters: Total packets transmitted from this interface. Total bytes transmitted form this interface.
-
Page 52: Wan
ALL126AS3 USER’S MANUAL 4.4.2 WAN To get WAN Statistics, click the WAN link (Statistics > WAN) on the left navigation bar. A screen is displayed as shown in Figure 4.4.2 Figure 4.4.2 WAN Statistics The screen contains the following details:... - Page 53 ALL126AS3 USER’S MANUAL WAN Channel Information about WAN Channel such as VCC or WAN-ethernet channel. Connection Type Type of WAN Connection. Fields in WAN Statistics (cont’d): Field Description Transmit Counters for WAN interface: Total packets transmitted from this interface.
-
Page 54: Select "Xdsl
ALL126AS3 USER’S MANUAL 4.5 Select “xDSL” You can view the xDSL link on the left navigation bar of the CPE Home page. This web page is available only on DSL platforms. Select the “xDSL”. The menu below includes the sub-menus of xDSL Status. -
Page 55: Xdsl Status
ALL126AS3 USER’S MANUAL 4.5.1 xDSL Status To view the xDSL Status, click the xDSL Status link (xDSL > xDSL Status) on the left navigation bar. A screen is displayed as shown in Figure 4.5.1 Figure 4.5.1 xDSL Status... - Page 56 ALL126AS3 USER’S MANUAL The screen contains the following details: Fields in xDSL Status: Field Description Displays the Vendor ID, Version Number and the Serial Number of the ATU-C System Vendor Information ATU-C (DSLAM). Displays the status of the physical xDSL Line in terms of the modem,...
-
Page 57: Vectoring Mode Selection
ALL126AS3 USER’S MANUAL 4.5.2 Vectoring Mode selection For viewing the vectoring mode, click the Vectoring Mode Selection link (xDSL > Vectoring Mode Selection) on the left navigation bar. A screen is displayed as shown in Figure 4.5.2 Fields in Vectoring Mode Selection... - Page 58 2. Vectoring technology is mainly used in intensive line equipment, such as 24-Port VDSL2 IP DSLAM. 3. If user would like to use ALL126AS3 vectoring technology, ALL126AS3 and IP DSLAM both need support vectoring technology features and need both enabled. The ALL126AS3 will auto follow the IP DSLAM vectoring technology configuration.
-
Page 59: Select "Wan
ALL126AS3 USER’S MANUAL 4.6 Select “WAN” You can view WAN link on the left navigation bar for WAN related settings. Select the “NAT”. The menu below includes the sub-menus of WAN Mode Selection, WAN Channel Config, VLAN Channel Config, Setting, Status, DNS, DDNS, Configuration. -
Page 60: Wan Mode Selection
ALL126AS3 USER’S MANUAL WAN Mode Selection 4.6.1 To configure the WAN Mode Setting, click the WAN Mode Selection (WAN > WAN Mode Selection) on the left navigation bar. A screen is displayed as shown in Figure 4.6.1 Figure 4.6.1 WAN Mode Setting(Seleted Auto) - Page 61 Click Apply at any time during configuration to save the information that you have entered. Click Cancel to exit from this page without saving the changes. Note: If user would like to use ADSL to connect ALL126AS3, please select ADSL item of Physical WAN Type, and confirm the TC type itme is ATM-TC.
-
Page 62: Auto Detect Setting
ALL126AS3 USER’S MANUAL Auto Detect Setting 4.6.2 Auto detect feature is a fully automatic way to find and configure VC channel or VLAN channel for active WAN PHY of the device and WAN protocol for the same (either PPPoE/DHCP). User has to provide pool of VC channels or VLAN channels which will be probed one by one sequentially and upon successful detection of a channel, WAN protocol probing will be done and configured in the device. - Page 63 ALL126AS3 USER’S MANUAL Figure 4.6.2 Port Mapping Configuration The screen contains the following details: Fields in Auto detect Config:...
- Page 64 ALL126AS3 USER’S MANUAL Field Description ADSL-PTM VLAN Pool This displays the current configured VLAN pool for autodetect in ADSL-PTM WAN mode. Add/Delete ADSL-PTM VLAN to Pool Add or delete VLAN to ADSL-PTM VLAN pool. VDSL-PTM VLAN Pool This displays the current configured VLAN pool for autodetect in VDSL-PTM WAN mode.
- Page 65 ALL126AS3 USER’S MANUAL Field Description L2 MII-1 VLAN Auto Detect Select this to enable VLAN auto detection from the specified pool for MII-1 WAN mode. L2 MII-0 VLAN Auto Detect Select this to enable VLAN auto detection from the specified pool for MII-0 WAN mode.
-
Page 66: Wan Channel Config
ALL126AS3 USER’S MANUAL WAN Channel Config 4.6.3 To configure the WAN Channel Config, click the WAN Channel Config (WAN > WAN Channel Config) on the left navigation bar. A screen is displayed as shown in Figure 4.6.3. Figure 4.6.3... - Page 67 ALL126AS3 USER’S MANUAL Figure 4.6.3.1 WAN Channel Config (Auto Detecting does not check the checkbox) The screen contains the following details:...
- Page 68 ALL126AS3 USER’S MANUAL Fields in WAN Channel Config: Field Description The ATM based WAN channels are configured through the ATM tab. Auto Detect Enable To enable Auto Detect. Channel Name User specified VCC Name. VPI/VCI Virtual Path Identifier and Virtual Channel Identifier.
- Page 69 ALL126AS3 USER’S MANUAL Figure 4.6.3.2 WAN Channel Config - ATM VCC Creation The screen contains the following details:...
- Page 70 ALL126AS3 USER’S MANUAL Fields in WAN Channel Config: Field Description VC Channel Name User specified VCC Name. VCI/VPI Virtual Path Identifier and Virtual Channel Identifier Encapsulation Mode Encapsulation Mode for this VCC from dropdown - LLC/SNAP or VCMux mode. Select AAL5 Link type for ATM VCC (possible values such as EoATM, IPoATM, Link type PPPoATM).
-
Page 71: Vlan Channel Confg
ALL126AS3 USER’S MANUAL VLAN Channel confg 4.6.4 To configure the VLAN Channel Config, click the VLAN Channel Config (WAN > VLAN Channel Config) on the left navigation bar. A screen is displayed as shown in Figure 4.6.4. Figure 4.6.4 Figure 4.6.4.1 VLAN Channel Config Display(Auto Detecting does not check the checkbox) - Page 72 ALL126AS3 USER’S MANUAL The screen contains the following details: Fields in VLAN Display: Field Description Auto Detect Enable To enable Auto Detect. VLAN Name User specified VLAN Channel name. Base WAN Name Displays the L2 interface names over which VLAN Channel has been configured.
- Page 73 ALL126AS3 USER’S MANUAL Figure 4.6.4.2 VLAN Channel Config - Add The screen contains the following details: Fields in VLAN Creation: Field Description VLAN Channel Name User specified VLAN Channel name. Mode Name List of L2 interfaces over which VLAN Channels can be configured.
-
Page 74: Wan Setting
ALL126AS3 USER’S MANUAL Click Cancel to exit from this page without saving the changes. 4.6.5 WAN Setting To configure the WAN interface, click the WAN Setting link (WAN > WAN Setting) on the left navigation bar and a screen is displayed as shown in Figure 4.6.5. - Page 75 Figure 4.6.5.1 WAN Setting The ALL126AS3 can support up to maximum 16 WAN connections in system. When a hardware based QoS is enabled in system, it limits the number of VCCs to 8 only for ATM based WAN. For creating a new WAN connection, click Add in the WAN setting page.
- Page 76 To get your IP Address from your service provider (means ALL126AS3 is DHCP Dynamic IP Address client on WAN) click Apply. To enter the WAN interface IP Address of ALL126AS3 enable this field and click Static IP Address Apply. PPPoE Point-to-Point Protocol over Ethernet used for connecting to the ISP, click Apply.
- Page 77 ALL126AS3 USER’S MANUAL Bridge To configure the WAN of bridged type, select this field and click Apply. Click Apply at any time during configuration to save the information that you have entered. Click Cancel to exit from this page without saving the changes.
- Page 78 ALL126AS3 USER’S MANUAL 4.6.5.2 Static IP Address To configure the WAN interface to use a static IP address, select the option Static IP Address in the WAN Settings screen. A screen is displayed as shown in Figure 4.6.5.4 Figure 4.6.5.4 WAN Static IP...
- Page 79 Fields in Static IP: Field Description Address Version To specify the IP Address of ALL126AS3 CPE’s WAN link. IP address assigned by your ISP To specify the Subnet Mask of ALL126AS3 CPE’s WAN link. Subnet Mask To specify the Gateway address of the ALL126AS3 CPE’s WAN.
- Page 80 ALL126AS3 USER’S MANUAL 4.6.5.3 PPPoE To configure the WAN interface to use PPPoE, choose the option PPPoE. A screen is displayed as shown in Figure 4.6.5.5...
- Page 81 ALL126AS3 USER’S MANUAL Figure 4.6.5.5 WAN PPPoE creation The screen contains the following details: Fields in PPPoE WAN: Field Description User Name To enter a username for PPPoE session used for authentication in B-RAS. Password To enter a password for PPPoE session used for authentication in B-RAS.
- Page 82 ALL126AS3 USER’S MANUAL Fields in PPPoE WAN (WAN IPv6 Configuration): Field Description This option allows to select following modes of IPv6 configuration: Stateful DHCPv6(IA_NA and IA_PD) Configuration Modes SLAAC (Address Configuration) with DHCPv6 (IA_PD) This option allows to configure different DUID (DHCP Unique Identifier) types: ...
- Page 83 ALL126AS3 USER’S MANUAL Click Apply at any time during configuration to save the information that you have entered. Click Cancel to exit from this page without saving the changes.
- Page 84 ALL126AS3 USER’S MANUAL 4.6.5.4 PPPoA The PPP-over-ATM (PPPoA) mode is valid only for ATM based WAN. To configure the WAN interface to use PPPoA, select the option PPPoA option. A screen is displayed as shown in Figure 4.6.5.6...
- Page 85 Specifies how long the connection may remain idle before the PPPoA connection Maximum Idle Time gets automatically disconnected. The Idle Timeout is specified in seconds. For PPPoA, the only supported IP addressing is IPv4 currently. The IPv6 for PPPoA Address Version is not available in this version of ALL126AS3.
- Page 86 ALL126AS3 USER’S MANUAL Fields in PPPoA WAN IPv6 Configuration: Field Description This option allows to select following modes of IPv6 configuration: Stateful DHCPv6(IA_NA and IA_PD) Configuration Modes SLAAC (Address Configuration) with DHCPv6 (IA_PD) This option allows to configure different DUID (DHCP Unique Identifier) types: ...
- Page 87 ALL126AS3 USER’S MANUAL Click Apply at any time during configuration to save the information that you have entered. Click Cancel to exit from this page without saving the changes. 4.6.5.5 Bridge The option Bridge enables the bridge mode, which is a common connection method used for xDSL modem. Select this option on WAN Settings page and click Next.
- Page 88 ALL126AS3 USER’S MANUAL The screen contains the following details: Fields in Bridge Configuration: Field Description This option allows to configure default route for relevant WAN mode of this WAN Default WAN connection. Click Apply at any time during configuration to save the information that you have entered.
-
Page 89: Wan Status
ALL126AS3 USER’S MANUAL 4.6.6 WAN Status To display the status report of VCCs, click the WAN Status link (WAN > WAN Status) on the left navigation bar. A screen id displayed as shown in Figure 4.6.6 Figure 4.6.6 WAN Status... - Page 90 For the currently configured WAN interface, this gives the layer-2 WAN channel WAN Channel information (such as ATM VCC). Connection Type The type of the connection mode in which ALL126AS3 is configured. Status Displays the connection status of the WAN. Displays the IP address in use.
- Page 91 ALL126AS3 USER’S MANUAL The control buttons shown against few WAN are explained below. Fields in Control Fields displayed in WAN Status Screen: Field Description This button appears only for PPPoA and PPPoE type of WAN links. On clicking this button, it tries Connect to establish PPP link.
- Page 92 ALL126AS3 USER’S MANUAL Figure 4.6.6.1 WAN Status IPv6 Tab The screen contains the details as described in table of “Fields in WAN Status”.
-
Page 93: Dns
ALL126AS3 USER’S MANUAL 4.6.7 DNS To configure the Domain Name Server (DNS) address, click the DNS link (WAN > DNS) on the left navigation bar. A screen is displayed as shown in Figure 4.6.7. For statically configured WAN, it is mandatory to configure DNS addresses through this page. - Page 94 ALL126AS3 USER’S MANUAL The screen contains the following details: Fields in DNS: Field Description Select the appropriate tab to configure IPv4 or IPv6. IPv6 support is currently not IPv4/IPv6 available for DNS configuration. Domain Name Server (DNS) Address Enter the DNS address of the primary DNS server.
-
Page 95: Ddns
ALL126AS3 USER’S MANUAL 4.6.8 DDNS The Dynamic DNS is useful for getting a FQDN URL registered for a dynamic IP address to a DNS service provider. The ALL126AS3 software integrates support for three Dynamic DNS service providers: • • dyndns •... - Page 96 ALL126AS3 USER’S MANUAL The screen contains the following details: Fields in DDNS: Field Description Enable DDNS support Check box to enable DDNS support in CPE. WAN Interface name from dropdown for DDNS resolution. The DDNS agent running in CPE WAN Interface keeps track of changes in IP address of chosen WAN and informs DNS service provider.
-
Page 97: Oam Configuration
ALL126AS3 USER’S MANUAL 4.6.9 OAM Configuration This page provides ATM F5 based OAM test. Hence the settings are valid only for ATM based WAN. To configure the ADSL OAM settings, click the OAM Configuration link (WAN > OAM Configuration) on the left navigation bar. This release supports only F5 type of OAM tests as shown in Figure 4.6.9... - Page 98 ALL126AS3 USER’S MANUAL The screen contains the following details: Fields in ADSL OAM F5 Test page: Field Description This table displays all active connections with following OAM parameters information: No: Number VPI: Virtual Path Identifier VCI: Virtual Connection Identifier OAM F5 Setting Table ...
- Page 99 ALL126AS3 USER’S MANUAL When you test the OAM Configuration, the F5 result is displayed as shown in Figure 4.6.9.1 and this may be a failure or successful OAM F5 result. Figure 4.6.9.1 Tset Successful Figure 4.6.9.2 Test Failed...
- Page 100 ALL126AS3 USER’S MANUAL The screen contains the following details: Fields in ADSL OAM F5 Test Page: Field Description VPI/VCI Displays the selected VPI/VCI channel of the OAM F5 Setting Table. Cells Tx Count of total number of transmitted ATM cells.
-
Page 101: Select "Lan
4.7 Select “LAN” When connecting the ALL126AS3 to a new control PC, one may want to go through the following steps in order to make the IP address previously set by ifconfig in the console or on some later occasion, one may want to change it again without using the console, then the menu below will be helpful. -
Page 102: Lan Arp List
ALL126AS3 USER’S MANUAL LAN ARP List 4.7.1 To view the ARP entries list that is currently present in CPE, click the LAN ARP List link (LAN > LAN ARP List) on the left navigation bar. A screen is displayed as shown in Figure 4.7.1... -
Page 103: Lan Settings
ALL126AS3 USER’S MANUAL Click Perform ARP Scan to ensure the ARP entries connected to the CPE. 4.7.2 LAN Settings To configure the LAN interface, click the LAN Settings link (LAN > LAN Settings) on the left navigation bar. In case the Secondary level subnet Range checkbox is checked, some additional data and options will be on display. - Page 104 This is to enter the secondary subnet mask. To choose the mode of DHCP in ALL126AS3. The options available are: Disable, Server and Relay Agent. The default value is Disable. If DHCP Mode is set to Server, there are some additional options available, which are shown in Figure 4.7.2.
- Page 105 ALL126AS3 USER’S MANUAL Field Description DHCP Server IP Pool Starting Address DHCPv4 pool start IPv4 address. IP Pool Ending Address DHCPv4 pool end IPv4 address. Lease Time Lease Time for every DHCP leased entry. Select from dropdown of allowed values.
- Page 106 ALL126AS3 USER’S MANUAL When you click the Click Here link under IP Address Reservation in the LAN Settings page, a screen is displayed as shown in Figure This is used for the reservation of IP address of client’s MAC address in DHCP server.
- Page 107 ALL126AS3 USER’S MANUAL Fields in LAN Settings: Field Description Host Name Host Computer name. IP Address IP Address to be statistically reserved for this host identified by MAC address. MAC Address MAC address of Host computer for which static IP reservation is needed.
- Page 108 ALL126AS3 USER’S MANUAL LAN Settings - IPv6 Tab If IPv6 functionality is enabled through (Advanced Setup > IPv6), then LAN Settings web page also presents IPv6 tab. Based on the Auto Configuration Mode, the following screens are displayed is as shown in Figure 4.7.2.2,...
- Page 109 ALL126AS3 USER’S MANUAL Figure 4.7.2.2 LAN Settings - IPv6 Tab (Option 1: SLAAC + Stateless DHCPv6) Figure 4.7.2.3 LAN Settings - IPv6 Tab (Option 2: SLAAC)
- Page 110 Figure 4.7.2.4 LAN Settings - IPv6 Tab (Option 3: Statefull DHCPv6 Server) For LAN interface, the ALL126AS3 uses SLAAC based prefix assignment to LAN hosts. The IPv6 prefix obtained from DHCPv6 on WAN is automatically passed to LAN hosts for their IPv6 address configuration.
- Page 111 ALL126AS3 USER’S MANUAL Fields in LAN Settings – IPv6: Field Description LAN IPv6 Configuration IPv6 Address IPv6 Address of CPE IPv6 Address Autoconfiguration Auto Configuration Mode on LAN interface for LAN hosts. • Stateless Auto Config (SLAAC) + Statefull DHCPv6 • Stateless Auto Config (SLAAC) • Statefull DHCPv6 Stateless Address...
- Page 112 ALL126AS3 USER’S MANUAL When you click Prefix Delegated view button in the LAN Settings - IPv6 page, a screen is displayed as shown in Figure 4.7.2.5 Figure 4.7.2.5 Prefix Delegated view Click Back to exit from this page.
-
Page 113: Upnp Devices List
ALL126AS3 USER’S MANUAL 4.7.3 UPnP Devices List To discover the UPnP Devices in LAN network, click the UPnP Devices link (LAN > UPnP Devices) on the left navigation bar. When click UPnP page, please wait a few time to show the UpnP device information. A screen is displayed as shown in Figure 4.7.3... -
Page 114: Lan Switch Port Setting
ALL126AS3 USER’S MANUAL UUID Universal Unique Identifier. Click Refresh to view a new UPnP devices list. 4.7.4 LAN Switch Port Setting To discover the All LAN Port Setting in LAN network, click the LAN Switch Port Setting link (LAN > LAN Switch Port Setting) on the left navigation bar. -
Page 115: Lan Port Status
ALL126AS3 USER’S MANUAL 4.7.5 LAN Port Status To discover the LAN Port Status in LAN network, click the LAN Port Status link (LAN > LAN Port Status) on the left navigation bar. A screen is displayed as shown in Figure 4.7.5 Figure 4.7.5 LAN Port Status... -
Page 116: Vlan Settings
ALL126AS3 USER’S MANUAL NWAY 10M Full 10M Full Force 10M Full 10M Half None Link Down NWAY 10M Half 10M Half Input 5 Output 5 Input 6 Output 6 Input 7 Output 7 Input 8 Output 8 NWAY 100M Half... - Page 117 ALL126AS3 USER’S MANUAL Click APPLY to save the VLAN settings that has been checked. Click CANCEL to exit from this page without saving the changes. The following table is to configure VLAN settings Example: When enable VLAN, all ports does not communicate. Please refer to the following example to configure the intercommunication status of each port.
- Page 118 ALL126AS3 USER’S MANUAL Port 2 & Port3 intercommunicate...
-
Page 119: Select "Route
ALL126AS3 USER’S MANUAL 4.8 Select “Route” If there are multiple routers installed on your network, it is necessary to configure the VDSL2 router unit’s routing functions. Select the “Route”. The menu below includes the sub-menus of Static Routing, RIP Support Routing Table List. -
Page 120: Static Routing
ALL126AS3 USER’S MANUAL 4.8.1 Static Routing The static routing function determines the path that data follows over your network before and after it passes through your router. You can use static routing to allow different IP domain users to access the Internet through this VDSL2 Router device. - Page 121 ALL126AS3 USER’S MANUAL The screen contains the following details: Fields in Static Routing: Field Description To enter the destination IP Address of routing entry. Enter the IP Address 0-0-0-0 Destination LAN IP routing entry. To enter the Subnet Mask of routing entry. Enter the Subnet Mask...
- Page 122 ALL126AS3 USER’S MANUAL When you click the IPV6 tab in the Static Routing page, a screen is displayed as shown in Figure 4.8.1.1 The addition and deletion of static IPv6 routes is not supported currently. Figure 4.8.1.1 Static Routing IPv6 Tip: Please note that default route should not be added from this web page.
-
Page 123: Rip Support
ALL126AS3 USER’S MANUAL 4.8.2 RIP Support The RIP support for enabling dynamic routes in CPE may be present in some of pre-built packages. To enable the RIP support, click the RIP Support link (Route > RIP Support) on the left navigation bar. A screen is displayed as shown in Figure 4.8.2. - Page 124 ALL126AS3 USER’S MANUAL Figure 4.8.2 Dynamic Routing The screen contains the following details: Fields in Dynamic Routing: Field Description Dynamic Routing To enable or disable the Dynamic Routing (RIP) in CPE. To configure the listen mode of RIP to: Disabled ...
- Page 125 ALL126AS3 USER’S MANUAL The Routing Information Protocol (RIP) is one of the oldest distance-vector routing protocols, which employs the hop count as a routing metric. RIP prevents routing loops by implementing a limit on the number of hops allowed in a path from the source to a destination.
-
Page 126: Routing Table List
The Routing table allows you to see how many routings on your VDSL2 router routing table and interface information. To view the Routing entry table list of ALL126AS3, click on the “Routing Table List” link in the left navigation bar. A screen is... - Page 127 ALL126AS3 USER’S MANUAL Fields in Static Routing: Field Description Destination IP Destination IPv4 address for route. Subnet Mask Destination IPv4 subnet mask for route. Gateway IPv4 gateway address for this route. Routing metric is number used by the routing protocol. Higher metrics have the effect Metric of making a route less favorable by Router.
- Page 128 ALL126AS3 USER’S MANUAL Routing Table List - IPv6 Tab If IPv6 functionality is enabled through (Quick Setup > IPv6), then the Routing Table List web page also lists all IPv6 routes in system under IPv6 tab as shown in Figure 4.8.3.1...
-
Page 129: Select "Firewall
ALL126AS3 USER’S MANUAL 4.9 Select “Firewall” You can view Firewall link on the left navigation bar of the ALL126AS3 CPE homepage. The menu below includes the sub-menus of Firewall Setting, IPv6 Firewall Setting, Packet Filtering, Filtering, Parental Control, Application Server Settings and ACL. -
Page 130: Firewall Setting
ALL126AS3 USER’S MANUAL 4.9.1 Firewall Setting To enable or disable the firewall, click the Firewall Setting link (Firewall > Firewall Setting) on the left navigation bar. A screen is displayed as shown in Figure 4.9.1 Figure 4.9.1 Firewall Setting The screen contains the following details:... -
Page 131: Ipv6 Firewall Setting
ALL126AS3 USER’S MANUAL Click APPLY at any time during configuration to save the information that you have entered. Click CANCEL to exit from this page without saving the changes. 4.9.2 IPv6 Firewall Setting To enable or disable the firewall, click the IPV6 Firewall Setting link (Firewall > IPv6 Firewall Setting) on the left navigation bar. A screen is displayed as shown in Figure 4.9.2... - Page 132 ALL126AS3 USER’S MANUAL Figure 4.9.2 IPv6 Firewall Setting The screen contains the following details: Fields in UPnP Settings: Field Description Firewall Mode The available options are Off, CPE policy, High and Low. Click APPLY for committing the desired action.
-
Page 133: Packet Filtering
ALL126AS3 USER’S MANUAL 4.9.3 Packet Filtering To enable Packet Filtering, click the Packet Filtering link (Firewall > Packet Filtering) on the left navigation bar. A screen is displayed as shown in Figure 4.9.3 Figure 4.9.3 Packet Filtering The screen contains the following details:... - Page 134 Field Description IPV4/IPv6 Choose the appropriate tab to configure. To enable or disable the Packet Filter feature of ALL126AS3 CPE. To enable, select Enable Packet Filter the check box. Source IP Filter IP Address range of the local machine under ALL126AS3 CPE.
- Page 135 ALL126AS3 USER’S MANUAL Figure 4.9.3.1 Add a Packet Filtering Rule for Firewall - IPv4 The screen contains the following details:...
- Page 136 ALL126AS3 USER’S MANUAL Fields in“Add a Packet Filtering Rule” page: Field Description Protocol To select the protocol. The options available are ALL, TCP, UDP, ICMP, AH and ESP. Source IP The source IP can be a SINGLE address or a SUBNET, involving a range of IP addresses.
- Page 137 ALL126AS3 USER’S MANUAL Figure 4.9.3.2 Add a Packet Filtering Rule for Firewall - IPv6 The screen contains the following details:...
- Page 138 ALL126AS3 USER’S MANUAL Fields in “Add a Packet Filtering Rule - IPv6” page: Field Description Ingress Interface To specify the input interface of the packet from dropdown options. (e.g. WAN1). Egress Interface To specify the output interface of the packet from dropdown options. (e.g. WAN2).
- Page 139 (1). All devices must be connected and turned on. (2). Confirm that the ALL126AS3 is in router mode (default mode). (3). If there is not router mode, please refer to the following configuration diagram to configure the router mode and packet filter.
- Page 140 ALL126AS3 USER’S MANUAL Configure example: WAN→WAN Setting Items Setting argument / Action Attached Channel Default WAN TYPE Static IP Address IP address assigned by tour ISP WAN IP: 192.168.16.204 (Example) Subnet Mask 255.255.255.0 (Example) ISP Gateway Address 192.168.16.1(Example) Default WAN...
- Page 141 ALL126AS3 USER’S MANUAL LAN Setting Configure example: LAN→LAN Settings Items Setting argument / Action IP Address LAN IP: 192.168.1.204 (Example) Subnet Mask 255.255.255.0(Example) MAC Address ALL126AS3 mac address(Auto detect) DHCP Server Server IP Pool Starting Address 192.168.1.30 (DHCP IP pool example)
- Page 142 192.168.1.50 (DHCP IP pool example) Apply Button Click it DNS Setting Configure example: WAN→DNS Items Setting argument / Action DNS Address DNS IP: 168.95.1.1 (Example) Apply Button Click it Note: When configuration is completed with the above arguments, please reboot the ALL126AS3.
- Page 143 ALL126AS3 USER’S MANUAL PC NIC card setting Configure example: Items Setting argument / Action IP Address PC LAN IP: 192.168.1.30 (Example) Subnet Mask 255.255.255.0 (Example) Gateway 192.168.1.204 (Example) 192.168.16.5 (Example)
- Page 144 ALL126AS3 USER’S MANUAL 3. Packet Filtering configuration: ALL126AS3 Packet Filtering...
- Page 145 ALL126AS3 USER’S MANUAL Configure example: Firewall→Packet Filtering Items Setting argument / Action Protocol TCP (Example) Source IP Type ALL (All source IP Address) Source port 3671~3671 Destination IP Type Subnet 192.168.1.0 Destination IP Address (Example, it means 192.168.1.0~192.168.16.255) Destination Netmask 255.255.255.0 (Example)
- Page 146 ALL126AS3 USER’S MANUAL Packet filtering complete Enable Firewall function: The firewall has to be enabled in order to start the packet filter. Note: All the setting arguments above are examples; please follow the on-site environment to set.
-
Page 147: Url Filtering
ALL126AS3 USER’S MANUAL 4.9.4 URL Filtering Using URL Filtering, the user can block the access to specific URLs to the web users by adding them to the list in the URL Blocking web page. To configure the URL Filtering, click the URL Filtering link (Firewall > URL Filtering) on the left navigation bar. A screen is displayed as shown in Figure 4.9.4... - Page 148 ALL126AS3 USER’S MANUAL Fields in URL Blocking: Field Description Domain Name URL of the domain that needs to be blocked. For example: www.google.com.tw Select Select this option to remove the URL entry from blocked list. Click Add for adding a new URL filtering entry.
-
Page 149: Parental Control
ALL126AS3 USER’S MANUAL 4.9.5 Parental Control To configure the Parental Control, click the Parental Control link (Firewall > Parental Control) on the left navigation bar. A screen is displayed as shown in Figure 4.9.5 Figure 4.9.5 Parental Control Configuration... - Page 150 ALL126AS3 USER’S MANUAL The screen contains the following details: Fields in Parental Control: Field Description To disable/”deny all”/”permit all” - MAC address control feature. MAC Address Control MAC Address Control List Policy To specify whether the particular MAC address is disabled, denied or permitted.
-
Page 151: Application Server Settings
ALL126AS3 USER’S MANUAL 4.9.6 Application Server Settings To configure the Application Server Settings, click the Application Server Settings link (Firewall > Application Server Settings) on the left navigation bar. A screen is displayed as shown in Figure 4.9.6 Figure 4.9.6 Application Server Settings... - Page 152 ALL126AS3 USER’S MANUAL The screen contains the following details: Fields in Application Servers Settings: Field Description Web Server settings: The acceptance from WAN Web Server The Port Number The acceptance from LAN Telnet Server settings: The acceptance from WAN Telnet Server ...
-
Page 153: Access Control List (Acl)
To configure the access control list, click the ACL link (Firewall > ACL) on the left navigation bar. This can be used for allowing specified IP addresses to access the ALL126AS3 CPE from WAN. The system allows upto 16 ACL entries to be configured in the CPE device.A screen is displayed as shown in... - Page 154 ALL126AS3 USER’S MANUAL Figure 4.9.7 Application Server Settings The screen contains the following details:...
-
Page 155: Nat
Click Apply after filling the IP address for adding the entry in ACL list. Click Cancel to exit from this page without saving the changes. 4.10 NAT You can view the NAT on the left navigation bar of the ALL126AS3 CPE homepage. The menu below includes the sub-menus... -
Page 156: Nat Settings
ALL126AS3 USER’S MANUAL Settings, Virtual Server, PortTriggering and DMZ. Following are the options available under NAT as shown in Figure 4.10 Figure 4.10 NAT Options 4.10.1 NAT Settings... - Page 157 ALL126AS3 USER’S MANUAL To configure Network Address Translation (NAT), click the NAT Settings link (NAT > NAT Settings) on the left navigation bar. A screen is displayed as shown in Figure 4.10.1 Figure 4.10.1 Network Address Translation (NAT) Settings The screen contains the following details:...
-
Page 158: Virtual Server
ALL126AS3 USER’S MANUAL 4.10.2 Virtual Server To configure the virtual server, click the Virtual Server link (NAT > Virtual Server) on the left navigation bar. A screen is displayed as shown in Figure 4.10.2 Figure 4.10.2 Virtual Server The screen contains the following details:... - Page 159 ALL126AS3 USER’S MANUAL Fields in Virtual Server Page: Field Description Application Name Configured Application Name for Virtual Server rule. Private IP Private IP address of Virtual Server rule. Remote IP Remote IP address of Virtual Server rule. Private Start Port Private Port starting range.
- Page 160 ALL126AS3 USER’S MANUAL When you click Add button in the Virtual Server page, a screen opens with a new web page as shown in Figure 4.10.2.1 Figure 4.10.2.1 Virtual Server Add The screen contains the following details:...
- Page 161 ALL126AS3 USER’S MANUAL Fields in Virtual Server - Add: Field Description Application Name Specify Application name from dropdown or custom name for Virtual Server rule. Protocol Specify Virtual Server protocol - TCP or UDP or Both i.e. TCP/UDP. Private IP Specify Private IP address of Virtual Server rule.
-
Page 162: Port Triggering
ALL126AS3 USER’S MANUAL 4.10.3 Port Triggering To configure Port Triggering, click the Port Triggering link (NAT > Port Triggering) on the left navigation bar. A screen is displayed as shown in Figure 4.10.3 Figure 4.10.3 Port Triggering The screen contains the following details:... - Page 163 ALL126AS3 USER’S MANUAL Fields in Port Triggering: Field Description Application Name Port Triggering Application Name Trigger Start Port Trigger Port start range. Trigger End Port Trigger Port End Range. In case of one port, the end and start both are same.
- Page 164 ALL126AS3 USER’S MANUAL When you click Add button in the Port Triggering page, a screen is displayed as shown in Figure 4.10.3.1. Figure 4.10.3.1 Port Triggering Add...
- Page 165 ALL126AS3 USER’S MANUAL The screen contains the following details: Fields in Port Triggering: Field Description Application Name Port Triggering Application Name. Trigger Port Start Trigger Port start range. Trigger Port End Trigger Port End Range. In case of one port, the end and start both are same.
-
Page 166: Dmz
ALL126AS3 USER’S MANUAL 4.10.4 DMZ To configure the DMZ (Demilitarized Zone), click the DMZ link (NAT > DMZ) on the left navigation bar. Upon configuration of DMZ all traffic sent towards RG would be unconditionally forwarded to DMZ Lan Host. A screen is displayed as shown in Figure 4.10.4. - Page 167 ALL126AS3 USER’S MANUAL The screen contains the following details: Fields in DMZ: Field Description To enable or disable the DMZ setting of ALL126AS3 CPE. Select the check box to Enable enable. IP Address of To enter IP Address of the DMZ host.
-
Page 168: Qos
ALL126AS3 USER’S MANUAL 4.11 QoS You can view QoS on the left navigation bar of the ALL126AS3 CPE homepage. The menu below includes the sub-menus of Settings, Queue Config Class Config. Following are the options available under QoS as shown in Figure 4.11... -
Page 169: Qos Settings
ALL126AS3 USER’S MANUAL 4.11.1 QoS Settings To configure the Quality of Service (QoS) Settings, click the QoS Settings link (QoS > QoS Settings) on the left navigation bar. A screen is displayed as shown in Figure 4.11.1... - Page 170 Description Active WAN mode Informative Parameter to show current WAN mode being used in CPE. Enable This selection will enable the QoS feature in ALL126AS3 system. Disable This selection will disable the QoS feature in ALL126AS3 system. Upstream QoS Enable This selection will enable the upstream QoS.
-
Page 171: Queue Config
ALL126AS3 USER’S MANUAL Click CANCEL to exit from this page without saving the changes. 4.11.2 Queue Config To configure the Queue Config, click the Queue Config link (QoS > Queue Config) on the left navigation bar. A screen is displayed as shown in Figure 4.11.2... - Page 172 ALL126AS3 USER’S MANUAL The screen contains the following details: Fields in Queue Config - Upstream: Field Description Upstream/Downstr Selection tab for upstream/downstream Queue configuration. Queue Name This is the name of the queue configured in system. Queue Precedence of Queue. (Lower values denote higher priority).
- Page 173 ALL126AS3 USER’S MANUAL When you click Add button in the Port Triggering page, a screen is displayed as shown in Figure 4.11.2.1. Figure 4.11.2.1 Add/Modify a Queue Entry...
- Page 174 ALL126AS3 USER’S MANUAL The screen contains the following details: Fields in Add/Modify a Queue Entry: Field Description Queue Name Name or Identifier of Queue. This is the Egress interface to which the queue is attached. For xRX200 platform the Queue Interface dropdown for LAN egress would also appear.
-
Page 175: Class Config
ALL126AS3 USER’S MANUAL 4.11.3 Class Config To classify the upstream traffic. Click the Class Config link (QoS > Class Config) on the left navigation bar. A screen is displayed as shown in Figure 4.11.3 Figure 4.11.3 Class Config... - Page 176 ALL126AS3 USER’S MANUAL The screen contains the following details: Fields in Class Config: Field Description Upstream/Downstream Selection tab for upstream/downstream Classifier configuration. Classifier Name This is the name or identifier of the classifier entry. Order This shows the order of the classification entry.
- Page 177 ALL126AS3 USER’S MANUAL When you click Add or Modify in the Classifier Config page, a screen is displayed as shown in Figure 4.11.3.1 Figure 4.11.3.1 Add/Modify a Classifier Rule (DSCP Based)
- Page 178 ALL126AS3 USER’S MANUAL Figure 4.11.3.1 Add/Modify a Classifier Rule(MFC Based)
- Page 179 ALL126AS3 USER’S MANUAL The screen contains the following details: Fields in Add/Modify a Classifier Rule: Field Description Classifier Name This is the name of Classifier. This is an Unique identifier for an instance of classifier rule. Enable This is used to enable or disable the QoS Classifier entry.
- Page 180 ALL126AS3 USER’S MANUAL Source MAC Mask Mask bits for Source MAC. Destination MAC Destination MAC classification. Destination MAC Mask Mask bits for Destination MAC. L3 Protocol Dropdown to select IPv4/IPv6. Source IP Source IPv4/IPv6 classification. Netmask Mask bits for Source IP.
-
Page 181: Multicast
ALL126AS3 USER’S MANUAL 4.12 Multicast You can view Multicast on the left navigation bar of the ALL126AS3 CPE homepage. The menu below includes the sub-menus Proxy Settings, Snooping Settings Advanced Settings. Following are the options available under Multicast as shown in Figure 4.12... -
Page 182: Proxy Settings
ALL126AS3 USER’S MANUAL 4.12.1 Proxy Settings To configure the Multicast proxy settings in CPE, click the Proxy Settings link (Multicast > Proxy Settings) on the left navigation bar. A screen is displayed as shown in Figure 4.12.1 Figure 4.12.1 IGMP Proxy... - Page 183 ALL126AS3 USER’S MANUAL Fields in IGMP Proxy: Field Description Enable IGMP Enable or Disable the IGMPv3/IGMPv2 Proxy functionality. Proxy Enable MLD Proxy Enable or Disable the MLDv2 (IPv6) Proxy functionality. Select one of the WAN interfaces from the drop-down menu on which Multicast Proxy functionality to be enabled.
-
Page 184: Snooping Settings
ALL126AS3 USER’S MANUAL 4.12.2 Snooping Settings To configure the Multicast Snooping settings, click the Snooping Settings link (Multicast > Snooping Settings) on the left navigation bar. A screen is displayed as shown in Figure 4.12.2 Figure 4.12.2 IGMP Snooping... - Page 185 ALL126AS3 USER’S MANUAL The screen contains the following details: Fields in Fields in Snooping: Field Description Enable IGMP Enable or Disable the IGMPv3/IGMPv2 Snooping functionality. Snooping Enable MLD Enable or Disable the MLDv2 (IPv6) Snooping functionality. Snooping Click Apply at any time during configuration to save the information that you have entered.
-
Page 186: Advanced Settings
ALL126AS3 USER’S MANUAL 4.12.3 Advanced Settings To configure the advanced settings on Multicast features, click the Advanced Settings link (Multicast > Advanced Settings) on the left navigation bar. A screen is displayed as shown in Figure 4.12.3 Figure 4.12.3 Multicast Advanced Settings... - Page 187 ALL126AS3 USER’S MANUAL The screen contains the following details: Fields in Multicast Advanced Settings: Field Description IPv4/IPv6 Choose the appropriate tab to configure either for IPv4 or IPv6. To enable or disable Fast-Leave support in IGMPv3/IGMPv2. The fast-leave is not to wait till group membership timers on multicast routers have expired, but...
-
Page 188: Ipsec
ALL126AS3 USER’S MANUAL 4.13 IPsec When you click IPsec on the left navigation bar of the ALL126AS3 CPE homepage. The menu below includes the sub-menus Tunnel Mode. The following option Tunnel Mode is available under IPsec as shown in Figure 4.13... -
Page 189: Tunnel Mode
ALL126AS3 USER’S MANUAL 4.13.1 Tunnel Mode When you click the Tunnel Mode link (IPsec > Tunnel Mode) on the left navigation bar, a screen is displayed as shown in Figure 4.13.1 Figure 4.13.1 IPsec Tunnel Configuration... - Page 190 ALL126AS3 USER’S MANUAL When you click Add button in the IPsec Tunnel Configuration page, a screen is displayed as shown in Figure 4.13.1.1 Figure 4.13.1.1 Add IPSec Tunnel Mode Configuration...
- Page 191 ALL126AS3 USER’S MANUAL The screen contains the following details: Fields in Add IPSec Add Configuration: Field Description Tunnel Name IPsec Tunnel name AUTH_METHOD This is the authentication method. PSK Secret Shared secret string used for tunnel authentication. IKE Mode IKE v1 or v2 algorithm WAN Interface WAN on which tunnel to be created.,...
-
Page 192: Ipv6
Click Apply for applying the configured IPsec tunnel. Click CANCEL to exit from this page without saving the changes. 4.14 IPv6 When you click IPv6 link on the left navigation bar of the ALL126AS3 CPE homepage. The menu below includes the sub-menus of IPv6... -
Page 193: Ipv6 Setting
ALL126AS3 USER’S MANUAL 4.14.1 IPv6 Setting To enable or disable IPv6 functionality in CPE, click the IPv6 Setting link on the left navigation bar. A screen is displayed as shown Figure 4.14.1. By default IPv6 is not enabled. Figure 4.14.1 IPv6 Setting... - Page 194 ALL126AS3 USER’S MANUAL The system wide IPv6 feature can be enabled or disabled through this web page. Select appropriate control and click Apply button for making the change effective in CPE. All other IPv6 features in CPE would be in effect, only when this global IPv6 is enabled in CPE.
-
Page 195: 6Rd Configuration
4.14.2 6RD Configuration The ALL126AS3 supports IPv6 transition mechanism defined in 6rd (RFC 5569). To configure the 6RD configuration, click the 6RD configuration link (IPv6 > 6RD Configuration) on the left navigation bar. A screen is displayed as shown in... - Page 196 ALL126AS3 USER’S MANUAL Figure 4.14.2 6RD Configuration The screen contains the following details:...
-
Page 197: Ds-Lite Configuration
ALL126AS3 USER’S MANUAL Fields in 6RD Configuration: Field Description General Settings Enable 6rd tunnel To enable or disable 6rd functionality in CPE. Select WAN interface form dropdown on which 6rd tunnel WAN Interface to be created. Select dynamic 6rd tunnel through DHCP option or static... - Page 198 ALL126AS3 USER’S MANUAL The ALL126AS3 supports DS-Lite configuration mechanism. To configure the Ds-Lite configuration, click the DS-Lite configuration link (IPv6 > DS-Lite Configuration) on the left navigation bar. A screen is displayed as shown in Figure 4.14.3 Figure 4.14.3 DS-Lite Configuration...
- Page 199 ALL126AS3 USER’S MANUAL Fields in DS-Lite Configuration: Field Description General Settings Enable DS-Lite tunnel To enable/disable DS-Lite functionality in CPE. Select WAN interface from dropdown on which DS-Lite WAN Interface tunnel has to be created. Modes to configure DS-Lite tunnel on a WAN interface.
-
Page 200: Diagnostics
ALL126AS3 USER’S MANUAL 4.15 Diagnostics When you click Diagnostics link on the left navigation bar of the ALL126AS3 CPE homepage. The menu below includes the sub-menus of Diagnostic Test Suite. The following options are available under Diagnostics as shown in Figure 4.15... -
Page 201: Diagnostic Test Suite
ALL126AS3 USER’S MANUAL 4.15.1 Diagnostic Test Suite To configure the Diagnostic Test Suite settings, click the Diagnostic Test Suite link (Diagnostics > Diagnostic Test Suite) on the left navigation bar. A screen is displayed as shown in Figure 4.15.1 Figure 4.15.1 Diagnostic Test Suite... - Page 202 ALL126AS3 USER’S MANUAL The screen contains the following details: Fields in Diagnostic Test Suite: Field Description Connection Status DSL WAN State Wireless Wireless State ENET LAN-0 Ethernet LAN Port-0 state. ENET LAN-1 Ethernet LAN Port-1 state ENET LAN-2 Ethernet LAN Port-2 state...
- Page 203 ALL126AS3 USER’S MANUAL Reset Resets the diagnostics output. Note: Please wait few seconds to show the test result.
-
Page 204: Appendix A: Cable Requirements
ALL126AS3 USER’S MANUAL Appendix A: Cable Requirements A.1 Ethernet Cable A CAT 3~7 UTP (unshielded twisted pair) cable is typically used to connect the Ethernet device to the router. A 10Base-T cable often consists of four pairs of wires, two of which are used for transmission. The connector at the end of the 10Base-T cable is referred to as an RJ-45 connector and it consists of eight pins. - Page 205 ALL126AS3 USER’S MANUAL Figure A-2 Pin Assignments and Wiring for an RJ-45 Straight-Through Cable...
- Page 206 ALL126AS3 USER’S MANUAL Figure A-3 Pin Assignments and Wiring for an RJ-45 Crossover Cable A.2 Telephone wire Standard telephone wire of any gauge or type-flat, twisted or quad is used to connect the Modem to the telephone network. A telephone cable typically consists of three pairs of wires, one of which is used for transmission. The connector at the end of the telephone cable is called an RJ-11 connector and it consists of six pins.
-
Page 207: Appendix B: Product Specification
ALL126AS3 USER’S MANUAL Appendix B: Product Specification Key Features & Benefits Supports ITU-T G.993.5 Vectoring Support ATM and PTM transmission mode auto detection ( ADSL Annex B backward compatible) Supports high bandwidth up to 100Mbps symmetric over line ports ... - Page 208 ALL126AS3 USER’S MANUAL Support remote management and monitor Support configuration backup and restore Provides surge protection for Line port Supports jumbo frame up to 1680 bytes Supports IEEE 802.1w RSTP(*) Support Router & Switch(Bridged) mode selection ...
- Page 209 ALL126AS3 USER’S MANUAL Full duplex: IEEE 802.3x Flow control: Half duplex: Back pressure 1 x Power LED LED Indicators: 4 x Link/Active Status for Ethernet port 1 x Link LED for VDSL2 port Switch method: Store and forward Typical Power Consumption: 6.7 W...
-
Page 210: Appendix C: Router Mode Select
Appendix C: Router Mode select This appendix describes how to select the router mode, The ALL126AS3 default mode is switch(bridged mode), please refer to the following steps to select the router mode or switch mode. Select the Router mode: 1. - Page 211 ALL126AS3 USER’S MANUAL Figure C-1 DHCP Mode – Server Note: Please refer to the section 4.7.2 to configure the DHCP Server settings. 2. Click the WAN Setting link (WAN Setting > WAN) on the left navigation bar to specify the WAN setting. Please cancel the check of the Auto Detect Enable, and Add to config the wan type.
- Page 212 ALL126AS3 USER’S MANUAL Figure C-3 Config WAN Type Click Apply for applying the changes. Click CANCEL to exit from this page without saving the changes.
-
Page 213: Appendix D: Nv-600L & All126As3/W Compatibility Table
ALL126AS3 USER’S MANUAL Appendix D: NV-600L & ALL126AS3/W Compatibility Table The following shows the band profile and band plan compatibility table: Band Profile List Band Plan List VDSL2 Profile8a Annex A M1_EU32 VDSL2 Profile8b Annex A M9_EU64 VDSL2 Profile8c Annex B 997-M2x-A (B05) - Page 214 ALL126AS3 USER’S MANUAL Band Profile \ Band Plan 0 ( 8a) 1 ( 8b) 2 ( 8c) 3 ( 8d) 4 (12a) 5 (12b) 6 (17a) 7 (30a) 8 (17b)
-
Page 215: Appendix E: Troubleshooting
2.4 Verify that the proper cable type is used and its length does not exceed specified limits. 2.5 Check the router on the attached device and cable connections for possible defects. 2.6 Make sure that the phone wire must be connecting ALL126AS3 first, when powered on. - Page 216 3.1 Please make sure that the phone wire must be connected between NV-600L(CO) and ALL126AS3 (CPE) when both are power on. NV-600L (CO) will do link speed function depending on phone wire length, therefore if NV-600L (CO) can’t detect ALL126AS3 (CPE) over Solution: phone wire while both power on, this will cause the link to fail.
- Page 217 ALL126AS3 USER’S MANUAL infrastructure. The protocol was standardized in the International Telecommunication Union telecommunications sector (ITU-T) as Recommendation G.993.2. It was announced as finalized on 27 May 2005,[1] and first published on 17 February 2006. Several corrections and amendments were published in 2007 through 2011.
- Page 218 –c server IP address –i 1 –t 50 –w 65535 for client side. I just bought a ALLNET ALL126AS3 to replace my Quest DSL modem for my home. I was told any VDSL2 modem would replace and give me higher communication speeds. It doesn’t get me internet 7.
- Page 219 ALL126AS3 USER’S MANUAL unit? Re: Please note ALL126AS3 is a remote side(CPE side), it must be connected to the CO side to work. Answer: Tone mode, Band profile and band plan setting must be compatible to each other if not access error will show when applied.
- Page 220 The default ip is 192.168.16.254. When logging in, the default username and password both are “admin”. 11. Question: What is the maximum Ethernet frame MTU for these routers? Answer: ALL126AS3 maximum Ethernet frame MTU is 1680 bytes(Jumbo Frame).
- Page 221 ALL126AS3 USER’S MANUAL System Diagnostics Power and Cooling Problems If the POWER indicator does not turn on when the power cord is plugged in, you may have a problem with the power outlet, power cord, or internal power supply as explained in the previous section. However, if the unit power is off after running for a while, check for loose power connections, power losses or surges at the power outlet.
- Page 222 ALL126AS3 USER’S MANUAL Physical Configuration If problems occur after altering the network configuration, restore the original connections, and try to track the problem down by implementing the new changes, one step at a time. Ensure that cable distances and other physical aspects of the installation do not exceed recommendations.
-
Page 223: Appendix F: Compliance Information
ALL126AS3 USER’S MANUAL Appendix F: Compliance Information FCC Radio Frequency Interference Statement This equipment has been tested and found to comply with the limits for a computing device, pursuant to Part 15 of FCC rules. These limits are designed to provide reasonable protection against harmful interference when the equipment is operated in a commercial environment. - Page 224 ALL126AS3 USER’S MANUAL it is necessary. The telephone company may make changes in its facilities, equipment, operations or procedures that could affect the proper functioning of your equipment. If they do, you will be notified in advance in order for you to make necessary modifications to maintain uninterrupted service.
- Page 225 ALL126AS3 USER’S MANUAL...
- Page 226 ALL126AS3 USER’S MANUAL DISCLAIMER_OF_WARRANTY This Program is free software; you can redistribute it and/or modify it under the terms of the GNU General Public License as published by the Free Software Foundation; version 2 of the License. This Program is distributed in the hope that it will be useful, but WITHOUT ANY WARRANTY;...
-
Page 227: Ce Declaration
Written Offer for Source Code For binaries that you receive from ALLNET GmbH Computersysteme on physical media or within the download of the offered firmware that are licensed under any version of the GNU General Public License (GPL) or the GNU LGPL, you can receive a complete machine-readable copy of... -
Page 228: Gpl General Public License
82110 Germering Your request should include: (i) the name of the covered binary, (ii) the version number of the ALLNET product containing the covered binary, (iii) your name, (iv) your company name (if applicable) and (v) your return mailing and email address (if available). We may charge you a nominal fee to cover the cost of the media and distribution. - Page 229 ALL126AS3 USER’S MANUAL Free Software Foundation software is covered by the GNU Library General Public License instead.) You can apply it to your programs, too. When we speak of free software, we are referring to freedom, not price. Our General Public Licenses are designed to make sure that you have the freedom to distribute copies of free software (and charge for this service if you wish), that you receive source code or can get it if you want it, that you can change the software or use pieces of it in new free programs;...
- Page 230 ALL126AS3 USER’S MANUAL The precise terms and conditions for copying, distribution and modification follow. GNU GENERAL PUBLIC LICENSE TERMS AND CONDITIONS FOR COPYING, DISTRIBUTION AND MODIFICATION 0. This License applies to any program or other work which contains a notice placed by the copyright holder saying it may be distributed under the terms of this General Public License.
- Page 231 ALL126AS3 USER’S MANUAL 2. You may modify your copy or copies of the Program or any portion of it, thus forming a work based on the Program, and copy and distribute such modifications or work under the terms of Section 1 above, provided that you also meet all of these conditions: a) You must cause the modified files to carry prominent notices stating that you changed the files and the date of any change.
- Page 232 ALL126AS3 USER’S MANUAL In addition, mere aggregation of another work not based on the Program with the Program (or with a work based on the Program) on a volume of a storage or distribution medium does not bring the other work under the scope of this License.
- Page 233 ALL126AS3 USER’S MANUAL operating system on which the executable runs, unless that component itself accompanies the executable. If distribution of executable or object code is made by offering access to copy from a designated place, then offering equivalent access to copy the source code from the same place counts as distribution of the source code, even though third parties are not compelled to copy the source along with the object code.
- Page 234 ALL126AS3 USER’S MANUAL all its terms and conditions for copying, distributing or modifying the Program or works based on it. 6. Each time you redistribute the Program (or any work based on the Program), the recipient automatically receives a license from the original licensor to copy, distribute or modify the Program subject to these terms and conditions.
- Page 235 ALL126AS3 USER’S MANUAL If any portion of this section is held invalid or unenforceable under any particular circumstance, the balance of the section is intended to apply and the section as a whole is intended to apply in other circumstances.
- Page 236 ALL126AS3 USER’S MANUAL may add an explicit geographical distribution limitation excluding those countries, so that distribution is permitted only in or among countries not thus excluded. In such case, this License incorporates the limitation as if written in the body of this License.
- Page 237 ALL126AS3 USER’S MANUAL of preserving the free status of all derivatives of our free software and of promoting the sharing and reuse of software generally. NO WARRANTY 11. BECAUSE THE PROGRAM IS LICENSED FREE OF CHARGE, THERE IS NO WARRANTY FOR THE PROGRAM, TO THE EXTENT PERMITTED BY APPLICABLE LAW.
- Page 238 ALL126AS3 USER’S MANUAL POSSIBILITY OF SUCH DAMAGES. END OF TERMS AND CONDITIONS How to Apply These Terms to Your New Programs If you develop a new program, and you want it to be of the greatest possible use to the public, the best way to achieve this is to make it free software which everyone can redistribute and change under these terms.
- Page 239 ALL126AS3 USER’S MANUAL This program is distributed in the hope that it will be useful, but WITHOUT ANY WARRANTY; without even the implied warranty of MERCHANTABILITY or FITNESS FOR A PARTICULAR PURPOSE. See the GNU General Public License for more details.
- Page 240 ALL126AS3 USER’S MANUAL mouse-clicks or menu items--whatever suits your program. You should also get your employer (if you work as a programmer) or your school, if any, to sign a "copyright disclaimer" for the program, if necessary. Here is a sample; alter the names: Yoyodyne, Inc., hereby disclaims all copyright interest in the program...
- Page 241 ALL126AS3 USER’S MANUAL 51 Franklin Street, Fifth Floor, Boston, MA 02110-1301 USA Everyone is permitted to copy and distribute verbatim copies of this license document, but changing it is not allowed. [This is the first released version of the Lesser GPL. It also counts as the successor of the GNU Library Public License, version 2, hence the version number 2.1.]...
- Page 242 ALL126AS3 USER’S MANUAL not price. Our General Public Licenses are designed to make sure that you have the freedom to distribute copies of free software (and charge for this service if you wish); that you receive source code or can get it if you want it;...
- Page 243 ALL126AS3 USER’S MANUAL To protect each distributor, we want to make it very clear that there is no warranty for the free library. Also, if the library is modified by someone else and passed on, the recipients should know that what they have is not the original version, so that the original author's reputation will not be affected by problems that might be introduced by others.
- Page 244 ALL126AS3 USER’S MANUAL a shared library, the combination of the two is legally speaking a combined work, a derivative of the original library. The ordinary General Public License therefore permits such linking only if the entire combination fits its criteria of freedom. The Lesser General Public License permits more lax criteria for linking other code with the library.
- Page 245 ALL126AS3 USER’S MANUAL In other cases, permission to use a particular library in non-free programs enables a greater number of people to use a large body of free software. For example, permission to use the GNU C Library in non-free programs enables many more people to use the whole GNU operating system, as well as its variant, the GNU/Linux operating system.
- Page 246 ALL126AS3 USER’S MANUAL other authorized party saying it may be distributed under the terms of this Lesser General Public License (also called "this License"). Each licensee is addressed as "you". A "library" means a collection of software functions and/or data prepared so as to be conveniently linked with application programs (which use some of those functions and data) to form executables.
- Page 247 ALL126AS3 USER’S MANUAL covered by this License; they are outside its scope. The act of running a program using the Library is not restricted, and output from such a program is covered only if its contents constitute a work based on the Library (independent of the use of the Library in a tool for writing it).
- Page 248 ALL126AS3 USER’S MANUAL a) The modified work must itself be a software library. b) You must cause the files modified to carry prominent notices stating that you changed the files and the date of any change. c) You must cause the whole of the work to be licensed at no charge to all third parties under the terms of this License.
- Page 249 ALL126AS3 USER’S MANUAL These requirements apply to the modified work as a whole. If identifiable sections of that work are not derived from the Library, and can be reasonably considered independent and separate works in themselves, then this License, and its terms, do not apply to those sections when you distribute them as separate works.
- Page 250 ALL126AS3 USER’S MANUAL License instead of this License to a given copy of the Library. To do this, you must alter all the notices that refer to this License, so that they refer to the ordinary GNU General Public License, version 2, instead of to this License.
- Page 251 ALL126AS3 USER’S MANUAL from a designated place, then offering equivalent access to copy the source code from the same place satisfies the requirement to distribute the source code, even though third parties are not compelled to copy the source along with the object code.
- Page 252 ALL126AS3 USER’S MANUAL If such an object file uses only numerical parameters, data structure layouts and accessors, and small macros and small inline functions (ten lines or less in length), then the use of the object file is unrestricted, regardless of whether it is legally a derivative work.
- Page 253 ALL126AS3 USER’S MANUAL during execution displays copyright notices, you must include the copyright notice for the Library among them, as well as a reference directing the user to the copy of this License. Also, you must do one of these things:...
- Page 254 ALL126AS3 USER’S MANUAL interface-compatible with the version that the work was made with. c) Accompany the work with a written offer, valid for at least three years, to give the same user the materials specified in Subsection 6a, above, for a charge no more than the cost of performing this distribution.
- Page 255 ALL126AS3 USER’S MANUAL It may happen that this requirement contradicts the license restrictions of other proprietary libraries that do not normally accompany the operating system. Such a contradiction means you cannot use both them and the Library together in an executable that you distribute.
- Page 256 ALL126AS3 USER’S MANUAL the Library except as expressly provided under this License. Any attempt otherwise to copy, modify, sublicense, link with, or distribute the Library is void, and will automatically terminate your rights under this License. However, parties who have received copies, or rights, from you under this License will not have their licenses terminated so long as such parties remain in full compliance.
- Page 257 ALL126AS3 USER’S MANUAL 11. If, as a consequence of a court judgment or allegation of patent infringement or for any other reason (not limited to patent issues), conditions are imposed on you (whether by court order, agreement or otherwise) that contradict the conditions of this License, they do not excuse you from the conditions of this License.
- Page 258 ALL126AS3 USER’S MANUAL generous contributions to the wide range of software distributed through that system in reliance on consistent application of that system; it is up to the author/donor to decide if he or she is willing to distribute software through any other system and a licensee cannot impose that choice.
- Page 259 ALL126AS3 USER’S MANUAL specifies a version number of this License which applies to it and "any later version", you have the option of following the terms and conditions either of that version or of any later version published by the Free Software Foundation. If the Library does not specify a license version number, you may choose any version ever published by the Free Software Foundation.
- Page 260 ALL126AS3 USER’S MANUAL IMPLIED WARRANTIES OF MERCHANTABILITY AND FITNESS FOR A PARTICULAR PURPOSE. THE ENTIRE RISK AS TO THE QUALITY AND PERFORMANCE OF THE LIBRARY IS WITH YOU. SHOULD THE LIBRARY PROVE DEFECTIVE, YOU ASSUME THE COST OF ALL NECESSARY SERVICING, REPAIR OR CORRECTION.
- Page 261 ALL126AS3 USER’S MANUAL redistribution under these terms (or, alternatively, under the terms of the ordinary General Public License). To apply these terms, attach the following notices to the library. It is safest to attach them to the start of each source file to most effectively convey the exclusion of warranty;...
- Page 262 ALL126AS3 USER’S MANUAL Foundation, Inc., 51 Franklin Street, Fifth Floor, Boston, MA 02110-1301 USA Also add information on how to contact you by electronic and paper mail. You should also get your employer (if you work as a programmer) or your school, if any, to sign a "copyright disclaimer"...
Need help?
Do you have a question about the ALL126AS3 and is the answer not in the manual?
Questions and answers