Sony STR-DN1070 User Manual
Multi channel
Hide thumbs
Also See for STR-DN1070:
- Operating instructions manual (60 pages) ,
- Service manual (124 pages)
Table of Contents
Advertisement
MULTI CHANNEL AV RECEIVER
Parts and Controls
Receiver
Front panel (upper section) [1]
Front panel (lower section) [2]
Power indicator [3]
Indicators on the display panel [4]
Rear panel [5]
Remote control
Remote control (upper section) [6]
Remote control (lower section) [7]
Preparation
1. Installing speakers
Names and functions of speakers [8]
Installing 5.1-channel speaker system [9]
Installing 7.1-channel speaker system using surround back speakers [10]
Installing 7.1-channel speaker system using front high speakers [11]
Installing 5.1-channel speaker system with Zone 2 connection [12]
Installing 3.1-channel speaker system with Zone 2 and Zone 3 connections [13]
Installing 5.1-channel speaker system with bi-amplifier connection [14]
Installing 5.1-channel speaker system with front B speaker connection [15]
Speaker configuration and speaker pattern settings [16]
2. Connecting speakers
Connecting 5.1-channel speaker system [17]
Connecting 7.1-channel speaker system using surround back speakers [18]
Connecting 7.1-channel speaker system using front high speakers [19]
Connecting 5.1-channel speaker system with Zone 2 connection [20]
Connecting 3.1-channel speaker system with Zone 2 and Zone 3 connections [21]
Connecting 5.1-channel speaker system with bi-amplifier connection [22]
Connecting 5.1-channel speaker system with front B speaker connection [23]
3. Connecting a TV
Connecting a TV [24]
Connecting a 4K TV [25]
Notes on connecting cables [26]
About HDMI connections [27]
4. Connecting audio-visual devices and the antennas (aerials)
Connecting devices with HDMI jacks [28]
Connecting devices with jacks other than HDMI jacks [29]
STR-DN1070
Advertisement
Table of Contents

Subscribe to Our Youtube Channel
Related Manuals for Sony STR-DN1070


Summary of Contents for Sony STR-DN1070
- Page 1 STR-DN1070 MULTI CHANNEL AV RECEIVER Parts and Controls Receiver Front panel (upper section) [1] Front panel (lower section) [2] Power indicator [3] Indicators on the display panel [4] Rear panel [5] Remote control Remote control (upper section) [6] Remote control (lower section) [7] Preparation 1.
-
Page 2: Table Of Contents
Connecting a USB device [30] Connecting the antenna (aerial) [31] Connecting another amplifier in Zone 2 [32] Connecting another amplifier or TV in the HDMI zone [33] Digital audio formats supported by the receiver [34] Notes on connecting cables [35] About HDMI connections [36] 5. -
Page 3: Compatible Iphone/Ipad/Ipod
Listening to the radio Listening to FM radio [59] Presetting FM radio stations (Preset Memory) [60] Naming preset stations (Preset Name Input) [61] Tuning to a station directly (Direct Tuning) [62] Receiving RDS broadcasts (for European and Oceanian models only) [63] Enjoying sound effects Selecting a sound field (Sound Field) [64] Relations between sound fields and speaker outputs [65]... - Page 4 Using SongPal to control the receiver from a smartphone or tablet device Controlling the receiver using a smartphone or tablet device (SongPal) [83] Listening to the same music on multiple devices/Listening to different music in a different location (SongPal Link) [84] Listening to music by connecting the SongPal Link-compatible device Listening to the same music in different rooms (Wireless Multi Room) [85] Using Video &...
-
Page 5: Connecting Another Amplifier In Zone
Using the Multi-Zone Features Overview of multi-zone features What you can do with multi-zone features [102] Available inputs for each zone [103] Enjoying sound from speakers located in other rooms Connecting 5.1-channel speaker system with Zone 2 connection [104] Connecting 3.1-channel speaker system with Zone 2 and Zone 3 connections [105] Setting the priority on the surround back speakers or Zone 2 speakers (SURROUND BACK/ZONE2 Priority) [106]... -
Page 6: Setting Up The Receiver Using Easy
Saving and recalling various settings for the receiver (Custom Preset) About Custom Preset [129] Saving the settings to a preset [130] Recalling the settings saved to the scene [131] Items for which you can save settings and the default values for each item [132] Using the sleep timer Using the sleep timer (Sleep) [133] Checking information on the receiver... - Page 7 Playing audio signals with high-quality sound (Digital Legato Linear (D.L.L.)) [158] Enjoying clear and dynamic sound at a low volume (Sound Optimizer) [159] Selecting a sound field (Sound Field) [160] Selecting the HD-D.C.S. effect type (HD-D.C.S. Type) [161] Enjoying more natural sound with speakers installed in the ceiling (In-Ceiling Speaker Mode) [162] Enabling the direct playback of DSD signals (DSD Native) [163] Enjoying high-fidelity sound (Pure Direct) [164]...
- Page 8 Displaying the connected home network server (Connection Server Settings) [192] Enabling automatic access from a newly detected controller device (Auto Home Network Access Permission) [193] Setting whether to control this receiver from a controller device on the home network (Home Network Access Control) [194] Checking the registered Video &...
- Page 9 Error messages PROTECTOR [221] An over-current from the USB port was detected. [222] List of messages after Auto Calibration measurements [223] General The receiver is turned off automatically. [224] Cannot find an available input when connecting several digital devices. [225] The receiver does not turn on even when the TV is turned on.
- Page 10 models only). [255] iPhone/iPad/iPod The sound is distorted. [256] USB devices Are you using a compatible USB device? [257] There is noise, skipping, or distorted sound. [258] A USB device is not recognized. [259] Playback does not start. [260] A USB device cannot be connected to the USB port. [261] Erroneous display.
- Page 11 Severe humming or noise. [287] Cannot control the receiver using a SongPal device. [288] “BRAVIA” Sync (Control for HDMI) The Control for HDMI function does not work properly. [289] TV sound cannot be heard from the speakers connected to the receiver. [290] Remote control The remote control does not function.
-
Page 12: Indicators On The Display
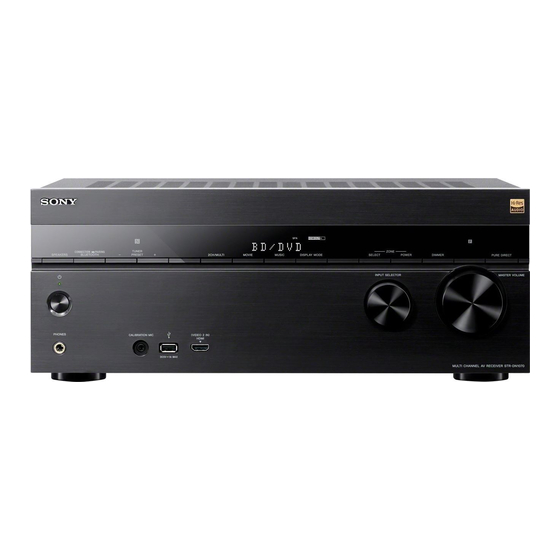
[2] Parts and Controls Receiver Front panel (lower section) PHONES jack Connect headphones here. CALIBRATION MIC jack (USB) port HDMI (VIDEO 2 IN) jack INPUT SELECTOR MASTER VOLUME [3] Parts and Controls Receiver Power indicator Green: The receiver is turned on. Amber: The receiver is in standby mode, and you have set one of the following: [Control for HDMI], [Remote Start], [Bluetooth Standby] (*1), or [Quick Start/Network Standby] (*2) is set to [On]. - Page 13 TV input is selected and Audio Return Channel (ARC) signals are detected. COAX Digital signals are input through the COAXIAL jack. Digital signals are input through the OPTICAL jack. S.OPTIMIZER Lights up when the Sound Optimizer function is activated. D.C.A.C. Lights up when the measurement results of the Auto Calibration function are applied.
-
Page 14: Rear
Rear panel COAXIAL IN jack HDMI IN/OUT jacks (*1)(*2) IR REMOTE IN/OUT jacks You can control the receiver from a distance by connecting an IR repeater (not supplied) to the IR REMOTE IN jack. You can start or stop playback of devices such as a CD player connected to the receiver by connecting an IR Blaster (not supplied) to the IR REMOTE OUT jack. - Page 15 (power) Turns the receiver on or sets it to the standby mode. Saving power in standby mode Save power by setting up the receiver as follows: Set [Control for HDMI] to [Off] in the [HDMI Settings] menu. Set [Remote Start] to [Off] in the [Network Settings] menu. Set [Bluetooth Standby] to [Off] in the [Bluetooth Settings] menu.
-
Page 16: Names And Functions Of
AMP MENU Displays the menu on the display panel to operate the receiver. Press to select the menu items. Then press to enter the selection. OPTIONS Display and select items from the options menus. HOME Displays the home menu on the TV screen. (*), Skip, play, pause, stop operation. -
Page 17: Installing 5.1-Channel Speaker
speaker Surround back left speaker Produces sounds from surround back left/right channels. Surround back right speaker Surround back Produces sounds from surround back channel. speaker Produces LFE (low frequency effect) channel sounds Subwoofer and reinforces bass parts of other channels. Left front high speaker Produces vertical sound effects from front high... -
Page 18: Installing 7.1-Channel Speaker System Using Front High
back speakers You can enjoy high-fidelity reproduction of recorded sound from DVD or Blu-ray Disc software in 6.1-channel or 7.1-channel format. 30° 100° - 120° Same angle Note When you use a 6.1-channel connection, place a surround back speaker directly behind the listening position. -
Page 19: Installing 5.1-Channel Speaker System With Zone 2
30° - 45° H: Left front high speaker or right front high speaker F: Front left speaker or front right speaker Hint As the subwoofer does not emit highly directional signals, you can place it wherever you want. [12] Preparation 1. -
Page 20: Connecting A
30° Hint As the subwoofer does not emit highly directional signals, you can place it wherever you want. [14] Preparation 1. Installing speakers Installing 5.1-channel speaker system with bi-amplifier connection You can enhance the sound quality of the front speakers by connecting a different amplifier to both a tweeter and a woofer, using bi-amplifier connection. -
Page 21: Speaker Configuration And Speaker Pattern
30° 100° - 120° Hint As the subwoofer does not emit highly directional signals, you can place it wherever you want. [16] Preparation 1. Installing speakers Speaker configuration and speaker pattern settings Select the speaker pattern using [Speaker Pattern] in the [Speaker Settings] menu according to the speaker configuration which you are using. -
Page 22: Connecting 7.1-Channel Speaker System Using Surround Back
Connecting 5.1-channel speaker system Connect each speaker as illustrated below. Before connecting cables, be sure to disconnect the AC power cord (mains lead). For details on how to connect speaker cables to the receiver, see “How to connect speaker cables.” Monaural audio cable (not supplied) Speaker cable (not supplied) After you have made the connections, set [Surround Speaker Assign] to [Off] in the [Speaker... -
Page 23: Connecting 5.1-Channel Speaker System With Zone 2
Monaural audio cable (not supplied) Speaker cable (not supplied) After you have connected the surround back speakers, set [Surround Back Speaker Assign] to [Off] in the [Speaker Settings] menu. Note After you have installed and connected your speakers, be sure to select the speaker pattern you want using [Speaker Pattern] in the [Speaker Settings] menu. -
Page 24: Connecting 3.1-Channel Speaker System With Zone 2 And Zone 3
Monaural audio cable (not supplied) Speaker cable (not supplied) Note You can only enable the SPEAKERS ZONE 2 terminals if you set [SURROUND BACK/ZONE2 Priority] to [ZONE2 Terminals] in the [Speaker Settings] menu,and set [Zone2 Power] to [On] in the [Zone Controls] menu. -
Page 25: Connecting 5.1-Channel Speaker System With Bi-Amplifier
Note You can only enable the SPEAKERS ZONE 2 terminals if you set [SURROUND BACK/ZONE2 Priority] to [ZONE2 Terminals] in the [Speaker Settings] menu, and set [Zone2 Power] to [On] in the [Zone Controls] menu. You can only set [Surround Speaker Assign] if the speaker pattern is set to a setting that does not have surround speakers. -
Page 26: Connecting 5.1-Channel Speaker System With Front B Speaker
Monaural audio cable (not supplied) Speaker cable (not supplied) After you have made the bi-amplifier connection, set [Surround Back Speaker Assign] to [Bi- Amp] in the [Speaker Settings] menu. Note After you have installed and connected your speakers, be sure to select the speaker pattern you want using [Speaker Pattern] in the [Speaker Settings] menu. -
Page 27: Using The Menu On The Tv
HDMI cable (not supplied) Note Sony recommends that you use an HDMI-authorized cable or HDMI cable made by Sony. Be sure to use a High Speed HDMI Cable with Ethernet. Premium High Speed HDMI Cable with Ethernet that supports 18 Gbps is required for 4K/60p 4:4:4, 4:2:2, and 4K/60p 4:2:0 10 bit, etc. - Page 28 HDMI cable (not supplied) Note Sony recommends that you use an HDMI-authorized cable or HDMI cable made by Sony. Be sure to use a High Speed HDMI Cable with Ethernet. Premium High Speed HDMI Cable with Ethernet that supports 18 Gbps is required for 4K/60p 4:4:4, 4:2:2, and 4K/60p 4:2:0 10 bit, etc.
-
Page 29: Connecting A 4K
Note Sony recommends that you use an HDMI-authorized cable or HDMI cable made by Sony. Be sure to use a High Speed HDMI Cable with Ethernet. Premium High Speed HDMI Cable with Ethernet that supports 18 Gbps is required for 4K/60p 4:4:4, 4:2:2, and 4K/60p 4:2:0 10 bit, etc. -
Page 30: Notes On Connecting
HDMI cable (not supplied) Note Sony recommends that you use an HDMI-authorized cable or HDMI cable made by Sony. Be sure to use a High Speed HDMI Cable with Ethernet. Premium High Speed HDMI Cable with Ethernet that supports 18 Gbps is required for 4K/60p 4:4:4, 4:2:2, and 4K/60p 4:2:0 10 bit, etc. - Page 31 All HDMI jacks on the receiver support 4K, HDCP 2.2, ITU-R BT.2020 wide color spaces, 3D, Deep Color (Deep Colour), and HDR (High Dynamic Range) contents pass-through. The HDMI OUT A (TV) jack supports Audio Return Channel (ARC). HDCP 2.2 is newly enhanced copyright protection technology that is used to protect content such as 4K movies.
-
Page 32: Connecting Devices With Hdmi
640 × 480p @ 59.94/60 ○ If you use YCbCr 4:4:4/YCbCr 4:2:2/RGB 4:4:4 or YCbCr 4:2:0 Deep Color (Deep Colour) (10 bit or 12 bit) of these video formats, we recommend you to use Premium High Speed HDMI Cables with Ethernet that support 18 Gbps and be sure to set the HDMI signal format to [Enhanced format] in the [HDMI Settings] menu. -
Page 33: Connecting Devices With Jacks Other Than Hdmi
Cable box or satellite box Note Sony recommends that you use an HDMI-authorized cable or HDMI cable made by Sony. Be sure to use a High Speed HDMI Cable with Ethernet. Premium High Speed HDMI Cable with Ethernet that supports 18 Gbps is required for 4K/60p 4:4:4, 4:2:2, and 4K/60p 4:2:0 10 bit, etc. -
Page 34: Connecting A Usb
For details, see “Changing the name for each input (Name).” The image quality depends on the connecting jack. We recommend that you connect your devices via an HDMI connection if they have HDMI jacks. [30] Preparation 4. Connecting audio-visual devices and the antennas (aerials) Connecting a USB device Connect a USB device as illustrated below. -
Page 35: Digital Audio Formats Supported By The
Speakers Amplifier/receiver Audio cable (not supplied) Audio signals Note Only audio signals from [USB], [Bluetooth] (only when in BLUETOOTH RX mode), [Home Network], [Music Services], [FM TUNER] and audio signals input from AUDIO IN jacks are output to the Zone 2 speakers. -
Page 36: Notes On Connecting
It is not necessary to connect all of the cables. Connect cables according to the availability of jacks on the connected device. Sony recommends that you use an HDMI-authorized cable or HDMI cable made by Sony. Be sure to use a High Speed HDMI Cable with Ethernet. Premium High Speed HDMI Cable with Ethernet that supports 18 Gbps is required for 4K/60p 4:4:4, 4:2:2, and 4K/60p 4:2:0 10 bit, etc. - Page 37 4. Connecting audio-visual devices and the antennas (aerials) About HDMI connections High-Definition Multimedia Interface (HDMI) is an interface that transmits video and audio signals in digital format. Connecting Sony “BRAVIA” Sync-compatible devices using HDMI cables simplifies operations. HDMI features Digital audio signals transmitted by HDMI can be output from the speakers connected to the receiver.
- Page 38 1920 × 1080p @ ○ ○ ○ 59.94/60 Hz ○ ○ ○ 1920 × 1080p @ 50 Hz 1920 × 1080p @ ○ ○ ○ ○ 29.97/30 Hz ○ ○ ○ ○ 1920 × 1080p @ 25 Hz 1920 × 1080p @ ○...
-
Page 39: Inserting Batteries Into The Remote
Server (computer, etc.) LAN cable (not supplied) Router Modem Internet [38] Preparation 5. Connecting to the network Connecting the receiver to the network using the wireless LAN antenna (for wireless LAN connections only) The following illustration is an example configuration of a home network with the receiver and a server. -
Page 40: Turning On The Receiver
Note Do not leave the remote control in an extremely hot or humid place. Do not use a new battery with an old one. Do not mix manganese batteries with other kinds of batteries. Do not expose the remote control sensor to direct sunlight or lights. Doing so may cause a malfunction. -
Page 41: About Auto
Setting up the receiver using Easy Setup When you turn on the receiver for the first time or after the receiver is initialized, the Easy Setup screen appears on the TV screen. You can set up the following settings for the receiver by following the instructions on the Easy Setup screen. -
Page 42: Before You Perform Auto
Note Auto Calibration is not available when [Bluetooth Mode] is set to [Transmitter]. The speakers emit very loud sound during the calibration and the volume cannot be adjusted. Be considerate of your neighbors and any children who are present. If the muting function has been activated before you perform Auto Calibration, the muting function will shut off automatically. -
Page 43: Performing Auto
SPA+B (*): Speakers connected to both the SPEAKERS FRONT A and SPEAKERS SURROUND BACK/BI-AMP/FRONT HIGH/FRONT B terminals (parallel connection). (None): [SPK OFF] appears on the display panel. No audio signals are output from any speaker terminals. To select [SPB] or [SPA+B], set the assignment for the SPEAKERS SURROUND BACK/BI-AMP/FRONT HIGH/FRONT B terminals to [Front B] by using [Surround Back Speaker Assign] in the [Speaker Settings] menu. -
Page 44: Enjoying Video And Sound
[47] Preparation Performing Auto Calibration 6. Checking Auto Calibration results To check error codes or warning messages received in [Auto Calibration], proceed with the following steps: If an error code appears Check the error and perform Auto Calibration again. Select [Retry]. Follow the instructions on the TV screen and then press to select [Start]. -
Page 45: Enjoying Video/Sound From The Connected
Network devices Enjoying audio content from an iPhone/iPad/iPod or other smartphone You can send content such as audio from an iPhone/iPad/iPod or other smartphone to the receiver via the network. Enjoying audio content from iTunes or an iPhone/iPad/iPod via the network (AirPlay) BLUETOOTH devices Enjoying audio content from an iPhone/iPod or other smartphone You can transmit audio from an iPhone/iPod or other smartphone to the receiver via... - Page 46 You can display the menu of the receiver on the TV screen (*). When you want to display the menu on the TV screen connected to the HDMI OUT B/HDMI ZONE jack, set [HDMI Out B Mode] to [Main]. Switch the input of the TV to the input to which the receiver is connected. Press HOME to display the home menu on the TV screen.
-
Page 47: Enjoying Sound Of An Audio Return Channel (Arc) Compatible
Select [Watch] or [Listen] from the home menu. The menu item list appears on the TV screen. Select the device you want. Turn on the device and start playback. Press +/– to adjust the volume. You can also use MASTER VOLUME on the receiver. Press 2CH/MULTI, MOVIE, MUSIC or FRONT SURROUND to enjoy the surround sound. -
Page 48: Watching Hdcp 2.2 Copyright-Protected
[HDMI Settings] menu to output the sound of the TV from the TV speaker and the speakers connected to the receiver. The ARC function may work on other devices than those manufactured by Sony. However, operation is not guaranteed. [52] Enjoying Video and Sound Playing AV devices Watching HDCP 2.2 copyright-protected content... - Page 49 (*). Select [STR-DN1070 XXXXXX] (*) on the BLUETOOTH device display. If [STR-DN1070 XXXXXX] (*) is not displayed, repeat this process from step 1. When the BLUETOOTH connection is established, the device name appears and [BT] lights up on the display panel.
-
Page 50: Enjoying Content Stored On A Usb
Note Some applications of BLUETOOTH device cannot be controlled from the receiver. If a passkey is required on the display of the BLUETOOTH device in step 4, enter [0000]. The passkey may be called “Passcode,” “PIN code,” “PIN number” or “Password.” You can pair up to 9 BLUETOOTH devices. -
Page 51: Usb Specifications And Compatible Usb
Select the content you want from the content list. The selected content starts playing and the information of content appears on the TV screen. Operating the USB device using the remote control Press USB before you use the following buttons: : Starts or pauses playback. - Page 52 The receiver can recognize Mass Storage Class (MSC) devices (such as flash memory or an HDD) and Still Image Capture Devices (SICDs). Compatible USB device Mass Storage Class, High-speed type Maximum current Verified Sony USB devices You can use the following Sony USB devices on this receiver: Walkman: NW-E083 NW-S14/S15 NW-S784/S785/S786 NW-WH505...
-
Page 53: Notes On Usb
[58] Enjoying Video and Sound Playing content from a USB device Notes on USB devices Do not remove a USB device during operation. To avoid data corruption and damage to the USB device, turn the receiver off when removing a USB device. Do not connect a USB device to the receiver through a USB hub. - Page 54 You can also perform auto tuning by pressing and holding PRESET +/–. [60] Enjoying Video and Sound Listening to the radio Presetting FM radio stations (Preset Memory) You can store up to 30 FM stations as your favorite stations. Select [Listen] - [FM TUNER] from the home menu. The FM screen appears.
- Page 55 Select [Preset Name Input]. A preset list appears on the TV screen. Select the preset number to which you want to assign a name. An on-screen keyboard appears on the TV screen. Press to select characters one by one to enter the name. Select [Enter].
- Page 56 The tuning scale for direct tuning is shown below: USA and Canadian models 100 kHz Other models 50 kHz [63] Enjoying Video and Sound Listening to the radio Receiving RDS broadcasts (for European and Oceanian models only) This receiver allows you to use Radio Data System (RDS), which enables FM radio stations (*) to send additional information along with the regular programming signal.
- Page 57 you select, or with audio formats. The receiver may play signals at a lower sampling frequency than the actual sampling frequency of the input signals, depending on the audio format. [Pro Logic llx Movie] or [Pro Logic llx Music] may not appear, depending on the speaker pattern you select.
- Page 58 ◎ ○ ○ ○ ○ (*2) Neo:6 Music Neo6.MUSIC -: No sound is output. ◎ : Outputs sound. ○: Outputs sound depending on the speaker pattern setting. USA and Canadian models: outputs sound. Other models: output sound depending on the speaker pattern setting only when [Size] is set to [Small] in the [Speaker Settings] menu.
- Page 59 Hold down MUSIC and press (power) on the receiver. [S.F. CLEAR] appears on the display panel and all sound fields are reset to their default setting. [67] Enjoying Video and Sound Enjoying sound effects Adjusting the equalizer (Equalizer) You can use the following parameters to adjust the tonal quality (bass/treble level) of the front, center, surround/surround back and front high speakers.
- Page 60 You can enjoy clear and dynamic sound at low volume levels using the Sound Optimizer. After the Auto Calibration is performed, the sound level is optimized to suit your environment. Select [Setup] - [Audio Settings] from the home menu. Select [Sound Optimizer]. Select the setting you want.
-
Page 61: Screen Mirroring
This function does not work when [Direct] is being used and analog input is selected. This function may not work depending on the audio format. The receiver may play signals at a lower sampling frequency than the actual sampling frequency of the input signals depending on the audio format. - Page 62 Follow the on-screen instructions. Activate the Screen mirroring function from your mobile device. For details on how to activate the function, refer to the operating instructions supplied with your mobile device. To cancel mirroring Press BACK, HOME or switch the input. Note When using Screen mirroring, the quality of the picture and sound may deteriorate due to interference from other networks.
- Page 63 You can control your receiver wirelessly by installing the Video & TV SideView app on your smartphone or tablet device. This app is recommended for customers who use a TV manufactured by Sony with the receiver. Registering Video & TV SideView device to the receiver...
- Page 64 Select [Auto]. The confirmation screen appears. Press to browse information, and then press Select [Save & Connect]. The receiver starts connecting to the network. For details, refer to the messages that appear on the TV screen. If using a fixed IP address Select [Manual] in step 4 and follow the on-screen instructions.
- Page 65 [76] Using Network Features Setting up a wireless LAN connection (for wireless LAN connections only) Setting up a wireless LAN connection Before performing network settings When your wireless LAN router (access point) is Wi-Fi Protected Setup (WPS)-compatible, you can easily set the network settings with the WPS button. If not, you will be required to select or enter the following information.
-
Page 66: Deleting A Server From The Server List
You can enjoy music/photo files stored on a server on the home network using the receiver. The server may require some settings to be configured to allow the receiver to play music/photo files from the server. For details, refer to the operating instructions or help of the respective devices or applications. - Page 67 Select the server which you want to delete and press OPTIONS. Select [Remove] from the options menu. Select [OK] on the confirmation display. [The device has been removed from the list.] appears on the TV screen, and the selected server is deleted. Note A server will appear in the server list even after being deleted from the list if the receiver finds it on the network (such as when you refresh the server list).
- Page 68 Tap/click the AirPlay icon ( , etc.) on the iPhone/iPad/iPod screen or iTunes window. Select [STR-DN1070 XXXXXX] (*) on the AirPlay menu of iTunes or your iPhone/iPad/iPod. Start playing back audio content on an iPhone/iPad/iPod or in iTunes. XXXXXX is the identification number for each unit.
-
Page 69: Enjoying Music Services Offered On The Internet
Controlling the receiver using a smartphone or tablet device (SongPal) SongPal is a dedicated app for operating SongPal-compatible audio devices manufactured by Sony using a smartphone or tablet device. Search for SongPal on Google Play or the App Store and download to your smartphone or tablet device. - Page 70 You can enjoy music stored on your computer or smartphone or from music services in multiple rooms at the same time. Refer to the following for details of SongPal Link: http://www.sony.net/nasite [85] Using Network Features Listening to music by connecting the SongPal Link-compatible...
- Page 71 You can control the receiver using Video & TV SideView from a mobile device or tablet device. You need to register your mobile devices in which Video & TV SideView is installed to the receiver before you use Video & TV SideView for the first time. Search for Video &...
- Page 72 You only need to perform steps 1 and 2 the first time. Perform the procedure from step 3 from the next time. Refer to the following for details of SongPal: http://info.songpal.sony.net/help/ [90] Using Network Features Setting whether to control this receiver from a device on the...
-
Page 73: Access Control
Select [Home Network Access Control]. A list of registered controllers appears (up to 40 devices). Select the controller you want to set and press Select the setting you want. Allow: Permits access from the controller. Block: Blocks access from the controller. [91] Using Network Features Setting whether to control this receiver from a device on the home network... - Page 74 [93] Using BLUETOOTH Features About BLUETOOTH Features What you can do with BLUETOOTH features RX (Receiver mode) Listening to audio content from a BLUETOOTH device via the receiver You can receive audio from an iPhone/iPod, smartphone or tablet that has a BLUETOOTH function and listen to it via this receiver.
- Page 75 Follow the on-screen instructions displayed on the BLUETOOTH device, and complete the procedure for BLUETOOTH connection. Check that the connection is completed and [BT] lights up on the display panel. Start playback on the BLUETOOTH device. Adjust the volume. Adjust the volume of the BLUETOOTH device first. If the volume level is still too low, adjust the volume level of the receiver.
- Page 76 (*). Select [STR-DN1070 XXXXXX] (*) on the BLUETOOTH device display. If [STR-DN1070 XXXXXX] (*) is not displayed, repeat this process from step 1. When the BLUETOOTH connection is established, the device name appears and [BT] lights up on the display panel.
-
Page 77: Compatible Bluetooth Version And Profiles
[97] Using BLUETOOTH Features Enjoying audio content stored on a BLUETOOTH device Compatible BLUETOOTH version and profiles “Profile” refers to a standard set of capabilities for various BLUETOOTH product capabilities. This receiver supports the following BLUETOOTH version and profiles: Compatible BLUETOOTH version: BLUETOOTH Specification Version 4.1 Compatible BLUETOOTH profiles: A2DP 1.2 (Advanced Audio Distribution Profile): Receives high-quality audio content. - Page 78 Using SongPal to control the receiver from a smartphone or tablet device Controlling the receiver using a smartphone or tablet device (SongPal) SongPal is a dedicated app for operating SongPal-compatible audio devices manufactured by Sony using a smartphone or tablet device.
- Page 79 You can enjoy music stored on your computer or smartphone or from music services in multiple rooms at the same time. Refer to the following for details of SongPal Link: http://www.sony.net/nasite [102] Using the Multi-Zone Features Overview of multi-zone features What you can do with multi-zone features Listening in two locations ―...
- Page 80 kitchen. The volume can be adjusted separately for each room. Hint Connect one more receiver or amplifier in Zone 2 to the ZONE 2 OUT jacks to enjoy more powerful sound in Zone 2. Listening in three locations ― Zone 2 + Zone 3 In addition to Zone 2, you can enjoy music at the same time in a third room by connecting the speakers located in the third room to the SPEAKERS SURROUND/ZONE 3 terminals.
- Page 81 [103] Using the Multi-Zone Features Overview of multi-zone features Available inputs for each zone Available inputs vary depending on the zone you have selected. Available inputs for main zone You can select all input source from every device connected to the receiver in the main zone. Additionally, you can select a sound source received via BLUETOOTH connection.
- Page 82 Signals from the AUDIO IN VIDEO 1 jacks VIDEO 1 Signals from the AUDIO IN SA-CD/CD jacks SA-CD/CD FM broadcasts received through the built-in tuner FM TUNER (*) Signals from the (USB) port on the front panel USB (*) Signals received via BLUETOOTH Bluetooth (*) Signals received via home network Home Network (*)
- Page 83 Connecting 5.1-channel speaker system with Zone 2 connection Connect each speaker as illustrated below. Before connecting cables, be sure to disconnect the AC power cord (mains lead). For details on how to connect speaker cables to the receiver, see “How to connect speaker cables.”...
- Page 84 Monaural audio cable (not supplied) Speaker cable (not supplied) After you have connected the Zone 3 speakers, set [Surround Speaker Assign] to [Zone3] in the [Speaker Settings] menu. Note You can only enable the SPEAKERS ZONE 2 terminals if you set [SURROUND BACK/ZONE2 Priority] to [ZONE2 Terminals] in the [Speaker Settings] menu, and set [Zone2 Power] to [On] in the [Zone Controls] menu.
- Page 85 When [ZONE2 Terminals] is selected and [Zone2 Power] is set to [On], [Zone2 Power] will be set to [Off] automatically if the [Speaker Pattern] is set to [5.0] or higher. [107] Using the Multi-Zone Features Enjoying sound from speakers located in other rooms Assigning speakers for Zone 3 You can assign the speakers installed in Zone 3 as Zone 3 speakers.
- Page 86 Hint You can also activate the zone you want using ZONE SELECT and ZONE POWER on the receiver. You can also select source signals you want to output using INPUT SELECTOR on the receiver while [2. xxxx(input name)] or [3. xxxx (input name)] is shown on the display panel. You can also adjust volume using MASTER VOLUME on the receiver while [2.
- Page 87 Select [Setup] - [Zone Settings] from the home menu. Select [Zone2 Line Out]. Select the setting you want. Variable: Recommended when using another amplifier that does not have volume control for Zone 2. The volume for the ZONE 2 OUT jacks can be changed. Fixed: Recommended when using another amplifier with variable volume control for Zone 2.
- Page 88 To exit Zone 2 operation Select [Zone Controls] - [Zone2 Power] from the home menu, then select [Off]. Available input for Zone 2 operations See “Available inputs for each zone.” Hint A dedicated App for this model SongPal enables easier zone operation such as changing the settings or switching the zone inputs from your smartphone or tablet.
- Page 89 from a device connected to the receiver in another room (HDMI zone). Note When [Zone] is selected, the Control for HDMI function does not work. For details on selecting the HDMI zone input, see “Enjoying video and sound in another location by connecting another amplifier or TV using HDMI connections (HDMI Zone).”...
- Page 90 Interlocking with BRAVIA TV and other devices (“BRAVIA” Sync) What is “BRAVIA” Sync? “BRAVIA” Sync is an extended function developed by Sony based on the Control for HDMI (*1) function. By connecting “BRAVIA” Sync-compatible devices, such as a TV or a Blu-ray Disc player, using an HDMI cable (*2) (not supplied) you can control the devices with the TV remote control.
- Page 91 Functions such as System Power Off, System Audio Control, One-Touch Play, and Remote Easy Control may be used with other devices than those manufactured by Sony that support the Control for HDMI function. However, compatibility with other devices than those manufactured by Sony is not guaranteed.
- Page 92 Note The connected device may not turn off depending on the status of the device. System Power Off function may work with devices other than those manufactured by Sony, but operation is not guaranteed. [119] Using Other Features Interlocking with BRAVIA TV and other devices (“BRAVIA”...
- Page 93 Game: Multi Ch Stereo Graphics: Multi Ch Stereo Note The Scene Select function is a function developed by Sony, and cannot be used on other devices than those manufactured by Sony. [122] Using Other Features Interlocking with BRAVIA TV and other devices (“BRAVIA” Sync) About Home Theatre Control function Setting the receiver, the sound field settings, input switching, etc., can be done by selecting the...
- Page 94 This function cannot be used when the sound is output from the TV. The Echo Canceling function is a function developed by Sony, and cannot be used on other devices than those manufactured by Sony. [125] Using Other Features Interlocking with BRAVIA TV and other devices (“BRAVIA”...
- Page 95 [HDMI A+B] may not work depending on the playback device you connect. Even if you select [HDMI OFF], HDMI signals are output to the HDMI zone. [127] Using Other Features Enjoying video and sound with your desired way of use Switching between digital and analog audio (Input Mode) When you connect devices to both digital and analog audio input jacks on the receiver, you can...
-
Page 96: About Custom Preset
OPT: BD/DVD, GAME, SAT/CATV, VIDEO 1, VIDEO 2, SA-CD/CD COAX: BD/DVD, GAME, SAT/CATV, VIDEO 1, VIDEO 2, SA-CD/CD (*) None: BD/DVD (*), GAME (*), SAT/CATV, VIDEO 1 (*), VIDEO 2 (*), SA-CD/CD Default setting Note When you assign the digital audio input, the Input Mode setting may change automatically. One reassignment is allowed for each input. -
Page 97: Recalling The Settings Saved To The Scene
[Import] from the menu. When you select [3: Party], Zone 2, Zone 3 and HDMI zone are turned on automatically allowing you to enjoy the same music that is playing in the main zone. [131] Using Other Features Saving and recalling various settings for the receiver (Custom Preset) Recalling the settings saved to the scene Select [Custom Preset] from the home menu. - Page 98 Center Bass: – Center Treble: – Surround Bass: – Surround Treble: – Front High Bass: – Front High Treble: – 3: Party Input: – Tuner Preset: – Volume: 27 HDMI Output: – Party Mode: On Sleep: – Sound Field: Multi Ch Stereo Sound Optimizer: Off In-Ceiling Speaker Mode: –...
- Page 99 [SLEEP] lights up on the display panel of the receiver when sleep timer is being used. Hint You can check the remaining time before the receiver turns off on the System Settings screen. Also, the remaining time appears on the bottom right of the TV screen when it becomes 1 minute or less. The sleep timer will be canceled if you perform the following: Update the software of the receiver.
- Page 100 Select the network connection method and configure settings to connect the receiver to the network. Note Switch the input of the TV to the input to which the receiver is connected to use this function. Auto Calibration is not available when [Bluetooth Mode] is set to [Transmitter]. If the Easy Setup screen does not appear or you want to display the Easy Setup screen manually, you can display it by selecting [Setup] - [Easy Setup] from the home menu.
-
Page 101: Selecting The Front Speakers
[138] Adjusting Settings Performing Auto Calibration 3. Connecting the calibration microphone Calibration microphone (supplied) Connect the supplied calibration microphone to the CALIBRATION MIC jack. Set up the calibration microphone. Place the calibration microphone at your listening position and set it at the same height as your ears. -
Page 102: Performing Auto Calibration
[140] Adjusting Settings Performing Auto Calibration 5. Performing Auto Calibration You can perform automatic calibration from your listening position. Select [Setup] - [Speaker Settings] from the home menu. Select [Auto Calibration]. Follow the instructions on the TV screen, then press to select [Start]. - Page 103 Select [Retry]. Follow the instructions on the TV screen and then press to select [Start]. The measurement starts in a few seconds. The measurement process will take approximately 30 seconds with a test tone. When the measurement ends, a beep sounds and the screen switches. Select the item you want.
- Page 104 Select the setting you want. Full Flat: Makes the measurement of frequency from each speaker flat. Engineer: Sets to “the Sony listening room standard” frequency characteristics. Front Reference: Adjusts the characteristics of all of the speakers to match the characteristics of the front speaker.
- Page 105 [145] Adjusting Settings Speaker Settings Checking the speaker position and the corresponding speaker terminals (Speaker Connection Guide) This function lets you know the position of the speaker you select and the corresponding speaker terminals on the receiver to which the speaker should be connected. Select [Setup] - [Speaker Settings] from the home menu.
- Page 106 Select the desired speaker pattern according to the speaker installation example displayed on the TV screen, then select [Save]. Select the setting you want (*). Off: When none of the connections above is used. Front B: When using the front B speaker connection. Bi-Amp: When using the bi-amplifier speaker connection.
- Page 107 Select [Setup] - [Speaker Settings] from the home menu. Select [Size]. Select the speaker on the screen for which you want to adjust the size. Select the size you want. Large: If you connect large speakers that will effectively reproduce bass frequencies, select [Large].
- Page 108 [151] Adjusting Settings Speaker Settings Adjusting the speaker level (Level) You can adjust the level of each speaker (front left/right, front high left/right, center, surround left/right, surround back left/right and subwoofer). Select [Setup] - [Speaker Settings] from the home menu. Select [Level].
-
Page 109: Crossover Frequency
To output a test tone from adjacent speakers See “Adjusting the balance between adjacent speakers by outputting a test tone (Phase Noise).” To output the source sound from adjacent speakers See “Adjusting the balance between adjacent speakers by outputting a source sound (Phase Audio).”... - Page 110 Select [Equalizer]. Select [Front], [Center], [Surround] or [Front High]. Select [Bass] or [Treble]. Adjust the gain. Note This function does not work in the following cases: [Pure Direct] is set to [On]. [Bluetooth Mode] is set to [Transmitter]. [DSD Native] is set to [On] and a DSD file is played back. Frequencies for [Bass] and [Treble] are fixed.
- Page 111 Playing audio signals with high-quality sound (Digital Legato Linear (D.L.L.)) The D.L.L. function is Sony proprietary technology that allows low-quality digital and analog audio signals to be played with high-quality sound. Select [Setup] - [Audio Settings] from the home menu.
- Page 112 Auto 1: This function is available for lossy compression audio formats and analog audio signals. Auto 2: This function is available for Linear PCM signals, as well as lossy compression audio formats and analog audio signals. Note This function may not work on some content via a USB device, home network or music services. This function works when [2ch Stereo], [Multi Ch Stereo] or [Direct] is selected.
- Page 113 You can select from a variety of sound field modes according to speaker connections or input sources. Select [Sound Effects] - [Sound Field] from the home menu. Select the sound field you want. For movies, select a sound field labeled with [Movie]. For music, select a sound field labeled with [Music].
- Page 114 [162] Adjusting Settings Audio Settings Enjoying more natural sound with speakers installed in the ceiling (In-Ceiling Speaker Mode) Set whether or not to use in-ceiling speaker mode with the current input. In a setup where the front and center speakers are installed in the ceiling, lowering the audio output position to the screen height allows you to enjoy a more natural experience.
-
Page 115: Subwoofer Low Pass Filter
Note [DSD Native] does not work when [Bluetooth Mode] is set to [Transmitter]. When [DSD Native] is set to [On] and a DSD file is played back, the settings of the equalizer and bass crossover frequency are invalid, and the sound field does not work. Hint You can also use DSD NATIVE on the remote control to turn on this function. - Page 116 Select the setting you want. On: Always activates the low-pass filter with a cutoff frequency of 120 Hz. Off: Does not activate the low-pass filter. Note This function does not work in the following cases: [Bluetooth Mode] is set to [Transmitter]. [DSD Native] is set to [On] and a DSD file is played back.
- Page 117 Select the setting you want. 0 ms – 20 ms: You can adjust the gap from 0 ms to 20 ms in 0.5 ms intervals. Note This function does not work in the following cases: Headphones are connected. [Bluetooth Mode] is set to [Transmitter]. [DSD Native] is set to [On] and a DSD file is played back.
- Page 118 Main/Sub: Sound in the main language will be output through the front left speaker and sound in the sub language will be output through the front right speaker simultaneously. [170] Adjusting Settings Audio Settings Compressing the dynamic range (Dynamic Range Compressor) You can compress the dynamic range of the soundtrack.
- Page 119 Output]. Also outputs 4K/24p photo images when you play 2D photo files. Note If your Sony device is not detected when [Auto1] is selected, the setting will have the same effect as the [Auto2] setting. The [4K Output] setting does not affect video signals from the HDMI IN jacks. If you want to upscale video signals from the HDMI IN jacks to 4K, use [HDMI In 4K Scaling] in the [HDMI Settings] menu.
- Page 120 Select the setting you want. Auto: Automatically detects the type of external device, and switches to the corresponding color setting. YCbCr (4 : 2 : 2): Outputs YCbCr 4:2:2 video signals YCbCr (4 : 4 : 4): Outputs YCbCr 4:4:4 video signals. RGB: Select this when connecting to a device with an HDCP-compatible DVI jack.
- Page 121 Select [HDMI In 4K Scaling]. Select the setting you want. Auto: Enables video scaling control of 4K HDMI output automatically if you connect a 4K-compatible TV. Note This function works only when video signals are received via the HDMI IN jacks. HDMI input signal must be 1080p/24 Hz 2D signal.
- Page 122 Note The connected device may not turn off depending on the status of the device. System Power Off function may work with devices other than those manufactured by Sony, but operation is not guaranteed. [179] Adjusting Settings HDMI Settings...
- Page 123 HDMI connection. Select [Setup] - [HDMI Settings] from the home menu. Select [Audio Out]. Select the setting you want. AMP: HDMI audio signals from playback devices are only output to the speakers connected to the receiver. Multi-channel sound can be played back as it is. TV + AMP: The sound is output from the speaker of the TV and the speakers connected to the receiver.
- Page 124 The HDMI OUT B/HDMI ZONE jack can be used for HDMI zone. Select [Setup] - [HDMI Settings] from the home menu. Select [HDMI Out B Mode]. Select the setting you want. Main: Uses the jack for HDMI OUT B. Recommended when you enjoy TV or projector content in only one room (main zone).
- Page 125 You can select the signal format so that the receiver can receive high resolution 4K signals. Select [Setup] - [HDMI Settings] from the home menu. Select [HDMI Signal Format]. Select the HDMI input you want to apply the setting. Select the setting you want. Standard format: Select this when you do not use high bandwidth video format.
- Page 126 Show / Hide You can set whether or not an input is displayed. Show: Shows the input. Hide: Hides the input. OPTICAL / COAXIAL You can set the digital audio input jack(s) assigned to each input. COAX None Input Mode You can set the input mode for each input.
- Page 127 The screen for selecting the IP address acquisition method appears on the TV screen. Select [Auto]. The confirmation screen appears. Press to browse information, and then press Select [Save & Connect]. The receiver starts connecting to the network. For details, refer to the messages that appear on the TV screen.
-
Page 128: Connection Status
If selecting the network name (SSID) you want Select the network name (SSID) you want in step 4, enter the security key (or passphrase) using the on-screen keyboard, and then select [Enter] to confirm the security key. The receiver starts connecting to the network. For details, refer to the messages that appear on the TV screen. - Page 129 If you are using multiple wireless systems such as wireless LANs (Local Area Networks), the wireless signals may be unstable. In this case, playback stability may be improved by setting the priority radio frequency channel for Screen mirroring. Select [Setup] - [Network Settings] from the home menu. Select [Screen mirroring RF Setting].
- Page 130 You can check a list of products compatible with a controller on the home network and set whether or not each product is accessible via this receiver. Select [Setup] - [Network Settings] from the home menu. Select [Home Network Access Control]. A list of registered controllers appears (up to 40 devices).
-
Page 131: External Control
Turning on the control mode for maintenance (External Control) You can set whether a dedicated controller (home automation controller) on the home network is allowed to control the receiver. Select [Setup] - [Network Settings] from the home menu. Select [External Control]. Select [On] or [Off]. - Page 132 [199] Adjusting Settings Bluetooth Settings Checking the BLUETOOTH device list (Device List) You can check a list of the paired and detected BLUETOOTH receivers such as headphones when [Bluetooth Mode] is set to [Transmitter]. You can perform pairing with detected devices from the list.
- Page 133 Hint You can enjoy high-quality sound if AAC or LDAC is enabled. LDAC is an audio coding technology developed by Sony that enables the transmission of High- Resolution (Hi-Res) Audio content, even over a BLUETOOTH connection. Unlike other BLUETOOTH compatible coding technologies such as SBC, it operates without any down-conversion of the Hi-...
- Page 134 [203] Adjusting Settings Zone Settings Setting whether or not to display [Zone Controls] on the home menu (Zone Controls) You can set whether or not to display [Zone Controls] on the home menu by following the steps below. Select [Setup] - [Zone Settings] from the home menu. Select [Zone Controls].
- Page 135 Select [Language]. Select the language you want. Note When the Control for HDMI function on both the receiver and the TV (BRAVIA TV) is turned on, the on-screen display language of the receiver is changed simultaneously when changing the language for the on-screen display of the TV.
- Page 136 Select [Auto Standby]. Select [On] or [Off]. When you select [On], the receiver switches to standby mode after approximately 20 minutes. Note This function does not work in the following cases: [FM TUNER] is selected as the input. The software of the receiver is being updated. BLUETOOTH headphones are connected.
-
Page 137: Update Notification
1:00:00 0:30:00 [SLEEP] lights up on the display panel of the receiver when sleep timer is being used. Hint You can check the remaining time before the receiver turns off on the System Settings screen. Also, the remaining time appears on the bottom right of the TV screen when it becomes 1 minute or less. The sleep timer will be canceled if you perform the following: Update the software of the receiver. -
Page 138: License Information
Mobile devices connected using the Screen mirroring function Content input with the on-screen keyboard [213] Adjusting Settings System Settings Assigning a name to the receiver (Device Name) You can assign a device name to the receiver to make it easily recognizable by other devices. Select [Setup] - [System Settings] from the home menu. - Page 139 [216] Adjusting Settings System Settings Updating the software automatically (Auto Update Settings) You can set the software to update automatically. If you set [Auto Update] to [On], the auto update is performed from 2:00 AM to 5:00 AM of the selected time zone. Select [Setup] - [System Settings] from the home menu.
- Page 140 It may take about 1 hour for the update to be completed. Do not turn the receiver off while the software is being updated. It may cause a malfunction. You cannot restore the old version after updating the software. [218] Adjusting Settings Using the menu on the display panel Operating the receiver with the menu on the display panel...
- Page 141 After checking the above items and fixing any problems, plug in the AC power cord (mains lead) and turn on the receiver. If the problem persists, consult your nearest Sony dealer.
-
Page 142: List Of Messages After Auto Calibration Measurements
[222] Troubleshooting Error messages An over-current from the USB port was detected. Disconnect the USB device as prompted in the warning message and close the message. [223] Troubleshooting Error messages List of messages after Auto Calibration measurements Code 30: Headphones are connected to the PHONES jack on the receiver. Remove the headphones and perform the Auto Calibration again. - Page 143 several digital devices. You can reassign the COAXIAL/OPTICAL digital audio input jacks to other inputs. See “Using other audio input jacks (Input Assign).” [226] Troubleshooting General The receiver does not turn on even when the TV is turned on. Set [Control for HDMI] to [On] in the [HDMI Settings] menu. The TV must support the Control for HDMI function.
- Page 144 4:2:2 and 4K/60p 4:2:0 10 bit etc. The output of the HDMI video signals of the receiver may be set to [HDMI OFF]. In this case, press HDMI OUT to set to [HDMI A], [HDMI B], or [HDMI A + B]. If you want to play HDCP 2.2 content, connect the receiver to an HDMI input jack of a TV that supports HDCP 2.2.
-
Page 145: The Display Panel Is Turned Off
Turn on the receiver, then select the input to which the playing device is connected. If connected to other devices than those manufactured by Sony that support the Control for HDMI function, set [Control for HDMI] to [On] in the [HDMI Settings] menu. -
Page 146: There Is Severe Humming Or Noise
source is played back. If you set the speaker pattern to a setting that does not have surround speakers, no sound is output from the surround speakers when [DSD Native] is set to [On] and a DSD multi- channel source is played back. No sound is output from the Zone 2/3 speakers if [DSD Native] is set to [On] and a DSD file is played back in Zone 2/3. -
Page 147: The Left And Right Sound Is Unbalanced Or Reversed
Sound may not be output from the receiver while the home menu is displayed on the TV screen. Press HOME to exit the home menu. Audio signals (format, sampling frequency, bit length, etc.) transmitted from an HDMI jack may be suppressed by the connected device. Check the setup of a device connected via an HDMI cable if the image is poor or the sound does not come out of the device. -
Page 148: The Surround Effect Cannot Be Obtained
[243] Troubleshooting Sound Dolby Digital or DTS multi-channel sound is not reproduced. Check that the DVD, etc., you are playing is recorded in Dolby Digital or DTS format. When connecting the DVD player, etc., to the digital input jacks of this receiver, make sure the digital audio output setting of the connected device is available. -
Page 149: The Fm Reception Is Poor
Turn on the receiver, then select the input to which the playing device is connected. If connected to devices other than those manufactured by Sony that support the Control for HDMI function, set [Setup] - [HDMI Settings] - [Control for HDMI] to [On]. -
Page 150: The Fm Stereo Reception Is Poor
The FM stereo reception is poor. Perform the following procedure to set the FM station receiving mode to the monaural mode. Select [Listen] - [FM TUNER] from the home menu. Select a station on the FM band. Press OPTIONS. Select [FM Mode] from the menu. Select [Monaural]. -
Page 151: The Sound Is Distorted
[256] Troubleshooting iPhone/iPad/iPod The sound is distorted. Press - on the remote control repeatedly. You can also use MASTER VOLUME on the receiver. [257] Troubleshooting USB devices Are you using a compatible USB device? If you connect an incompatible USB device, the following problems may occur. The USB device is not recognized. -
Page 152: Erroneous Display
The USB device is being connected upside down. Connect the USB device in the correct orientation. [262] Troubleshooting USB devices Erroneous display. The data stored in the USB device may have been corrupted. The character codes that can be displayed by this receiver are as follows: Upper case letters (A to Z) Lower case letters (a to z) Numbers (0 to 9) - Page 153 Wireless networks are influenced by electromagnetic radiation emitted by microwave ovens and other devices. Move the receiver away from these devices. [266] Troubleshooting Network connection Cannot control the receiver using a SongPal device. It may take some time for the receiver to connect to the network after it is turned on. Try again later.
-
Page 154: The Sound Skips During Playback
[270] Troubleshooting Home Network A server does not appear in the server list. (A message that indicates that the receiver cannot find the server appears on the TV screen.) You may have turned on this receiver before you turned on the server. Refresh the server list. -
Page 155: Cannot Play Copyrighted Files
cannot expand the folder to display its content. [274] Troubleshooting Home Network Cannot play copyrighted files. Audio content with DRM (Digital Rights Management) copyright protection cannot be played on this receiver. [275] Troubleshooting Home Network Cannot select a previously selected track. The track information may have been changed on the server. - Page 156 The receiver cannot be found from an iPhone/iPad/iPod or iTunes. Make sure the iPhone/iPad/iPod or computer with iTunes is connected to your home network. Update the software of the receiver and the iPhone/iPad/iPod or iTunes to the latest version. [279] Troubleshooting AirPlay The sound skips.
-
Page 157: Cannot Make A Bluetooth Connection
Move the BLUETOOTH device closer to the receiver. Pairing may not be possible if there are other BLUETOOTH devices near the receiver. In this case, turn off the other BLUETOOTH devices. Correctly enter the same passkey that was entered on the BLUETOOTH device. [284] Troubleshooting BLUETOOTH device Cannot make a BLUETOOTH connection. -
Page 158: Connected To The Receiver
[288] Troubleshooting BLUETOOTH device Cannot control the receiver using a SongPal device. It may take some time for the receiver to connect to the network after it is turned on. Try again later. The smartphone or tablet device may not be connected to the same network as the receiver. -
Page 159: Customer Support Websites
[294] Troubleshooting If the problem is not solved Customer support websites Refer to the following websites for the latest information on the receiver. For customers in the USA: http://esupport.sony.com/ For customers in Canada: http://esupport.sony.com/CA/ For customers in Europe: www.sony.eu/support For customers in Asia-Pacific countries and regions:... - Page 160 Digital Living Network Alliance. The BLUETOOTH® word mark and logos are registered trademarks owned by Bluetooth SIG, Inc. and any use of such marks by Sony Corporation is under license. Other trademarks and trade names are those of their respective owners.
- Page 161 The source code for the software used in this product is subject to the GPL and LGPL, and is available on the Web. To download, please access the following: URL: http://oss.sony.net/Products/Linux/ Please note that Sony cannot answer or respond to any inquiries regarding the content of this source code. How to connect speaker cables Connect speaker cables as illustrated below.
- Page 162 These bring the exciting and powerful sound of movie theaters into your home. HD-D.C.S.: HD Digital Cinema Sound (HD-D.C.S.) is Sony’s new innovative home theater technology using the latest acoustic and digital signal processing technologies. It is based on the precise response measurement data of a mastering studio.
- Page 163 Concert Hall A (HALL A): Reproduces the acoustics of a vineyard style concert hall in Berlin famous for its clear acoustics. Concert Hall B (HALL B): Reproduces the acoustics of a shoe box style concert hall with plaster walls in Amsterdam. Concert Hall C (HALL C): Reproduces the acoustics of a wooden shoe box style concert hall in Vienna.
- Page 164 Level settings [<LEVEL>] Test Tone [TEST TONE] (*2) OFF, AUTO XXX (*3), FIX XXX (*3) Test Tone Phase Noise [P. NOISE] (*2) OFF, FL/FR, FL/CNT, CNT/FR, FR/SR, SR/SBR, SR/SB, SBR/SBL, SR/SL, SBL/SL, SB/SL, SL/FL, LH/RH, FL/SR, SL/FR, FL/RH, LH/FR Test Tone Phase Audio [P. AUDIO] (*2) OFF, FL/FR, FL/CNT, CNT/FR, FR/SR, SR/SBR, SR/SB, SBR/SBL, SR/SL, SBL/SL, SB/SL, SL/FL, LH/RH, FL/SR, SL/FR, FL/RH, LH/FR Front left speaker level [FL LEVEL] (*2)
- Page 165 RH 1.00 m to RH 10.00 m (RH 3’3” to RH 32’9”) (0.01 m (1 inch) interval) Subwoofer distance[SW DIST.] (*2) SW 1.00 m to SW 10.00 m (SW 3’3” to SW 32’9”) (0.01 m (1 inch) interval) Distance Unit [DIST. UNIT] FEET, METER Front speakers crossover frequency [FRT CROSS] (*9) CROSS 40 Hz to CROSS 200 Hz (10 Hz interval)
- Page 166 Digital broadcast language selection [DUAL MONO] MAIN/SUB, MAIN, SUB Dynamic Range Compressor [D. RANGE] COMP. ON, COMP. AUTO, COMP. OFF HDMI settings [<HDMI>] HDMI In 4K Scaling [4K SCALING] AUTO, OFF Control for HDMI [CTRL: HDMI] CTRL ON, CTRL OFF Standby Link to TV [STBY LINK] ON, AUTO, OFF Standby Through [STBY THRU]...
- Page 167 [Bluetooth Mode] is set to [Off]. A BLUETOOTH device is connected. You can only select this parameter when [Bluetooth Mode] is set to [Transmitter] and [Bluetooth Codec - LDAC] is set to [On]. XXXX represents the version number. Formats compatible with home networks Supported music formats (*1) MP3 (MPEG 1 Audio Layer-3): .mp3...
- Page 168 You can output a test tone from adjacent speakers to adjust the balance between the speakers. This operation is only available using the display panel on the front of the receiver. Press AMP MENU. The menu is displayed on the display panel of the receiver. Select [<LEVEL>] (Level settings) - [P.
- Page 169 Select [<LEVEL>] (Level settings) - [P. AUDIO]. Select the speakers to output the sound from. The front 2 channel source sound is output sequentially from adjacent speakers. Adjust the speaker level using MASTER VOLUME on the receiver. Available speakers: FL/FR (Front Left/Front Right) FL/CNT (Front Left/Center) CNT/FR (Center/Front Right) FR/SR (Front Right/Surround Right)
Need help?
Do you have a question about the STR-DN1070 and is the answer not in the manual?
Questions and answers