Table of Contents
Advertisement
Advertisement
Table of Contents

Related Manuals for Sony STR-DN1070


Summary of Contents for Sony STR-DN1070
- Page 1 Multi Channel AV Receiver Operating Instructions STR-DN1070...
- Page 2 Record these numbers in POUR LES CONSOMMATEURS AUX the spaces provided below. Refer to them ÉTATS-UNIS. NON APPLICABLE AU whenever you call upon your Sony dealer CANADA, Y COMPRIS LA PROVINCE DE regarding this product. QUÉBEC.
- Page 3 12) Use only with the cart, stand, tripod, bracket, To reduce the risk of electric shock, the speaker or table specified by the manufacturer, or cable should be connected to the apparatus and sold with the apparatus. When a cart is used, the speakers in accordance with the following use caution when moving the cart/apparatus instructions.
- Page 4 EU directives This product has been manufactured by or on behalf of Sony Corporation, 1-7-1 Konan Minato-ku Tokyo, 108-0075 Japan. Inquiries related to product compliance based on European Union legislation shall be addressed...
- Page 5 Hereby, Sony Corp., declares that this equipment is in compliance with the essential requirements and other relevant provisions of Directive 1999/5/EC. For details, please access the following URL: http://www.compliance.sony.de/ This product is intended to be used in the following countries.
-
Page 6: Manuals Provided For This Product
Advanced operations Listening/Watching Advanced operations BLUETOOTH function Network features Other features Adjusting Settings Troubleshooting Precautions / Specifications To read the Help Guide, go to the following website: For the customers in Europe http://rd1.sony.net/help/ha/strdn107/h_eu/ For the customers in other areas http://rd1.sony.net/help/ha/strdn107/h_zz/... -
Page 7: About These Operating Instructions
Apple, the Apple logo, AirPlay, iPad, iPhone, registered trademarks owned by Bluetooth SIG, iPod, iPod touch, and Retina are trademarks of Inc. and any use of such marks by Sony Apple Inc., registered in the U.S. and other Corporation is under license. Other trademarks countries. - Page 8 GPL and LGPL, and is available on the Web. To download, please access the following: URL: http://oss.sony.net/Products/Linux Please note that Sony cannot answer or respond to any inquiries regarding the content of this source code.
-
Page 9: Table Of Contents
Table of Contents Supplied Accessories Manuals provided for this product ....6 Remote control (1) About These Operating Instructions .... 7 R03 (size AAA) batteries (2) Supplied Accessories ........9 FM wire antenna (aerial) (1) Parts and Controls ........10 Preparation ... -
Page 10: Parts And Controls
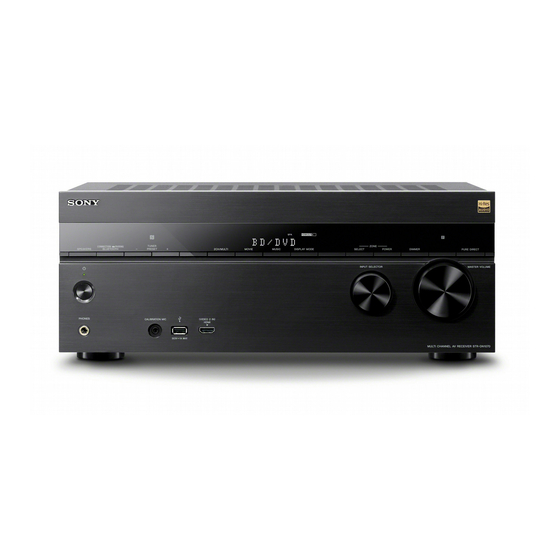
Parts and Controls Receiver Front panel (power) (page 34) (USB) port Power indicator Connect a USB device here. CALIBRATION MIC jack (page 35) SPEAKERS (page 36) PHONES jack CONNECTION PAIRING BLUETOOTH Connect headphones here. -
Page 11: Indicators On The Display Panel
* When [Bluetooth Standby] is activated, the indicator lights up in amber only if a device has been paired with the receiver. If no devices are paired with the receiver, the indicator turns off. ** For USA, Canadian and Oceanian models only. Indicators on the display panel The indicator lights up to indicate the current status. -
Page 12: Rear Panel
Wired LAN indicator * When playing a Dolby Digital or DTS format disc, make sure that you have completed the digital A LAN cable is connected. connections and [Input Mode] is not set to BT [Analog]. Lights up when a BLUETOOTH device is connected. -
Page 13: Input Buttons
HDMI OUT Remote control Switches the output for two monitors connected to the HDMI OUT A (TV) and HDMI OUT B/HDMI ZONE jacks. Output is toggled between “HDMI A”, “HDMI B”, “HDMI A+B” and “HDMI OFF” each time the button is pressed. Select “HDMI OFF”... - Page 14 HOME Displays the home menu on the TV screen. / (previous/next), (play/pause)**, (stop) Skip, play, pause, stop operation. PRESET +/– Selects preset stations or channels. (volume) +**/– Adjusts the volume level of all speakers at the same time.
-
Page 15: Preparation
Preparation Installing Speakers You can connect up to 7 speakers and 2 subwoofers to this AV receiver. Place the speakers and subwoofers according to the speaker system of your preference. Location of each speaker Note When you connect only one surround back speaker (SB), place the surround back speaker directly behind the listening position. -
Page 16: Connecting Speakers
Speaker configuration and speaker pattern settings Select the speaker pattern according to the speaker configuration which you are using. Speaker configuration in each zone Main zone Zone 2* Zone 3 [Surround [Surround Speaker Back Speaker pattern to connection, Speaker Assign] be selected see page Assign]**... - Page 17 Examples of speaker connections 5.1-channel speaker system 30˚ 100˚ – 120˚ Surround speakers Center speaker Subwoofer Front speakers Monaural audio cable (not supplied) Speaker cable (not supplied)
- Page 18 7.1-channel speaker system using surround back speakers 30˚ 100˚ – 120˚ Same angle. Surround speakers Center speaker Subwoofer Surround back speakers* Front speakers Monaural audio cable (not supplied) Speaker cable (not supplied) * If you connect only one surround back speaker, connect it to the L (+/–) terminals.
- Page 19 7.1-channel speaker system using front high speakers 30˚ 100˚ – 120˚ Surround speakers Center speaker Subwoofer Front high speakers* Front speakers Monaural audio cable (not supplied) Speaker cable (not supplied) * After you have made the connection, set [Surround Back Speaker Assign] in [Speaker Settings] to [Off].
- Page 20 5.1-channel speaker system with Zone 2 speakers Main zone Zone 2 30˚ 100˚ – 120˚ Surround speakers Center speaker Subwoofer Speakers (Zone 2)* Front speakers Monaural audio cable (not supplied) Speaker cable (not supplied) * You can only enable the SPEAKERS ZONE 2 terminals if you set [SURROUND BACK/ZONE2 Priority] in [Speaker Settings] to [ZONE2 Terminals], and turn on the ZONE 2 power.
- Page 21 3.1-channel speaker system with Zone 2 and Zone 3 connections Main zone Zone 2 Zone 3 30˚ Speakers (Zone 3)** Center speaker Subwoofer Speakers (Zone 2)* Front speakers Monaural audio cable (not supplied) Speaker cable (not supplied) * You can only enable the SPEAKERS ZONE 2 terminals if you set [SURROUND BACK/ZONE2 Priority] in [Speaker Settings] to [ZONE2...
- Page 22 5.1-channel speaker system with Bi-Amplifier connection You can enhance the sound quality by connecting different amplifiers to both a tweeter and a woofer, using bi-amplifier connection. 30˚ 100˚ – 120˚ Surround speakers Center speaker Front speaker Front speaker Subwoofer ...
- Page 23 5.1-channel speaker system with Front B speakers If you have an additional front speaker system, connect it to SPEAKERS SURROUND BACK/ BI-AMP/FRONT HIGH/FRONT B terminals. 30˚ 100˚ – 120˚ Surround speakers Center speaker Subwoofer Front B speakers Front A speakers ...
-
Page 24: Connecting A Tv
Connect a TV monitor or a projector to the HDMI OUT A (TV), HDMI OUT B/HDMI ZONE or MONITOR OUT jack on the receiver. Sony recommends that you use an HDMI authorized cable or HDMI cable made by Sony. Be sure ... - Page 25 Connecting a TV incompatible with the Audio Return Channel (ARC) function via an HDMI connection It is not necessary to connect all the cables. HDMI connection for audio/video signals is required. Audio/Video Audio signals signals Optical digital cable (not supplied) Recommended connection ...
- Page 26 Connecting a TV compatible with the Audio Return Channel (ARC) function via an HDMI connection With just one HDMI cable connection, you can listen to the TV audio from the speakers connected to the receiver while the receiver sends audio and video signals to the TV. Audio/Video signals ...
- Page 27 Connecting a TV without HDMI jacks It is not necessary to connect all the cables. Connections for video signals are required. Video signals Audio signals Video cable (not supplied) Recommended connection Audio cable (not supplied) Alternative connection Optical digital cable (not supplied)
-
Page 28: Connecting Audio-Visual Devices
Connecting Audio-Visual Devices Connecting devices with HDMI jacks Before connecting cables, be sure to disconnect the AC power cord (mains lead). The HDMI jacks are compatible with HDCP 2.2. To watch content protected by HDCP 2.2, such as 4K content, connect these HDMI jacks to HDCP 2.2-compatible HDMI jacks on the TV and player. Refer to the operating instructions of the connected device for details. - Page 29 Front Audio/Video signals Game console, DVD player, etc. HDMI cable (not supplied) This HDMI connection is an example. You can connect each HDMI device to any HDMI input. The BD/DVD and SA-CD/CD inputs have better sound quality. When you need a higher sound quality, connect your device to these jacks and select them as the input.
- Page 30 Connecting devices with jacks other than HDMI jacks Before connecting cables, be sure to disconnect the AC power cord (mains lead). VCR, DVD recorder, Cable box or satellite box camcorder, video game Audio signals Video signals Audio signals Video signals Audio signals Super Audio CD player, CD player ...
- Page 31 You can rename each input so that the name can be displayed on the display panel of the receiver. For details, refer to “Changing the name for each input (Name)” in Help Guide. Connecting another amplifier in Zone 2 Before connecting cables, be sure to disconnect the AC power cord (mains lead). Main zone Zone 2 Speaker...
- Page 32 Connecting another amplifier or TV in the HDMI zone Before connecting cables, be sure to disconnect the AC power cord (mains lead). Main zone HDMI zone Speaker Speaker Amplifier/ Receiver Audio/Video signals HDMI cable (not supplied) Recommended connection Alternative connection Note To use this connection, set [HDMI Out B Mode] in the [HDMI Settings] menu to [Zone].
-
Page 33: Connecting The Antenna (Aerial)
Connecting the Antenna (aerial) Before connecting the antenna (aerial), be sure to disconnect the AC power cord (mains lead). LAN cable (not supplied) ADSL modem/ Cable modem Internet Broadband router LAN cable (not supplied) Server FM wire antenna (aerial) (supplied) When using wireless LAN Note connection... -
Page 34: Connecting The Ac Power Cord (Mains Lead)
Note Note Audio playback on a server may occasionally be After you turn off the receiver, “STANDBY” flashes on interrupted if you use a wireless connection. the display panel. Do not disconnect the AC power When using Screen mirroring, BLUETOOTH TX or cord (mains lead) while “STANDBY”... -
Page 35: Auto Calibration
Connect the supplied calibration What you can do with Easy Setup microphone to CALIBRATION MIC jack. Set up the calibration microphone at your listening position. By performing Easy Setup, you can complete: 1: Selecting the language 2: Setting the speakers Check your speaker system and perform Auto Calibration according to the configuration and arrangement of your... -
Page 36: Listening/Watching
Selecting the front speakers Listening/Watching Be sure to use the buttons on the receiver to Enjoying Sound and perform this operation. SPEAKERS Video Playing AV devices Turn the TV on, and then switch the input of the TV to the input to which the receiver is Press SPEAKERS repeatedly. - Page 37 Note Enjoying sound from speakers Before you turn off the receiver, be sure to turn located in other rooms (Zone 2/ down the volume level to avoid damaging your speakers. Zone 3) You can turn INPUT SELECTOR on the receiver or Connect the speakers located press the input buttons on the remote control to in Zone 2/Zone 3 (page 20, 21).
-
Page 38: Adjust The Volume
Press HOME, then select [Zone If you want to listen to the same sound as main Controls] – [Zone2] – [Zone2 zone in other zone, select [SOURCE]. Power] – [On]. Start playback on the selected You can also press ZONE SELECT on the input device. - Page 39 To exit zone operation Enjoying video and sound in Set [HDMI Zone Power] to [Off] in step 4. another room using a TV or another amplifier (HDMI zone) Available inputs for each zone Connect another amplifier or Available inputs vary depending on the zone TV in other room (page 32).
-
Page 40: Enjoying Sound Effects
For HDMI zone You can only watch video or listen to audio You can also select a sound field by using [Sound Field] in [Audio Settings] from the [Setup] input from the HDMI IN jacks (except for menu. VIDEO 1). ... - Page 41 Relations between sound fields and speaker outputs The list below shows which speaker outputs sound when a certain sound field is selected. 2-channel contents Surround Front Center Surround Front high back Subwoofer speakers speaker speakers speakers Sound field Display panel speakers ...
- Page 42 Multi-channel contents Surround Front Center Surround Front high back Subwoofer speakers speaker speakers speakers Sound field Display panel speakers 2ch Stereo 2CH STEREO 2CH/ Multi Channel MULTI ST. MULTI Stereo ...
- Page 43 For details, refer to “Enjoying content stored TV manufactured by Sony with the receiver. on a server on the home network” in Help For details, refer to “Registering TV SideView Guide.
-
Page 44: Listening To Audio With Bluetooth Headphones
Press / to select the name of Listening to Audio with the headphones, and then BLUETOOTH Headphones press After “CONNECTING” flashes and the headphone name is displayed, Press RX/TX repeatedly to BLUETOOTH connection is complete. select “BT TX”. The BLUETOOTH mode of the receiver switches to transmitter. -
Page 45: Listening To An Internet Music Service (Google Cast)
Launch SongPal, and download a Google Cast- enabled music app. Launch SongPal, then tap “STR-DN1070” “Settings” “Google Cast” “Learn how to cast”. See the instructions, then find and install a Google Cast-enabled app on your smartphone/iPhone. -
Page 46: Additional Information
It may cause a malfunction. For customers in the USA: You cannot restore the old version after updating the software. http://esupport.sony.com/ Set [Auto Update] to [On] when you want to For customers in Canada: perform software updates automatically. -
Page 47: Troubleshooting
Ethernet when you view images or receiver, check the following to resolve the listen to sound, especially for 1080p, Deep problem before consulting your nearest Sony Color (Deep Colour), 4K or 3D transmission. dealer. Premium High Speed HDMI Cable with ... -
Page 48: Network Connection
The home menu does not appear on the TV setting that does not have surround screen. speakers and playback a DSD multi-channel The home menu can only be used when source. you connect the TV to the HDMI OUT jack. ... -
Page 49: Error Messages
AC power cord If the calibration microphone is connected (mains lead) and turn on the receiver. If the properly but the error code still appears, the problem persists, consult your nearest Sony calibration microphone cable may be dealer. damaged. -
Page 50: Precautions
Warning 40 On placement The measurement process has been Place the receiver in a location with completed and a high noise level has been adequate ventilation to prevent heat detected. You may be able to achieve buildup and prolong the life of the receiver. better results if you try the process again in ... -
Page 51: Specifications
USA, Canada 120 V AC, 60 Hz BLUETOOTH technology. Sony shall not be held liable in any way for Oceania, Europe 230 V AC, 50 Hz damages or other loss resulting from information leaks during communication using BLUETOOTH Reference power output for front, center, technology. - Page 52 Frequency response iPhone/iPad/iPod section Analog BLUETOOTH technology works with iPhone 6s 10 Hz – 100 kHz, +0.5/–2 dB (with sound Plus, iPhone 6s, iPhone 6 Plus, iPhone 6, iPhone field and equalizer bypassed) 5s, iPhone 5c, iPhone 5, iPhone 4s, iPhone 4, and Input iPod touch (5th and 6th generation).
- Page 53 Transmission range (A2DP) 20 Hz – 40,000 Hz (LDAC sampling frequency 96 kHz with 990 kbps transmission) 20 Hz – 20,000 Hz (Sampling frequency 44.1 kHz) The actual range will vary depending on factors such as obstacles between devices, magnetic fields around a microwave oven, static electricity, cordless phone, reception sensitivity, antenna’s performance, operating system, software...
-
Page 54: End User License Agreement
All right and title in and to the SOFTWARE (including, but not limited to, any images, photographs, animation, video, audio, music, text and “applets” incorporated into the SOFTWARE) is owned by SONY or one or more of the THIRD-PARTY SUPPLIERS. - Page 55 YOUR USE OF THE SOFTWARE WILL BE LIMITED. You acknowledge and agree that certain content and services available through the SOFTWARE may be provided by third parties over which SONY has no control. USE OF THE CONTENT SERVICE REQUIRES AN INTERNET CONNECTION. THE CONTENT SERVICE MAY BE DISCONTINUED AT ANY TIME.
- Page 56 TERMINATION Without prejudice to any of its other rights, SONY may terminate this EULA if you fail to comply with any of its terms. In case of such termination, you must cease all use, and destroy any copies, of the SOFTWARE.
- Page 60 4-583-748-13(1) ©2016 Sony Corporation Printed in Malaysia...
Need help?
Do you have a question about the STR-DN1070 and is the answer not in the manual?
Questions and answers