
Related Manuals for True ZTX 825HRC


Summary of Contents for True ZTX 825HRC
- Page 1 Commercial Treadmill Owner’s Manual ZTX 825HRC ZTX 825P ZTX 825 · Heart Rate Control · Programmed · Non-Programmed...
- Page 2 Technology, Inc. and began manufacturing hand-crafted treadmills. His team’s obsession with quality has propelled True to the top of the industry and has created one of America’s oldest, largest and most respected treadmill manufacturers. True’s 200,000 square foot facility, just outside St.
- Page 3 ZTX 825/825P/825HRC Commercial Treadmill Owner’s Manual Save These Instructions Rev. A April, 2002...
- Page 4 Copyright 2002 by True Fitness Technology, Inc. All rights reserved. For more information, contact: True Fitness Technology, Inc. 865 Hoff Road O’Fallon, MO 63366 Phone: (636) 800-426-6570 Fax: (636) 272-5702 www.truefitness.com...
-
Page 5: Safety Instructions
Read First Safety Instructions CAUTION: When using electrical equipment, basic precautions should always be followed. Read and understand all instructions, warnings, and cautions before using treadmill. Lire Premièrement Instructions de Sûreté LA PRUDENCE: en utilisant l’équipement électrique, les précautions fondamentales toujours devraient être suivies. Lit et comprend toutes instructions, avertissements, et prudences avant utilisation treadmill. - Page 6 Safety Instructions CAUTION—to reduce the risk of burns, fire and electric shock and injury to persons: Do’s: • An appliance should never be left unattended when plugged in. Unplug from outlet when not in use and before putting on or taking off parts. •...
- Page 7 Safety Instructions Don’ts: • Do not operate the treadmill with the air opening blocked. Keep air openings free of lint, hair, and the like. • Do not drop or insert any object into any opening. • Do not operate this treadmill with a damaged cord or plug or if it is not working properly.
- Page 8 DANGER ELECTRICAL SHOCK HAZARD Do Not Touch Motor. WARNING: The drive motor is not electrically grounded and should not be touched when power is supplied to the treadmill. A DANGER Label has been affixed to the motor which reads: DANGER The label also shows the symbol for an electrical shock hazard that illustrates the motor should not be touched.
- Page 9 Instructions de Sûreté PRUDENCE—réduire le risque de brûlures, feu et électrique choc et blessure à personnes: Faire: • Un appareil ne devrait jamais être gauche indépendant quand plugged dans. Débrancher de la sortie quand pas dans l’usage et avant de mettre ou enlever partiee. •...
- Page 10 Instructions de Sûreté Ne Pas Faire: • Ne pas opérer le treadmill avec l’air qui ouvre bloqué. Garder l’air ouvre libère de bourre, les cheveux, et l’aimé. • Ne pas tomber ou insérer de l’objet dans l’ouverture. • N’opère pas ce treadmill avec un endommagé corde ou bouchon ou il ne travaille pas convenablement.
- Page 11 LE DANGER DANGER DE CHOC ELECTRIQUE ne Touche pas le Moteur. L ’AVERTISSEMENT: Le moteur d’unité n’est pas mis à terre et ne devrait pas être électriquement touché quand l’alimentation au treadmill. Une Etiquette de DANGER a été placée sur le moteur qui lit: L ’étiquette montre aussi le symbole pour un danger de choc électrique qui ne devrait pas être touché.
-
Page 12: How To Use This Manual
Section D: ZTX 825HRC (Heart Rate Control) Provides a general description of the display windows and keys and detailed operating instructions on how to use the ZTX 825HRC (Heart Rate Control) treadmill. Section E: Maintenance Provides information on maintenance, including maintenance schedules, calibration, error codes, and diagnostics. - Page 13 How to Use This Manual How to Read the Instructions The instructions contain four elements. Sequential Steps in two sections: • Preliminary Instructions These steps cover powering up, placing the SAFETY KEY, and adjusting weight. • Workout Instructions These steps cover setting up a workout, working out, and ending a workout. NOTES Helpful information is found in note boxes.
-
Page 14: Table Of Contents
Upper Control Panel Keyboard Manual Mode Workout Instructions Programmed Workout Mode Quick Reference Operating Instructions Section D: ZTX 825HRC (Heart Rate Control) Upper Control Panel Keyboard Manual Mode Workout Instructions Programmed Workout Mode Heart Rate Control (HRC) Overview Cruise Control Mode Workout Instructions... -
Page 15: Basic Information
Section A Basic Information Table of Contents Basic Information Knowing Your Treadmill General Specifications Setting Up Your Treadmill Receiving and Inspection Physical Requirements Electrical Requirements Treadmill Assembly Pedestal Positioning Handrail Assembly Tread Belt Adjustment Tread Belt Alignment Tread Belt Tension... -
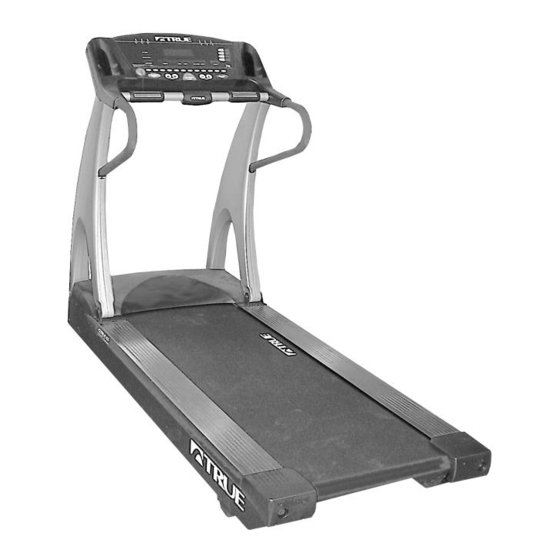
Page 16: Knowing Your Treadmill
Section A Knowing Your Treadmill Quick Reference Upper Control Panel Instructions Bottle/CD Holder Heart Rate Chart SAFETY Keyboard Heart Rate Contacts Lanyard Handlebar Heart Rate Clip Transmitter Handrail Pedestal Motor Cover Straddle Cover Tread Belt Roller Shield Rear Roller Adjustment Bolt... - Page 17 Section A Knowing Your Treadmill CSAFE Power Port Circuit Breaker Pedestal Hinge Screw Pedestal Screws Power Cord Serial Number ON/OFF Front Switch Wheel Incline Rack...
-
Page 18: General Specifications
Section A Knowing Your Treadmill General Specifications Height: 56” Length: 74” Width: 30” Weight: 400 lbs Tread Belt Area: 20” x 63” Electrical Requirements: Either a) Dedicated 120 VAC (108-132 VAC, 50/60 Hz), 20 amp, grounded outlet circuit (The receptacle must be a NEMA 5-20R Receptacle), or b) Dedicated 230 VAC (207-503 VAC, 50/60 HZ), 20 amp, grounded outlet circuit (The receptacle must be a NEMA 6-20 R. -
Page 19: Setting Up Your Treadmill
Section A Setting Up Your Treadmill... -
Page 20: Receiving And Inspection
SAFETY INSTRUCTIONS located in the front of this manual. Use this chapter to set up and familiarize yourself with your new TRUE ZTX treadmill. The first part of the chapter describes how to set up your treadmill. The second part of the chapter describes how to adjust the tread belt and store your treadmill. -
Page 21: Physical Requirements
Have someone stand on the deck and make sure the tread belt does not touch the carpet at any point. Your TRUE treadmill is designed for indoor use only. Your treadmill should not be used in the same area as hot tubs, pools, etc. Such use may void the warranty. Keep the control panel out of direct sunlight as it may damage the materials from which the panel is made and may result in malfunction of the unit. -
Page 22: Electrical Requirements
Units produced for use outside of the U.S.A. will have voltage listed on the identification tag. Treadmill Assembly To assemble your True ZTX treadmill it is necessary to lift the pedestal into position and assemble the handrails. NOTE: When assembling the treadmill, it is not necessary to re- move the motor cover. -
Page 23: Pedestal Positioning
Section A Setting Up Your Treadmill Treadmill Assembly (Continued) Pedestal Positioning 1. Place the treadmill on location. Make sure that the location you have chosen meets the physical and electrical requirements listed earlier. 2. Remove screws (2) and Lower Pedestal Spacer from the Pedestal. -
Page 24: Handrail Assembly
Section A Setting Up Your Treadmill Treadmill Assembly Pedestal Positioning (Continued) 5. Insert 2 screws (3/8”-16 X 4”) and lock washers on each side of the Pedestal. Tighten all 4 screws with the Allen Wrench provided. Use the 2 screws removed from the Lower Pedestal Spacer and the 2 screws and 4 washers from the hardware package. - Page 25 Section A Setting Up Your Treadmill Treadmill Assembly (Continued) 9. Insert 4 screws and star lock washers (1/4”-20 X 5/8”) through the holes in the top of the handrails and 2 self-drilling screws into the holes in the bottom of the handrails. Tighten all 6 screws.
-
Page 26: Tread Belt Adjustment
Section A Tread Belt Adjustment Caution: When making tread belt adjustments, keep fingers, loose clothing, jewelry, and long hair well out of the way of moving parts. La Prudence: En faisant chape de, garde doigts, détaché , bijouterie, et long bien de déménagement parties. -
Page 27: Tread Belt Alignment
Section A Tread Belt Adjustment Tread Belt Alignment (If Tread Belt is Not Centered) Your treadmill’s tread belt has been properly aligned at the factory. It is important that the treadmill be level from side to side. When the treadmill is used on an uneven surface, it may require further adjustment. -
Page 28: Tread Belt Tension
Section A Tread Belt Adjustment Tread Belt Tension (If Tread Belt is Slipping) Your treadmill’s tread belt has been properly tensioned at the factory. To assure maximum life of the tread belt, roller, and drive motor, make sure the tread belt tension is set correctly. -
Page 29: Ztx 825 (Non-Programmed)
Section B ZTX 825 (Non-Programmed) Operating Instructions Table of Contents ZTX 825 (Non-Programmed) Upper Control Panel Windows Indicators Keyboard Manual Mode Preliminary Instructions SAFETY KEY Instructions Adjusting Weight Instructions Workout Instructions Ending Workout Instructions Quick Reference Instructions... -
Page 30: Upper Control Panel
Section B ZTX 825 Upper Control Panel... -
Page 31: Windows
Section B ZTX 825 Upper Control Panel Windows HEART RATE Window The HEART RATE Window displays your heart rate when you hold the two heart rate contacts or are wearing the heart rate transmitter strap (sold separately). Primary Display Window The Primary Display Window: Displays the time, pace, grade, calories, and distance. -
Page 32: Keyboard
Section B ZTX 825 Keyboard... - Page 33 Section B ZTX 825 Keyboard SAFETY KEY and Lanyard Clip You can help to protect yourself from injuries resulting from unexpected loss of balance by attaching the SAFETY KEY to the Keyboard and the lanyard clip to your clothing about waist height.
-
Page 34: Manual Mode Workout Instructions
Section B Manual Mode You start the workout without setting any parameters and the treadmill will automatically begin your workout at .5 MPH and 0% grade. You then can manually change both the speed and grade at any time during the workout. You may also monitor your heart rate with the heart rate contacts or the heart rate chest strap (sold separately). -
Page 35: Adjusting Weight Instructions
Section B Manual Mode Safety Key Instructions (Continued) 6. Connect the lanyard clip to the waistband of your clothing. CAUTION: Do not operate the treadmill without the SAFETY KEY attached to the Keyboard and the lanyard clip clipped to your clothing about waist height. -
Page 36: Ending Workout Instructions
Section B Manual Mode Workout Instructions (Continued) Helpful Operation • To reset distance, time, or calories during the workout, press and hold until a 0 appears in the Primary Display Window. Ending Workout Instructions 5. Press to reduce speed to 2 MPH. 6. -
Page 37: Quick Reference Operating Instructions
Section B Quick Reference Instructions The following is a quick overview of the basic operating instructions for your TRUE ZTX 825 treadmill. While detailed operating instructions are provided in the specific sections for each model, these quick reference instructions can be used to remind yourself of the basic operating procedures. - Page 38 Section B...
-
Page 39: Ztx 825P (Programmed)
Section C ZTX 825P (Programmed) Operating Instructions Table of Contents ZTX 825P (Programmed) Upper Control Panel Windows Indicators Express Keys Keyboard Manual Mode Preliminary Instructions SAFETY KEY Instructions Adjusting Weight Instructions Workout Instructions Ending Workout Instructions Programmed Workout Mode Program Profiles Programmed Workout Mode Preliminary Instructions SAFETY KEY Instructions... -
Page 40: Upper Control Panel
Section C ZTX 825P Upper Control Panel... -
Page 41: Windows
Section C ZTX 825P Upper Control Panel Windows: HEART RATE Window The HEART RATE Window displays your heart rate when you hold the two heart rate contacts or are wearing the heart rate transmitter strap (sold separately). DISTANCE Window The DISTANCE Window displays the miles traveled in .01 mile increments up to 9.99 miles and .1 mile increments past 10 miles. -
Page 42: Keyboard
Section C ZTX 825P Keyboard Express Keys (Continued) WEIGHT LOSS Express Key The WEIGHT LOSS Express Key allows you to quickly and easily access the WEIGHT LOSS program. HILL INTERVAL Express Key The HILL INTERVAL Express Key allows you to quickly and easily access the HILL INTERVAL program. - Page 43 Section C ZTX 825P Keyboard (Continued) SPEED Keys The SPEED Keys are used to adjust the speed in .1 MPH increments. During setup they can be used to change weight, to choose workout parameters, and to set time to count down. SELECT/ ENTER The SELECT/...
-
Page 44: Keyboard
Section C ZTX 825P Upper Control Panel... -
Page 45: Manual Mode
Section C Manual Mode In the manual mode you can set the duration or distance of the workout to count down. You may also start the workout without setting any parameters and the treadmill will automatically begin your workout at .5 MPH and 0% grade. You can then manually change both the speed and grade at any time during the workout. -
Page 46: Safety Key Instructions
Section C Preliminary Instructions SAFETY KEY Instructions: 5. Place SAFETY KEY onto the Keyboard. 6. Connect the lanyard clip to the waistband of your clothing. CAUTION: Do not operate treadmill without SAFETY KEY attached to the Keyboard and the lanyard clip clipped to your clothing about waist height. -
Page 47: Manual Mode Workout Instructions
Section C Manual Mode Preliminary Instructions Helpful Operations • To set the countdown feature that causes the time or distance to count down rather than starting at “0” and counting up: Press The following messages will repeat themselves in the Message Center one at a time: ADJUST TIME + PRESS START... -
Page 48: Workout Instructions
Section C Manual Mode (Continued) Workout Instructions 1. Press to start the belt in motion. The Upper Control Panel gives an audible signal three times. 2. Hold the handlebar, carefully step onto the tread belt, and begin walking. Adjust the speed or grade: to input the numeric value. -
Page 49: Ending Workout Instructions
Section C Manual Mode Workout Instructions (Continued) Helpful Operations • You can also use to change the speed and change the grade instead of using the and the • To reset distance, time, or calories during the workout, press and hold until 0’s appear in the TIME/PACE, DISTANCE, and CALORIES/METS windows. -
Page 50: Programmed Workout Mode
Section C Programmed Workout Mode There are four programmed workouts: • Hill Interval • Weight Loss Workout • Cardiovascular Workout • Speed Interval Workout Each program has nine levels of intensity. The treadmill controls both the speed and grade. See the Program Profiles on the next page. These workouts are not heart rate controlled, but you can monitor your heart rate with the heart rate contacts or the heart rate transmitter strap (sold separately). -
Page 51: Program Profiles
Section C Program Profiles Hill Interval Workout Grade Speed (MPH) Level Min Max Min Max Solid Line is The Grade Screened Area Is The Speed 10.0 11.0 12.0 Weight Loss Workout Speed Grade (MPH) Level Min Max Min Max Solid Line is The Grade Screened Area Is The Speed 10.0 Cardiovascular Workout... -
Page 52: Programmed Workout Mode
Section C Programmed Workout Mode Preliminary Instructions 1. Inspect the treadmill before using it. CAUTION: Keep area under the treadmill free from obstructions because the deck returns to 0% grade when the SAFETY KEY is placed. Failure to do so could cause personal injury or damage to the machine. -
Page 53: Safety Key Instructions
Section C Programmed Workout Mode Preliminary Instructions SAFETY KEY Instructions 5. Place SAFETY KEY onto the Keyboard. 6. Connect lanyard clip to the waistband of your clothing. CAUTION: Do not operate treadmill without SAFETY KEY attached to the Keyboard and the lanyard clip clipped to your clothing about waist height. -
Page 54: Adjusting Weight Instructions
Section C Programmed Workout Mode Adjusting Weight Instructions You can set your weight to obtain a more accurate Calories/METs readout. 7. Use enter new weight. 8. Press The following messages will repeat themselves in the Message Center one at a time: MANUAL EDIT-SELECT NEXT UP/DOWN... -
Page 55: Enter Time
Section C Programmed Workout Mode Workout Instructions (Continued) Enter Time. 4. Use enter time. NOTE: If you accidently pressed , the program profile will display in the Dot Matrix Window. Press begin workout. 5. Press to start the tread belt in motion. The following messages will display themselves in the Message Center one at a time: STARTING 3... -
Page 56: Ending Workout Instructions
Section C Programmed Workout Mode Helpful Operations: • To reset time, distance, or calories during the workout, press and hold until 0’s appear in the DISTANCE and CALORIES/METS Windows and time restarts. • To adjust the speed or grade: to input the numeric value. The following message will display in the Message Center: DATA= (XXX) NOTE:... -
Page 57: Quick Reference Operating Instructions
Section C Quick Reference Instructions The following is a quick overview of the basic operating instructions for your TRUE ZTX 825P treadmill. While detailed operating instructions are provided in the specific sections for each model, these quick reference instructions can be used to remind yourself of the basic operating procedures. - Page 58 Section C...
-
Page 59: Ztx 825Hrc (Heart Rate Control)
Section D ZTX 825HRC (Heart Rate Control) Operating Instructions Table of Contents ZTX 825HRC (Heart Rate Control) Upper Control Panel Windows/Indicators Express Keys Keyboard Manual Mode Preliminary Instructions SAFETY KEY Instructions Adjusting Weight Instructions Workout Instructions Ending Workout Instructions Programmed Workout Mode... -
Page 60: Upper Control Panel
Section D ZTX 825HRC Upper Control Panel... -
Page 61: Windows/Indicators
Section D ZTX 825HRC Upper Control Panel Windows/Indicators HEART RATE Window The HEART RATE Window displays your heart rate when you hold the two heart rate contacts or are wearing the heart rate transmitter strap (sold separately). DISTANCE Window The DISTANCE Window displays the miles traveled in .01 mile increments up to 9.99 miles and .1 mile increments past 10 miles. -
Page 62: Keyboard
Section D ZTX 825HRC Keyboard Express Keys (CONTINUED) WEIGHT LOSS Express Key The WEIGHT LOSS Express Key allows you to quickly and easily access the WEIGHT LOSS program. HILL INTERVAL Express Key The HILL INTERVAL Express Key allows you to quickly and easily access the HILL INTERVAL program. - Page 63 Section D ZTX 825HRC Keyboard (Continued) SPEED Keys The SPEED Keys are used to adjust the speed in .1 MPH increments. They can be used to change weight, to choose workout parameters, and to set time to countdown. SELECT/ ENTER The SELECT/ Key is used to enter your weight during setup.
-
Page 64: Keyboard
Section D ZTX 825HRC Keyboard... -
Page 65: Manual Mode Workout Instructions
Section D Manual Mode The manual mode allows you to set the duration of the workout or distance before you start the workout. If you start the workout without setting any parameters, the treadmill will automatically begin your workout at .5 MPH and 0% grade. You can then manually change both the speed and grade at any time during the workout. -
Page 66: Safety Key Instructions
Section D Manual Mode SAFETY KEY Instructions 5. Place SAFETY KEY onto the Keyboard. 6. Connect lanyard clip to the waistband of your clothing. CAUTION: Do not operate treadmill without SAFETY KEY attached to the Keyboard and the lanyard clip clipped to your clothing about waist height. -
Page 67: Workout Instructions
Section D Manual Mode Helpful Operation (Continued) 1. Press three times. The DISTANCE and TIME/PACE Windows will blink and the following messages will repeat themselves in the Message Center one at a time: ADJUST TIME + ADJUST DISTANCE PRESS START 2. -
Page 68: Ending Workout Instructions
Section D Manual Mode Workout Instructions (Continued) NOTE: When you enter the grade (2=0.2, 20=2.0) the treadmill will round the numbers down to nearest 0.5 increment. Ex: If you input 3.9, the treadmill will change incline to 3.5. b. Choose speed or grade. •... -
Page 69: Programmed Workout Mode
Section D Programmed Workout Mode There are four programmed workouts: • Hill Interval Workout • Weight Loss Workout • Cardiovascular Workout • Speed Interval Workout Each program has nine levels of intensity. The treadmill controls both the speed and grade. See the Program Profiles on the next page. These workouts are not heart rate controlled, but you can monitor your heart rate with the heart rate contacts or the heart rate transmitter strap (sold separately). -
Page 70: Program Profiles
Section D Programmed Workout Mode Program Profiles Grade Speed Hill Interval Workout (MPH) Level Min Max Min Max Solid Line is The Grade 10.0 Screened Area Is The Speed 11.0 12.0 Grade Speed Weight Loss Workout (MPH) Level Min Max Min Max Solid Line is The Grade Screened Area Is The Speed 10.0... -
Page 71: Preliminary Instructions
Section D Programmed Workout Mode Preliminary Instructions 1. Inspect the treadmill before using it. CAUTION: Keep area under the treadmill free from obstructions because the deck returns to 0% grade when the SAFETY KEY is placed on the Keyboard. Failure to do so could cause personal injury or damage to the machine. -
Page 72: Adjusting Weight Instructions
Section D Programmed Workout Mode Safety Key Instructions (Continued) 6. Connect lanyard clip to the waistband of your clothing. CAUTION: Do not operate treadmill without SAFETY KEY attached to the Keyboard and the lanyard clip clipped to your clothing about waist height. La Prudence: N’opère pas le treadmill sans la sûreté... -
Page 73: Workout Instructions
Section D Programmed Workout Mode Workout Instructions Choose a Program. 1. Press , or , or , or to access a program. Set Program Level. 2. Use to enter the program level. The following messages will repeat themselves in the Message Center one at a time: ADJUST LEVEL + NEXT UP/DOWN... - Page 74 Section D Programmed Workout Mode Workout Instructions (Continued) 5. Press to start the tread belt in motion. The following messages will repeat themselves in the Message Center one at a time: STARTING 3 STARTING 2 STARTING 1 The time will begin to count down in the TIME/PACE Window. Start Workout.
-
Page 75: Ending Workout Instructions
Section D Programmed Workout Mode Helpful Operations (Continued) • To adjust the speed or grade: to input the numeric value. The following message will display in the Message Center: DATA= (XXX) NOTE: When you enter the grade (2=0.2, 20=2.0) the treadmill will round the numbers down to nearest 0.5 increment. -
Page 76: Heart Rate Control (Hrc) Overview
The TRUE HRC system is unique because you can enter the key parameters of your workout: target heart rate, maximum speed, maximum grade, and time prior to beginning your HRC workout. -
Page 77: Cruise Control Mode Workout Instructions
Section D Cruise Control Cruise Control is similar to the manual workout. The difference is that when you are using heart rate transmitter strap (sold separately) and you press , the treadmill will adjust the speed and grade in order to maintain the heart rate at that level for the rest of your workout. -
Page 78: Preliminary Instructions
Section D Cruise Control Preliminary Instructions 1. Attach the heart rate transmitter strap (sold separately) around your chest. Attach the transmitter to the elastic strap. Adjust the strap length to fit snugly and comfortably. Secure the strap around your chest. It should be worn directly against your skin, 1-2 inches below the pectoral muscles/breast line. -
Page 79: Safety Key Instructions
Section D Cruise Control Preliminary Instructions 3. Plug in the machine to a dedicated, 3-prong, grounded, 120/230 VAC, 20 amp outlet. 4. Turn power on with the ON/OFF switch. 5. Step onto treadmill and straddle the tread belt by placing one foot on each of the Straddle Covers. -
Page 80: Adjusting Weight Instructions
Section D Cruise Control Adjusting Weight Instructions You can set your weight to obtain a more accurate CALORIES/METS readout. 8. Use to enter your weight. 9. Press The following messages will repeat themselves in the Message Center one at a time: MANUAL EDIT-SELECT NEXT UP/DOWN... -
Page 81: Ending Workout Instructions
Section D Cruise Control Workout Instructions (Continued) Choose speed or grade. • Press either to choose speed. • Press either to choose grade. The SPEED or GRADE Window will display the new value and the treadmill will change speed or grade to that value. 4. -
Page 82: Target Heart Rate Control Mode Workout Instructions
Section D Target Heart Rate Control (Target HRC) This workout is available when you press the . Before you begin this workout, you set your target heart rate, maximum speed, duration, and maximum grade for the workout. The treadmill will adjust the speed and grade in order to keep you at your selected target heart rate when in the Heart Rate Control Stage. -
Page 83: Safety Key Instructions
Section D Target Heart Rate Control (Target HRC) Preliminary Instructions (Continued) 2. Inspect the treadmill before using it. CAUTION: Keep area under the treadmill free from obstructions because the deck returns to 0% grade when the SAFETY KEY is inserted. Failure to do so could cause personal injury or damage to the machine. -
Page 84: Adjusting Weight Instructions
Section D Target HRC SAFETY KEY Instructions (Continued) 7. Connect lanyard clip to the waistband of your clothing. CAUTION: Do not operate treadmill without SAFETY KEY attached to the Keyboard and the lanyard clip clipped to your clothing about waist height. La Prudence: N’opère pas le treadmill sans la sûreté... -
Page 85: Workout Instructions
Section D Target HRC Workout Instructions: Choose Program. 1. Press The following messages will repeat themselves in the Message Center one at a time: EDIT-SELECT NEXT UP/DOWN PRESS START NOTE: Verify your target heart rate using the target heart rate chart each time you use the HRC workout. - Page 86 Section D Target HRC Workout Instructions Set Speed. 5. Use enter your maximum speed. 6. Press The following messages will repeat themselves in the Message Center one at a time: ADJUST TIME + NEXT-SELECT PRESS START Set Time. 7. Use enter the length of your workout (time in Heart Rate Control Stage).
- Page 87 Section D Target HRC Workout Instructions Set Grade (Continued). The following messages will display in the Message Center one at a time: STARTING 3 STARTING 2 STARTING 1 ADJUST SPEED + ADJUST GRADE WARMUP TARGETXXX 11. Carefully step onto the tread belt and begin walking. The heart will blink in the HEART RATE Window and your heart rate will be displayed in the Message Center.
- Page 88 Section D Target HRC Increase speed and grade. (Continued) NOTE: When you enter the grade (2=0.2, 20=2.0) the treadmill will round the numbers down to nearest 0.5 increment. Ex: If you input 3.9, the treadmill will change incline to 3.5. NOTE: Remember, warm up slowly! Continue increasing speed and/ or grade to gradually increase your heart rate.
- Page 89 Section D Target HRC Heart Rate Control Stage Instructions The Warm Up Stage ends when your heart rate is 10 beats from the Target Heart Rate. In the Heart Rate Control Stage the treadmill software gradually increases your heart rate to the target.
- Page 90 Section D Target HRC Heart Rate Control Stage Instructions (Continued) NOTE: To edit your selected target heart rate during Heart Rate Control Stage: 1. Press The following messages will repeat themselves in the Message Center one at a time: TARGET XXX ADJUST TARGET + 2.
- Page 91 Section D Target HRC Cool Down Stage 13. Continue to workout in manual mode while cooling down. 14. Use to enter 20 (20=2.0) and press to adjust the speed down to 2 MPH. 15. Press when you are finished. NOTE: Workout totals of average heart rate, distance, calories and time will appear in the Message Center at the end of your workout when you press...
-
Page 92: Interval Heart Rate Control Mode Workout Instructions
Section D Interval Heart Rate Control (Interval HRC) Interval Heart Rate Control (HRC) Interval Heart Rate Control takes your workout to an even higher level than the Target HRC workout. With this workout, you set periods of rest between periods of work. You enter your target heart rate, maximum speed, duration of workout, duration of work intervals, duration of rest intervals, and maximum grade. - Page 93 Section D Interval HRC Preliminary Instructions (Continued) 2. Inspect the treadmill before using it. CAUTION: Keep area under the treadmill free from obstructions because the deck returns to 0% grade when the SAFETY KEY is placed on the Keyboard. Failure to do so could cause personal injury or damage to the machine.
-
Page 94: Safety Key Instructions
Section D Interval HRC SAFETY KEY Instructions 6. Place SAFETY KEY onto the Keyboard. 7. Connect lanyard clip to the waistband of your clothing. CAUTION: Do not operate treadmill without SAFETY KEY attached to the Keyboard and the lanyard clip clipped to your clothing about waist height. -
Page 95: Workout Instructions
Section D Interval HRC Workout Instructions Choose Program. 1. Press INTERVAL The following messages will repeat themselves in the Message Center one at a time: INT HRC EDIT-SELECT NEXT UP/DOWN PRESS START NOTE: Verify your target heart rate using the target heart rate chart each time you use the HRC workout. - Page 96 Section D Interval HRC Workout Instructions Set Speed. 6. Use enter your maximum speed. 7. Press The following messages will repeat themselves in the Message Center one at a time: ADJUST TIME + NEXT-SELECT PRESS START Set Time. 8. Use enter the length of your workout (time in Heart Rate Control Stage).
- Page 97 Section D Interval HRC Workout Instructions (Continued) Set Rest Interval Time. 12. Use enter your rest interval time. You can vary the rest interval time from 30 seconds to nine minutes in five second segments. 13. Press The following messages will repeat themselves in the Message Center one at a time: ADJ MAX GRD + NEXT-SELECT...
- Page 98 Section D Interval HRC Warm-up Stage The initial stage of the Interval Heart Rate Control workout is the Warm-up Stage. The treadmill operates in the manual mode during the Warm-up Stage, so you can control both speed and grade. It is important that you start at a low level of exertion and gradually increase your workload over several minutes until you approach your target heart rate.
- Page 99 Section D Interval HRC Heart Rate Control Stage When your heart rate is within 10 beats of the target heart rate, the computer software takes over the speed and grade allowing hands free operation. Hands free means that you do not have to make adjustments on the Keyboard. By taking control before you actually reach your target heart rate, the computer reduces the chances of overshooting your target heart rate.
- Page 100 Section D Interval HRC Heart Rate Control Stage (Continued) The treadmill will gradually continue to increase your work load until your heart rate reaches your selected target. When your heart rate is at the selected target, the Message Center will read: AT TARGET It will then change to: WORK INT XX:XX...
- Page 101 Section D Interval HRC Heart Rate Control Stage (Continued) NOTE: To end your workout, any time during your workout, press The Heart Rate Control Stage will end when the pre-set time has elapsed. Cool Down Stage The computer will give an audible signal when you enter the Cool Down Stage. It will also display your accumulated average heart rate, distance, calories, and time.
-
Page 102: Quick Reference Operating Instructions
Section D Quick Reference Instructions The following is a quick overview of the basic operating instructions for your TRUE ZTX 825HRC treadmill. While detailed operating instructions are provided in the specific sections for each model, these quick reference instructions can be used to remind yourself of the basic operating procedures. - Page 103 Section D Quick Reference Instructions CAUTION: Read and understand all instructions, warnings, and cautions before using treadmill. La Prudence: Lit et comprend toutes instructions, avertissements, et prudences avant utilisation treadmill. Programmed Workout: 1. Stand on Straddle Covers. 2. Place SAFETY KEY onto the Keyboard and attach clip to clothing about waist height.
- Page 104 Section D Quick Reference Instructions CAUTION: Read and understand all instructions, warnings, and cautions before using treadmill. La Prudence: Lit et comprend toutes instructions, avertissements, et prudences avant utilisation treadmill. Target Heart Rate Workout: 1. Attach the Heart Rate Transmitter Strap around your chest. 2.
- Page 105 Section D Quick Reference Instructions CAUTION: Read and understand all instructions, warnings, and cautions before using treadmill. La Prudence: Lit et comprend toutes instructions, avertissements, et prudences avant utilisation treadmill. Interval Heart Rate Workout: 1. Attach the Heart Rate Transmitter Strap around your chest. 2.
- Page 106 Section D...
-
Page 107: Maintenance
Section E Maintenance Table of Contents Maintenance Maintenance Schedules Daily Care and Service Weekly Care and Service Monthly Care and Service Quarterly Care and Service Calibration Error and Service Codes Diagnostics CAUTION: Servicing is to be done with appliance disconnected from the supply circuit. -
Page 108: Maintenance Schedules
Daily Care and Service To extend the life and appearance of your TRUE ZTX treadmill we recommend that you perform the following steps daily: Wipe clean your TRUE ZTX Treadmill to remove perspiration. We also recommend that you encourage your employees and clients to wipe perspiration from the unit after each use. -
Page 109: Monthly Care And Service
Monthly Care and Service To extend the life and appearance of your TRUE ZTX treadmill, we recommend that you monthly: Clean the treadmill of dust and dirt that might accumulate under and behind the treadmill. - Page 110 Section E Maintenance Schedules Daily, Weekly, Monthly Maintenance Photocopy and Keep Schedule This Original for Repeated Month ______________ Year ______________ Initial As Completed Daily Weekly Monthly Wipe w/ Damp Visual Channel Date Cloth Unplug Inspection Vacuum Inspection...
-
Page 111: Quarterly Care And Service
Expert service and maintenance at a modest cost are available through your factory trained authorized TRUE dealer. He maintains a stock of repair parts and has the technical knowledge to meet your service needs. -
Page 112: Calibration
à la machine. NOTE: Messages appear in the Message Center on the ZTX 825P and the ZTX 825HRC. The messages display differently on the ZTX 825 and appear in the Primary Display Window. They are shown below in parentheses. -
Page 113: Error And Service Codes
Section E Calibration Incline and Speed Calibration (Continued) 4. Remove and replace Safety Key to exit Calibration Mode Error And Service Codes The following Error Codes and Service Codes will follow a double “beep” and show on the display. Service Codes provide preventive maintenance reminders. A Service Code will repeat for the next five times you start the treadmill. -
Page 114: Diagnostics
Section E Diagnostics Your True ZTX treadmill is equipped with built in diagnostic capabilities to assist in configuring, maintaining and servicing your treadmill. The Field Diagnostic mode provides total hours, distance, average speed, ability to change the units of measure, ability to set the “user not present”... - Page 115 Section E Diagnostics 8. Press to display program time. The following messages will display: MAX TIME No. of minutes allowed in programmed workouts 9. Press repeatedly to display the error log. The Error Log lists the five most recent Error Codes and the distance at which each Error Code occurred.
- Page 116 MADE IN THE USA © 2002 TRUE FITNESS TECHNOLOGY, INC. TRUE and TRUE Treadmills are registered trademarks of TRUE FITNESS. Specifications subject to change. U.S. and foreign patents pending. International specifications available on request. ETL Listed. www.truefitness.com PART NO. 00317000 REV.
Need help?
Do you have a question about the ZTX 825HRC and is the answer not in the manual?
Questions and answers