
Subscribe to Our Youtube Channel
Related Manuals for True PERFORMANCE 800


Summary of Contents for True PERFORMANCE 800
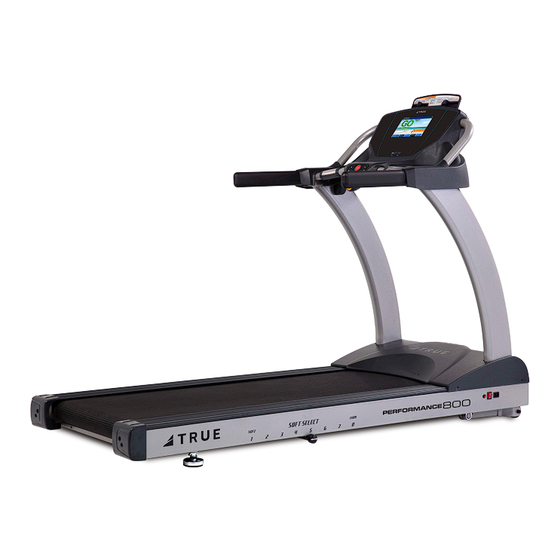
- Page 1 PERFORMANCE 800 TREADMILL OWNER'S MANUAL Model TPS800-19 Version 122618 * Assembly Guide & Warranty Card Included...
- Page 2 PS800 TREADMILL OWNER’S MANUAL IMPORTANT: All Products shown are prototype. Actual product delivered may vary. Product specifications, features & software are subject to change without notice. For the most up to date owner’s manual please visit www.truefitness.com. For documents in additional languages please visit www.truefitness.com/resources/document-library/ IMPORTANTE: Todos los productos mostrados son prototipos.
- Page 3 The proud manufacturing tradition of quality and the culture of innovation at TRUE have given rise to a full line of extraordinary cardio and strength equipment. As a result, people all over the world are benefiting from the TRUE experience.
-
Page 4: Table Of Contents
PS800 TREADMILL OWNER’S MANUAL TABLE OF CONTENTS: Chapter 1: Safety Instructions Chapter 5: Care & Maintenance Safety Instructions Care & Maintenance Space Requirements Cleaning the Equipment Use of Safety Key Running Belt Alignment Grounding Instructions Tensioning the Running Belt Power Requirements Treadmill Lubrication Warning Decals Leveling the Treadmill... -
Page 5: Safety Instructions
45, smokes, has high cholesterol, is obese or has not exercised regularly in the past year. Additionally, TRUE recommends consulting a fitness professional on the correct use of this product. - Page 6 To disconnect, turn power OFF at the ON/OFF switch if applicable, then remove plug from electrical outlet. • Never operate a TRUE product if it has a damaged power cord or electrical plug, or if it has been dropped, damaged, or even partially immersed in water. Contact TRUE Customer Service for a replacement.
- Page 7 CHAPTER 1: SAFETY INSTRUCTIONS CAUTION (CONTINUED) • Wear shoes with rubber or high traction soles. Do not use shoes with heels, leather soles, cleats or spikes. Make sure no stones are embedded in the soles. Do not use this product in bare feet. Keep all loose clothing, shoelaces and towels away from moving parts.
-
Page 8: Space Requirements
CHAPTER 1: SAFETY INSTRUCTIONS SPACE REQUIREMENTS: TRUE’s recommendation is to leave a minimum of 20” (0.5m) on each side of the treadmill and a 79” (2 m) safety zone at the rear of the treadmill. (See Fig 1) Fig. 1 USE OF SAFETY KEY (E-STOP): •... -
Page 9: Grounding Instructions
CHAPTER 1: SAFETY INSTRUCTIONS GROUNDING INSTRUCTIONS: This product must be grounded, if it should malfunction or breakdown, grounding provides a path of least resistance for electric current to reduce the risk of electric shock. This product is equipped with a cord having an equipment-ground- ing conductor and a grounding plug. -
Page 10: Power Requirements
CHAPTER 1: SAFETY INSTRUCTIONS Truefitness.com / 800.426.6570 / 636.272.7100... -
Page 11: Warning Decals
WARNING DECALS: WARNING: Replace warning labels that may be worn, damaged or missing. To replace any worn or missing warning decals contact TRUE FITNESS by visiting www.truefitness.com or contact cus- tomer service at 800-883-8783. COMPLIANCES: This equipment complies with all applicable codes and regulations. For a complete list of compliances, please visit www.truefitness.com... -
Page 12: Chapter 2: Assembly Guide
Important Electrical Requirements – 120V: Your TRUE treadmill requires a dedicated 120 volt, alternating current (AC), 20 amp grounded outlet circuit. This means nothing else can be plugged into the same circuit. Most power circuits are rated for this 120V AC 20 amp requirement, but you must ensure the treadmill does not share the circuit with anything else. -
Page 13: Pre-Assembly Checklist
CHAPTER 2: ASSEMBLY GUIDE PRE-ASSEMBLY CHECKLIST: Item Description QTY: Console Assembly Base Pedestal Upright (L) Pedestal Upright (R) Tablet Holder Bolt Cover Cable Cover Hardware Pack Truefitness.com / 800.426.6570 / 636.272.7100... -
Page 14: Assembly Steps
CHAPTER 2: ASSEMBLY GUIDE TREADMILL ASSEMBLY STEPS: STEP 1 Remove Motor Cover: a) Remove the 9 screws securing the mo- tor cover to the treadmill frame. b) Remove the motor cover and set to the side. STEP 2 Install Pedestal Uprights: a) Slide the left and right pedestal uprights into place. - Page 15 CHAPTER 2: ASSEMBLY GUIDE TREADMILL ASSEMBLY STEPS (CONTINUED) STEP 3 Lower Data Cable: a) Connect the data cable coming from the bottom of the left pedestal upright to the lower control board as shown. STEP 4 Console Assembly: a) Place the console assembly on the ped- estal uprights and secure with 4 bolts.
- Page 16 CHAPTER 2: ASSEMBLY GUIDE TREADMILL ASSEMBLY STEPS (CONTINUED) STEP 5 Data Cable & Cable Cover: a) Connect the lower control wire coming out of left upright with the upper control wire attached in the console. b) Install the wire cover with 2 bolts to the upper console cover.
- Page 17 CHAPTER 2: ASSEMBLY GUIDE TREADMILL ASSEMBLY STEPS (CONTINUED) STEP 7 Re-Install Motor Cover: a) Re-install the motor cover as shown. STEP 8 Tablet Holder: a) Slide the tablet holder into the slots on the back of the console assembly. b) Secure the tablet holder with two screws.
- Page 18 CHAPTER 2: ASSEMBLY GUIDE TREADMILL ASSEMBLY STEPS (CONTINUED) STEP 9 Rear Foot Leveling: a) Ensure treadmill incline rack wheels and rear feet are resting on the floor and not on cardboard, packaging, etc. b) Using the pliers to loosen the wing-nut (A) counter-clockwise.
-
Page 19: Chapter 3: Product Overview
CHAPTER 3: PRODUCT OVERVIEW TREADMILL OVERVIEW: Console Assembly Safety (E-Stop) Key Contact Heart Rate Pads Belt Straddle Covers Belt Adjustment Bolts On/Off Switch Circuit Breaker Adjustable Soft Select Power Cord Leveling Feet Truefitness.com / 800.426.6570 / 636.272.7100... - Page 20 CHAPTER 3: PRODUCT OVERVIEW TREADMILL OVERVIEW (CONTINUED): Console Assembly: The console allows the user to set up a workout program and control the treadmill during a workout *For console overview and operation instructions refer to chapter 4. Contact Heart Rate Pads: Allows the user to check their heart rate without wearing a wireless chest strap.
-
Page 21: Chapter 4: Programming & Operation
CHAPTER 4: PROGRAMMING & OPERATION CAUTION: The safety key must be in place on the treadmill console, and should be attached to the user’s clothing. The treadmill will not operate if the safety key is not attached to the console. HEART RATE MONITORING: This treadmill can monitor a user’s heart rate using a Polar®... -
Page 22: Heart Rate Control
Introduction: You are now the owner of the most sophisticated Heart Rate Control treadmill available. TRUE HRC is unique and patent- ed. It accommodates users from rehabilitation to world class athletes, and all those in between. TRUE HRC allows users to do a completely hands free heart rate controlled workout using speed, incline or both. -
Page 23: Program Descriptions
CHAPTER 4: PROGRAMMING & OPERATION PROGRAM DESCRIPTIONS: Quick Start: A workout in which the user controls all settings. The workout continues until it is ended by the user. Manual: Users enter their weight, workout time or distance. The user controls both the SPEED and INCLINE of the treadmill throughout the workout. - Page 24 CHAPTER 4: PROGRAMMING & OPERATION PROGRAM DESCRIPTIONS (CONTINUED) Cardio Challenge: Speed and incline increase to a maximum at the mid-point of the workout, then decrease to the finish. Incline and speed changes affect the current segment only. Target HRC: Users choose their target heart rate. The treadmill begins in MANUAL control – The user should gradually increase the workout intensity until heart rate is within 10 bpm of their target.
-
Page 25: Console Overview
CHAPTER 4: PROGRAMMING & OPERATION CONSOLE OVERVIEW: USB Port Headphone Jack Tablet Holder Warning Label Touchscreen Safety Key Contact Heart Stop Key Contact Heart Quick Touch Quick Touch Rate Pad Rate Pad Speed Keys Incline Keys Truefitness.com / 800.426.6570 / 636.272.7100... - Page 26 CHAPTER 4: PROGRAMMING & OPERATION CONSOLE OVERVIEW (CONTINUED) Touchscreen: Used to monitor and/or control workouts and for feature navigation. Quick Touch Incline Keys: Manually increases or decreases the incline of the treadmill. USB Port: Allows users to export workout data to an external USB drive, charge a mobile device, or update the console software. Numeric Keypad: A small panel of keys on the console that allow the user to quickly enter numeric data.
-
Page 27: Console Navigation
CHAPTER 4: PROGRAMMING & OPERATION CONSOLE NAVIGATION: Home Screen: The Home Screen is displayed on the console when there is no workout in progress. From this screen the user is able to select from various options to begin a workout. A) Quick Start: Starts a Quick Start workout in which the user controls all settings until the workout is ended by the user. - Page 28 CHAPTER 4: PROGRAMMING & OPERATION CONSOLE NAVIGATION (CONTINUED) Selecting a Preset Workout: Preset workouts are accessed by selecting Workout Finder from the home screen. To view the description of a workout (A), select the workout by touching it (B). Once the desired workout has been selected, simply press Next (C) to proceed. NOTE: Workouts can be viewed by category by pressing the “i”...
- Page 29 CHAPTER 4: PROGRAMMING & OPERATION CONSOLE NAVIGATION (CONTINUED) Workout Data Screens: During any workout a Workout Data Screen will be displayed to give the user a comprehensive visual overview of their current workout data. A)Statistics Bar: F) Speed: Displays data such as Calories, METS, Distance, Time Displays the current treadmill speed.
-
Page 30: User Profiles
CHAPTER 4: PROGRAMMING & OPERATION USER PROFILES Creating a New User: To create a new user profile, touch “New User” on the home screen and the new user screen will appear. Tap the information (A) on the left sided of the screen to edit it. Once all of the information is complete, touch the back button (B) to return to the home screen. -
Page 31: Bluetooth Functions
CHAPTER 4: PROGRAMMING & OPERATION BLUETOOTH FUNCTIONS Bluetooth Audio (Before Workout): Tap the Bluetooth button on the homepage or in a user profile to display the connectivity screen. Touch the pair button (A) on the console to begin the pairing process. From the Bluetooth menu on your audio device, select the device listed on the console (B) to complete the pairing process. - Page 32 CHAPTER 4: PROGRAMMING & OPERATION BLUETOOTH FUNCTIONS (CONTINUED) Bluetooth Heart Rate (Before Workout): Tap the Bluetooth button on the homepage or in a user profile to display the connectivity screen. Touch the heart rate pair button (A) to display the heart rate pairing screen. Tap the Bluetooth HR button (B) and then select the desired device from the list provided.
-
Page 33: Advanced Console Functions
Entering Service Mode: Press and hold the TRUE logo (A) in the upper left corner of the home screen. When the word “TRUE” (B) begins to flash, release the logo and press and hold the lower right corner of the screen(C). - Page 34 CHAPTER 4: PROGRAMMING & OPERATION ADVANCED CONSOLE FUNCTIONS (CONTINUED) Service Menu: The first screen displayed after entering service mode is the Service Menu. From this menu technicians can access all of the service mode features by selecting different categories. To select a category, touch the desired category (A) to highlight it. Once a category has been selected, press the next (B) to continue.
- Page 35 Utilities Menu - Software Update: TRUE may periodically release software updates to ensure users enjoy the best workout experience available. Due to the complex nature of this procedure, it is recommended that any software update be completed by a TRUE certified service professional.
- Page 36 CHAPTER 4: PROGRAMMING & OPERATION ADVANCED CONSOLE FUNCTIONS (CONTINUED) Options Menu: The options menu contains various options and settings that pertain to the operation and setup of the machine. To make changes, select the option to change and use the up and down incline keys to make changes. User Profiles Finder Timeout Enables or disables the custom user profile feature.
- Page 37 CHAPTER 4: PROGRAMMING & OPERATION ADVANCED CONSOLE FUNCTIONS (CONTINUED) Diagnostics Menu - Calibration/Test: This menu contains tools for testing and verifying treadmill operation. Key Test: When a key is pressed on the console “NONE” will change to indicate which key is being pressed. In the event of a stuck key, the key that is being engaged will display.
- Page 38 CHAPTER 4: PROGRAMMING & OPERATION ADVANCED CONSOLE FUNCTIONS (CONTINUED) Diagnostics Menu - Error Log: Error codes are an important part of troubleshooting any issues with the treadmill. Any time an error occurs it is entered into the error log for review by a service professional. This console is capable of storing the ten most recent errors. The error log can be cleared by pressing the next button (A), but it is not recommended.
-
Page 39: Chapter 5: Care & Maintenance
CAUTION: Do not use any acidic cleaners. Doing so will weaken the paint or powder coatings and may void the TRUE Fitness War- ranty. Never pour water or spray liquids on any part of the treadmill. Allow the treadmill to dry completely before us- ing. -
Page 40: Running Belt Alignment
If you are unsure how to adjust the running belt, call the TRUE Service Department. Important: Failure to align the belt may cause the belt to tear or fray, which may not be covered under the TRUE Fitness Warranty. To stop the running belt, press the STOP key. Turn the treadmill off. -
Page 41: Tensioning The Running Belt
Repeat the above steps if additional adjustment is necessary. TREADMILL LUBRICATION: For in-home use over 20 hours per week, TRUE recommends lubricating every three months. For average in-home use of the treadmill, TRUE recommends lubrication under the tread belt once per year. •... -
Page 42: Other Scheduled Preventive Maintenance
CHAPTER 5: CARE & MAINTENANCE OTHER SCHEDULED PREVENTIVE MAINTENANCE: TRUE recommends that quarterly scheduled maintenance be performed by a qualified service technician. Please contact your dealer or visit www.truefitness.com to contact a local TRUE authorized service technician. Scheduled Preventive Maintenance: •... -
Page 43: Chapter 6: Customer Service
HOURS OF OPERATION: 8:30 A.M. - 5:00 P.M. CST E-MAIL: service@truefitness.com CONTACTING SALES: Interested in TRUE Products? Please contact us with any sales or product inquires so that we may direct you to the appropriate sales representative to answer your questions. TRUE FITNESS HOME OFFICE 865 HOFF ROAD ST. -
Page 44: Reporting Freight Claims Or Parts Damage
Please make sure the photos include the damaged product as well as the damaged box the product arrived in. Contact the TRUE Fitness cus- tomer support team by calling 800.883.8783 or sales support team by calling 800.426.6570 Monday-Friday during normal business hours. -
Page 45: Chapter 7: Additional Information
This troubleshooting guide is intended to assist in diagnostics only and is not all inclusive. Technical specifications, error codes and programming are subject to change without notice. TRUE accepts no liability for any damage or loss suffered by persons whom rely wholly or in part on any description or statement contained within this manual. Please visit www.true- fitness.com to obtain the most recent version of all manuals and contact the TRUE Service Department at 800-883-8783 for... - Page 46 Re-install software/ Console figuration - fails integrity Firmware and Console Configuration firmware check software versions are Contact dealer or not compatible TRUE service Power cycle Console Configure incorrectly Re-configure console Fault CN01: Internal Re-install software/ Console Math error - software Fault...
- Page 47 Run incline calibration Reached lower limit. Incline Potentiometer Contact dealer or value out of range TRUE service Safety Key not engaged Re-insert safety key Check cable Fault CN09: Insert Loose Cable Console Emergency Circuit opened...
- Page 48 Fault Code Category Description Cause Corrective Action Lubricate treadbelt High belt/deck Contact dealer or friction TRUE service Fault SP01: Belt Under Tread motor rpm is below Check drive belt and Speed High belt tension Speed target rpm walking belt tension...
- Page 49 Incline disabled. Incline Run Fault commanded Run incline calibration Incline Potentiometer Contact dealer or value out of range TRUE service Power cycle Console displays Fault Check cable Incline value is out of Calibration not saved. connections Fault IN04: Incline expected operating range Incline disabled.
- Page 50 Fault D109: Motor Controller Zero Cur- DC MCB Low Incoming AC Voltage Low AC Line Voltage Contact dealer or rent TRUE service High AC line voltage Check AC line voltage Power cycle Fault D110: Motor Motor Control Board Contact dealer or...
-
Page 51: Chapter 8: Warranty Information
All TRUE® Fitness products are distributed by TRUE and are warranted reasonable and necessary maintenance. This limited warranty will ap- to the original registered Product purchaser and the parts of the TRUE ply to but may not be limited to the treadmill elevation motor, upper product (the “Product”) listed below, under normal use and service,... - Page 52 YOU. Registration Form is completed on-line; or if the attached form is filled in, signed by the original purchaser and mailed to TRUE NOTE TO AUTHORIZED WARRANTY LABOR PROVIDERS: within 30 days of purchaser’s receipt of this Product. The serial...
- Page 53 If you prefer to mail your warranty card, have the owner of the product complete the information below and return it to TRUE Fitness within 30 days from the date of equipment installation.
-
Page 54: Appendix A The Wahoo Runfit App
TRUE Fitness – Data Connectivity Powered by Wahoo: Your TRUE cardio equipment comes equipped with Wahoo’s SMART technology. Now you can stay connected to your workout with Wahoo’s RunFit App and get the results of your workout instantly on your smartphone. - Page 55 Start with the Wahoo RunFit Fitness app open on your smartphone/device (Fig 2) Fig 1 Fig 2 From the Home Screen of the TRUE Fitness Performance treadmill– touch the Bluetooth logo in the upper right-hand corner (A – Fig 3) Fig 3 Under Connectivity –...
- Page 56 You will be prompted to connect to a unique pairing code (C – Fig 5) Fig 5 If the code on your console and App match, please touch the blue connect button (D – Fig 6) on your smartphone/device Fig 6 Click Home (E –...
- Page 57 Upon completion of workout – Press Stop on the center console to Pause the workout. Press Stop again to end the workout. Your data will appear on the screen (Fig 8). Fig 8 When the workout is complete you will have the option to Save or Discard the data on your smartphone/device (Fig 9). If you choose to discard, the information will be deleted.
- Page 58 Start with the Wahoo RunFit Fitness app open on your smartphone/device (A – Fig 2) Fig 1 Fig 2 On your Device: Click on Cardio – Track Your Heart Rate option and select the TRUE product you are using (B – Fig 3) – Treadmill, Indoor Bike or Elliptical. Truefitness.com / 800.426.6570 / 636.272.7100...
- Page 59 Fig 3 On the Home Screen of the TRUE Fitness Performance treadmill– touch the Bluetooth logo in the upper right-hand corner (C – Fig 4). Fig 4 Under Connectivity – touch PAIR under Mobile App (D – Fig 5) Fig 5...
- Page 60 You will be prompted to connect to a unique pairing code (E – Fig 5 and 5A). The code much match to sync your device with the console you are using. Fig 5 Fig 5A Touch connect on your smartphone/device Fig 6 Truefitness.com / 800.426.6570 / 636.272.7100...
- Page 61 Phone may search for Bluetooth code for a moment. Once it says Connected, please click Home (G – Fig 7) on the treadmill console and start your workout – either Quick Start or Find Workout. Fig 7 During your workout you have two screens you can view with different data (Fig 8 and Fig 9). You can swipe back and forth between these displays.
- Page 62 Fig 10 Press Stop again to end the workout. Your data will appear on the console screen as shown in Fig 11. Fig 11 When the workout is complete you will have the option to Save or Discard the data on your smartphone/device (Fig 12). If you choose to discard, the information will be deleted.
- Page 63 Fig 12 If you elect to save your workout your data will go into the Results section of your Wahoo Fitness RunFit app. Choose the workout you wish to share. You will be taken to a results page where you can see details of your workout (Fig 13). Fig 13 From there, you can click on the share option in the bottom-right corner (H –...
- Page 64 TRUE console after being routed through the iPhone or Android device if the iPhone or Android device is connected to the TRUE console via Bluetooth. If your Bluetooth Heart Rate device is connected to the TRUE console, you will not be able to connect to the RunFit app on your iPhone or Android device.
Need help?
Do you have a question about the PERFORMANCE 800 and is the answer not in the manual?
Questions and answers