Powerware 9330 Installation & Operation Manual
Ibm 9910 ups 20 kva
Hide thumbs
Also See for 9330:
- Installation and operation manual (246 pages) ,
- Installation & operation manual (268 pages)
Table of Contents
Advertisement
Quick Links
Advertisement
Table of Contents

Related Manuals for Powerware 9330


Summary of Contents for Powerware 9330
- Page 1 9330 IBM 9910 UPS 20 kVA INSTALLATION & OPERATION MANUAL...
- Page 3 9330 IBM 9910 UPS 20 kVA INSTALLATION & OPERATION MANUAL www.powerware.com...
-
Page 4: Important Safety Instructions
Operation of this equipment in a residential area is likely to cause harmful interference in which case the user will be required to correct the interference at their own expense. Powerware 9330 (IBM 9910 20 kVA) Installation and Operation 164201491 REV. B 013004... -
Page 5: Table Of Contents
2---2 2.2.1 Unloading the Powerware 9330 (IBM 9910 20 kVA) UPS Cabinet from the Pallet ........ - Page 6 ........7---13 Powerware 9330 (IBM 9910 20 kVA) Installation and Operation 164201491 REV. B 013004...
- Page 7 ......9---23 Powerware 9330 (IBM 9910 20 kVA) Installation and Operation 164201491 REV. B 013004...
- Page 8 ........13---13 Powerware 9330 (IBM 9910 20 kVA) Installation and Operation 164201491 REV. B 013004...
- Page 9 ..........W ---1 Powerware 9330 (IBM 9910 20 kVA) Installation and Operation 164201491 REV. B 013004...
- Page 10 2---17 Figure 3---1. Battery Schematic --- Powerware 9330 (IBM 9910 20 kVA) UPS and Battery Cabinet ........
- Page 11 ......... 9---22 Powerware 9330 (IBM 9910 20 kVA) Installation and Operation 164201491 REV. B 013004...
- Page 12 ......... 13---14 Powerware 9330 (IBM 9910 20 kVA) Installation and Operation 164201491 REV. B 013004...
- Page 13 ........13---3 Powerware 9330 (IBM 9910 20 kVA) Installation and Operation 164201491 REV. B 013004...
- Page 14 This Page Intentionally Left Blank. Powerware 9330 (IBM 9910 20 kVA) Installation and Operation 164201491 REV. B 013004...
-
Page 15: Introduction
Introduction Powerware 9330 UPS true double conversion online power protection can be utilized to prevent loss of valuable electronic information, minimize equipment downtime, and/or minimize the adverse effect on equipment production due to unexpected power problems. The Powerware UPS System continually monitors incoming electrical power and removes the surges, spikes, sags, and other irregularities that are inherent in commercial utility power. -
Page 16: System Configurations
Chapter 6 -- Installing an Industrial Relay Card -- contains information for installing the optional Industrial Relay Card (IRC). Section II • Chapter 7 -- Understanding UPS Operation -- provides information on understanding UPS operation. Powerware 9330 (IBM 9910 20 kVA) Installation and Operation 164201491 REV. B 013004... -
Page 17: Conventions Used In This Manual
In this manual, the term UPS refers only to the UPS cabinet and its internal elements. The term UPS system refers to the entire power protection system—the UPS modules, battery strings and options or accessories installed. Powerware 9330 (IBM 9910 20 kVA) Installation and Operation 164201491 REV. B 013004... -
Page 18: Safety Considerations
Version or Part number (if available) • Date of failure or problem • Symptoms of failure or problem • Customer return address and contact information. To contact Powerware directly, call 1-800-843-9433. Powerware 9330 (IBM 9910 20 kVA) Installation and Operation 164201491 REV. B 013004... -
Page 19: Section I
Section I Installation Powerware 9330 (IBM 9910 20 kVA) Installation and Operation 164201491 REV. B 013004... - Page 20 This Page Intentionally Left Blank. Powerware 9330 (IBM 9910 20 kVA) Installation and Operation 164201491 REV. B 013004...
-
Page 21: Getting Started
The operating environment must meet the weight, airflow, size and clearance, requirements specified in Appendix A. Powerware 9330 (IBM 9910 20 kVA) Installation and Operation 1--1 164201491 REV. B 013004... -
Page 22: Environment Considerations
(such as building alarms, and monitoring interface) should be connected at the customer interface panels and terminal blocks located inside the UPS using class 1 wiring methods. Powerware 9330 (IBM 9910 20 kVA) Installation and Operation 1--2 164201491 REV. B 013004... -
Page 23: Inspecting And Unpacking Each Cabinet
The UPS and accessory cabinets are shipped bolted to wooden pallets, as shown in Figures 1---1 and Figure , and protected with outer protective packaging material. Figure 1 ---1. Powerware 9330 (IBM 9910 20 kVA) UPS Cabinet as Shipped on Pallet Powerware 9330 (IBM 9910 20 kVA) Installation and Operation 1--3 164201491 REV. - Page 24 Figure 1 ---2. Powerware 9330 (IBM 9910 20 kVA) Options Cabinet as Shipped on Pallet Powerware 9330 (IBM 9910 20 kVA) Installation and Operation 1--4 164201491 REV. B 013004...
- Page 25 After removing the protective covering, inspect the contents for any evidence of physical damage, and compare each item with the Bill of Lading. If damage has occurred or shortages are evident, contact the Powerware, Inc. Customer Service Department immediately to determine the extent of the damage and its impact upon further installation.
- Page 26 This Page Intentionally Left Blank. Powerware 9330 (IBM 9910 20 kVA) Installation and Operation 1--6 164201491 REV. B 013004...
-
Page 27: Installing The Ups System
Details about control wiring are provided in each procedure for connecting options and features. Drawing 164201491---2 and Tables G and H in Appendix A identify the control wiring terminations. Powerware 9330 (IBM 9910 20 kVA) Installation and Operation 2--1 164201491 REV. B 013004... -
Page 28: Ups Cabinet Installation
To install an UPS cabinet, perform the procedures in the following paragraphs. 2.2.1 Unloading the Powerware 9330 (IBM 9910 20 kVA) UPS Cabinet from the Pallet The UPS cabinet is bolted to a wooden pallet supported by wood skids. To... - Page 29 SOLID FRONT PANEL SHIPPING BOLTS (1) FRONT SHIPPING BRACKET (3) FRONT VIEW Figure 2 ---1. Removing UPS Front Shipping Bracket (Powerware 9330 (IBM 9910 20 kVA)) Powerware 9330 (IBM 9910 20 kVA) Installation and Operation 2--3 164201491 REV. B 013004...
- Page 30 BOLTS (1) PALLET REAR SHIPPING SHIPPING BRACKET (3) BOLTS (2) REAR VIEW Figure 2 ---2. Removing UPS Rear Shipping Bracket (Powerware 9330 (IBM 9910 20 kVA)) Powerware 9330 (IBM 9910 20 kVA) Installation and Operation 2--4 164201491 REV. B 013004...
-
Page 31: Unloading The Powerware 9330 (Ibm 9910 20 Kva) Options Cabinet From The Pallet
To Install Battery cabinets, repeat steps 1 through 10 for remaining Battery cabinets and proceed to paragraph 2.2.2. 2.2.2 Unloading the Powerware 9330 (IBM 9910 20 kVA) Options Cabinet from the Pallet The Options cabinet is bolted to a wooden pallet supported by wood skids. To... - Page 32 BOLTS (2) SHIPPING BOLTS (1) FRONT SHIPPING BRACKET (3) FRONT VIEW Figure 2 ---3. Removing Options Cabinet Front Shipping Bracket (Powerware 9330 (IBM 9910 20 kVA)) Powerware 9330 (IBM 9910 20 kVA) Installation and Operation 2--6 164201491 REV. B 013004...
- Page 33 REAR BOLTS (1) SHIPPING BRACKET (3) SHIPPING BOLTS (2) REAR VIEW Figure 2 ---4. Removing Options Cabinet Rear Shipping Bracket (Powerware 9330 (IBM 9910 20 kVA)) Powerware 9330 (IBM 9910 20 kVA) Installation and Operation 2--7 164201491 REV. B 013004...
- Page 34 If installing Battery cabinets, proceed to paragraph 2.3 for Battery cabinet installation and then proceed to paragraph 2.4 for Options cabinet installation; otherwise, proceed to paragraph 2.4. Powerware 9330 (IBM 9910 20 kVA) Installation and Operation 2--8 164201491 REV. B 013004...
-
Page 35: Installing Customer Connections
Reinstall Customer Interface conduit landing plate. Refer to Chapter 4 for installation instructions. When wiring is complete, secure UPS by reinstalling all panels removed in previous steps. Powerware 9330 (IBM 9910 20 kVA) Installation and Operation 2--9 164201491 REV. B 013004... -
Page 36: Battery Cabinet Installation
Roll the Battery cabinet to a spot near the right side of the UPS. Remove left front solid panel, and right front vented panel from the Powerware 9330 (IBM 9910 20 kVA) UPS cabinet . Front panels are secured with magnetic latches and are removed by pulling panels straight forward to disengage magnetic latches (see Figure 2---1). - Page 37 BATTERY CONNECTOR Figure 2 ---5. Battery Cabinet Installation --- Powerware 9330 (IBM 9910 20 kVA) (Non–Permanent Mounting) Powerware 9330 (IBM 9910 20 kVA) Installation and Operation 2--11 164201491 REV. B 013004...
- Page 38 BATTERY CONNECTOR Figure 2 ---6. Battery Cabinet Installation --- Powerware 9330 (IBM 9910 20 kVA) (Permanent Mounting) Powerware 9330 (IBM 9910 20 kVA) Installation and Operation 2--12 164201491 REV. B 013004...
-
Page 39: Joining Additional Battery Cabinets
To join additional battery cabinets, perform the following steps. Refer to Figure 2---5 for non-permanent installation or Figure 2---6 for permanent installation of the Powerware 9330 (IBM 9910 20 kVA) UPS. Roll the Battery cabinet to a spot near the right side of the previously installed Battery cabinet. - Page 40 When all wiring is complete, proceed to Chapter 3 and connect battery strings in accordance with instructions contained in paragraph 3.4.2. Repeat steps 1 through 21 to join additional Battery cabinets. Powerware 9330 (IBM 9910 20 kVA) Installation and Operation 2--14 164201491 REV. B 013004...
-
Page 41: Options Cabinet Installation
Roll the Options cabinet to a spot near the left side of the UPS. Remove left front solid panel, and right front vented panel from the Powerware 9330 (IBM 9910 20 kVA) UPS cabinet. Front panels are secured with magnetic latches and are removed by pulling panels straight forward to disengage magnetic latches (see Figure 2---1). - Page 42 Figure 2 ---7. Options Cabinet Installation --- Powerware 9330 (IBM 9910 20 kVA) (Non–Permanent Mounting) Powerware 9330 (IBM 9910 20 kVA) Installation and Operation 2--16 164201491 REV. B 013004...
- Page 43 Figure 2 ---8. Options Cabinet Installation --- Powerware 9330 (IBM 9910 20 kVA) (Permanent Mounting) Powerware 9330 (IBM 9910 20 kVA) Installation and Operation 2--17 164201491 REV. B 013004...
- Page 44 Secure the back of Options cabinet to the back of the UPS cabinet with the tie/grounding bracket. Secure the bracket with the side panel mounting screws. Secure cabinets to floor with contractor supplied hardware. Proceed to paragraph 2.4.3. Powerware 9330 (IBM 9910 20 kVA) Installation and Operation 2--18 164201491 REV. B 013004...
-
Page 45: Installing Options Cabinet Internal And Ups Optional Remote Battery Power Wiring
Battery Power Wiring If not already removed, remove left front solid panel, and right front vented panel from the Powerware 9330 (IBM 9910 20 kVA) UPS cabinet. Front panels are secured with magnetic latches and are removed by pulling panels straight forward to disengage magnetic latches (see Figure 2---1). -
Page 46: Installing Options Cabinet External Power Wiring
Install side panel removed from the UPS cabinet to the left side of the Options cabinet. Secure the Options cabinet by reinstalling front vented panel and Distribution Housing rear cover, and closing top cover. Powerware 9330 (IBM 9910 20 kVA) Installation and Operation 2--20 164201491 REV. B 013004... -
Page 47: Initial Startup
Installation Checklist to be sure you have completed all applicable equipment installation. NOTE: The Installation Checklist MUST be completed prior to starting the UPS system for the first time. Powerware 9330 (IBM 9910 20 kVA) Installation and Operation 2--21 164201491 REV. B 013004... -
Page 48: Installation Checklist
UPS cabinet. Summary alarms and/or building alarms are wired appropriately. (OPTIONAL) Startup and operational checks performed by authorized service personnel. Powerware 9330 (IBM 9910 20 kVA) Installation and Operation 2--22 164201491 REV. B 013004... - Page 49 Notes ________________________________________________________________________________ ________________________________________________________________________________ ________________________________________________________________________________ ________________________________________________________________________________ ________________________________________________________________________________ ________________________________________________________________________________ ________________________________________________________________________________ ________________________________________________________________________________ ________________________________________________________________________________ ________________________________________________________________________________ ________________________________________________________________________________ ________________________________________________________________________________ ________________________________________________________________________________ Powerware 9330 (IBM 9910 20 kVA) Installation and Operation 2--23 164201491 REV. B 013004...
- Page 50 This Page Intentionally Left Blank. Powerware 9330 (IBM 9910 20 kVA) Installation and Operation 2--24 164201491 REV. B 013004...
-
Page 51: Powerware 9330 (Ibm 9910 20 Kva) Installation And Operation 164201491 Rev. B 013004
Suivre les précautions qui s’imposent. • Pour le remplacement, utiliser le même nombre et modéle des batteries. • L’élimination des batteries est règlementée. Consulter les codes locaux à cet effet. Powerware 9330 (IBM 9910 20 kVA) Installation and Operation 3--1 164201491 REV. B 013004... -
Page 52: Battery Type
Ensure that battery breaker CB2 is in the OFF position. If not, set breaker to OFF position. Remove left front solid panel and right front vented panel from Powerware 9330 (IBM 9910 20 kVA) UPS. Front panels are secured with magnetic latches and are removed by pulling panels straight forward to disengage magnetic latches. - Page 53 Figure 3 ---1. Battery Schematic --- Powerware 9330 (IBM 9910 20 kVA) UPS and Battery Cabinet Powerware 9330 (IBM 9910 20 kVA) Installation and Operation 3--3 164201491 REV. B 013004...
-
Page 54: Installing Internal Batteries In The Battery Cabinet
Ensure that battery breaker CB2 is in the OFF position. If not, set breaker to OFF position. Remove left front solid panel and right front vented panel from Powerware 9330 IBM 9910 20 kVA UPS. Front panels are secured with magnetic latches and are removed by pulling panels straight forward to disengage magnetic latches. -
Page 55: Electrically Connecting Battery Cabinet Battery Strings
Secure the Battery Cabinet by reinstalling safety shield panel, and front vented panel. If you are installing more than one battery cabinet, perform Steps 1 through 6 for each cabinet. Powerware 9330 (IBM 9910 20 kVA) Installation and Operation 3--5 164201491 REV. B 013004... - Page 56 CONNECT CONNECT RED TO RED TO BLACK BLACK BLACK CONNECTOR CONNECT RED TO BLACK CONNECTOR BATTERY STRINGS Figure 3 ---2. Battery String Connection Powerware 9330 (IBM 9910 20 kVA) Installation and Operation 3--6 164201491 REV. B 013004...
-
Page 57: Installing And Connecting Remote Battery System
Install battery system in accordance with battery and rack manufactures instructions. Install DC disconnect device between battery system and UPS Cabinet. Connect battery system to UPS cabinets (refer to Paragraph 2.4.3). Powerware 9330 (IBM 9910 20 kVA) Installation and Operation 3--7 164201491 REV. B 013004... - Page 58 This Page Intentionally Left Blank. Powerware 9330 (IBM 9910 20 kVA) Installation and Operation 3--8 164201491 REV. B 013004...
-
Page 59: Installation Procedures
Securely mount the Remote EPO switch enclosure bottom. Recommended locations include operator’s consoles or by exit doors. Refer to Appendix A, Drawing 164201491---14, for enclosure dimensions and wiring knockouts. Powerware 9330 (IBM 9910 20 kVA) Installation and Operation 4--1 164201491 REV. B 013004... - Page 60 Connect the Remote EPO wiring as shown in Tables 4---1 and 4---2 and Figure 4---2. If you are installing multiple Remote EPO stations, wire additional stations in series with the first Remote EPO. Powerware 9330 (IBM 9910 20 kVA) Installation and Operation 4--2 164201491 REV. B 013004...
- Page 61 When wiring is complete, remove cover from Remote EPO switch enclosure bottom. Turn cover over and secure to enclosure bottom. Secure the UPS by reversing all steps taken to prepare it for Remote EPO installation. Powerware 9330 (IBM 9910 20 kVA) Installation and Operation 4--3 164201491 REV. B 013004...
- Page 62 This Page Intentionally Left Blank. Powerware 9330 (IBM 9910 20 kVA) Installation and Operation 4--4 164201491 REV. B 013004...
-
Page 63: Installation Procedures
HORN SILENCE BUTTON CABLE EXIT OPENING FOR 1/2” CONDUIT OR PROVIDED STRAIN RELIEF Figure 5 ---1. Remote Monitor Panel (RMP) Powerware 9330 (IBM 9910 20 kVA) Installation and Operation 5--1 164201491 REV. B 013004... -
Page 64: To Install An Rmp
RMP still does not operate correctly, replace the fuse. If this does not correct the problem, contact your local field service office for verification that the RMP is working correctly. Powerware 9330 (IBM 9910 20 kVA) Installation and Operation 5--2 164201491 REV. B 013004... - Page 65 CUSTOMER. THE MAXIMUM DISTANCE BETWEEN THE REMOTE MONITOR AND THE UPS IS NOT TO EXCEED 500 FEET. Figure 5 ---3. Remote Monitor Panel (RMP) --- Top Internal View Powerware 9330 (IBM 9910 20 kVA) Installation and Operation 5--3 164201491 REV. B 013004...
- Page 66 This Page Intentionally Left Blank. Powerware 9330 (IBM 9910 20 kVA) Installation and Operation 5--4 164201491 REV. B 013004...
-
Page 67: Installation Procedures
6---1. Figure 6---1 shows an IRC. PLUG-IN TERMINAL BLOCK J2 CABLE EXIT FROM RELAY CONTACTS OPENING FOR TO CUSTOMER 1/2” CONDUIT MONITORING EQUIPMENT Figure 6 ---1. Industrial Relay Card (IRC) Powerware 9330 (IBM 9910 20 kVA) Installation and Operation 6--1 164201491 REV. B 013004... -
Page 68: To Install An Irc
IRC still does not operate correctly, replace the fuse. If this does not correct the problem, contact your local field service office for verification that the IRC is working correctly. Powerware 9330 (IBM 9910 20 kVA) Installation and Operation 6--2 164201491 REV. B 013004... -
Page 69: Operation
Section II Operation Powerware 9330 (IBM 9910 20 kVA) Installation and Operation 164201491 REV. B 013004... - Page 70 This Page Intentionally Left Blank. Powerware 9330 (IBM 9910 20 kVA) Installation and Operation 164201491 REV. B 013004...
-
Page 71: Understanding Ups Operation
Operation Looking Inside the UPS System The Powerware 9330 is a continuous duty, solid-state, transformerless (at 208 VAC), three phase, true online system that provide conditioned and uninterruptible AC power to the UPS systems output. The UPS supports process control, data processing, telecommunications/PBX, research, and non---patient medical equipment. - Page 72 Power Processsing Unit (PPU) for servicing, while still suppling power to the critical load. The operation of the UPS system is described in greater detail in the following paragraphs. Powerware 9330 (IBM 9910 20 kVA) Installation and Operation 7--2 164201491 REV. B 013004...
-
Page 73: Ups Modes
System events, alarm horns, and indicator lights are described in Chapter 12, “Responding to System Events.” The following descriptions provide the differences in UPS operating modes. Powerware 9330 (IBM 9910 20 kVA) Installation and Operation 7--3 164201491 REV. B 013004... -
Page 74: Normal Mode
The battery is not charged directly from the unregulated rectifier. Instead, a separate battery charger is used to maintain the proper charge level on the battery during normal operation. Powerware 9330 (IBM 9910 20 kVA) Installation and Operation 7--4 164201491 REV. B 013004... - Page 75 If the UPS suffers an internal failure, it switches automatically to Bypass mode and remains in that mode until the failure is corrected and the UPS is back in service. Powerware 9330 (IBM 9910 20 kVA) Installation and Operation 7--5...
-
Page 76: Bypass Mode
The static switch is wired in series with the back feed protection contactor and together they are wired in parallel with Powerware 9330 (IBM 9910 20 kVA) Installation and Operation 7--6 164201491 REV. B 013004... - Page 77 Bypass mode is a normal operating mode, and not an alarm condition. However, if the UPS is unable to return to Normal mode following an automatic transfer to Bypass mode, an alarm condition is recorded. Powerware 9330 (IBM 9910 20 kVA) Installation and Operation 7--7 164201491 REV. B 013004...
-
Page 78: High Efficiency Mode
High Efficiency mode is a normal operating mode, and not an alarm condition. While the UPS is in High Efficiency mode, the NORMAL light on the front display will illuminate. Powerware 9330 (IBM 9910 20 kVA) Installation and Operation 7--8 164201491 REV. B 013004... -
Page 79: Battery Mode
The UPS will remain in this operating mode until the input power to the rectifier is again within the specified voltage or frequency acceptance windows. Powerware 9330 (IBM 9910 20 kVA) Installation and Operation 7--9 164201491 REV. B 013004... - Page 80 The greater the load, the less support time the battery will have. Decrease the load, and the battery support time will generally increase. Powerware 9330 (IBM 9910 20 kVA) Installation and Operation 7--10 164201491 REV. B 013004...
-
Page 81: Test And Maintenance Bypass Modes
CHARGER Main Power Flow Breakers Contactors Trickle Current Closed Energized Open De- -Energized BATTERY Figure 7 ---6. Path of Current Through the UPS in Test Mode Powerware 9330 (IBM 9910 20 kVA) Installation and Operation 7--11 164201491 REV. B 013004... -
Page 82: Maintenance Bypass Mode
DC IN Bus. The raw DC at this point will be approximately 290 VDC. A precharge system precharges the DC IN Bus prior to the input contactor being closed. Powerware 9330 (IBM 9910 20 kVA) Installation and Operation 7--12 164201491 REV. B 013004... -
Page 83: Boost Converter And Neutral Regulator
External Batteries connect in parallel to the Internal Battery via an internal breaker. The internal charger charges the Batteries in parallel or in conjunction with an optional external charger Powerware 9330 (IBM 9910 20 kVA) Installation and Operation 7--13 164201491 REV. B 013004... - Page 84 This Page Intentionally Left Blank. Powerware 9330 (IBM 9910 20 kVA) Installation and Operation 7--14 164201491 REV. B 013004...
-
Page 85: General
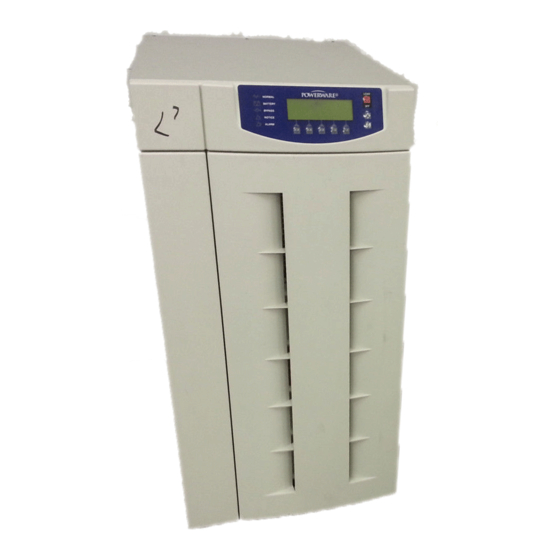
Figure 8---1 identifies and shows the location of the controls and indicators on the Powerware 9330 (IBM 9910 20 kVA) UPS. The descriptions provide a brief overview of the UPS controls, and standard and optional features. - Page 86 SWITCH AC INPUT BREAKER CB1 MAINTENANCE BYPASS SWITCH OPTIONS BATTERY CABINET CABINET CABINET Figure 8 ---1. Powerware 9330 (IBM 9910 20 kVA) UPS Controls and Indicators 8--2 Powerware 9330 (IBM 9910 20 kVA) Installation and Operation 164201491 REV. B 013004...
-
Page 87: Ups Circuit Breakers
The UPS uses these inputs to monitor your building alarms in addition to the UPS status. This feature is described further in Chapter 11, “Using Features and Options.” Powerware 9330 (IBM 9910 20 kVA) Installation and Operation 8--3 164201491 REV. B 013004... -
Page 88: Advanced Battery Management
8.3.6 Auto Restart An Auto Restart function can be enabled to automatically restart the UPS after a power outage. To have the Auto Restart function enabled, contact a Powerware service representative. 8.3.7 Options Cabinet Maintenance Bypass Switch An internal Maintenance Bypass switch is provided to completely isolate the UPS during service. -
Page 89: Options And Accessories
Up to four optional X-Slot cards can be installed in the UPS module at any time. The X-Slot cards support several protocols such as SNMP , HTTP , AS---400, and Modbus ® See Chapter 13, “Communications” for additional information. Powerware 9330 (IBM 9910 20 kVA) Installation and Operation 8--5 164201491 REV. B 013004... -
Page 90: Safety Considerations
Observe all DANGER, CAUTION, and WARNING notices affixed to the inside and outside of the equipment. • Always conform to the more detailed safety precautions described in “Important Safety Instructions” section of Chapter 14. 8--6 Powerware 9330 (IBM 9910 20 kVA) Installation and Operation 164201491 REV. B 013004... -
Page 91: Symbols, Controls, And Indicators
Stop and refer to the Operator’s Manual for more information. RISK OF ELECTRIC SHOCK There is a risk of electric shock present, and you should observe associated warnings. The UPS contains high voltages. Powerware 9330 (IBM 9910 20 kVA) Installation and Operation 8--7 164201491 REV. B 013004... - Page 92 This Page Intentionally Left Blank. 8--8 Powerware 9330 (IBM 9910 20 kVA) Installation and Operation 164201491 REV. B 013004...
-
Page 93: Using The Control Panel
(5), and a vertical column of backlit status indicators, (6). The following sections describe using the UPS Control Panel to monitor the UPS. Refer to Chapter 10 UPS Operating Instructions for use of the operational controls. Powerware 9330 (IBM 9910 20 kVA) Installation and Operation 9--1 164201491 REV. B 013004... -
Page 94: Using The Lcd Screen And Pushbuttons
Look at a log of UPS events (alarms, notices, and commands) (see paragraph 9.3.2). After approximately one hour, the display screen dims. To restore the screen, press any pushbutton once. Powerware 9330 (IBM 9910 20 kVA) Installation and Operation 9--2 164201491 REV. B 013004... -
Page 95: Using The Main Menu
DATE: 01/10/2001 TIME: 11:35:43 BATT STSW OUTPUT EVENTS METERS CONTROLS SETUP Figure 9 ---3. Mimic Screen Powerware 9330 (IBM 9910 20 kVA) Installation and Operation 9--3 164201491 REV. B 013004... -
Page 96: System Event Screens
ALARM: AC INPUT UNDER VOLTAGE CMD: LOAD OFF COMMAND CMD: NORMAL MODE COMMAND 06/20/2003 10:20:03.539 EVENTS SHOW ALL Figure 9 ---4. Event Simple History Log Screen Powerware 9330 (IBM 9910 20 kVA) Installation and Operation 9--4 164201491 REV. B 013004... - Page 97 ACTIVE EVENTS ALARM: AC INPUT UNDERVOLTAGE ALARM: BYPASS UNDER VOLTAGE NOTICE: BATTERY VOLTAGE LOW NOTICE: NO SYNC ON HISTORY Figure 9 ---6. Active System Events Screen Powerware 9330 (IBM 9910 20 kVA) Installation and Operation 9--5 164201491 REV. B 013004...
-
Page 98: Unit Meter Screens
The Input screen shows the phase-to-phase voltage, phase current, and frequency, of the incoming utility, followed by the KVA, KW, and power factor measurements. INPUT FREQ SYSTEM Figure 9 ---7. Input Meter Screen Powerware 9330 (IBM 9910 20 kVA) Installation and Operation 9--6 164201491 REV. B 013004... - Page 99 Figure 9 ---8. Output Meter Screen The Bypass screen shows the phase-to-neutral voltage, and frequency of the bypass source. BYPASS Freq SYSTEM Figure 9 ---9. Bypass Meter Screen Powerware 9330 (IBM 9910 20 kVA) Installation and Operation 9--7 164201491 REV. B 013004...
- Page 100 The Output Current Screen displays a real-time bar graph of the output current of the UPS. The graph shows the current for each phase. Output I 125% 100% Figure 9 ---11. Output Current (Load) Meter Screen Powerware 9330 (IBM 9910 20 kVA) Installation and Operation 9--8 164201491 REV. B 013004...
-
Page 101: System Meter Screens
The Input screen shows the phase-to-phase voltage, phase current, and frequency, of the incoming utility, followed by the KVA, KW, and power factor measurements. SYSTEM INPUT FREQ UNIT Figure 9 ---12. System Input Meter Screen Powerware 9330 (IBM 9910 20 kVA) Installation and Operation 9--9 164201491 REV. B 013004... - Page 102 Figure 9 ---13. System Output Meter Screen The Bypass screen shows the phase-to-neutral voltage, and frequency of the bypass source. BYPASS Freq UNIT Figure 9 ---14. System Bypass Meter Screen Powerware 9330 (IBM 9910 20 kVA) Installation and Operation 9--10 164201491 REV. B 013004...
-
Page 103: Log Out
LCD screen. To return to the System Setup menu screen, select the pushbutton. CONTRAST ADJUST Figure 9 ---16. Contrast Adjust Menu Screen Powerware 9330 (IBM 9910 20 kVA) Installation and Operation 9--11 164201491 REV. B 013004... - Page 104 UPS unit. Figure 9---18 shows the Unit Type screen. To return to the System Setup menu screen, select the pushbutton. UNIT TYPE MODEL: POWERWARE 9330 CTO: 000000000000000 SERIAL: 0000000000000000 Figure 9 ---18. Unit Type Screen Powerware 9330 (IBM 9910 20 kVA) Installation and Operation 9--12 164201491 REV. B 013004...
-
Page 105: Enter Password
ENTER pushbutton. The System Setup Level 1 menu screen is displayed. The default password is L1. ENTER PASSWORD IF NO PASSWORD THEN PRESS ENTER ENTER Figure 9 ---19. Enter Password Screen Powerware 9330 (IBM 9910 20 kVA) Installation and Operation 9--13 164201491 REV. B 013004... - Page 106 SELECT pushbutton. SYSTEM SETUP --- LEVEL 1 CHANGE PASSWORD ENTER PASSWORD LOG OUT ENTER PASSWORD CONTRAST VERSIONS SELECT Figure 9 ---20. Setup Menu Level 1 Screen Powerware 9330 (IBM 9910 20 kVA) Installation and Operation 9--14 164201491 REV. B 013004...
-
Page 107: Change Password
Once the new password is entered, select the pushbutton. The Change Password Save screen is displayed. CHANGE PASSWORD OLD: NEW: Figure 9 ---21. Change Password Screen Powerware 9330 (IBM 9910 20 kVA) Installation and Operation 9--15 164201491 REV. B 013004... - Page 108 SELECT pushbutton. CHANGE PASSWORD OLD: NEW: SAVE ABORT RETRY SELECT Figure 9 ---22. Change Password Save Screen Powerware 9330 (IBM 9910 20 kVA) Installation and Operation 9--16 164201491 REV. B 013004...
- Page 109 To complete the save function and return to the Setup Menu screen, select the pushbutton. DATE & TIME DAY DT MONTH YEAR HOUR MINUTE SAVE 2000 Figure 9 ---23. Date & Time Screen Powerware 9330 (IBM 9910 20 kVA) Installation and Operation 9--17 164201491 REV. B 013004...
- Page 110 To complete the save function and return to the Setup Menu screen, select the pushbutton. SERIAL PORTS PORT BAUD PARITY DATA STOP SAVE COM1 9600 NONE Figure 9 ---24. Port Setup Screen Powerware 9330 (IBM 9910 20 kVA) Installation and Operation 9--18 164201491 REV. B 013004...
-
Page 111: System Controls Screen
PPU ON TOGGLES BETWEEN TOGGLES BETWEEN HI-EFF AND NORMAL, ONLINE AND HI-EFF, DEPENDING ON MODE DEPENDING ON MODE Figure 9 ---25. System Controls Screen in Normal Mode Powerware 9330 (IBM 9910 20 kVA) Installation and Operation 9--19 164201491 REV. B 013004... - Page 112 TOGGLES BETWEEN TOGGLES BETWEEN NORMAL AND HI-EFF, HI-EFF AND ONLINE, DEPENDING ON MODE DEPENDING ON MODE Figure 9 ---26. System Controls Screen in High Efficiency Mode Powerware 9330 (IBM 9910 20 kVA) Installation and Operation 9--20 164201491 REV. B 013004...
-
Page 113: Charger Controls Screen
ON after an outage. The charger must then be set to OFF manually. CHARGER CONTROLS CHARGER ON CHARGER OFF Figure 9 ---27. Charger Controls Screen Powerware 9330 (IBM 9910 20 kVA) Installation and Operation 9--21 164201491 REV. B 013004... -
Page 114: Unit Shutdown Screen
Chapter 10, “UPS Operating Instructions”. UNIT SHUTDOWN THIS WILL REMOVE POWER TO THE LOAD! ARE YOU SURE? HOLD YES FOR 2 SECONDS TO POWER DOWN Figure 9 ---28. Shutdown Screen Powerware 9330 (IBM 9910 20 kVA) Installation and Operation 9--22 164201491 REV. B 013004... -
Page 115: Reading The Status Indicators
The Alarm indicator may be lit along with other indicators. For more information about audible horns, refer to the “System Event Horns” section of Chapter 12. Powerware 9330 (IBM 9910 20 kVA) Installation and Operation 9--23 164201491 REV. B 013004... - Page 116 This Page Intentionally Left Blank. Powerware 9330 (IBM 9910 20 kVA) Installation and Operation 9--24 164201491 REV. B 013004...
-
Page 117: Ups Operating Instructions
UPS transfers to Normal mode. The status indicator on the UPS Control Panel indicates the UPS is in Bypass mode. Powerware 9330 (IBM 9910 20 kVA) Installation and Operation 10--1 164201491 REV. B 013004... -
Page 118: Starting The Ups In Bypass Mode
The critical load is immediately supplied by the bypass source, in Bypass mode. The UPS is now operating in the bypass mode and the BYPASS status indicator is illuminated. Powerware 9330 (IBM 9910 20 kVA) Installation and Operation 10--2 164201491 REV. B 013004... -
Page 119: Starting The Power Processing Unit
Normal mode and supply the critical load. The UPS is now operating in the Bypass mode and the BYPASS status indicator is illuminated. Powerware 9330 (IBM 9910 20 kVA) Installation and Operation 10--3 164201491 REV. B 013004... -
Page 120: Cold Starting The Ups
Select NORMAL or HI -- EFF from the System Control menu. Normal Mode Requested appears on the screen. The status indicator on the UPS Control Panel indicates the UPS is in Normal---Battery mode. Powerware 9330 (IBM 9910 20 kVA) Installation and Operation 10--4 164201491 REV. B 013004... -
Page 121: Transfer From Normal To Bypass Mode
The PPU status indicates READY. System is now on bypass and UPS power processor remains on. WARNING: Power is present inside the UPS and Options cabinets. Powerware 9330 (IBM 9910 20 kVA) Installation and Operation 10--5 164201491 REV. B 013004... -
Page 122: Transfer From Bypass To Normal Mode
The UPS is now operating in the Normal mode and the NORMAL status indicator is illuminated. The PPU status indicates ONLINE. Powerware 9330 (IBM 9910 20 kVA) Installation and Operation 10--6 164201491 REV. B 013004... -
Page 123: Transfer From Normal To Bypass Mode With Ups Shutdown
The input, output, battery and bypass backfeed contactors open and the PPU is turned off. The maintenance bypass source supplies the critical load. WARNING: Power is present inside the UPS and Options cabinets Powerware 9330 (IBM 9910 20 kVA) Installation and Operation 10--7 164201491 REV. B 013004... -
Page 124: Options Cabinet Maintenance Bypass Transfer
Do not attempt to restart the system after Load Off until the cause of the shutdown has been identified and cleared. To restart the UPS after pressing the LOAD OFF pushbutton, follow the procedure, in paragraphs 10.2 or 10.3. Powerware 9330 (IBM 9910 20 kVA) Installation and Operation 10--8 164201491 REV. B 013004... -
Page 125: To Use The Repo Switch
NOTE: The following instructions are for the Powerware supplied REPO switch. If a customer supplied REPO switch is used it may not activate in the same manner. - Page 126 This Page Intentionally Left Blank. Powerware 9330 (IBM 9910 20 kVA) Installation and Operation 10--10 164201491 REV. B 013004...
-
Page 127: Using Features
UPS. This feature is useful if the UPS is located in a remote area where the UPS alarm horn may not be heard immediately. CAUTION: Contacts should not be operated in excess of 120 VAC @ 5A maximum. Powerware 9330 (IBM 9910 20 kVA) Installation and Operation 11--1 164201491 REV. B 013004... -
Page 128: Optional Remote Monitor Panel
The NORMAL indicator is also lit. After 30 seconds of run time, the alarm indicator will illuminate and a horn sound. Powerware 9330 (IBM 9910 20 kVA) Installation and Operation 11--2 164201491 REV. B 013004... -
Page 129: Optional Industrial Relay Card
The UPS battery backup is supplying the critical load. The utility power is either interrupted or out of specification. • ALARM MODE The UPS system is issuing an alarm that affect the current UPS mode Powerware 9330 (IBM 9910 20 kVA) Installation and Operation 11--3 164201491 REV. B 013004... - Page 130 This Page Intentionally Left Blank. Powerware 9330 (IBM 9910 20 kVA) Installation and Operation 11--4 164201491 REV. B 013004...
-
Page 131: Responding To System Events
(For descriptions of the status indicators, refer to paragraph 9.6 “Reading the Status Indicators” of Chapter 9.) Powerware 9330 (IBM 9910 20 kVA) Installation and Operation 12--1 164201491 REV. B 013004... -
Page 132: System Event Messages
HA Condition Cleared Check CSB Setup HA Service Required Check CSB Setup OK HA Condition Cleared Check Inverter HA Service Required Check Inverter OK HA Condition Cleared Powerware 9330 (IBM 9910 20 kVA) Installation and Operation 12--2 164201491 REV. B 013004... - Page 133 HA Service Required Gate Driver Failed 1 OK HA Condition Cleared Heat Sink Thermistor Failure HA Service Required Heat Sink Thermistor Failure OK HA Condition Cleared Powerware 9330 (IBM 9910 20 kVA) Installation and Operation 12--3 164201491 REV. B 013004...
- Page 134 HA Condition Cleared Output Phase Rotation HA User Action Required Output Phase Rotation OK HA Condition Cleared Parallel Setup Error Service Required Parallel Setup Error OK Condition Cleared Powerware 9330 (IBM 9910 20 kVA) Installation and Operation 12--4 164201491 REV. B 013004...
- Page 135 Warning: Battery Time is Low OK HA Condition Cleared Table Key To Log Column HA --- Event recorded in History and Active Logs. --- Event recorded in Active Log only. Powerware 9330 (IBM 9910 20 kVA) Installation and Operation 12--5 164201491 REV. B 013004...
- Page 136 HA Information Only Call Phone # 4 Clear HA Condition Cleared Calling Unsuccessful Information Only Calling Phone #1 HA Information Only Calling Phone #1 OK HA Condition Cleared Powerware 9330 (IBM 9910 20 kVA) Installation and Operation 12--6 164201491 REV. B 013004...
- Page 137 Information Only Phone #3 Failed Information Only Phone #4 Failed Information Only SBM IO 1 Not Reporting Information Only SBM IO Not Reporting OK Condition Cleared Powerware 9330 (IBM 9910 20 kVA) Installation and Operation 12--7 164201491 REV. B 013004...
- Page 138 Condition Cleared System Not Redundant Table Key To Log Column HA --- Event recorded in History and Active Logs. --- Event recorded in Active Log only. Powerware 9330 (IBM 9910 20 kVA) Installation and Operation 12--8 164201491 REV. B 013004...
- Page 139 UPS Power Supply OK HA Service Status Table Key To Log Column HA --- Event recorded in History and Active Logs. --- Event recorded in Active Log only. Powerware 9330 (IBM 9910 20 kVA) Installation and Operation 12--9 164201491 REV. B 013004...
- Page 140 Normal Mode PPU On PPU Off Table Key To Log Column HA --- Event recorded in History and Active Logs. --- Event recorded in Active Log only. Powerware 9330 (IBM 9910 20 kVA) Installation and Operation 12--10 164201491 REV. B 013004...
-
Page 141: Communications
UPS should be male. Figure 13---1 shows the pin assignments for Serial Port, and Table 13---1 describes them. For connection and set up of a Modem, please contact Powerware. See “Getting Help” in the “Introduction” of this manual for contact information. -
Page 142: Configuring The Serial Port
The serial port is pre-configured and can not be changed. 13.4 X-Slot Cards The Powerware 9330 (IBM 9910) contains a factory-installed X-Slot communication bay (refer to Appendix A, Drawing 164201491---8 for bay location), and is compatible with the following optional cards (see Figure 13---2): •... -
Page 143: Remote Notification
Single-Port Card --- connects to the Powerware Expansion Chassis to enable multiple communication options. For installation and set up of an X-Slot card, please contact Powerware. See “Getting Help” in the “Introduction” of this manual for contact information. Refer to the manual supplied with the X-Slot card for user instructions. -
Page 144: Remote Notification Features
Control Panel softkeys. Refer to Chapter 9 “Using the Control Panel” for instructions on navigating the control panel. Figures 13---3 through 13---18 show typical screens using this function. Powerware 9330 (IBM 9910 20 kVA) Installation and Operation 13--4 164201491 REV. B 013004... - Page 145 Figure 13 ---3. Main Screen --- UPS Normal Mimic Figure 13 ---4. Main Screen --- UPS On Battery Mimic Powerware 9330 (IBM 9910 20 kVA) Installation and Operation 13--5 164201491 REV. B 013004...
- Page 146 Figure 13 ---5. Main Screen --- UPS On Bypass Mimic Figure 13 ---6. System Controls Powerware 9330 (IBM 9910 20 kVA) Installation and Operation 13--6 164201491 REV. B 013004...
- Page 147 Figure 13 ---7. Load Off Figure 13 ---8. Events --- History Powerware 9330 (IBM 9910 20 kVA) Installation and Operation 13--7 164201491 REV. B 013004...
- Page 148 Figure 13 ---9. Events --- Active Figure 13 ---10. Input Meter Powerware 9330 (IBM 9910 20 kVA) Installation and Operation 13--8 164201491 REV. B 013004...
- Page 149 Figure 13 ---11. Output Meter Figure 13 ---12. Bypass Meter Powerware 9330 (IBM 9910 20 kVA) Installation and Operation 13--9 164201491 REV. B 013004...
- Page 150 Figure 13 ---13. Output Current (Load) Meter Figure 13 ---14. Setup Powerware 9330 (IBM 9910 20 kVA) Installation and Operation 13--10 164201491 REV. B 013004...
- Page 151 Figure 13 ---15. Contrast Adjust Figure 13 ---16. Date and Time Setup Powerware 9330 (IBM 9910 20 kVA) Installation and Operation 13--11 164201491 REV. B 013004...
- Page 152 Figure 13 ---17. Serial Port Setup Figure 13 ---18. Versions Powerware 9330 (IBM 9910 20 kVA) Installation and Operation 13--12 164201491 REV. B 013004...
-
Page 153: Event History Log
Esc+H Prints the entire log with a firmware version header To use a key combination, hold down the Esc key and press the letter key. Powerware 9330 (IBM 9910 20 kVA) Installation and Operation 13--13 164201491 REV. B 013004... - Page 154 08/12/2000 14:17:23.606 ALARM: Rectifier Under Voltage OK 08/12/2000 14:17:25.557 ALARM: Battery Under Voltage OK 08/12/2000 14:19:01.899 CMD: PPU On Command 08/12/2000 14:19:04.089 STATUS: K1 (Input) Closed Figure 13 ---19. Event History Log Powerware 9330 (IBM 9910 20 kVA) Installation and Operation 13--14 164201491 REV. B 013004...
-
Page 155: Maintaining The Ups System
If the string requires service, refer to the battery manufacturer’s operating manual for instructions on battery maintenance, or contact your local field service office. Powerware 9330 (IBM 9910 20 kVA) Installation and Operation 14--1 164201491 REV. B 013004... - Page 156 Suivre les précautions qui s’imposent. • Pour le remplacement, utiliser le même nombre et modéle des batteries. • L’élimination des batteries est règlementée. Consulter les codes locaux à cet effet. Powerware 9330 (IBM 9910 20 kVA) Installation and Operation 14--2 164201491 REV. B 013004...
-
Page 157: Performing Preventive Maintenance
BATTERY maintenance: Contact your nearest field service office for battery maintenance. Battery replacement and maintenance should be performed only by authorized service personnel. Powerware 9330 (IBM 9910 20 kVA) Installation and Operation 14--3 164201491 REV. B 013004... -
Page 158: Maintenance Training
For more information about training and other services, contact the Powerware Corporation Training Coordinator in Raleigh, North Carolina, or call Powerware corporation field service at 1 -- 800 -- 843 -- 9433. Powerware 9330 (IBM 9910 20 kVA) Installation and Operation 14--4 164201491 REV. -
Page 159: Product Specifications
Power Factor Minimum 0.96 Line Surges 6 kV OC, 3 kA SC per ANSI 62.41 and IEC 801---4 Battery Voltage 288 VDC nominal (144 cells @2V/cell) Powerware 9330 (IBM 9910 20 kVA) Installation and Operation 15--1 164201491 REV. B 013004... -
Page 160: Ups System Output
1 Hz per second maximum (adjustable) Overload Capability 1101---125% for 10 minutes 1126---150% for 1 minute Maximum Output Capability 300% peak for 10 cycles without bypass Powerware 9330 (IBM 9910 20 kVA) Installation and Operation 15--2 164201491 REV. B 013004... -
Page 161: Environmental Specifications
Electrostatic Discharge (ESD) Meets IEC 801---2 specifications. Withstands up Immunity to 25 kV pulse without damage and with no disturbance or adverse effect to the critical load. Powerware 9330 (IBM 9910 20 kVA) Installation and Operation 15--3 164201491 REV. B 013004... - Page 162 This Page Intentionally Left Blank. Powerware 9330 (IBM 9910 20 kVA) Installation and Operation 15--4 164201491 REV. B 013004...
- Page 163 Powerware 9330 (IBM 9910 20 kVA) • 164201491---13 Battery Cabinet Dimensions Powerware 9330 (IBM 9910 20 kVA) • 164201491---14 Remote Emergency Power Off Dimensions • 164201491---15 Remote Monitor Panel Dimensions Powerware 9330 (IBM 9910 20 kVA) Installation and Operation A ---1 164201491 REV. B 013004...
- Page 164 DESCRIPTION: POWER WIRING INSTALLATION NOTES NOTE: Callout letter DRAWING NO: SHEET: map to drawing #164201300---6 164201491---1 1 of 4 REVISION: DATE: 071503 Powerware 9330 (IBM 9910 20 kVA) Installation and Operation A ---2 164201491 REV. B 013004...
- Page 165 Table D and for conduit requirements. Drawings 164201491---8 through 164201491---10 show the location of the power cable terminals inside the UPS, Options, and Battery Cabinets. Table B. UPS Cabinet Power Cable Terminations Powerware 9330 (IBM 9910 20 kVA) Size of Pressure Tightening Torque...
- Page 166 D. All 9330 products can accommodate a double size neutral. Conduit sizes were chosen from NEC Table C1, type letters RHH, RHW, RHW-2, TW, THW, THHW, THW-2.
- Page 167 When the optional Options Cabinet is used, source protection for the AC input should be treated as if you were supplying a 20 kVA three phase transformer for the Powerware 9330 (20 kVA), to allow for inrush current. Bypass and output overcurrent protection and bypass and output disconnect switches are to be provided by the user.
- Page 168 Contacts used to indicate Battery Low status of UPS DESCRIPTION: CUSTOMER INTERFACE WIRING INSTALLATION NOTES DRAWING NO: SHEET: 164201491---2 1 of 5 REVISION: DATE: 071503 Powerware 9330 (IBM 9910 20 kVA) Installation and Operation A ---6 164201491 REV. B 013004...
- Page 169 Monitor Panel. Use twisted pair wires for each alarm input and common. CUSTOMER INTERFACE WIRING DESCRIPTION: INSTALLATION NOTES DRAWING NO: SHEET: 164201491---2 2 of 5 REVISION: DATE: 071503 Powerware 9330 (IBM 9910 20 kVA) Installation and Operation A ---7 164201491 REV. B 013004...
- Page 170 REFER TO DRAWING 164201491--- 8 SERIAL PORT FOR LOCATION OF CSB DESCRIPTION: CUSTOMER INTERFACE WIRING INSTALLATION NOTES DRAWING NO: SHEET: 164201491---2 3 of 5 REVISION: DATE: 071503 Powerware 9330 (IBM 9910 20 kVA) Installation and Operation A ---8 164201491 REV. B 013004...
- Page 171 NOTE: Relays are shown in de-energized state. Relays change state when the UPS is in normal operating mode. DESCRIPTION: CUSTOMER INTERFACE WIRING INSTALLATION NOTES DRAWING NO: SHEET: 164201491---2 4 of 5 REVISION: DATE: 071503 Powerware 9330 (IBM 9910 20 kVA) Installation and Operation A ---9 164201491 REV. B 013004...
- Page 172 NOTE: This switch must be a dedicated switch not tied into any other circuits. DESCRIPTION: CUSTOMER INTERFACE WIRING INSTALLATION NOTES DRAWING NO: SHEET: 164201491---2 5 of 5 REVISION: DATE: 013004 Powerware 9330 (IBM 9910 20 kVA) Installation and Operation A ---10 164201491 REV. B 013004...
- Page 173 Input/Output Voltage BTU/hr ¢ 1000/hr (Kg---cal/hr) 20 KVA 208/208 4.2 (1.1) DESCRIPTION: PHYSICAL FEATURES AND REQUIREMENTS DRAWING NO: SHEET: 164201491---3 1 of 1 REVISION: DATE: 071503 Powerware 9330 (IBM 9910 20 kVA) Installation and Operation A ---11 164201491 REV. B 013004...
- Page 174 CABINET (OPTIONAL) CABINET OPTIONS CABINET POWERWARE 9330 (IBM 9910 20 kVA) DESCRIPTION: TYPICAL UPS SYSTEM DRAWING NO: SHEET: 164201491---4 1 of 1 REVISION: DATE: 071503 Powerware 9330 (IBM 9910 20 kVA) Installation and Operation A ---12 164201491 REV. B 013004...
- Page 175 NOTE 1: A bypass neutral feeder must be DESCRIPTION: UPS SYSTEM CONFIGURATIONS supplied. DRAWING NO: SHEET: 164201491---5 1 of 1 NOTE 2: Output Voltage must match Bypass Input Voltage. REVISION: DATE: 071503 Powerware 9330 (IBM 9910 20 kVA) Installation and Operation A ---13 164201491 REV. B 013004...
- Page 176 UPS SYSTEM WITH 208V INPUT AND OUTPUT, SINGLE FEED POWERWARE 9330 (IBM 9910 20 kVA) DESCRIPTION: ONELINE DRAWINGS OF UPS SYSTEM DRAWING NO: SHEET: 164201491---6 1 of 1 REVISION: DATE: 071503 Powerware 9330 (IBM 9910 20 kVA) Installation and Operation A ---14 164201491 REV. B 013004...
- Page 177 POWERWARE 9330 (IBM 9910 20 kVA) SINGLE FEED WITH BYPASS SWITCH AND DISTRIBUTION PANEL DESCRIPTION: OPTIONS CABINET SCHEMATICS DRAWING NO: SHEET: 164201491---7 1 of 1 REVISION: DATE: 013004 Powerware 9330 (IBM 9910 20 kVA) Installation and Operation A ---15 164201491 REV. B 013004...
-
Page 178: Front View
COMPARTMENT MUST BE REMOVED POWERWARE 9330 (IBM 9910 20 kVA) TO GAIN ACCESS TO WIRING TERMINALS. DRAWING NO: SHEET: 164201491---8 1 of 5 REVISION: DATE: 071503 Powerware 9330 (IBM 9910 20 kVA) Installation and Operation A ---16 164201491 REV. B 013004... - Page 179 FRONT VIEW DETAIL DESCRIPTION: LOCATION OF UPS CABINET TERMINALS POWERWARE 9330 (IBM 9910 20 kVA) DRAWING NO: SHEET: 164201491---8 2 of 5 REVISION: DATE: 071503 Powerware 9330 (IBM 9910 20 kVA) Installation and Operation A ---17 164201491 REV. B 013004...
- Page 180 NEUTRAL LEFT VIEW DESCRIPTION: LOCATION OF UPS CABINET TERMINALS POWERWARE 9330 (IBM 9910 20 kVA) DRAWING NO: SHEET: 164201491---8 3 of 5 REVISION: DATE: 071503 Powerware 9330 (IBM 9910 20 kVA) Installation and Operation A ---18 164201491 REV. B 013004...
- Page 181 OR PUNCH CONDUIT HOLES.) DESCRIPTION: LOCATION OF UPS CABINET TERMINALS POWERWARE 9330 (IBM 9910 20 kVA) DRAWING NO: SHEET: 164201491---8 4 of 5 REVISION: DATE: 013004 Powerware 9330 (IBM 9910 20 kVA) Installation and Operation A ---19 164201491 REV. B 013004...
- Page 182 EXTERNAL BATTERY CABINET POWER CONNECTOR LOCATION OF UPS CABINET TERMINALS DESCRIPTION: POWERWARE 9330 (IBM 9910 20 kVA) DRAWING NO: SHEET: 164201491---8 5 of 5 REVISION: DATE: 013004 Powerware 9330 (IBM 9910 20 kVA) Installation and Operation A ---20 164201491 REV. B 013004...
- Page 183 WITH ARTICLE 356 OF THE NEC.) DESCRIPTION: LOCATION OF OPTIONS CABINET TERMINALS POWERWARE 9330 (IBM 9910 20 kVA) DRAWING NO: SHEET: 164201491---9 1 of 4 REVISION: DATE: 071503 Powerware 9330 (IBM 9910 20 kVA) Installation and Operation A ---21 164201491 REV. B 013004...
- Page 184 (SEE SHEET 3 FOR DETAILS) DESCRIPTION: LOCATION OF OPTIONS CABINET TERMINALS POWERWARE 9330 (IBM 9910 20 kVA) DRAWING NO: SHEET: 164201491---9 2 of 4 REVISION: DATE: 071503 Powerware 9330 (IBM 9910 20 kVA) Installation and Operation A ---22 164201491 REV. B 013004...
- Page 185 TERMINAL STRIP TB1 DESCRIPTION: LOCATION OF OPTIONS CABINET TERMINALS POWERWARE 9330 (IBM 9910 20 kVA) DRAWING NO: SHEET: 164201491---9 3 of 4 REVISION: DATE: 071503 Powerware 9330 (IBM 9910 20 kVA) Installation and Operation A ---23 164201491 REV. B 013004...
- Page 186 COVER PANEL REMOVED DESCRIPTION: LOCATION OF OPTIONS CABINET TERMNALS POWERWARE 9330 (IBM 9910 20 kVA) DRAWING NO: SHEET: 164201491---9 4 of 4 REVISION: DATE: 071503 Powerware 9330 (IBM 9910 20 kVA) Installation and Operation A ---24 164201491 REV. B 013004...
- Page 187 BATTERY CONNECTION BREAKER DESCRIPTION: LOCATION OF BATTERY CABINET TERMINALS POWERWARE 9330 (IBM 9910 20 kVA) DRAWING NO: SHEET: 164201491---10 1 of 1 REVISION: DATE: 071503 Powerware 9330 (IBM 9910 20 kVA) Installation and Operation A ---25 164201491 REV. B 013004...
- Page 188 UPS CABINET DIMENSIONS POWERWARE 9330 (IBM 9910 20 kVA) DRAWING NO: SHEET: 164201491---11 1 of 2 Dimensions are in millimeters and [inches] REVISION: DATE: 071503 Powerware 9330 (IBM 9910 20 kVA) Installation and Operation A ---26 164201491 REV. B 013004...
- Page 189 Dimensions are in millimeters and [inches] DESCRIPTION: UPS CABINET DIMENSIONS POWERWARE 9330 (IBM 9910 20 kVA) DRAWING NO: SHEET: 164201491---11 2 of 2 REVISION: DATE: 071503 Powerware 9330 (IBM 9910 20 kVA) Installation and Operation A ---27 164201491 REV. B 013004...
- Page 190 OPTIONS CABINET DIMENSIONS POWERWARE 9330 (IBM 9910 20 kVA) DRAWING NO: SHEET: 164201491---12 Dimensions are in millimeters and [inches] 1 of 3 REVISION: DATE: 071503 Powerware 9330 (IBM 9910 20 kVA) Installation and Operation A ---28 164201491 REV. B 013004...
- Page 191 OPTIONS CABINET DIMENSIONS POWERWARE 9330 (IBM 9910 20 kVA) DRAWING NO: SHEET: Dimensions are in millimeters and [inches] 164201491---12 2 of 3 REVISION: DATE: 071503 Powerware 9330 (IBM 9910 20 kVA) Installation and Operation A ---29 164201491 REV. B 013004...
- Page 192 Dimensions are in millimeters and [inches] DESCRIPTION: OPTIONS CABINET DIMENSIONS POWERWARE 9330 (IBM 9910 20 kVA) DRAWING NO: SHEET: 164201491---12 3 of 3 REVISION: DATE: 071503 Powerware 9330 (IBM 9910 20 kVA) Installation and Operation A ---30 164201491 REV. B 013004...
-
Page 193: Battery Cabinet
Dimensions are in millimeters and [inches] DESCRIPTION: BATTERY CABINET DIMENSIONS POWERWARE 9330 (IBM 9910 20 kVA) DRAWING NO: SHEET: 164201491---13 1 of 1 REVISION: DATE: 071503 Powerware 9330 (IBM 9910 20 kVA) Installation and Operation A ---31 164201491 REV. B 013004... - Page 194 1/2” CONDUIT (5 PLACES) DESCRIPTION: TYPICAL REMOTE EMERGENCY POWER OFF DRAWING NO: SHEET: 164201491---14 1 of 2 Dimensions are in millimeters and [inches] REVISION: DATE: 071503 Powerware 9330 (IBM 9910 20 kVA) Installation and Operation A ---32 164201491 REV. B 013004...
- Page 195 Remote Emergency Power Off DIMENSIONS switch and the UPS are to be DRAWING NO: SHEET: 164201491---14 supplied by the customer. 2 of 2 REVISION: DATE: 071503 Powerware 9330 (IBM 9910 20 kVA) Installation and Operation A ---33 164201491 REV. B 013004...
- Page 196 Remote Monitor Panel and the DRAWING NO: SHEET: UPS mounted Remote Monitor Card 164201491---15 1 of 1 are to be supplied by the customer. REVISION: DATE: 071503 Powerware 9330 (IBM 9910 20 kVA) Installation and Operation A ---34 164201491 REV. B 013004...
- Page 197 All parts requiring replacement for the Factory Warranty period. If, in the opinion of Powerware, the Unit fails to meet published specifications and the defect is within the terms of this warranty, the Unit will be repaired or replaced at the option of Powerware with no charge for replacement parts. Labor required, to make...
- Page 198 This Page Intentionally Left Blank. Powerware 9330 (IBM 9910 20 kVA) Installation and Operation W--2 164201491 REV. B 013004...
- Page 200 *164201491B* 164201491 Rev B...
Need help?
Do you have a question about the 9330 and is the answer not in the manual?
Questions and answers