Powerware 9315 Installation Manual
100 kva -- 160 kva
Hide thumbs
Also See for 9315:
- Operation manual (92 pages) ,
- Installation addendum (74 pages) ,
- Installation & operation manual (54 pages)

Related Manuals for Powerware 9315


Summary of Contents for Powerware 9315
- Page 1 Uninterruptible Power Supply 100 kVA - - 160 kVA Installation Manual 164200292 Rev. E...
-
Page 2: Save These Instructions
WARNING: This is a product for restricted sales distribution to informed partners. Installation restrictions or additional measures may be needed to prevent disturbances. Powerware 9315 (100 kVA- -160 kVA) Installation 164200292 REV. E 041500... -
Page 3: Table Of Contents
........Powerware 9315 (100 kVA- -160 kVA) Installation... - Page 4 ......A---1 Powerware 9315 (100 kVA- -160 kVA) Installation 164200292 REV. E 041500 Powerware 9315 (100 kVA- -160 kVA) Installation...
- Page 5 Figure 29. Supervisory Contact Module TB2 ..... . . Powerware 9315 (100 kVA- -160 kVA) Installation 164200292 Rev. E 041500...
- Page 6 This Page Intentionally Left Blank. Powerware 9315 (100 kVA- -160 kVA) Installation 164200292 REV. E 041500...
-
Page 7: Introduction
Introduction This manual describes how to install your Powerware 9315 Uninterruptible Power Supply (UPS) system. It contains instructions for installing the UPS and each optional component and accessory. The information you will use depends on the system you purchased. -
Page 8: Using This Manual
Read through each installation procedure before you begin. Perform only those procedures that apply to the UPS system you are installing. Powerware 9315 (100 kVA- -160 kVA) Installation 164200292 REV. E 041500... -
Page 9: Conventions Used In This Manual
Contact your local Field Service office for information on how to obtain copies of this manual. Getting Help If you have a question about any of the information in this manual, or if you have a question this manual does not answer, please call Powerware Corporation Field Service: United States 1-800-843-9433... - Page 10 This Page Intentionally Left Blank. Powerware 9315 (100 kVA- -160 kVA) Installation 164200292 REV. E 041500...
-
Page 11: Getting Started
National Electrical Code (NEC), Article 480. NOTE: Startup and operational checks should be performed only by authorized service personnel. This service is usually offered as part of the sales contract for your UPS system. Powerware 9315 (100 kVA- -160 kVA) Installation 164200292 Rev. E 041500... -
Page 12: Preparing Your Site
(RIM)) should be installed through the 28.6 mm (1.1 in.) knockout in the bottom of the UPS cabinet. The top entry connection requires installation of ½-in. flexible conduit within the UPS. Bottom entry connection requires no additional routing of conduit within the UPS. Powerware 9315 (100 kVA- -160 kVA) Installation 164200292 REV. E 041500... -
Page 13: Inspecting And Unpacking Each Cabinet
Use a forklift or other material handling equipment to move the cabinet to a convenient unpacking area. Insert the forklift jacks between the foam cushions on the bottom of the unit. CAUTION: Do not tilt cabinets more than 10 degrees from vertical. Powerware 9315 (100 kVA- -160 kVA) Installation 164200292 Rev. E 041500... -
Page 14: Unloading The Ups Cabinet From The Pallet
After the foam cushions clear the floor, remove the hardware loosened in step 3. Pull the foam cushions out from under the UPS cabinet, and discard or recycle them in a responsible manner. Powerware 9315 (100 kVA- -160 kVA) Installation 164200292 REV. E 041500... -
Page 15: Figure 3. Removing Front And Rear Supports
Replace the doors removed in step 1. The UPS cabinet is now ready to be rolled to its final location. Repeat steps 1 through 9 for each cabinet you are preparing to install. Powerware 9315 (100 kVA- -160 kVA) Installation 164200292 Rev. E 041500... -
Page 16: Creating An Installation Plan
Use the procedures and illustrations in the following sections to create a logical plan for installing the UPS and optional components. The information in Chapter 3 will help you plan the installation. Powerware 9315 (100 kVA- -160 kVA) Installation 164200292 REV. E 041500... -
Page 17: Installing The Ups
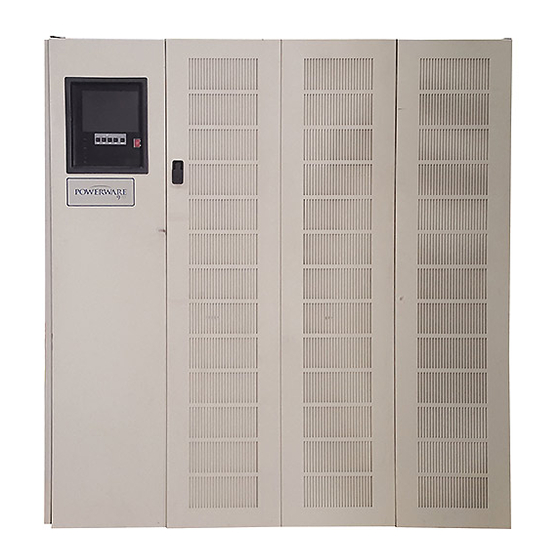
The UPS cabinet arrives as shown in Figure 4. COOLING AIR INLETS COOLING AIR EXHAUST WIRE ENTRY TOP VIEW BOTTOM WIRE ENTRY BOTTOM VIEW Figure 4. UPS Cabinet Powerware 9315 (100 kVA- -160 kVA) Installation 164200292 Rev. E 041500... - Page 18 Table U in Appendix A identifies the control wiring terminations. · Refer to the Powerware 9315 Maintenance Bypass Module (MBM) Installation and Operation Manual 164201177 for MBM installation. Powerware 9315 (100 kVA- -160 kVA) Installation 164200292 REV. E 041500...
-
Page 19: Preparing The Ups For Installing
(RMP), you must prepare the UPS cabinet for the installation of these options. Refer to Figure 5 for the locations of the items mentioned in these procedures. Also, refer to Powerware 9315 Series 685 and 1085 Auxiliary Battery Cabinets Installation Manual, 164200300, for information on installing battery cabinets. -
Page 20: Figure 5. Preparing The Ups For Installing Other Cabinets
BATTERY POWER BATTERY BREAKER LEVELING FEET SENSING CABLE CONNECTOR COMMUNICATION PANEL NOTE: UPS Shown with Right Door Open or Removed Figure 5. Preparing the UPS for Installing Other Cabinets Powerware 9315 (100 kVA- -160 kVA) Installation 164200292 REV. E 041500... -
Page 21: Completing The Installation Checklist
Installation Checklist to be sure you have completed all applicable equipment installation. NOTE: The Installation Checklist MUST be completed prior to starting the UPS system for the first time. Powerware 9315 (100 kVA- -160 kVA) Installation 164200292 Rev. E 041500... -
Page 22: Installation Checklist
UPS cabinet. (OPTIONAL) A remote battery disconnect control is mounted in its installed location and its wiring is terminated inside the UPS and battery cabinet. (OPTIONAL) Powerware 9315 (100 kVA- -160 kVA) Installation 164200292 REV. E 041500... -
Page 23: Notes
Notes ________________________________________________________________________________ ________________________________________________________________________________ ________________________________________________________________________________ ________________________________________________________________________________ ________________________________________________________________________________ ________________________________________________________________________________ ________________________________________________________________________________ ________________________________________________________________________________ ________________________________________________________________________________ ________________________________________________________________________________ ________________________________________________________________________________ ________________________________________________________________________________ ________________________________________________________________________________ Powerware 9315 (100 kVA- -160 kVA) Installation 164200292 Rev. E 041500... - Page 24 This Page Intentionally Left Blank. Powerware 9315 (100 kVA- -160 kVA) Installation 164200292 REV. E 041500...
-
Page 25: Joining Cabinets
Method A to join the PDM cabinet to the left side of the UPS cabinet. · Refer to Powerware 9315 Series 685 and 1085 Auxiliary Battery Cabinets Installation Manual, 164200300, for procedures to connect battery cabinets. Powerware 9315 (100 kVA- -160 kVA) Installation... -
Page 26: Method A
See Figure 9 and Figure 10. Either an angled bracket or a larger flat bracket joins the cabinets at the bottom. Attach the flat brackets to the cabinet tops first. Powerware 9315 (100 kVA- -160 kVA) Installation 164200292 REV. E 041500... -
Page 27: Figure 9. Placement Of Joining Brackets
Use the same method as step 6 to install the second flat bracket over the screws at the rear of the cabinet tops. Remove the nut from the screw in the lower door hinge of the UPS cabinet. Powerware 9315 (100 kVA- -160 kVA) Installation 164200292 Rev. E 041500... -
Page 28: Figure 10. Installing The Angled Bracket
Repeat steps 2 through 12 to join another optional cabinet to the other side of the UPS cabinet. Attach a ground wire to the joined cabinets using the procedure “Grounding Joined Cabinets” in this chapter. Powerware 9315 (100 kVA- -160 kVA) Installation 164200292 REV. E 041500... -
Page 29: Method B
Figure 12. Attach a ground to the joined cabinets using the procedure “Grounding Joined Cabinets” in this chapter. Powerware 9315 (100 kVA- -160 kVA) Installation 164200292 Rev. E 041500... -
Page 30: Figure 12. Joining Component Cabinets
Battery Cabinet Bracket from kit Optional Optional Cabinet Cabinet Existing Screw Bracket from kit Screw from kit Front of 685 Front of Battery Cabinet Figure 12. Joining Component Cabinets Powerware 9315 (100 kVA- -160 kVA) Installation 164200292 REV. E 041500... -
Page 31: Grounding Joined Cabinets
Mount the grounding bar as shown in Figure 14, attaching it to the frame of each cabinet using the hardware previously removed. Secure each cabinet by lowering the front leveling feet. Repeat steps 1 through 3 for joining each additional cabinet. Powerware 9315 (100 kVA- -160 kVA) Installation 164200292 Rev. E 041500... - Page 32 GROUNDING BAR CABINET CABINET FRONT OPTIONAL OPTIONAL CABINET CABINET CABINET BASE BASE BASE PERMANENTLY (side view) ATTACHED HARDWARE (top view of bases) Figure 14. Cabinet-to-Cabinet Grounding --- Method B Powerware 9315 (100 kVA- -160 kVA) Installation 164200292 REV. E 041500...
-
Page 33: Installing Battery Cabinets
This chapter describes installing the UPS manufacturer’s battery cabinets. If you are installing battery cabinets and remote disconnects provided by Powerware Corporation, refer to the Powerware 9315 Series 685 and 1085 Auxiliary Battery Cabinets Installation Manual, 164200300, for instructions. Two Models are Available ·... -
Page 34: General Notes About Installing Battery Cabinets And Remote Disconnects
General Notes About Installing Battery Cabinets and Remote Disconnects If you are installing battery cabinets not provided by Powerware Corporation, refer to the battery cabinet manufacturer’s operating manual for instructions on battery cabinet installation and maintenance. Powerware 9315 (100 kVA- -160 kVA) Installation... -
Page 35: Figure 15. Input Transformer Cabinet
UPS TOP VIEW (see Figure 9) JOINING POINTS for joining to other cabinets (see Figure 12) 88.9 mm (3.5 in.) SWIVEL RADIUS BOTTOM VIEW Figure 15. Input Transformer Cabinet Powerware 9315 (100 kVA- -160 kVA) Installation 164200292 Rev. E 041500... - Page 36 Secure the left side cover at the bottom with screws. Replace the deadfront on the UPS cabinet. Close the UPS cabinet doors and the input transformer cabinet door. Powerware 9315 (100 kVA- -160 kVA) Installation 164200292 REV. E 041500...
-
Page 37: Figure 16. Installing An Input Transformer Cabinet
AC INPUT TO UPS INPUT TRANSFORMER CONNECTION CABINET JOINING POINTS (See Figure 12) LEVELING FEET Figure 16. Installing an Input Transformer Cabinet Powerware 9315 (100 kVA- -160 kVA) Installation 164200292 Rev. E 041500... - Page 38 This Page Intentionally Left Blank. Powerware 9315 (100 kVA- -160 kVA) Installation 164200292 REV. E 041500...
-
Page 39: Figure 17. Typical Pdm Cabinet
The PDM cabinet arrives as shown in Figure 17 and Drawing 164200253---7 in Appendix A. Before installing the PDM, be sure you have prepared the UPS according to the instructions in Chapter 3. Refer to Powerware Power Distribution Module Installation and Operation Manual 164201061 for PDM installation and operation. - Page 40 This Page Intentionally Left Blank. Powerware 9315 (100 kVA- -160 kVA) Installation 164200292 REV. E 041500...
-
Page 41: Figure 18. Remote Epo Control
Connect the Remote EPO wiring as shown in Tables B and C: Table B. Remote EPO Wire Terminations From Remote To Communications EPO Station(s) Panel in UPS Remarks TB1---4 TB2---1 Twisted wires (2) Twisted wires (2) 14---18 gauge TB1---5 TB2---2 Powerware 9315 (100 kVA- -160 kVA) Installation 164200292 Rev. E 041500... - Page 42 Table C. Remote EPO switch wiring must be in accordance with UL Class II requirements. Secure the UPS by reversing all steps taken to prepare it for Remote EPO installation. Powerware 9315 (100 kVA- -160 kVA) Installation 164200292 REV. E 041500...
-
Page 43: Figure 19. Remote Battery Disconnect Enclosure
DC supply and the UPS, according to national and local codes. Figure 19 shows the remote battery disconnect enclosure. Refer to Chapter 5 of the Powerware 9315 Series 685 and 1085 Auxiliary Battery Cabinets Installation Manual, 164200300, for detailed instructions on installing a remote battery disconnect. - Page 44 This Page Intentionally Left Blank. Powerware 9315 (100 kVA- -160 kVA) Installation 164200292 REV. E 041500...
-
Page 45: Installing A Remote Monitor Panel
Table D. Optional Monitoring Accessories Number and Type of Accessories Permitted Remote Monitor Panel Relay Interface Panel Supervisory Contact Module — — — — — — — — — Powerware 9315 (100 kVA- -160 kVA) Installation 164200292 Rev. E 041500... -
Page 46: Figure 20. Remote Monitor Panel (Rmp)
Figure 20. Remote Monitor Panel (RMP) Before installing an RMP , be sure you have prepared the UPS according to the instructions in Chapter 3. Powerware 9315 (100 kVA- -160 kVA) Installation 164200292 REV. E 041500 Powerware 9315 (100 kVA- -160 kVA) Installation... -
Page 47: Figure 21. Terminal Block Bracket
Communications Panel. Connect to Port 1 (DE---9) on Communications Panel FUSE TERMINAL BLOCK (TB3) Figure 21. Terminal Block Bracket Powerware 9315 (100 kVA- -160 kVA) Installation 164200292 Rev. E 041500... -
Page 48: Figure 22. Wiring An Rmp To The Ups
From RMP B (if used) To UPS Remarks TB1---4 TB3---5 TWISTED WIRES (4) TWISTED WIRES (4) TB3---6 TB1---5 1---2 TURNS PER 1 2 TURNS PER 3 INCHES TB1---6 TB3---7 TB1---7 TB3---8 Powerware 9315 (100 kVA- -160 kVA) Installation 164200292 REV. E 041500... - Page 49 11 or 12, respectively; otherwise, secure the UPS cabinet by reversing the steps contained in procedure “To Prepare the UPS for Wiring to an RMP , RIM, SCM, or Remote EPO” of Chapter 3. Powerware 9315 (100 kVA- -160 kVA) Installation 164200292 Rev. E 041500...
- Page 50 This Page Intentionally Left Blank. Powerware 9315 (100 kVA- -160 kVA) Installation 164200292 REV. E 041500...
-
Page 51: Figure 23. Relay Interface Module
DE---9 connector on the Communications Panel of the UPS (see Figure 25). Use two screws from the spare parts kit to secure the terminal block bracket to the Communications Panel. Powerware 9315 (100 kVA- -160 kVA) Installation 164200292 Rev. E 041500... -
Page 52: Figure 24. Terminal Block Bracket
Port 1 (DE---9) on Communications Panel FUSE TERMINAL BLOCK (TB3) Figure 24. Terminal Block Bracket DE---9 CONNECTOR (ON COMMUNICATIONS PANEL OF THE UPS) Figure 25. Wiring an RIM to the UPS Powerware 9315 (100 kVA- -160 kVA) Installation 164200292 REV. E 041500... - Page 53 From RIM B (if used) To UPS Remarks TB3---5 TB1---4 TWISTED WIRES (4) TWISTED WIRES (4) TB1---5 TB3---6 1---2 TURNS PER 1 2 TURNS PER 3 INCHES TB1---6 TB3---7 TB3---8 TB1---7 Powerware 9315 (100 kVA- -160 kVA) Installation 164200292 Rev. E 041500...
- Page 54 This Page Intentionally Left Blank. Powerware 9315 (100 kVA- -160 kVA) Installation 164200292 REV. E 041500...
-
Page 55: Figure 26. Supervisory Contact Module
DE---9 connector on the Communications Panel of the UPS (see Figure 28). Use two screws from the spare parts kit to secure the terminal block bracket to the Communications Panel. Powerware 9315 (100 kVA- -160 kVA) Installation 164200292 Rev. E 041500... -
Page 56: Figure 27. Terminal Block Bracket
Port 1 (DE---9) on Communications Panel FUSE TERMINAL BLOCK (TB3) Figure 27. Terminal Block Bracket DE---9 CONNECTOR (ON COMMUNICATIONS PANEL OF THE UPS) Figure 28. Wiring an SCM to the UPS Powerware 9315 (100 kVA- -160 kVA) Installation 164200292 REV. E 041500... - Page 57 TB1---7 TB3---4 From SCM B (if used) To UPS Remarks TB1---4 TB3---5 TWISTED WIRES (4) TWISTED WIRES (4) TB1---5 TB3---6 1---2 TURNS PER 3 INCHES TB3---7 TB1---6 TB3---8 TB1---7 Powerware 9315 (100 kVA- -160 kVA) Installation 164200292 Rev. E 041500...
-
Page 58: Figure 29. Supervisory Contact Module Tb2
Note: Supervisory contacts are rated at 2.0 amps at 28 Vdc or 120 Vac and 0.15 amp at 115 Vdc. Supervisory contacts require external power supply. Internal 24 Vdc is not capable of supplying contact current. Figure 29. Supervisory Contact Module TB2 Powerware 9315 (100 kVA- -160 kVA) Installation 164200292 REV. E 041500... - Page 59 Power Distribution Module · 164200253---8 Maintenance Bypass Module · 164200253---9 Remote Emergency Power Off · 164200253---10 Remote Monitor Panel · 164200253---11 Relay Interface Module · 164200253---12 Supervisory Contact Module Powerware 9315 (100 kVA- -160 kVA) Installation A ---1 164200292 Rev. E 041500...
- Page 60 If wire is run in an ambient temperature greater than 30˚C, higher temperature and/or larger size wire may be necessary. DESCRIPTION: INSTALLATION NOTES NOTE: Callout letter DRAWING NO: SHEET: map to drawing #164200292---3 164200292---1 1 of 14 REVISION: DATE: 041500 Powerware 9315 (100 kVA- -160 kVA) Installation A ---2 164200292 REV. E 041500...
- Page 61 If wire is run in an ambient temperature greater than 30˚C, higher temperature and/or larger size wire may be necessary. DESCRIPTION: INSTALLATION NOTES NOTE: Callout letter DRAWING NO: SHEET: map to drawing #164200292---3 164200292---1 2 of 14 REVISION: DATE: 041500 Powerware 9315 (100 kVA- -160 kVA) Installation A ---3 164200292 Rev. E 041500...
- Page 62 If wire is run in an ambient temperature greater than 30˚C, higher temperature and/or larger size wire may be necessary. DESCRIPTION: INSTALLATION NOTES NOTE: Callout letter DRAWING NO: SHEET: map to drawing #164200292---3 164200292---1 3 of 14 REVISION: DATE: 041500 Powerware 9315 (100 kVA- -160 kVA) Installation A ---4 164200292 REV. E 041500...
- Page 63 If wire is run in an ambient temperature greater than 30˚C, higher temperature and/or larger size wire may be necessary. DESCRIPTION: INSTALLATION NOTES NOTE: Callout letter DRAWING NO: SHEET: map to drawing #164200292---3 164200292---1 4 of 14 REVISION: DATE: 041500 Powerware 9315 (100 kVA- -160 kVA) Installation A ---5 164200292 Rev. E 041500...
- Page 64 DESCRIPTION: INSTALLATION NOTES NOTE: Callout letter DRAWING NO: SHEET: map to drawing #164200292---3 164200292---1 5 of 14 400V = 380/400/415 Volt REVISION: DATE: 041500 Powerware 9315 (100 kVA- -160 kVA) Installation A ---6 164200292 REV. E 041500...
- Page 65 DESCRIPTION: INSTALLATION NOTES NOTE: Callout letter DRAWING NO: SHEET: map to drawing #164200292---3 164200292---1 6 of 14 REVISION: DATE: 400V=380/400/415 Volt 041500 Powerware 9315 (100 kVA- -160 kVA) Installation A ---7 164200292 Rev. E 041500...
- Page 66 1 --- #4---500 kcmil 42.4 (375) Customer Ground Ground Ground 4 --- #6---350 kcmil 42.4 (375) DESCRIPTION: INSTALLATION NOTES DRAWING NO: SHEET: 164200292---1 7 of 14 REVISION: C DATE: 081596 Powerware 9315 (100 kVA- -160 kVA) Installation A ---8 164200292 REV. E 041500...
- Page 67 DESCRIPTION: INSTALLATION NOTES DRAWING NO: SHEET: 164200292---1 8 of 14 REVISION: DATE: 041500 Powerware 9315 (100 kVA- -160 kVA) Installation A ---9 164200292 Rev. E 041500...
- Page 68 480V 600V Powerware 9315 160 Powerware 9315 150 Powerware 9315 130 Powerware 9315 125 DESCRIPTION: INSTALLATION NOTES DRAWING NO: SHEET: 164200292---1 9 of 14 REVISION: DATE: 041500 Powerware 9315 (100 kVA- -160 kVA) Installation A ---10 164200292 REV. E 041500...
-
Page 69: Figure 4. Ups Cabinet
Table P. Equipment Weight and Point Loading Weight Point Loading Component Kg (lb) Kg (lb) UPS Cabinet (Powerware 9315 150 & 160) 1429 (3150) 6 at 238 (525) (480/480 & 480/208 Systems) UPS Cabinet (Powerware 9315 150 & 160) 2268 (5000) 6 at 378 (833) (208/208, 600/208, 600/600, &... - Page 70 Regardless of assignment, alarms display as Building Alarm 1, Building Alarm 2, etc., on Monitor Panel. Use twisted pair wires for each alarm input and common. DESCRIPTION: INSTALLATION NOTES DRAWING NO: SHEET: 164200292---1 11 of 14 REVISION: C DATE: 081596 Powerware 9315 (100 kVA- -160 kVA) Installation A ---12 164200292 REV. E 041500...
- Page 71 RELAY 2 NC RELAY 2 NO General purpose NO and NC relay contacts. NOTICE RTN DESCRIPTION: INSTALLATION NOTES DRAWING NO: SHEET: 164200292---1 12 of 14 REVISION: C DATE: 081596 Powerware 9315 (100 kVA- -160 kVA) Installation A ---13 164200292 Rev. E 041500...
- Page 72 RELAY 1 CONTACT RATING: Maximum Switched Voltage 32 VAC 42 VDC Maximum Carrying Current DESCRIPTION: INSTALLATION NOTES DRAWING NO: SHEET: 164200292---1 13 of 14 REVISION: C DATE: 081596 Powerware 9315 (100 kVA- -160 kVA) Installation A ---14 164200292 REV. E 041500...
- Page 73 NOTE: This switch must be a dedicated switch, and not tied into any other circuits. DESCRIPTION: INSTALLATION NOTES DRAWING NO: SHEET: 164200292---1 14 of 14 REVISION: DATE: 081596 Powerware 9315 (100 kVA- -160 kVA) Installation A ---15 164200292 Rev. E 041500...
- Page 74 PDM CABINET INPUT BATTERY (optional) TRANSFORMER CABINET CABINET CABINET (optional) (optional) (up to four) DESCRIPTION: TYPICAL UPS SYSTEM DRAWING NO: SHEET: 164200292---2 1 of 1 REVISION: DATE: 010496 Powerware 9315 (100 kVA- -160 kVA) Installation A ---16 164200292 REV. E 041500...
- Page 75 NOTE 1: There is a zero degree phase shift DRAWING NO: SHEET: 164200292---3 1 of 7 through the bypass windings of the output transformer. REVISION: C DATE: 081596 Powerware 9315 (100 kVA- -160 kVA) Installation A ---17 164200292 Rev. E 041500...
- Page 76 NOTE 1: There is a zero degree phase shift DRAWING NO: SHEET: 164200292---3 2 of 7 through the bypass windings of the output transformer. REVISION: C DATE: 081596 Powerware 9315 (100 kVA- -160 kVA) Installation A ---18 164200292 REV. E 041500...
- Page 77 NOTE 2: There is a zero degree phase shift DRAWING NO: SHEET: 164200292---3 3 of 7 through the bypass windings of the REVISION: C DATE: output transformer. 081596 Powerware 9315 (100 kVA- -160 kVA) Installation A ---19 164200292 Rev. E 041500...
- Page 78 NOTE 2: There is a zero degree phase shift DRAWING NO: SHEET: 164200292---3 4 of 7 through the bypass windings of the output transformer. REVISION: C DATE: 081596 Powerware 9315 (100 kVA- -160 kVA) Installation A ---20 164200292 REV. E 041500...
- Page 79 NOTE 2: There is a zero degree phase shift DRAWING NO: SHEET: through the bypass windings of the 164200292---3 5 of 7 output transformer. REVISION: C DATE: 081596 Powerware 9315 (100 kVA- -160 kVA) Installation A ---21 164200292 Rev. E 041500...
- Page 80 NOTE 1: There is a zero degree phase shift through the bypass windings of the DRAWING NO: SHEET: 164200292---3 6 of 7 output transformer. REVISION: C DATE: 081596 Powerware 9315 (100 kVA- -160 kVA) Installation A ---22 164200292 REV. E 041500...
- Page 81 NOTE 2: There is a zero degree phase shift DRAWING NO: SHEET: 164200292---3 7 of 7 through the bypass windings of the output transformer. REVISION: C DATE: 081596 Powerware 9315 (100 kVA- -160 kVA) Installation A ---23 164200292 Rev. E 041500...
- Page 82 MAIN BATTERY SENSING CABLE RS---232 BONDING CABLE CONNECTION JUMPER COMMUNICATION PANEL DESCRIPTION: LOCATION OF UPS POWER TERMINALS DRAWING NO: SHEET: 164200292---4 1 of 1 REVISION: DATE: 060995 Powerware 9315 (100 kVA- -160 kVA) Installation A ---24 164200292 REV. E 041500...
- Page 83 (49.3) 1209 (47.4) (1.0) 399 (typ) (15.7) 1870 (73.6) Dimensions are in millimeters (inches) DESCRIPTION: UPS CABINET DRAWING NO: SHEET: 164200292---5 1 of 2 REVISION: DATE: 060995 Powerware 9315 (100 kVA- -160 kVA) Installation A ---25 164200292 Rev. E 041500...
- Page 84 (TYPICAL) (30.0) (18.74) 951.7 (37.47) Dimensions are in millimeters (inches) UPS CABINET DESCRIPTION: UPS CABINET BOTTOM DRAWING NO: SHEET: 164200292---5 2 of 2 VIEW REVISION: DATE: 060995 Powerware 9315 (100 kVA- -160 kVA) Installation A ---26 164200292 REV. E 041500...
- Page 85 SWIVEL RADIUS 635.5 (25.02) Dimensions are in millimeters (inches) DESCRIPTION: INPUT TRANSFORMER CABINET 142.4 DRAWING NO: SHEET: 164200292---6 1 of 1 375.7 (5.61) (14.79) REVISION: DATE: 060995 Powerware 9315 (100 kVA- -160 kVA) Installation A ---27 164200292 Rev. E 041500...
- Page 86 Breaker. 15-- 70A, 1-Pole; NQOM442M225IG -- NL 15-- 100A 2- and 3-Pole; 125A, 2-Pole. Grounding Grounding Stud Stud NOTE 1: Refer to Powerware 9315 Power DESCRIPTION: POWER DISTRIBUTION MODULE Distribution Module Installation and OperationManual 164201061 for DRAWING NO: SHEET: 164200292---7 1 of 1 PDM installation and operation.
- Page 87 OPTIONAL UPS BYPASS INPUT CONNECTIONS BIB1 UTILITY INPUT, IF BIB BREAKER INSTALLED BIB2 NOTE 1: Refer to Powerware 9315 Maintenance Bypass Module (MBM) Installation and Operation Manual 164201177 for MBM installation and operation. DESCRIPTION: MAINTENANCE BYPASS MODULE DRAWING NO: SHEET: 164200292---8...
- Page 88 5 sides TO OTHER TO UPS Dimensions are in millimeters (inches) EQUIPMENT DESCRIPTION: REMOTE EMERGENCY POWER OFF DRAWING NO: SHEET: 164200292---9 1 of 1 REVISION: DATE: 041500 Powerware 9315 (100 kVA- -160 kVA) Installation A ---30 164200292 REV. E 041500...
- Page 89 REMOTE MONITOR AND UPS NOT TO (14---18 gauge) EXCEED 500 FEET. Dimensions are in millimeters (inches) DESCRIPTION: REMOTE MONITOR PANEL DRAWING NO: SHEET: 164200292---10 1 of 1 REVISION: DATE: 041500 Powerware 9315 (100 kVA- -160 kVA) Installation A ---31 164200292 Rev. E 041500...
- Page 90 MAX WIRE SIZE NO. 14 AWG. MIN WIRE SIZE NO. 18 AWG. Dimensions are in millimeters (inches) DESCRIPTION: RELAY INTERFACE MODULE DRAWING NO: SHEET: 164200292---11 1 of 2 REVISION: DATE: 041500 Powerware 9315 (100 kVA- -160 kVA) Installation A ---32 164200292 REV. E 041500...
- Page 91 215.9 (6.75) (8.50) KNOCKOUTS PROVIDED ON FIVE SURFACES Dimensions are in millimeters (inches) DESCRIPTION: RELAY INTERFACE MODULE DRAWING NO: SHEET: 164200292---11 2 of 2 REVISION: DATE: 041500 Powerware 9315 (100 kVA- -160 kVA) Installation A ---33 164200292 Rev. E 041500...
- Page 92 REMOTE MONITOR AND UPS NOT TO EXCEED 500 FEET. Dimensions are in millimeters (inches) DESCRIPTION: SUPERVISORY CONTACT MODULE DRAWING NO: SHEET: 164200292---12 1 of 1 REVISION: DATE: 041500 Powerware 9315 (100 kVA- -160 kVA) Installation A ---34 164200292 REV. E 041500...
Need help?
Do you have a question about the 9315 and is the answer not in the manual?
Questions and answers