Table of Contents
Advertisement
Quick Links
Download this manual
See also:
Administrator's Manual
Advertisement
Table of Contents

Related Manuals for Fuji Xerox Color 550


Summary of Contents for Fuji Xerox Color 550
- Page 1 Color 550 Printer Color 560 Printer User Guide...
- Page 2 The data saved in the hard disk of the machine may be lost if there is any problem in the hard disk. Fuji Xerox is not responsible for any direct and indirect damages arising from or caused by such data loss.
-
Page 3: Table Of Contents
Table of Contents Table of Contents Table of Contents ......................3 Before Using the Machine ..................7 Preface ........................8 Types of Manuals ......................9 Using This Guide ....................... 10 Organization of This Guide ................... 10 Conventions ......................10 Safety Notes ......................12 Electrical Safety .................... - Page 4 Energy Saver Mode....................45 Entering the Energy Saver Mode................45 Exiting the Energy Saver Mode ................46 Control Panel......................47 Services and Options.....................49 Customizing the Control Panel ................50 Entering Text ......................52 Copy ..........................53 Copying Procedure.....................54 Step 1 Loading Documents ...................54 Step 2 Selecting Features ..................56 Step 3 Entering a Quantity..................57 Step 4 Starting the Copy Job.................58 Step 5 Confirming the Copy Job in Job Status ............59...
- Page 5 Table of Contents 2 Sided Copying (Making 2 Sided Copies) ............92 Book Copying (Copying Facing Pages onto Separate Sheets) ......93 2 Sided Book Copying (Making 2 Sided Copies of Facing Pages) ....... 95 Original Size (Specifying the Scan Size for the Document)........96 Mixed Size Originals (Scanning Different Size Documents Simultaneously)..
- Page 6 Original Type (Selecting the Document Type).............156 File Format (Selecting a File Format for Output Data).........157 Advanced Settings ....................159 Photographs (Scanning a Color Photograph)............159 Image Options (Adjusting Scan Density and Image Sharpness)......160 Image Enhancement (Erasing the Background Color of Documents/ Adjusting Contrast) ....................160 Shadow Suppression (Suppressing the Document Background)......161 Color Space (Specifying the Color Space) ............162 Layout Adjustment....................163...
-
Page 7: Before Using The Machine
1 Before Using the Machine This chapter describes how to use this guide, as well as safety notes and legal notice you should read before using the machine. Preface ......................8 Types of Manuals ..................9 Using This Guide ..................10 Safety Notes .................... -
Page 8: Preface
1 Before Using the Machine Preface Thank you for selecting the Color 550/560 Printer (hereafter referred to as “the machine”). This guide describes how to operate the machine and the precautions you should follow during operation. To get the most out of the machine and to use it effectively, be sure to read this guide before use. -
Page 9: Types Of Manuals
Types of Manuals Types of Manuals The following guides are provided with the machine. Accompanying Manuals User Guide (this guide) The guide describes all the necessary steps for copy and scan. Administrator Guide The guide is intended for system administrators, and describes how to solve problems that may occur with the machine. -
Page 10: Using This Guide
1 Before Using the Machine Using This Guide This guide is intended for first time users of the machine. It describes the basic operations for the Copy and Scan services. Organization of This Guide This guide consists of the following chapters: 1 Before Using the Machine Describes how to use this guide, as well as safety notes, legal notices, and other important information you should read before using the machine. - Page 11 Using This Guide • Names of menus, commands, windows, or dialog boxes displayed on the computer screen and their buttons and menu names. < > button : Hardware buttons on the control panel. < > key : Keys on the keyboard of the computer. >...
-
Page 12: Safety Notes
1 Before Using the Machine Safety Notes Before using this product, read "Safety Notes" carefully for safety use. This product and recommended supplies have been tested and found to comply with strict safety requirements including safety agency approvals and compliance with environmental standards. -
Page 13: Electrical Safety
If the power cord is damaged or insulated wires are exposed, contact your local Fuji Xerox representative for its replacement. Do not use a damaged or uninsulated cord to avoid the risk of electric shock and a fire accident. -
Page 14: Machine Installation
Once you notice any unusual condition, switch off and unplug this product first and contact your local Fuji Xerox representative. Machine Installation Do not locate this product where people might step on or trip over the power cord. - Page 15 Safety Notes Main unit 1716 1574 (Unit: mm) 1674 With Finisher C2 with Booklet Maker (optional) 1716 2092 (Unit: mm) 2192 With High Capacity Feeder C1-DS (optional) 1716 2045 (Unit: mm) 2145...
- Page 16 1 Before Using the Machine With Finisher D4 with Booklet Maker (optional) 1716 2575 (Unit: mm) 2675 With Finisher D4 with Booklet Maker (optional), D4 Folder Unit, and High Capacity Feeder C1-DS 1716 3246 (Unit: mm) 3346 Do not incline the product at more than 10 degree angle. Otherwise, it may fall over and cause injuries.
-
Page 17: Operational Safety
To avoid the risk of electric shock and a fire accident, switch off and unplug the product promptly in the following conditions, then contact your local Fuji Xerox representative. The product emits smoke or its surface is unusually hot. - Page 18 Never use aerosol cleaners, or it may catch fire and cause explosion. If you need to pull out a tray to remove paper jam, contact your local Fuji Xerox representative. Do not pull out a tray, otherwise it may cause injuries.
- Page 19 TEST button Breaker switch Finisher D4, Finisher D4 with Booklet Maker If the circuit does not work properly, contact your local Fuji Xerox representative. Do not attempt to remove a paper jammed deeply inside the product, particularly a paper wrapped around a Fusing Unit or a heat roller. Otherwise, it may cause injuries or burns.
-
Page 20: Consumable
Do not apply excessive force to hold thick document on the document glass. It may break the glass and cause injuries. To move this product to another location, contact your local Fuji Xerox representative Ventilate well during extended operation or mass copying. It may affect the office air environment due to odor such as ozone in a poorly ventilated room. -
Page 21: Location Of Warning And Caution Labels
Safety Notes Location of Warning and Caution Labels Always follow all warning instructions marked on or supplied with this product. To avoid the risk of burn injuries and electric shock, never touch the area with the "High Temperature" or "High Voltage" marks on. - Page 22 1 Before Using the Machine...
- Page 23 Safety Notes...
-
Page 24: Regulation
Changes and modifications to this product not specifically approved by Fuji Xerox may void the user's authority to operate this equipment. Product Safety Certification (CB) This product is certified by the following agency using the safety standards listed. -
Page 25: Environment
Environment Environment For environmental protection and efficient use of resources, Fuji Xerox reuses returned toner cartridges and drum cartridges to make recycle parts, recycle materials or energy recovery. Proper disposal is required for toner cartridges and drum cartridges no longer needed. -
Page 26: About License
1 Before Using the Machine About License This section describes information about licenses. Be sure to read through it. RSA BSAFE ® This product includes RSA BSAFE Cryptographic software from RSA Security Inc. Heimdal Copyright (c)2000 Kungliga Tekniska Högskolan (Royal Institute of Technology, Stockholm, Sweden). -
Page 27: Libcurl
About License Libcurl COPYRIGHT AND PERMISSION NOTICE Copyright (c) 1996 - 2006, Daniel Stenberg, <daniel@haxx.se>. All rights reserved. Permission to use, copy, modify, and distribute this software for any purpose with or without fee is hereby granted, provided that the above copyright notice and this permission notice appear in all copies. -
Page 28: Openldap
1 Before Using the Machine THIS SOFTWARE IS PROVIDED BY THE FREEBSD PROJECT ''AS IS'' AND ANY EXPRESS OR IMPLIED WARRANTIES, INCLUDING, BUT NOT LIMITED TO, THE IMPLIED WARRANTIES OF MERCHANTABILITY AND FITNESS FOR A PARTICULAR PURPOSE ARE DISCLAIMED. IN NO EVENT SHALL THE FREEBSD PROJECT OR CONTRIBUTORS BE LIABLE FOR ANY DIRECT, INDIRECT, INCIDENTAL, SPECIAL, EXEMPLARY, OR CONSEQUENTIAL DAMAGES (INCLUDING, BUT NOT LIMITED TO, PROCUREMENT OF SUBSTITUTE GOODS OR SERVICES;... - Page 29 About License Portions Copyright 1999-2005 Howard Y.H. Chu. Portions Copyright 1999-2005 Symas Corporation. Portions Copyright 1998-2003 Hallvard B. Furuseth. All rights reserved. Redistribution and use in source and binary forms, with or without modification, are permitted provided that this notice is preserved. The names of the copyright holders may not be used to endorse or promote products derived from this software without their specific prior written permission.
-
Page 30: Des
EDICT and COMPDIC The Japanese-English dictionaries (EDICT and COMPDIC) edited by The Electronic Dictionary Research and Development Group under the coordination of Professor James William Breen at Monash University are used in the searchable PDF kit option of Fuji Xerox. - Page 31 The Japanese-English dictionaries are provided to customers on an as-is basis, and Fuji Xerox and the original supplier make no representations of warranties of any kind. Original Author Information (extracted from http://www.csse.monash.edu.au/~jwb/ edrdg/licence.html)
-
Page 32: Legal Notice
1 Before Using the Machine Legal Notice Copying or printing certain documents may be illegal in your country. Penalties of fines or imprisonment may be imposed on those found guilty. The following are examples of items that may be illegal to copy or print in your country. Currency Banknotes and checks Bank and government bonds and securities... -
Page 33: Product Overview
2 Product Overview This chapter describes the basic information of the machine, such as machine components, how to switch the machine on and off, and how to use the touch screen. Machine Components................. 34 Power Source ..................... 41 Circuit Breaker .................... 44 Energy Saver Mode .................. -
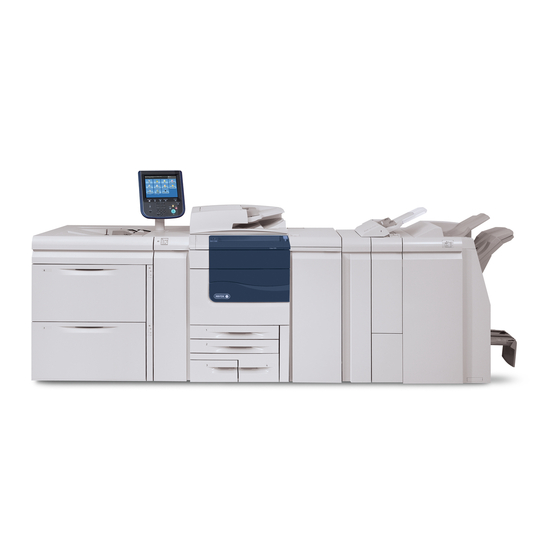
Page 34: Machine Components
2 Product Overview Machine Components This section describes the main components and functions of the machine. Color 550/560 Printer main unit with optional A4 High Capacity Feeder Component Function Document cover Holds a document in place. Document glass Load a document here. - Page 35 Machine Components Component Function Tray 6 top cover When accessing the bottom left cover of the machine to remove jammed paper, first move Tray 6 to the left, and then open this top cover. Tray 5 (Bypass) Used for loading non-standard paper, such as thick-stock paper and other special media, that cannot be loaded in Trays 1 to 4, and 6.
- Page 36 2 Product Overview Inside and right side view of the machine Component Function Output Tray Receives output paper. Two types of trays are available: the Simple Catch Tray and an optional Offset Catch Tray. When the optional offset stacking tray is attached and A4 or smaller size paper is to be output, do not use the extension flap.
- Page 37 Machine Components Duplex automatic document feeder Component Function <Confirmation> indicator This indicator lights to confirm that the document is loaded correctly. Left cover The left cover slightly opens when the top cover is opened. Open this cover widely to clear paper jams. Top cover Open this cover to access the insides of the machine to clear paper jams.
- Page 38 2 Product Overview Finisher C2 (optional) and Finisher C2 with Booklet Maker (optional) Component Function Hole punch waste Collects scraps from the puncher. Pull out this container when container discarding punch scraps. Output tray Outputs are delivered here. Exit cover Open this cover when clearing paper jams.
- Page 39 Machine Components Finisher D4, Finisher D4 with Booklet Maker (optional) 12 11 Component Function Tray 8 (Interposer) Load paper or transparencies to be used for covers or separators. The machine does not copy on paper or transparencies loaded in this tray. De-curl button Eliminates curl of paper.
- Page 40 2 Product Overview Component Function Staple cartridge Contains staples. Remove this cartridge when you need to add staples or clear staple jams. Hole punch waste Collects waste from the puncher. Remove this when emptying the container container. Tri-Fold output tray Delivers tri-folded (C fold and Z fold) copies.
-
Page 41: Power Source
Power Source Power Source The machine is provided with the power switch and the main power switch. Power switch To use the machine, press the power switch to the [ | ] position to switch its power on. You Power switch Power Switch can start operations after the machine warms Main power... -
Page 42: Switching The Power On
2 Product Overview Switching the Power On The following describes how to switch the power on. The machine takes approximately 90 seconds to warm up and to be ready to copy or print after switching the power on. This may take more time depending on your machine configuration. -
Page 43: Switching The Main Power Off
Power Source Press the power switch to the [ ] position. Important • Power off processing is performed internally on the machine for a while after the power is switched off. Do not switch the main power off immediately after switching the power off. -
Page 44: Circuit Breaker
If the breaker is in the Off (" ") position, an electrical problem may occur. Please contact your local Fuji Xerox representative. For information on how to check if the circuit breaker is working, refer to "Safety Notes" (P.12). Breaker switch... -
Page 45: Energy Saver Mode
Energy Saver Mode Energy Saver Mode The machine is equipped with the Energy Saver mode that reduces the power consumption by saving the electricity to the machine when no copy or print data is received for a specified time. The Energy Saver feature has two modes: Low Power mode and Sleep mode. The machine enters the Low Power mode after the preset time has elapsed if the machine is left unused for a fixed period of time. -
Page 46: Exiting The Energy Saver Mode
2 Product Overview Exiting the Energy Saver Mode The following describes how to exit the Energy Saver mode. The Energy Saver mode is exited in the following instances: Pressing the <Energy Saver> button Receiving a job Press the <Energy Saver> button. <Energy Saver>... -
Page 47: Control Panel
This indicator lights up when a problem other than a system error occurs with the machine, including paper jams and running out of paper. If the <Error> indicator blinks, contact your local Fuji Xerox representative. For information on the remedies for paper jams and running out of paper, refer... - Page 48 2 Product Overview Component Function <Main Power> indicator Lights up when the main power is switched on. Note • If the main power is not switched on, the machine will not be powered on even when the power is switched on. <Custom>...
-
Page 49: Services And Options
Control Panel Services and Options The machine has various options and provides valuable services. The following description outlines the services and explains the options on the [Services Home] screen. Login information field Message field Additional feature buttons Service buttons Message Field Displays a message. -
Page 50: Customizing The Control Panel
2 Product Overview Additional buttons in the [Services Home] screen Additional buttons appear in the right column of the [Services Home] screen, as rectangular buttons. Language Allows you to select a language for user-interface text displayed on the touch screen. The machine returns to the default language setting when it is turned off and then on. - Page 51 Control Panel Assigning Features to <Custom> Buttons You can assign services to the <Custom 1> to <Custom 3> buttons on the control panel. By assigning services to the <Custom> buttons, you can switch to these services without returning to the [Services Home] screen. If you do not want to assign any services to a button, select [(Not Set)].
-
Page 52: Entering Text
2 Product Overview Entering Text During operations, a screen for entering text sometimes appears. The following describes how to enter text. You can enter the following characters: numerals, alphabets, and symbols. Item Description Entering alphabets and numerals To enter uppercase letters, select [Shift]. To return to the lowercase letters, select [Shift] again. -
Page 53: Copy
3 Copy This chapter describes the basic operation and features for the Copy service. Copying Procedure ..................54 Operations during Copying ................. 60 Simple Copy ....................63 Copy ......................69 Image Quality....................82 Layout Adjustment ..................91 Output Format................... 106 Job Assembly ................... 137... -
Page 54: Copying Procedure
3 Copy Copying Procedure This section describes the basic copy procedures. The following shows the reference section for each procedure. Step 1 Loading Documents ......................54 Step 2 Selecting Features ......................56 Step 3 Entering a Quantity ......................57 Step 4 Starting the Copy Job.......................58 Step 5 Confirming the Copy Job in Job Status ................59 Step 1 Loading Documents The following two methods are available to load documents:... -
Page 55: Document Glass
Copying Procedure Remove any paper clips and staples before loading a document. Adjust the movable document guides to match the size of the document to be loaded. Note • When loading a large document such as A3, open the document stopper rightward. -
Page 56: Step 2 Selecting Features
3 Copy Load the document face down, and align it against the top left corner of the document glass. Close the document cover. Note • When a standard size document is placed on the document glass, the size of the document is displayed in the message area. -
Page 57: Step 3 Entering A Quantity
Copying Procedure If the previous settings still remain, press the <Clear All> button. <Clear All> button Select each tab, and configure features as necessary. The following shows the reference section for each tab. "Copy" (P.69) "Image Quality" (P.82) "Layout Adjustment" (P.91) "Output Format"... -
Page 58: Step 4 Starting The Copy Job
3 Copy Step 4 Starting the Copy Job The following describes how to start a copy job. Press the <Start> button. Important • If the document has been loaded in the document feeder, do not hold down the document while it is being conveyed. Note •... -
Page 59: Step 5 Confirming The Copy Job In Job Status
Copying Procedure Step 5 Confirming the Copy Job in Job Status If copies are not output after you start the copy job, the job may be in pending status. Use the following procedure to confirm the job status. Press the <Job Status> button. <Job Status>... -
Page 60: Operations During Copying
3 Copy Operations during Copying This section describes available operations during copying. The following shows the reference section for each operation. Stopping the Copy Job ........................60 Changing the Number of Copies....................61 Interrupting the Copy Job ......................62 Stopping the Copy Job To cancel a copy job in progress, use the following procedure. -
Page 61: Changing The Number Of Copies
Operations during Copying Select the job to cancel. Note • Select [ ] to return to the previous screen or [ ] to move to the next screen. Select [Delete]. Select [Delete]. Changing the Number of Copies To change the number of copy sets during scanning or copying, use the following procedure. -
Page 62: Interrupting The Copy Job
3 Copy Select [Change Quantity]. Specify the number of copy sets with the numeric keypad. The new quantity must include the number of copies that have already been printed. You cannot enter a number less than the number of copies that have already been printed. -
Page 63: Simple Copy
Simple Copy Simple Copy You can select [Copy] or [Simple Copy] on the [Services Home] screen to set the features for the Copy service. This section describes the features you can select on the [Simple Copy] screen. [Simple Copy] allows you to use only basic features to easily copy documents. The following shows the reference section for each feature. -
Page 64: Reduce/Enlarge (Making Enlarged/Reduced Copies)
3 Copy Auto Select Automatically determines the tray holding the appropriate paper, based on the document size and the specified copy ratio. Note • If you select [Auto Select], an option other than [Auto %] is selected in [Reduce/Enlarge]. Trays 1 to 5, and Trays 6 and 7 (optional) Allows you to directly select the desired tray. -
Page 65: Sided Copying (Making 2 Sided Copies)
Simple Copy Auto % Automatically determines the copy ratio based on the document size and the paper size specified in [Paper Supply], and copies the document to fit into the paper. Note • If you select [Auto %], an option other than [Auto Select] is selected in [Paper Supply]. Ratios Allows you to select from preset copy ratios. -
Page 66: Lighten/Darken (Adjusting The Copy Density)
3 Copy Lighten/Darken (Adjusting the Copy Density) This feature allows you to select a copy-density level from seven levels. The copy becomes darker when you move [ ] to the left, and lighter when you move it to the right. Use [ ] and [ ] to select a density level. -
Page 67: Staple
Simple Copy 1 Staple This feature allows you to select whether to staple copied outputs at the top left corner. The Finisher C2 and the Finisher C2 with Booklet Maker are capable of stapling 2 - 50 sheets of paper (when 80 gsm paper is used). The Finisher D4 and the Finisher D4 with Booklet Maker are capable of stapling 2 - 100 sheets of paper (when 80 gsm paper is used). - Page 68 - HW Tab Stock (177 - 220 gsm) - X-HW Tab Stock (221 - 256 gsm) - X-HW Tab Stock (257 - 300 gsm) Note • Optional finishing module is required to enable this feature. For more information, contact your local Fuji Xerox representative. Select [1 Staple].
-
Page 69: Copy
Copy Copy You can select [Copy] or [Simple Copy] on the [Services Home] screen to set the features for the Copy service. This section describes the features you can select on the [Copy] screen. The following shows the reference section for each feature. Reduce/Enlarge (Making Enlarged/Reduced Copies).............. - Page 70 3 Copy Ratios (3rd and 4th buttons) Displays preset copy ratios. You can change the copy ratio associated with each button. For information on the settings, refer to "5 Tools" > "Copy Service Settings" > "Preset Buttons" > "Reduce/Enlarge - Button 3 - 4" in the Administrator Guide.
- Page 71 Copy Preset % Select a copy ratio from the following options. 100% Copies at the same image size as the original document. Auto % Automatically determines the copy ratio based on the document size and the paper size specified in [Paper Supply], and copies the document to fit into the paper. Note •...
- Page 72 3 Copy Auto X - Y% Automatically determines the reduction/enlargement ratios for the width and length so that the document image fits in the paper. Fit Image to Paper Size X - Y% Automatically determines the reduction/enlargement ratios for the width and length so that the document image fits in the paper, and then slightly reduces the ratios so that the complete image is copied onto the paper.
-
Page 73: Paper Supply (Selecting The Paper For Copying)
Copy Paper Supply (Selecting the Paper for Copying) This feature allows you to select the tray that holds the paper you want to use. Select a paper tray. Auto Select Automatically determines the tray holding the appropriate paper, based on the document size and the specified copy ratio. - Page 74 3 Copy [Paper Supply] Screen This screen allows you to select a paper tray from all trays available on the machine. Select a paper tray. Tray Allows you to select a paper tray. When [Bypass] is selected, the [Tray 5] screen is displayed where you can specify a paper type other than plain paper, and non-standard size paper.
- Page 75 Copy Paper Size Select from [Auto Detect], [Standard Size], and [Custom Size]. When you select [Auto Detect], the paper size is identified automatically. When you select [Standard Size] or [Custom Size], refer to "When [Standard Size] is Selected" (P.75) or "When [Custom Size] is Selected"...
-
Page 76: Output Color (Selecting The Color For Copying)
3 Copy Output Color (Selecting the Color for Copying) This feature allows you to select copy colors. Note • If the use of certain colors is not allowed, the available colors will be restricted. For more information, refer to "5 Tools" > "Accounting" > "Create/View User Accounts" > "Account Limit"... - Page 77 Copy [Output Color] Screen This screen allows you to make settings for full color, dual color, and single color. Select [More]. Select the desired output color mode. Auto Detect Automatically determines the color of the original document and makes copies in full color if the original document is colored, or in single color (black) if the document is black-and-white.
- Page 78 3 Copy Single Color Copies in one specified color regardless of the color of the document. Selecting this option displays [Color] on the screen. Select a color on the [Output Color - Color] screen which is displayed after selecting [Color]. Refer to "[Output Color - Color] Screen"...
- Page 79 Copy Select [Dual Color]. Select [Target Area Color]. Select any color. [Non-target Area Color] Screen This screen allows you to select the color to be used in place of the colors other than the selected source colors. You can select one color from seven preset and six custom options.
-
Page 80: Sided Copying (Making 2 Sided Copies)
3 Copy Select any color. [Output Color - Color] Screen This screen allows you to specify the color to be used for single-color copying regardless of the colors in the original document. You can select one color from six preset and six custom options for [Single Color]. Select a single color listed in the displayed [Output Color -Color] screen. -
Page 81: Pages Per Side (Copying Multiple Pages Onto One Sheet)
Copy Pages per Side (Copying Multiple Pages onto One Sheet) This feature is the same as [Pages per Side] on the [Output Format] screen. For more information, refer to "Pages per Side (Copying Multiple Pages onto One Sheet)" (P.111). Lighten/Darken (Adjusting the Copy Density) This feature allows you to select a copy-density level from seven levels. -
Page 82: Image Quality
3 Copy Image Quality The section describes the features you can select on the [Image Quality] screen. The following shows the reference section for each feature. Original Type (Selecting the Document Type)................82 Image Options (Adjusting Copy Density/Sharpness/Saturation of Images).......84 Image Enhancement (Erasing the Background Color of Documents/Adjusting Contrast) ..85 Color Effects (Selecting an Image Quality)................86 Color Balance (Adjusting Color Balance) ..................87 Color Shift (Adjusting the Color Tone) ..................88... - Page 83 Image Quality Auto Automatically sets the document type based on the setting made in the System Administration mode and the setting made in [Output Color] on the [Copy] screen. Photo & Text Select this option when the document contains both text and photos. The machine automatically distinguishes the text and photo areas of the document and sets the appropriate image quality for each area.
-
Page 84: Image Options (Adjusting Copy Density/Sharpness/Saturation Of Images)
3 Copy Image Options (Adjusting Copy Density/Sharpness/Saturation of Images) This feature allows you to adjust the copy density, sharpness, and saturation levels. Note • [Lighten/Darken] under [Image Options] is the same as [Lighten/Darken] on the [Copy] screen. • If [Lighten/Darken], [Sharpness], or [Saturation] is set concurrently with [Color Effects], the setting made in [Color Effects] will be cleared. -
Page 85: Image Enhancement (Erasing The Background Color Of Documents/Adjusting Contrast)
Image Quality Image Enhancement (Erasing the Background Color of Documents/ Adjusting Contrast) This feature allows you to suppress the background color of documents, such as newspaper and colored paper. You can also adjust the contrast. Note • [Image Enhancement] is not available when [Original Type] is set to [Photo]. •... -
Page 86: Color Effects (Selecting An Image Quality)
3 Copy Color Effects (Selecting an Image Quality) If you set this feature, the [Image Enhancement], [Image Options], [Color Shift], and [Color Balance] settings are automatically adjusted and copies are made at the specified quality. Important • When the Color Effects feature is used, [Auto Contrast] is not available. Note •... -
Page 87: Color Balance (Adjusting Color Balance)
Image Quality Color Balance (Adjusting Color Balance) This feature allows you to adjust the color balance of the four CMYK toner colors (cyan, magenta, yellow and black). You can select from seven levels for each density level: Highlights, Midtones, and Shadows. The Color Balance feature finely adjusts the density level for each toner color to fine- tune the color balance, such as a reddish or bluish tint, while the Lighten/Darken feature adjusts the overall density level of the four colors. -
Page 88: Color Shift (Adjusting The Color Tone)
3 Copy Highlights Allows you to adjust the color strength of low-density areas. Example: If low-density yellow is printed darker, adjust the color strength in the minus (-) direction under [Yellow Balance] > [Highlights]. Midtones Allows you to adjust the color strength of medium-density areas. Example: If medium-density yellow is printed lighter, adjust the color strength in the plus (+) direction under [Yellow Balance] >... -
Page 89: Gloss Level (Enhancing Gloss Of The Document)
Hole Punched HW 3 (221 - 256 gsm) Hole Punched HW 4 (257 - 300 gsm) Important • When using the Color 550 Printer, this feature is not available for paper with a weight that is less than 105 gsm. - Page 90 3 Copy Select [Gloss Level]. Select [Normal] or [Enhanced].
-
Page 91: Layout Adjustment
Layout Adjustment Layout Adjustment This section describes the features you can select on the [Layout Adjustment] screen. The following shows the reference section for each feature. 2 Sided Copying (Making 2 Sided Copies)................92 Book Copying (Copying Facing Pages onto Separate Sheets) ..........93 2 Sided Book Copying (Making 2 Sided Copies of Facing Pages) ........... -
Page 92: Sided Copying (Making 2 Sided Copies)
3 Copy 2 Sided Copying (Making 2 Sided Copies) This feature allows you to make copies of 1-sided and 2-sided documents on one side or both sides of paper. Select [2 Sided Copying]. Select any option. 1 Sided Makes a copy of a 1-sided document on one side of paper. 2 Sided Makes a copy of a 1-sided document on both sides of paper. -
Page 93: Book Copying (Copying Facing Pages Onto Separate Sheets)
Layout Adjustment Head to Toe Select this option when you want the orientation of the front and back sides of the copy to be the opposite of that of the document. Original Orientation Allows you to specify the orientation of the document so that the machine can identify the top of the document. - Page 94 3 Copy Left Page then Right Copies the left page and then the right page of facing pages. Right Page then Left Copies the right page and then the left page of facing pages. Top Page then Bottom Copies the top page and then the bottom page of facing pages.
-
Page 95: Sided Book Copying (Making 2 Sided Copies Of Facing
Layout Adjustment 2 Sided Book Copying (Making 2 Sided Copies of Facing Pages) This feature allows you to assign pages when making copies of facing pages in a bound document such as a booklet so that pages face each other in the same way as the document. -
Page 96: Original Size (Specifying The Scan Size For The Document)
3 Copy [Starting & Ending Page] Screen This screen allows you to set the starting and ending pages to be copied. Set [Starting Page] and [Ending Page]. Starting Page [Left Page] / [Right Page] You can select these options when [Left Page then Right] or [Right Page then Left] is selected. -
Page 97: Mixed Size Originals (Scanning Different Size Documents Simultaneously)
B4 landscape. If another combination of document sizes is used, the documents can be fed at an angle and may not be copied properly. Note • This feature does not appear for some models. An optional component is required. For more information, contact your local Fuji Xerox representative. -
Page 98: Edge Erase (Erasing Edges And Margin Shadows Of The Document)
3 Copy Select [Mixed Size Originals]. Select [On]. Select this option when copying documents of the same size. When documents of different sizes are copied, the machine automatically detects the size of each document. Original Orientation Allows you to specify the orientation of the document so that the machine can identify the top of the document. - Page 99 Layout Adjustment Select [Edge Erase]. Select any option. Normal The edge width to erase is set to 2 mm for the top and bottom, and left and right edges. All Edges Erases the shadows of the four edges of a document, as well as the shadow in the center of the document if it is a bound document or a booklet.
-
Page 100: Image Shift (Adjusting The Image Position)
3 Copy Center Erases the shadow in the center of facing pages of a bound document or a booklet. You can set the binding erase width in the range from 0 to 50 mm in 1mm increments. Original Orientation Allows you to specify the orientation of the document so that the machine can identify the top of the document. - Page 101 Layout Adjustment Does not shift the position of document images. Auto Center Shifts document images so that they are placed in the center of paper. Margin Shift Allows you to specify the amounts of the top and bottom, and left and right margins in the range from 0 to 50 mm in 1 mm increments.
-
Page 102: Invert Image (Making Reversed Copies Of Images)
3 Copy Corner Shift Shifts document images so that they are placed at an edge or corner of paper. You can select from 8 shift directions. Specify the amounts of the top and bottom, and left and right margins in the range from 0 to 50 mm in 1 mm increments. -
Page 103: Original Orientation (Specifying The Orientation Of Loaded Documents)
Layout Adjustment Select [Invert Image]. Select any option. Mirror Image Reverses the left and right sides of the document image. Negative Image Creates a negative image of the document. Original Orientation (Specifying the Orientation of Loaded Documents) This feature allows you to specify the orientation of a document so that the machine can identify the top of the document. -
Page 104: Image Rotation (Changing The Orientation Of Images)
3 Copy Image Rotation (Changing the Orientation of Images) If the orientation of the paper currently loaded in the tray differs from that of the document loaded, the machine automatically rotates the document image so that the orientation of the image matches that of the paper. You can also select a reference position for image rotation if documents are of mixed orientations. - Page 105 Layout Adjustment [Image Rotation - Rotation Direction] Screen This screen allows you to set the reference position for rotation. Select any option. Staple Position This option is displayed when the finisher is installed. If documents are of mixed orientations, the images will be rotated to match the stapling edge specified in the settings of the Staple feature.
-
Page 106: Output Format
3 Copy Output Format This section describes the features you can select on the [Output Format] screen. The following shows the reference section for each feature. 2 Sided Copying (Making 2 Sided Copies) ................106 Booklet Creation (Creating a Booklet) ..................107 Covers (Attaching Covers to Copies) ..................110 Pages per Side (Copying Multiple Pages onto One Sheet)............111 Poster (Making Enlarged Copies Spread over Multiple Sheets)..........112... -
Page 107: Booklet Creation (Creating A Booklet)
"5 Tools" > "Copy Service Settings" > "Copy Control" > "Auto Paper Off" in the Administrator Guide. • Optional finishing module is required to enable this feature. For more information, contact your local Fuji Xerox representative. Specify the orientation of the document in [Original Orientation] on the [Layout Adjustment] screen. - Page 108 Staple]. Select this option when you do not need a document to be copied in booklet page order. Note • Optional finishing module is required to enable this feature. For more information, contact your local Fuji Xerox representative. Covers You can attach covers to a booklet. No cover is attached.
- Page 109 Output Format [Booklet Creation - Binding Shift] Screen This screen allows you to specify the binding shift value in the range from 0 to 50 mm in 1 mm increments. Use [+] and [-] or the numeric keypad to specify a binding shift value. [Booklet Creation - Divide Output] Screen When you have a large number of originals, the originals are divided to create subsets to reduce the thickness of each booklet.
-
Page 110: Covers (Attaching Covers To Copies)
3 Copy Covers (Attaching Covers to Copies) This feature allows you to attach covers to copies. You can use different types of paper (such as colored paper and heavyweight paper) as the front and back covers of copies. Important • When you select this feature, if the number of pages scanned by the machine exceeds the maximum, the machine will not print the already-scanned data. -
Page 111: Pages Per Side (Copying Multiple Pages Onto One Sheet)
Output Format Print on Side 2 The first page of the document is copied on the back side of the back cover. Print on Both The first and second pages of the document are copied on the front and back sides of the back cover. -
Page 112: Poster (Making Enlarged Copies Spread Over Multiple Sheets)
3 Copy Select [Pages per Side]. Select any option. Disables this feature. 2 Pages Copies two document pages onto one side of a single sheet of paper. 4 Pages Copies four document pages onto one side of a single sheet of paper. 8 Pages Copies eight document pages onto one side of a single sheet of paper. - Page 113 Output Format Select [Poster]. Select any option. No enlarged copies are made. Output Size Allows you to select the paper size. Enlargement % Refer to "When [Enlargement %] is Selected" (P.113). Paper Supply Displays the [Paper Supply] screen. Select the paper tray to be used. Note •...
-
Page 114: Repeat Image (Making Multiple Copies On One Sheet)
3 Copy Repeat Image (Making Multiple Copies on One Sheet) This feature allows you to copy a document image on one sheet of paper repeatedly for a specified number of times. When [Reduce/Enlarge] is set to [Auto %], the repeated copies of the image are reduced to fit on the selected paper. -
Page 115: Annotations (Adding A Comment/A Date/Page Numbers To Copies)
Output Format Annotations (Adding a Comment/a Date/Page Numbers to Copies) This feature allows you to add a comment, date, and page numbers onto copies. You can select a comment, date, and page numbers, and their print positions from preset formats. Important •... -
Page 116: Original Orientation
3 Copy Original Orientation Allows you to specify the orientation of the document so that the machine can identify the top of the document. Note • If the [Original Orientation] setting differs from the actual document orientation, the machine may not detect the top of the document correctly. Upright Images Select this option when placing the top edge of the document against the top side of the document glass or document feeder. - Page 117 Output Format [Date] Screen This screen allows you to add a date onto copies. The date shows when you started copying the document. You can change the date format. For more information, refer to "5 Tools" > "Common Service Settings" >...
- Page 118 3 Copy Style 1, 2, 3 Adds page numbers only. -1-, -2-, -3- Adds page numbers, and hyphens before and after each page number. (Example: -1-, -2-) Page 1, Page 2, Page 3 Adds page numbers, and the text "Page" before each page number. (Example: Page 1, Page 2) 1/N, 2/N, 3/N Adds page numbers, and the total number of pages to the right of each page number.
- Page 119 Output Format [Apply Page Numbers To] Screen This screen allows you to specify a page range to add page numbers. Select any option. All Pages Adds page numbers to all copy pages. Starting Page Number Allows you to specify the start page to add a page number, in the range from 1 to 999. Note •...
- Page 120 3 Copy Prefix Allows you to enter prefix text with up to 16 characters, using the displayed keyboard. Number of Digits Displays the [Bates Stamp - Number of Digits] screen. You can select [Auto Assign] or [Manual Assign]. When you select [Manual Assign], you can specify the number of digits to be used for page numbers in the range from 1 to 9 in 1 digit increments.
-
Page 121: Watermark (Printing Control Numbers On The Background Of Copies)
For more information on Watermark, refer to "5 Tools" > "Common Service Settings" > "Watermark" in the Administrator Guide. • This feature does not appear for some models. An optional component is required. For more information, contact your local Fuji Xerox representative. Select [Watermark]. Select any option. - Page 122 (horizontal text). Watermark Effect Displays the [Watermark Effect] screen. Refer to "[Watermark Effect] Screen" (P.123). Note • This feature does not appear for some models. An optional component is required. For more information, contact your local Fuji Xerox representative.
- Page 123 [Watermark Effect] screen. Note • This feature does not appear for some models. An optional component is required. For more information, contact your local Fuji Xerox representative. Select any option. Prints the text specified in [Stored Watermarks] as it is.
-
Page 124: Tab Margin Shift (Copying On Tab Stock Paper)
3 Copy Tab Margin Shift (Copying on Tab Stock Paper) This feature allows you to adjust the position of your document image to copy the image onto tab stock paper. Available sizes of tab stock paper are A4 and 8.5 x 11" . Available paper tray is Tray 5 (Bypass). -
Page 125: Face Up/Down Output (Specifying Face Up Or Down)
. Select the tray whose orientation is set to • [Z Fold] and [C Fold] can only be applied to A4 and 8.5 x 11" paper. • Optional finishing module is required to enable this feature. For more information, contact your local Fuji Xerox representative. Select [Folding]. -
Page 126: Preset Repeat Image (Making Multiple Copies On A Single Sheet)
3 Copy Select any option. No Folding Does not fold copies. Z Fold Folds copies in three with the printed side inside or outside. printing surface printing surface comes outside comes inside C Fold Folds copies in three with the printed side inside or outside. printing surface printing surface comes inside... -
Page 127: Transparency Options (Inserting Blank Sheets Between Transparencies)
Output Format Select [Preset Repeat Image]. Select any option. Disables this feature. 2 Times Makes two copies of the document image on a single sheet of paper. 4 Times Makes four copies of the document image on a single sheet of paper. 8 Times Makes eight copies of the document image on a single sheet of paper. - Page 128 3 Copy Select any option. Does not insert separators. Blank Transparency Separators Inserts a separator each time a transparency is copied. Only one set of copies can be made. Blank Separators & Handouts Inserts a separator each time a transparency is copied. At the same time, the required number of copies is made for handouts.
-
Page 129: Copy Output (Specifying Finishing Options)
Note • Optional finishing module is required to enable this feature. For more information, contact your local Fuji Xerox representative. If the Offset Catch Tray is installed, the output position of copies is offset alternately to separate each set of copies. - Page 130 3 Copy Collated/Stapling/Punching The machine outputs sheets sorted into sets that are arranged in page order. Uncollated The machine outputs the specified number of copies and sorts sheets by page. Uncollated with Separators The machine outputs copies with inserting blank sheets as a separator and sorts sheets by page.
-
Page 131: Hole Punch
Output Format Finisher D4/Finisher D4 with Booklet Maker: - Plain (64 - 79 gsm) - Plain (80 - 90 gsm) - Plain (91 - 105 gsm) - Heavyweight (106 - 128 gsm) - Heavyweight (129 - 150 gsm) - Heavyweight (151 - 176 gsm) - Extra-HW (177 - 220 gsm) - X-HW Plus (221 - 256 gsm) - X-HW Plus 2 (257 - 300 gsm) - Page 132 Every N Sets], and [System Default] for a paper stack. Note • This feature does not appear for some models. An optional component is required. For more information, contact your local Fuji Xerox representative. Paper Size and Stapling Position Finisher C2/Finisher C2 with Booklet Maker...
- Page 133 Output Format Finisher D4/Finisher D4 with Booklet Maker 1 Top 1 Staple 2 Staples 2 Top 2 Right Right B5 , 8 x 10" , 8.5 x 11" A4, B4, 8.5 x 11", 8.5 x 13" 8.5 x 14", 11 x 17", 1 Left 1 Top 1 Right...
- Page 134 3 Copy - 3 Holes (with 3 Hole Punch Unit for C Finisher) 3 Holes 3 Holes 3 Holes Left Right A4 , B5 , 7.25 x 10.5" 8 x 10" , A4 Cover , 9 x 11" 8.5 x 11" , 16K A3, B4, 11 x 15", 11 x 17", 8K - 4 Holes 4 Holes...
-
Page 135: Id Card Copy (Copying Both Sides Of An Id Card)
Output Format - 4 Holes 4 Holes 4 Holes 4 Holes Left Right A4 , 7.25 x 10.5" , 8.5 x 11" , 16K A4 Cover , 9 x 11" A3, 11 x 15", 11 x 17", 8K ID Card Copy (Copying Both Sides of an ID Card) This feature allows you to copy both sides of a small undetectable original, such as an ID card, onto one side of paper. - Page 136 3 Copy Select [ID Card Copy] on the [Output Format] screen. Select [On]. Disables ID card copying. Enables ID card copying.
-
Page 137: Job Assembly
Job Assembly Job Assembly This section describes the features you can select on the [Job Assembly] screen. The following shows the reference section for each feature. Build Job (Processing Documents Scanned with Different Settings as One Job) ....137 Sample Job (Checking the Finished Output of the Copy)............141 Combine Original Sets (Adding Originals)................ - Page 138 3 Copy Select any option. Note • Select [ ] to return to the previous screen or [ ] to move to the next screen. Build Job is not applied. Build Job is applied. The feature buttons appear. Specify any option if necessary. Important •...
- Page 139 Job Assembly Chapter Start Displays the [Build Job - Chapter Start] screen. Refer to "[Build Job - Chapter Start] Screen" (P.140). Insert Separators Displays the [Segment Separators] screen. Refer to "[Segment Separators] Screen" (P.140). Change Quantity Displays the [Change Quantity] screen on which you can change the number of copy sets using the numeric keypad.
- Page 140 3 Copy [Build Job - Chapter Start] Screen This screen allows you to set the chapter start. Select any option. The next stack of documents is copied after the previous stack. The next stack of documents is copied from Side 1 of a new sheet of paper. Pages per Side - New Page When [Pages per Side] is set, even if all documents are divided for every chapter before all of them are assembled in the Pages per Side feature, the next stack of...
-
Page 141: Sample Job (Checking The Finished Output Of The Copy)
Job Assembly 1 Sided Side 1 Only A first page of the loaded documents is copied on the front side of a separator, and the rest of the pages are copied on the paper other than a separator. When [Pages per Side] is set, the number of pages (2 pages, 4 pages, or 8 pages) that you selected to copy onto one side of a single sheet, starting from the first page of the loaded documents, are copied onto the front page of a separator. - Page 142 3 Copy Select [Sample Job]. Select [On]. No sample set is made. A sample set is made. [Copy] Screen When Sample Job is in Progress After the sample set is copied, the machine pauses the job and displays the [Copy] screen.
-
Page 143: Combine Original Sets (Adding Originals)
Job Assembly Combine Original Sets (Adding Originals) Use this feature when you copy a document that has too many pages to be loaded in the document feeder at one time, or when you scan each document page using the document glass and have the machine process the pages as one job. When you use this feature, [Next Original] is always selected on the screen during scanning documents with the document feeder or the document glass. -
Page 144: Delete Outside/Delete Inside (Deleting Outside Or Inside Of The Selected Area)
3 Copy [Copy] Screen When Combine Original Sets is in Progress The [Copy] screen is displayed when copying starts. Delete Clears the document data stored with the Combine Original Sets feature, and cancels copying. Note • You can also press the <C (Clear)> or <Clear All> button on the control panel to perform the same operation. - Page 145 Job Assembly Select any option. No area is deleted. Delete Outside Deletes the outside of the selected area. Delete Inside Deletes the inside of the selected area. Area Settings Displays the [Delete Outside/Delete Inside - Area 1 (Area 2 or Area 3)] screen. You can specify up to three areas.
-
Page 146: Stored Programming (Calling A Stored Program For Build Job)
3 Copy [Delete Outside/Delete Inside - Area 1 (Area 2 or Area 3)] Screen This screen allows you to specify the area to be deleted. The area is defined by the rectangle formed between the points X1,Y1 and X2,Y2. The origin point is the top right corner of a document. -
Page 147: Scan
Note • The Scan services are not available for some models. An optional component is required. For more information, contact your local Fuji Xerox representative. To use the scanning functions, you will need to configure your network settings. Scanning Procedure ................. 148 Cancelling a Scan Job ................153... -
Page 148: Scanning Procedure
4 Scan Scanning Procedure This section describes the basic scanning procedure. The following shows the reference section for each procedure. Step 1 Loading Documents .......................148 Step 2 Selecting a Service......................150 Step 3 Starting the Scan Job......................151 Step 4 Confirming the Scan Job in Job Status ................152 Step 5 Saving the Scanned Data ....................152 Step 1 Loading Documents The following two methods are available to load documents:... - Page 149 Scanning Procedure Remove any paper clips and staples before loading a document. Adjust the movable document guides to match the size of the document to be loaded. Note • When loading a large document such as A3, open the document stopper rightward.
-
Page 150: Step 2 Selecting A Service
4 Scan Load the document face down, and align it against the top left corner of the document glass. Close the document cover. Step 2 Selecting a Service Scans a document after specifying the file (job template) set with scanning conditions: information about the transfer destination server and other information. -
Page 151: Step 3 Starting The Scan Job
Scanning Procedure Go to Use the numeric keypad to enter a 3-digit job template number. The job template then appears at the top of the list. Template Description Displays the [Template Description] screen on which you can view the description of the job template. -
Page 152: Step 4 Confirming The Scan Job In Job Status
4 Scan Load the next document. Press the <Start> button. If you have more documents, repeat steps 3 and 4. <Start> button When all documents have been scanned, select [Last Original]. Step 4 Confirming the Scan Job in Job Status The following describes how to confirm the status of a scan job. -
Page 153: Cancelling A Scan Job
Cancelling a Scan Job Cancelling a Scan Job The following describes the operations for cancelling a scan job. Press either [Delete] on the touch screen or the <Stop> button on the control panel. <Stop> button Select [Delete]. If the screen in Step 1 does not appear, press the <Job Status>... -
Page 154: Network Scanning
4 Scan Network Scanning The general scan settings allow you to select various options to perform a scan. The following shows the reference section for each operation. Color Scanning (Selecting an Output Color) ................154 2 Sided Scanning (Scanning Both Sides of a Document)............155 Original Type (Selecting the Document Type).................156 File Format (Selecting a File Format for Output Data) ............157 Note... -
Page 155: Sided Scanning (Scanning Both Sides Of A Document)
Network Scanning 2 Sided Scanning (Scanning Both Sides of a Document) You can automatically scan both sides of a 2-sided document. By setting the binding style, both sides are scanned in the same orientation. From the menu displayed by selecting [2 Sided Scanning], select any option. -
Page 156: Original Type (Selecting The Document Type)
4 Scan Original Orientation Specify the orientation of the loaded document. When you load the top edge of the document against the left side of the document glass or the document feeder, and then select [Sideways Images], the document is displayed in the correct orientation when viewed on your computer screen. -
Page 157: File Format (Selecting A File Format For Output Data)
Network Scanning File Format (Selecting a File Format for Output Data) You can select a file format for scanned data. From the menu displayed by selecting [File Format], select any option. TIFF Saves scanned data in TIFF format. JPEG Saves scanned data in JPEG format. This option is selectable when either [Color] or [Grayscale] is selected in [Color Scanning]. -
Page 158: Compression Method
4 Scan Compression Method Allows you to select a compression method for scanned image data. Note • When you select [Auto], the following compression methods will be used: • When [Original Type] is set to [Photo & Text] or [Text] for black-and-white images: MMR •... -
Page 159: Advanced Settings
Advanced Settings Advanced Settings To select image quality options, select the [Advanced Settings] tab in the [Network Scanning] screen. The following shows the reference section for each feature. Photographs (Scanning a Color Photograph) ................159 Image Options (Adjusting Scan Density and Image Sharpness)..........160 Image Enhancement (Erasing the Background Color of Documents/Adjusting Contrast).. -
Page 160: Image Options (Adjusting Scan Density And Image Sharpness)
4 Scan Image Options (Adjusting Scan Density and Image Sharpness) This feature allows you to adjust the scan density and image sharpness. Select [Image Options]. Select any option. Lighten/Darken You can select a scan density level from seven levels between [Lighten] and [Darken]. Selecting an upper cell on the bar makes the scan density lighter, and selecting a lower cell makes darker. -
Page 161: Shadow Suppression (Suppressing The Document Background)
Advanced Settings Background Suppression Scans the document backgrounds with no filtering. Auto Suppression When [Color Scanning] is set to [Black & White], the background of a document printed on colored paper, such as newspaper, will be suppressed. When [Color Scanning] is set to [Color], the background of a document printed on white-color paper will be suppressed. -
Page 162: Color Space (Specifying The Color Space)
4 Scan Color Space (Specifying the Color Space) This feature allows you to set the color space. Note • [Color Space] is available when [Color Scanning] is set to [Color]. • To activate [Color Space] on the [Advanced Settings] screen, a prior setting must be made in the System Administration mode. -
Page 163: Layout Adjustment
Layout Adjustment Layout Adjustment To set up your scanning options, select the [Layout Adjustment] tab in the [Network Scanning] screen. The following shows the reference section for each feature. Resolution (Specifying a Scanning Resolution)............... 163 2 Sided Scanning (Scanning Both Sides of a Document) ............163 Book Scanning (Scanning Facing Pages on Separate Sheets) .......... -
Page 164: Book Scanning (Scanning Facing Pages On Separate Sheets)
4 Scan Book Scanning (Scanning Facing Pages on Separate Sheets) This feature allows you to scan facing pages of a document onto separate sheets of paper in page order. It is useful if you want to separately scan facing pages of a bound document such as a booklet. -
Page 165: Original Size (Specifying A Scan Size)
Layout Adjustment Bottom Page Only Scans the bottom page only in page order. You can select this option when [Top Page then Bottom] is selected. Binding Edge Erase Erases the shadow from the center section of the document. You can specify the binding erase width in the range from 0 to 50 mm in 1 mm increments. -
Page 166: Mixed Size Originals (Scanning Different Size Documents Simultaneously)
4 Scan Variable Size Allows you to enter the desired scan size when scanning a non-standard size document or when scanning at a size different from the original document size. You can specify a value in the range from 15 to 432 mm for the scan width (X), and a value in the range from 15 to 297 mm for the scan length (Y), in 1 mm increments. -
Page 167: Edge Erase (Erasing Edges And Margin Shadows In The Document)
Layout Adjustment When scanning documents of different sizes, the machine automatically detects the size of each document. Original Orientation Specify the orientation of the loaded document. When you load the top edge of the document against the left side of the document glass or the document feeder, and then select [Sideways Images], the document is displayed in the correct orientation when viewed on your computer screen. -
Page 168: Reduce/Enlarge (Specifying A Scanning Ratio)
4 Scan Parallel Edges Allows you to adjust the edge erase amounts. Top & Bottom Erases the shadows of top and bottom edges of the document according to the orientation of the loaded document. You can specify the edge width to erase in the range from 0 to 50 mm in 1 mm increments. -
Page 169: Original Orientation (Specifying The Orientation Of The Loaded Documents)
Layout Adjustment Proportional % Allows you to select a preset ratio, or enter a value in the range from 25 to 400% in 1% increments. Use the numeric keypad or [+] and [-] to enter a value. Variable % Enter the scanning ratio. Specifying "100%" scans at the same image size as the original document. -
Page 170: Filing Options
4 Scan Filing Options To select an output format for your files, select the [Filing Options] tab in the [Network Scanning] screen. The following shows the reference section for each feature. File Name (Specifying a Name for the File to be Sent)............170 File Name Conflict (Setting the Action to be Taken for File Name Conflict)......170 Quality/File Size (Specifying an Image Compression Ratio When Scanning) ......171 Select the [Filing Options] tab. -
Page 171: Quality/File Size (Specifying An Image Compression Ratio When Scanning)
Filing Options Overwrite Existing File The existing file is replaced with a new one. Add to Existing Folder The machine automatically adds a sequential number to the end of the file name when it conflicts with another file stored in the destination. Add Date Stamp to File Name The machine automatically adds a date stamp to the end of the file name. - Page 172 4 Scan...
-
Page 173: Stored Programming
5 Stored Programming This chapter describes the Stored Programming service that enables you to store customized job settings. Stored Programming Overview..............174 Registering/Deleting/Renaming Stored Programs ........175 Calling a Stored Program ................. 180... -
Page 174: Stored Programming Overview
5 Stored Programming Stored Programming Overview The Stored Programming service allows you to store settings that you expect to use frequently and call them with a single button operation. You can also assign a screen to a stored program button, to use the button as a short-cut to the screen. A stored program can store not only settings of a feature, but a flow of settings configured on multiple screens. -
Page 175: Registering/Deleting/Renaming Stored Programs
Registering/Deleting/Renaming Stored Programs Registering/Deleting/Renaming Stored Programs You can register and delete stored programs on the [Stored Programming] screen. Press the <Services Home> button. <Services Home> button Select [Setup]. Select [Stored Programming]. Important • Although [Create Folder], [Create Job Flow Sheet], and [Add Address Book Entry] are displayed on the touch screen, these features cannot be used on this machine. -
Page 176: Registering Stored Programs
5 Stored Programming Assign/Change Icon Specify an icon for a registered stored program. Refer to "Assigning/Changing Icons for Stored Programs" (P.179). Registering Stored Programs Up to 100 actions can be registered with one stored program. Up to 40 stored programs can be registered in the machine. -
Page 177: Notes And Restrictions On Registering Stored Programs
Registering/Deleting/Renaming Stored Programs Notes and Restrictions on Registering Stored Programs The following notes and restrictions applies when you register stored programs. When registering a stored program to select a paper size or type loaded on the bypass tray, register both the paper size and the paper type. If only the paper size or type is registered, the stored program may not be called properly. -
Page 178: Deleting Stored Programs
5 Stored Programming Select a number to register a stored program. Note • Once a job is stored to a button, it cannot be overwritten. • Select [ ] to return to the previous screen or [ ] to move to the next screen. Set the feature you want to register. -
Page 179: Assigning/Changing Icons For Stored Programs
Registering/Deleting/Renaming Stored Programs Select [Enter/Change Name]. Select the number to register or change a name. Note • Select [ ] to return to the previous screen or [ ] to move to the next screen. Enter a name, and select [Save]. Assigning/Changing Icons for Stored Programs The following describes how to assign or change an icon of a stored program. -
Page 180: Calling A Stored Program
5 Stored Programming Calling a Stored Program The following describes how to call a stored program. When you call a specified stored program, the last screen shown when you registered the stored program appears. Press the <Services Home> button. <Services Home> button Select [Stored Programming]. -
Page 181: Calling A Stored Program For Build Job
Calling a Stored Program Calling a Stored Program for Build Job You can call a stored program for Build Job on the [Copy] screen displayed while Build Job is running. Select [Change Settings]. Select the [Job Assembly] tab. Select [Stored Programming]. Select a number of a stored program containing the features you want to use. - Page 182 5 Stored Programming...
-
Page 183: Job Status
6 Job Status This chapter describes how to check the status of jobs and operate the jobs. Job Status Overview................. 184 Checking Current/Pending Jobs ...............185 Checking Completed Jobs................ 187 Handling Error Terminations ..............188... -
Page 184: Job Status Overview
6 Job Status Job Status Overview The Job Status feature allows you to check current, pending, and completed jobs. can also cancel printing and copy jobs that are waiting to be output or resumed. Press the <Job Status> button. <Job Status> button You can operate the following on the [Job Status] screen. -
Page 185: Checking Current/Pending Jobs
Checking Current/Pending Jobs Checking Current/Pending Jobs This section describes how to check current or pending jobs. On the status screen, you can cancel or preferentially execute jobs. Press the <Job Status> button. <Job Status> button Select the job to be canceled or preferentially executed. - Page 186 6 Job Status Start Resumes the suspended job. Change Quantity Displays the [Change Quantity] screen on which you can change the number of copies entered before. Enter a new quantity using the numeric keypad.
-
Page 187: Checking Completed Jobs
Checking Completed Jobs Checking Completed Jobs This section describes how to check completed jobs. You can check whether a job has been completed successfully. Selecting a job allows you to see its details. Press the <Job Status> button. <Job Status> button Select the [Completed Jobs] tab. -
Page 188: Handling Error Terminations
6 Job Status Handling Error Terminations This section describes how to handle error terminations. For a Print Job Select a job shown as an error termination in the [Completed Jobs] tab to check the error code. Follow the instructions of the error code to solve the problem. For information on error codes, refer to "7 Problem Solving"... -
Page 189: Index
Index Index Numerics booklet staple cartridges ........38 booklet tray ............38 1 Staple (Simple Copy) ........67 booklet unit ............38 100% ..............71 bottom left cover ..........34 2 Pages per Side (Simple Copy) ......66 bottom right cover ..........36 2 Sided Book Copying ........ - Page 190 Copies ..............92 <Error> indicator ..........47 Copy ..............69 error terminations ..........188 Copy Output ............129 exit cover ............. 38 copying both sides of an ID card .......135 copying facing pages onto separate sheets ..93 copying multiple pages onto one sheet .....111 Face Up/Down Output ........
- Page 191 Index Invert Image ............103 Narrow glass strip ..........37 Negative Image ..........103 Job Assembly ............ 137 Network Scanning ..........154 Job History Report ..........187 Next Original ....58, 139, 143, 144, 151, 185 Job Report ............187 non-standard size ..........
- Page 192 Single File for Each Page ........158 Sleep mode ............45 Quality/File Size ..........171 Slight Reduction (Improves Fit) ......71 Source Color ............78 specifying a name for the file to be sent .... 170 specifying a scan size ........165 Reduce/Enlarge ...........69, 168 specifying a scanning ratio ........
- Page 193 Index Tray 4 ..............34 Tray 5 (bypass) ..........35, 40 Tray 5 (bypass) top cover ......35, 40 Tray 6 ..............34 Tray 6 top cover ..........35 Tray 8 (Interposer) ..........39 Trays 6 and 7 ............40 tri-fold output tray ..........
- Page 195 Color 550/560 Printer User Guide DE4631E2-1 (Edition 1) January 2011 Fuji Xerox Co., Ltd. Copyright © 2011 by Fuji Xerox Co., Ltd. Printed in China...
- Page 196 Edition 1 January 2011 DE4631E2-1 898E 00380...
Need help?
Do you have a question about the Color 550 and is the answer not in the manual?
Questions and answers