Sign In
Upload
Manuals
Brands
Konica Minolta Manuals
Copier
7235
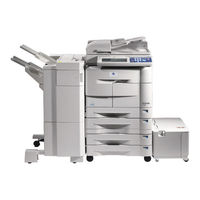
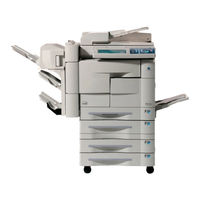
Konica Minolta 7235 Manuals
Manuals and User Guides for Konica Minolta 7235. We have
7
Konica Minolta 7235 manuals available for free PDF download: Service Manual, User Manual, Network Setup Manual
Konica Minolta 7235 Service Manual (448 pages)
Brand:
Konica Minolta
| Category:
Copier
| Size: 14.79 MB
Table of Contents
Table of Contents
5
Service Manual
1
Safety and Important Warning Items
9
Important Notice
9
Description Items for Danger, Warning and Caution
9
Safety Warnings
10
Safety Information
18
Important Information
18
Safety Circuits
19
Indication of Warning on the Machine
21
List of Major Differences between the 7145, 7235, 7228 and 7222
29
List of Options Corresponding to the 7145/7235/7228/7222
32
Ioutline
33
Outline of System
33
Product Specifications
35
Type
35
Functions
35
Copy Paper
37
Machine Data
37
Maintenance
37
Consumables
37
Operating Environment
38
Center Cross Section
39
Drive System Diagram
40
Drum Drive
40
Cleaning/Developer Agitation Drive
40
Fixing/Paper Exit Section/It-101/RU-101 Drive
41
Developing Drive
41
Paper Feed Drive
42
Drive from Paper Feed Motor to Loop Clutch
42
Tray 1 Drive
43
Tray 2 Drive
43
Bypass Feed Drive
44
Registration Clutch Drive
44
ADU Drive
45
Scanner Drive
46
Toner Supply Drive
47
Unit Explanation
49
Scanner Section
49
Composition
49
Operation
50
Initial Operation When Power Is Turned on and Shading Correction Reading
50
Original Reading Mode
50
Original Read Control
52
APS Control
53
AE Control
55
Image Processing
56
Write Unit
57
Composition
57
Operation
58
Image Writing
58
Write Control
58
Drum Unit
59
Composition
59
Operation
61
Image Formation Timing (When Copying Two Sheets)
61
Developing Unit
63
Composition
63
Operation
64
Control of Toner Density in the Developing Unit
64
Developing Control
64
Toner Supply/Cleaning/Recycle Unit
65
Composition
65
Operation
66
Toner Supply Control When the Toner Level in the Toner Supply Section Gets Reduced
66
Toner Supply Control When Toner Density in the Developing Unit Gets Reduced
67
Paper Feed Unit
68
Composition
68
Operation
69
Tray up Drive Control
69
Paper Feed Control
70
Remaining Paper Detection Control
70
Paper Size Detection
71
Fixing Unit
72
Composition
72
Operation
74
Cleaning Web Control
74
Fixing Temperature Control
74
Adu/Paper Exit Section
75
Composition
75
Operation
77
Switching Control of the Paper Exit/Adu Conveyance Path
77
ADU Conveyance Control
79
Paper Reverse Control
80
Interface Section
83
Composition
83
Network Section
84
Composition
84
Other Controls
85
Parts Energized When the Main Power Switch Is off
85
Components Operated When the Power Switch Is on
86
Components Operated When the SW1 (Main Power Switch) Is on
86
Components Operated When the SW2 (Sub Power Switch) Is on
87
Fan Control
88
Composition of the Cooling Fan
88
Fan Operation
89
Operation Unit Control
90
Composition of Operation Unit
90
Counter Control
91
Counter Composition
91
Counter Operation
91
Disassembly/Assembly
93
External Section
93
Replacing the Ozone Filter
93
Replacing the Filter Cover Assembly and Suction Filter/A
94
Drive Section
95
Removing and Reinstalling the Motor Units (Main, Fixing, Feed, Developing)
95
Replacing the Registration Clutch
97
Replacing the Loop Clutch
98
Removing the Ribbon Cable
99
Reinstalling the Ribbon Cable
100
Scanner Section
101
Screws that Must Not be Removed
101
Adjusting the Angle of the Operation Unit
102
Removing the Operating Unit
103
Removing the Platen Glass/Slit Glass
106
Removing and Reinstalling the CCD Unit
109
Replacing the Exposure Lamp
110
Removing and Reinstalling the Exposure Unit
111
Removing the Optics Wire
112
Installing the Optics Wire
113
Write Unit
115
Removing and Reinstalling the Write Unit
115
Drum Unit
119
Removing and Reinstalling the Drum Unit
119
Removing and Reinstalling the Charging Corona Unit
120
Removing and Reinstalling the Charge Control Plate
120
Replacing the Charging Wire
121
Removing and Reinstalling the Drum
121
Removing and Reinstalling the Separation Claw
125
Removing and Reinstalling the Transfer and Separation Corona Unit
126
Replacing the Transfer and Separation Wires
126
Developing Unit
128
Screws that Must Not be Removed
128
Removing and Reinstalling the Developing Unit
128
Replacing the Developer
129
Toner Supply/Cleaning/Recycle Unit
131
Removing and Reinstalling the Toner Bottle
131
Removing and Reinstalling the Toner Supply Unit
131
Removing and Reinstalling the Cleaning Blade
132
Paper Feed Unit
134
Replacing the Paper Feed Roller and the Feed Roller (Bypass)
134
Replacing the Double Feed Prevention Roller
136
Replacing the Paper Feed Rubber and the Feed Rubber (Tray 1)
137
Replacing the Double Feed Prevention Rubber (Tray 1)
139
Replacing the Paper Feed Rubber and the Feed Rubber (Tray 2)
140
Replacing the Double Feed Prevention Rubber (Tray 2)
142
Cleaning the Paper Dust Removing Brush
143
Fixing Unit
144
Removing and Reinstalling the Fixing Unit
144
Replacing the Fixing Heater Lamps/1, /2
145
Removing and Reinstalling the Fixing Claw
147
Replacing the Fixing Web
148
Fixing Heater Lamp/1, /2
151
Removing and Reinstalling the Fixing Temperature Sensors
156
Removing and Reinstalling the Fuse Mounting Plate Assembly
158
Advertisement
Konica Minolta 7235 User Manual (318 pages)
Brand:
Konica Minolta
| Category:
Copier
| Size: 11.51 MB
Table of Contents
Table of Contents
3
Caution Labels and Indicators
18
Requirements for Safe Use
21
Power Source
21
Environment
22
Precautions for Routine Handling
26
Section 2
29
Machine Information
29
Machine Configuration
30
External Machine Items
30
Machine
31
Internal Machine Items
33
Standard/Optional Equipment
35
Control Panel Layout
36
Basic Screen
38
Finisher
40
Information
41
Finisher / PK-114 Punch Kit / BK-114 Branch Kit
42
Saddle Kit
44
Turning on the Power Switch
46
To Turn on the Power
46
To Turn off the Power
47
Reducing the Power in Standby Mode (Auto Low Power)
48
Shutting off Automatically (Auto Shut-Off)
48
Shutting off / Reducing the Power Manually
49
Entering an User ID (User Account)
50
Loading Paper
51
Paper
51
Loading Paper in Main Body Trays and DB-211 Trays
51
Loading Paper in DB-411 Tray
53
Loading Paper in LT-203 Large Capacity Tray
54
Loading Paper in Multi-Sheet Bypass Tray
56
Changing Paper Size of Main Body Trays and DB-211 Trays
57
Section 3: 3
59
Positioning Originals
60
Positioning Originals in RADF
60
Lens Mode
61
Positioning Original on Platen Glass
63
Setting Print Quantity
65
To Set Print Quantity
65
To Change Print Quantity
65
To Stop Scanning/Printing
66
Selecting Paper Size
67
To Select Paper Size Automatically (APS)
67
Density
67
To Specify Desired Paper Size (AMS)
69
Selecting Magnification Ratio (Lens Mode)
71
To Copy in 1.00 Magnification Mode
71
To Copy in Fixed Magnification Mode
72
To Copy in Zoom Mode
73
Selecting Density Level
74
To Select Copy Density
74
Making Double-Sided Copies (1-2, 2-2)
76
Using RADF
76
Bypass Tray
77
Multi-Sheet
77
Using Platen Glass
78
Making Single-Sided Copies from Double-Sided Originals (2-1)
80
Using Memory
81
Copying Using Special Paper (Multi-Sheet Bypass Tray)
82
Output Without
83
On the Platen Glass
83
Copying Using Memory
84
To Scan Originals into Memory (Store Mode)
84
Finisher
85
To Set Next Copying Job (Reserve)
86
To Check/Control Jobs in Progress (Job List Screen)
88
Output Mode for Machine Without Finisher
90
Output with Finisher
91
Output Mode for Machine with Finisher
92
Stapling Output Copies (Staple)
96
Staple
97
Punching File Holes in Copies (Punch)
100
Punch
101
Making Fold in Copies (Fold / Fold & Stitch)
105
Fold
105
Output Mode for Machine with Inner Tray IT-101
108
Output Mode for Machine with Inner Tray IT-101
109
Fold&Stitch
109
Section 4: 4
111
Interrupt Copying
111
Making Sample Copy (Proof Copy)
112
Checking Feature Selections / Proof Copying (Check Mode)
114
Job Memory
115
Interrupt Copying
116
Storing Job Conditions (Job Memory: Job Store)
118
Help Mode
119
Recalling Stored Job Settings (Job Memory: Job Recall)
121
Displaying Screen for Operation Guide (Help Mode)
122
To Display the Help Screen from Basic Screen
122
To Display Help Screen from Other Screens
124
Clearing Mishandled Paper
125
When "JAM" Appears on Folder Key
125
When "Call for Service" Message Is Displayed
126
Preventive Maintenance
127
Limited Use of the Copier in Trouble
127
Clearing Mishandled Paper
129
When "JAM" Appears on Folder Key
131
When "ADD PAPER" Appears on Folder Key
133
Machine
134
When "Memory Full" Message Is Displayed (Memory Overflow)
134
Action 1
134
Action 2
135
When Power OFF/ON Screen Is Displayed
136
Troubleshooting Tips
137
Section 6: Machine Specifications
141
Main Body Specifications
142
Main Body
142
Option Specifications
143
In-Bin Stapler Finisher
143
Inner Tray
143
Radf (Df-320)
143
Punch Kit
144
Paper
144
Saddle Kit
144
Drawer Base Unit
144
Desk Unit
144
Drawer Base Unit
145
Large Capacity Tray
145
Memory Unit
145
Others
145
Section 7: Advanced Information
149
Programmed Shut-Off (Weekly Timer)
150
Timer Interrupt
150
Rotation
152
Vertical/Horizontal Zoom Mode
153
Section 8: Special Original
157
Special Original
157
Making Copy Quality Closer to Originals (Text/Photo Enhance)
158
Enhance
159
Copying Mixed Size Originals (Mixed Original)
160
Mixed Original
161
Copying Folded Originals (Folded Original)
162
Folded
163
Copying Non-Standard Size Originals (Non-Standard Size)
164
Section 9
165
To Display Application Selection Screen
166
Inserting Sheets and Covers (Sheet/Cover Insertion)
167
Non-Image Area Erase
167
Positioning Title Pages on the Right Side (Chapter)
171
Lay out Several Pages Onto One Sheet (Combination)
174
Reverse Image
175
Making a Multiple Page Signature Booklet (Booklet)
177
Copying Onto Transparent Films (OHP Interleave)
180
Repeat
181
Inserting Images into Printed Sets (Image Insert)
182
Frame/Fold Erasure
183
Dividing an Image into Right and Left Pages (Dual Page)
185
Auto
185
Reverse the Second Side in 1-2 Mode (Flip Side 2)
189
Layout
189
Erasing Outside of the Original (Non-Image Area Erase)
191
Reversing Colour in Black and White Image (Reverse Image)
193
Applications
193
Repeating Selected Image Area (Repeat: Vert./Horiz. Mode)
195
Repeating Automatically or Selecting Repeating Times
198
(Repeat: AUTO/ Repeat Mode)
198
Repeat Mode
198
Reduce
199
Eliminating Black Copy Marks Along Borders (Frame/Fold Erasure)
201
Shift
201
Copying Image in the Centre of Copy Paper (AUTO Layout)
204
Stamp
205
Adjusting Position of Copy Image (Image Shift)
206
Overlay
207
Reducing Images to Create Binding Margin (Reduce&Shift)
208
Printing Stamp, Page, Watermark Onto Copies (Stamp)
211
Overlaying an Image Onto each Page Copied in the Job (Overlay)
215
Section 10: Paper and Original Information
217
Paper Information
218
Paper Weight
218
Tray/ Exit Tray Capacity
219
Paper Size
222
Special Paper in Multi-Sheet Bypass Tray
223
To Store Copy Paper
223
Original Information
224
Platen Glass Originals
224
RADF Originals
225
Konica Minolta 7235 User Manual (328 pages)
Workgroup Document System
Brand:
Konica Minolta
| Category:
All in One Printer
| Size: 5.42 MB
Table of Contents
Table of Contents
5
Continued) 2
12
Section 1: Safety Information
19
Caution Labels and Indicators
20
Regulations
23
FCC Regulations
23
FDA Regulations
23
Requirements for Safe Use
24
Power Source
24
Environment
25
Precautions for Routine Handling
30
Section 2: 2
33
Machine Configuration
34
External Machine Items
34
Internal Machine Items
37
Standard/Optional Equipment
39
Information
39
Control Panel Layout
40
Basic Screen
42
Finisher
44
Finisher / PK-114 Punch Kit / BK-114 Branch Kit
46
Saddle Kit
48
Turning on the Power Switch
50
To Turn on the Power
50
To Turn off the Power
51
Turning on the Power Switch
51
Reducing the Power in Standby Mode (Auto Low Power)
52
Shutting off Automatically (Auto Shut-Off)
52
Paper
53
Shutting off / Reducing the Power Manually
53
Entering an User ID (User Account)
54
Loading Paper
55
Loading Paper in Main Body Trays and DB-211 Trays
55
Loading Paper in DB-411 Tray
57
Loading Paper in LT-203 Large Capacity Tray
58
Loading Paper in Multi-Sheet Bypass Tray
60
Changing Paper Size of Main Body Trays and DB-211 Trays
61
Positioning Originals
64
Positioning Originals in RADF
64
Document Feeder Tray
65
Positioning Original on Platen Glass
67
Setting Print Quantity
69
To Set Print Quantity
69
To Change Print Quantity
69
To Stop Scanning/Printing
70
Selecting Copy Size
71
To Select Copy Size Automatically (APS)
71
To Specify Desired Copy Size (AMS)
73
Selecting Magnification Ratio (Lens Mode)
75
To Copy in 1.00 Magnification Mode
75
To Copy in Fixed Magnification Mode
76
To Copy in Zoom Mode
77
Selecting Density Level
78
To Select Copy Density
78
Making Double-Sided Copies (1 2, 2 2)
80
Using RADF
80
Using Platen Glass
82
Making Single-Sided Copies from Double-Sided Originals (2 1)
84
Copying Using Special Paper (Multi-Sheet Bypass Tray)
86
Copying Using Memory
88
To Scan Originals into Memory (Store Mode)
88
To Set Next Copying Job (Reserve)
90
To Check/Control Jobs in Progress (Job List Screen)
92
Output Mode for Machine Without Finisher
94
Output Mode for Machine with Finisher
96
Stapling Output Copies (Staple)
100
Punching File Holes in Copies (Punch)
104
Making Fold in Copies (Fold / Fold & Stitch)
109
Output Mode for Machine with Inner Tray IT-101
112
4 4 Helpful Functions
115
Making Sample Copy (Proof Copy)
116
Checking Feature Selections / Proof Copying (Check Mode)
118
Interrupt Copying
120
Job Memory
121
Help Mode
121
Storing Job Conditions (Job Memory: Job Store)
122
Recalling Stored Job Settings (Job Memory: Job Recall)
125
Displaying Screen for Operation Guide (Help Mode)
126
To Display the Help Screen from Basic Screen
126
To Display Help Screen from Other Screens
128
Troubleshooting 5
129
Clearing Mishandled Paper
129
When "JAM" Appears on Folder Key
129
When "Call for Service" Message Is Displayed
130
Shooting
131
Trouble-
131
Limited Use of the Copier in Trouble
131
Trouble
131
Add Paper
131
Call for Service
131
Clearing Mishandled Paper
131
JAM Key
131
Mishandled Paper
131
Preventive Maintenance
131
Preventive Maintenance
132
Clearing Mishandled Paper
133
When "JAM" Appears on Folder Key
135
When "ADD PAPER" Appears on Folder Key
137
When "Memory Full" Message Is Displayed (Memory Overflow)
138
Action 1
138
When Power OFF/ON Screen Is Displayed
140
Troubleshooting Tips
141
Section 6: Machine Specifications
145
Main Body Specifications
146
Option Specifications
151
Applications 10
153
Programmed Shut-Off (Weekly Timer)
155
Timer Interrupt
156
Rotation
157
Vertical/Horizontal Zoom Mode
159
Special Original
163
Making Copy Quality Closer to Originals (Text/Photo Enhance)
164
Copying Mixed Size Originals (Mixed Original)
166
Copying Folded Originals (Folded Original)
168
Copying Non-Standard Size Originals (Non-Standard Size)
170
To Display Application Selection Screen
172
Inserting Sheets and Covers (Sheet/Cover Insertion)
173
Positioning Title Pages on the Right Side (Chapter)
177
Lay out Several Pages Onto One Sheet (Combination)
180
Making a Multiple Page Signature Booklet (Booklet)
183
Copying Onto Transparent Films (Transparency Interleave)
186
Inserting Images into Printed Sets (Image Insert)
188
Dividing an Image into Right and Left Pages (Book Copy)
191
Reverse the Second Side in 1-2 Mode (Upside Down)
195
Erasing Outside of the Original (Non-Image Area Erase)
197
Reversing Color in Black and White Image (Reverse Image)
199
Repeating Selected Image Area (Repeat: Vert./Horiz. Mode)
201
Repeating Automatically or Selecting Repeating Times
204
Eliminating Black Copy Marks Along Borders (Frame/Fold Erasure)
207
Copying Image in the Center of Copy Paper (AUTO Layout)
210
Adjusting Position of Copy Image (Image Shift)
212
Reducing Images to Create Binding Margin (Reduce&Shift)
214
Printing Stamp, Page, Watermark Onto Copies (Stamp)
217
Overlaying an Image Onto each Page Copied in the Job (Overlay)
221
Paper Information
224
Paper Weight
224
Tray / Exit Tray Capacity
225
Paper Size
228
Special Paper in Multi-Sheet Bypass Tray
229
To Store Copy Paper
229
Original Information
230
Platen Glass Originals
230
Radf Originals
231
11 Supplies
233
Adding Toner
234
Inserting a New Staple Cartridge into FS-113 Finisher
238
Empty Trash Basket of FS-113 Finisher
242
Inserting a New Staple Cartridge into FS-114 Finisher
244
Inserting a New Staple Cartridge into SK-114 Saddle Kit
248
Empty Trash Basket of PK-114 Punch Kit
252
Add Toner
253
Advertisement
Konica Minolta 7235 Service Manual (288 pages)
Brand:
Konica Minolta
| Category:
All in One Printer
| Size: 12.6 MB
Table of Contents
Table of Contents
5
Safety and Important Warning Items
11
Important Notice
11
Description Items for Danger, Warning and Caution
11
Safety Warnings
12
Safety Information
20
Important Information
20
Safety Circuits
21
Indication of Warning on the Machine
23
Iadjustment
31
How to Use the Adjustment Section
31
Composition
31
Adjustments When Replacing Parts
31
List of Adjustment Items
32
Ce Password Setting
34
Mode Change Menu
34
Setting Method
34
Checking by the Counter Key Function
35
Checking Method of the Counter Key Function
35
Mode
36
Setting Method
38
Setting Software DIPSW
38
PM Count Setting
60
Counter Clear
60
Entering PM Count Start Date
60
PM Count Reset
60
Setting of PM Cycle
60
Data Collection
61
Copy Count for each Part to be Replaced
67
Copy Count by Parts to be Replaced (Fixed)
67
Copy Count by Parts to be Replaced (Named; Arbitrarily)
69
Password Setting
71
Setting Phone Number of the Service Center
72
Setting the Serial Number/The Destination
72
Setting the Serial Number
72
Setting the Destination
73
Displaying the ROM Version
73
KRDS Setting
73
ISW Setting
73
Root Counter Display
73
Setting Date
74
Tray Size Setting
74
Mode
75
Setting Method
75
Process Adjustment
75
L Detection Adjustment
76
Toner Density Adjustment
76
Dot Diameter Adjustment
77
LD1 Offset Adjustment
77
LD2 Offset Adjustment (7145 Only)
78
Timing Adjustment
79
Vertical/Horizontal Magnification Adjustment
79
Restart Timing Adjustment
82
Leading Edge Original Erasure Adjustment
85
Paper Feed Loop Amount Adjustment
85
Centering Adjustment
86
Image Read Point Adjustment
88
Recall Standard Data
89
Running Test Mode
89
Setting Method
90
Test Pattern Output
90
Test Pattern Density Adjustment
95
Image Quality Adjustment
95
RADF Scanning Density Adjustment
95
Non-Image Area Erase Check
96
List Print
97
Counter Clear
98
Adjustment of RADF
98
Vertical Magnification Adjustment in RADF System
98
Adjustment of Restart Timing
99
Centering Adjustment
100
Paper Feed Loop Adjustment
100
RADF Image Read Point Adjustment
101
RADF Scanning Density Adjustment
101
FNS Adjustment (FS-112 Only)
101
FNS Adjustment (FS-114 Only)
102
Fold & Stitch Position Adjustment (SK-114)
102
Fold Position Adjustment (SK-114)
103
Punch Position Adjustment (PK-114)
103
Punch Loop Adjustment (PK-114)
104
Mode
106
Mode Setting Method
106
RADF Original Size Detection
107
By-Pass Size Detection Adjustment
107
Action for Mounting When Reinstalling the HDD
107
Input Check List
108
Output Check List
114
Other Adjustments
119
RADF Height Adjustment
119
RADF Distortion Adjustment
120
RADF Original Skew Adjustment (Front Side)
121
RADF Original Skew Adjustment (Back Side)
122
Paper-Centering Adjustment
124
Tray Tilt Adjustment
125
LT Tray Tilt Adjustment
126
Output Check Mode
128
Lengthwise Position Adjustment of Punch Hole of FS-113
133
Adjustment of FS-113 Solenoids
134
Timing Belt Tension Adjustment
135
Adjustment of the Elevator Tray Upper Limit Sensor
136
Adjustment of FS-113 Elevator Tray Overload Detection Level
137
Staple Position Adjustment of FS-114
138
Adjustment of the Installation Position of the Shutter Drive Gear of FS-114
139
Punch Hole Deviance Adjustment of FS-114 (PK-114)
140
Fold Angle Adjustment of SK-114
141
Staple Angle Adjustment of SK-114
142
Isw
143
2 II Isw
143
Description of the Isw
143
Setup
143
Usb Isw
147
Service
149
3 III Service
149
Service Schedule
149
Maintenance Items
153
Df-318/320
155
Db-211/411
156
Fs-113/Ru-101
157
Sk-114
158
Periodic Check Items
159
Df-318
163
Db-211
164
Fs-112
165
Replacement Parts List
166
Important Maintenance Parts
168
Pm Parts Kit
169
Service Materials List
170
Ce Tools List
171
Konica Minolta 7235 Network Setup Manual (230 pages)
Network Setup and Scanner Operations
Brand:
Konica Minolta
| Category:
All in One Printer
| Size: 4.68 MB
Table of Contents
Table of Contents
3
Configuration of Manuals
6
About this Manual
7
Conventions Used in this Manual
7
Selecting the Destination
8
Using of this Manual
8
Folder Structure on the CD-ROM
9
I Outline
10
Chapter 1 Summary of Network Functions
12
Network/Scanner Function Outline
13
Connection with the Network
13
Network Setting Method
13
Scanner Functions
14
Scan Data Output
15
Scan to E-Mail
15
Scan to FTP
16
Send to a Shared Folder (Scan to PC (SMB))
17
Chapter 2 Before Use
18
Control Panel Descriptions
19
LCD Screen
20
LCD Screen Operation Methods
20
Job List Screen
21
Changing Job Order
22
Job Deletion
22
Chapter 3 Inputting Text
24
Inputting Text
25
Data Input Screen
25
Keyboard Input Screen
26
Network Setup - Administrators Only
28
Chapter 4 Setting from the Control Panel
30
Network Setup List
31
Method for Setting Network from Control Panel
32
Method for Setting Network from Control Panel
33
IP Address Settings
35
TCP/IP Setup
36
Enable Tcp/Ip
37
Ip Address
37
Subnet Mask
37
TCP/IP Setup
37
Default Gateway
38
Enable Dhcp
38
Other Dns Server
39
Preferred Dns Server
39
Raw Port Number
40
Dns Domain Name
41
Netware Setup
42
Dns Host Name
41
Netware Setup
43
Enable Netware
44
Ethernet Frame Type
44
Print Server Name
44
Print Server Password
45
Nds Tree
47
Operating Mode
48
Printer Number
48
Disable Bindery
49
Appletalk Setup
50
Print Queue Scan Rate
49
Appletalk Setup
51
Enable Appletalk
51
Zone Name
52
IPP Setup
53
IPP Setup
54
The Display Returns to the [Network Setting] Screen
54
Accept Ipp Job
55
Enable Ipp
55
Job Size
56
Message from Operator
56
Operation Support Information
57
Printer Related Infomation
59
Printer Information
60
More Printer Information
61
Printer Driver Installer
61
Printer Model
61
Printer Manufacturer
62
FTP Setup
63
Enable Pasv Mode
64
FTP Setup
64
Proxy Port Number
64
Proxy Server
64
Ftp Client Port Number
65
E-Mail (SMTP) Setup
66
Enable Smtp
67
Smtp Server
67
Binary Division
68
Maximum Message Size
69
Pop before Smtp
71
E-Mail (POP) Setup
72
Enable Pop
73
Login Name
73
Pop Server
73
Polling Interval
75
Pop Port Number
76
Pop Connection Timeout
77
E-Mail Extended Config
78
Control Panel
78
Dsn Request
79
Mdn Request
80
Response Timeout for Mdn/Dsn
80
Device Setup
81
Device Setup
82
Mac Address
82
Network Speed
82
Network Receiving
83
List Print
84
PC(SMB) Setup
85
LDAP Setup
86
Enable Ldap
88
LDAP Setup
88
Maximum Hit Number
88
Search Timeout
88
Search Root
90
Server Address
90
Enable Ssl
91
Port no
91
Authentication Type
92
User Authentication
92
User Name
93
Domain Name
94
Chapter 5 Web Utility
98
Accessing Web Utility
99
Network Information
100
Protocol Information
100
TCP/IP Configuration
101
Changing IP Settings
102
Enabling TCP/IP
102
Changing DHCP Settings
103
Changing DNS Settings
104
Netware Configuration
105
Changing Netware Settings
106
Enabling Netware
106
Netware Configuration
106
Appletalk Configuration
109
Enabling Appletalk
109
Changing Appletalk Settings
110
Appletalk Configuration
110
IPP Configuration
111
Enabling IPP
112
IPP Configuration
112
Changing IPP Configuration Settings
113
FTP Configuration
114
Changing FTP Setting
115
FTP Configuration
115
E-Mail Send (SMTP) Configuration
116
Changing E-Mail Send (SMTP) Setting
117
Enabling E-Mail Send (SMTP)
117
E-Mail Receive (POP) Configuration
119
Changing E-Mail Receive (POP) Setting
120
E-Mail Extended Configuration
121
PC(SMB) Configuration
122
LDAP Configuration
123
LDAP Configuration
124
E-Mail Notification Configuration
125
Device Configuration
127
Changing Device Setting
128
Device Configuration
128
Reset
129
Resetting the Network Function
130
Restoring the Factory Defaults
130
III Scanner
132
Konica Minolta 7235 User Manual (123 pages)
Document Folder Operations
Brand:
Konica Minolta
| Category:
Copier
| Size: 2.14 MB
Table of Contents
Table of Contents
3
Introduction
5
Getting Started
6
Features of the Document Folder
6
Printing the Document
6
How to Use this User's Guide
8
Manual Structure
9
System Box and User Box
11
Chapter 1 : Overview of Document Folder
12
What Is Document Folder
12
Re-Print Function
13
System Box and User Box
14
Confidentiality
15
Re-Print Function
16
Chapter 2: Storing Documents in Document Folder
17
Storing Documents in Document Folder
17
Storing Copy Documents
20
Storing Scanned Document
28
Chapter 3 : Print Documents
34
How to See the Document List Screen
34
Printing the Documents in Box
35
Operating the Re-Print Function
54
Deleting Documents
59
Transmit or Transfer a Document in the Box
61
How to See
61
The Document
61
Importing Scanned Documents to Computer
74
List Screen
75
Key Operator Mode
89
Key Operator Operation Menu List
89
Chapter 4 : Key Operator Mode
90
Key Operator Operation Menu List
90
User Box List
91
Displaying/Completing Document Folder Setting
92
System Box Setting
96
User Box Registration/Edit
99
User Box List
103
Re-Print Setting
109
Appendix
111
Specifications
112
Entering Names
114
Scan Direct
116
Index
119
KONICA MINOLTA 7235 User Manual (38 pages)
Security
Brand:
KONICA MINOLTA
| Category:
All in One Printer
| Size: 1.64 MB
Table of Contents
Table of Contents
5
Security Functions
7
Enhanced Security Mode
8
Description of Enhanced Security Mode
8
Data Protected by Enhanced Security Mode
9
Display When Enhanced Security Mode Is on
10
Protect and Delete Data after Use
12
Protect Data in the Document Folder from Access and Tampering
13
Access to a User Box in Enhanced Security Mode
14
Delete Data in the User Box in Enhanced Security Mode
17
Save Scanned Data / Change Box Password in Enhanced Security Mode
19
Output Data in the Confidential Print Box
22
Output Data in the Fax Confidential Inbox
24
Key Operator Security Functions
26
Turn Enhanced Security Mode ON/OFF
26
Register/Edit User ID and Password in the User Box
29
Print Audit Log
32
Analyze Audit Log
35
Table of Items Saved in Audit Log
36
Advertisement
Related Products
Konica Minolta 7228
Konica Minolta 7222
Konica Minolta 7075
KONICA MINOLTA 7118
KONICA MINOLTA 7115
Konica Minolta 7920
Konica Minolta 7915
Konica Minolta 7415
Konica Minolta 7075/FORCE 75
Konica Minolta 7085/FORCE 85
Konica Minolta Categories
All in One Printer
Printer
Digital Camera
Measuring Instruments
Copier
More Konica Minolta Manuals
Login
Sign In
OR
Sign in with Facebook
Sign in with Google
Upload manual
Upload from disk
Upload from URL