Sign In
Upload
Manuals
Brands
Volkswagen Manuals
Automobile
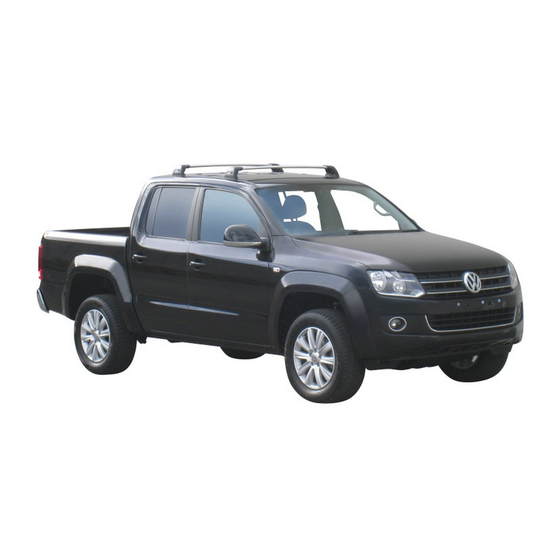
Amarok 2011
Volkswagen Amarok 2011 Manuals
Manuals and User Guides for Volkswagen Amarok 2011. We have
4
Volkswagen Amarok 2011 manuals available for free PDF download: Workshop Manual, Service & Maintenance, Maintenance Manual
Volkswagen Amarok 2011 Workshop Manual (259 pages)
4-cylinder injection engine (2.0 l direct injection engine, turbocharger)
Brand:
Volkswagen
| Category:
Automobile
| Size: 8 MB
Table of Contents
Table of Contents
3
Technical Data
7
Engine Number
7
Engine Data
7
Removing and Installing Engine
9
Removing Engine
9
Securing Engine on Engine and Gearbox Support - VAS 6095
19
Notes on Installing
20
Assembly and Gearbox Mountings
23
Crankshaft Group
25
Cylinder Block (Pulley End)
25
Assembly Overview - Poly V-Belt Drive
25
Removing and Installing Tensioner for Poly V-Belt
27
Removing and Installing Poly V-Belt
28
Removing and Installing Ancillary Bracket
30
Removing and Installing Vibration Damper
33
Cylinder Block (Gearbox End)
35
Assembly Overview - Sealing Flange and Drive Plate
35
Removing and Installing Drive Plate
36
Removing and Installing Needle Bearing In/From Drive Plate
38
Removing and Installing Sealing Flange on Gearbox Side
39
Pistons and Conrods
42
Assembly Overview - Pistons and Conrods
42
Separating New Conrod
45
Piston and Cylinder Dimensions
45
Crankshaft
46
Assembly Overview - Crankshaft
46
Allocation of Crankshaft Bearing Shells (Classification)
47
Crankshaft Dimensions
48
Measuring Axial Clearance of Crankshaft
49
Measuring Radial Clearance of Crankshaft
49
Pulling Needle Bearing out of and Driving into Crankshaft
50
Cylinder Head, Valve Gear
52
Cylinder Head
52
Assembly Overview - Cylinder Head
52
Amarok
53
Removing and Installing Cylinder Head
54
Checking Compression
68
Removing and Installing Vacuum Pump
69
Chain Drive
71
Assembly Overview - Timing Chain Cover
71
Removing and Installing Inlet Camshaft Control Valve 1 N205
72
Removing and Installing Upper Timing Chain Cover
73
Removing and Installing Timing Chain Cover (Bottom)
73
Renewing Oil Seal for Vibration Damper
77
Camshaft Timing Chain - Exploded View
81
Removing and Installing Camshaft Timing Chain
82
Assembly Overview - Balancer Shaft Timing Chain
86
Removing and Installing Balancer Shaft Module
88
Renewing Balancer Shaft for Inlet Camshaft
90
Renewing Balancer Shaft for Exhaust Camshaft
93
Checking Valve Timing
96
Valve Gear
98
Assembly Overview - Valve Gear
98
Removing and Installing Camshafts
100
Renewing Valve Stem Seals with Cylinder Head Installed
111
Renewing Valve Stem Seals with Cylinder Head Removed
115
Checking Valve Guides
118
Checking Axial Clearance of Camshafts
119
Lubrication
121
Parts of Lubrication System
121
General Notes on the Lubrication System
121
Engine Oil
121
Assembly Overview - Sump, Oil Pump
122
Removing and Installing Coarse Oil Separator
124
Removing and Installing Oil Pump
125
Removing and Installing Lower Part of Sump
126
Removing and Installing Upper Part of Sump
130
Oil Filter Bracket, Oil Pressure, Engine Oil Cooler and Oil Supply Line
134
Assembly Overview - Oil Filter, Engine Oil Cooler
134
Removing and Installing Engine Oil Cooler
135
Removing and Installing Oil Pressure Switch F22
136
Removing and Installing Oil Supply Line to Turbocharger
136
Checking Oil Pressure
136
Cooling
138
Cooling System
138
General Notes on Cooling System
138
Draining and Filling Coolant
139
Checking Cooling System for Leaks
142
Coolant Hose Schematic Diagram
145
Coolant Hose Schematic Diagram for Vehicles with Heat Exchanger
145
Coolant Hose Schematic Diagram for Vehicles with 2Nd Heat Exchanger
146
Parts of Cooling System, Engine Side
147
Assembly Overview - Coolant Pipes and Continued Coolant Circulation Pump V51
147
Removing and Installing Continued Coolant Circulation Pump V51
148
Coolant Pump and Thermostat - Exploded View
150
Removing and Installing Coolant Temperature Sender G62
151
Removing and Installing Toothed Belt for Coolant Pump
152
Renewing Oil Seal for Coolant Pump Drive
154
Removing and Installing Coolant Pump
155
Removing and Installing Thermostat
157
Parts of Cooling System, Body Side
158
Assembly Overview - Parts of Cooling System, Body Side
158
Assembly Overview - Air Ducting with Radiator Fan V7
159
Removing and Installing Cowling with Radiator Fan V7
160
Removing and Installing Radiator
161
Fuel Supply System
165
General Notes on Fuel System
165
Safety Precautions When Working on Fuel Supply System
166
Rules for Cleanliness
166
Releasing Pressure in High-Pressure Area
167
Fuel Pump
168
Checking Fuel Pump
168
Checking Fuel Pressure
170
Fuel Tank
173
Assembly Overview - Fuel Tank
173
Removing and Installing Fuel Tank
175
Removing and Installing Fuel Delivery Unit
178
Removing and Installing Fuel Gauge Sender G
179
Removing and Installing Filler Neck
180
Assembly Overview - Fuel Filter with Attachments
182
Removing and Installing Fuel Filter
183
Removing and Installing Fuel Pump Control Unit J538
184
Electronic Power Control (EPC)
185
Assembly Overview - Accelerator Module
185
Removing and Installing Accelerator Module
185
Activated Charcoal Filter System
187
Checking Fuel Tank Breather
187
Turbocharging/Supercharging
189
Charge Air System
189
Safety Precautions
189
Rules for Cleanliness
189
Instructions for Hose Connections with Screw-Type Clips
190
Assembly Overview - Charge Air Cooling
190
Removing and Installing Pressure Pipe
192
Removing and Installing Charge Pressure Sender G31
192
Removing and Installing Charge Air Cooler
192
Checking Charge Air System for Leaks
195
Turbocharger
198
Assembly Overview - Turbocharger
198
Removing and Installing Turbocharger
203
Checking Vacuum Unit for Turbocharger
206
Mixture Preparation - Injection
208
Safety Precautions and Rules for Cleanliness
208
General Notes on Self-Diagnosis
208
Injection System
209
Overview of Fitting Locations
210
Assembly Overview - Air Filter
211
Removing and Installing Air Filter Housing
213
Removing and Installing Air Filter Element
215
Removing and Installing Air Mass Meter G70
215
Assembly Overview - Intake Manifold
217
Assembly Overview - Fuel Rail
218
Removing and Installing Intake Manifold
219
Removing and Installing Injectors
223
Renewing Teflon Seal on Injector
225
Cleaning Injectors
227
Removing and Installing Fuel Pressure Sender -G247
228
Removing and Installing Throttle Valve Module J338
229
Cleaning Throttle Valve Module J338
230
Assembly Overview - High-Pressure Pump
231
Removing and Installing High-Pressure Pump
232
Removing and Installing Engine Control Unit
233
Checking Components
235
Check Fuel Holding Pressure Upstream of High-Pressure Pump
235
Checking Intake Manifold Change-Over
238
Checking Fuel Pressure Sender G247
240
Checking Double Non-Return Valve
242
Exhaust System
245
Assembly Overview - Parts of the Exhaust System
245
Removing and Installing Catalytic Converter
246
Removing and Installing Exhaust Manifold
247
Removing and Installing Centre Silencer
248
Removing and Installing Rear Silencer
249
Checking Exhaust System for Leaks
249
Aligning Exhaust System Free of Stress
249
Installation Position and Specified Torque of the Clamp
251
Ignition System
253
Repairing Ignition System
253
General Notes on Ignition System
253
Safety Precautions
253
Assembly Overview - Ignition System
254
Removing and Installing Ignition Coils with Output Stage
254
Removing and Installing Spark Plugs
256
Removing and Installing Knock Sensor 1 G61
258
Removing and Installing Engine Speed Sender G28
258
Test Data, Spark Plugs
259
Advertisement
Volkswagen Amarok 2011 Service & Maintenance (173 pages)
Brand:
Volkswagen
| Category:
Automobile
| Size: 2 MB
Table of Contents
Table of Contents
3
1 Engine List
5
2 General Rules of Cleanliness
7
Rules of Cleanliness During Work with Information Material Maintenance Manual
7
Rules of Cleanliness During Work with Information Material "Maintenance Manual
14
Rules of Cleanliness During Work with Information Material "Maintenance Manual
20
Rules of Cleanliness During Work with Information Material "Maintenance Manual
21
Rules of Cleanliness During Work with Information Material "Maintenance Manual for Heating, Ventilation and Air Conditioning System
22
Rules of Cleanliness During Work with Information Material "Maintenance Manual - Body
39
3 Service Work
42
Information Reference Flexible or Fixed Service
42
Service Tables
44
Scopes of Service
54
4 General
63
Vehicle Identification Number (Chassis Number)
63
Vehicle Data Sticker
63
Severe Operating Conditions
64
Engine Code and Engine Number
64
Countries with High Levels of Dust
64
Sticker
66
Entries in Service Schedule
67
5 Descriptions of Work
68
Lifting the Vehicle
69
Swivel Joints: Visual Check
83
Reading Ash Mass (Saturation Level) of Diesel Particulate Filter
84
Battery: Check Battery Terminal Clamps for Secure Seating
85
Battery: Perform Visual Check and Check Magic Eye
88
Removing Relay for Battery Disconnection (if Fitted)
88
Front Passenger Front Airbag: Check Key Switch and "On/Off Function
92
Checking Tyres: Condition, Wear Pattern, Tyre Pressure, Tread Depth
93
Brake System: Perform Visual Check for Leaks and Damage
96
Thickness of Brake Pads and Condition of Front Brake Discs and Rear Drum Brake Linings: Check
97
Brake System and Shock Absorbers: Perform Visual Check for Leaks and Damage
99
Brake Fluid: Change
99
Brake Fluid Level: Check
104
Climatronic: Set Temperature to 22 °C
105
Window Regulators: Check Positioning (Open and Close Functions)
106
Vehicle Diagnosis Tester
106
Performing Vehicle System Test
108
Four-Wheel Drive: Insert Fuse
111
Protective Bellows: Visual Check
114
Dust and Pollen Filter: Clean Housing and Renew Filter Element
114
Poly V-Belt: Check Condition
115
Poly V-Belt: Renew
116
Fuel Filter: Renew (Diesel Engine)
117
Fuel System: Bleed (Diesel Engine)
118
Fuel Filter: Drain Water (Diesel Engine)
118
Cooling System: Check Frost Protection and Coolant Level
119
Air Filter: Clean Housing and Renew Filter Element
122
Air Filter with Saturation Indicator in Dash Panel Insert
125
Resetting Programmed Values in Engine Control Unit
125
Engine Oil Level: Check
126
Engine Oil: Drain or Extract; Renew Oil Filter and Replenish Engine Oil
126
Engine and Components in Engine Compartment (from above and Below): Perform Visual Check for Leaks and Damage
130
Bonnet Catch: Clean, Ensure Attachment Is Secure and Lubricate
131
Check Breakdown Set
132
Performing Road Test
133
Wheel Securing Bolts: Tighten to Specified Torque
134
Reading Radio Code
135
Radio / Radio Navigation System: Enter Anti-Theft Coding PIN
137
Radio Navigation System: Insert Navigation CD/DVD and Perform Update
138
Timing Chain: Renew
138
Windscreen Wash/Wipe System and Headlight Washer System: Check Function and Settings
138
Windscreen Wiper Blades: Check Park Position
141
Headlight Adjustment: Check, if Necessary Adjust
142
Service Interval Display: Reset
145
Service Interval Display: Adapt (Export)
147
Track Rod Ends: Check Clearance, Security and Boots
148
Power Assisted Steering: Check Fluid Level
148
Doors: Grease Door Arrester
149
Paint: Perform Visual Check for Damage and Corrosion, Interior and Exterior When Doors and Bonnet/Rear Lid/Flaps Are Open
149
Protective Foil: Remove (if Fitted)
150
Underbody Protection: Perform Visual Check for Damage
150
Clock: Set to Correct Time
150
Camshaft Drive Toothed Belt and Toothed Belt Tensioning Roller: Renew
152
Camshaft Drive Toothed Belt: Check Condition
152
Toothed Belt for Water Pump: Renew
152
Toothed Belt for Balancer Shaft: Renew
152
Spark Plugs: Renew
153
Removing and Installing Skid Plate
154
Steering: Check Bellows for Leaks and Damage
155
6 Exhaust Emissions Test
156
General Information for Exhaust Emissions Test
156
Exhaust Emissions Test for Petrol Engines with Engine Code CFPA
157
Exhaust Emissions Test for Diesel Engines with Engine Codes CDBA, CDCA
164
Exhaust Emissions Test with OBD
167
7 Glossary
170
Volkswagen Amarok 2011 Workshop Manual (180 pages)
Brand:
Volkswagen
| Category:
Automobile
| Size: 1 MB
Table of Contents
Table of Contents
5
Technical Data
7
1 General Notes on Air Conditioning Systems
7
Introduction
7
Additional Information
7
Basics of Air Conditioning
8
Vapour Pressure Table for Refrigerant R134A
9
Refrigerant R134A
10
Characteristics of Refrigerant R134A
11
Refrigerant Machine Oil
13
Comfort
15
How Air Conditioning Works
15
General Safety
16
Safety Precautions for When Working on Vehicles with Air Conditioning and When Handling
19
Refrigerant R134A
19
Basics for Working on Refrigerant Circuit
20
2 General Information on Refrigerant Circuit
23
Refrigerant Circuit Components
23
Design of Refrigerant Circuit
31
Evacuation and Charging Valves for Quick-Release Couplings of Air Conditioner Service Station
31
On Refrigerant Circuit
31
Switch and Sender in Refrigerant Circuit and Related Connections
33
Electrical Components Not Installed in Refrigerant Circuit
36
Pressures and Temperatures in the Refrigerant Circuit
38
Refrigerant Circuit with Expansion Valve
38
Refrigerant Circuit with Restrictor and Reservoir
40
Test and Measurement Work that Can be Performed Using a Pressure Gauge
42
Air Conditioner Service and Recycling Equipment
43
Notes to Repairs on Refrigerant Circuit
44
3 Statutory Texts and Instructions
45
Statutes and Regulations
45
Recycling and Refuse Law
50
Converting R12 Refrigerant Circuits to R134A Refrigerant Circuits and Repairing Them (Retrofitting)
51
Maintaining Records on Refrigerant
51
4 Refrigerant Circuit
52
Important Repair Notes on Air Conditioning
52
Retrofitting Refrigerant Circuit from R12 Refrigerant to R134A Refrigerant
52
5 Working with the Air Conditioner Service Station
53
Important Notes for Working with the Air Conditioner Service Station
54
Connecting Air Conditioner Service Station for Measuring and Checking
54
Draining Refrigerant Circuit Using Air Conditioner Service Station
55
Evacuating Refrigerant Circuit Using Air Conditioner Service Station
56
Charging Refrigerant Circuit Using Air Conditioner Service Station
57
Bringing Air Conditioning System into Service after Charging
58
Charging Container in Air Conditioner Service Station with Refrigerant
59
Draining Air Conditioner Service Station
59
6 Detecting Leaks in Refrigerant Circuit
61
Leak Detection in Refrigerant Circuit Using Compressed Air or Nitrogen
62
Searching for Leaks in Refrigerant Circuits Using Leak Detector V.A.G 1796
64
Detecting Leaks in Refrigerant Circuit Using Leak Detecting System VAS 6196 or Leak Detecting
65
System VAS 6201 or a Later Model
65
7 Clearing Refrigerant Circuit of Contaminants
71
Blowing through Refrigerant Circuit with Compressed Air and Nitrogen
71
Purging (Cleaning) Refrigerant Circuit with Refrigerant R134A
73
8 Complaints
128
Possible Complaints about Refrigerant Circuit
128
Smells from Heater and Air Conditioner Unit
129
9 Connecting Air Conditioner Service Station
132
For Vehicles that Have Connections on both Low-Pressure and High-Pressure Sides of
132
Refrigerant Circuit
132
10 Checking Pressures on Vehicles
133
Checking Pressures in Refrigerant Circuit (Using Air Conditioner Service Station)
133
Checking Systems with a Restrictor and Collector
136
Compressor
138
Checking Systems with an Expansion Valve and Reservoir (with Internally Regulated Air Conditioner Compressor)
141
Checking Systems with an Expansion Valve and Reservoir
147
Compressor)
147
Checking Systems with a Restrictor and Reservoir and Air Conditioner Compressor Regulating Valve N280 (with Externally Regulated Air Conditioner Compressor)
149
Checking Systems with an Expansion Valve, Receiver and Air Conditioner Compressor
154
Regulating Valve N280 (with Externally Regulated Air Conditioner Compressor)
154
With Expansion Valve, Receiver and Electrical Air Conditioner Compressor
164
11 Renewing Components
165
In the Event of Leaking or Damaged Components (Apart from the Air Conditioner Compressor, Receiver or Reservoir)
166
Renewing Air Conditioner Compressor
167
Renewing Receiver or Reservoir, and Restrictor
169
12 Testing Equipment and Tools
171
List of Test Equipment, Tools and Materials
171
Advertisement
Volkswagen Amarok 2011 Maintenance Manual (155 pages)
Brand:
Volkswagen
| Category:
Automobile
| Size: 2 MB
Table of Contents
Table of Contents
3
1 Engine List
5
2 Service Work
6
Information on Longlife Service and Time or Distance Dependent Service
6
Service Tables, Inland
9
Service Tables, Export
10
Service Tables, Argentina and Brazil
13
VW Engine Oil Standards
14
Delivery Inspection
14
Scopes of Service
16
Time or Distance Dependent Additional Work
19
Market Specific Deviations - Scope of Work for Argentina and Brazil
21
3 General
23
Vehicle Identification Number (Chassis Number)
23
Vehicle Data Sticker
23
Severe Operating Conditions
24
Engine Code and Engine Number
24
Sticker
24
Entries in Service Schedule
26
RME Fuel (Biodiesel) that Does Not Conform with the Standard
26
4 Descriptions of Work
28
Lifting Vehicle
29
Swivel Joints: Visual Check
48
Reading Ash Mass (Saturation Level) of Diesel Particulate Filter
49
Battery: Check Battery Terminal Clamps for Secure Seating
51
Battery: Perform Visual Check and Check Magic Eye
55
Removing Relay for Battery Disconnection
55
Front Passenger Front Airbag: Check Key Switch and „On/Off Function
59
Checking Tyres: Condition, Wear Pattern, Tyre Pressure, Tread Depth
60
Brake System: Perform Visual Check for Leaks and Damage
64
Front Brake Pads/Linings: Check Thickness
65
Rear Drum Brake Linings: Check Thickness
68
Brake System and Shock Absorbers: Perform Visual Check for Leaks and Damage
69
Brake Fluid: Change
69
Brake Fluid Level: Check
73
Climatronic: Set Temperature to 22 °C
74
Window Regulators: Check Positioning (Open and Close Functions)
75
Connecting Vehicle Diagnosis Tester
75
Performing Vehicle System Test
78
Four-Wheel Drive: Insert Fuse
81
Protective Bellows: Visual Check
84
Dust and Pollen Filter: Clean Housing and Renew Filter Element
84
Poly V-Belt: Check Condition
85
High Pressure Pump: Check
86
Poly V-Belt: Renew
86
Fuel Filter: Renew (Diesel Engine)
86
Fuel System: Bleed (Diesel Engine)
87
Fuel Filter: Drain Water (Diesel Engine)
88
Cooling System: Check Frost Protection and Coolant Level
88
Air Filter: Clean Housing and Renew Filter Element
92
Air Filter with Saturation Indicator in Dash Panel Insert
94
Resetting Programmed Values in Engine Control Unit
94
Engine Oil Level: Check
95
Engine Oil: Drain or Extract; Renew Oil Filter and Replenish Engine Oil
95
Engine and Components in Engine Compartment (from above and Below): Perform Visual
99
Check for Leaks and Damage
99
Bonnet Catch: Clean, Ensure Attachment Is Secure and Lubricate
100
Check Breakdown Set
100
Performing Road Test
101
Wheel Securing Bolts: Tighten to Specified Torque
102
Reading Radio Code
103
Radio / Radio Navigation System: Enter Anti-Theft Coding PIN
105
Radio Navigation System: Insert Navigation CD/DVD and Perform Update
106
Timing Chain: Renew
106
Windscreen Wash/Wipe System and Headlight Washer System: Check Function and Settings
106
Windscreen Wiper Blades: Check Park Position
109
Headlight Adjustment: Check, if Necessary Adjust
110
Service Interval Display: Reset
113
Service Interval Display: Recode (Adapt)
115
Service Interval: Adjusting (Inland)
116
Service Interval: Adjusting (Export)
121
Service Interval: Adjusting (Argentina and Brazil)
125
Track Rod Ends: Check Clearance, Security and Boots
130
Power Assisted Steering: Check Fluid Level
130
Doors: Grease Door Arrester
132
Paint: Perform Visual Check for Damage and Corrosion, Interior and Exterior When Doors and Bonnet/Rear Lid/Flaps Are Open
132
Protective Foil: Remove (if Fitted)
132
Underbody Protection: Perform Visual Check for Damage
133
Clock: Set to Correct Time
133
Camshaft Drive Toothed Belt and Toothed Belt Tensioning Roller: Renew
134
Camshaft Drive Toothed Belt: Check Condition
134
Coolant Pump Toothed Belt Sprocket and Toothed Belt: Renew
135
Spark Plugs: Renew
135
Removing and Installing Skid Plate
137
Steering: Check Bellows for Leaks and Damage
137
5 Exhaust Emissions Test
138
General Information for Exhaust Emissions Test
138
Exhaust Emissions Test for Petrol Engines with Engine Code CFPA
139
Exhaust Emissions Test for Diesel Engines with Engine Codes CDBA, CDCA
146
Exhaust Emissions Test with OBD
148
6 Glossary
152
Advertisement
Related Products
Volkswagen Amarok 2017
Volkswagen Amarok 2020
Volkswagen Amarok 2024
Volkswagen Amarok 2023
Volkswagen atlantic
Volkswagen Arteon 2021
Volkswagen Atlas 2018
Volkswagen Atlas 2024
Volkswagen Atlas 2017
Volkswagen Atlas 2020
Volkswagen Categories
Automobile
Automobile Accessories
Adapter
Cables and connectors
Engine
More Volkswagen Manuals
Login
Sign In
OR
Sign in with Facebook
Sign in with Google
Upload manual
Upload from disk
Upload from URL