Sign In
Upload
Manuals
Brands
Lexmark Manuals
Printer
C77X
User Manuals: Lexmark C77X Print Cartridge
Manuals and User Guides for Lexmark C77X Print Cartridge. We have
3
Lexmark C77X Print Cartridge manuals available for free PDF download: Service Manual, User Manual
Lexmark C77X Service Manual (480 pages)
Brand:
Lexmark
| Category:
Printer
| Size: 12 MB
Table of Contents
Table of Contents
3
Notices and Safety Information
11
Laser Notice
11
Safety Information
17
Preface
20
Change History
20
Index
20
Conventions
21
General Information
23
Models
23
Tools Required for Service
23
Options and Features
24
Options for All Models
24
Options for C772 and C782 (310 and 410)
24
Toner Darkness
25
Printer Specifications
26
Power and Performance
29
Time to First Print
29
Memory Configuration
30
Media Specifications
31
Media Sizes
32
Media Guidelines
39
Paper
39
Paper Characteristics
40
Selecting Paper
41
Unacceptable Paper
41
Web Oiler Upgrade Kit and Replacements
42
Acronyms
43
Diagnostic Information
45
Start
45
POR (Power-On Reset) Sequence
46
Symptom Tables
47
Symptom Table-Base Printer
47
Symptom Table-500-Sheet Drawer Option
48
Symptom Table-HCIT 2000-Sheet Option
49
Symptom Table-Output Expander Option
49
Symptom Table-5-Bin Mailbox Option
49
Symptom Table-Staplesmart Finisher
50
Service Error Code and Paper Jam Message Table
51
1Xx Service Errors
51
2Xx Paper Jams
53
9Xx Service Errors
55
Service Checks
58
100.01 ITU Error Service Check
58
100.02 ITU Error Service Check
61
122.01 Error Code Service Check
62
122.03 Error Code Service Check
63
Error Code Service Check
64
122.05 and 122.06 Error Code Service Check
65
122.07, 122.14, and 122.15 Error Code Service Check
66
148.XX Error Code Service Check
69
XX Error Code Service Check
69
Error Code Service Check
70
XX Error Code Service Check
71
177.XX Error Code Service Check
72
200.03 Paper Jam Service Check
72
Paper Jam Service Check
73
200.05 Paper Jam Service Check
74
200.07 Paper Jam Service Check
75
200.21, 200.28, and 200.29 Paper Jam Service Check
76
200.93 Paper Jam Service Check
77
200.96 Paper Jam Service Check
79
201.XX and 202.XX Paper Jam Service Check
79
230.XX Paper Jam Service Check
81
241.XX Paper Jam Service Check
82
XX Paper Jam Service Check
83
243.XX Paper Jam Service Check
87
244.XX Paper Jam Service Check
92
XX Paper Jam Service Check
93
271.XX Paper Jam Service Check
95
272.XX Paper Jam Service Check
96
282.98 Paper Jam Service Check
97
940.XX Error Code Service Check
102
XX Error Code Service Check
104
XX Error Code Service Check
106
XX Error Code Service Check
108
956.XX Service Error Service Check
110
982.XX Error Service Check
110
Error Service Check
111
5-Bin Mailbox Option Service Check
113
500-Sheet Drawer Option Service Check
117
AC and DC Power Service Check
120
Autocompensator Service Check
122
Black Only Retract (BOR) Service Check
124
Close Door/Hvps/Printhead Interlock Switch Service Check
125
Duplex Option Service Check
127
Envelope Feeder Option Service Check
129
HCIT 2000-Sheet Option Service Check
130
Fuser Drive Assembly Noise Check
133
Operator Panel Lcd/Status Led/Buttons Service Check
134
Output Expander Option Service Check
136
Print Quality Service Check
139
Blank Page (no Image)
139
Entire Page Is Mostly One Color-Full Bleed Planes in One Color
140
Missing Colors-Complete or Partially Missing Color Planes
141
Black and White Only-Cyan, Magenta, and Yellow Are Missing
142
Light Print over the Entire Page
142
Horizontal Lines or Streaks
144
Vertical Lines or Streaks
144
Low Image Density
145
Poor Color Alignment
145
Transparency Print Quality Is Poor
146
Negative Ghosting or Faded Image
147
Residual Image
147
Uneven Printing
147
Smudged or Distorted Images on Fused Page
148
Toner Smears or Rubs off the Page with no Error Code Displayed
148
Light Lines or Streaks Appear on the Page
149
Toner Is on the Back of the Printed Page
149
Paper Wrapped Around the Second Transfer Roll
150
White Streak in Color Plane
150
User Troubleshooting for Quality
151
Second Transfer Roll Service Check
155
Staplesmart Finisher Service Check
157
Tray 1 Service Check
161
Tray 1 Media Size Sensing Service Check
162
User Operator Panel, Menus, and Messages
163
Operator Panel Buttons
163
Understanding the Printer Operator Panel
163
Menu Map
165
Quality Menu
166
Selected Menus
166
Utilities Menu
168
User Attendance Messages
170
Diagnostic Aids
183
Diagnostic Procedures
183
Printhead Diagnostics
183
Print Quality Defect Locator Chart
185
Partial Print Test
186
HCIT Standalone Test Mode
187
Accessing Service Menus
188
Diagnostics Mode
189
Entering Diagnostics Mode
189
Diagnostic Mode Menus
189
Exiting the Diagnostics Mode
191
Registration
192
Alignment Menu
193
Setting Alignment for Color
193
Drift Sensors
194
Misc Tests
195
Belt Tracking (ITU 4Th Point Adjustment)
195
Toggle ITU
195
Printhead Inst
196
Print Tests
196
Print Tests (Input Sources)
196
Print Quality Pgs
197
Hardware Tests
197
Button Test
197
LCD Test
197
CACHE Test
198
DRAM Test
198
Parallel Wrap Test
199
Serial Wrap Test
200
Duplex Tests
201
Duplex Quick Test
201
Duplex Top Margin Offset
201
Duplex Sensor Test
201
Input Tray Tests
202
Feed Test
202
Sensor Test
202
Output bin Tests
203
Feed Test
203
Feed to All Bins
203
Diverter Test
204
Sensor Test
204
Finisher Tests
205
Finisher Feed Test
205
Finisher Sensor Test
205
Staple Test
205
Base Sensor Test
206
Device Tests
207
Disk Test/Clean
207
Flash Test
207
Quick Disk Test
207
Printer Setup
208
Defaults
208
Page Counts
208
Configuration ID
209
Engine Setting X
209
Model Name
209
Serial Number
209
Cal Ref Adj
210
Edge to Edge
210
Reset Color Calibration
210
Ep Setup
210
DC Charge Adjustment
210
Dev Bias Adj
210
EP Defaults
210
Fuser Temp
210
Transfer Adjust
210
Error Log
211
Display Log
211
Print Log
211
Clear Log
212
Exit Diagnostics
212
Configuration Menu
213
Entering Config Menu
213
Exiting the Config Menu
213
Reset Fuser Cnt
214
Black Only Mode
214
Prt Quality Pgs
214
Color Trapping
214
Tray Insert Msg
214
Size Sensing
214
Panel Menus
215
PPDS Emulation
215
Demo Mode
215
Factory Defaults
215
Energy Conserve
215
Event Log
215
Auto Color Adjust
216
Paper Prompts
216
Env Prompts
216
Font Sharpening
216
Jobs on Disk
217
Disk Encryption
217
Exit Config Menu
217
Paper Jams
218
Identifying Jams
218
Access Doors and Trays
218
Understanding Jam Messages
219
Paper Jam Messages
219
Clearing the Entire Paper Path
220
Area a
220
Area B
221
Area C
221
Area D
222
Area T1
222
Area E
223
Area T<X
223
Area J
224
Area K
224
Area L
225
Clearing Mailbox, Finisher, or Output Expander Jams (Area M)
225
Clearing Fuser Jams
226
Clearing Image Transfer Unit Jams
227
If You Still Need Help
232
Repair Information
233
Handling ESD-Sensitive Parts
233
Screw Identification Table
234
Removal Procedures
238
Operator Panel Bezel Removal
239
Lens Removal
241
Front Cover Rear Pivot Cover Removal
242
Front Cover or Front Cover Backplate Assembly Removal
243
Redrive Cap Removal
244
Top Cover Assembly Removal
245
Front Lower Left Cover Removal
249
Paper Path Access Door Removal
250
Front Left Handle Cover Assembly Removal
251
Front Lower Right Cover Removal
251
Front Right Handle Cover Assembly Removal
253
Rear Cover Removal
254
Lower Right Door Assembly Removal
256
Left Lower Cover Removal
256
Lower Jam Access Door Assembly Removal
257
Redrive Door Removal
258
Autocompensator Pick Assembly Removal
259
BOR Drive Assembly Removal
266
Cartridge Contact Assembly Removal
267
Cartridge Drive Assembly Removal
270
Developer HVPS Board Removal
271
Friction Buckler and Buckler Housing Removal
272
Front Right Light Shield Removal
274
Fuser Assembly Removal
276
Fuser Bottom Duct Removal
278
Fuser Drive Assembly Removal
278
Fuser Fan Removal
279
Fuser Top Duct Removal
279
Inner System Board Shield Removal
280
ITU Assembly Removal
281
ITU Drive Assembly Removal
284
LVPS Assembly Removal
285
Media Size Sensing Assembly Removal
287
Media Size Sensing Board Removal
290
Multipurpose Feeder (MPF) Removal
291
Multipurpose Feeder (MPF) Autocompensator or Side Restraints Removal
294
Multipurpose Feeder (MPF) Motor Removal
296
Nip Relief Handle Removal
297
Installation Notes
298
Operator Panel Assembly Removal
300
Outer System Board Shield Removal
301
Pick Rolls Removal
302
Printhead Removal and Adjustments
305
Mechanical Alignment
305
Black Printhead Electronic Alignment
310
Color Printhead Electronic Alignment
311
Rear Bellcrank Removal (Cyan, Magenta, Yellow)
312
Rear Bellcrank (Black) Removal
314
Redrive Assembly Removal
315
Registration Motor Removal
316
Rib Housing Removal
317
RIP Fan Removal
319
S2/Narrow Media/Transparency/Multipurpose Feeder Cable Removal
320
S2/Narrow Media/Transparency/Multipurpose Feeder Sensors Removal
321
Second Transfer Roll Removal
321
System Board Removal
322
Transfer HVPS Board Removal
324
Transfer Plate Assembly Removal
327
Vacuum Transport Belt (VTB) Removal
328
Vacuum Transport Belt (VTB) Fan Removal
330
Waste Container Door Removal
330
Waste Container Latch Removal
331
Web Oiler Fuser Assembly and Card Removal and Replacement
332
Connector Locations
339
Locations
339
Printer Boards
339
Printer Motors
340
Printer Sensors
341
Cartridge Contact Assembly Pin Locations (Cyan, Magenta and Yellow)
342
Cartridge Contact Assembly Pin Locations (Black)
343
System Board Cabling Reference
344
Connectors
345
System Board
345
System Board
346
Autoconnect-Top
356
Autoconnect-Bottom
357
Transfer High Voltage Power Supply (HVPS)
358
Developer High Voltage Power Supply (HVPS) Board
360
Low Voltage Power Supply (LVPS)
361
LVPS Cable Connectors to System Board
361
LVPS Fuser Connectors
362
Media Size Sensing Board
363
High-Capacity Input Tray (HCIT)
364
Staplesmart Finisher
366
Preventive Maintenance
369
Safety Inspection Guide
369
Scheduled Maintenance
369
Standard Fusers
369
ITU Maintenance Kits
369
Lubrication Specifications
370
Lubrication for Replacement Motors
370
Fuser Drive Assembly
370
Cartridge Drive Assembly
371
ITU Drive Assembly
371
Parts Catalog
373
How to Use this Parts Catalog
373
Assembly 1: Covers
374
Assembly 2: Cartridge Mounting
378
Assembly 3: Fuser Assembly
379
Assembly 4: Fuser Drive
382
Assembly 5: Vacuum Transport Belt (VTB) Assembly
383
Assembly 6: Transfer
384
Assembly 7: Printheads
385
Assembly 8: Paper Feed Output (Redrive)
386
Assembly 9: Paper Feed Input
387
Assembly 10: Media Size Sensing
388
Assembly 11: Paper Feed Transport
389
Assembly 12: Multipurpose Feeder (MPF)
390
Assembly 13: 500-Sheet Integrated Tray
392
Assembly 14: Autocompensator Assembly
393
Assembly 15: ITU Assembly
394
Assembly 16: ITU Drive Assembly
395
Assembly 17: ITU Loading
396
Assembly 18: Waste Toner
398
Assembly 19: BOR Drive Assembly
399
Assembly 20: Cartridge Contact Assembly
400
Assembly 21: Cartridge Drive Assembly
401
Assembly 22: Electronics
402
Assembly 23: Electronics-Cabling Interconnections 1
408
Assembly 24: Electronics-Cabling Interconnections 2
410
Assembly 25: Electronics-Cabling Interconnections 3
412
Assembly 26: Electronics-Cabling Interconnections 4
413
Assembly 27: Output Expander
414
Assembly 28: 5-Bin Mailbox
418
Assembly 29: 500-Sheet Drawer Option
422
Assembly 30: Duplex Option
426
Assembly 31: High-Capacity Input Tray (HCIT)
430
Assembly 32: Staplesmart Finishe
434
Assembly 33: Envelope Option
438
Assembly 34: Outdoor Media Tray Option
440
Assembly 35: Banner Option
441
Assembly 36: Options
442
Appendix A-Service Tips
445
Identifying the Printheads
445
Redrive Belt Routing
446
Duplex Option Deflector Button Replacement
447
Advertisement
Lexmark C77X Service Manual (474 pages)
C77/C78 Series
Brand:
Lexmark
| Category:
Printer
| Size: 15 MB
Table of Contents
Table of Contents
3
Notices and Safety Information
11
Laser Notice
11
Safety Information
17
Preface
20
Conventions
20
General Information
21
Models
21
Tools Required for Service
21
Options and Features
22
Options for All Models
22
Options for C772 and C782 (310 and 410)
22
Automatic Calibration
23
Toner Darkness
23
Printer Specifications
24
Electrical Specifications
25
Power and Performance
27
Time to First Print
27
Memory Configuration
28
Media Specifications
29
Media Sizes
30
Media Guidelines
37
Paper
37
Paper Characteristics
38
Selecting Paper
39
Unacceptable Paper
39
Web Oiler Upgrade Kit and Replacements
40
Acronyms
41
Diagnostic Information
43
Start
43
POR (Power-On Reset) Sequence
44
Symptom Tables
45
Symptom Table-Base Printer
45
Symptom Table-500-Sheet Drawer Option
46
Symptom Table-HCIT 2000-Sheet Option
46
Symptom Table-Output Expander Option
47
Symptom Table-5-Bin Mailbox Option
47
Symptom Table-Staplesmart Finisher
47
Service Error Code and Paper Jam Message Table
49
Service Checks
56
ITU Error Service Check
56
ITU Error Service Check
59
Error Code Service Check
60
Error Code Service Check
61
And 122.06 Error Code Service Check
63
122.14, and 122.15 Error Code Service Check
64
Error Code Service Check
67
XX Error Code Service Check
67
Error Code Service Check
68
Error Code Service Check
70
Paper Jam Service Check
70
Paper Jam Service Check
71
Paper Jam Service Check
72
200.28, and 200.29 Paper Jam Service Check
73
Paper Jam Service Check
73
Paper Jam Service Check
75
And 202.XX Paper Jam Service Check
75
Paper Jam Service Check
77
Paper Jam Service Check
78
Paper Jam Service Check
79
Envelope Feeder
82
Paper Jam Service Check
83
Paper Jam Service Check
88
Paper Jam Service Check
89
Paper Jam Service Check
91
Paper Jam Service Check
92
Paper Jam Service Check
93
XX RIP Software Error Service Check
93
Error Code Service Check
96
Error Code Service Check
98
Error Code Service Check
100
XX Error Code Service Check
102
Error Code Service Check
104
Service Error Service Check
106
Error Service Check
106
Error Service Check
107
Output Expander
108
5-Bin Mailbox Option Service Check
109
500-Sheet Drawer Option Service Check
113
AC and DC Power Service Check
116
DC Power Service Check
117
Autocompensator Service Check
118
Black Only Retract (BOR) Service Check
120
Close Door/Hvps/Printhead Interlock Switch Service Check
121
Duplex Option Service Check
123
Envelope Feeder Option Service Check
125
HCIT 2000-Sheet Option Service Check
126
Fuser Drive Assembly Noise Check
129
Operator Panel Lcd/Status Led/Buttons Service Check
130
Output Expander Option Service Check
132
Print Quality Service Check
135
Blank Page (no Image)
135
Entire Page Is Mostly One Color-Full Bleed Planes in One Color
136
Missing Colors-Complete or Partially Missing Color Planes
137
Black and White Only-Cyan, Magenta, and Yellow Are Missing
138
Light Print over the Entire Page
138
All Colors Have Light Print over the Entire Page
139
One Color Has Light Print over the Entire Page
139
Horizontal Lines or Streaks
140
Vertical Lines or Streaks
140
Low Image Density
141
Poor Color Alignment
141
Transparency Print Quality Is Poor
142
Negative Ghosting or Faded Image
143
Residual Image
143
Uneven Printing
143
Smudged or Distorted Images on Fused Page
144
Toner Smears or Rubs off the Page with no Error Code Displayed
144
Light Lines or Streaks Appear on the Page
145
Toner Is on the Back of the Printed Page
145
Paper Wrapped Around the Second Transfer Roll
146
White Streak in Color Plane
146
User Troubleshooting for Quality
147
Second Transfer Roll Service Check
151
Staplesmart Finisher Service Check
153
Tray 1 Service Check
157
Tray 1 Media Size Sensing Service Check
158
User Operator Panel, Menus, and Messages
159
Operator Panel Buttons
159
Understanding the Printer Operator Panel
159
Menu Map
161
Quality Menu
162
Selected Menus
162
Utilities Menu
164
User Attendance Messages
166
Diagnostic Aids
179
Diagnostic Procedures
179
Printhead Diagnostics
179
Print Quality Defect Locator Chart
181
Partial Print Test
182
HCIT Standalone Test Mode
183
Accessing Service Menus
184
Diagnostics Mode
185
Entering Diagnostics Mode
185
Diagnostic Mode Menus
185
Exiting the Diagnostics Mode
187
Registration
188
Alignment Menu
189
Setting Alignment for Color
189
Drift Sensors
190
Misc Tests
191
Belt Tracking (ITU 4Th Point Adjustment)
191
Toggle ITU
191
Printhead Inst
192
Print Tests
192
Print Tests (Input Sources)
192
Print Quality Pgs
193
Hardware Tests
193
Button Test
193
LCD Test
193
CACHE Test
194
DRAM Test
194
Parallel Wrap Test
195
Serial Wrap Test
196
Duplex Tests
197
Duplex Quick Test
197
Duplex Sensor Test
197
Duplex Top Margin Offset
197
Input Tray Tests
198
Feed Test
198
Sensor Test
198
Output bin Tests
199
Feed Test
199
Feed to All Bins
199
Diverter Test
200
Sensor Test
200
Finisher Tests
201
Finisher Feed Test
201
Finisher Sensor Test
201
Staple Test
201
Base Sensor Test
202
Device Tests
203
Disk Test/Clean
203
Flash Test
203
Quick Disk Test
203
Printer Setup
204
Defaults
204
Page Counts
204
Configuration ID
205
Engine Setting X
205
Model Name
205
Serial Number
205
Cal Ref Adj
206
Edge to Edge
206
Reset Color Calibration
206
Ep Setup
206
DC Charge Adjustment
206
Dev Bias Adj
206
EP Defaults
206
Fuser Temp
206
Transfer Adjust
206
Error Log
207
Display Log
207
Print Log
207
Clear Log
208
Exit Diagnostics
208
Configuration Menu
209
Entering Config Menu
209
Exiting the Config Menu
209
Reset Fuser Cnt
210
Black Only Mode
210
Prt Quality Pgs
210
Color Trapping
210
Tray Insert Msg
210
Size Sensing
210
Panel Menus
211
PPDS Emulation
211
Demo Mode
211
Factory Defaults
211
Energy Conserve
211
Event Log
211
Auto Color Adjust
212
Paper Prompts
212
Env Prompts
212
Font Sharpening
212
Jobs on Disk
213
Disk Encryption
213
Exit Config Menu
213
Paper Jams
214
Identifying Jams
214
Access Doors and Trays
214
Understanding Jam Messages
215
Paper Jam Messages
215
Clearing the Entire Paper Path
216
Area a
216
Area B
217
Area C
217
Area D
218
Area T1
218
Area E
219
Area T<X
219
Area J
220
Area K
220
Area L
221
Clearing Mailbox, Finisher, or Output Expander Jams (Area M)
221
Clearing Fuser Jams
222
Clearing Image Transfer Unit Jams
223
If You Still Need Help
228
Repair Information
229
Handling ESD-Sensitive Parts
229
Screw Identification Table
230
Removal Procedures
234
Operator Panel Bezel Removal
235
Lens Removal
237
Front Cover Rear Pivot Cover Removal
238
Front Cover or Front Cover Backplate Assembly Removal
239
Redrive Cap Removal
240
Top Cover Assembly Removal
241
Installation Notes
244
Front Lower Left Cover Removal
245
Paper Path Access Door Removal
246
Front Left Handle Cover Assembly Removal
247
Front Lower Right Cover Removal
247
Front Right Handle Cover Assembly Removal
249
Rear Cover Removal
250
Lower Right Door Assembly Removal
252
Left Lower Cover Removal
252
Lower Jam Access Door Assembly Removal
253
Redrive Door Removal
254
Autocompensator Pick Assembly Removal
255
BOR Drive Assembly Removal
262
Cartridge Contact Assembly Removal
263
Cartridge Drive Assembly Removal
266
Developer HVPS Board Removal
267
Friction Buckler and Buckler Housing Removal
268
Front Right Light Shield Removal
270
Fuser Assembly Removal
272
Fuser Bottom Duct Removal
274
Fuser Drive Assembly Removal
274
Fuser Fan Removal
275
Fuser Top Duct Removal
275
Inner System Board Shield Removal
276
ITU Assembly Removal
277
ITU Drive Assembly Removal
280
LVPS Assembly Removal
281
Media Size Sensing Assembly Removal
283
Media Size Sensing Board Removal
286
Multipurpose Feeder (MPF) Removal
287
Multipurpose Feeder (MPF) Autocompensator or Side Restraints Removal
290
Multipurpose Feeder (MPF) Motor Removal
292
Nip Relief Handle Removal
293
Operator Panel Assembly Removal
296
Outer System Board Shield Removal
297
Pick Rolls Removal
298
Printhead Removal and Adjustments
300
Mechanical Alignment
300
Black Printhead Electronic Alignment
305
Color Printhead Electronic Alignment
306
Rear Bellcrank Removal (Cyan, Magenta, Yellow)
307
Rear Bellcrank (Black) Removal
309
Redrive Assembly Removal
310
Registration Motor Removal
311
Rib Housing Removal
312
RIP Fan Removal
314
S2/Narrow Media/Transparency/Multipurpose Feeder Cable Removal
315
S2/Narrow Media/Transparency/Multipurpose Feeder Sensors Removal
316
Second Transfer Roll Removal
316
System Board Removal
317
Transfer HVPS Board Removal
319
Transfer Plate Assembly Removal
322
Vacuum Transport Belt (VTB) Removal
323
Vacuum Transport Belt (VTB) Fan Removal
325
Waste Container Door Removal
325
Waste Container Latch Removal
326
Web Oiler Fuser Assembly and Card Removal and Replacement
327
Connector Locations
333
Locations
333
Printer Boards
333
Printer Motors
334
Printer Sensors
335
Cartridge Contact Assembly Pin Locations (Cyan, Magenta and Yellow)
336
Cartridge Contact Assembly Pin Locations (Black)
337
System Board Cabling Reference
338
Connectors
339
System Board
339
Autoconnect-Top
350
Autoconnect-Bottom
351
Transfer High Voltage Power Supply (HVPS)
352
Developer High Voltage Power Supply (HVPS) Board
354
Low Voltage Power Supply (LVPS)
355
LVPS Cable Connectors to System Board
355
LVPS Fuser Connectors
356
Media Size Sensing Board
357
High-Capacity Input Tray (HCIT)
358
Hcit 2000-Sheet Board
358
Staplesmart Finisher
360
Preventive Maintenance
363
Safety Inspection Guide
363
Scheduled Maintenance
363
Standard Fusers
363
ITU Maintenance Kits
363
Lubrication Specifications
364
Lubrication for Replacement Motors
364
Fuser Drive Assembly
364
Cartridge Drive Assembly
365
ITU Drive Assembly
365
Parts Catalog
367
How to Use this Parts Catalog
367
Assembly 1: Covers
368
Assembly 2: Cartridge Mounting
372
Assembly 3: Fuser Assembly
373
Assembly 4: Fuser Drive
376
Assembly 5: Vacuum Transport Belt (VTB) Assembly
377
Assembly 6: Transfer
378
Assembly 7: Printheads
379
Assembly 8: Paper Feed Output (Redrive)
380
Assembly 9: Paper Feed Input
381
Assembly 10: Media Size Sensing
382
Assembly 11: Paper Feed Transport
383
Assembly 12: Multipurpose Feeder (MPF)
384
Assembly 13: 500-Sheet Integrated Tray
386
Assembly 14: Autocompensator Assembly
387
Assembly 15: ITU Assembly
388
Assembly 16: ITU Drive Assembly
389
Assembly 17: ITU Loading
390
Assembly 18: Waste Toner
392
Assembly 19: BOR Drive Assembly
393
Assembly 20: Cartridge Contact Assembly
394
Assembly 21: Cartridge Drive Assembly
395
Assembly 22: Electronics
396
Assembly 23: Electronics-Cabling Interconnections 1
402
Assembly 24: Electronics—Cabling Interconnections 2
404
Assembly 25: Electronics—Cabling Interconnections 3
406
Assembly 26: Electronics—Cabling Interconnections 4
407
Assembly 24: Electronics-Cabling Interconnections 2
408
Assembly 26: Electronics-Cabling Interconnections 4
408
Assembly 25: Electronics-Cabling Interconnections 3
408
Assembly 27: Output Expander
408
Assembly 28: 5-Bin Mailbox
412
Assembly 29: 500-Sheet Drawer Option
416
Assembly 30: Duplex Option
420
Assembly 31: High-Capacity Input Tray (HCIT)
426
Assembly 32: Staplesmart Finisher
429
Assembly 33: Envelope Option
432
Assembly 34: Outdoor Media Tray Option
434
Assembly 35: Banner Option
435
Assembly 36: Options
436
Appendix A-Service Tips
439
Identifying the Printheads
439
Redrive Belt Routing
440
Duplex Option Deflector Button Replacement
441
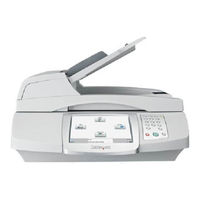
Lexmark C77X User Manual (123 pages)
Scanner MFP Option
Brand:
Lexmark
| Category:
Printer Accessories
| Size: 2 MB
Table of Contents
Safety Information
2
Table of Contents
3
Chapter 1: Learning about the MFP
7
Basic Functions of the Scanner
7
Automatic Document Feeder and Flatbed
7
Understanding the MFP Control Panel
8
Home Screen and Home Screen Buttons
10
Using the LCD Touch-Screen Buttons
13
Sample Screen Two
15
Other Touch-Screen Buttons
16
Menus
19
Chapter 2: Copying
20
Quick Copy
20
Multiple Page Copying
20
Using the Flatbed
21
Understanding the Copy Screens and Options
21
Copying from One Size to Another
23
Making Transparencies
23
Copying to Letterhead
23
Copying Photographs
23
Making Copies Using Media from a Selected Tray
24
Copying Mixed-Sized Media
24
Setting the Duplex Option
25
Reducing and Enlarging Copies
25
Adjusting Copy Quality
25
Setting Collation Options
26
Placing Separator Sheets between Copies
26
Setting Paper Saving Options
26
Placing the Date and Time at the Top of each Page
27
Placing an Overlay Message on each Page
27
Creating a Custom Job (Job Build)
27
Canceling a Copy Job
28
Copy Tips
28
Chapter 3: E-Mail
29
Entering an E-Mail Address
29
Using a Shortcut Number
29
Using the Address Book
30
E-Mailing to a Profile
30
Adding E-Mail Subject and Message Information
30
Changing the Output File Type
31
E-Mailing Color Documents
31
Creating an E-Mail Shortcut
31
Creating an E-Mail Profile
32
Canceling an E-Mail
32
Understanding E-Mail Options
32
E-Mail Server Setup
34
Address Book Setup
34
Chapter 4: Faxing
35
Sending a Fax
35
Using Fax Destination Shortcuts
36
Using the Address Book
36
Sending Faxes from a Computer
36
Creating Shortcuts
37
Understanding Fax Options
38
Changing the Fax Resolution
39
Adjusting the Darkness Setting
39
Sending a Fax at a Later Time
39
Cancel an Outgoing Fax
40
Viewing a Fax Log
40
Fax Tips
40
Chapter 5: FTP
41
Entering the FTP Address
41
Using a Shortcut Number
41
Using the Address Book
41
Creating Shortcuts
42
FTP Options
42
FTP Tips
44
Chapter 6: Scanning to a PC or USB Flash Memory Device
45
Create a Scan to PC Profile
45
Understanding Scan to PC Options
46
Scanning to a USB Flash Memory Device
47
Scanning Tips
47
Chapter 7: Printing
48
Printing from a USB Flash Memory Device
48
Canceling a Print Job
49
Canceling a Job from a Computer Running Windows
50
Canceling a Job from a Macintosh Computer
50
Printing the Menu Settings Page
51
Printing a Network Setup Page
51
Printing a Font Sample List
51
Printing a Directory List
51
Printing Confidential and Held Jobs
52
Printing and Deleting Held Jobs
53
Printing on Specialty Media
55
Loading Standard Trays and Optional Trays
56
Setting the Paper Type and Paper Size
58
Loading the Multipurpose Feeder
58
Loading the 2000-Sheet Drawer
61
Loading the Envelope Feeder
63
Linking Trays
65
Chapter 8: Understanding Paper and Specialty Media Guidelines
66
Supported Print Media
66
Selecting Print Media
73
Storing Print Media
76
Avoiding Jams
77
Chapter 9: Installing and Removing Options
79
Installing Memory or Option Cards
79
Accessing the MFP System Board
79
Installing or Removing a Memory Card
82
Installing or Removing a Flash Memory or Firmware Card
84
Installing an Option Card
86
Replacing the Shield
87
Chapter 10: Maintaining the MFP
88
Determining the Status of Supplies
89
Ordering Supplies
89
Recycling Lexmark Products
90
Cleaning the Scanner Glass and Backing Material
90
Cleaning the Automatic Document Feeder
91
Scanner Registration
92
Removing the Scanner Top
93
Moving the MFP
94
Chapter 11: Clearing Jams
95
Identifying Jams
95
Access Doors and Trays
96
Understanding Jam Messages
97
Clearing Printer Jams
98
Clearing Scanner Jams
98
Chapter 12: Administrative Support
99
Adjusting Control Panel Brightness
99
Restoring Factory Default Settings
99
Adjusting Screen Timeout
100
Adjusting Power Saver
100
Configuring the MFP
101
Encrypting the Hard Disk
107
Hard Disk Wiping
108
Using the Restricted Server List Function
108
Chapter 13: Troubleshooting
109
Understanding MFP Messages
109
Online Technical Support
109
Checking an Unresponsive MFP
109
Locating the Port Name and IP Address
109
Solving Copy Quality Problems
110
Solving Scan Quality Problems
110
Solving Fax Problems
111
Solving Paper Feed Problems
111
Notices
112
Conventions
112
Electronic Emission Notices
112
Other Telecommunications Notices
117
Noise Emission Levels
118
Energy Star
119
Waste from Electrical and Electronic Equipment (WEEE) Directive
119
Index
120
Advertisement
Advertisement
Related Products
Lexmark C772N - 4600 Mfp Option
Lexmark 22L0214 - C 770dtn Color Laser Printer
Lexmark C770n
Lexmark C770
Lexmark C772
Lexmark 24A0226 - C 772dtn Color Laser Printer
Lexmark C782n
Lexmark C792dte 5062-230
Lexmark C750dn
Lexmark Optra C710
Lexmark Categories
Printer
All in One Printer
Printer Accessories
Software
Print Server
More Lexmark Manuals
Login
Sign In
OR
Sign in with Facebook
Sign in with Google
Upload manual
Upload from disk
Upload from URL