Sign In
Upload
Manuals
Brands
Fuji Xerox Manuals
Copier
DocuCentre-IV 4070
Fuji Xerox DocuCentre-IV 4070 Manuals
Manuals and User Guides for Fuji Xerox DocuCentre-IV 4070. We have
2
Fuji Xerox DocuCentre-IV 4070 manuals available for free PDF download: Administrator's Manual, Quick User Manual Quick User Guid
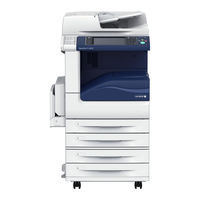
Fuji Xerox DocuCentre-IV 4070 Administrator's Manual (675 pages)
Brand:
Fuji Xerox
| Category:
Copier
| Size: 11.84 MB
Table of Contents
Table of Contents
3
1 Before Using the Machine
15
Preface
16
Types of Manuals
17
Using this Guide
18
Organization of this Guide
18
Conventions
19
Interface Cables
21
Using the USB Interface
21
Using the Parallel Interface
21
Using the Ethernet Interface
22
Energy Saver Mode
24
Changing the Interval for Entering Energy Saver Mode
25
Customizing the Control Panel
27
Changing the Screen Default
27
Setting the Screen after Auto Clear
28
Customizing the Button Layout
29
Services Home
30
Assigning Services to the Custom Buttons
33
Adjusting Screen Brightness
34
Entering Text
35
2 Paper and Other Media
37
Paper Types
38
Loadable Quantity and Weight for Supported Paper
38
Supported Paper Type
40
Loading Paper
45
Loading Paper in Trays 1 to 4 (Trays 3 and 4 (Two Tray Module)(Optional))
45
Loading Paper in Tray 3 (Tandem Tray Module) (Optional)
46
Loading Paper in Tray 4 (Tandem Tray Module) (Optional)
47
Loading Paper in Tray 5 (Bypass)
47
Loading Paper in Tray 6 (HCF) (Optional)
49
Changing the Paper Size
50
Changing the Paper Size for Trays 1 to 4
50
(Trays 3 and 4 (Two Tray Module)(Optional))
50
Changing the Paper Size for Tray 3 (Tandem Tray Module) (Optional)
51
Changing the Paper Size for Tray 4 (Tandem Tray Module) (Optional)
52
Changing the Paper Size for Tray 6 (HCF) (Optional)
53
Changing the Paper Settings
55
3 Maintenance
57
Replacing Consumables
58
Replacing Toner Cartridge
60
Replacing Drum Cartridge
62
Replacing Staple Cartridge (for Finisher-A1)
65
Replacing Staple Cartridge (for Finisher-B1)
66
Replacing Staple Cartridge (for Finisher-C1 or Finisher-C1 with Booklet Maker)
68
Replacing Booklet Staple Cartridge (for Booklet Maker Unit for Finisher-B1)
69
Replacing Booklet Staple Cartridge (for Finisher-C1 with Booklet Maker)
70
Emptying the Hole Punch Waste Container (for Finisher-B1)
72
Emptying the Hole Punch Waste Container (for Finisher-C1 or Finisher-C1 with Booklet Maker)
73
Replacing Stamp
74
Cleaning the Machine
76
Cleaning the Exterior
76
Cleaning the Touch Screen
77
Cleaning the Document Cover and Document Glass
77
Cleaning the Constant Velocity Transport Glass and Document Presser
78
Cleaning the Document Feeder Rollers
78
Printing a Report/List
80
Deleting a Private Charge Print Job with an Invalid User ID
81
Setting Restore Tool
82
4 Machine Status
83
Overview of Machine Status
84
Machine Information
85
General Information
85
Paper Tray Status
87
Print Reports
87
Printer Reports
89
Fax Reports
91
Job Counter Report
93
Automatically Printed Reports/Lists
95
Transmission Report
95
Overwrite Hard Disk
96
Job Flow Error Report
96
Print Mode
97
Fax Receiving Mode
99
Faults
101
Press the <Machine Status> Button
101
Supplies
102
Billing Information
103
On the [Machine Information] Screen
103
User Account Billing Information
104
5 Tools
107
System Settings Procedure
108
Step 1 Entering System Administration Mode
108
Step 2 Entering the System Administrator User ID and Passcode
108
Step 3 Selecting [Tools]
109
Step 4 Selecting a Setting Item on the [Tools] Screen
109
Step 5 Setting a Feature
111
Step 6 Exiting System Administration Mode
111
Tools Menu List
112
Common Service Settings
125
Machine Clock/Timers
125
Connection Interval
126
Auto Print
126
Daylight Savings
128
Audio Tones
128
Screen/Button Settings
129
Paper Tray Settings
131
Image Quality
134
Reports
134
Print Reports Button
134
Maintenance
136
Software Options
136
Finisher Adjustment
136
Watermark
137
Software Upgrade
137
Background Pattern
138
Secure Watermark
139
Force Annotation
141
Print Universal Unique ID (Apeosport Series Models Only)
143
Image Log Control (Apeosport Series Models Only)
143
Print Position
143
Print Position Adjustment
143
Notify Job Completion by E-Mail
145
Other Settings
146
Auto Job Promotion
147
Keyboard Input Restriction
152
Data Encryption
152
Data Restoration
153
Software Download
155
Copy Service Settings
156
Copy Tab - Features Allocation
156
Preset Buttons
157
Copy Defaults
157
Background Suppression
158
Copy Control
161
Original Size Defaults
162
Reduce/Enlarge Presets
163
Annotations - Create Comments
163
Connectivity & Network Setup
164
Port Settings
164
Protocol Settings
169
Machine's E-Mail Address/Host Name
172
Proxy Server Settings (Apeosport Series Models Only)
173
EP Proxy Server Setup
174
SIP Settings
175
T.38 Settings
177
Outgoing/Incoming E-Mail Settings
178
Remote Authentication/Directory Service
179
Security Settings
184
Other Settings
187
Certificate Revocation Retrieval Settings
187
Print Service Settings
189
Allocate Memory
189
Postscript Memory
189
Delete Form
191
Other Settings
192
Substitute Tray
192
Unregistered Forms
193
Postscript Paper Supply
194
Postscript Font Absence
194
Postscript Font Substitution
194
Scan Service Settings
196
First Tab
196
Scan Defaults
197
Scan to PC Defaults
199
Original Size Defaults
200
Output Size Defaults
200
Reduce/Enlarge Presets
200
Other Settings
201
Background Suppression Level
201
Shadow Suppression Level
201
Fax Service Settings
203
Screen Defaults
203
Fax Defaults
204
Original Type
204
Fax Control
205
Fax Received Options
210
Reduce/Enlarge Presets
210
Company Logo
211
Local Terminal Information
211
Original Size Defaults
211
Internet Fax Control
212
E-Mail/Internet Fax Service Settings
215
E-Mail Control
215
Folder Service Settings
218
Job Flow Service Settings (Apeosport Series Models Only)
219
Media Print Service Settings
220
Stored File Settings
221
Web Applications Service Setup (Apeosport Series Models Only)
223
Server Certificate Verification Settings
223
Server Setup
225
Other Settings
226
Web Browser Setup (Apeosport Series Models Only)
227
Setup
229
Create Folder
229
Create Job Flow Sheet
231
Stored Programming
231
Add Address Book Entry
239
Create Job Flow Sheet Keyword
239
Relay Broadcast
245
Create Fax Group Recipients
246
Add Fax Comment
247
Paper Tray Attributes
247
Accounting
248
Create/View User Accounts
248
Account Limit
249
View Accounts
251
Reset User Accounts
251
System Administrator's Meter (Copy Jobs)
252
Accounting Type
252
Accounting Login Screen Settings
253
Fax Billing Data
254
Accounting/Billing Device Settings
255
Interrupt Mode
255
Authentication/Security Settings
257
System Administrator Settings
257
Authentication
258
Login Type
258
Access Control
259
Create Authorization Groups
260
User Details Setup
261
Maximum Login Attempts
262
Passcode Policy
262
Allow User to Disable Active Settings
265
Job Status Default
265
Active Jobs View
265
Completed Jobs View
265
Overwrite Hard Disk
266
Number of Overwrites
266
6 Centreware Internet Services Settings
269
Installation of Centreware Internet Services
270
Preparations
270
Configuration on the Machine
270
Starting Centreware Internet Services
272
Configuring Machine Settings Using Centreware Internet Services
273
7 Printer Environment Settings
277
Print Overview
278
Supported Operating Systems
280
Installation When Using Parallel Port
281
Step 1 Preparations
281
Step 2 Configuration on the Machine
281
Step 3 Configuration on the Computer
282
Centreware Internet Services Setting Items
283
Installation When Using USB Port
284
Step 1 Preparations
284
Step 2 Configuration on the Machine
284
Step 3 Configuration on the Computer
285
Centreware Internet Services Setting Items
285
Installation When Using TCP/IP (Lpd/Port 9100)
286
Step 1 Preparations
286
Step 2 Configuration on the Machine
286
Step 3 Configuration on the Computer
287
Centreware Internet Services Setting Items
288
Installation When Using Netware
289
Step 1 Preparations
289
Step 2 Configuration on the Machine
289
Step 3 Configuration on the Computer
291
Centreware Internet Services Setting Items
291
Installation When Using Microsoft Network (SMB)
292
Step 1 Preparations
292
Step 2 Configuration on the Machine
292
Step 3 Configuration on the Computer
293
Centreware Internet Services Setting Items
293
Installation When Using Internet Printing Protocol (IPP)
295
Step 1 Preparations
295
Step 2 Configuration on the Machine
295
Step 3 Configuration on the Computer
296
Centreware Internet Services Setting Items
296
Installation When Using Ethertalk
297
Step 1 Preparations
297
Step 2 Configuration on the Machine
297
Step 3 Configuration on the Computer
298
Centreware Internet Services Setting Items
298
8 E-Mail Environment Settings
299
E-Mail Overview
300
Preparations
302
Installation Procedures
304
Step 1 Enabling Port and Setting up TCP/IP
304
Step 2 Configuring E-Mail Environment
305
Centreware Internet Services Setting Items
306
9 Scanner Environment Settings
307
Scan Service Overview
308
Configuration of Store to Folder
310
Step 1 Enabling Port and Setting up TCP/IP
310
Step 2 Registering a Folder
311
Step 3 Configuring a Computer
311
Configuration of Scan to PC
312
Step 1 Preparations
312
Step 2 Enabling Port and Setting up TCP/IP
313
Step 3 Configuration on the Computer
314
Configuration of Store to USB
315
Step 1 Available USB Memory Devices
315
Centreware Internet Services Setting Items
315
Configuration of Network Scanning (Job Template Scanning)
316
Step 1 Preparations
316
Step 2 Enabling Ports and Setting up TCP/IP
316
Step 3 Configuring the SNMP Port
317
Step 4 Configuration on the Computer
318
Configuration of Scan to Home (Apeosport Series Models Only)
319
Step 1 Preparations
319
Step 2 Enabling SMB Port and Setting up TCP/IP
319
Step 3 Configuring Remote Authentication
320
Step 4 Configuring Scan to Home
321
Step 5 Configuration on the Computer
323
Configuration of Job Flow Sheets
324
Step 1 Enabling Ports and Setting up TCP/IP
324
Step 2 Configuring the SNMP Port
325
Step 3 Configuration on the Computer
325
Configuration of Store & Send Link
326
Step 1 Configuring E-Mail
326
Step 2 Enabling Authentication
326
Step 3 Other Settings
326
Centreware Internet Services Setting Items
327
Configuration of Store to WSD
328
Step 1 Preparations
328
Step 2 Enabling Port
328
Step 3 Confirmation on the Computer
329
10 Using IP Fax (SIP)
331
IP Fax (SIP) Overview
332
Preparations
332
System Requirements for the Machine
332
Settings by System Configuration
332
Installation Procedures
333
Step 1 Enabling Port and Setting up TCP/IP
333
Step 2 Configuring the SIP User Name
334
Step 3 Configuring Fax Environment
335
Step 4 Configuring the SIP Server
336
Step 5 Registering the Voip Gateway
337
11 Using the Internet Fax Service
339
Internet Fax Overview
340
Preparations
340
System Requirements for the Machine
340
E-Mail Environment
340
Installation Procedures
342
Step 1 Enabling Port and Setting up TCP/IP
342
Step 2 Configuring E-Mail Environment
343
Step 3 Testing the Internet Fax
344
12 Using the Server Fax Service
345
Server Fax Overview
346
Preparations
346
System Requirements for the Machine
346
Installation Procedure
347
Installation Overview
347
Step 1 Fax Settings
347
Step 2 Setting the Server Fax Feature
348
13 Encryption and Digital Signature Settings
351
Encryption and Digital Signature Overview
352
Types of Certificate
352
Encryption Features for Communication
352
Encryption and Digital-Signature Features for Scan Files
353
Configuration of HTTP Communications Encryption
354
Installation Overview
354
Step1 Configuration on the Machine
354
Step2 Configuration on the Computer
355
Configuration of Encryption Using Ipsec
356
Installation Overview
356
Step1 Import and Configuration of a Certificate
356
Step2 Configuration on the Machine (Configuration of Ipsec)
357
Step3 Configuration on the Computer
358
Configuration of E-Mail Encryption/Digital Signature
359
Installation Overview
359
Step1 Configuration on the Machine
359
Step2 Configuration on Sender and Recipient
361
Configuration of Pdf/Docuworks/Xps Signature
364
Configuration of Pdf/Docuworks/Xps Signature (Apeosport Series Models Only)
364
Installation Overview
364
Step1 Configuration on the Machine
364
Models Only)
364
Step2 Configuration on the Computer
366
14 Authentication and Accounting Features
367
Overview of Authentication and Accounting Feature
368
Overview of Authentication Feature
368
Overview of Accounting Feature
369
Authentication
370
User Types Managed by Authentication Feature
370
User Roles and Authorization Groups
371
Types of Authentication
372
Types of Account Administration
373
Authentication and Accounting Relationship
374
Services Controlled by Authentication
375
Overview
375
Services Restricted by User ID Authentication
375
Services Restricted by the Combined Use of Smart Card Authentication and User ID Authentication
378
Authentication for Job Flow Sheets and Folders
381
Overview
381
When the Authentication Feature Is Disabled
383
When the Authentication Feature Is Enabled
386
Jobs Manageable by Account Administration
389
Configuration for Authentication
392
Installation Overview
392
Enabling Authentication
392
Changing the Default Authorization Group Settings
395
Creating an Authorization Group
396
Configuration for IC Card Reader (Optional)
397
Step 1 Preparations
397
Step 2 Logout Method Using the Smart Card
397
Step 3 Registering Smart Card Information
398
Configuration for Account Administration
399
Step 1 Selecting an Accounting Type
399
Step 2 Registering User Information
399
User Authentication Operations
401
Authenticating Login Users
401
Changing Passcode
402
15 Problem Solving
403
Troubleshooting
404
Machine Trouble
405
Image Quality Trouble
410
Trouble During Copying
415
Unable to Copy
415
The Copy Result Is Not What was Expected
416
Trouble During Printing
418
Unable to Print
418
The Print Result Is Not What was Expected
419
Trouble During Faxing
420
Sending Problems
420
Receiving Problems
425
Trouble During Scanning
429
Unable to Scan with the Machine
429
Unable to Import Scanned Documents to the Computer
430
Unable to Send a Scanned Document over the Network (FTP/SMB)
431
Unable to Send E-Mail
432
The Image Is Not What was Expected
432
Network-Related Problems
434
When Using SMB
434
When You Cannot Print
435
When Using Netware
436
When Using TCP/IP
440
When Using Ethertalk
441
Centreware Internet Services Problems
442
E-Mail Features Problems
443
Internet/Intranet Connection Problems
444
Ipv4 and Ipv6 Connection Problems
445
Media Print - Text Trouble
448
Error Code
449
Other Errors
523
Paper Jams
524
Paper Jams in Cover a
525
Paper Jams in Cover B
527
Paper Jams in Cover C
528
Paper Jams in Cover D (Duplex Module)
528
Paper Jams in Cover E
529
Paper Jams in Trays 1 to 4 (Trays 3 and 4 (Two Tray Module)(Optional))
530
Paper Jams in Trays 3 and 4 (Tandem Tray Module)(Optional)
531
Paper Jams in Tray 5 (Bypass)
532
Paper Jams in Tray 6 (HCF)(Optional)
532
Paper Jams in Finisher-A1 (Optional)
534
Paper Jams in Finisher-B1 (Optional)
534
Paper Jams in Finisher-C1 / Finisher-C1 with Booklet Maker (Optional)
536
Paper Jams in the Center Tray
536
Paper Jams in the Finisher Transport
536
Paper Jams at 2A in the Finisher
537
Paper Jams at 2A in the Finisher (Using Knob 2C)
538
Paper Jams at 2B in the Finisher
539
Paper Jams at 2B in the Finisher (Using Knob 2C)
540
Paper Jams at 3 in the Finisher
541
Paper Jams at 5 in the Finisher
541
Paper Jams at 4A in the Finisher (for Finisher-C1 with Booklet Maker)
542
Paper Jams at 4B in the Finisher (for Finisher-C1 with Booklet Maker)
543
Paper Jams in the Booklet Tray (for Finisher-C1 with Booklet Maker)
544
Document Jams
545
Stapler Faults
547
Staple Jams in Staple Cartridge (for Finisher-A1)
548
Staple Jams in Staple Cartridge (for Finisher-B1)
549
16 Appendix
555
Specifications
556
Print Function
558
Scan Function
560
Fax Function
562
Printable Area
569
Internal Fonts
570
Optional Components
572
ESC/P-K Emulation
575
Fonts
576
Form Overlay
577
ESC/P-K Emulation Settings
578
Magnification Table
585
Paper Size and Number of Printable Characters
589
PDF Direct Print
591
Docuworks Direct Print
593
PCL Emulation
595
Fonts
596
Output Feature
597
PCL Emulation Settings
598
HP-GL/2 Emulation
603
Output Feature
604
HP-GL/2 Emulation Settings
605
Hard Clip Area
612
Printable Area
613
Auto Layout
614
Notes and Restrictions
622
Notes and Restrictions on the Use of the Copy Feature
626
Notes and Restrictions on the Use of the Scan Features
629
Notes and Restrictions on the Use of the Fax Feature
634
Notes and Restrictions on the Use of the E-Mail/Internet Fax Feature
635
Notes and Restrictions for IP Fax (SIP)
639
Notes and Restrictions When Connecting with Internet Service Provider
641
Notes and Restrictions on the Interrupt Mode
643
Notes and Restrictions on Folders
645
Notes and Restrictions on Job Flows
647
Notes and Restrictions on the Security Features
648
Notes and Restrictions for Using SMB
649
Notes and Restrictions for Using TCP/IP
651
Notes and Restrictions for Using Ethertalk
652
Notes and Restrictions for Using Bonjour
653
Notes and Restrictions for Print E-Mail
655
Notes and Restrictions for USB Cable Distribution
656
Using the Telephone
657
Activity Report
659
EP System
662
Glossary
663
Index
665
Advertisement
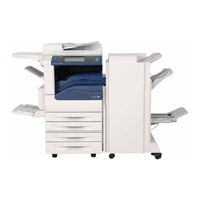
Fuji Xerox DocuCentre-IV 4070 Quick User Manual Quick User Guid (48 pages)
Copy / Print / Scan / Fax
Brand:
Fuji Xerox
| Category:
All in One Printer
| Size: 3.5 MB
Table of Contents
Troubleshooting
2
Table of Contents
4
C1: Simple Copy
8
Reduce/Enlarge
9
C3: 2 Sided Copying
10
Book Copying
11
C5: Mixed Sized Originals
12
C6: Edge Erase/Image Shift
13
Pages Per Side
14
Booklet Creation
15
Copy Output / Sorting
16
C10: Repeat Image
17
ID Card Copy
18
P1: Job Types
29
P1: Paper Tray/Paper Type
29
P2: Secure Print
30
Sided Print
31
Booklet Print
32
Pages Per Sheet
33
Watermarks
34
PC Faxing
35
Media Print Text/Photo
36
Clearing Paper Jams
38
Replacing Consumables
41
Advertisement
Related Products
Fuji Xerox DocuCentre-IV 5070
Fuji Xerox DC 236
Fuji Xerox DC336
Fuji Xerox DC286
Fuji Xerox DC 450i
Fuji Xerox DC 550i
Fuji Xerox DocuCentre-IV C5570
Fuji Xerox DocuCentre-IV 4470
Fuji Xerox DocuCentre-IV 3370
Fuji Xerox DocuCentre-IV 2270
Fuji Xerox Categories
All in One Printer
Printer
Copier
Scanner
Office Equipment
More Fuji Xerox Manuals
Login
Sign In
OR
Sign in with Facebook
Sign in with Google
Upload manual
Upload from disk
Upload from URL