Sign In
Upload
Manuals
Brands
Citizen Manuals
Printer
CD-S500 series
Citizen CD-S500 series Manuals
Manuals and User Guides for Citizen CD-S500 series. We have
6
Citizen CD-S500 series manuals available for free PDF download: User Manual, Service Manual, Command Reference Manual
Citizen CD-S500 series Service Manual (164 pages)
DOT MATRIX PRINTER
Brand:
Citizen
| Category:
Printer
| Size: 11 MB
Table of Contents
Service Manual
1
Table of Contents
4
Chapter 1 SAFETY INSTRUCTIONS
9
Conventions for Warning and Caution
10
Precautions in Handling
10
Precautions in Storage
10
Precautions in Maintenance
11
Chapter 2 SPECIFICATIONS
12
General Specification
13
External Dimensions
15
Chapter 3 DISASSEMBLY, ASSEMBLY and ADJUSTMENT
16
Precautions in Maintenance
17
Service Tools
17
Disassembly Flow Diagram
18
Disassembly and Assembly of AC Adapter Case (Built-In AC Adapter Type)
19
Removing the AC Adapter
19
Precaution When Mounting the AC Adapter
19
Disassembly and Assembly of the Rear Cover, Window and Rear Plate
20
Disassembly and Assembly of Standard Model
20
Removing Rear Cover N and Window N
20
Precaution When Mounting Window N
20
Removing the Rear Plate
21
Disassembly and Assembly of Rewinder Model
22
Removing Rear Cover R and Window R
22
Precaution When Mounting Window R
22
Disassembly and Assembly of Case U, Front Cover and Operation Panel PCB
23
Removing the Lever Cover, Case U and Knob N
23
Precaution When Mounting Case N
24
Removing the Front Cover
24
Removing the Operation Panel PCB
24
Removing the Rewinder Case (for Rewinder Model Only)
25
Precaution When Mounting the Rewinder Case
25
Disassembly and Assembly of the Mechanism Unit
26
Disassembly and Assembly of Standard Model
26
Removing the SA Rear Cover Switch and the Spring for Lever
26
Precaution When Mounting the Rear Cover Switch
27
Removing the Mechanism Unit
28
Precaution When Mounting the Mechanism Unit
29
Oiling to the Mechanism Unit
29
Disassembly and Assembly of Rewinder Model
30
Disassembly and Assembly of the Main PCB Unit
31
Removing the PCB Cover
31
Precaution When Mounting the PCB Cover
32
Removing the SA I/F PCB
33
Precaution When Mounting the SA I/F PCB
33
Removing the Cables
34
Removing the SA Front Cover Switch
35
Removing the Main PCB
35
Precaution When Mounting the SA Front Cover Switch
35
Precaution When Mounting the Main PCB
35
Disassembly and Assembly of the Printing Unit
36
Removing the Manual Cutter
36
Removing the Lower Blade (Optional)
36
Removing the Cutter Plate
36
Precaution When Mounting the Lower Blade (Optional)
37
Removing the Head Cover
38
Removing the SA Print Head
38
Removing the Ribbon Mask
38
Precaution When Mounting the SA Print Head and the Ribbon Mask
39
Removing the SA Black Mark Sensor PCB
40
Precaution When Mounting the SA Black Mark Sensor PCB
40
Oiling to the Printing Unit
41
Disassembly and Assembly of the Platen Chassis and Cutter Chassis
42
Disassembly and Assembly of Standard Model
42
Removing the Sector Gear Plates 1 and 2
42
Removing the Platen Chassis
42
Precaution When Mounting Sector Gear Plates 1, 2
43
Precaution When Mounting the Platen Chassis
43
Removing the Platen Cover
44
Removing Armature Switch 2
45
Oiling to the Platen Chassis
46
Disassembly and Assembly of Rewinder Model
47
Removing the Cutter Chassis
47
Removing the Sector Gear Plate 1
47
Removing the Platen Chassis
47
Precaution When Mounting the Sector Gear Plate 1
48
Precaution When Mounting the Platen Chassis
48
Precaution When Mounting the Cutter Chassis
48
Removing the Platen Cover
49
Removing the Paper Guide
49
Removing the Platen
49
Removing the SA1 PF Shaft
49
Precaution When Mounting the SA1 PF Shaft
49
Oiling to the Platen Chassis and the Cutter Chassis
50
Disassembly and Assembly of the Auto Cutter
51
Disassembly and Assembly of Standard Model
51
Removing the Auto Cutter (Optional)
51
Removing the Auto Cutter Plate
51
Precaution When Mounting the Auto Cutter (Optional)
52
Precaution When Mounting the Auto Cutter Plate
52
Disassembly and Assembly of Rewinder Model
53
Removing the Auto Cutter
53
Removing Armature Switch 1
53
Precaution When Mounting the Auto Cutter
54
Precaution When Mounting Armature Switch 1
54
Disassembly and Assembly of the Rewinder Unit (for Rewinder Model Only)
55
Removing the Rewinder Motor
55
Removing the Rewinder Gear, Rewinder Roller and Rewinder Roller Pin
55
Precaution When Mounting the Rewinder Motor
56
Precaution When Mounting the Rewinder Roller Pin
56
Oiling to the Rewinder Unit
57
Oiling
58
Setting the Paper Near End Sensor
59
Adjusting the Head Gap
60
Chapter 4 PARTS LIST
61
Mechanical Parts List
62
Drawing No. 1 Parts List & Location for AC Adapter Case
62
Drawing No. 2 Parts List & Location for Rear Cover
65
Drawing No. 3 Parts List & Location for Overall Cover
68
Drawing No. 4 Parts List & Location for Mechanism Unit
72
Drawing No. 5 Parts List & Location for Main PCB
77
Drawing No. 6 Parts List & Location for Base Frame
81
Drawing No. 7 Parts List & Location for Rewinder
90
Drawing No. 8 Parts List & Location for Paper Near End Sensor
94
Electric Parts List
97
Parts List & Location for Unit, Main PCB
97
Parts List & Location for Unit, Ope-Pane PCB
105
Parts List & Location for Unit, Serial I/F PCB
108
Parts List & Location for Unit, Parallel I/F PCB
113
Parts List & Location for Unit, PNE SENS PCB
116
Parts List & Location for Unit, BM SENS PCB
119
Accessory Parts List
122
Recommended Spare Parts List
124
Chapter 5 CIRCUIT DIAGRAMS
126
Inter-Connection
127
Unit, Main Pcb
128
Cpu Circuit
128
Memory Circuit
129
Gate Array Circuit
130
Pf/Cr Motor Circuit
131
Pf/Cr Mtr VCC Control Circuit
132
Head Pin Driver Circuit
133
I/F Connector Circuit
134
Drawer/Ope-Pane/Buzzer Circuit
135
Sensor/Rewinder Circuit
136
Power/Cutter Circut
137
Sa, Ope-Pane Pcb
138
Sa, Serial I/F Pcb (MM)
139
Sa, Serial I/F Pcb (Inch)
140
Sa, Parallel I/F Pcb
141
Sa, Pne Sens Pcb
142
Sa, Bm Sens Pcb
143
Chapter 6 TROUBLESHOOTING
144
Troubleshooting List
145
Clearing a Paper Jam
148
Operation Panel
149
Basic Display
149
Error Indication
150
Demonstration Printing Function
152
Maintenance Function
153
HEX Dump Mode
153
Soft SW Setting Mode
154
Initial Factory Shipping Mode
159
Cut Position Adjustment Mode
159
Maintenance Function for Service
160
Busy Condition Check Mode
161
ROM Rewrite Receiving Mode
163
ROM Rewrite Sending Mode
163
Printing Column Misalignment Adjustment Mode
163
Drawer Check Mode
164
Maintenance Sending/Receiving Mode
164
Advertisement
Citizen CD-S500 series User Manual (220 pages)
Citizen Systems CD-S500S: Users Manual
Brand:
Citizen
| Category:
Printer
| Size: 3 MB
Table of Contents
Table of Contents
4
Important Safety Instructions
8
Safety Instructions
10
Meaning of Symbols
10
General Precautions
12
Precautions When Installing the Printer
13
Introduction
14
Features
14
Explanation of the Models
15
Checking the Accessories
17
Names and Functions of Parts
18
Exterior
18
AC Adaptor Type
18
Interior
19
Operation Panel
20
Rear Connectors
21
Built-In AC Adapter Type
21
Others
21
Built-In Buzzer
21
Connections
22
Connecting the Interface Cable
22
Connecting the Serial Interface Cable
22
Connecting the Parallel Interface Cable
22
Connecting the Drawer
23
Connecting the Power
24
Installation
25
Vertical Installation and Wall Mounted Installation
25
Removing the Chassis Platen L Spring
25
LED Name Sheet
25
Setting the Paper Near End Sensor
26
Setting the Paper Width and Printing Line Column Number
27
When Setting Paper Width of 76.2Mm
27
Installing the Ribbon Cassette
29
Installing Roll Paper
30
Standard and Auto Cutter Equipped Models
30
Installation Method
30
Auto Cutter and Rewinder Equipped Model
32
Operation When the Cover Is Opened and Closed
35
Operation When the Front Cover Is Opened and Closed
35
Maintenance Mode
36
Demonstration Printing Mode
36
Setting Maintenance Mode
36
Types of Maintenance Mode
36
HEX Dump Mode
37
Setting the Mode
37
Soft SW Setting Mode
37
Cut Position Adjustment Mode
42
Initial Factory Shipping Mode
42
Error Indicators
43
Clearing a Paper Jam
44
Troubleshooting
45
Specifications
46
Ribbon Cassette
48
Paper
49
Interface
50
Pin Assignment
50
Buffer Full Control
50
Connection with HOST
50
Parallel Interface
51
Data Reception Timing
51
Parallel (IEEE1284) Interface
52
Drawer Kick-Out Interface
52
Timing When Power Is on
52
INIT Signal Timing
52
Pin Assignment
52
Citizen CD-S500 series Command Reference Manual (111 pages)
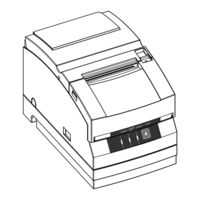
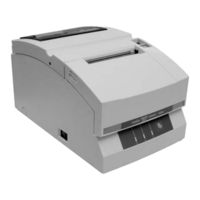
Serial dot impact printer
Brand:
Citizen
| Category:
Printer
| Size: 2 MB
Table of Contents
Revision List
3
Table of Contents
5
1 Outline
6
Mode of Operation
6
Character Set
6
Control Commands
7
Explanation of Control Commands
7
How to Send Control Commands
7
2 Control Code Command
8
ESC/POS Mode
9
CBM1/CBM2 Mode
43
Star Mode
61
3 Character Code Table
89
4 Attention on Use
97
Cutter Operation
97
Cooling Operation by Head Temperature
97
Morning Shot
97
Cover Opening-And-Closing Processing
98
Recording Paper
99
Paper Width and Printing Digit Number
100
Paper Near-End (PNE) Detection
102
5 Attention of Black Mark Sensor Equipped Model
103
Operation of Black Mark Equipped Model
103
FEED Switch Operation of Black Mark Equipped Model
103
Cautions on Program Creation
103
Black Mark Position of Paper
104
6 Interface
106
Serial Interface
106
IEEE 1284 Interface
107
Drawer Kick-Out Interface
108
7 General Specification
109
Advertisement
Citizen CD-S500 series User Manual (52 pages)
Dot matrix printer
Brand:
Citizen
| Category:
Printer
| Size: 2 MB
Table of Contents
Table of Contents
2
Compliance Statement for European Users
3
Fcc Compliance Statement for American Users
3
Emi Compliance Statement for Canadian Users
4
Etat de Conformite Emi a L'usage des Utilisateurs Canadiens
5
Important Safety Instructions
6
Notice
7
Meaning of Symbols
8
SAFETY INSTRUCTIONS Which Must be Strictry Observed
8
General Precautions
10
Precautions When Installing the Printer
11
Chapter1 Introduction
12
Features
12
Explanation of the Models
13
Checking the Accessories
15
Chapter2 Names And Functions of Parts
16
Operation Panel
18
Rear Connectors
19
Chapter3 Preparing The Printer
20
Connections
20
Connecting the Interface Cable
20
Connecting the Drawer
21
Connecting the Power
22
Installation
23
Setting the Paper Near End Sensor
24
Setting the Paper Width and Printing Line Column Number
25
Installing the Ribbon Cassette
27
Installing Roll Paper
28
Operation When the Cover Is Opened and Closed
33
Chapter4 Maintenance Mode
34
HEX Dump Mode
35
Soft SW Setting Mode
35
Operating Method
36
Initial Factory Shipping Mode
39
Setting the Mode
39
Cut Position Adjustment Mode
40
Error Indicators
41
Error Indicator Table
41
Clearing a Paper Jam
42
Trouble Shooting
43
Chapter5
44
Specifications
44
Ribbon Cassette
46
Interface
48
Pin Assignment
48
Connection with Host
48
Citizen CD-S500 series User Manual (52 pages)
Citizen Systems Dot Matrix Printer CD-S500 Series User's Manual
Brand:
Citizen
| Category:
Printer
| Size: 1 MB
Citizen CD-S500 series User Manual (52 pages)
Citizen Systems Dot Matrix Printer User's Manual CD-S500 Series
Brand:
Citizen
| Category:
Printer
| Size: 2 MB
Advertisement
Related Products
Citizen CD-S500A
Citizen CD-S500S
Citizen CD-S501
Citizen CD-S501A
Citizen CD-S501S
Citizen CD-S503
Citizen CD-S503A
Citizen CD-S503S
Citizen CD-S50X
Citizen CT-S2000L
Citizen Categories
Watch
Printer
Calculator
Blood Pressure Monitor
Label Maker
More Citizen Manuals
Login
Sign In
OR
Sign in with Facebook
Sign in with Google
Upload manual
Upload from disk
Upload from URL