Sign In
Upload
Manuals
Brands
Barco Manuals
Projector
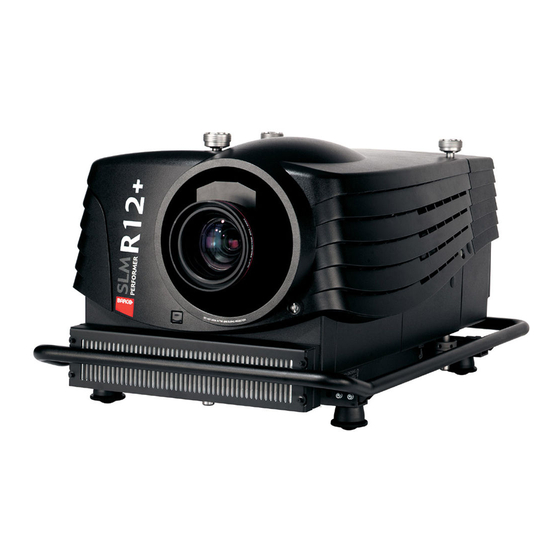
SLM R12+ Performer
Barco SLM R12+ Performer DLP Projector Manuals
Manuals and User Guides for Barco SLM R12+ Performer DLP Projector. We have
3
Barco SLM R12+ Performer DLP Projector manuals available for free PDF download: Owner's Manual, Specifications
Barco SLM R12+ Performer Owner's Manual (159 pages)
Brand:
Barco
| Category:
Projector
| Size: 5 MB
Table of Contents
Table of Contents
5
1 Safety Instructions
9
Warnings
9
FCC Statement
9
Note
9
2 Packaging and Dimensions
11
Projector Packaging
11
Box Content
11
Lamp Packaging
11
Lens Packaging
12
Projector Dimensions
12
Projector Dimensions (Inclusive Dust Filters)
13
Projector Side View
14
3 Installation Guidelines
15
General
15
Configuration
16
Safety Area Around Projector
18
Projector Tilting
20
Mounting the Projection Lamp
20
Access to the Lamp Unit
21
Installation of the New Lamp Unit
21
Reinstalling the Side Panel
23
Realignment of the Lamp in Its Reflector
24
Lenses
27
Lens Selection
27
Lens Formulas
27
Lens Installation
28
Cleaning the Lens
29
Battery Installation in the RCU
29
Stacking Projectors
31
Rigging Points and Accessories
34
4 Connections
37
Power Connection
37
Switching on
37
Switching to Standby
39
Switching off
39
Input Source Connections
39
Input Facilities
39
Inputs Via RCVDS05
39
Input Module Insertion
40
Fixed Slot (Slot 1 & 2)
41
Serial Digital Input (Slot 3 & 4)
42
HD SDI Digital Input (Slot 3 & 4)
43
Digital Video Decoder Input
44
Communication Connections
46
RS232 (RS422) Connection
46
Linked System
46
Communication with Peripherals
49
Network Connection
49
Ethernet Connection
50
5 Getting Started
51
RCU & Local Keypad
51
Terminology Overview
51
Operating the Projector
52
Switching on
52
Switching to Standby
53
Switching off
53
Temperature Error DMD
53
Quick Set up Adjustments
54
Quick Language Change
54
Quick Lens Adjustment
55
Quick on Screen Color Change
56
Using the RCU
57
Projector Address
59
Controlling the Projector
59
Displaying and Programming Addresses
60
Controlling the Projector
60
6 Start up of the Adjustment Mode
63
Start up
63
Password
63
Menus on Local LCD Display
64
7 Random Access Adjustment Mode
65
Overview Flow
65
Picture Services
66
File Annotation
66
Possible File Manipulations
66
Start up
67
Load File
67
The Image Is Not Perfect
68
Edit File
69
Start up
69
Changing the Settings
69
Correct Value
70
Rename
72
Copy
73
Delete
75
File Options
75
Picture Tuning
76
Start up
76
Color Temperature
77
Gamma
77
Color Space
78
Noise Reduction
79
Input Balance
79
Input Balance for RGB Input Signals
80
Input Balance for YUV Signals
81
Returning to the Factory Defaults
82
Black Balance for Digital Source
82
Geometry
82
Introduction
82
Geometry Start up
83
Shift
83
Size
84
Side Keystone
85
Size Adjustment
85
Blanking
86
Aspect Ratio
87
Geometry Options
87
Scenergix
88
Order Information
88
Introduction
88
Preparations
89
Scenergix
89
Scenergix Overlap Zone (Horizontal Scenergix)
90
Scenergix Overlap Zone (Vertical Scenergix)
91
Scenergix Size Adjustment
92
Adjusting the Black Level of the Images
93
Picture in Picture (Pip)
94
Introduction to Pip
94
Picture in Picture Activation
95
Picture in Picture Source
96
Position of Picture in Picture Window
96
Set up of the Quick Selection
96
Save Changes
97
8 Installation Mode
99
Start up of the Installation Mode
99
Input Slots
99
What if a Switcher Is Connected to the Projector
100
Peripheral
101
Defining the Output Module of the RCVDS05
101
Defining the Infrared Communication Protocol
101
CLO Using Comm 800
102
Source Switching
103
No Signal
103
Changing the Background Color
104
Changing the Shutdown Setting
104
Changing the Shutdown Time
105
Contrast Enhancement
105
Convergence
106
Configuration
107
Lens Adjustment
107
How to Zoom/Focus
108
How to Shift the Image
108
Quick Access Keys
109
Osd
110
Color Settings
110
Menu Position
111
Internal Patterns
111
Available Patterns
112
9 Service Mode
113
Built-Up
113
Start up
113
Identification
113
Password
114
Change Password
114
Access Control List
116
Access Levels
117
Changing Language
118
Change Projector Address
118
Serial Communication
119
Start up of the Serial Communication
120
Baud Rate Setting
120
Setting up the Interface Standard
121
RS422 Termination
121
Network Configuration
121
Set up the Network Configuration
122
Entering the Necessary Addresses
122
Lamp
123
Dimming
126
BARCO Logo
127
Add-Ins
127
Preset Input Balance
128
Advanced Processing
129
Minimum Delay
129
Diagnosis
130
How to Start up the Diagnosis
130
C Diagnoses
130
I 2 C Diagnoses
130
DMD
131
How to Select
131
Smps
132
LPS (Lamp Power Supply)
132
Voltages
133
Factory Defaults
133
10 Programmable Function Keys
135
Function Keys
135
Standard Source Set up Files
137
A.1 Table Overview
137
Built-In Dust Filters
141
Built-In Dust Filters First Series Projectors
141
Dust Filter on the Front Side
141
Dust Filter on the Back Side
143
Dust Filter on the Bottom Side
145
Built-In Dust Filters Recent Series Projectors
146
Location of the Dust Filters
146
Cleaning/Replacement of the Dust Filters
146
Dust Filter on the Front Side of the Projector
146
Dust Filters on the Rear Side of the Projector
148
Troubleshooting
151
Error Codes
151
Glossary
153
Index
155
Advertisement
Barco SLM R12+ Performer Owner's Manual (131 pages)
EVENTS
Brand:
Barco
| Category:
Projector
| Size: 4 MB
Table of Contents
Table of Contents
5
1 Safety Instructions
9
Warnings
9
FCC Statement
9
Note
9
2 Packaging and Dimensions
11
Projector Packaging
11
Box Content
11
Lens Packaging
11
Projector Case
12
3 Installation Guidelines
13
General
13
Configuration
14
Positioning the Projector
15
Safety Area Around Projector
17
Re-Adjusting the Lamp Position in the Lamp Casing
18
Lenses
19
Lenses
20
Lens Selection
20
Lens Formulas
20
Lens Installation
21
Cleaning the Lens
21
Battery Installation in the RCU
22
Stacking Projectors
22
Rigging Points and Accessories
25
4 Connections
27
Power Connection
27
Switching on
27
Switching to Standby
29
Switching off
29
Input Source Connections
29
Input Facilities
29
Inputs Via RCVDS05
29
Input Module Insertion
30
Fixed Slot (Slot 1 & 2)
31
Serial Digital Input (Slot 3 & 4)
32
HD SDI Digital Input (Slot 3 & 4)
33
Digital Video Decoder Input
34
Communication Connections
36
RS232 (RS422) Connection
36
Communication with Peripherals
36
Network Connection
36
What Can be Done
37
Ethernet Connection
37
5 Getting Started
39
RCU & Local Keypad
39
Terminology Overview
39
Operating the Projector
40
Switching on
40
Switching to Standby
41
Switching off
41
Temperature Error DMD
41
Quick Set up Adjustments
42
Quick Language Change
42
Quick Lens Adjustment
42
Quick on Screen Color Change
43
Using the RCU
44
Projector Address
46
Controlling the Projector
46
Displaying and Programming Addresses
47
Controlling the Projector
47
6 Start up of the Adjustment Mode
49
Start up
49
Password
49
Menus on Local LCD Display
50
7 Random Access Adjustment Mode
51
Overview Flow
51
Picture Services
52
File Annotation
52
Possible File Manipulations
52
Start up
53
Load File
53
Edit File
54
Start up
54
Changing the Settings
55
Correct Value
55
Rename
58
Copy
59
Delete
59
File Options
60
Picture Tuning
61
Start up
61
Color Temperature
61
Gamma
62
Color Space
62
Noise Reduction
63
Input Balance
64
Input Balance for RGB Input Signals
64
Input Balance for YUV Signals
65
Returning to the Factory Defaults
66
Black Balance for Digital Source
66
Geometry
66
Introduction
66
Geometry Start up
67
Shift
67
Size
68
Side Keystone
69
Size Adjustment
69
Blanking
70
Aspect Ratio
71
Geometry Options
72
Scenergix
72
Order Information
73
Introduction
73
Preparations
74
Scenergix
74
Scenergix Overlap Zone (Horizontal Scenergix)
74
Scenergix Overlap Zone (Vertical Scenergix)
75
Scenergix Size Adjustment
76
Adjusting the Black Level of the Images
78
Picture in Picture (Pip)
79
Introduction to Pip
79
Picture in Picture Activation
80
Picture in Picture Source
80
Position of Picture in Picture Window
80
Set up of the Quick Selection
81
Save Changes
81
8 Installation Mode
83
Start up of the Installation Mode
83
Input Slots
83
What if a Switcher Is Connected to the Projector
84
Peripheral
85
Defining the Output Module of the RCVDS05
85
Defining the Infrared Communication Protocol
85
Source Switching
86
No Signal
86
Changing the Background Color
87
Changing the Shutdown Setting
87
Changing the Shutdown Time
87
Contrast Enhancement
88
Convergence
89
Configuration
89
Lens Adjustment
90
Quick Access Keys
91
Osd
92
1Color Settings
92
2Menu Position
92
Internal Patterns
92
Available Patterns
93
9 Service Mode
95
Built-Up
95
Start up
95
Identification
95
Password
96
Change Password
96
Access Control List
97
Access Levels
98
Changing Language
99
Change Projector Address
99
Serial Communication
100
Start up of the Serial Communication
100
Baud Rate Setting
101
Setting up the Interface Standard
101
RS422 Termination
102
Network Configuration
102
Lamp
103
Dimming
106
BARCO Logo
106
Add-Ins
107
Preset Input Balance
107
Advanced Processing
108
1Minimum Delay
108
Diagnosis
109
1How to Start up the Diagnosis
109
C Diagnoses
109
3Dmd
110
4Smps
110
5LPS (Lamp Power Supply)
110
6Voltages
111
10 Programmable Function Keys
113
Function Keys
113
Standard Source Set up Files
115
A.1 Table Overview
115
Cleaning the Dust Filters
119
Dust Filter on the Front Side
119
Dust Filter on the Back Side
122
Dust Filter on the Bottom Side
123
Troubleshooting
125
Error Codes
125
Glossary
127
Index
129
Barco SLM R12+ Performer Specifications (2 pages)
Barco SLM R12: Specifications
Brand:
Barco
| Category:
Projector
| Size: 0 MB
Advertisement
Advertisement
Related Products
Barco SLM R12
Barco SLM G10 Performer
Barco SLM G5 Executive
Barco SLM R9+
Barco SLM R6 Executive
Barco SLM G8
Barco SLM G5 Performer
Barco SLM R12 Plus
Barco SIM 7QP HC
Barco SIM 7Q
Barco Categories
Projector
Monitor
Projector Accessories
Controller
Medical Equipment
More Barco Manuals
Login
Sign In
OR
Sign in with Facebook
Sign in with Google
Upload manual
Upload from disk
Upload from URL