
Summary of Contents for Distform MyChef 4 GN 2/3
- Page 1 MyChef HORNO MIXTO | FOUR MIXTE | COMBI OVEN MANUAL DE INSTALACIÓN, USO Y MANTENIMIENTO MANUEL D’INSTALLATION, D’UTILISATION ET DE MAINTENANCE INSTALLATION, USE AND MAINTENANCE MANUAL...
-
Page 2: Table Of Contents
CONTENTS INTRODUCTION ................TECHNICAL FEATURES ..............2.1 Main features ................GENERAL SECURITY AND ACCIDENT PREVENTION STANDARDS ..................3.1 Personnel responsible for appliance use ......3.2 Electrical hazard ..............3.3 Thermal hazard ................ 3.4 Corrosive materials hazard ............ 4. RECEIPT, TRANSPORT, AND POSITIONING ........ 4.1 Receipt .................. - Page 3 7.5 Cooking control ............... 7.5.1 Temperature and time-controlled cooking ....7.5.2 Temperature and time-controlled cooking with preheating ................7.5.3 Temperature and probe-controlled cooking ....7.5.4 Delta T and core probe cooking ........7.6 Editing programs ..............7.7 Editing phases ................. 7.7.1 Navigating between phases ..........
- Page 4 7.14.12 Day ..................... 7.14.13 Month ..................7.14.14 Year .................... 7.15 HACCP data registry ............... 7.16 NightWatch ................ERRORS AND FAILURES ..............MAINTENANCE ................9.1 Cleaning ..................9.2 Cleaning the cooking chamber ..........9.2.1 Semi-automatic cleaning ........... 9.2.2 Self-cleaning ................9.2.2.1 Self-cleaning and rinsing programs ....9.2.2.2 Changing cleaning liquids .........
-
Page 5: Introduction
INTRODUCTION This document has been meticulously prepared for the purpose of providing reliable and helpful information for proper installation, use, and maintenance to ensure correct operation and prolonged life of the oven. This manual is divided in two sections. The first sections is dedicated to the appliance installation in the workplace, and the second section focuses on oven operation and maintenance. -
Page 6: Technical Features
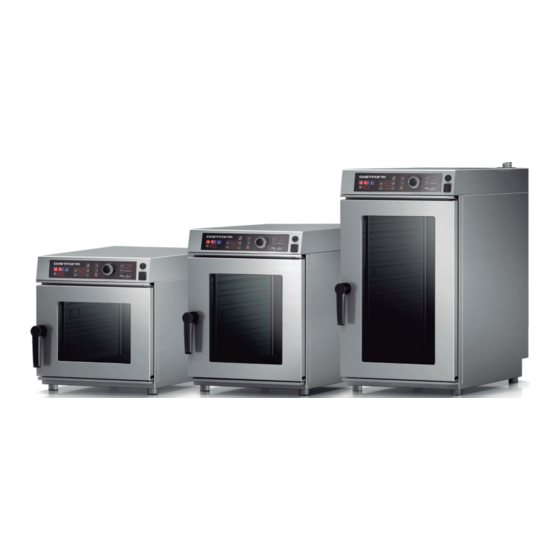
TECHNICAL FEATURES Main features 4 GN 2/3 4 GN 1/1 6 GN 2/3 6 GN 1/1 10 GN 1/1 Exterior dimensions 520 x 625 520 x 799 520 x 625 520 x 799 520 x 799 (Width x Depth x Height) x 575 mm x 575 mm x 694 mm... -
Page 7: General Security And Accident Prevention Standards
GENERAL SECURITY AND ACCIDENT PREVENTION STANDARDS Personnel responsible for appliance use The use of the appliance is reserved for trained personnel. The personnel who operate the oven, including use, cleaning, installation, handling, etc., should be familiar with safety standards and usage instructions. -
Page 8: Corrosive Materials Hazard
Figure 1 Distform DG detergent. Figure 2 Distform AB rinse aid. Distform DG detergent and Distform AB rinse aid were formulated specifically for MyChef ovens. Distform is not responsible for any adverse effects resulting from use of other detergents or rinse aids. -
Page 9: Receipt, Transport, And Positioning
4. RECEIPT, TRANSPORT, AND POSITIONING Before installing, verify the dimensions of the area where the appliance will be installed and verify the electrical and water connections to ensure they are within the parameters indicated in the installation sheet attached in chapter 6. Receipt Once the oven has been received, check that the model corresponds to the model ordered. -
Page 10: Positioning
4.3 Positioning The oven should be placed at a distance from the wall that allows space for electrical and water connections. Each part of the oven has space requirements so that ventilation and cooling can properly occur. The space requirements are as follows: o 50mm on the left and right sides o 100mm on the back o 500mm on the top... -
Page 11: Installation
5. INSTALLATION Electrical connection Check that the voltage at the point where the oven will be connected is the correct voltage for the the appliance. Before doing any electrical work, be sure that there is no electric current at the appliance connection point. - Page 12 Figure 4. Electrical terminal connectors. Figure 5: Wire input. Once the connection is made, ensure that there are no loose wires and that all wires are firmly secured. Also check the wire stuffing box. Never connect a phase to neutral or ground wires. Check that the installation voltage corresponds to the appliance power requirements.
-
Page 13: Three-Phase Connection 400V 3L+N
5.1.1 Three-phase connection 400V 3L+N Figure 6: Three-phase connection 400V Figure 7: Three-phase connection 400V 3L+N 3L+N. Color Wire ■ Yellow-green Ground ■ Blue Neutral ■ Brown ■ Black ■ Grey Table 3: Three-phase wire 400V 3L+N. Oven Total Power Maximum current Minimum wire length 4GN 1/1... -
Page 14: Three-Phase Connection 230V 3L
5.1.2 Three-phase connection 230V 3L Figure 8: Three-phase connection 230V 3L. Figure 9: Three-phase connection 230V 3L. Color Wire ■ Yellow-green Tierra ■ Brown ■ Black ■ Grey Table5: Three-phase wire 230V 3L+N. Oven Total Power Maximum current Minimum wire length 4GN 1/1 5.6 kW 2.5 mm... -
Page 15: Single-Phrase Connection 230V L+N
5.1.3 Single-phrase connection 230V L+N Figure 10. Medium-power single-phase Figure 11: Medium-power single-phase connection. connection. Figure 12: Full-power single-phase Figure 13: Full-power single-phase connection. connection. Color Wire ■ Yellow-green Ground ■ Blue Neutral ■,■,■ Brown, Black or Grey Table 7: Single-phrase connection 230V L+N. -
Page 16: Water Connection
5.2 Water connection 5.2.1 Water input Cold water (max. 30°C) ¾ inch, from 150 to 400 kPa fluid pressure. Potable water with the following features: Hardness between 3ºf and 6ºf pH between 6.5 and 8.5 Chloride level less than 30ppm Use of water softener and filter required (BRITA Purity Steam 450 recommended) In a new installation, let the water run until the connection is completely cleaned. -
Page 17: Condensation Hood
5.3 Condensation hood The condensation hood is an optional feature. The hood can be installed after the oven is installed. See the installation guide provided with the condensation hood to install. -
Page 18: Start-Up Report
START-UP REPORT The individual in charge of oven installation should fill out the installation sheet pursuant to sections 4 and 5 and return it to the manufacturer to activate the warranty. CONTACT I NFORMATION Name GREY ... -
Page 19: Oven Operation
OVEN OPERATION Control panel The figure below shows the control panel of a MyChef oven. The panel includes displays, buttons, rotating knob, and visual signs. Figure 15: Control panel. The function of each component is explained below: Figure 16: Control panel description. Letter Function Description... - Page 20 Letter Function Description Temperature button Selects temperature. When the oven is running, you can see the temperature by pushing this button. Temperature light Indicates temperature selection. Temperature display Desired/actual temperature of the chamber in °C. Time button Selects time. Time light Indicates timed cooking selection.
- Page 21 Letter Function Description START/STOP button Starts and stops the oven. If the oven is turned off, hold down the button for two seconds to turn on. If the oven is turned on but not cooking, pressing the button briefly will start the cooking cycle.
-
Page 22: Turning On The Appliance
Turning on the appliance Holding down the button for two seconds will turn the appliance on or off button for a few seconds. Immediately after, you may adjust the cooking settings. If the oven is cooking, it is not possible to turn it off by holding down the button for two seconds. - Page 23 Programs Description Probe-controlled low-temperature cooking for tender meats or fish. Cleaning program. You must insert detergent followed by rinse aid. See section 9.2.1. Self-cleaning program for low level of soiling. See section 9.2.2. Only available in ovens equipped with self-cleaning system. Self-cleaning program for medium level of soiling.
-
Page 24: Cooking Modes
Cooking modes There are three cooking modes: convection, combination, and steam. To select a specific mode, press the corresponding button. Figure 17: Cooking modes selectors. The convection mode acts like a forced convection oven without providing or eliminating humidity from the cooking chamber. The combination convection mode can regulate the elimination or provision of humidity in the cooking chamber. -
Page 25: Cooking Control
Cooking control 7.5.1 Temperature and time-controlled cooking The time- and temperature-controlled mode is the most simple. Just choose a temperature and set time by pushing the buttons . button for a few seconds. When you press the button, the oven will begin to heat and will stop when the set time has passed. - Page 26 During the preheating phase, the oven will show this status in the program display: Figure 21: Preheat display. It is possible to cancel preheating and continue with cooking by pushing the button or by opening the oven door. Once the oven reaches the preheating temperature, the user will receive an auditory and visual alert that the oven may be loaded.
-
Page 27: Temperature And Probe-Controlled Cooking
7.5.3 Temperature and probe-controlled cooking The temperature and probe-controlled cooking mode ends the cooking when the temperature in the center of the food reaches the selected temperature. The chamber temperature remains constant and matches the value selected in the temperature display. To use this mode, choose a chamber temperature as well as a desired temperature for the food’s center by pushing the button for a few seconds. -
Page 28: Delta T And Core Probe Cooking
When a probe-controlled cooking program is running, the chamber temperature display shows the desired temperature, and the probe display shows the actual food temperature. 7.5.4 Delta T and core probe cooking The Delta T and probe-controlled cooking mode ends the cooking when the temperature in the center of the food reaches the selected temperature. -
Page 29: Editing Programs
If a probe-controlled cooking cycle is running, the time/program display will show the actual temperature of the probe. When you press the button, the probe display will show the desired temperature of the core probe. When a probe-controlled cooking program is running, the chamber temperature display shows the desired temperature, and the probe display shows the actual food temperature. -
Page 30: Adding A Phase
Figure 30: Example of program 2, with four phases, and phase 2 is active. The active phase will blink, and, when it is blinking, the others will remain marked. It is possible to add or delete phases to the program during the last phase. 7.7.2 Adding a phase To add a phase, briefly press the... -
Page 31: Multi-Time
Multi-time The multi-time mode allows different times to be assigned to each oven tray. To enter multi-time mode, push the button and turn the knob until “---“ (manual program) appears in the program display. Then, press the button again until T01 appears in the program display. This means you are editing the cooking settings of tray 1. -
Page 32: End Of Cooking Cycle
7.10 End of cooking cycle When the cooking cycle has finished, the appliance will signal the end visually and with a beep. Specifically: The chamber light turns on and off for 30 seconds. Three beeps of 2 seconds each will be heard with 10 seconds in between. END will appear in the time/probe display until the user ends the cooking cycle. -
Page 33: Speed Selection
7.12 Speed selection In any cooking mode, the user may select whichever convection fan speed is appropriate for the task. To select fan speed, push the fan speed button. If the speed light is off, the oven will run with high fan speed. If the speed light is turned on, the oven will run with low fan speed. -
Page 34: Series Number
Navigate between the various setup menu settings by pressing the button and turning the knob. 7.14.0 Series number Displays the electronic control panel series number. Figure 37: Control panel series number. The series number is the combination of the value that appears in the temperature display and the time display. -
Page 35: Usb Download
To select a specific mode, press the button and turn the knob to the desired value. At this point, the time display will display the temperature measured by the selected sensor. To change this value, press the button and turn the knob to the desired temperature value. -
Page 36: Firmware
Firmware can also be updated. To update firmware, connect a USB flash drive to the USB port and hold down the button for a few seconds. The new firmware can be found in the USB flash drive folder labeled DISTFORM\MYCHEF\FW and called IMAGE.HEX. Figure 42: Location of new firmware to be uploaded. -
Page 37: Default Firmware
7.14.5 Default firmware Restores factory settings. To restore factory settings, hold down the button for a few seconds. Figure 43: Default firmware. 7.14.6 Lock Disables oven program editing. 1 is locked and 0 is unlocked. Figure 44: Program editing lock To change this value, press the button and adjust the 0 or 1 setting by turning the knob. -
Page 38: User Interface
To change this value, press the button and adjust the settings from -1 to 600 by turning the knob. If the value is greater than zero, it indicates the seconds the light will stay on. If the value is -1, the light will stay on permanently every time the oven is turned on. -
Page 39: Day
7.14.11 Seconds Changes the seconds on the oven clock. Figure 48: Seconds. To change this value, press the button and adjust value by turning the knob. 7.14.12 Changes the day on the oven date. Figure 49: Day. To change this value, press the button and adjust value by turning the knob. -
Page 40: Year
7.14.14 Year Changes the year on the oven date. Figure 51: Year. To change this value, press the button and adjust value by turning the knob. 7.15 HACCP data registry The appliance allows registration of temperatures and events produced during normal use. -
Page 41: Nightwatch
7.16 NightWatch NightWatch allows the oven to automatically continue cooking after a power outage. This feature is especially useful for unsupervised cooking. This feature will only resume cooking if there is an outage and subsequent recovery of power. This feature must be enabled by the distributor and does not require any intervention by the user. -
Page 42: Errors And Failures
ERRORS AND FAILURES Errors may occur while preparing and running any of the oven’s programs due to appliance failure. If appliance failure occurs, “ERR” will appear in the humidity display, and the error number will appear in the temperature display. Figure 53: Example. - Page 43 Error Definición interna Aclaración ERROR PROBE2 Probe not connected. Check the external probe TEMP SENSOR NOT and the connector. CONNECTED ERROR PROBE2 External probe short-circuited. Check the TEMP SENSOR external probe and the connector. SHORTED ERROR PROBE3 Probe not connected. Check the external probe TEMP SENSOR NOT and the connector.
- Page 44 Error Definición interna Aclaración ERROR PROGRAM Reserved. Not used. NOT TERMINATED ERROR CLEANING The oven has been turned off during self-cleaning PROGRAM NOT program. Rinse. TERMINATED ERROR CLEANING During self-cleaning program, oven TEMPERATURE TOO temperature exceeded maximum allowable temperature. The oven has returned from a power outage, and ERROR RECOVERY the chamber temperature was lower than 56ºC.
-
Page 45: Maintenance
MAINTENANCE Before the appliance is handled for maintenance or repair, it should be disconnected from the power supply. If the power line is damaged, it should be replaced by your after-sales service provider or by personnel with similar qualifications in order to avoid risk. - Page 46 Make sure you have all the necessary materials before starting the semi-automatic cleaning process. This material can be purchased from your regular Distform product distributor. Cleaning hose Product cleaning spray gun Distform DG detergent or equivalent: o Mixture of substances, including: § Potassium hydroxide 10 - <25%...
-
Page 47: Self-Cleaning
Meanwhile, refill the spray gun with Distform DG detergent. After 10 minutes, open the door, spray the chamber with the spray gun, and close the door again. When the appliance is running, open the door slowly and carefully to avoid possible burns from the steam or hot air that may escape the oven chamber. - Page 48 The table below lists the amounts of detergent and rinse aid used by each program as well as the time needed to run each program. Detergent Rinse aid Program Description Duration quantity quantity Self-cleaning program 40 min 280 ml 200 ml for low-level of soiling.
- Page 49 When you have selected the program you want, start it with the button for a few seconds. If the oven detects that the temperature within the chamber is too high, it will automatically start the cooling process until the oven reaches a temperature appropriate for the cleaning process.
-
Page 50: Changing Cleaning Liquids
If the liquids are interchanged, it could result in food contamination. At all times, follow the established order. Distform recommends the use of its line of oven cleaning products. These products have been formulated especially for MyChef ovens. DISTFORM DG DISTFORM AB DESENGRASANTE ESPECIAL PARA HORNOS DE CONVECCIÓN - VAPOR... - Page 51 • Distform DG detergent or equivalent: o Mixture of substances, including: § Potassium hydroxide 10 - <25% • Distform AB rinse aid or equivalent: o Water mixture, non dangerous ingredients and the following substances: § Alcoholate, polymer 5 -15% § Citric acid 1-5% To change the empty tank, unscrew the lid, and remove the lid with the tube.
-
Page 52: Compartment Behind Exhaust
In order to clean out the pumps, turn on the oven and activate the rinsing program (see section 9.2.2.1). With the oven door closed, hold down the button for two seconds until detergent is released in the cooking chamber. Likewise, hold down the button for two seconds until rinse aid is released in the cooking chamber. -
Page 53: Seal
Exercise extreme caution when cleaning this part of the oven. Leave the door partly open and wait until the chamber fan stops. When you have finished cleaning, fasten the chamber fan exhaust with the two screws. 9.4 Seal Once you have finished cleaning the chamber, the cleaning process will continue with the gasket that ensures the airtightness of the chamber. -
Page 54: Owner Liability
However, if it is dirty, run a semi-automatic or self-cleaning cycle to remove the excess remnants. Once the cleaning has finished, close the interior door and fasten it with the clips. Figure 59: Fastening clips for interior glass. Cleaning the oven with a pressure cleaning equipment is damaging to the appliance and may cause the appliance to break, after which the appliance warranty would no longer be valid. -
Page 55: Ce Marking
10. CE MARKING The oven bears a name plate with the following specifications and references: Manufacturer: Distform, S.L. Camí de les Comes, s/n 25123 Torrefarrera (Lleida) Item Series number Distinguishing features Year manufactured This oven has been manufactured in compliance with the following standards:... -
Page 56: General Electric Blueprint
11. GENERAL ELECTRIC BLUEPRINT 11.1 Electric blueprint Figure 60: Electric blueprint. -
Page 57: Human Interface
11.2 Human interface Figure 61: Human interface. -
Page 58: Electrical Connections
11.3 Electrical connections The connections made during oven installation are shown below, along with the heating power that corresponds to each configuration. 11.3.1 MyChef 4GN 2/3 11.3.2 MyChef 4GN 1/1 and MyChef 6GN 2/3... -
Page 59: Mychef 6Gn 1/1
11.3.3 MyChef 6GN 1/1 11.3.4 MyChef 10GN 1/1... - Page 63 | 902 10 18 90 | info@distform.com...
Need help?
Do you have a question about the MyChef 4 GN 2/3 and is the answer not in the manual?
Questions and answers