Xerox Phaser 3100MFP Service Manual
Hide thumbs
Also See for Phaser 3100MFP:
- Evaluator manual (12 pages) ,
- User manual (2 pages) ,
- Features (1 page)
Chapters
Table of Contents

Related Manuals for Xerox Phaser 3100MFP


Summary of Contents for Xerox Phaser 3100MFP
- Page 1 Phaser 3100MFP SERVICE MANUAL 708P89057 04/08...
- Page 2 Xerox service documentation is intended for use by certified, product trained service per- sonnel only. Xerox does not warrant or represent that it will notify or provide to such customer any future change to this documentation. Customer performed service of equipment, or modules, components or parts of such equipment may affect whether Xerox is responsible to fix machine defects under the warranty offered by Xerox with respect to such equipment.
-
Page 3: Image Quality
Introduction Introduction Safety Precautions ........................Health and Safety Incident Reporting ..................viii 1 Service Call Procedures Section Contents ........................2 Repair Analysis Procedures Section Contents ........................3 Image Quality Section Contents ........................4 Repairs and Adjustments Section Contents ........................5 Parts List Section Contents ........................ - Page 4 Introduction This page is intentionally blank 4/08...
-
Page 5: Safety Precautions
High voltages and lasers inside this product are dangerous. This machine should only be ser- viced by a suitably trained and qualified service engineer. 2. Use only Xerox replacement parts There are no user serviceable parts inside the machine. Do not make any unauthorized changes or additions to the machine, these could cause the machine to malfunction and cre- ate electric shock or fire hazards. - Page 6 Introduction Materials 1. If the LCD control panel is damaged, it is possible for the liquid inside the display to leak. Contact with skin should be avoided, wash any splashes from eyes or skin immediately and contact your doctor. If the liquid gets into the mouth or is swallowed see a doctor immediately. 2.
- Page 7 Assembly / Disassembly Precautions Replace parts carefully, always use Xerox parts. Take care to note the exact location of parts and also cable routing before dismantling any part of the machine. Ensure all parts and cables are re- placed correctly.
- Page 8 Introduction The techniques outlined below should be followed to help reduce the incidence of component damage caused by static electricity. CAUTION Be sure no power is applied to the chassis or circuit, and observe all other safety precautions. 1. Immediately before handling a semiconductor component or semiconductor-equipped assembly, drain off any electrostatic charge on your body by touching a known earth ground.
-
Page 9: Health And Safety Incident Reporting
(equipment and materials) at customer locations. II. Scope Xerox Corporation and subsidiaries worldwide. III. Objective To enable prompt resolution of health and safety incidents involving Xerox products and to ensure Xerox regulatory compliance. IV. Definitions Incident: An event or condition occurring in a customer account that has resulted in injury, illness or prop- erty damage. - Page 10 Fund all field retrofits. 2. Field Service Operations shall: a. Preserve the Xerox product involved and the scene of the incident inclusive of any associ- ated equipment located in the vicinity of the incident. b. Return any affected equipment/part(s) to the location designated by Xerox EH&S and/or the Business Division.
- Page 11 Service Call Procedures 1 Service Call Procedures SCP 1 Service Call Actions ....................... SCP 2 Cleaning......................... SCP 3 Final Actions ........................Phaser 3100 MFP 04/08...
- Page 12 Service Call Procedures This page is intentionally blank 04/08 Phaser 3100 MFP...
-
Page 13: Scp 1 Service Call Actions
Service Call Procedures SCP 1 Service Call Actions Procedure WARNING Switch off the electricity to the machine. Disconnect the power cord from the customer supply while performing tasks that do not need electricity. Electricity can cause death or injury. Moving parts can cause injury. -
Page 14: Scp 2 Cleaning
Service Call Procedures SCP 2 Cleaning To keep the machine in good working condition, the following operations should be carried out regularly: • Cleaning the paper transport rollers of the ADF (3100 MFP/X only). • Cleaning the paper separator (3100 MFP/X only). •... - Page 15 Service Call Procedures Paper Separator Module (3100 MFP/X only) Figure 2 1. Set the On/Off switch to Off (position 0). 2. Open the ADF scanner cover. 3. Disassemble the ADF feeder (REP 4. Wipe the elements of the paper separator module with a lint-free cloth soaked with isopropyl alcohol.
- Page 16 Service Call Procedures Cleaning the Covers It is advisable to clean all the covers during a maintenance visit. 1. Set the On/Off switch to Off (position 0). 2. Clean the external areas of the covers with a lint-free cloth moistened with isopropyl alcohol or a spray-on cleaning product.
-
Page 17: Scp 3 Final Actions
Service Call Procedures SCP 3 Final Actions After the machine has been re-assembled, perform the steps that follow: 1. Exercise the machine in all modes. 2. Make a proof copy or print of a customer document. 3. If any of the customers selections were changed, return them to the customers preferred set- tings. - Page 18 Service Call Procedures This page is intentionally blank 04/08 Phaser 3100 MFP...
-
Page 19: Status Indicator Raps
Status Indicator RAPs 2 Status Indicator RAPs RAP 1 Error Codes ........................RAP 2 Jam Detection ....................... Phaser 3100 MFP 04/08... - Page 20 Status Indicator RAPs This page is intentionally blank 04/08 Phaser 3100 MFP...
-
Page 21: General Codes
Status Indicator RAPs RAP 1 Error Codes Scanning and Communication Error Codes The communication error codes appear in the logs (printed using key sequence 5 4) and in the transmission reports. General Codes The following table presents and details for each error code displayed by the machine its cause and when required the corrective action to perform. - Page 22 Status Indicator RAPs Table 1: No document to recover You have attempted to recover a document Contact your corre- from a correspondent, but the latter has not spondent to check stored the document or the password that whether the document to was entered is wrong.
- Page 23 Status Indicator RAPs Table 1: Document transmission fault Document transmission error. Transmission: restart the transmission. Reception: ask your correspondent to retransmit the docu- ment. Phaser 3100 MFP 04/08...
- Page 24 Status Indicator RAPs RAP 2 Jam Detection Jam 1. Paper jam at the paper cassette When the registration sensor does not turn on within 2.52 seconds after the paper pick-up clutch for the paper cassette turns on. Jam 2. Paper did not pass the registration sensor When the registration sensor does not turn off within the specified time for passing each paper size (see below) + 3 seconds after the registration sensor turns on.
- Page 25 Image Quality 3 Image Quality IQ 1 Checking the quality of Prints and Tuning the Scanner ............ Phaser 3100 MFP 04/08...
- Page 26 Image Quality This page is intentionally blank 04/08 Phaser 3100 MFP...
- Page 27 Image Quality IQ 1 Checking the Quality of Prints and Calibrating the Scanner To check or improve the quality of prints, you should first calibrate the scanner. Follow this proce- dure: 1. Press enter * then A on the keyboard and confirm with OK. The machine reboots. 2.
- Page 28 Image Quality This page is intentionally blank 04/08 Phaser 3100 MFP...
-
Page 29: Table Of Contents
Repairs and Adjustments 4 Repairs and Adjustments REP 1 Control Panel ........................ REP 2 ADF Cover and Document Pad ..................REP 3 Front Door and Side Cover ..................4-10 REP 4 Feeder Assembly ......................4-13 REP 5 Retard Pad and Cork Pad ................... 4-15 REP 6 ADF Document Feed Assembly .................. - Page 30 Repairs and Adjustments This page is intentionally blank 04/08 Phaser 3100 MFP...
-
Page 31: Rep 1 Control Panel
Repairs and Adjustments REP 1 Control Panel Parts List on: PL 1 WARNING Switch off the electricity to the machine. Disconnect the power cord from the customer supply while performing tasks that do not need electricity. Electricity can cause death or injury. Moving parts can cause injury. - Page 32 Repairs and Adjustments 3. Disconnect the ribbon cable from the control panel board, Figure 2. Figure 2 4. Remove the control panel. Replacement 1. Replacement is the reverse of the removal procedure. 04/08 Phaser 3100 MFP...
-
Page 33: Rep 2 Adf Cover And Document Pad
Repairs and Adjustments REP 2 ADF Cover and Document Pad Parts List on: PL 7 WARNING Switch off the electricity to the machine. Disconnect the power cord from the customer supply while performing tasks that do not need electricity. Electricity can cause death or injury. Moving parts can cause injury. - Page 34 Repairs and Adjustments ADF Cover: 1. Close the ADF and open the ADF cover assembly, Figure 2. Figure 2 2. Remove the ADF motor cover from its two slots using a flat screwdriver then remove the ADF motor cover, Figure 3. Figure 3 04/08 Phaser 3100 MFP...
- Page 35 Repairs and Adjustments 3. Unscrew the mounting screw of the ground cable, Figure 4. Figure 4 4. Disconnect the ADF cover sensor connector (A) and the paper sensor connector (B), Figure Figure 5 Phaser 3100 MFP 04/08...
- Page 36 Repairs and Adjustments 5. Open the ADF cover, unscrew the two mounting screws of the cable cover and remove the cable cover, Figure 6. Figure 6 6. Remove the ground cable, the ADF cover sensor connector and the paper sensor connector from their cable guide then slide them out of the ADF cover, Figure 7.
- Page 37 Repairs and Adjustments 7. Insert a flat screwdriver in each slot of the two ADF cover hinges, Figure 8. Figure 8 8. Lift and remove the ADF cover, do not forget the mounting screws of the hinges, Figure 9. Figure 9 Replacement 1.
-
Page 38: Rep 3 Front Door And Side Cover
Repairs and Adjustments REP 3 Front Door and Side Cover Parts List on: PL 2 WARNING Switch off the electricity to the machine. Disconnect the power cord from the customer supply while performing tasks that do not need electricity. Electricity can cause death or injury. Moving parts can cause injury. - Page 39 Repairs and Adjustments 2. Unscrew the two mounting screws on the front and back of the side covers, front mounting screw of the right hand side cover, back mounting screw of the right-hand side cover, Figure Figure 2 3. Using a flat screwdriver, release the tabs under the covers from their slots, Figure 3. Figure 3 Phaser 3100 MFP 04/08...
- Page 40 Repairs and Adjustments 4. Unclip the side covers from the top slots located at the back of the machine and pivot them towards yourself to remove them, Figure 4. Figure 4 5. Remove the side covers. Replacement 1. Replacement is the reverse of the removal procedure. 4-12 04/08 Phaser 3100 MFP...
-
Page 41: Rep 4 Feeder Assembly
Repairs and Adjustments REP 4 Feeder Assembly Parts List on: PL 8 WARNING Switch off the electricity to the machine. Disconnect the power cord from the customer supply while performing tasks that do not need electricity. Electricity can cause death or injury. Moving parts can cause injury. - Page 42 Repairs and Adjustments 3. Lift the roller bearing, Figure 2. Figure 2 4. Lift the roller bearing from the other end of the feeder, Figure 3. Figure 3 5. Lift the feeder and remove the feeder. Replacement 1. Replacement is the reverse of the removal procedure. 4-14 04/08 Phaser 3100 MFP...
-
Page 43: Rep 5 Retard Pad And Cork Pad
Repairs and Adjustments REP 5 Retard Pad and Cork Pad Parts List on: PL 8 WARNING Switch off the electricity to the machine. Disconnect the power cord from the customer supply while performing tasks that do not need electricity. Electricity can cause death or injury. Moving parts can cause injury. - Page 44 Repairs and Adjustments Cork Dad: 4. Insert a screwdriver in the right slot as shown below and make a pivoting movement down- wards without strain to remove the cork pad, Figure 2. Figure 2 Replacement Cork Pad 1. Make sure that the slot of the cork on the paper input guide is clean. 2.
-
Page 45: Rep 6 Adf Document Feed Assembly
Repairs and Adjustments REP 6 ADF Document Feed Assembly Parts List on: PL 7 WARNING Switch off the electricity to the machine. Disconnect the power cord from the customer supply while performing tasks that do not need electricity. Electricity can cause death or injury. Moving parts can cause injury. - Page 46 Repairs and Adjustments 2. Lift the document feed assembly and remove it from its slot without disassembling it, Figure Figure 4 3. Remove the motor frame cable from its cable guide, Figure 5. Figure 5 4-18 04/08 Phaser 3100 MFP...
- Page 47 Repairs and Adjustments 4. Disconnect the connector to the ADF cover and remove the assembly, Figure 6. Figure 6 Replacement 1. Replacement is the reverse of the removal procedure. Phaser 3100 MFP 04/08 4-19...
-
Page 48: Rep 7 Upper Paper Guide Assembly
Repairs and Adjustments REP 7 Upper Paper Guide Assembly Parts List on: PL 8 WARNING Switch off the electricity to the machine. Disconnect the power cord from the customer supply while performing tasks that do not need electricity. Electricity can cause death or injury. Moving parts can cause injury. - Page 49 Repairs and Adjustments 3. Pull out the paper guide assembly, Figure 2. Figure 2 Replacement 1. Replacement is the reverse of the removal procedure. Phaser 3100 MFP 04/08 4-21...
-
Page 50: Rep 8 Motor Frame
Repairs and Adjustments REP 8 Motor Frame Parts List on: PL 8 WARNING Switch off the electricity to the machine. Disconnect the power cord from the customer supply while performing tasks that do not need electricity. Electricity can cause death or injury. Moving parts can cause injury. - Page 51 Repairs and Adjustments 2. Lift and remove the motor frame. Take note of the location of the teeth gears, then remove them, Figure 2. Figure 2 3. If required unscrew the two mounting screws of the motor and remove the motor, Figure 3. Figure 3 Phaser 3100 MFP 04/08...
- Page 52 Repairs and Adjustments Replacement 1. Replacement is the reverse of the removal procedure. 2. Position the teeth gears respecting their location identified during disassembly, Figure 4. Figure 4 4-24 04/08 Phaser 3100 MFP...
-
Page 53: Rep 9 Adf Feed Guide / Registration Roll / Paper Deflector
Repairs and Adjustments REP 9 ADF Feed Guide / Registration Roll / Paper Deflector Parts List on: PL 9 WARNING Switch off the electricity to the machine. Disconnect the power cord from the customer supply while performing tasks that do not need electricity. Electricity can cause death or injury. Moving parts can cause injury. - Page 54 Repairs and Adjustments Paper Deflector 3. Turn the ADF assembly upside down. 4. Unclip the paper deflector and remove it. Registration Roller 5. Turn the assembly upside down. 6. Turn each roller bearing of the registration roller, Figure 2. Figure 2 7.
- Page 55 Repairs and Adjustments Replacement ADF Feed Guide 1. Replacement is the reverse of the removal procedure. Paper Deflector 2. Position the paper deflector on the registration roller and press to clip it in place, Figure 3. Figure 3 Registration Roller 3.
-
Page 56: Rep 10 Adf Sliders And Antistatic Brush
Repairs and Adjustments REP 10 ADF Sliders and Antistatic Brush Parts List on: PL 9 WARNING Switch off the electricity to the machine. Disconnect the power cord from the customer supply while performing tasks that do not need electricity. Electricity can cause death or injury. Moving parts can cause injury. - Page 57 Repairs and Adjustments 3. Lift the rack gears and remove them from the input tray assembly, Figure 2. Figure 2 4. Carefully remove the antistatic brush, Figure 3. Figure 3 Replacement 1. Replacement is the reverse of the removal procedure. 2.
-
Page 58: Rep 11 Cpu Module
Repairs and Adjustments REP 11 CPU Module Parts List on: PL 2 WARNING Switch off the electricity to the machine. Disconnect the power cord from the customer supply while performing tasks that do not need electricity. Electricity can cause death or injury. Moving parts can cause injury. - Page 59 Repairs and Adjustments 3. Unscrew the mounting screw of the CPU card ground connector and disconnect it, Figure 2. Figure 2 4. Disconnect all connectors from the CPU board. CAUTION Note all connections for reassembly. 5. Unscrew the eight mounting screws and remove the CPU board, Figure 3. Figure 3 Phaser 3100 MFP 04/08...
- Page 60 Repairs and Adjustments Replacement 1. Replacement is the reverse of the removal procedure. 2. Connect all connectors to the CPU board, Figure 4. Figure 4 3. Perform the scanner calibration ( 8 0). 4-32 04/08 Phaser 3100 MFP...
-
Page 61: Rep 12 Speaker
Repairs and Adjustments REP 12 Speaker Parts List on: PL 2 WARNING Switch off the electricity to the machine. Disconnect the power cord from the customer supply while performing tasks that do not need electricity. Electricity can cause death or injury. Moving parts can cause injury. - Page 62 Repairs and Adjustments 3. Press the top clip inwards until it unclips and pull out the speaker, Figure 2. Figure 2 Replacement 1. Replacement is the reverse of the removal procedure. 4-34 04/08 Phaser 3100 MFP...
-
Page 63: Rep 13 Back Cover
Repairs and Adjustments REP 13 Back Cover Parts List on: PL 3 WARNING Switch off the electricity to the machine. Disconnect the power cord from the customer supply while performing tasks that do not need electricity. Electricity can cause death or injury. Moving parts can cause injury. - Page 64 Repairs and Adjustments 2. Unscrew the two top mounting screws on the back cover (C and D), Figure 2. Figure 2 3. Pull the back cover and remove it. Replacement 1. Replacement is the reverse of the removal procedure. 4-36 04/08 Phaser 3100 MFP...
-
Page 65: Rep 14 Output Tray Assembly
Repairs and Adjustments REP 14 Output Tray Assembly Parts List on: PL 3 WARNING Switch off the electricity to the machine. Disconnect the power cord from the customer supply while performing tasks that do not need electricity. Electricity can cause death or injury. Moving parts can cause injury. - Page 66 Repairs and Adjustments 2. Lift and remove the output tray assembly, Figure 2. Figure 2 Replacement 1. Replacement is the reverse of the removal procedure. 4-38 04/08 Phaser 3100 MFP...
-
Page 67: Rep 15 Machine Disassembly
Repairs and Adjustments REP 15 Machine Disassembly Parts List on: PL 2 WARNING Switch off the electricity to the machine. Disconnect the power cord from the customer supply while performing tasks that do not need electricity. Electricity can cause death or injury. Moving parts can cause injury. -
Page 68: Rep 16 Scanner Assembly
Repairs and Adjustments REP 16 Scanner Assembly Parts List on: PL 2 WARNING Switch off the electricity to the machine. Disconnect the power cord from the customer supply while performing tasks that do not need electricity. Electricity can cause death or injury. Moving parts can cause injury. - Page 69 Repairs and Adjustments 3. Remove the front panel and CIS ribbon cables from their cable guide, Figure 2. Figure 2 4. Use a flat head screwdriver to unhook, then remove the scanner assembly, Figure 3. Figure 3 Phaser 3100 MFP 04/08 4-41...
- Page 70 Repairs and Adjustments 5. Lift, then remove the platen assembly, Figure 4. Figure 4 Replacement 1. Replacement is the reverse of the removal procedure. 2. Perform the scanner calibration ( 8 0). 4-42 04/08 Phaser 3100 MFP...
-
Page 71: Rep 17 Power Supply Unit
Repairs and Adjustments REP 17 Power Supply Unit Parts List on: PL 13 WARNING Switch off the electricity to the machine. Disconnect the power cord from the customer supply while performing tasks that do not need electricity. Electricity can cause death or injury. Moving parts can cause injury. -
Page 72: Rep 18 Scanner Frame
Repairs and Adjustments REP 18 Scanner Frame Parts List on: PL 5 WARNING Switch off the electricity to the machine. Disconnect the power cord from the customer supply while performing tasks that do not need electricity. Electricity can cause death or injury. Moving parts can cause injury. - Page 73 Repairs and Adjustments 2. Unscrew the seven mounting screws at the back of the frame and turn it upside down, Figure Figure 2 3. Lift the front part of the scanner frame and remove it, Figure 3. Figure 3 Replacement 1.
-
Page 74: Rep 19 Cis
Repairs and Adjustments REP 19 CIS Parts List on: PL 5 WARNING Switch off the electricity to the machine. Disconnect the power cord from the customer supply while performing tasks that do not need electricity. Electricity can cause death or injury. Moving parts can cause injury. - Page 75 Repairs and Adjustments 2. Disconnect the CIS ribbon cable and remove it from its two side slots, Figure 2. CAUTION Keep the CIS support springs and slides. Figure 2 3. Remove the CIS. Replacement 1. Replacement is the reverse of the removal procedure. Phaser 3100 MFP 04/08 4-47...
-
Page 76: Rep 20 Cis Ribbon Cable
Repairs and Adjustments REP 20 CIS Ribbon Cable Parts List on: PL 6 WARNING Switch off the electricity to the machine. Disconnect the power cord from the customer supply while performing tasks that do not need electricity. Electricity can cause death or injury. Moving parts can cause injury. - Page 77 Repairs and Adjustments Replacement 1. Replacement is the reverse of the removal procedure. Phaser 3100 MFP 04/08 4-49...
-
Page 78: Rep 21 Cis Support
Repairs and Adjustments REP 21 CIS Support Parts List on: PL 6 WARNING Switch off the electricity to the machine. Disconnect the power cord from the customer supply while performing tasks that do not need electricity. Electricity can cause death or injury. Moving parts can cause injury. - Page 79 Repairs and Adjustments 2. Remove the belt from the drive pulley, Figure 2. Figure 2 3. Lift then remove the CIS panel. Replacement 1. Replacement is the reverse of the removal procedure. Phaser 3100 MFP 04/08 4-51...
-
Page 80: Rep 22 Scanner Motor
Repairs and Adjustments REP 22 Scanner Motor Parts List on: PL 5 WARNING Switch off the electricity to the machine. Disconnect the power cord from the customer supply while performing tasks that do not need electricity. Electricity can cause death or injury. Moving parts can cause injury. - Page 81 Repairs and Adjustments 3. Remove the CIS motor connector from its cable guide, Figure 2. Figure 2 4. Remove the scanner motor. Replacement 1. Replacement is the reverse of the removal procedure. Phaser 3100 MFP 04/08 4-53...
-
Page 82: Rep 23 Paper Tray Components
Repairs and Adjustments REP 23 Paper Tray Components Parts List on: PL 10 WARNING Switch off the electricity to the machine. Disconnect the power cord from the customer supply while performing tasks that do not need electricity. Electricity can cause death or injury. Moving parts can cause injury. - Page 83 Repairs and Adjustments Pinion Gear 2. Remove the pinion gear, Figure 2. Figure 2 Phaser 3100 MFP 04/08 4-55...
- Page 84 Repairs and Adjustments 3. Unhook and lift the bottom plate, Figure 3. Figure 3 4. Unhook the left pinion gear. Repeat with the right pinion gear. Bottom Plate 5. Unhook the bottom plate from the pivots pins at both sides of the cassette, Figure 3. 4-56 04/08 Phaser 3100 MFP...
- Page 85 Repairs and Adjustments Friction Pad 6. Release 2 hooks from below, Figure 4. CAUTION When releasing the hooks take care not to lose the spring. Figure 4 Replacement 1. Replacement is the reverse of the removal procedure. Phaser 3100 MFP 04/08 4-57...
-
Page 86: Rep 24 Laser Unit
Repairs and Adjustments REP 24 Laser Unit Parts List on: PL 13 WARNING Switch off the electricity to the machine. Disconnect the power cord from the customer supply while performing tasks that do not need electricity. Electricity can cause death or injury. Moving parts can cause injury. - Page 87 Repairs and Adjustments Removal 2. Remove the laser unit, Figure 1. Disconnect the laser Disconnect the polygon Remove 3 screws (circled) diode harness mirror motor harness to remove the laser unit Figure 1 Phaser 3100 MFP 04/08 4-59...
- Page 88 Repairs and Adjustments Replacement 1. Replacement is the reverse of the removal procedure. 2. When reassembling, ensure to set the positioning pin in the hole, Figure 2. Positioning pin Figure 2 4-60 04/08 Phaser 3100 MFP...
-
Page 89: Rep 25 Fusing Unit
Repairs and Adjustments REP 25 Fusing Unit Parts List on: PL 12 WARNING Switch off the electricity to the machine. Disconnect the power cord from the customer supply while performing tasks that do not need electricity. Electricity can cause death or injury. Moving parts can cause injury. - Page 90 Repairs and Adjustments Replacement 1. Replacement is the reverse of the removal procedure. 4-62 04/08 Phaser 3100 MFP...
-
Page 91: Rep 26 Paper Exit Assembly
Repairs and Adjustments REP 26 Paper Exit Assembly Parts List on: PL 12 WARNING Switch off the electricity to the machine. Disconnect the power cord from the customer supply while performing tasks that do not need electricity. Electricity can cause death or injury. Moving parts can cause injury. - Page 92 Repairs and Adjustments 2. Remove 2 screws to remove the paper exit assembly, Figure 2 and Figure 3. Remove 2 screws Figure 2 Figure 3 Replacement 1. Replacement is the reverse of the removal procedure. 4-64 04/08 Phaser 3100 MFP...
-
Page 93: Rep 27 Fusing Lamp And Heat Roller
Repairs and Adjustments REP 27 Fusing Lamp and Heat Roller Parts List on: PL 12 WARNING Switch off the electricity to the machine. Disconnect the power cord from the customer supply while performing tasks that do not need electricity. Electricity can cause death or injury. Moving parts can cause injury. - Page 94 Repairs and Adjustments Removal Fusing Lamp 1. Release the fusing lamp, Figure 1. CAUTION Do not touch the surface of the fusing lamp with bare hands. Take care when removing the lamp, it can break if not handled with care. Remove 2 screws, 1 at each end of the fusing lamp Figure 1...
- Page 95 Repairs and Adjustments 2. Remove the fusing lamp from the fuser, Figure 2. Carefully remove the fusing lamp by withdrawing it from the fuser Figure 2 Hot Roller 3. Disconnect the electrode, Figure 3. Disconnect the electrode Figure 3 Phaser 3100 MFP 04/08 4-67...
- Page 96 Repairs and Adjustments 4. Pull the heat roller out of the fuser unit, Figure 4. CAUTION Do not touch the surface of the heat roller with bare hands. Figure 4 4-68 04/08 Phaser 3100 MFP...
- Page 97 Repairs and Adjustments Replacement 1. Replacement is the reverse of the removal procedure. CAUTION When re-assembling, be careful not to damage the stripper fingers. 2. When reassembling, be careful to set the fusing lamp on the frame first, then set the termi- nals, Figure 5.
-
Page 98: Rep 28 Pressure Roller
Repairs and Adjustments REP 28 Pressure Roller Parts List on: PL 12 WARNING Switch off the electricity to the machine. Disconnect the power cord from the customer supply while performing tasks that do not need electricity. Electricity can cause death or injury. Moving parts can cause injury. - Page 99 Repairs and Adjustments Removal 1. Remove the pressure roller, Figure 1. CAUTION Note the position of the bushing and spring at each end of the roller. Pressure roller Bushing and spring at each side Figure 1 Phaser 3100 MFP 04/08 4-71...
- Page 100 Repairs and Adjustments Replacement 1. Replacement is the reverse of the removal procedure. 2. When re-assembling, be careful to set the bushing and spring in the correct position, Figure Figure 2 4-72 04/08 Phaser 3100 MFP...
-
Page 101: Rep 29 Thermistor
Repairs and Adjustments REP 29 Thermistor Parts List on: PL 12 WARNING Switch off the electricity to the machine. Disconnect the power cord from the customer supply while performing tasks that do not need electricity. Electricity can cause death or injury. Moving parts can cause injury. -
Page 102: Rep 30 Thermostat
Repairs and Adjustments REP 30 Thermostat Parts List on: PL 12 WARNING Switch off the electricity to the machine. Disconnect the power cord from the customer supply while performing tasks that do not need electricity. Electricity can cause death or injury. Moving parts can cause injury. - Page 103 Repairs and Adjustments Remove 2 screws (circled) to remove the thermostat Figure 2 Replacement 1. Replacement is the reverse of the removal procedure. Phaser 3100 MFP 04/08 4-75...
-
Page 104: Rep 31 Heat Roller Stripper Fingers
Repairs and Adjustments REP 31 Heat Roller Stripper Fingers Parts List on: PL 12 WARNING Switch off the electricity to the machine. Disconnect the power cord from the customer supply while performing tasks that do not need electricity. Electricity can cause death or injury. Moving parts can cause injury. - Page 105 Repairs and Adjustments 2. Remove the heat roller stripper fingers, Figure 2, Figure 2 Replacement 1. Replacement is the reverse of the removal procedure. CAUTION When reassembling, be careful not to lose the spring. Phaser 3100 MFP 04/08 4-77...
-
Page 106: Rep 32 Paper Feed Roller
Repairs and Adjustments REP 32 Paper Feed Roller Parts List on: PL 11 WARNING Switch off the electricity to the machine. Disconnect the power cord from the customer supply while performing tasks that do not need electricity. Electricity can cause death or injury. Moving parts can cause injury. - Page 107 Repairs and Adjustments 2. Remove the electromagnetic clutch assembly, Figure 2. Remove the clip to release the Remove the clip to release the clutch from the shaft shaft end Figure 2 3. Release the second clip to remove the shaft, Figure 3. Release the second clip to allow the shaft to be withdrawn and re- moved...
- Page 108 Repairs and Adjustments 4. Remove the paper feed roller from the shaft, Figure 4. Release the clip to remove the roller from the shaft Figure 4 Replacement 1. Replacement is the reverse of the removal procedure. 4-80 04/08 Phaser 3100 MFP...
-
Page 109: Rep 33 Registration Roller
Repairs and Adjustments REP 33 Registration Roller Parts List on: PL 11 WARNING Switch off the electricity to the machine. Disconnect the power cord from the customer supply while performing tasks that do not need electricity. Electricity can cause death or injury. Moving parts can cause injury. - Page 110 Repairs and Adjustments Removal 1. Remove the surrounding components, Figure 1. Remove the paper Remove the left Remove the tray guides, 2 shield, 13 screws right shield, 9 screws and 2 screws at the screws bottom Remove the Remove the laser guide shield, 4 shield, 4 screws screws...
- Page 111 Repairs and Adjustments 2. Remove the registration roller, Figure 2. Lift out the registration roller Remove 2 white bushings Remove 2 screws (circled) Figure 2 Replacement 1. Replacement is the reverse of the removal procedure. Phaser 3100 MFP 04/08 4-83...
-
Page 112: Rep 34 Transfer Roller
Repairs and Adjustments REP 34 Transfer Roller Parts List on: PL 11 WARNING Switch off the electricity to the machine. Disconnect the power cord from the customer supply while performing tasks that do not need electricity. Electricity can cause death or injury. Moving parts can cause injury. - Page 113 Repairs and Adjustments 2. Use a screwdriver to lift the transfer roller out of the recess, Figure 2. Figure 2 Replacement 1. Replacement is the reverse of the removal procedure. Phaser 3100 MFP 04/08 4-85...
-
Page 114: Rep 35 Fan Assembly
Repairs and Adjustments REP 35 Fan Assembly Parts List on: PL 13 WARNING Switch off the electricity to the machine. Disconnect the power cord from the customer supply while performing tasks that do not need electricity. Electricity can cause death or injury. Moving parts can cause injury. -
Page 115: Rep 36 Main Motor
Repairs and Adjustments REP 36 Main Motor Parts List on: PL 11 WARNING Switch off the electricity to the machine. Disconnect the power cord from the customer supply while performing tasks that do not need electricity. Electricity can cause death or injury. Moving parts can cause injury. - Page 116 Repairs and Adjustments Figure 2 Main motor Replacement 1. Replacement is the reverse of the removal procedure. 4-88 04/08 Phaser 3100 MFP...
-
Page 117: Rep 37 Discharge Lamp Assembly
Repairs and Adjustments REP 37 Discharge Lamp Assembly Parts List on: PL 11 WARNING Switch off the electricity to the machine. Disconnect the power cord from the customer supply while performing tasks that do not need electricity. Electricity can cause death or injury. Moving parts can cause injury. - Page 118 Repairs and Adjustments Replacement 1. Replacement is the reverse of the removal procedure. 4-90 04/08 Phaser 3100 MFP...
-
Page 119: Rep 38 Scanner Cover And Document Pad
Repairs and Adjustments REP 38 Scanner Cover and Document Pad Parts List on: PL 2 WARNING Switch off the electricity to the machine. Disconnect the power cord from the customer supply while performing tasks that do not need electricity. Electricity can cause death or injury. Moving parts can cause injury. - Page 120 Repairs and Adjustments This page is intentionally blank 4-92 04/08 Phaser 3100 MFP...
- Page 121 Parts List 5 Parts List PL 1 Controls and Cables ......................PL 2 Covers ..........................PL 3 Paper Exit and Rear Cover ....................PL 4 Output Tray Assembly ..................... PL 5 Scanner .......................... 5-10 PL 6 CIS Support ........................5-12 PL 7 Automatic Document Feeder (3100MFP/X only) (1 of 3) ..........
-
Page 122: Pl 1 Controls And Cables
Parts List PL 1 Controls and Cables 04/08 Phaser 3100 MFP... - Page 123 Parts List PL 1 Controls and Cables ITEM No. REFERENCE DESCRIPTION 002N02742 Pupitre PHASER Assemble REP 1 Control panel assembly (3100 MFP/X) 002N02751 Pupitre PHASER Assemble REP 1 Control panel assembly (3100MFP/S) Refer to PL 2 Flap équipé V2 ADF cover (3100MFP/X) Refer to PL 2 ADF doc tray D7N coloré...
-
Page 124: Pl 2 Covers
Parts List PL 2 Covers 04/08 Phaser 3100 MFP... - Page 125 Porte façade avant imprimante assemblé REP 3 Front door assembly 002N02744 Capot gauche imprimante LFF V2 Coloré REP 3 Left cover 002N02749 Support Pupitre ASS.LFF3/4V2 XEROX REP 1 Control Panel (3100MFP/X) 002N02753 Support Pupitre ASS.LFF1V2 XEROX REP 1 Control Panel (3100MFP/S) 120N00526 Serre câble Twist-lok nylon...
-
Page 126: Pl 3 Paper Exit And Rear Cover
Parts List PL 3 Paper Exit and Rear Cover 04/08 Phaser 3100 MFP... - Page 127 Parts List PL 3 Paper Exit and Rear Cover ITEM No. REFERENCE DESCRIPTION 038N00521 Guide papier sortie imprimante Exit paper guide Not spared VIS 3x10 self tapping screw for plastic Screw 3x10 Self tapping screw for plastic 002N02745 Capot arrière imprimante LFX V2 coloré REP 13 Lower rear cover 002N02746...
-
Page 128: Pl 4 Output Tray Assembly
Parts List PL 4 Output Tray Assembly 04/08 Phaser 3100 MFP... - Page 129 Parts List PL 4 Output Tray Assembly ITEM No. REFERENCE DESCRIPTION Not spared VIS 3x10 self tapping screw for plastic Screw 3x10 self tapping screw for plastic 115N00872 Brosse antistatique Discharge brush 050N00526 Interface LFX V2 Colorée Grey White REP 14 Output tray 117N01797 Ferrite p.cable plat 3W800 10 cond.
-
Page 130: Pl 5 Scanner
Parts List PL 5 Scanner 5-10 04/08 Phaser 3100 MFP... - Page 131 Parts List PL 5 Scanner ITEM No. REFERENCE DESCRIPTION Not spared Vis 3x10 self tapping screw for plastic Screw 3x10 Self tapping screw for plastic Not spared Cadre vitre scanner LFF3 assemblé REP 18 Scanner frame LFF3 assembly (3100 MFP/X) Not spared Cadre vitre scanner LFF1 assemblé...
-
Page 132: Pl 6 Cis Support
Parts List PL 6 CIS Support 5-12 04/08 Phaser 3100 MFP... - Page 133 Parts List PL 6 CIS Support ITEM No. REFERENCE DESCRIPTION 117N01798 Nappe CIS 12 points 50 microns REP 20 12 pin 50 micrometers CIS flat cable 117N01797 Ferrite p.cable plat 3W800 10 cond. SP Ferrite p.cable plat 3W800 10 cond. SP Not spared Guidage central chariot CIS coloré...
-
Page 134: Pl 7 Automatic Document Feeder (3100Mfp/X Only) (1 Of 3)
Parts List PL 7 Automatic Document Feeder (3100MFP/X only) (1 of 3) 5-14 04/08 Phaser 3100 MFP... - Page 135 Parts List PL 7 Automatic Document Feeder (3100MFP/X only) (1 of 3) ITEM No. REFERENCE DESCRIPTION 002N02750 Capot ADF assemblé V2 ADF cover assembly V2 002N02747 Capot moteur coloré Motor cover 038N00522 Chemin papier interne deflect. ass V2 Document input tray 050N00527 Flap assemblé...
-
Page 136: Pl 8 Automatic Document Feeder (3100Mfp/X Only) (2 Of 3)
Parts List PL 8 Automatic Document Feeder (3100MFP/X only) (2 of 3) 5-16 04/08 Phaser 3100 MFP... - Page 137 Parts List PL 8 Automatic Document Feeder (3100MFP/X only) (2 of 3) ITEM No. REFERENCE DESCRIPTION Not spared ADF slider left D7N coloré REP 10 Left document guide Not spared ADF slider right D7N coloré REP 10 Right document guide Not spared Palier quart de tour rouleau coloré...
-
Page 138: Pl 9 Automatic Document Feeder (3100Mfp/X Only) (3 Of 3)
Parts List PL 9 Automatic Document Feeder (3100MFP/X only) (3 of 3) 5-18 04/08 Phaser 3100 MFP... - Page 139 Parts List PL 9 Automatic Document Feeder (3100MFP/X only) (3 of 3) ITEM No. REFERENCE DESCRIPTION Not spared Chassis blanc coloré REP 9 White frame plate colored Not spared Ressort palette blanche White frame plate spring Not spared Palier quart de tour rouleau coloré Roller bearing turning colored Not spared Vis autotartête large pour plast.
-
Page 140: Pl 10 Paper Tray
Parts List PL 10 Paper Tray 5-20 04/08 Phaser 3100 MFP... - Page 141 Parts List PL 10 Paper Tray ITEM No. REFERENCE DESCRIPTION 050N00524 Bac papier REP 23 Paper tray unit Phaser 3100 MFP 04/08 5-21...
-
Page 142: Pl 11 Rollers And Drives
Parts List PL 11 Rollers and Drives 5-22 04/08 Phaser 3100 MFP... - Page 143 Parts List PL 11 Rollers and Drives ITEM No. REFERENCE DESCRIPTION 127N07574 Brushless motor - DC24V REP 36 022N02362 Transfer roller REP 34 022N02363 Paper feed roller - MM32 REP 32 121N01171 Magnetic clutch -43z 120N00525 Actuator - Paper pick-up sensor Phaser 3100 MFP 04/08 5-23...
-
Page 144: Pl 12 Fuser
Parts List PL 12 Fuser 5-24 04/08 Phaser 3100 MFP... - Page 145 Parts List PL 12 Fuser ITEM No. REFERENCE DESCRIPTION 126N00298 Unité de fusion REP 25 Fuser (220V) 126N00297 Unité de fusion REP 25 Fuser (110V) 130N01542 Fusing thermistor REP 29 126N00300 Heater (220V) REP 27 126N00299 Heater (110V) REP 27 Phaser 3100 MFP 04/08 5-25...
-
Page 146: Pl 13 Power Supply And Laser Unit
Parts List PL 13 Power Supply and Laser Unit 5-26 04/08 Phaser 3100 MFP... - Page 147 Parts List PL 13 Power Supply and Laser Unit ITEM No. REFERENCE DESCRIPTION 122N00280 Laser unit REP 24 110N01425 Micro switch 127N07575 Fan assembly REP 35 105N02149 Power supply unit (220V) REP 17 105N02148 Power supply unit (110) REP 17 110N01426 Push switch Phaser 3100 MFP...
- Page 148 Parts List This page is intentionally blank 5-28 04/08 Phaser 3100 MFP...
- Page 149 General Procedures and Information 6 General Procedures and Information GP 1 Presentation ........................GP 2 Characteristics (Xerox 3100MFP/X and 3100MFP/S) ............. GP 3 Electronic Architecture ....................6-12 GP 4 Print Cartridge Characteristics ..................6-18 GP 5 Operation ........................6-19 GP 6 Printer Language ......................
- Page 150 General Procedures and Information This page is intentionally blank 04/08 Phaser 3100 MFP...
-
Page 151: General Procedures And Information
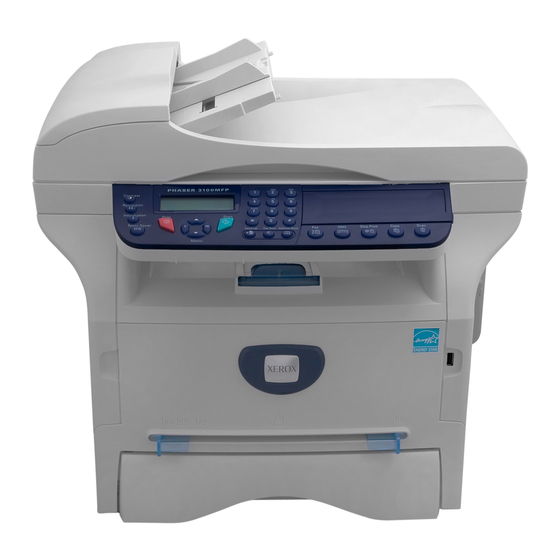
General Description 3100MFP/X The Xerox 3100MFP/X consists of a colour scanner with a 600 Dpi resolution and a Black and White printer with a 600 Dpi resolution. These two components are integrated into a single com- pact machine. Documents are processed by a scanner using CIS (Contact Image Sensor) tech- nology, via the ADF (Automatic Document Feeder) or via the document glass for bulky documents. - Page 152 General Procedures and Information Document feeder Control panel Paper output Master USB connection Smart card insertion (USB key) point Output support tab Manual input tray Front cover Paper tray Manual paper feed setup guides Figure 1 Master USB connection (USB key)* Paper jam cover Slave USB connection (For PC)
- Page 153 General Description X3100MFP/S The Xerox 3100MFP/S consists of a colour scanner with a 600 Dpi resolution and a Black and White printer with a 600 Dpi resolution. These two components are integrated into a single com- pact machine. Documents are processed by a scanner using CIS (Contact Image Sensor) tech- nology, via the document glass.
- Page 154 General Procedures and Information Control panel Paper output Master USB connection Smart card insertion (USB key) point Output support tab Manual input tray Front cover Paper tray Manual paper feed setup guides Figure 3 Paper jam cover Slave USB connection (For PC) Power supply cable connection...
-
Page 155: Physical Characteristics
General Procedures and Information GP 2 Characteristics (Xerox 3100MFP/X and 3100MFP/S) Physical Characteristics Environment Operating: - The machine should not be exposed to direct sunlight. - Power Supply - Single phase 120 V -50/60 Hz 8.5 A or Single phase 220-240 V - 50/60 Hz - 4.5 A according model (see rating plate). - Page 156 Weight 11.6 kgs (25.5 lbs) (3100 MFP/S) Consumables Type (for platen and ADF scanners) Inapa tecno SPEED A4 -80 g/m 2 Type (for printer) Xerox 75gsm Document reference (DR) Type ITU #1 -A4 Black/white ratio Resolution Normal mode (200 x 100 DPI)
- Page 157 General Procedures and Information Platen scanner Type CIS Colour and B/W Colour analysis Resolution in DPI 600 x 2400 Grey scale Colour scale 36 bits/pixel Window size 220 mm x 304 mm Maximum paper width Letter (215.9 x 279.4) Zoom in steps of 1% 25% to 400% Contrast Yes (7 levels)
- Page 158 General Procedures and Information Copier Type Black/White Input resolution (optical) in DPI 300 x 300 (fast) or 600 x 600 (quality) Output resolution in DPI 600 x 600 Maximum paper size (in mm) Legal (215.9 x 355.6) Maximum speed for 300 x 300 (RP) resolution 20 PPM Maximum speed for 300 x 300 resolution (Letter) 21 PPM...
- Page 159 General Procedures and Information SMS Communication (3100MFP/X only) Transmission Yes (V23) Reception Mailing 10 directly 249 from directory DECT Telephone Communication (option) (3100MFP/X only) Wireless DECT Telephone Yes (via USB dongle) Network notification Answering device Directory (3100MFP/X only) Capacity Type Name / PSTN and SMS number Transmission list Transmission list capacity...
-
Page 160: Gp 3 Electronic Architecture
General Procedures and Information GP 3 Electronic Architecture The CPU card is based on the Digicolor2 circuit, which ensures the processor functions. All exe- cutable code is stored in the flash Z466. This flash is divided into two zones, one is reserved for storing code and the other is reserved for storing documents. - Page 161 General Procedures and Information Electronic Architecture Figure 1 Overview of the CPU electronic architecture (3100MFP/X): Phaser 3100 MFP 04/08 6-13...
- Page 162 General Procedures and Information Figure 2 Overview of the CPU electronic architecture (3100MFP/S): 6-14 04/08 Phaser 3100 MFP...
-
Page 163: Power Supply
General Procedures and Information Power Supply The 24V and 5V power supply are provided by the printer. Figure 3 Diagram of printer power supply connections: Phaser 3100 MFP 04/08 6-15... - Page 164 General Procedures and Information CPU Card Clocks Figure 4 6-16 04/08 Phaser 3100 MFP...
- Page 165 General Procedures and Information Reset The reset is generated from 3.3V as all logical parts (DIGICOLOR2, memory, …) are supplied in 3.3V. The reset is active during at least 100ms. Figure 5 Printer’s reset diagram: Phaser 3100 MFP 04/08 6-17...
-
Page 166: Gp 4 Print Cartridge Characteristics
General Procedures and Information GP 4 Print Cartridge Characteristics For the print cartridge a counter assigns the percentage of toner that can still be used. For a new cartridge this counter is initialized to the capacity announced by the vendor. This ca- pacity is stored on the smart card provided with the new cartridge and requested for print cartridge replacement. -
Page 167: Gp 5 Operation
General Procedures and Information GP 5 Operation The Xerox 3100MFP range is a Group 3 multi-function machine operating in accordance with the UIT-T T30 recommendations. The 3100MFP/X consists of a laser printer, a CIS (Contact Image Sensor) colour ADF scanner, a... -
Page 168: Gp 6 Printer Language
General Procedures and Information GP 6 Printer Language The machine uses the proprietary GDI printing language. To install the drivers, carried out via the Companion Suite software installation, refer to the User Guide and the Companion Suite documentation kit. Remark(s): The two-way PJL mode is supported. 6-20 04/08 Phaser 3100 MFP... -
Page 169: Gp 7 Paper Types
General Procedures and Information GP 7 Paper types The following is a list of compatible paper formats: Figure 1 Phaser 3100 MFP 04/08 6-21... -
Page 170: Gp 8 Space Requirements
General Procedures and Information GP 8 Space Requirements The following diagram provides the machine’s measurements, excluding optional accessories. 3100MFP/X 445 mm (17.5 inches) 345 mm (13.5 inches) 447 mm (17.5 inches) Figure 1 6-22 04/08 Phaser 3100 MFP... - Page 171 General Procedures and Information 3100MFP/S 447 mm (17.5 inches) 386 mm (15.1 inches) 344 mm (13.5 inches) Figure 2 Phaser 3100 MFP 04/08 6-23...
-
Page 172: Gp 9 Environmental Conditions
General Procedures and Information GP 9 Environmental Conditions When selecting the machine’s location, the following factors should be taken into consideration: • The room should be adequately ventilated. • A standard single-phase power socket with earth (rated in conformance with the information on the label at the back of the machine) should be located no more than 2 meters (78 inches) from the machine. -
Page 173: Gp 10 Connections
General Procedures and Information GP 10 Connections 3100MFP/X Figure 1 Master USB connection (USB key) Power cord Telephone cord (US only) Master USB connection (USB key) Slave USB connection (for PC) EXT.socket - connection for external devices LINE socket - telephone cable connection On/Off switch Power supply cord connection USB cord... - Page 174 General Procedures and Information 3100MFP/S Figure 2 Master USB connection (USB key) Power cable On/Off switch Power connection Slave USB for PC USB cable Phone Line Connection (3100MFP/X only) 1. Plug the end of the telephone line (C) into the terminal socket (G). 2.
- Page 175 General Procedures and Information PC Connections Via USB Note: Before connecting the machine to a PC, the Companion Suite software must be installed on the PC (Refer to the User Guide booklet for the detailed procedure). 1. Connect the end of the USB cable into the USB slave connector (E) located at the back of the machine.
- Page 176 General Procedures and Information Figure 2 2. Connect the other end of the USB cable into a USB port on the PC. 6-28 04/08 Phaser 3100 MFP...
-
Page 177: Gp 11 Connecting The Power And Switching On The Machine
General Procedures and Information GP 11 Connecting the Power and Switching on the Machine 1. Make sure the machines On/Off switch (H) is positioned to Off (position 0). 2. Plug one end of the power cord (B) into the machines power socket (I), refer to 3. -
Page 178: User Parameters
General Procedures and Information GP 12 Getting Started and Software Configuration User Parameters Refer to the User Guide booklet for a detailed description of parameters available to the user. Installation Parameters The installation parameters are used for configuring the machine to the specific requirements of users. - Page 179 General Procedures and Information List of Configuration (SOS) Note: The undocumented Soft Switches in this section are reserved. Soft-switch 1: Tuning the ringing tone and automatic printing (3100MFP/X) Value Description Reserved Reserved SOS-DURPAUSE: Long/short pause while dialing Values: 0 (Short 2s) 1 (Long 6s) Reserved Reserved...
- Page 180 General Procedures and Information Soft-switch 2: Scanner/printer configuration Value Description Reserved Reserved Emitting a beep tone when pressing a front panel key Values: 0 (with beep tone) 1 (without beep tone) Reserved Reserved Reserved SOS-COPLOC: Local copy Values: 0 (Enabled) 1 (Disabled) Reserved Soft-switch 3: Line Configuration (3100MFP/X only)
- Page 181 General Procedures and Information Soft-switch 4: Fax protocol configuration (3100MFP/X only) Value Description SOS-MODPRIV: Communication in private mode Values: 0 (Without) 1 (With) SOS-DIS-COURT: Restricted DIS size Values: 0 (long DIS (complete)) 1 (Short DIS) SOS-TCF: TCF accept criterion Values: 0 (Normal): refused if there has not been 1 continuous second.
- Page 182 General Procedures and Information Soft-switch 5: Voice/loudspeaker Configuration (3100MFP/X only) Value Description Reserved Reserved Reserved Reserved SOS-HP: Line monitoring during fax comm. Values: 0 (Without) 1 (With) Reserved Reserved Reserved Soft-switch 6: Line adjustment (3100MFP/X only) Value Description Reserved Reserved Reserved Reserved Reserved...
- Page 183 General Procedures and Information Soft-switch 8: Remote readout/internal answering machine/modem (3100MFP/X only) Value Description SOS-TLR: Remote readout enable (ATTENTION!) Values: 0 (No remote readout) 1 (Remote readout enabled) Reserved Reserved Reserved Reserved Reserved Reserved Reserved Soft-switch 9: Approval + communication applications (3100MFP/X only) Value Description Reserved...
- Page 184 General Procedures and Information Soft-switch 10: Communications: Locks/Miscellaneous (3100MFP/X only) Value Description SOS-AFFVIT: Communication rate display Values: 0 (Without) the page number is displayed. 1 (With) the comm. rate is displayed. SOS-BTYPNUM: Access to impulse/DTMF parameter Values: 0 (With) Reserved 1 (Without) Reserved Reserved...
- Page 185 General Procedures and Information Soft-switch 19: Miscellaneous software functions (3100MFP/X only) Value Description Reserved Reserved SOS-GROUPE: Restriction on groups (or distribution list) Values: 0 (No groups) 1 (Groups accepted) SOS-REGULREC: T30 reception control inhibited Values: 0 (Without) 1 (With) Reserved SOS-MENUCLAVIER: Hide keyboard menus and force QWERTY keyboard Values: 0 (Show)
- Page 186 General Procedures and Information Soft-switch 22: Miscellaneous (3100MFP/X only) Value Description SOS-DUREE-2100: Transmission time of the 2100 modified for V34 reception Values: 00 (5 seconds) 01 (4.5 seconds) 10 (4 seconds) 11 (3.5 seconds) Reserved Reserved Reserved Reserved Reserved Reserved Soft-switch 23: Miscellaneous (3100MFP/X) Value Description...
- Page 187 General Procedures and Information Soft-switch 23: Miscellaneous (3100MFP/S) Value Description Reserved Reserved Reserved Reserved SOS-DEBRIDAGE-JAUGE: Acceptance of EEPROM cards at any moment. Values: 0 (No) 1 (Yes) Reserved Reserved Reserved Soft-switch 26: Miscellaneous (3100MFP/X) Value Description Reserved Reserved Reserved Restriction on USB function Values: 0 (Without) 1 (With)
- Page 188 General Procedures and Information Soft-switch 26: Miscellaneous (3100MFP/S) Value Description Reserved Reserved Reserved Restriction on USB function Values: 0 (Without) 1 (With) Reserved Reserved Reserved Reserved Soft-switch 27: Miscellaneous (3100MFP/X only) Value Description Reserved Waiting time before validation of unexpected modulation in comparison with expected modulation.
- Page 189 General Procedures and Information Soft-switch 29: Miscellaneous (3100MFP/X only) Value Description Reserved Reserved Reserved Force the V29 modulation for 9600 and 7200 rates #0: Enabled 1: Disabled Reserved Reserved Reserved Reserved Soft-switch 31: Miscellaneous Value Description Reserved Reserved Reserved Displaying the TRASH CAN consumable (in the 86 menu) Values: 0 (Without) 1 (With)
- Page 190 General Procedures and Information Soft-switch 32: Miscellaneous (3100MFP/X only) Value Description Reserved Reserved Reserved Reserved Reserved Reserved Reserved Reserved Soft-switch 33: Miscellaneous (3100MFP/X only) Value Description Reserved Reserved Reserved Reserved Question to the user about a good fax printing Values: # 0 (with) 1 (without question to user) Reserved Reserved...
-
Page 191: Gp 13 Downloading The Software
General Procedures and Information GP 13 Downloading the Software Updating the machine software is principally carried out via a PC connection (USB only, see PC connections, page 7). The principal software which controls the card core and the miniboot software may be downloaded separately. - Page 192 General Procedures and Information Downloading with the miniboot Via the executable TELUSB2 This procedure requires a standard PC running under Windows and equipped with the TELUSB2.exe (version 2.02) executable and a USB cable. Before you start, position the bit n° 8 to 1 on the Soft-switch 1. 1.
-
Page 193: Gp 14 Remote Readout
General Procedures and Information GP 14 Remote Readout CAUTION Before and after each service call on a machine equipped with the remote readout option, per- form a manual transmission of the remote readout parameters to the service center, if the state of the machine allows it. - Page 194 General Procedures and Information initial number of pages for the consumable is 8000 and the threshold is set to 2000 pages, the remote readout will be triggered when the corresponding percentage drops below 25%. The remote readout using the threshold criterion can be triggered only once per consumable. Once the remote readout has been transmitted, the criterion will no longer be tested until the con- sumable has been replaced.
- Page 195 General Procedures and Information Field Type Char. / Num. Manual entry TVERS_TLR 0x00 char TNO_23MIL 0x01 char* TNO_SERIE 0x02 char* TNO_CLIENT 0x03 char* TNO_VERSION 0x04 char* TINDICATIF 0x05 char* TIDENTIFIANT 0x06 char* TNO_SERVEUR 0x08 char* TCAUSE_EMIS 0x09 uchar TNOMRESP 0x10 char[15] TSOCIETE 0x11...
- Page 196 General Procedures and Information Remote Readout Report For each transmission a remote readout report is printed. It contains all the data that has been transmitted to the service center in transparent mode. In the case of a transmission in fax mode, the fax that is received is identical to this report.
- Page 197 General Procedures and Information Description of the Parameters The different fields shown in the report are described below. General Information • (TNO_23MIL): the 23M of the module managed by the service center, entered by the installer; • (TNO_SERIE): the identification of the machine, entered by the installer; •...
- Page 198 General Procedures and Information • (T_DATE_CHG_NOIR): date of the last replacement of the print cartridge. Transmission Data • (TCAUSE_EMIS): reason for the remote readout transmission; • (TDATE_EMIS): date of the transmission of the remote readout. Reminders • Every machine is equipped with a copy counter, implemented in EEPROM memory on the CPU board.
-
Page 199: Gp 15 Storing User Parameters And Activity Counters On The Machine
General Procedures and Information GP 15 Storing User Parameters And Activity Counters On The Machine The condition of the printer consumable (print cartridge) is stored in EEPROM memory (on the CPU card) and can be read via the command 8 6. This evaluation, provided in percentage for- mat, indicates the remaining quantity of toner in relation to the consumable’s initial values. -
Page 200: Gp 16 Packing And Transporting The Machine
General Procedures and Information GP 16 Packing and Transporting the Machine If you need to transport the machine, always use the original package. If the machine is not prop- erly packed, the warranty may be cancelled. Also check that the machine new location meets the installation requirements, 1. -
Page 201: Gp 17 Administrator Functions
General Procedures and Information GP 17 Administrator Functions Each one of the administrator functions described here is accessible via a specific sequence of keys. The alphabetic keys are available via the navigation keys via the keyboard. For example, to enter a sequence * A (launching scanner calibration): 1. - Page 202 General Procedures and Information • Erase all documents stored in memory: • Erase the first job in the print queue: • Erase Printer Error: Then switch ON/OFF the machine. 6-54 04/08 Phaser 3100 MFP...
-
Page 203: Other Functions
General Procedures and Information Other Functions Some of the administrator functions allow you to display or print the machine counters. The table below details the counters available: The counter... lists the number of... Sent pages counter (3100MFP/X only) pages sent Received pages counter (3100MFP/X only) pages received Printed pages counter... - Page 204 General Procedures and Information Before you start, position the Soft-switch 1 bit n°8 to 1. CAUTION Undocumented functions are reserved. Do not try and use functions that are not documented in this section, this may lead to the permanent loss of data. •...
- Page 205 General Procedures and Information • Display modem software version: • Entering the serial number (with the SOS 1 bit 8 at 1): • Displaying the internal counters: • Displaying the GDI throughput: • Rebooting the machine manually (with the SOS 1 bit 8 at 1): •...
-
Page 206: Mechanical Components
General Procedures and Information GP 18 Component Layout Mechanical Components Figure 1 Table 1: Name Description Laser Unit Consists of the laser diode unit, cylindrical lens, f-theta lens, poly- gon mirror motor, and other laser optical components. Toner Cassette Consists of the OPC drum, toner, toner application roller, develop- ment roller, charge brush roller, cleaning blade, and other develop- ment components. - Page 207 General Procedures and Information Printing Printing Processes Around the Drum Figure 2 This machine uses a “write to black” system, using negative toner. Charge: The charge brush roller [A] gives the OPC drum [B] surface a negative charge. Exposure: A laser [C] writes a latent image on the drum. The charge in the area exposed by the laser beam drops.
- Page 208 General Procedures and Information Charge Figure 3 The OPC (Organic Photoconductor) drum [A] used in this machine is small in diameter. This al- lows a very compact design. A charge roller [B] charges the photoconductor. The charge roller has the advantage of not gen- erating ozone.
- Page 209 General Procedures and Information Figure 4 The voltage to the charge roller is supplied through the terminal [C] from the Power Supply Unit board. Phaser 3100 MFP 04/08 6-61...
- Page 210 General Procedures and Information Laser Exposure Overview Figure 1 Laser Unit Layout A: Laser Diode Unit B: Polygon Mirror Motor C: F-theta Lens D: First Mirror E: Second Mirror F: Laser Synchronization Detector G: Cylindrical Lens H: Synchronization Detector Lens J: Shutter This machine uses a laser diode to produce an electrostatic latent image on the OPC drum.
- Page 211 General Procedures and Information Block Diagram Figure 2 The Engine Board controls the laser diode power (APCSH) and transfers data for printing to the laser diode (VIDEO). As an electrical safety feature, there is an interlock switch on the Engine Board.
- Page 212 General Procedures and Information Development Overview [D] Figure 3 This machine uses mono-component toner, which is composed of resin and ferrite. The toner mix- ing bar [A] stirs and carries toner to the toner application roller [B]. The toner application roller sup- plies toner to the development roller [C].
- Page 213 General Procedures and Information Figure 4 The voltage to the development roller and the toner application roller is supplied through the ter- minals ([A] for the development roller and [B] for the toner application roller) from the Power Sup- ply Unit board. Toner End Detection This machine does not have toner end detection.
- Page 214 General Procedures and Information Transfer and Separation Overview Figure 5 This machine uses a transfer roller [A], which touches the OPC drum [B] surface. A constant cur- rent is applied to the transfer roller from the power supply unit board [C]. The positively-biased transfer roller pulls negatively-charged toner off the drum.
- Page 215 General Procedures and Information Drum Cleaning Figure 6 The cleaning blade and the used toner tank are contained in the print cartridge. The Discharge Lamp and A counter blade system is used for drum cleaning. The Discharge Lamp[C] discharge the drum surface. The cleaning blade [A] removes any toner remaining on the drum after the image is transferred to the paper.
- Page 216 General Procedures and Information Paper Feed and Registration Overview Figure 7 Paper Feed System: Feed roller [A] and Friction pad [B] Paper Lift Mechanism: Bottom plate with spring [C] Sheet feeder 1 sheet feeder [D] Tray Capacity: 250 sheets [E] Paper End Detection: Paper end sensor [F] Paper Size Detection:...
- Page 217 General Procedures and Information Paper Feed Drive Mechanism Figure 8 The feed roller [A] is located above the upper tray bottom plate [B], and the friction pad [C]. It al- lows only one sheet to feed from the paper tray. They are controlled by the paper feed clutch [D]. The registration sensor detects the leading edge of the paper and synchronizes paper feed with the activation of the laser diode to write the image on the OPC drum.
- Page 218 General Procedures and Information Paper Feed Operation Figure 9 A: Paper feed drive gear B: Paper feed clutch C: Paper feed roller D: Friction pad E: Paper feed sensor F: Registration sensor The paper feed drive gear [A] always rotates while the main motor rotates, since the paper feed clutch (magnet clutch) [B] is energized to turn the paper feed roller [C].
- Page 219 General Procedures and Information Registration Figure 10 The registration sensor [A] detects the leading edge of the paper and synchronizes paper feed with the writing of the image on the drum, so that the image and paper match up properly. This sensor also detects paper feed jams.
- Page 220 General Procedures and Information Tray Empty Sensor Figure 11 The laser unit [A] has the tray empty sensor [B] built into it. The tray empty sensor detects the presence or absence of paper. The sensor has an actuator that extends through a slot in the paper tray bottom plate [C], so that the sensor is actuated when paper is placed in the upper tray.
- Page 221 General Procedures and Information Fusing Overview Figure 1 After the image is transferred, the sheet enters the fusing unit. The image is fused to the sheet by applying heat and pressure through the use of a heat roller [A] and pressure roller [B]. The CPU monitors the heat roller temperature through a thermistor [C] that is in contact with the heat roller surface.
- Page 222 General Procedures and Information Figure 2 When the power saver timer expires, the machine automatically goes into energy saver mode. Power saver timer t1 =? minutes. • After time interval t1 passes following printing, copying, scanning, or key-in [A], the LCD and all LEDís go off.
- Page 223 General Procedures and Information Cover Interlock Switch When the front door is opened, the interlock switch will be opened and power supply to the follow- ing parts will be cut. • Power pack • Laser diode driver • Fan motor •...
- Page 224 General Procedures and Information Paper Feed Drive Release and Fusing Drive Release Figure 1 6-76 04/08 Phaser 3100 MFP...
- Page 225 General Procedures and Information The main motor drives the paper feed unit, the transfer roller, the toner cassette, and fusing unit through a series of gears as follows. Phaser 3100 MFP 04/08 6-77...
-
Page 226: Gp 19 Service Log
General Procedures and Information GP 19 Service Log Service Log Use the service log to record all service procedures. The service log is included at the end of the manual. 6-78 04/08 Phaser 3100 MFP... - Page 227 Wiring Data 7 Wiring Data WD1 Connector Information ..................... Phaser 3100 MFP 04/08...
- Page 228 Wiring Data This page is intentionally blank 04/08 Phaser 3100 MFP...
- Page 229 Wiring Data WD1 Connector Information Figure 1 Overview of the position of the connectors and sockets for the control panel PWB (bottom view): Table 1: List of connectors: Connector Topography Number of points Gender Position CPU Connection P4200 Female Elbow top contact P4002 Female Elbow, top contact...
- Page 230 Wiring Data Table 2: CPU - P4200: CPU connection STROB2 Out-of-register strobe to control the dis- play 5V power supply Table 3: LCD - P4002: LCD interface Signal Input/Output Utilization Ground LCD Contrast Selection of registers Read or Write (driver configured to write in LCD_E Enable Signal (active at 1) VCCLCD...
- Page 231 Wiring Data Figure 5 Overview of the CPU card connector positions (3100MFP/X) Figure 6 Overview of the CPU card connector positions (3100MFP/S) Phaser 3100 MFP 04/08...
- Page 232 Wiring Data Table 7: List of connectors: Connector Topography Number of points Position Printer Loudspeaker P1650 Front panel P4100 Female Straight, top con- tact ADF scanner motor P4303 Female Straight Flatbed scanner motor P4302 Female Straight P4380 Female Straight, top con- tact Phone line P4420...
- Page 233 Wiring Data Table 8: CNx: printer connectors Ground XMMENA MMCLK MMCW XMMLOCK MMGAIN FANEMA Fan in operation motor signal Ground FANLOCK Paper output clutch +24VS 24V power supply XFPCL Electric paper clutch signal Paper detection captors 1-4-7 Ground XFEED Paper feed signal captor 3-6-9 5V power supply XREGIST...
- Page 234 Wiring Data Table 8: CNx: printer connectors HTEN Fuser relay (Activated to H) Ground 5-1213 +24V 24V power supply 6-710- Ground 5V power supply CN12 Temperature captor FTEMP Fuser temperature detector Ground CN13 Opening of printer cover captor P24V 24V power supply P24VS 24V power supply CN15...
- Page 235 Wiring Data Table 10: Frontpanel - P4100: connection with the front panel card CLKPUCE Smart card clock CVCC Smart card power supply (3.3V) (control- led byr I/0 CVCC) FERCAP Detection of smart card Table 11: ADF scanner motor - P4303: connection with the ADF scanner motor Signal Input/Output Utilization...
- Page 236 Wiring Data Table 15: CIS - P4380: connection with the CIS Signal Input/Output Utilization VIDCIS CIS video CMD RESOL 300/600dpi resolution command VREFCIS CIS voltage reference VIDEOGND Ground CLKCIS CIS (synchro point) pixel clock ALIMCIS 3.3V power supply SPCIS Start Pulse CIS (line synchro) ALIMLED leds power supply (in voltage) GNDLEDB...
- Page 237 Wiring Data Table 16: USB - P4901: USB slave interface Signal Input/Output Utilization VBUS_USB Power supply provided by the master USBN Differential pair USBP Differential pair Ground Table 17: USB - P4950: USB master interface Signal Input/Output Utilization VBUS_USB_HO Power supply provided to the slave USBN Differential pair USBP...
- Page 238 Wiring Data This page is intentionally blank 7-12 04/08 Phaser 3100 MFP...
- Page 240 EHS 700 - Health & Safety Incident Report Form for Incidents Involving a Xerox Product For incidents in Canada: EH&S Office Use ONLY PIPEDA consent given EH&S Incident Reference Number: PIPEDA is the Canadian “Personal Information Protection and Electronic Documents Act.”...
- Page 241 *Preliminary actions taken to mitigate incident: Instructions: E-mail or fax both pages of this completed form to EH&S: • For incidents in Xerox Europe and Developing Markets East (Middle East, Africa, India, China, and Hong Kong) Submit to Elaine Grange e-mail: ehs-europe@xerox.com...
- Page 242 XEROX EUROPE PUBLICATION COMMENT SHEET Please copy this master sheet and use it to help us to improve this publication. We would like you to tell us about improvements to its accuracy, format and quality. Please give specific references, i.e.: page numbers and figure numbers and attach marked up photocopies wher- ever possible.
- Page 243 XEROX EUROPE...
Need help?
Do you have a question about the Phaser 3100MFP and is the answer not in the manual?
Questions and answers