
Related Manuals for LifeSpan SPRINTER XL


Summary of Contents for LifeSpan SPRINTER XL
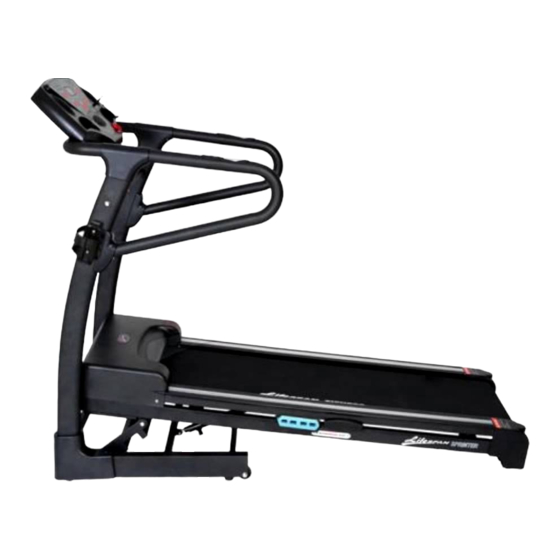
- Page 1 SPRINTER XL USER’S MANUAL Product may vary slightly from the item pictured due to model upgrades LIFESPAN SPRINTER Page0...
-
Page 2: Table Of Contents
HOW TO CHECK THE RUNNING MAT FOR PROPER ……………………………………………….. LUBRICATION ……………………………………………….. BELT ADJUSTMENT ……………………………………………….. BELT TRACKING ADJUSTMENT TROUBLESHOOTING ……………………………………………….. ……………………………………………….. TROUBLESHOOTING TABLE EXERCISE GUIDE ……………………………………………….. ……………………………………………….. WORKOUT GUIDELINES WARRANTY REGISTRATION ……………………………………………….. EXPLODED DIAGRAM ……………………………………………….. PARTS LIST ……………………………………………….. LIFESPAN SPRINTER Page1... -
Page 3: Important Safety Instructions
Never drop or insert any object into any openings. The treadmill is intended for in-home use only and not suitable for long time running. To disconnect, turn all controls to the off position, remove the safety key, and then remove the plug from the outlet. LIFESPAN SPRINTER Page2... -
Page 4: Important Electrical Information
Be sure to read the entire manual before operating your machine. Understand that changes in speed and incline do not occur immediately. Set your desired speed on the computer console and release the adjustment key. The computer will obey the command gradually. LIFESPAN SPRINTER Page3... -
Page 5: Key Components Of The Treadmill
Do not use excessive pressure on console control keys. They are precision set to function properly with little finger pressure. 1.3KEYCOMPONANTSOFTREADMIL Display Safety Key Hand Pulse Hand Rails Motor Cover Running Mat Deck- Underneath the running mat Transportation Wheels Belt Adjustment LIFESPAN SPRINTER Page4... -
Page 6: Assembly Instructions
2 ASSEMBLY INSTRUCTIONS HARDWARE BAG CONTAINING: Parts# Description Remarks Qty. Bottom parts Left handle Right handle Computer assembly Horizontal support Vertical support TOOLS REQUIRED: Description Remarks Qty. Cross ringent wrench S13、S14、S15 Inner six-angle wrench LIFESPAN SPRINTER Page5... - Page 7 3. connect the link line in the handle bar to the link line in the computer tube, insert the computer tube into the L&R handle, tighten the computer on the L&R handle with the screw(M6*12,No.34), D6 spring washer(9). LIFESPAN SPRINTER Page6...
-
Page 8: Display Panel Operations
WE RECOMMEND YOU HAVE SOMEONE TO ASSIST YOU IN LIFTING AND ASSEMBLING YOUR LIFESPAN TREADMILL. FOLLOW THESE INSTRUCTIONS CAREFULLY AND IT WILL MAKE IT EASIER TO ASSEMBLE YOUR LIFESPAN TREADMILL Ensure all fixings are tightly secured and the treadmill is well constructed. -
Page 9: Basic Characters
When the treadmill is not in use, you should remove the safety key. Store the safety key in a safe place OUT OF REACH OF CHILDREN. LIFESPAN SPRINTER Page8... -
Page 10: Console Display Status
When it reached zero, it will turn to RUNNING status and will run at the default speed. In RUNNING status, press START will not work. During the 3 seconds counting down, you can press any button to cancel startup and turn to STOP status. LIFESPAN SPRINTER Page9... -
Page 11: Getting Started
Ensure that the safety key is installed, as the treadmill will not power on without it. When the power is turned on, all the lights on the display will light for a short time. LIFESPAN SPRINTER Page10... -
Page 12: Pulse Grip Feature
The default time for each program is 30 minutes. You may choose to change the program time from the default period of 30 minutes. This is done by simply using the speed up and speed down keys. Each program has 16 intervals with each LIFESPAN SPRINTER Page11... -
Page 13: Preset Program
Press PROGRAM to change through P1 to P12 and MANUAL PROGRAM. 3.11 Preset Programs TIME INTERVALS PROGRAM SPEED INCLINE SPEED INCLINE SPEED INCLINE SPEED INCLINE SPEED INCLINE SPEED INCLINE SPEED INCLINE SPEED INCLINE SPEED INCLINE SPEED INCLINE SPEED INCLINE SPEED INCLINE LIFESPAN SPRINTER Page12... -
Page 14: Program Graphs
3.12 Program Graphs SP E E D IN C LIN E Intervals SP E E D IN C LIN E Intervals SP E E D IN C LIN E Intervals SP E E D IN C LIN E Intervals LIFESPAN SPRINTER Page13... - Page 15 SP E E D IN C LIN E Intervals SP E E D IN C LIN E Intervals SP E E D IN C LIN E Intervals SP E E D IN C LIN E Intervals LIFESPAN SPRINTER Page14...
- Page 16 SP E E D IN C LIN E Intervals SP E E D IN C LIN E Intervals SP E E D IN C LIN E Intervals SP E E D IN C LIN E Intervals LIFESPAN SPRINTER Page15...
-
Page 17: Maintenance
Pay particular attention to the fixing knobs and make sure they are tight. • Always replace the mat if worn and any other defective parts. • If in doubt do not use the treadmill and contact our helpline. LIFESPAN SPRINTER Page16... -
Page 18: Belt/Deck/Roller Lubrication
2. Fold the treadmill up into the storage posit ion. 3. Feel the back surface of the running mat. If the surface is slick when touched, then no further lubrication is nee ded. the surface is dry to the touch, apply a suitable silicone lubricant. LIFESPAN SPRINTER Page17... -
Page 19: Belt Adjustment
We recommend you use a silicone based spray to lubricate your Lifespan Treadmill. This Can be purchased from your local sports Retailer or a local hardware store. 4.5 Belt Adjustment Belt Tension Adjustment -It is very important for joggers and runners in order to provide a smooth, steady running surface. -
Page 20: Belt Tracking Adjustment
1 minute then turning the power button back on. If, after you have reset the treadmill, it is still not running correctly, please run the self- checking analyse to distinguish what type of error problem the machine is encountering. 5.1 Troubleshooting Table LIFESPAN SPRINTER Page19... -
Page 21: Exercise Guide
2. Check power outlet (Plug something else into the power outlet to ensure that the power outlet is working correctly). 3. Check Power Cable (You may need to take it to an electrician). 6 EXERCISE GUIDE LIFESPAN SPRINTER Page20... -
Page 22: Workout Guidelines
It will pump a lot fewer times per minute, reducing the wear and tear of your heart. So as you can see, the fitter you are, the healthier and greater you will feel. 6.1 Workout Guidelines TARGET ZONE LIFESPAN SPRINTER Page21... -
Page 23: Warranty Registration
Finish each workout with a light jog or walk for at least 1 minute. Then complete 5 to 10 minutes of stretching to cool down. This will increase the flexibility of your muscles and will help prevent post-exercise problems. 7 WARRANTY REGISTRATION LIFESPAN SPRINTER Page22... - Page 24 Please visit the following link to complete the product warranty form online. Please visit http://www. warrantyform.lifespanfitness.com.au PLEASE NOTE: YOUR WARRANTY IS ONLY VALID IF YOU CAN PROVE YOU ARE THE ORIGINAL PURCHASER ON THIS ITEM (i.e. A copy of the receipt, invoice, delivery date or internet confirmation). LIFESPAN SPRINTER Page23...
-
Page 25: Exploded Diagram
8 EXPLODED DIAGRAM LIFESPAN SPRINTER Page0... -
Page 26: Parts List
Six-angle bolt headφ<16 Pin sleeve See diagram M6*45 teeth 8.8 φ8.2 X bolt Pin washer grade φ0.8 X15 M6*60 teeth S6 out16*out14 Inner six-angle Steel bushing (45# iron) 8.8 out*φ10.1*12 pan-headed bolt grade Air pressure sping bolt M5*12 LIFESPAN SPRINTER Page0... - Page 27 Rubber wheel φ53*φ8*20 30ml Link line 2 1200mm Wax tube Length 200mm Round cap See diagram Link line3 700mm washer See diagram Inner six-angle filter 63x51x38 wrench Cross-head wrench S13、S14、S15 reactance See diagram Power switch KCD4 black LIFESPAN SPRINTER Page1...
- Page 28 LIFESPAN SPRINTER Page1...
Need help?
Do you have a question about the SPRINTER XL and is the answer not in the manual?
Questions and answers