Advertisement
Quick Links
Advertisement

Related Manuals for LifeSpan TR2500-HRC


Summary of Contents for LifeSpan TR2500-HRC
- Page 1 Owners Manual Version 1.1...
- Page 2 Maintenance and Cleaning ....18 Congratulations on the purchase of your new LifeSpan treadmill. To help ensure the enjoyable and trouble-free operation of your new treadmill, we strongly suggest you...
- Page 3 The LifeSpan product line is designed specifically for people who want to make exercise a part of their lifestyles. Your treadmill includes the features you want to make your exercise routine enjoyable and effective.
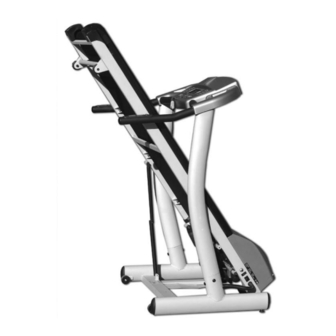
- Page 4 1. Safety Key Console Grip Pulse . Running Belt . Hood . Side Rail On/Off Switch 8. Power Cord Outlet Transport Wheels Dimensions 79" L * 34.5" W * 50" H Dimensions Folded 46" L * 34.5" W * 60" H Weight 215 Pounds Construction...
- Page 5 Free labor is included for the first year. If within the time frames specified above, any part of the LifeSpan fails to operate properly contact your authorized LifeSpan retailer to report the problem. All labor shall be supplied by the authorized retailer that sold your product and the product must be located within that retailer’s service area.
-
Page 6: Grounding Instructions
When using electrical equipment, basic precautions should always be followed, including: • Never drop or insert any object into any opening. • Never operate this treadmill if it has been damaged, if it is not working properly or if it has been exposed to water. - Page 7 Steady state training keep the workload constant. The manual program on your LifeSpan treadmill allows you to manually control the speed and incline of your treadmill providing a constant workout completely controlled by the user.
-
Page 8: Target Heart Rate Chart
The three components of a successful cardiovascular exercise program are: • Frequency • Intensity • Time In terms of frequency, you should try and exercise at least three times per week and no more than five times per week. Preferably you should try to exercise every other day to give your body a days rest in-between workouts. - Page 9 Since your treadmill is a heavy piece of equipment, we recommend that after taking off the top portion of the box, you slit the corners of the lower carton and fold down the sides. This will eliminate the need for you to pick up the treadmill over the sides of the box. We also recommend that you use 2 people to assemble your treadmill, as some of the parts need to be held in place while the electrical connectors are pushed together.
- Page 10 Step 1: Left Handle Support Post Insert left handle support (C) into base frame (B). 2. Tighten with 3-sets of curved washers (O) and screws (N). Step 2: Right Handle Support Post Connect wire cable-lower (M) and wire cable-middle (L). 2.
- Page 11 Step 3: Right Side Handlebar Connect wire cable-middle (L) and wire cable-upper (K). 2. Insert handle rail (F) into handlebar (E). 3. Push connectors into right handle support tube and be careful not to pinch the wires. 4. Attach completed handlebar console & handle rail on right handle support (D) 5.
- Page 12 Step 5: Right Side Water Bottle Holder Attach right rack on handlebar. 2. Tighten with screws (J) from bottom of rack. 3. Attach the connected bracket (P) on the bottom of console and rack. Tighten with screws (Q). ‹ Ú Step 6: Left Side Water Bottle Holder Attach left rack on handlebar.
- Page 13 Your LifeSpan treadmill includes a standard American ground plug. Do not alter this plug in any- way and do not by pass the ground with an adapter. Plug your treadmill into a 115 VAC/10 amp grounded electrical outlet with 115 volts measured at the treadmill.
- Page 14 Preset Program – The TR2500-HRC comes with 5 preset programs that control the belt speed of the treadmill throughout the workout. Once you select the workout time, the treadmill automatically divides the workout into 30 different segments that are represented by columns on the workout matrix.
-
Page 15: Quick Start
Be certain that your treadmill is completely unfolded and sits stable on the floor. It is also recommended that you locate your treadmill in a pleasant area that gives you something to look at while your working out, such as a window or television. Maintaining an exercise program with a treadmill located in a poorly lit basement room is more difficult than when your treadmill is located in an active and pleasant location. - Page 16 5. Display Readouts - The Display Console shows the following information on the readouts – distance, time, calories, 1⁄4 Mile Lap count, incline level, Heart Rate and Speed in Miles Per Hour. 6. Heart Rate - When you put both hands on the Grip Pulse hand grips, the "Calories" display will automatically shift to the "Heart Rate"...
- Page 17 Target Heart Rate Program Setup Select Program: Press the “Program” button until you come to HRC and then press the “Mode” button to select the program. 2. Set Time: Now chose how long you would like to workout by pressing the buttons.
- Page 18 The treadmill comes with a folding feature that reduces the amount of storage space required when your treadmill is not in use and makes the treadmill easier to move. Folding the Treadmill Make sure that the On/Off switch is turned Off and the power cord is removed from the wall. Make sure that nothing is on or near your treadmill which might spill, be knocked over or prevent the treadmill from completely folding.
-
Page 19: General Cleaning
roblem, these troubleshooting steps may help you find the cause. Problem: The console lights do not light up. Solution: Check to make sure that the treadmill is properly plugged-in, the On/Off switch is turned to the "On" position, and Safety Key is attached. Problem: The belt does not stay in the center of the treadmill when in use. - Page 20 Before proceeding, ensure that the treadmill power is off and that it is unplugged from the electrical outlet. 2. To remove dust, use a small vacuum nozzle to carefully vacuum around all visible components. 3. To remove film or dirt use a slightly damp rag with a mild cleaning agent sprayed onto the rag only.
- Page 21 Adjusting Belt Tension Adjust belt tension only if it begins to slip on the rollers during use. This is important, as overtensioning decreases longevity of the treadmill’s components. Press "START" to begin running belt, then increase the treadmill`s speed to 3 MPH. 2.
- Page 22 435-940-1180 www.pcefitness.com P.O. Box 981316 Park City, Utah 84098-1316...
Need help?
Do you have a question about the TR2500-HRC and is the answer not in the manual?
Questions and answers