
Related Manuals for LifeSpan MyTread TR100


Summary of Contents for LifeSpan MyTread TR100
-
Page 1: Owners Manual
MyTread Owners Manual For safe use and product knowledge, please completely read this Product OWNERS MANUAL. - Page 3 In this manual we have included exercise information that is specific to each of these 4 key motivations for exercise. We also invite you to the LifeSpan Fitness website at www.LifeSpanfitness.com where we include additional information and tools to help you maintain your exercise program and achieve your health and fitness goals.
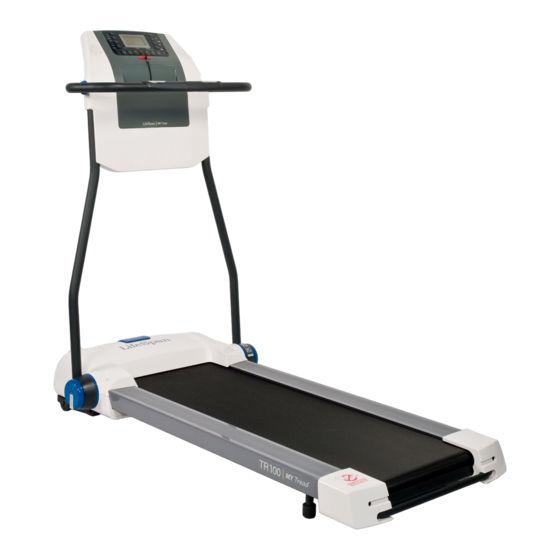
- Page 5 Console Overview Treadmill Operations Moving and Storage Maintenance and Troubleshooting 34 TR100 / TR200 MyTread...
- Page 6 TR100 and TR200 Folding Treadmills Treadmill Motor: and complete the form to request assistance. click on Register Products, or ll out the warranty card received by received...
- Page 7 Do not operate with the side rails removed. Keep the treadmill on a solid surface, with the side rails and front a minimum of two feet from any walls or furniture. Make sure that the area behind the treadmill remains completely clear during use.
- Page 8 Treadmill American College of Sports Medicine (ACSM) and the American Heart Association (AHA) are proud to serve as a resource to help people understand the new guidlines and ultimately live healthier, more active and higher quality lives.
- Page 9 TR100 / TR200 MyTread...
- Page 11 TR100 / TR200 MyTread .com...
- Page 13 TR100 / TR200 MyTread...
- Page 15 TR100 / TR200 MyTread...
- Page 17 TR100 / TR200 MyTread...
- Page 19 TR100 / TR200 MyTread...
- Page 20 model treadmills come completely assembled in the box and are ready to operate in just minutes. Step 1: Remove from Packaging Step 2: Stand up the Console A. Rotate the blue round cap on each side at the bottom of the post ½...
- Page 21 Repeat on the opposite side. Caution: Injury to the user could occur if lever is not pushed into the locked position and cap is not securely tightened. This could result in handlebar and console support falling onto the treadmill platform. TR100 / TR200 MyTread...
- Page 22 Step 3: Lock the Handlebar in Place A. Rotate the handlebar down until it stops. FRONT VIEW B. On the back side of the console lock the handlebar in place by turning the handle to the locked position. LOCK UNLOCK REAR VIEW...
- Page 23 Tighten each lock nut. Adaquate Space Make sure you have room to lay the treadmill down. There needs to be at least 2 feet of clearance on both sides and in the front of the treadmill. There should be at least 4 feet of clearance on the back side of the treadmill for safety reasons.
-
Page 24: Display Console
Display Console TR100 TR200 Start / Stop: incline or speed as you exercise. When your workout is completed, the console will reset after 30 seconds. Press the reset button to exit your exercise program or restart program set up. Mode: MODE... -
Page 25: Display Screen
Lubrication: This icon turns on when it is time to apply silicone lubricant to the running belt Maintenance: This icon turns on when it’s time to clean and check all hardware on the treadmill For more information on Lubrication and Maintenance please see page 34. - Page 26 Audio Jack Contact Sensors TR100 and TR200 Note: Volume is controlled by your mp3 or other audio device. There are no volume controls on the console.
- Page 27 TR100 / TR200 MyTread...
- Page 28 The preset programs default to 24 minute workout time but you can adjust these times during program set up. You can also select from 3 di erent intensity levels during the program set up. The TR100 comes with 5 programs that control the speed of the walking belt during your program to vary the e ort required during your workout.
- Page 29 P1: Rolling Hills - Speed 1.2 1.2 1.8 2.5 1.8 1.2 1.8 2.5 1.8 1.2 1.8 1.2 1.8 1.8 2.5 3.1 2.5 1.8 2.5 3.1 2.5 1.8 2.5 1.8 2.5 2.5 3.1 3.7 3.1 2.5 3.1 3.7 3.1 2.5 3.1 2.5 P2: Uphill Walk - Speed 1.2 1.8 2.5 3.1 3.7 4.3 4.3 5.0 5.0 3.7 2.5 1.2 1.8 2.5 3.1 3.7 4.3 5.0 5.0 5.6 5.6 4.3 3.1 1.8...
- Page 30 Constant Heart Rate Control: The “Constant” program lets you select a single heart rate that you want to maintain throughout your workout and the treadmill will maintain this heart rate for you by adjust- ing the speed and the incline. There is a 3 minute warm up before the actual program starts.
- Page 31 6. Press the Mode button and use the Speed Up/ Down buttons to set the Max. Incline. 7. Press the Start button, the treadmill will run through a 3 minute warm up at 2 MPH and incline to level 5. After the 3 minute warm up the treadmill will start to change speed and incline to get your heart rate to your Target Heart Rate.
- Page 32 B. Release the Quick Release lever on the same round cap. Repeat on the opposite side. C. Fold the handlebar and console support down until it rests on the treadmill platform. Upright Storage B. Lift the Handlebar upwards as shown below. C. Turn the Locking Handle counterclockwise to the LOCK position.
- Page 33 Note: The treadmill is equipped with transport wheels located in front. To move, lift up on the back end of the frame. Relocate the treadmill by rolling the treadmill on these wheels. E. Turn the blue round cap clockwise to tighten and secure the joint.
- Page 34 Belt Lubrication Use only 100% Silicone and avoid using aerosol silicone sprays which include additives and petroleum distillates. One ounce of Silicone should be used for each application. LifeSpan o ers 100% silicone lubricant that can be ordered at www.lifespan tness.com.
-
Page 35: Troubleshooting
The belt does not stay in the center of the treadmill when in use. Solution: First check to make sure that the treadmill is level, then refer to the instructions in this manual on how to tension and adjust the belt. - Page 36 Engineering Mode (TR100) Press Reset + Speed Down button simultaneously and hold till display changes and shows Year and date. Pressing Start shows the software version. (TR200) Press Reset + Speed Up button simultaneously and hold till display changes and shows Year and date. Pressing Start shows the software version.
- Page 37 Belt Tensioning If the belt begins to slip during use, it will need to be tensioned. Your treadmill is equipped with tension bolts that are accessible from the back of the treadmill. Before tensioning the belt, start the treadmill and set the speed to 3 MPH. Using a 6 mm Allen Wrench, included in your hardware bag, turn the right and left tension bolts 1/2 turn, alternating back and forth until the belt slipping stops.
- Page 39 TR100 / TR200 MyTread...
- Page 40 TR100 / TR200 Folding Treadmill TREADMILL MODEL NUMBER Version 1.1 SERIAL NUMBER : MADE IN TAIWAN - TR100 / TR200...
Need help?
Do you have a question about the MyTread TR100 and is the answer not in the manual?
Questions and answers
The bar I hold onto keeps folding down. How do I tighten it.
To tighten the handlebar on the LifeSpan MyTread TR100 treadmill:
1. Press in the Quick Release lever on the round cap.
2. Turn the blue round cap clockwise to lock the handlebar and secure the joint.
3. Repeat on the opposite side.
This answer is automatically generated