Table of Contents
Advertisement
Quick Links
MODEL W1676
COMBINATION SANDER
INSTRUCTION MANUAL
Phone: 1-360-734-3482 • On-Line Technical Support: tech-support@woodstockint.com
COPYRIGHT © 2001 BY WOODSTOCK INTERNATIONAL, INC.
WARNING: NO PORTION OF THIS MANUAL MAY BE REPRODUCED IN ANY SHAPE OR FORM WITHOUT
THE WRITTEN APPROVAL OF WOODSTOCK INTERNATIONAL, INC.
Printed in Taiwan
Advertisement
Table of Contents

Related Manuals for Shop fox W1676


Summary of Contents for Shop fox W1676
- Page 1 MODEL W1676 COMBINATION SANDER INSTRUCTION MANUAL Phone: 1-360-734-3482 • On-Line Technical Support: tech-support@woodstockint.com COPYRIGHT © 2001 BY WOODSTOCK INTERNATIONAL, INC. WARNING: NO PORTION OF THIS MANUAL MAY BE REPRODUCED IN ANY SHAPE OR FORM WITHOUT THE WRITTEN APPROVAL OF WOODSTOCK INTERNATIONAL, INC.
- Page 2 WARNING Some dust created by power sanding, sawing, grind- ing, drilling, and other construction activities con- tains chemicals known to the State of California to cause cancer, birth defects or other reproductive harm. Some examples of these chemicals are: • Lead from lead-based paints. •...
-
Page 3: Table Of Contents
Table Of Contents PAGE 1. INTRODUCTION ..................2 ABOUT YOUR NEW SANDER..............2 WOODSTOCK SERVICE AND SUPPORT............2 WARRANTY AND RETURNS ..............3 MACHINE SPECIFICATIONS ..............3 2. SAFETY ....................4 SAFETY FIRST................4-5 SANDER SAFETY................6 110V ELECTRICAL REQUIREMENTS ............7 220V ELECTRICAL REQUIREMENTS ............8 AVOIDING POTENTIAL INJURIES ............9 3. -
Page 4: Introduction
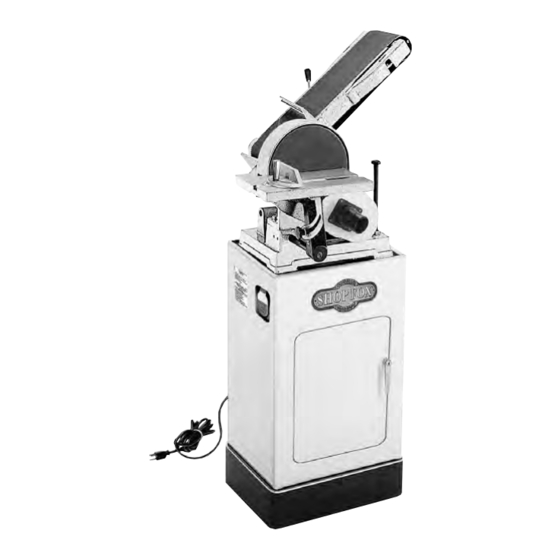
Close attention to detail, ruggedly built parts and a rigid quality control program assure safe and reliable operation. The Model W1676 is capable of a wide variety of sanding operations. The 6" wide belt can quickly sand large surfaces flat and the 10" sanding disc and adjustable table can sand many different angles. The combination sander comes with a cabinet-style stand, miter gauge, 1 H.P. -
Page 5: Warranty And Returns
Woodstock International, Inc. ® Woodstock International, Inc. will repair or replace, at its expense and at its option, the SHOP FOX machine or machine part which in normal use has proven to be defective, provided that the original ®... -
Page 6: Safety
SAFETY FIRST! READ MANUAL BEFORE OPERATING MACHINE. FAILURE TO FOLLOW INSTRUCTIONS BELOW WILL RESULT IN PERSONAL INJURY. Indicates an imminently hazardous situation which, if not avoided, WILL result in death or serious injury. Indicates a potentially hazardous situation which, if not avoided, COULD result in death or serious injury. - Page 7 12. Do not force tool. The machine will do a safer and better job at the rate for which it was designed. 13. Use correct tool. Do not force machine or attachment to do a job for which it was not designed. 14.
-
Page 8: Sander Safety
Additional Safety Instructions For Sanders 1. Be aware of belt or disc rotation when sanding. Always brace workpiece against the rotation of the sanding belt. Always sand on the side of the disc that is rotating downward, towards the work table. 2. -
Page 9: 110V Electrical Requirements
Figure 1. Never remove grounding pin. Grounding This machine must be grounded! See Figure 1A. The electrical cord supplied with the W1676 comes with a grounding pin. Do not remove it. If your outlet does not accommodate a ground pin, have it replaced by a qualified electrician or have an appropriate adapter installed. -
Page 10: 220V Electrical Requirements
This machine must be grounded! See Figure 2. The electrical cord supplied with the W1676 does not come with a 220 volt plug. Use a plug with a ground pin. If your outlet does not... -
Page 11: Avoiding Potential Injuries
AVOIDING POTENTIAL INJURIES Figure 3. Never place fingers close to moving disk. Figure 4. Never use the right side of disk. Upward rotation of disk can propel workpiece into the air. Figure 5. Always unplug sander when adjusting. Figure 6. Never place hands near back stop. On small workpieces always use push blocks. -
Page 12: Assembly Instructions
ASSEMBLY INSTRUCTIONS Unpacking Read the manual before The Model W1676 has been carefully packaged assembly and operation. for safe transporting. If you notice the machine Become familiar with has been damaged or is missing any parts, the machine and its... - Page 13 The following is a description of the components ® shipped with the Shop Fox W1676. It is recom- mended that the components be laid out in a sim- ilar fashion to those in Figures 7 and 8. This will help in identification before beginning assembly.
-
Page 14: Clean Up
Clean Up Do not use gasoline or The exposed, unpainted surfaces of the machine other petroleum-based have been coated with an oil to prevent rust solvents. They have low during shipment. This oil needs to be removed flash points which make before operation. -
Page 15: General
General Disconnect power to the ® While the main components of the Shop Fox machine when perform- W1676 are assembled at the factory, some ing any maintenance, assembly is required. The following is the rec- assembly adjust- ommended sequence best suited for final ments. -
Page 16: Sanding Unit To Base
Sanding Unit To Base The Model W1676 comes with a prefabricated welded steel stand that requires no assembly. However, the sanding unit needs to be mounted to the stand. The W1676 represents a heavy load pounds. Seek assistance before beginning assem- bly. -
Page 17: Back Stop
Figure 13. Fasten the disc dust port using (4) ® Phillips head screws and nuts as shown in Figure 14. Always wear a dust mask when operating W1676. Using this machine produces saw- dust which may cause allergic reactions or res- piratory problems. Figure 13. Installing dust port. -
Page 18: Working Table
Working Table The working table has two mounting locations: next to the sanding disc and next to the verti- cally positioned belt sander. We recommend ini- tially mounting the working table next to the disc. If you want to mount it next to the verti- cally positioned belt sander, skip to the “Vertical Positioning”... -
Page 19: Adjustments
ADJUSTMENTS General Disconnect power to the machine when perform- The Model W1676 is capable of a wide variety of ing any maintenance, sanding operations. The sanding belt can be assembly adjust- positioned in a variety of angles ranging from 0- ments. -
Page 20: Belt Tracking/Tension
Belt Tracking/Tension NOTICE It is best to adjust the tracking of the sanding belt before making any tension adjustments. If you have trouble maintaining proper track- ing after several attempts, you may need to adjust the belt tension. Improper tension can often times be the cause of tracking problems. -
Page 21: Idler Guard
Belt Tracking/Tension Continued Gauging proper belt tension is very subjective. The easiest way to check the tension is to pluck the edge of the sanding belt. If it sounds like a drum, the tension is probably too tight. To adjust the tension: 1. -
Page 22: Vertical Positioning
Vertical Positioning The belt sander arm can be moved to a vertical arrangement. 1. Remove the belt dust port. 2. Loosen the two nuts located on the bracket behind the pulley cover as shown in Figure 23. We recommend using a 12mm open-end wrench for clearance purposes. -
Page 23: Changing Disc Abrasive
Changing Abrasive Disc To replace abrasive sanding disc: 1. Remove the working table assembly. 2. Remove the knob holding the pulley cover door shut and open the door as shown in Figure 26. 3. Remove the worn sanding disc and the new sanding disc. -
Page 24: Table Tilt
Table Tilt To adjust the working table angle: 1. Set the working table angle to the 90° mark on the scale. 2. Using a 90° square, adjust the working table so it is perpendicular to the sanding disc as shown in Figure 29. 3. -
Page 25: Operations
Do not make personal injury. any adjustments to the machine while it is plugged in. Always wear a dust mask when operating the W1676. Using this machine produces saw- dust which may cause allergic reactions respiratory problems. -
Page 26: Horizontal Sanding
Horizontal Sanding 1. Turn the power on and allow the sander to reach full speed. 2. Place the workpiece against the surface of the sanding belt. Make sure you have both hands securely on the workpiece and keep fingers and hands away from sanding surface as shown in Figure 32. -
Page 27: Disc Sanding
Disc Sanding The disc is best used for sanding end grain and convex curves. 1. Set the working table to the desired angle. 2. Always use the left half of the disc. (The half that is rotating downward.) 3. Set the miter gauge at 90° to keep the work- piece perpendicular to the sanding disc as shown in Figure 35. -
Page 28: Maintenance
MAINTENANCE General Disconnect power to the Regular periodic maintenance on your Model machine when perform- W1676 will ensure its optimum performance. ing any maintenance, Make a habit of inspecting your sander each time assembly adjust- you use it. Check for the following conditions ments. -
Page 29: Closure
CLOSURE The following pages contain parts diagrams/lists We recommend you keep this manual for com- ® and a warranty card for your Shop Fox Model plete information regarding Woodstock W1676. International, Inc.’s warranty and return policy. Should a problem arise, we recommend that you If you need parts or help in assembling your keep your proof of purchase with your manual. -
Page 30: Wiring Diagram
W1676 Combination Sander 110 VOLT Disconnect power from machine before performing any electrical MOTOR WIRES service. Failure to do this will result in a shock hazard leading BLACK YELLOW to injury or death. WHITE NOTE: THE WIRES FROM THE POWER SUPPLY, BESIDES THE... - Page 33 110B 104A 110B 110A 110C...
- Page 34 part # description part # description X1676001 DUST COVER X1676057 SUPPORT ⁄ ''-11 x 9'' XPR03M SNAP RING 12MM X1676058 RUBBER FOOT 02A XPR05M SNAP RING 15MM X1676059 IDLER ROLLER SHAFT XP6201-2RS BALL BEARING 6201-2RS 62A X1676062B ROLLER ADJ BAR 03A XP6002-2RS BALL BEARING 6002-2RS X1676064 IDLER ROLLER...
- Page 35 Notes -33-...
- Page 36 Notes -34-...
- Page 37 City ____________________________________________________________________State________Zip_________ Phone Number_______________________E-Mail_________________________________FAX___________________ MODEL #W1676 Combination Sander The following information is given on a voluntary basis and is strictly confidential. Where did you purchase your Shop Fox ® machine? What stationary woodworking tools do you own? Check all that apply.
- Page 38 FOLD ALONG DOTTED LINE Place Stamp Here WOODSTOCK INTERNATIONAL, INC. P.O. BOX 2309 BELLINGHAM, WA 98227-2309 FOLD ALONG DOTTED LINE TAPE ALONG EDGES--PLEASE DO NOT STAPLE...
Need help?
Do you have a question about the W1676 and is the answer not in the manual?
Questions and answers