Table of Contents
Advertisement
Quick Links
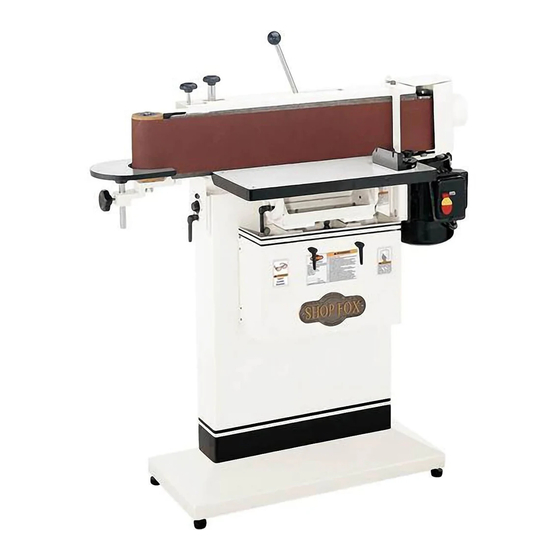
MODEL W1688
EDGE SANDER
INSTRUCTION MANUAL
Phone: 1-360-734-3482 • On-Line Technical Support: tech-support@shopfox.biz
COPYRIGHT © NOVEMBER, 2002 BY WOODSTOCK INTERNATIONAL, INC.
WARNING: NO PORTION OF THIS MANUAL MAY BE REPRODUCED IN ANY SHAPE OR FORM WITHOUT
THE WRITTEN APPROVAL OF WOODSTOCK INTERNATIONAL, INC.
Printed in Taiwan
Advertisement
Table of Contents

Subscribe to Our Youtube Channel
Related Manuals for Shop fox SHOP FOX W1688


Summary of Contents for Shop fox SHOP FOX W1688
- Page 1 EDGE SANDER INSTRUCTION MANUAL Phone: 1-360-734-3482 • On-Line Technical Support: tech-support@shopfox.biz COPYRIGHT © NOVEMBER, 2002 BY WOODSTOCK INTERNATIONAL, INC. WARNING: NO PORTION OF THIS MANUAL MAY BE REPRODUCED IN ANY SHAPE OR FORM WITHOUT THE WRITTEN APPROVAL OF WOODSTOCK INTERNATIONAL, INC.
- Page 2 WARNING Some dust created by power sanding, sawing, grind- ing, drilling, and other construction activities con- tains chemicals known to the State of California to cause cancer, birth defects or other reproductive harm. Some examples of these chemicals are: • Lead from lead-based paints. •...
-
Page 3: Table Of Contents
TABLE OF CONTENTS PAGE INTRODUCTION ..................2 About Your New Edge Sander ..............2 Woodstock Service and Support..............2 Warranty and Returns ................3 Specifications ................3 SAFETY ....................4 Standard Safety Instructions ..............4-5 Additional Safety Instructions for Edge Sanders ..........6 Avoiding Potential Injuries ................7 ELECTRICAL REQUIREMENTS ..............8 220V Operation ..................8... -
Page 4: Introduction
Woodstock International, Inc. is committed to customer satisfaction in providing this manual. It is our intent to make sure all the information necessary for safety, ease of assembly, practical use and dura- bility of this product be included. -
Page 5: Warranty And Returns
SHOP FOX the provisions of any law or acts. In no event shall Woodstock International, Inc.'s liability under this war- ranty exceed the purchase price paid for the product, and any legal actions brought against Woodstock International, Inc. shall be tried in the State of Washington, County of Whatcom. We shall in no event be liable for death, injuries to persons or property or for incidental, contingent, special or consequen- tial damages arising from the use of our products. -
Page 6: Safety
SAFETY READ MANUAL BEFORE OPERATING MACHINE. FAILURE TO FOLLOW INSTRUCTIONS BELOW WILL RESULT IN PERSONAL INJURY. Indicates an imminently hazardous situation which, if not avoided, WILL result in death or serious injury. Indicates a potentially hazardous situation which, if not avoided, COULD result in death or serious injury. - Page 7 12. Do not force tool. The machine will do a safer and better job at the rate for which it was designed. 13. Use correct tool. Do not force machine or attachment to do a job for which it was not designed. 14.
-
Page 8: Additional Safety Instructions For Edge Sanders
Do not risk your injury, damage to equipment and/or poor COPYRIGHT © SEPTEMBER, 2002 BY WOODSTOCK INTERNATIONAL, INC. WARNING: NO PORTION OF THIS MANUAL MAY BE REPRODUCED IN ANY SHAPE OR FORM WITHOUT THE WRITTEN APPROVAL OF WOODSTOCK INTERNATIONAL, INC. -
Page 9: Avoiding Potential Injuries
Avoiding Potential Injuries Back Stop Back Stop Figure 1. DO NOT hold wood away from the back Figure 2. ALWAYS use the back stop, and keep stop, and keep your fingers away from the belt. your fingers away from the belt. Figure 3. -
Page 10: Electrical Requirements
ELECTRICAL REQUIREMENTS Grounding 220V Operation ® W1688 is prewired for 220V SHOP FOX operation. You will need a NEMA-style 6-15 plug and receptacle as shown in Figure 7. The motor Any electrical outlet and cir- supplied with your new machine is rated at 1 ⁄... -
Page 11: 110V Operation
110V Operation Grounding ® W1688 can also be operated at SHOP FOX 110 volts (refer to the wiring diagram on Page 38. You will need a NEMA-style 5-20 plug and Any electrical outlet and cir- receptacle as shown in Figure 8. The motor is cuit that you plug your rated at 1 ⁄... - Page 12 This Page Intentionally Left Blank -10-...
-
Page 13: Assembly Instructions
⁄ "-18 X 1" missing any parts, please contact 6. Flat Washer ( ⁄ " Woodstock International Service and 7. Miter Gauge Support at 1-360-734-3482 or send e-mail 8. Miter Lock Knob to: tech-support@shopfox.biz. 9. Back Stop 10. Cap Screw ( ⁄... -
Page 14: Shop Preparation
Shop Preparation Cleaning The Model W1688 table and other unpainted parts are coated with a waxy grease for corro- sion protection. For the best machine perform- Make sure all shop entrances ance, clean all moving parts and coated sur- are locked and machines are faces. -
Page 15: Feet
Feet The rubber feet are designed to minimize vibra- tion and reduce wear-and-tear on the machine. Wear safety glasses during assembly. Serious injury may occur if this warning is ignored! Get moving assistance before starting assembly. Figure 11. One rubber foot installed. The Model W1688 Edge Sander is a heavy load at 260 pounds. - Page 16 4. With one hand, hold the main table and with the other hand place a machinist’s square on the main table and against the platen graphite pad. See Figure 14. Platen Get assistance before Graphite Pad adjusting this machine any further. Otherwise, you may be injured.
-
Page 17: Quick Release Lever
Quick Release Lever Your Model W1688 Edge Sander is equipped with the quick release lever that allows you to release the tension on the belt for quick belt Jam Nut changing. Quick Release Lever To install the quick release lever, do these steps: 1. -
Page 18: Dust Hood
For additional information on the correct dust collection system, additions, or modifications; contact your Woodstock International dealer for your copy of the Dust Collection Basics hand- book and available accessories. operate... - Page 19 3. Move the quick release lever to the unlocked Quick Release Lever in position so it drops into the lock groove. See Normal Operating Position Figure 23. 4. Locate the arrows printed on the inside of the sanding belt that indicate direction or belt rotation.
-
Page 20: Back Stop
Back Stop The back stop is used to support shorter work- pieces and for 90˚ horizontal platen sanding operations. See Figure 25. Make sure the back stop adjusted correctly. Otherwise, your fingers or the workpiece may get trapped between the back stop and the sanding belt causing serious injury. -
Page 21: Adjustments
ADJUSTMENTS Vertical Belt Tracking Through normal operation, sanding belts become worn on the inside and outside surfaces, which can cause the belt to track too high or too low on the platen and pulleys. See Figure 28. You can compensate for this normal wear by adjusting the belt tracking knobs. -
Page 22: Diagonal Belt Tracking
Diagonal Belt Tracking The diagonal belt tracking for your Model W1688 Edge Sander has been setup at the factory; how- ever, due to shipping or long use of the sander, the belt can begin to track diagonally. You can compensate for this normal condition by adjust- ing the roller support bracket. -
Page 23: Platen-To-Roller Alignment
Platen-to-Roller Alignment The platen-to-roller alignment for your Model W1688 Edge Sander has been setup at the facto- ry; however, due to shipping or long use of the sander, the platen-to-roller alignment can change. You can compensate for this normal condition by adjusting the platen toward a straight edge set across the rollers. -
Page 24: Belt Tension
Belt Tension The sanding belt tension for your Model W1688 Edge Sander has been setup at the factory; how- ever, due to shipping, varying belt length, or Tension Rod long use of the sander, the tension may need to be adjusted. You can compensate for this nor- mal condition by adjusting the hex bolt on the end of the tension rod to increase or decrease the belt tension. -
Page 25: Main Table Height
Main Table Height Periodically through normal operation of the Model 1688 Edge Sander, the belts will wear in certain areas. To compensate for this wear and ensure consistent sanding or to adjust for a workpiece, you can adjust the main table high- er or lower. -
Page 26: Main Table Tilt
Main Table Tilt Often you may have to tilt the main table to accommodate for the angles of your workpiece. The main table is equipped with a degree scale which indicates the angle that the the work- piece will be sanded at. Tilting the table increas- es the gap between the table edge and the sand-... -
Page 27: Operations
INSTRUCTION MANUAL Phone: 1-360-734-3482 • On-Line Technical Support: shopfox.biz COPYRIGHT © SEPTEMBER, 2002 BY WOODSTOCK INTERNATIONAL, INC. entire manual. WARNING: NO PORTION OF THIS MANUAL MAY BE REPRODUCED IN ANY SHAPE OR FORM WITHOUT THE WRITTEN APPROVAL OF WOODSTOCK INTERNATIONAL, INC. -
Page 28: Platen Tilting
Platen Tilting Often you will have to sand the face of a work- piece, which is one of the most common sanding operations. To help you accomplish this task, the Model W1688 Edge Sander has the option of either vertical or horizontal tilt. DO NOT tilt the platen by only holding the idler roller and the auxiliary table shaft. -
Page 29: Vertical Sanding
Vertical Sanding The steps below show you how to sand the edges and the ends of a basic workpiece, which is one of the most common sanding operations you will do. Always wear a dust mask and safety glasses when operating this machine. - Page 30 DO NOT sand a workpiece with the sharp cor- ners at the leading-edge of the sanding opera- tion. The belt can grab and propel the work- piece causing injury. See Figure 48. 5. Set the miter gauge to the needed angle. 6.
-
Page 31: Horizontal Sanding
Horizontal Sanding The steps below show you how to sand the face of a basic workpiece. Always wear a dust mask and safety glasses when operating this machine. Sawdust may cause aller- gic reactions or respiratory Platen Tilt Stop problems. Platen Tilt Lock Lever Make sure loose clothing... -
Page 32: Contour Sanding
Contour Sanding The steps below show you how to sand the rounded contours of a basic workpiece. Always wear a dust mask and safety glasses when operating this machine. Sawdust may cause aller- gic reactions or respiratory problems. Figure 53. Auxiliary table adjusted height to Make sure loose clothing center of idler roller. -
Page 33: Troubleshooting
Troubleshooting Use this troubleshooting chart to correct common edge sander problems. SYMPTOM POSSIBLE REASON HOW TO REMEDY The sander The mobile base, stand, or platform is loose or Make sure all fasteners are tight, the rubber wobbles or unstable. feet are installed, and the sander is operating vibrates. - Page 34 (Troubleshooting Continued) SYMPTOM POSSIBLE REASON HOW TO REMEDY The sander The extension cord used is the wrong gauge Eliminate the extension cord and move the runs slow. and has too much resistance. sander closer to the wall receptacle. The motor is wired incorrectly. Contact a qualified electrician if you are unqualified to do this task: Rewire the junction box for 110V or 220V as outlined in wiring...
- Page 35 (Troubleshooting Continued) SYMPTOM POSSIBLE REASON HOW TO REMEDY The workpiece has been held against the belt Keeping the workpiece against the back stop, sanded in one position. and move the workpiece around on the sanding surface surface slightly. scratches The workpiece has been pushed too hard Decrease how hard you are pushing on the and/or has against the sanding belt.
- Page 36 This Page Intentionally Left Blank -34-...
- Page 37 4. Damaged sanding belt. lation of sawdust. Immediately investigate the 5. Any other condition that could hamper the area and remove any sawdust. Or contact Woodstock International, Inc. safe operation of this machine. Service and Support at 1-360-734-3482 or send e- Lubrication and mail to: tech-support@shopfox.biz.
- Page 38 W1688 Edge Sander Wiring Diagram Keep your machine Seek assistance from a qualified electrician if unplugged during all elec- you do not understand the wiring diagram in this manual, and always follow the applicable trical service and wiring electrical codes and standards. Otherwise procedures.
-
Page 39: Maintenance
Model W1688 as supplied local library are good places to start. when the manual was prepared. However, due to Woodstock International, Inc.’s policy of con- The Model W1688 is specifically designed for tinuous improvement, changes may be made at sanding operations. -
Page 40: Wiring Diagram
-38-... -
Page 41: Closure
PART # DESCRIPTION PART # DESCRIPTION X1688001 PLATEN COVER XPN04 HEX NUT ⁄ "-11 XPLW04 LOCK WASHER ⁄ " XPSS17 SET SCREW ⁄ "-18 X ⁄ " X1688003 DRIVE ROLLER X1688056 AUXILIARY TABLE POST XPLW06 LOCK WASHER ⁄ " X1688057 ROLLER BLOCK BRACKET XP6204 BEARING 6204... -
Page 42: Parts Breakdown And Parts List
PART # DESCRIPTION PART # DESCRIPTION 106 X1688106 TILT PLATE 111 X1688111 WIDE STRIPE TAPE 107 X1688107 TABLE SUPPORT 112 X1688112 LABEL (WEAR SAFETY GLASSES) 108 X1688108 LEVER SCREW 113 X1688113 LABEL (READ MANUAL) 109 X1688109 SPRING 114 X1688114 LABEL (SHOCK HAZARD) 110 X1688110 NARROW STRIPE TAPE -40-... - Page 43 YOUR NOTES...
- Page 44 YOUR NOTES...
- Page 45 FOLD ALONG DOTTED LINE Place Stamp Here WOODSTOCK INTERNATIONAL, INC. P.O. BOX 2309 BELLINGHAM, WA 98227-2309 FOLD ALONG DOTTED LINE TAPE ALONG EDGES--PLEASE DO NOT STAPLE...
- Page 46 _________________________________________________________ ___$20,000-$29,999 ___$60,000-$69,999 _________________________________________________________ ___$30,000-$39,999 ___$70,000-$79,999 _________________________________________________________ ___$40,000-$49,999 ___$80,000-$89,999 What new accessories would you like Woodstock International to carry? ___$50,000-$59,999 ___$90,000 + _________________________________________________________ _________________________________________________________ What is your age group? Do you think your purchase represents good value? ___20-29 ___50-59 ___30-39...
Need help?
Do you have a question about the SHOP FOX W1688 and is the answer not in the manual?
Questions and answers