Table of Contents
Advertisement
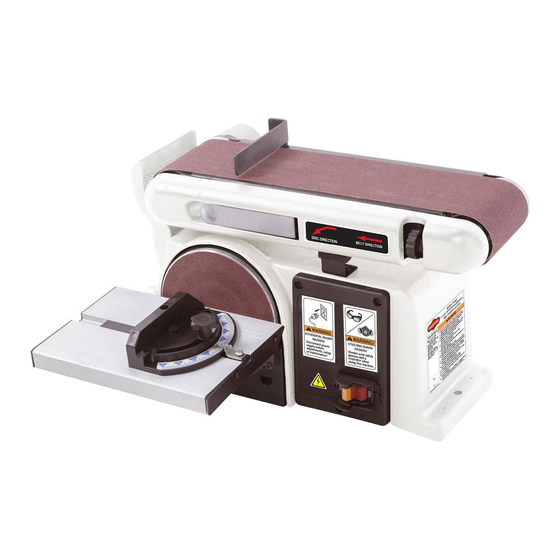
MODEL W1855
4" x 36" HORIZONTAL/VERTICAL
BELT SANDER w/6" DISC
OWNER'S MANUAL
(FOR MODELS MANUFACTURED SINCE 6/17)
Phone: (360) 734-3482 • Online Technical Support: techsupport@woodstockint.com
COPYRIGHT © JULY, 2017 BY WOODSTOCK INTERNATIONAL, INC.
WARNING: NO PORTION OF THIS MANUAL MAY BE REPRODUCED IN ANY SHAPE OR FORM WITHOUT
THE WRITTEN APPROVAL OF WOODSTOCK INTERNATIONAL, INC.
#19081JH Printed in China
Advertisement
Table of Contents

Related Manuals for Shop fox W1855


Summary of Contents for Shop fox W1855
- Page 1 MODEL W1855 4" x 36" HORIZONTAL/VERTICAL BELT SANDER w/6" DISC OWNER'S MANUAL (FOR MODELS MANUFACTURED SINCE 6/17) Phone: (360) 734-3482 • Online Technical Support: techsupport@woodstockint.com COPYRIGHT © JULY, 2017 BY WOODSTOCK INTERNATIONAL, INC. WARNING: NO PORTION OF THIS MANUAL MAY BE REPRODUCED IN ANY SHAPE OR FORM WITHOUT THE WRITTEN APPROVAL OF WOODSTOCK INTERNATIONAL, INC.
- Page 2 This manual provides critical safety instructions on the proper setup, operation, maintenance, and service of this machine/tool. Save this document, refer to it often, and use it to instruct other operators. Failure to read, understand and follow the instructions in this manual may result in fire or serious personal injury—including amputation, electrocution, or death.
- Page 3 Contents INTRODUCTION........2 ACCESSORIES........26 Woodstock Technical Support ....2 Belt/Disc Sander Accessories ....26 Machine Specifications ......3 MAINTENANCE........27 Controls & Components ......5 General .......... 27 SAFETY..........6 Cleaning & Protecting ......27 Standard Machinery Safety Instructions ..6 Cleaning Sanding Belt/Disc ....
-
Page 4: Introduction
Model W1855 (For Machines Mfd. Since 6/17) INTRODUCTION Woodstock Technical Support This machine has been specially designed to provide many years of trouble-free service. Close attention to detail, ruggedly built parts and a rigid quality control program assure safe and reliable operation. -
Page 5: Machine Specifications
Switch Type............. Toggle Safety Switch w/Removable Key Motors Main Type................Capacitor‐Start Induction Horsepower....................1/2 HP Phase....................Single‐Phase Amps......................4.3A Speed....................3600 RPM Power Transfer ..................Belt Drive Bearings............... Shielded & Permanently Lubricated Model W1855 Machine Specifications, Page 1 of 2... - Page 6 Serial Number Location ..................ID Label ISO 9001 Factory ....................Yes Certified by a Nationally Recognized Testing Laboratory (NRTL) ......... Yes Features Built‐In Dust Port Fast‐Tracking Adjustment Knob Quick‐Release Belt Lever Adjustable Miter Gauge Model W1855 Machine Specifications, Page 2 of 2...
-
Page 7: Controls & Components
Model W1855 (For Machines Mfd. Since 6/17) Controls.&.Components Refer to the Figures.1–2.and the following descriptions to become familiar with the basic controls and components of this machine. Understanding these items and how they work will help you understand the rest of the manual and stay safe when operating this machine. -
Page 8: Safety
Model W1855 (For Machines Mfd. Since 6/17) SAFETY SAFETY For.Your.Own.Safety, Read.Manual.Before.Operating.Machine The. purpose. of. safety. symbols. is. to. attract. your. attention. to. possible. hazardous. conditions.. This. manual.uses.a.series.of.symbols.and.signal.words.intended.to.convey.the.level.of.importance.of.the. safety.messages..The.progression.of.symbols.is.described.below..Remember.that.safety.messages.by. themselves. do. not. eliminate. danger. and. are. not. a. substitute. for. proper. accident. prevention. mea- sures—this.responsibility.is.ultimately.up.to.the.operator! - Page 9 Model W1855 (For Machines Mfd. Since 6/17) WEARING.PROPER.APPAREL..Do not wear FORCING.MACHINERY..Do not force machine. It clothing, apparel, or jewelry that can become will do the job safer and better at the rate for entangled in moving parts. Always tie back which it was designed.
-
Page 10: Additional Safety For Combo Sanders
Model W1855 (For Machines Mfd. Since 6/17) Additional.Safety.for.Combo.Sanders Serious injury or death can occur if fingers, clothing, jewelry, or hair get entangled in moving components. Impact injuries can occur from kickback if workpiece is improperly fed into moving sandpaper. Serious pinch injuries can occur from touching in-running nip point between table and sanding surface. -
Page 11: Electrical
Model W1855 (For Machines Mfd. Since 6/17) ELECTRICAL Circuit.Requirements This machine must be connected to the correct size and type of power supply circuit, or fire or electrical damage may occur. Read through this section to determine if an The. machine. must. be. properly. set. up. -
Page 12: Grounding Requirements
Model W1855 (For Machines Mfd. Since 6/17) Grounding.Requirements This machine MUST be grounded. In the event of certain types of malfunctions or breakdowns, grounding provides GROUNDED 120V 5-15 RECEPTACLE a path of least resistance for electric current to travel—in order to reduce the risk of electric shock. -
Page 13: Setup
Model W1855 (For Machines Mfd. Since 6/17) SETUP Unpacking This machine has been carefully packaged for safe This machine presents transportation. If you notice the machine has been serious injury hazards damaged during shipping, please contact your authorized to untrained users. Read Shop Fox dealer immediately. -
Page 14: Hardware Recognition Chart
Model W1855 (For Machines Mfd. Since 6/17) Hardware.Recognition.Chart USE THIS CHART TO IDENTIFY HARDWARE DURING THE INVENTORY/ASSEMBLY ⁄ " ⁄ " ⁄ " PROCESS. ⁄ " ⁄ " ⁄ " ⁄ " ⁄ " ⁄ " ⁄ " ⁄ "... -
Page 15: Machine Placement
Model W1855 (For Machines Mfd. Since 6/17) Machine.Placement Cleaning.Machine Workbench.Load The unpainted surfaces of your machine are coated with a heavy-duty rust preventative that Refer to the Machine.Specifications for the prevents corrosion during shipment and storage. weight and footprint specifications of your This rust preventative works extremely well, but machine. -
Page 16: Bench Mounting
Model W1855 (For Machines Mfd. Since 6/17) Bench.Mounting Number.of.Mounting.Holes........4 Diameter.of.Mounting.Hardware.Needed....⁄ " Bolt The base of this machine has mounting holes that allow it to be fastened to a workbench or other mounting surface to prevent it from moving during operation and causing Flat Washer accidental injury or damage. -
Page 17: Assembly
Ensure all parts have been properly cleaned of the heavy-duty rust-preventative applied at the factory, if applicable. Be sure to complete all steps in the assembly procedure prior to performing the Test.Run. The Model W1855 ships with the sanding belt Disc Cover pre-installed. Figure.8. Installing disc cover. -
Page 18: Dust Collection
Model W1855 (For Machines Mfd. Since 6/17) Dust.Collection Recommended.CFM.at.Dust.Port:....250.CFM Do not confuse this CFM recommendation with the rating of the dust collector. To determine the CFM at the dust port, you must consider these variables: (1) CFM rating of... -
Page 19: Test Run
Model W1855 (For Machines Mfd. Since 6/17) Test.Run Once assembly is complete, test run the machine to ensure it is properly connected to power and safety components are functioning properly. Serious. injury. or. death. can. result. from. using. this. machine. BEFORE. -
Page 20: Operations
Model W1855 (For Machines Mfd. Since 6/17) OPERATIONS General This machine will perform many types of operations that are beyond the scope of this manual. Many of these operations can be dangerous or deadly if performed incorrectly. The instructions in this section are written with the understanding that the operator has the necessary knowledge and skills to operate this machine. -
Page 21: Setting Work Table
Model W1855 (For Machines Mfd. Since 6/17) Setting.Work.Table Only. sand. workpiece. on. side. of. sanding. disc. that. Angle is. rotating. down. toward. work. table.. This. will. keep. Adjustment workpiece.from.flying.out.of.your.hands.from.rotational. Knob force.of.disc. Square Set the work table angle relative to the sanding disc. The... -
Page 22: Disc Sanding
Sanding.Outside.Curves Figure.16. Disc sanding with miter gauge. The Model W1855 disc sander can be used to sand convex (outside) curves. Since the miter gauge is not used for this operation, use both hands to firmly hold the workpiece. -
Page 23: Belt Sanding
Model W1855 (For Machines Mfd. Since 6/17) Belt.Sanding The Model W1855 belt sander bed tilts from 0°–90°, allowing for both horizontal and vertical belt sanding. The horizontal position is generally used for sanding with the grain along the length of a workpiece or for sanding inside curves. - Page 24 Model W1855 (For Machines Mfd. Since 6/17) Inside.Curves The sanding belt can be used to sand concave (inside) curves, using the idler drum end of the sanding belt. Idler Drum End To.sand.inside.curves,.do.these.steps: 1. Turn machine ON and allow sander to reach full speed.
-
Page 25: Changing/Replacing Sandpaper Disc
Model W1855 (For Machines Mfd. Since 6/17) Changing/Replacing. Sandpaper.Disc The Model W1855 Disc/Belt Sander accepts 6" diameter cloth- or paper-backed pressure sensitive adhesive (PSA) sandpaper discs. These are available in a variety of grits through the Woodstock catalog. See Accessories.on Page. -
Page 26: Changing/Replacing Sanding Belt
Model W1855 (For Machines Mfd. Since 6/17) Changing/Replacing. Sanding.Belt To.change.or.replace.sanding.belt,.do.these.steps: 1. DISCONNECT MACHINE FROM POWER! 2. Raise sanding bed off of bed support, as shown in Figure 24 (see Adjusting.Sanding.Bed.Angle.on Page.21). MAKE. SURE. that. your. machine. is. unplugged. during. all. service. proce- 3. -
Page 27: Adjusting Belt Tracking
Model W1855 (For Machines Mfd. Since 6/17) Adjusting.Belt.Tracking The belt tracking needs to be adjusted any time you change or replace the sanding belt, or if the belt drifts to one side of the sanding bed during operations. Drums Tracking To.check.and.adjust.sanding.belt.tracking,.do.these. -
Page 28: Accessories
D3640 Our tough 4" x 36" Aluminum Oxide Sanding Belts.are sized per- fectly for the W1855, and we offer a wide selection of popular grit options. Sold per 2-pack. D1249 4" x 36" 60-Grit D1253 4" x 36" 150-Grit D1250 4"... -
Page 29: Maintenance
• Drive belt tension, damage, or wear. Cleaning.&.Protecting Cleaning the Model W1855 is relatively easy. Vacuum excess wood chips and sawdust, and wipe off the remaining dust with a dry cloth. If any pitch/resin has built up, use a pitch/resin dissolving cleaner to remove it. -
Page 30: Service
Model W1855 (For Machines Mfd. Since 6/17) SERVICE General This section covers the most common service adjustments or procedures that may need to be made during the life of your machine. If you require additional machine service not included in this section, please contact Woodstock International Technical Support at (360) 734-3482 or send e-mail to: techsupport@woodstockint.com. -
Page 31: Calibrating Miter Gauge
Model W1855 (For Machines Mfd. Since 6/17) Calibrating.Miter.Gauge The miter gauge is pre-calibrated at the factory. However, if the scale pointer gets bumped during shipping or after prolonged use, it may need to be recalibrated to ensure accurate results with the miter gauge. Follow the instructions below any time you notice the miter gauge producing inaccurate results. -
Page 32: Replacing Drive Belt
Model W1855 (For Machines Mfd. Since 6/17) Replacing.Drive.Belt To ensure optimum power transmission, the belt must be in good condition (free from cracks, fraying, and wear) and properly tensioned. After the first 16 hours of belt life, re-tension the belt, as it will stretch and seat during this time. -
Page 33: Troubleshooting
Model W1855 (For Machines Mfd. Since 6/17) Troubleshooting The following troubleshooting tables cover common problems that may occur with this machine. If you need replacement parts or additional troubleshooting help, contact our Technical Support. Note: Before contacting Tech Support, find the machine serial number and manufacture date, and if available, your original purchase receipt. - Page 34 Model W1855 (For Machines Mfd. Since 6/17) PROBLEM POSSIBLE.CAUSE CORRECTIVE.ACTION Sanding grains 1. Sanding belt/disc previously stored in an 1. Store sanding belt/disc in a cool, dry area. easily rub off incorrect environment. belt or disc. 2. Sanding belt/disc has been smashed or folded.
-
Page 35: Electrical Safety Instructions
Model W1855 (For Machines Mfd. Since 6/17) Electrical.Safety.Instructions These pages are current at the time of printing. However, in the spirit of improvement, we may make changes to the electrical systems of future machines. Compare the manufacture date of your machine to the one stated in this manual, and study this section carefully. -
Page 36: Wiring Diagram
Model W1855 (For Machines Mfd. Since 6/17) Wiring.Diagram PADDLE SWITCH/RELAY (Viewed from Behind) KEDU HY7 Relay WE-10 Read Machine Housing Page 33 STOP Before Wiring Ground MOTOR Ground Start 120 VAC Relay Capacitor 5-15 Plug Neutral Ground Paddle Switch This. motor. wiring. diagram. is. current. at. the. time. of. -
Page 37: Parts
Model W1855 (For Machines Mfd. Since 6/17) PARTS Main 29 28 91 19 -35-... - Page 38 Model W1855 (For Machines Mfd. Since 6/17) Main.Parts.List REF PART # DESCRIPTION REF PART # DESCRIPTION X1855001 PHLP HD SCR M4-.7 X 6 W/WASHER X1855047 PHLP HD SCR M5-.8 X 20 X1855002 PHLP HD SCR M4-.7 X 8 W/WASHERS X1855048...
-
Page 39: Labels & Cosmetics
Model W1855 (For Machines Mfd. Since 6/17) Labels.&.Cosmetics W1855 Machine Labels • 1:1 Sizing (Labels are actual size) (07/28/17) • Labels must be made of chemical-resistant material Safety.labels.warn.about.machine.hazards.and.how.to.prevent.serious.personal.injury..The.owner. Specifications WARNING! Motor: 1/2 HP, 120V, To reduce risk of serious injury while using this machine: 1-Ph, 60 Hz, 4.3A... - Page 42 Fold along dotted lIne place stamp Here Woodstock international inc. p.o. box 2309 bellingham, Wa 98227-2309 Fold along dotted lIne tape along edges--please do not staple...
-
Page 43: Warranty
Woodstock International, Inc. will repair, replace, or arrange for a dealer refund, at its expense and option, the Shop Fox machine or machine part proven to be defective for its designed and intended use, provided that the original owner returns the product prepaid to an authorized warranty or repair facility as designated by our Bellingham, Washington office with proof of their purchase of the product within two years, and provides Woodstock International, Inc.
Need help?
Do you have a question about the W1855 and is the answer not in the manual?
Questions and answers