Table of Contents
Advertisement
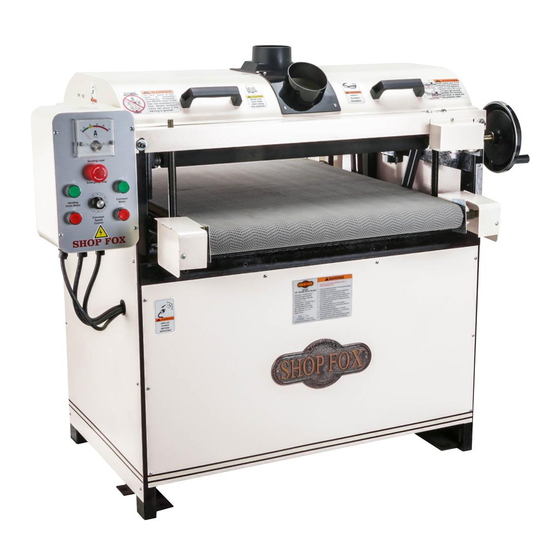
MODEL W1678
26" DOUBLE DRUM SANDER
INSTRUCTION MANUAL
Phone: 1-360-734-3482 • On-Line Technical Support: tech-support@woodstockint.com
COPYRIGHT © MAY, 2003 BY WOODSTOCK INTERNATIONAL, INC., REVISED DECEMBER, 2014 (MN)
WARNING: NO PORTION OF THIS MANUAL MAY BE REPRODUCED IN ANY SHAPE OR FORM WITHOUT
THE WRITTEN APPROVAL OF WOODSTOCK INTERNATIONAL, INC.
Printed in Taiwan
Advertisement
Table of Contents

Related Manuals for Shop fox W1678


Summary of Contents for Shop fox W1678
- Page 1 MODEL W1678 26" DOUBLE DRUM SANDER INSTRUCTION MANUAL Phone: 1-360-734-3482 • On-Line Technical Support: tech-support@woodstockint.com COPYRIGHT © MAY, 2003 BY WOODSTOCK INTERNATIONAL, INC., REVISED DECEMBER, 2014 (MN) WARNING: NO PORTION OF THIS MANUAL MAY BE REPRODUCED IN ANY SHAPE OR FORM WITHOUT THE WRITTEN APPROVAL OF WOODSTOCK INTERNATIONAL, INC.
- Page 2 This manual provides critical safety instructions on the proper setup, operation, maintenance, and service of this machine/tool. Save this document, refer to it often, and use it to instruct other operators. Failure to read, understand and follow the instructions in this manual may result in fire or serious personal injury—including amputation, electrocution, or death.
-
Page 3: Table Of Contents
TABLE OF CONTENTS PAGE INTRODUCTION ..................2 Woodstock Tech Support ................2 Specifications ................. 3 SAFETY ..................... 4 Standard Safety Instructions ..............4-5 Additional Safety Instructions for Drum Sanders ..........6 Avoiding Potential Injuries ................. 7 ELECTRICAL REQUIREMENTS ..............8 220V Operation .................. -
Page 4: Introduction
INTRODUCTION Woodstock Technical Support Woodstock International, Inc. is committed to customer satisfaction. Our intent with this manual is to include the basic information for safety, setup, operation, maintenance, and service of this product. In the event that questions arise about your machine, please contact Woodstock International Technical Support at (360) 734-3482 or send e-mail to: tech-support@shopfox.biz. -
Page 5: Specifications
Specifications Drum Sander Motor....5 HP , 220 VAC, 25 Amp., 3450 RPM, 60 Hertz, Single-Phase Drum Drive ................Dual V-Belt Drum Size ................. 6" x 27 ⁄ " Drum Surface Speed ................2300 FPM Drum Rotation ............Opposite of Feed Conveyor Conveyor Motor ...... -
Page 6: Safety
SAFETY SAFETY For Your Own Safety, Read Manual Before Operating Machine The purpose of safety symbols is to attract your attention to possible hazardous conditions. This manual uses a series of symbols and signal words intended to convey the level of importance of the safety messages. - Page 7 WEARING PROPER APPAREL. Do not wear FORCING MACHINERY. Do not force machine. It clothing, apparel, or jewelry that can become will do the job safer and better at the rate for entangled in moving parts. Always tie back which it was designed. or cover long hair.
-
Page 8: Additional Safety Instructions For Drum Sanders
Additional Safety Instructions for Drum Sanders Read and understand this Use this and other machinery with caution entire instruction manual and respect, and always consider safety MODEL W1678 26" DOUBLE DRUM SANDER before using this machine. first, as it applies to your individual working Serious personal injury conditions. -
Page 9: Avoiding Potential Injuries
Avoiding Potential Injuries Figure 1. NEVER hold the stock where the Figure 2. ALWAYS keep fingers away from conveyor and stock can pinch your fingers. conveyor and the underside of the stock. Figure 3. NEVER stand in the path of potential Figure 4. -
Page 10: Electrical Requirements
Figure 7. NEVER sand stock using a “sled” Figure 8. ALWAYS sand the workpiece with it (another board) under the workpiece. sitting flat against the conveyor belt. - Page 11 Ground this machine! The electrical cord circuit, circuit breaker, or fuse must be able to supplied with the Model W1678 does not come carry a load of at least 27 Amps. Remember with a 220 volt plug. Use a plug with a ground other machines using this circuit add to the total pin as shown in Figure 9.
-
Page 12: Assembly
The Model W1678 Double Drum Sander is a heavy load at 435 pounds. The Model W1678 26" Double Drum Sander is carefully packed. However, if it is damaged or is missing any parts, please contact Woodstock International Service and Support at 1-360-734-3482 or send e-mail to: tech-support@shopfox.biz. -
Page 13: Shop Preparation
Woodstock International Inc. offers a line of coat of machine oil to prevent corrosion. SHOP FOX Mobile Bases. For your drum ® sander, use the SHOP FOX Super Heavy- ® Duty Mobile Base (Model Number D2058) and the SHOP FOX 36"... -
Page 14: Beginning
Dust Ports Beginning When connected to a dust collection system, the The main components of the Model W1678 are assembled at the factory. However, some dust ports direct suction to remove harmful assembly is required. We recommend the wood and abrasive dust from the workpiece and following sequence in this section for assembly. -
Page 15: Dust Port And Handles
Control Box The control panel allows you to control the sander electronically. For shipping, the control box comes bolted to the sander with L-brackets. Retain these brackets should you ever need to Shipping ship the sander. See Figure 13. Bolts To install the control box, do these steps: L-Bracket 1. -
Page 16: Adjustments
PART Drum-to-Conveyor Keep your drum sander unplugged during these adjustments. Otherwise, Figure 17. W1678 dust hood open. serious personal injury may occur! Squareness For this adjustment, you will align the drums so the drums are square with the feed conveyor belt surface. - Page 17 4. Lower the conveyor table and position the 30" gauge block under one end of the front drum and flush with the end of the conveyor. See Figure 19. 5. Turn the micro adjusting knob and raise the rear drum so it will not contact the gauge block.
- Page 18 PART Drum-to-Conveyor Center-Tracking Conveyor Parallelism For this adjustment, you will align the front drum so the sanding path runs parallel with the conveyor belt feed path. You will then align the rear drum to the front drum so it is parallel with NOTICE If the drum-to-conveyor parallelism is out of adjustment, the sandpaper may become loose...
- Page 19 5. At one end of the rear drum, place the 2 ⁄ " gauge block on the dust collector bar and between both drums. Your goal is to slide the rear drum against the block so the rear drum sanding path runs true with the front drum, which now runs true with the conveyor feed path.
- Page 20 PART 3: Drum-to-Conveyor Height For this adjustment, you will find a reference height for the front drum and then adjust the rear drum so it is 0.007" to 0.010" lower than the FRONT DRUM REAR DRUM front drum. See Figure 27. 0.007"...
- Page 21 PART 4: Pressure Roller Adjustment Pressure Depending on your sanding needs, adjust the Roller ring ension pressure roller height and spring tension. See Adjustment Figure 30. To adjust pressure-roller height, do these steps: Pressure 1. Loosen all six height jam nuts. See Figure Roller Height Adjustment...
-
Page 22: Dust Scoop Gap
Dust Scoop Gap For this adjustment, you will adjust the dust scoops so they can efficiently focus dust collection Dust Scoop system suction where the most dust is created as the workpiece travels through the drum sander. You will set the dust scoops above the bottom of the drums. -
Page 23: V-Belt Tension
V-Belt Tension The sanding drums are driven by two heavy-duty V-belts. After drum adjustments and normal operation, the belts may need adjustment. The belt looseness or deflection must be approximately " Front Panel Mounting Screw Keep your drum sander unplugged during assembly, maintenance, and adjustment tasks. -
Page 24: Conveyor Belt
Conveyor Belt For this adjustment, you will adjust the feed conveyor belt hanging gap and the tracking, so the conveyor runs in the center of the table and the drive roller does not slip at maximum sanding load. See Figure 39. NOTICE ONLY make adjustments to the infeed roller side so the drive-chain tension is not affected. -
Page 25: Operations
OPERATIONS Control Panel Overview The control panel enables you to turn the The Model W1678 26" Double Drum Sander conveyor ON/OFF, control the workpiece feed accepts stock up to 4 ⁄ " thick by 26" wide, and rate, turn the sanding drums ON/OFF, and... -
Page 26: Basic Sanding
® 15" x 20" cleaning pad through the drum sander so the light-colored wood will not become stained from the previously sanded dark wood. DO NOT operate this MODEL W1678 sander until you have 26" DOUBLE DRUM SANDER completed all assembly and adjustments. Observe... - Page 27 NOTICE ALWAYS take a few moments to listen and observe for unusual noise and vibration after starting the Double Drum Sander. To use the double drum sander, do these steps: 1. Twist and pull the emergency stop switch knob, and position your finger over the knob. Be ready to push the knob and shut the sander OFF if there is a problem.
- Page 28 NOTICE Since various types of stock will react differently with various loads, use a process of trial-and-error to determine the best load settings and feed rate for your sanding needs. A slower feed rate will sand the surface smoother, but risks burning the wood; a faster feed rate will remove material faster, but risks overloading the motor.
-
Page 29: Troubleshooting
Troubleshooting Use this troubleshooting chart to correct potential W1678 Double Drum Sander problems. S S S S Y Y Y Y M M M M P P P P T T T T O O O O M M M M... - Page 30 Troubleshooting (Continued) S S S S Y Y Y Y M M M M P P P P T T T T O O O O M M M M P P P P O O O O S S S S S S S S I I I I B B B B L L L L E E E E R R R R E E E E A A A A S S S S O O O O N N N N H H H H O O O O W W W W T T T T O O O O R R R R E E E E M M M M E E E E D D D D Y Y Y Y The feed The conveyor belt tension is incorrect.
-
Page 31: Maintenance
The Model W1678 allows you to use two different grit sandpapers at once. The first drum is fitted with a coarser grit than the second. Usually this translates into combinations of successive group Figure 51. -
Page 32: Lubrication
Lubrication The four drum bearings in the bearing blocks need to be lubricated every 20 hours of operation. Grease Drum Bearings Light Oil on However, all other bearings used on this machine at Zerk Fittings Sprockets and Chain are shielded and permanently lubricated. Simply leave them alone until they need to be replaced. -
Page 33: Brush Replacement
Sandpaper Replacement The Model W1678 Double Drum Sander is designed for rolls of 3" wide hook-and-loop sandpaper. To change the sandpaper, do these steps: Figure 55. Carbon brush and spring. 1. Unplug the double drum sander! Open the dust hood to expose the drums. -
Page 34: Bearing Replacement
Bearing Replacement The Model W1678 26" Double Drum Sander is designed for many years of reliable service. But after long periods of heavy sander use, it may be necessary to replace the drum bearings. Always replace both bearings on the same drum. - Page 35 7. Remove any metal or abrasives trapped in the bearing grease groove and grease port, or contaminants will be pumped into the new bearing when you lubricate it, causing bearing failure. Figure 60. 8. Clean and inspect the bearing-block for cracks, burrs, wear, and other damage;...
-
Page 36: General Cleaning
General Cleaning DO NOT use a mineral-spirit solvent or chlorine- To clean grease from the sander, do these based cleaner to clean a painted or plastic steps: surface, or the rubber conveyor belt. If you do, 1. Unplug the double drum sander. you will permanently ruin the surface. -
Page 37: Wiring Diagram
W1678 26 " Double Drum Sander Drive System Wiring Diagram Seek assistance from a qualified electrician Keep your machine if you do not understand the wiring diagram unplugged during service wiring in this manual. Always follow the applicable procedures. Otherwise electrical codes and standards. - Page 38 W1678 26 " Double Drum Sander Control System Wiring Diagram CONV. MOTOR SPEED CIRCUIT BOARD 220V FUSE 10 A BLACK POWER WHITE SUPPLY GREEN WIRING BLOCK (GROUND) CONV. MOTOR SWITCH CONV. WHITE MOTOR BLACK GREEN DRUM MOTOR SWITCH DRUM MOTOR...
-
Page 39: Closure
Trade drawings, and photographs illustrated in this journals, woodworking magazines, and your manual represent the Model W1678 as supplied local library are good places to start. when the manual was prepared. However, due to Woodstock International, Inc.’s policy of... -
Page 40: Parts Breakdown And Parts List
-38-... - Page 41 PART # DESCRIPTION PART # DESCRIPTION X1678001 SCALE X1678050 LEFT ROLLER-END GUARD XPHTEK7 SELF TAP SCREW #8 X ⁄ " X1678051 ROLLER BRACKET XPK34M KEY 5 X 5 X 20MM XPSS11 SET SCREW ⁄ "-20 X ⁄ " XPN02 HEX NUT ⁄...
- Page 42 106 81 137 136 -40-...
- Page 43 PART # DESCRIPTION PART # DESCRIPTION X1678070 PRESSURE ROLLER 123 X1678123 THRUST BEARING 51101 X1678071 SANDING DRUM 124 XPR09M EXT RETAINING RING 20MM X1678074 BUSHING 125 XPSS34 SET SCREW #10-24 X ⁄ " X1678081 BEARING BLOCK 126 XPN11 HEX NUT #10-24 X1678088 COMPRESSION SPRING 127 X1678127...
- Page 44 -42-...
- Page 45 BRACKET 271 XPHTEK7 SELF TAP SCREW #8 X ⁄ " 204 XPB18 HEX BOLT ⁄ "-16 X 1" 272 X1678272 LOGO (SHOP FOX) 205 XPW02 FLAT WASHER ⁄ " 273 X1678273 LOGO SCREW #4- ⁄ " 206 XPN08 HEX NUT ⁄...
- Page 46 300 301 348V2 -44-...
- Page 47 PART # DESCRIPTION PART # DESCRIPTION 222 X1678222 MAGNETIC SWITCH XPN07 HEX NUT #10-24 223 X1678223 ON SWITCH XPB58 HEX BOLT ⁄ "-16 X 2" 224 X1678224 OFF SWITCH XPW07 FLAT WASHER ⁄ " 226 X1678226 LOAD AMP METER XPSW10 STRAIN RELIEF ⁄...
- Page 48 NOTES...
- Page 50 Fold along dotted lIne place stamp Here Woodstock international inc. p.o. box 2309 bellingham, Wa 98227-2309 Fold along dotted lIne tape along edges--please do not staple...
-
Page 51: Warranty
Woodstock International, Inc. will repair, replace, or arrange for a dealer refund, at its expense and option, the Shop Fox machine or machine part proven to be defective for its designed and intended use, provided that the original owner returns the product prepaid to an authorized warranty or repair facility as designated by our Bellingham, Washington office with proof of their purchase of the product within two years, and provides Woodstock International, Inc. - Page 52 High Quality Machines and Tools Woodstock International, Inc. carries thousands of products designed to meet the needs of today's woodworkers and metalworkers. Ask your dealer about these fine products:...
Need help?
Do you have a question about the W1678 and is the answer not in the manual?
Questions and answers