Table of Contents
Advertisement
Quick Links
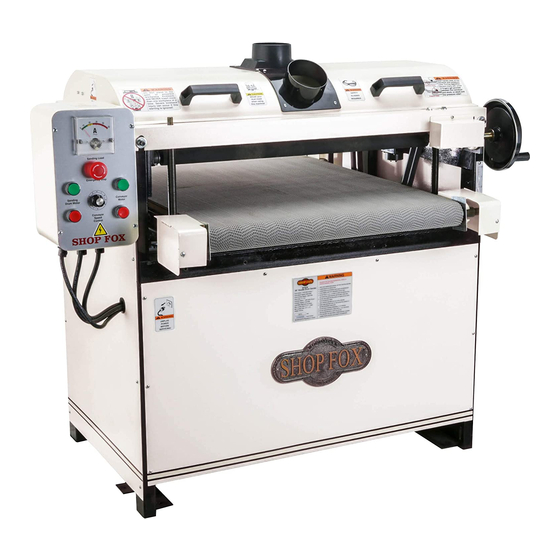
MODEL W1678
26" DOUBLE DRUM SANDER
INSTRUCTION MANUAL
Phone: 1-360-734-3482 • On-Line Technical Support: tech-support@shopfox.biz
COPYRIGHT © MAY, 2003 BY WOODSTOCK INTERNATIONAL, INC.
WARNING: NO PORTION OF THIS MANUAL MAY BE REPRODUCED IN ANY SHAPE OR FORM WITHOUT
THE WRITTEN APPROVAL OF WOODSTOCK INTERNATIONAL, INC.
Printed in Taiwan
Advertisement
Table of Contents

Related Manuals for Shop fox SHOP FOX W1678


Summary of Contents for Shop fox SHOP FOX W1678
- Page 1 26" DOUBLE DRUM SANDER INSTRUCTION MANUAL Phone: 1-360-734-3482 • On-Line Technical Support: tech-support@shopfox.biz COPYRIGHT © MAY, 2003 BY WOODSTOCK INTERNATIONAL, INC. WARNING: NO PORTION OF THIS MANUAL MAY BE REPRODUCED IN ANY SHAPE OR FORM WITHOUT THE WRITTEN APPROVAL OF WOODSTOCK INTERNATIONAL, INC.
- Page 2 WARNING Some dust created by power sanding, sawing, grinding, drilling, and other construction activities contains chemicals known to the State of California to cause cancer, birth defects or other reproductive harm. Some examples of these chemicals are: • Lead from lead-based paints. •...
-
Page 3: Table Of Contents
TABLE OF CONTENTS PAGE INTRODUCTION ..................2 About Your New 26" Double Drum Sander ............2 Woodstock Service and Support..............2 Warranty and Returns ................3 Specifications ................3 SAFETY ....................4 Standard Safety Instructions ..............4-5 Additional Safety Instructions for Drum Sanders ..........6 Avoiding Potential Injuries ................7 ELECTRICAL REQUIREMENTS ..............8... -
Page 4: Introduction
For further details refer to the Specifications section of this manual on Page Woodstock International, Inc. is committed to customer satisfaction in providing this manual. It is our intent to make sure all the information necessary for safety, ease of assembly, practical use and durability of this product be included. -
Page 5: Warranty And Returns
® the provisions of any law or acts. In no event shall Woodstock International, Inc.'s liability under this warranty exceed the purchase price paid for the product, and any legal actions brought against Woodstock International, Inc. shall be tried in the State of Washington, County of Whatcom. We shall in no event be liable for death, injuries to persons or property or for incidental, contingent, special or consequential damages arising from the use of our products. -
Page 6: Safety
SAFETY READ MANUAL BEFORE OPERATING MACHINE. FAILURE TO FOLLOW INSTRUCTIONS BELOW WILL RESULT IN PERSONAL INJURY. Indicates an imminently hazardous situation which, if not avoided, WILL result in death or serious injury. Indicates a potentially hazardous situation which, if not avoided, COULD result in death or serious injury. - Page 7 12. Do not force tool. The machine will do a safer and better job at the rate for which it was designed. 13. Use correct tool. Do not force machine or attachment to do a job for which it was not designed. 14.
-
Page 8: Additional Safety Instructions For Drum Sanders
Do not risk your injury, damage to equipment or poor work COPYRIGHT © MARCH, 2003 BY WOODSTOCK INTERNATIONAL, INC. WARNING: NO PORTION OF THIS MANUAL MAY BE REPRODUCED IN ANY SHAPE OR FORM WITHOUT THE WRITTEN APPROVAL OF WOODSTOCK INTERNATIONAL, INC. -
Page 9: Avoiding Potential Injuries
Avoiding Potential Injuries Figure 1. NEVER hold the stock where the Figure 2. ALWAYS keep fingers away from conveyor and stock can pinch your fingers. conveyor and the underside of the stock. Figure 3. NEVER stand in the path of potential Figure 4. -
Page 10: Electrical Requirements
Figure 7. NEVER sand stock using a “sled” Figure 8. ALWAYS sand the workpiece with it (another board) under the workpiece. sitting flat against the conveyor belt. - Page 11 ELECTRICAL REQUIREMENTS 220V Operation Grounding SHOP FOX Model W1678 Drum Sander ® uses one 220 VAC single-phase motor. This sanding drum motor is rated at 5 HP and draws Any electrical outlet and approximately 25 amps under a normal sanding circuit that you plug your load.The ⁄...
-
Page 12: Assembly
Drum Sander is a heavy load at 435 pounds. The Model W1678 26" Double Drum Sander is carefully packed. However, if it is damaged or is missing any parts, please contact Woodstock International Service Support at 1-360-734-3482 or send e-mail to: tech-support@shopfox.biz. -
Page 13: Shop Preparation
Then coat the cleaned metal surface with a light Woodstock International Inc. offers a line of coat of machine oil to prevent corrosion. SHOP FOX Mobile Bases. For your drum ®... -
Page 14: Beginning
For additional information on the correct dust The Model W1678 Double collection system, additions, or modifications; Drum Sander is a heavy contact your Woodstock International dealer for load at 435 pounds. your copy of the Dust Collection Basics handbook and available accessories. -
Page 15: Dust Port And Handles
Control Box The control panel allows you to control the sander electrically. For shipping, the control box Short Bolts comes bolted to the sander with L-brackets and long and short bolts. Retain these brackets Long Bolts should you ever need to ship the sander. See Figure 13. -
Page 16: Adjustments
ADJUSTMENTS Drums and Pressure Rollers Adjust the sanding drums and pressure rollers correctly. Complete PART 1, PART 2, PART 3, and PART 4 of this section in sequence. Otherwise, the sanding drums can grab and project the workpiece damaging the sander, and injuring you and bystanders! To get the best sanding results and longest life out of your sandpaper, both the front and rear... - Page 17 4. Lower the conveyor table and position the 30" gauge block under one end of the front drum and flush with the end of the conveyor. See Figure 19. 5. Turn the micro adjusting knob and raise the rear drum so it will not contact the gauge block.
- Page 18 PART 2: Drum-to-Conveyor Parallelism Center-Tracking Conveyor For this adjustment, you will align the front drum so the sanding path runs parallel with the conveyor belt feed path. You will then align the rear drum to the front drum so it is parallel with the front drum.
- Page 19 5. At one end of the rear drum, place the 2 ⁄ " gauge block on the dust collector bar and between both drums. Your goal is to slide the rear drum against the block so the rear drum sanding path runs true with the front drum, which now runs true with the conveyor feed path.
- Page 20 PART 3: Drum-to-Conveyor Height For this adjustment, you will find a reference height for the front drum and then adjust the rear drum so it is 0.007" to 0.010" lower than the FRONT DRUM REAR DRUM front drum. See Figure 27. 0.007"...
- Page 21 PART 4: Pressure Roller Adjustment Pressure Depending on your sanding needs, adjust the Roller Spring Tension pressure roller height and spring tension. See Adjustment Figure 30. To adjust pressure-roller height, do these steps: 1. Loosen all six height jam nuts. See Figure 31. Pressure Roller 2.
-
Page 22: Dust Scoop Gap
Dust Scoop Gap For this adjustment, you will adjust the dust scoops so they can efficiently focus dust Dust Scoop collection system suction where the most dust is created as the workpiece travels through the drum sander. You will set the dust scoops above the bottom of the drums. -
Page 23: V-Belt Tension
V-Belt Tension The sanding drums are driven by two heavy-duty V-belts. After drum adjustments and normal operation, the belts may need adjustment. The belt looseness or deflection must be approximately 1". Front Panel Mounting Screw Keep your drum sander unplugged during assembly, maintenance, and adjustment tasks. -
Page 24: Conveyor Belt
Conveyor Belt For this adjustment, you will adjust the feed conveyor belt hanging gap and the tracking, so the conveyor runs in the center of the table and the drive roller does not slip at maximum sanding load. See Figure 39. NOTICE ONLY make adjustments to the infeed roller side so the drive-chain tension is not affected. -
Page 25: Operations
Phone: 1-360-734-3482 • On-Line Technical Support: tech-support@shopfox.biz two dust ports. COPYRIGHT © MARCH, 2003 BY WOODSTOCK INTERNATIONAL, INC. WARNING: NO PORTION OF THIS MANUAL MAY BE REPRODUCED IN ANY SHAPE OR FORM WITHOUT THE WRITTEN APPROVAL OF WOODSTOCK INTERNATIONAL, INC. -
Page 26: Basic Sanding
Phone: 1-360-734-3482 • On-Line Technical Support: tech-support@shopfox.biz COPYRIGHT © MARCH, 2003 BY WOODSTOCK INTERNATIONAL, INC. WARNING: NO PORTION OF THIS MANUAL MAY BE REPRODUCED IN ANY SHAPE OR FORM WITHOUT THE WRITTEN APPROVAL OF WOODSTOCK INTERNATIONAL, INC. - Page 27 NOTICE ALWAYS take a few moments to listen and observe for unusual noise and vibration after starting the Double Drum Sander. To use the double drum sander, do these steps: 1. Twist and pull the emergency stop switch knob, and position your finger over the knob. Be ready to push the knob and shut the sander OFF if there is a problem.
- Page 28 NOTICE Since various types of stock will react differently with various loads, use a process of trial-and-error to determine the best load settings and feed rate for your sanding needs. A slower feed rate will sand the surface smoother, but risks burning the wood; a faster feed rate will remove material faster, but risks overloading the motor.
-
Page 29: Troubleshooting
Troubleshooting Use this troubleshooting chart to correct potential W1678 Double Drum Sander problems. S S S S Y Y Y Y M M M M P P P P T T T T O O O O M M M M P P P P O O O O S S S S S S S S I I I I B B B B L L L L E E E E R R R R E E E E A A A A S S S S O O O O N N N N H H H H O O O O W W W W T T T T O O O O R R R R E E E E M M M M E E E E D D D D Y Y Y Y The sanding... - Page 30 Troubleshooting (Continued) S S S S Y Y Y Y M M M M P P P P T T T T O O O O M M M M P P P P O O O O S S S S S S S S I I I I B B B B L L L L E E E E R R R R E E E E A A A A S S S S O O O O N N N N H H H H O O O O W W W W T T T T O O O O R R R R E E E E M M M M E E E E D D D D Y Y Y Y The feed The conveyor belt tension is incorrect.
-
Page 31: Maintenance
MAINTENANCE General Sanding Belts Regular maintenance on your Model W1678 helps As sanding drums are used, the sandpaper can quickly become "loaded" with sawdust. If not ensure optimum performance. Inspect your removed, this sawdust may harden on the machine each time you use it for the following abrasive surface and can glaze instead of sand conditions. -
Page 32: Lubrication
Immediately wipe-off the residual oil. See Figure 52. troubleshoot the area and remove any Woodstock sawdust. contact 7. Put three drops of the machine oil in the International, Inc. handwheel bushing oil port and a couple of... -
Page 33: Brush Replacement
Brush Replacement After long periods of heavy sander use, it may be necessary to replace the conveyor motor carbon brushes. Brush Cover To replace the carbon brushes, do these steps: 1. Unplug the double drum sander! 2. Raise the table to the highest position. 3. -
Page 34: Bearing Replacement
Bearing Replacement The Model W1678 26" Double Drum Sander is designed for many years of reliable service. But after long periods of heavy sander use, it may be necessary to replace the drum bearings. Always replace both bearings on the same drum. Mounting Nuts Keep your drum sander unplugged... - Page 35 7. Remove any metal or abrasives trapped in the bearing grease groove and grease port, or contaminants will be pumped into the new bearing when you lubricate it, causing bearing failure. Figure 60. 8. Clean and inspect the bearing-block for cracks, burrs, wear, and other damage;...
-
Page 36: General Cleaning
General Cleaning DO NOT use a mineral-spirit solvent or chlorine- To clean grease from the sander, do these steps: based cleaner to clean a painted or plastic 1. Unplug the double drum sander. surface, or the rubber conveyor belt. If you do, you will permanently ruin the surface. -
Page 37: Wiring Diagram
W1678 26 " Double Drum Sander Drive System Wiring Diagram Keep your machine Seek assistance from a qualified electrician if you do not understand the wiring diagram unplugged during in this manual. Always follow the applicable service wiring procedures. Otherwise electrical codes and standards. - Page 38 W1678 26 " Double Drum Sander Control System Wiring Diagram CONV. MOTOR SPEED CIRCUIT BOARD 220V FUSE 10 A 10 A BLACK POWER SUPPLY GREEN WIRING BLOCK (GROUND) CONV. MOTOR SWITCH CONV. WHITE MOTOR BLACK GREEN DRUM MOTOR SWITCH DRUM MOTOR GREEN BLACK...
-
Page 39: Closure
Model W1678 as supplied local library are good places to start. when the manual was prepared. However, due to Woodstock International, Inc.’s policy of The Model W1678 is specifically designed for sanding operations. DO NOT MODIFY AND/OR... -
Page 40: Parts Breakdown And Parts List
-38-... - Page 41 PART # DESCRIPTION PART # DESCRIPTION X1678001 SCALE X1678050 LEFT ROLLER-END GUARD XPHTEK7 SELF TAP SCREW #8 X ⁄ " X1678051 ROLLER BRACKET XPK34M KEY 5 X 5 X 20MM XPSS11 SET SCREW ⁄ "-20 X ⁄ " ⁄ "-18 XPN02 HEX NUT X1678054...
- Page 42 106 81 137 136 -40-...
- Page 43 PART # DESCRIPTION PART # DESCRIPTION X1678070 PRESSURE ROLLER 123 X1678123 THRUST BEARING 51101 X1678071 SANDING DRUM 124 XPR09M EXT RETAINING RING 20MM X1678074 BUSHING 125 XPSS34 SET SCREW #10-24 X ⁄ " X1678081 BEARING BLOCK 126 XPN11 HEX NUT #10-24 X1678088 COMPRESSION SPRING 127 X1678127...
- Page 44 -42-...
- Page 45 PART # DESCRIPTION PART # DESCRIPTION X1678004 SIDE PANEL 239 X1678239 GEAR 25-TEETH X1678004A SIDE PANEL 240 XPK06M KEY 5 X 5 X 10MM X1678006 SPROCKET 10-TEETH 241 XPLN06 LOCK NUT ⁄ "-13 X1678007 SPROCKET W/SHAFT 244 X1678244 BEARING SEAT X1678008 TABLE LEAD SCREW ⁄...
- Page 46 300 301 -44-...
- Page 47 PART # DESCRIPTION PART # DESCRIPTION 222 X1678222 MAGNETIC SWITCH 318 XPN07 HEX NUT #10-24 223 X1678223 ON SWITCH 319 XPB23 HEX BOLT ⁄ "-16 X 2- ⁄ " 224 X1678224 OFF SWITCH 320 XPW07 FLAT WASHER ⁄ " 226 X1678226 LOAD AMP METER 321 XPSW10 STRAIN RELIEF...
- Page 48 NOTES...
- Page 49 NOTES...
- Page 50 NOTES...
- Page 51 FOLD ALONG DOTTED LINE Place Stamp Here WOODSTOCK INTERNATIONAL, INC. P.O. BOX 2309 BELLINGHAM, WA 98227-2309 FOLD ALONG DOTTED LINE TAPE ALONG EDGES--PLEASE DO NOT STAPLE...
- Page 52 ___$60,000-$69,999 _________________________________________________________ ___$30,000-$39,999 ___$70,000-$79,999 _________________________________________________________ ___$40,000-$49,999 ___$80,000-$89,999 ___$50,000-$59,999 ___$90,000 + What new accessories would you like Woodstock International to carry? _________________________________________________________ What is your age group? _________________________________________________________ ___20-29 ___50-59 Do you think your purchase represents good value? ___30-39 ___60-69 ___Yes...
Need help?
Do you have a question about the SHOP FOX W1678 and is the answer not in the manual?
Questions and answers