Siemens HiPath 2000 User Manual
Hide thumbs
Also See for HiPath 2000:
- Administration manual (192 pages) ,
- User manual (154 pages) ,
- Operating manual (152 pages)

Related Manuals for Siemens HiPath 2000


Summary of Contents for Siemens HiPath 2000
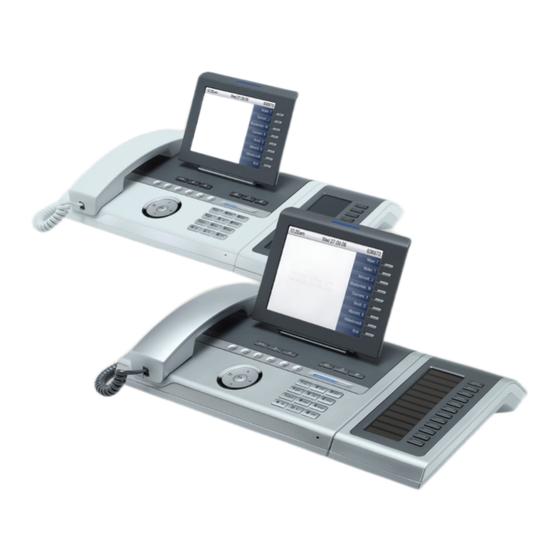
- Page 1 Documentation HiPath 2000, HiPath 3000, HiPath 5000 HiPath OpenOffice OpenStage 60/60 G, OpenStage 80/80 G OpenStage Key Module User Guide Communication for the open minded Siemens Enterprise Communications www.siemens.com/open...
-
Page 2: Important Information
Never open the telephone or a key module. Should you encounter any problems, contact the responsible ser- vice personnel. Use only original Siemens accessories. The use of oth- er accessories may be hazardous and will render the warranty, extended manufacturer’s liability and the CE marking invalid. -
Page 3: Location Of The Telephone
LEDs. Product support on the internet Information and support for our products can be found on the Internet at: http://www.siemens-enterprise.com/. Technical notes, current information about firmware updates, frequently asked questions and lots more can be found on the Internet at:... -
Page 4: Table Of Contents
Contents Contents Important information ......2 Trademarks ..........2 Location of the telephone . - Page 5 Contents Applications available on your OpenStage phone 34 Application navigation ........34 Telephony interface .
- Page 6 Contents Enhanced phone functions.....58 Answering calls ......... . . 58 Accepting calls via the Headset .
- Page 7 Contents Call forwarding ......82 Active call forwarding indication ......82 Overview of call forwarding types.
- Page 8 Privacy/security ......113 Voice encryption (only for HiPath 2000/3000/5000/OpenOffice EE) . . 113 Notes on voice encryption .
- Page 9 Contents Making calls in the team/executive/secretary configuration ....... 142 Lines ..........142 Line utilization .
- Page 10 Contents Adjusting audio settings ........169 Volumes.
- Page 11 Contents Web interface....... 197 User Pages ..........197 Administrator Pages .
-
Page 12: General Information
• Your communications platform does not feature this function. Please contact your Siemens sales partner for information on how to upgrade. This user guide is intended to help you familiarize yourself with OpenStage and all of its functions. It contains important information on the safe and proper operation of your OpenStage phone. -
Page 13: Intended Use
Voice encryption Your OpenStage 60/60 G/80/80 G 2 (software release V1 R2.xxxx and later) supports voice encryption on HiPath 2000 V2, HiPath 3000/5000 V7 (minR 4 and later), and HiPath OpenOffice EE (V1). This allows you to use your OpenStage to perform tap-proof calls. Voice transmission is encrypted and data is decrypted at the other call party’s... -
Page 14: Multi-Line Telephone, Executive/Secretary Functions
General information Multi-line telephone, executive/secretary functions Your OpenStage 60/60 G/80/80 G is a "multi-line telephone". This means that your service personnel can configure multiple lines on your phone, which is not the case with single-line phones. Each line is assigned an in- dividual phone number which you can use to make and receive calls. -
Page 15: Getting To Know Your Openstage Phone
Getting to know your OpenStage phone Getting to know your OpenStage phone The following sections describe the most frequently used operating ele- ments and the displays on your OpenStage phone. The user interface of your OpenStage 60/60 G/80/80 G The diagram shows an OpenStage 60/60 G, the description applies to all product variants. -
Page 16: Ports On The Underside Of The Phone
Getting to know your OpenStage phone Ports on the underside of the phone USB memory stick (For example, OpenStage Manager) Power supply unit Network switch Headset Local cable type Handset Port for key modules OpenStage operating features OpenStage 80 G 60 G Display type Color TFT... -
Page 17: Using Network Ports More Efficiently
Getting to know your OpenStage phone Using network ports more efficiently OpenStage 60/80 has a built-in 10/100 Mbps Ethernet switch. OpenStage 60 G/80 G has a 1000 Mbps Ethernet switch. This means that you can connect a PC to the LAN directly via the phone. The telephone-PC connection option must first be activated on the telephone by service per- sonnel. -
Page 18: Openstage Manager
Getting to know your OpenStage phone OpenStage Manager This program offers an additional option for tailoring your phone to your personal needs. OpenStage Manager is suitable for the following models: • OpenStage 60 (SIP/HFA) • OpenStage 60 T • OpenStage 80 (SIP/HFA) •... -
Page 19: Openstage Key Module
Getting to know your OpenStage phone OpenStage Key Module The OpenStage Key Module is a key module attached to the side of the phone that provides 12 additional illuminated, programmable keys. Like keys on the phone, these keys can be programmed and used accor- ding to your needs page 24. -
Page 20: Keys And Controls
Getting to know your OpenStage phone Keys and controls Function keys Function when key is pressed End (disconnect) call page 52. Call forwarding page 82. Key currently has no function. [1] If the LED key flashes on the phone, your phone was configured as a forwarding destina- tion. -
Page 21: Mode Keys
Getting to know your OpenStage phone Mode keys These sensor keys allow you to switch to the required application with the simple stroke of a key. To select a tab within an application press the rele- vant key repeatedly until the required tab is displayed. Function when key is LED display pressed... -
Page 22: Touchguide
Getting to know your OpenStage phone TouchGuide Before using the telephone, remove the protective covering from the TouchGuide ring surface. With this control, you can manage most of your phone’s functions, as well as its displays. Operation Functions when key is pressed In idle mode: •... - Page 23 Getting to know your OpenStage phone Browsing in the call list and phonebook tabs If you are in the phonebook, you normally navigate between the "Personal" and "Corporate" tabs using the u key or if you are in the call lists you nav- igate between the "Missed", "Received", "Dialled"...
-
Page 24: Programmable Sensor Keys
Getting to know your OpenStage phone Programmable sensor keys Your OpenStage 80/80 G has nine (OpenStage 60/60 G: eight) illuminated sensor keys. You can assign functions or numbers to them. Increase the number of programmable sensor keys by connecting a key module page 19. - Page 25 Getting to know your OpenStage phone Text input Example: Changing the key label page 98. Enter the required characters via the keypad. Select the functions using the keys Confirm your entry with L1 label: Ma Characters entered Save Save entry #=Delete Character Delete character Previous...
-
Page 26: Keypad
Getting to know your OpenStage phone Keypad Text input In cases where text input is possible, you can use the keypad to input text, punctuation and special characters in addition to the digits 0 to 9 and the hash and asterisk symbols. To do this, press the numerical keys repeatedly. Example: To enter the letter "h", press the number key on the keypad twice. -
Page 27: Graphic Display
Getting to know your OpenStage phone Graphic display Your OpenStage 60/60 G/80/80 G is equipped with a tilt-and-swivel color display page 16. Appearance You can customize your display to suit your personal requirements: • Angle the display as required page 13. •... -
Page 28: Display Keyboard
Getting to know your OpenStage phone Display keyboard Simple text and characters can also be entered at any time using the keypad page 26. Depending on the context, the display keyboard is displayed with different elements. Element in focus Letters, digits, punctuation or special characters Function bar Use the TouchGuide to operate the display keyboard... - Page 29 Getting to know your OpenStage phone Character overview (depends on the current language setting) 1x 2x 3x 4x 5x 6x 7x 8x 9x 10x 11x 12x 13x 14x ä ö ß ü ’ [1] Space [2] Additional special characters are available on the display keyboard [3] Switch between upper and lower-case text and number entry...
-
Page 30: Context-Dependent Displays
Getting to know your OpenStage phone Context-dependent displays Depending on the situation at hand, the graphic display on your OpenStage phone displays different content, to which you can respond intuitively. Idle mode If there are no calls taking place or settings being made, your OpenStage is in idle mode. -
Page 31: Telephony Dialogs
Getting to know your OpenStage phone Telephony dialogs The dialogs in the lower area of the display prompt you to input data or pro- vide you with information about the call states. Example: You dialed the phone number of a contact saved in the phone- book. -
Page 32: Context Menus
Getting to know your OpenStage phone Context menus If the arrow icon appears next to a selected entry, additional menu lev- els or selection options are available in the form of a context menu. Navi- gate through these options using the TouchGuide page 22. -
Page 33: Application Tab
Getting to know your OpenStage phone Application tab In many cases you can select further content within an application using tabs. Missed Received Arrow icon: Additional tabs Icon Active tab Additional tab Example: Press the mode key to open the call lists page 21. -
Page 34: Applications Available On Your Openstage Phone
Applications available on your OpenStage phone Applications available on your OpenStage phone The following descriptions provide an overview of the various applications available on your OpenStage phone. Application navigation Activating an application You can switch to the relevant application using the mode keys page 21. -
Page 35: Telephony Interface
Applications available on your OpenStage phone Telephony interface Additional information is displayed in the telephony interface when your phone rings, when you dial a number or during a call, for instance. The same information is available on multi-line telephones for the selected line in the line overview. -
Page 36: Phonebooks
Applications available on your OpenStage phone Phonebooks In addition to the personal phonebook, this application contains entries from other directory services such as an LDAP corporate directory and the company’s internal phonebook. To access the menu: Press the key until the required tab is active. Example: Corporate Personal... -
Page 37: Personal Phonebook
Applications available on your OpenStage phone Personal phonebook The "Personal" tab contains your personal phonebook. You can store up to 1000 contacts in this phonebook. The entries are sorted in alphabetical or- der in the phonebook list and displayed with the icon for the specified de- fault phone number. -
Page 38: Ldap Directory
Applications available on your OpenStage phone LDAP directory If you have access to an LDAP directory (contact the responsible service personnel), you can search contacts in a company-wide directory. Both a simple and an advanced search function are available for this in the "Corporate"... -
Page 39: Call Lists
Applications available on your OpenStage phone Call lists All calls and numbers dialed on your phone are logged in chronological or- der in call lists. Callers with suppressed numbers cannot be saved in the call lists. The following call lists are displayed individually on separate tabs: •... -
Page 40: Entry Details
Applications available on your OpenStage phone Example: "Dialled" tab Additional tabs Missed Dialled Selected entry with Options context menu Coco, Chanel 12.07. Date of call 220870 Number of call attempts The following functions are available via the context menu of a selected en- try: •... -
Page 41: Mailbox
Applications available on your OpenStage phone Mailbox Depending on the type and configuration of your communications platform (contact the relevant service personnel), messages from services such as HiPath Xpressions are displayed in this application in addition to messages received. The following messages are displayed individually on separate tabs: •... -
Page 42: Menu
Applications available on your OpenStage phone Menu This menu includes a configuration area for users and administrators, as well as an area for any available applications (contact service personnel). To access the menu: Press the key. XML applications Settings Applications Service Menu User User menu, open... - Page 43 Applications available on your OpenStage phone Audio Optimize the volumes, audio settings and ring tones of your OpenStagefor your environment and according to your personal requirements. Volumes Adjust the settings on your telephone page 169. Settings Adjust the settings on your telephone page 170.
-
Page 44: Settings - Administration
Applications available on your OpenStage phone Security Protect your settings and data by assigning a password. Adjust the settings on your telephone page 114. Make settings via the Web interface page 199. Network information View status information for the network environment. Viewing settings on your telephone page 184. -
Page 45: Control And Monitoring Function
Applications available on your OpenStage phone Control and monitoring function A control or monitoring function can be activated on your phone for service purposes by remote maintenance. Control function Service personnel have the option to activate and deactivate features of the phone via remote maintenance. -
Page 46: Basic Functions
Basic functions Step by Step Basic functions Please read the introductory chapters "Getting to know your OpenStage phone" page 15 and "Applications available on your OpenStage phone" page 34 carefully before performing any of the steps described here on your phone. Answering a call Your OpenStage phone rings with the tone signal set when an incoming call is received. -
Page 47: Answering A Call Via The Loudspeaker (Speakerphone Mode)
Basic functions Step by Step Answering a call via the loudspeaker (speakerphone mode) Suggestions for using speakerphone mode • Tell the other party that speakerphone mode is ac- tive. • Adjust the call volume while speakerphone mode is active. • The ideal distance between the user and the phone in speakerphone mode is about 50 cm. -
Page 48: Switching To Speakerphone Mode
Basic functions Step by Step Switching to speakerphone mode People present in the room can participate in your call. Prerequisite: You are conducting a call via the handset. Hold down the key and replace the handset. Then re- lease the key and proceed with your call. if nec. -
Page 49: Open Listening
Basic functions Step by Step Open listening People present in the room can silently monitor your call. You are recommended not to activate the speak- erphone feature when using a Bluetooth headset (see page 190) because depending on head- set and environment, this can lead to reduced speech quality. -
Page 50: Making Calls
Basic functions Step by Step Making calls Off-hook dialing Lift the handset. Internal calls: Enter the station number. External calls: Enter the external code and the station number. Pay attention to the notes on voice encryption page 113. The called party does not answer or is busy Replace the handset. -
Page 51: On-Hook Dialing
Basic functions Step by Step On-hook dialing Internal calls: Enter the station number. External calls: Enter the external code and the station number. Your system may also be programmed so that you have to press the "internal" key before you dial an internal number. -
Page 52: Dialing With The Headset Connected
Basic functions Step by Step Dialing with the headset connected Prerequisite: The headset is connected. Internal calls: Enter the station number. External calls: Enter the external code and the station number. The headset key lights up. The connection is established as soon as your input is complete. -
Page 53: Rejecting A Call
Basic functions Step by Step Rejecting a call The phone is ringing. The caller is displayed. Reject call Select and confirm the option shown. The connection is cleared down. The caller receives the message "Currently not possible". Turning the microphone on and off To prevent the other party from listening in while you consult with someone in your office, you can temporari- ly switch off the handset microphone or the handsfree... -
Page 54: Calling A Second Party (Consultation)
Basic functions Step by Step Calling a second party (consultation) You can call a second party while a call is in progress. The first party is placed on hold. if nec. Open the context menu page 32. Consultation Confirm. Call the second party. Pay attention to the notes on voice encryption page 113. -
Page 55: Transferring A Call
Basic functions Step by Step Transferring a call If the person you are speaking to wants to talk to anoth- er colleague of yours, you can transfer the call that col- league. if nec. Open the context menu page 32. Consultation Confirm. -
Page 56: Using Callback
Basic functions Step by Step Using callback You can request a callback if the station called is busy or if nobody answers. This feature saves you from having to make repeated attempts to reach the user. You receive a callback, •... -
Page 57: Viewing And Deleting A Stored Callback
Basic functions Step by Step Viewing and deleting a stored callback Open the idle menu page 30. View callbacks Select and confirm the option shown Next callback Select and confirm to display additional entries. Deleting a displayed entry Delete Confirm. Ending retrieval Exit Select and confirm the option shown. -
Page 58: Enhanced Phone Functions
Enhanced phone functions Step by Step Enhanced phone functions Answering calls Accepting calls via the Headset Prerequisite: You have connected a headset or are using a Bluetooth headset page 190. Make sure your headset port is set up properly page 171. The LED flashes when a call is received. -
Page 59: Using The Speakerphone
Enhanced phone functions Step by Step If you know the number of the telephone that is ringing, enter it directly. Pay attention to the notes on voice encryption page 113. Accepting a call in a team page 151. Using the speakerphone A colleague addresses you directly over the speaker with a speaker call. -
Page 60: Answering Calls From The Entrance Telephone
Enhanced phone functions Step by Step Answering calls from the entrance telephone and opening the door If an entrance telephone has been programmed, you can use your telephone to speak to someone at the en- trance telephone and to activate a door opener. If you have the proper authorization (contact your ser- vice personnel), you can activate the door opener, en- abling visitors to open the door themselves by entering... -
Page 61: Accepting A Call From An Answering Machine
Enhanced phone functions Step by Step Activating the door opener Open the Program/Service menu page 42. More features Select and confirm the option shown. Door opener on Select and confirm the option shown. Dial the entrance telephone number. Confirm the five-digit code to change the code. 3=change password Select the displayed function and press the "OK"... -
Page 62: Making Calls
Enhanced phone functions Step by Step Making calls Redialing from a call list For information about the call lists as well as sample en- tries, refer to page 39. Press the key until the call list you want is active. Niels, Bohr 18.10. - Page 63 Enhanced phone functions Step by Step Open the context menu. Dial Select and confirm the required phone number using the icons. Explanation of the icons page 36. Pay attention to the notes on voice encryption page 113. Calling a contact from a group Press the key shown until the "Personal"...
-
Page 64: Using A System Phonebook
Enhanced phone functions Step by Step Using a system phonebook For information about the system phonebook, see page 38. Press the key shown until the "System" tab is active. Open the idle menu page 30. Directory Select and confirm the option shown. if nec. -
Page 65: Making Calls Using System Speed-Dial Numbers
Enhanced phone functions Step by Step Making calls using system speed-dial numbers Prerequisite: You know the system speed-dial num- bers (consult your service personnel). Open the Program/Service menu page 42. Use speed dialing Select and confirm the option shown Enter a three-digit speed-dial number. Pay attention to the notes on voice encryption page 113. - Page 66 Enhanced phone functions Step by Step Press the required speed-dial key. If the key is already in use, the programmed phone number appears on the screen. Change Confirm. First enter the external code and then the external sta- tion number. Save Confirm.
-
Page 67: Talking To Your Colleague With A Speaker Call
Enhanced phone functions Step by Step Talking to your colleague with a speaker call You can make a loudspeaker announcement through a loudspeaker if connected (ask your service personnel), or to an internal user with a system telephone without any action on their part. Open the Program/Service menu page 42. -
Page 68: Automatic Connection Setup/Hotline
Enhanced phone functions Step by Step Automatic connection setup/hotline If this function is configured (contact your service per- sonnel), the system automatically sets up a connection to a preset internal or external destination. Lift the handset. Depending on the setting, the connection is either set up immediately or only after a preset period of time (hotline after a timeout). -
Page 69: Assigning A Station Number (Not For U.s.)
Enhanced phone functions Step by Step Assigning a station number (not for U.S.) If this function has been configured (contact your ser- vice personnel), you can selectively assign a specific number (DID number) to your telephone before making an external call. The assigned number then appears on the called party’s display. -
Page 70: During A Call
Enhanced phone functions Step by Step During a call Using call waiting (second call) You can be reached by a caller even if you are already conducting a call. The call waiting tone signals a second call. You can ignore or accept the second call. When you accept the waiting call, you can either end the first call or place it on hold and resume the call later You can block the second call or the signal tone... -
Page 71: Preventing And Allowing A Second Call (Call Waiting)
Enhanced phone functions Step by Step Preventing and allowing a second call (call waiting) If this function has been configured (ask your service personnel), you can prevent or allow a second call page 70 from being signaled by automatic camp-on during an ongoing call. -
Page 72: Parking A Call
Enhanced phone functions Step by Step Parking a call You can park up to ten calls, either internal, external, or both. Parked calls can be displayed on and picked up from another telephone. This feature is useful if you want to continue a call at another phone. Prerequisite: You are conducting a call. -
Page 73: Placing An External Call On Hold
Enhanced phone functions Step by Step Placing an external call on hold If you have programmed a hold key on your phone page 91, you can put external calls on hold. Then all other stations can accept the call on the as- signed trunk. -
Page 74: Conducting A Conference
Enhanced phone functions Step by Step Conducting a conference In a conference call, you can talk to as many as four oth- er parties at the same time. These may be internal or external users. You can only add parties to or remove them from a conference if you initiated the conference. - Page 75 Enhanced phone functions Step by Step If a participant that was connected to the confer- ence via an unencrypted line leaves, the confer- ence remains unsecured. Ending a conference Open the context menu page 32. End conference Select and confirm the option shown. Replace the handset, if this feature is configured (con- tact your service personnel).
-
Page 76: Activating Tone Dialing/Dtmf Suffix-Dialing
Enhanced phone functions Step by Step Activating tone dialing/DTMF suffix-dialing You can transmit dual-tone multifrequency (DTMF) sig- nals to control devices such as an answering machine or automatic information system. Open the Program/Service menu page 42. Calls Select and confirm the option shown. DTMF dialing Select and confirm the option shown. -
Page 77: Recording A Call
Enhanced phone functions Step by Step Recording a call If configured (contact your service personnel), you can record an ongoing call. Prerequisite: You are on a call, the "Recording" key is configured page 91. Press the "Recording" key. The LED lights up. You and the other party hear an acoustic announce- ment, indicating that recording has started, and an acoustic signal is emitted approx. -
Page 78: Transferring A Call After A Speaker Call Announcement In A Group
Enhanced phone functions Step by Step Transferring a call after a speaker call announcement in a group If this function has been configured (contact your ser- vice personnel), you can use a speaker call (announce- ment, page 151) to announce a call in progress to a group of users page 67. -
Page 79: Sending A Trunk Flash
Enhanced phone functions Step by Step Sending a trunk flash To activate ISDN-type services and features through the network carrier’s analog trunks or those of other com- munications platforms (such as "consultation hold"), you must send a signal to the trunks before dialing the ser- vice code or telephone number. -
Page 80: If You Cannot Reach A Destination
Enhanced phone functions Step by Step If you cannot reach a destination Call waiting (camp-on) Prerequisite: You have dialed an internal number and hear a busy signal. It is important that you reach the called party. Camp-on Wait (approx. 5 seconds) until "Camp-on" appears on the display and the busy tone is followed by the ring tone. -
Page 81: Using Night Answer
Enhanced phone functions Step by Step Using night answer When night answer mode is active, for example during a lunch break or after office hours, all external calls are immediately forwarded to a specific internal telephone (night station). The night station can be defined by ser- vice personnel ( standard night answer service) or by you ( temporary night answer service). -
Page 82: Call Forwarding
Call forwarding Step by Step Call forwarding You can immediately forward internal or external calls to different internal or external telephones (destinations). (An external destination requires special configuration in the system.) Select your preferred method: • "Call forwarding key" page 83 •... -
Page 83: Overview Of Call Forwarding Types
Call forwarding Step by Step Overview of call forwarding types Different input masks are displayed depending on how you program call forwarding (call forwarding key page 83 or Program/Service menu page 86). The entries in the relevant menus correspond as explained in the following table: Call forwarding key Program/Service menu... -
Page 84: Editing Forwarding Destinations
Call forwarding Step by Step Editing forwarding destinations Entering a station number directly Prerequisite: The cursor is in a station number input field. 2208| Enter the station number. Select and confirm the option shown to insert the sta- tion number just copied page 84. - Page 85 Call forwarding Step by Step Saving a station number as a favorite for call for- warding You can save up to five station numbers as favorites. These station numbers then appear in the context menu when you are programming a call forwarding des- tination.
-
Page 86: Forwarding Express Activation For "All Calls
Call forwarding Step by Step Forwarding express activation for "all calls" Press the key quickly. The LED lights up. Enter the forwarding destination page 84. Set forwarding Confirm. or The last forwarding destination saved for "all calls" is the first entry in the pop-up menu: Dalai, Lama Select and confirm the option shown. -
Page 87: Deactivating Call Forwarding
Call forwarding Step by Step Deactivating call forwarding Press the lit key. The LED goes out. Open the idle menu page 30. Forwarding off Select and confirm the option shown. -
Page 88: Using System Forwarding Instructions
Call forwarding Step by Step Using system forwarding instructions Call forwarding no reply (CFNR) Calls that are not answered after three rings (=default, can be adjusted by service personnel) or that are re- ceived while another call is ongoing can be automatical- ly forwarded to a specified telephone. -
Page 89: Call Forwarding In The Event Of Telephone Failure (Cfss)
Call forwarding Step by Step Call forwarding in the event of telephone failure (CFSS) If configured (consult your service personnel), you can define an internal or external call forwarding destination that activates in the event of telephone failure. Open the Program/Service menu page 42. -
Page 90: Call Forwarding In The Carrier Network And Forwarding Multiple Subscriber Numbers (Msn) (Not For U.s.)
Call forwarding Step by Step Call forwarding in the carrier network and forwarding multiple subscriber numbers (MSN) (not for U.S.) If this function has been configured (contact your ser- vice personnel), you can forward calls to your assigned multiple subscriber number (MSN) (DID number) direct- ly within the carrier network. -
Page 91: Programming Sensor Keys
Programming sensor keys Step by Step Programming sensor keys You can program frequently used functions, phone numbers or procedures on your OpenStage 60/60 G/ 80/80 G’s sensor keys. Configuring function keys See also page 24. Example: Programming the Shift key Press and hold the required sensor key. -
Page 92: Overview Of Functions
Programming sensor keys Step by Step The programmed function is activated by briefly touching the key. For functions that can be switched on/off such as "Do not disturb", press once to switch the function on and press again to switch the function off. When the function is switched on, the LED lights up. - Page 93 Programming sensor keys Step by Step Repdial key (Internal), Direct station select: Party not on a call. Party is on a call or has activated DND. Flashing quickly - I’m being called, please accept. Flashing slowly - another party is being called and has not yet answered.
- Page 94 Programming sensor keys Step by Step The following functions programmed on keys do not have a LED function: Repdial key, Procedure key, Trace call, Speed dial, Clear, Lock all phones, Send message, Directory (1=internal, 2=LDAP), Call waiting, Toggle/Connect, Conference, Speaker call, Retrieve line, Reserve trunk, Release trunk, Temporary Phone, Override, Park a call, Pickup - directed, Pickup - group, Account code, Show call charges, Page, Answer page, Timed reminder, Open...
-
Page 95: Programming A Procedure Key
Programming sensor keys Step by Step Programming a procedure key Numbers and functions which require further input, i.e. which contain several operating steps, can be saved on a key on your telephone. Press and hold the required sensor key. Assign functionality Select and confirm the option shown. - Page 96 Programming sensor keys Step by Step Select the stored procedure by clicking the sen- sor key. Procedures with activatable/deactivatable func- tions are activated by pressing the sensor key once and deactivated by pressing it again. You can press the procedure key during a call to automatically send the saved digits as DTMF sig- nals page 76.
-
Page 97: Configuring Repdial Keys
Programming sensor keys Step by Step Configuring repdial keys You can also program internal and external station num- bers on the second level. The LED function is not avail- able for internal station numbers on the second level. To program the second level, you must program a "Shift" page 91. -
Page 98: Changing The Label Retrospectively
Programming sensor keys Step by Step Changing the label retrospectively The label set when a repdial key was programmed can also be subsequently changed. Changing the label Open the Program/Service menu page 42. Prog. feature key Select and confirm the option shown. Press the required sensor key. -
Page 99: Deleting Sensor Key Programming
Programming sensor keys Step by Step Deleting sensor key programming Hold down the required key. Assign functionality Select and confirm the option shown. if nec. Next layer Select and confirm the option shown to delete the en- tries on the second level. Clear key Select and confirm the option shown. -
Page 100: Phonebooks And Call Lists
Phonebooks and call lists Step by Step Phonebooks and call lists Personal phonebook For a detailed description of this function, see page 36. Creating a new contact Press the key until the "Personal" tab is active. Options Confirm. New contact Confirm. - Page 101 Phonebooks and call lists Step by Step Select the "Default No." entry. Business 1 The phone displays the current setting. Confirm. Mobile Select and confirm the required phone number. Select the "Options" entry. Save & exit Select and confirm the option shown. Press the key shown.
-
Page 102: Changing Contact Data
Phonebooks and call lists Step by Step Changing contact data Press the key until the "Personal" tab is active. Niels, Bohr Select a contact. Open the context menu. Details Select and confirm the option shown. Select the required field. if nec. Delete existing text. -
Page 103: Managing The Phonebook
Phonebooks and call lists Step by Step Managing the phonebook Defining the contact display format Press the key until the "Personal" tab is active. Options Confirm. Display Select and confirm the option shown in the context menu. Select and confirm the display format. Example Option Miller, Peter... -
Page 104: Managing Groups
Phonebooks and call lists Step by Step Managing groups Creating a group Press the key until the "Personal" tab is active. Options Confirm. Groups Select and confirm the option shown in the context menu. Options Confirm. New group Confirm the option shown in the context menu. Select the "Group name"... - Page 105 Phonebooks and call lists Step by Step Press the key shown. Save Confirm. Deleting a contact from a group Press the key until the "Personal" tab is active. Niels, Bohr Select a contact. Open the context menu. Details Select and confirm the option shown. Select the "Groups"...
-
Page 106: Ldap Database
Phonebooks and call lists Step by Step LDAP database Information about the LDAP directory can also be found page 38. Finding an LDAP entry Pay attention to the notes on voice encryption page 113. Press the key shown until the "Corporate" tab is active. Options Confirm. -
Page 107: Quick Search
Phonebooks and call lists Step by Step Importing an LDAP entry into the local phonebook Coco, Chanel Select an entry. Open the context menu. Save Select and confirm the option shown in the context me- nu. The entry is copied with all details into the personal phonebook. -
Page 108: Call Lists
Phonebooks and call lists Step by Step Call lists For a detailed description of this function, see page 39. View details Press the key until the call list you want is active. Niels, Bohr 18.10. Select the entry you want. Open the context menu page 32. -
Page 109: Copying Entries From The Call Logs Into The Personal Phonebook
Phonebooks and call lists Step by Step Copying entries from the call logs into the personal phonebook Press the key until the call list you want is active. Niels, Bohr 18.10. 07:06am Select the entry you want. Copy as contact Select and confirm the option shown in the context me- You have the following options for "Create contact": •... -
Page 110: Displaying And Assigning Call Charges
Displaying and assigning call charges Step by Step Displaying and assigning call charges Displaying call charges (not for U.S.) For the current call Call charges are shown by default on the display when a call ends. If you want to display call charges as they occur during a chargeable call, your service personnel must request this option from the network operator. -
Page 111: Displaying Call Charges For Another Telephone (Not For U.s.)
Displaying and assigning call charges Step by Step Displaying call charges for another telephone (not for U.S.) If configured (contact your service personnel), you can also display and print out information on chargeable calls for other phones (such as a pay phone). Prerequisite: You have programmed the function "Show call charges"... -
Page 112: Dialing With Call Charge Assignment
Displaying and assigning call charges Step by Step Dialing with call charge assignment You can assign external calls to certain projects. Prerequisite: Your service personnel have defined ac- count codes for you. Open the Program/Service menu page 42. Calls Select and confirm the option shown. Account code Select and confirm the option shown. -
Page 113: Privacy/Security
Privacy/security Step by Step Privacy/security Voice encryption (only for HiPath 2000/ 3000/5000/OpenOffice EE) Please see also the explanations on page 13. Notes on voice encryption Unencrypted connection warning Your service personnel can define at the communica- tion system whether you are notified of unencrypted calls and how. -
Page 114: User Password
Privacy/security Step by Step User password The user password protects access to the user menu page 42. The preset password "000000" is a blank pass- word, that is, the "User" menu is freely accessi- ble. z You can also configure this setting via the Web interface page 199. -
Page 115: Turning Ringer Cutoff On And Off
Privacy/security Step by Step Turning ringer cutoff on and off If you do not wish to take calls, you can activate the ring- er cutoff function. Calls are only identified by one ring signal, an indication on the display, and a key which has been programmed to flash (such as a trunk key). -
Page 116: Do Not Disturb
Privacy/security Step by Step Do not disturb If you do not wish to take calls, you can activate do not disturb. Internal callers hear the busy tone, external call- ers are connected to another phone, which you can specify (contact your service personnel). In multi-line telephones, "Do not disturb"... -
Page 117: Monitoring A Room
Privacy/security Step by Step Monitoring a room You can use a phone to monitor a room. This function must be enabled on the monitoring phone. When you call this phone, you can immediately hear what is happening in that room. Activating the telephone to be monitored Open the Program/Service menu page 42. -
Page 118: Trace Call: Identifying Anonymous Callers (Not For U.s.)
Privacy/security Step by Step Trace call: identifying anonymous callers (not for U.S.) You can identify malicious external callers. You can record the caller’s phone number during a call or up to 30 seconds after a call. In this case, you should not hang up. -
Page 119: Locking The Telephone To Prevent Unauthorized Use
Privacy/security Step by Step Locking the telephone to prevent unauthorized use You can prevent unauthorized parties from using your phone during your absence. Locking the phone Open the idle menu page 30. Lock phone Select and confirm the option shown. Press the key shown. -
Page 120: Locking Another Telephone To Prevent Unauthorized Use
Privacy/security Step by Step Locking another telephone to prevent unauthorized use If configured (contact your service personnel), you can lock and unlock other telephones to prevent unautho- rized access. If a phone user locks his or her phone and forgets the personal lock code, you can use this function to unlock the phone. -
Page 121: Saving Your Pin
Privacy/security Step by Step Saving your PIN Enter the lock code to use the functions • for locking the phone page 119 • for using another telephone like your own page 127. You can change this lock code on your own. If you forget your code, contact your service per- sonnel to have the default code restored. -
Page 122: More Functions/Services
More functions/services Step by Step More functions/services Appointments function You can program your telephone to send you a timed re- minder call. You must save the relevant time of the call for this. You can enter a single appointment that will take place in the next twenty four hours or you can enter a daily re- curring appointment. -
Page 123: Using Timed Reminders
More functions/services Step by Step Using timed reminders Prerequisite: You have saved a reminder page 122. The saved time arrives. Reminder at 1200 The phone is ringing. The appointment time is dis- played. Press key twice. Lift the handset and replace it again. If you do not answer the timed reminder, it is re- peated five times and then deleted. -
Page 124: Sending A Message
More functions/services Step by Step Sending a message You can send short text messages to individual stations or groups of stations with system telephones. Creating and sending a message Open the idle menu page 30. Open the context menu during a call Send message select and confirm the option shown. -
Page 125: Viewing And Editing Incoming Messages
More functions/services Step by Step Viewing and editing incoming messages Pay attention to the notes on page 41. The LED lights up. Press the key shown. View messages Confirm. The sender’s caller ID appears on the display. Message sent Confirm. The text message appears on the display. -
Page 126: Leaving An Advisory Message
More functions/services Step by Step Leaving an advisory message You can leave messages/advisory messages on your phone’s display for internal callers that wish to contact you in your absence. When you receive a call, the message appears on the caller’s display. Open the idle menu page 30. -
Page 127: Displaying The Number Of Waiting Calls/Overload Display
More functions/services Step by Step Displaying the number of waiting calls/ overload display You can show the number of external waiting calls on the display by pressing the "View number of calls" key page 91. Press the " Calls in Q" key. If the number of waiting calls exceeds a preset limit while you are engaged in another call (overload), the LED on the key lights up. -
Page 128: Using A Mobile Connection At Another Phone
More functions/services Step by Step Using a mobile connection at another phone You can configure a mobile phone connection that was set up especially for you by your service personnel at a OpenStage prepared for this purpose in the system. The original "guest telephone"... - Page 129 More functions/services Step by Step Data Privacy When "logging onto" the "guest telephone", the follo- wing mobile connection settings are transferred: • Key assignments • Call forwarding • Authorizations (other than user password) Waiting messages are also signaled (mailbox lamp or MWI).
-
Page 130: Logging On To The "Guest Telephone
More functions/services Step by Step Logging on to the "guest telephone" Log the mobile connection on to the "guest telephone". Prerequisite: A mobile connection with a separate pho- ne number and a password has been configured for you (contact your service personnel). The key "Mobile Login" is configured on your OpenStage where required. -
Page 131: Moving The Connection To The Next Telephone
More functions/services Step by Step Data Privacy You can no longer see the original user settings for the "guest telephone", however you can now use your con- nection, an empty phonebook and an empty caller list. Data Mobility Your connection and your "Mobility phonebook and cal- ler list"... -
Page 132: Logging Off The "Guest Telephone
More functions/services Step by Step Logging off the "guest telephone" If you no longer need your connection on the "guest telephone" or if you want to switch to another tele- phone, log off on the "guest telephone". Where re- quired, save current changes to the phonebook or caller list to the USB memory stick (see page 191). -
Page 133: Fax Details And Message On Answering Machine
More functions/services Step by Step Fax details and message on answering machine If a fax or answering machine is connected to your sys- tem and you have assigned the "Fax details" function to a programmable key page 91, the key lights up when a fax or a message has been received. -
Page 134: Activating Functions For Another Telephone
More functions/services Step by Step Activating functions for another telephone If configured (contact your service personnel), you can activate and deactivate the following functions for other phones (associated service): • Do not disturb, code: 97/#97 page 116 • Call forwarding, code: 13/#1 page 86... -
Page 135: Using System Functions From Outside Disa (Direct Inward System Access)
More functions/services Step by Step Using system functions from outside DISA (direct inward system access) If configured (contact your service personnel), you can use an external phone like an internal station to set up an outgoing external connection via the system. You can also activate or deactivate the following system functions: •... - Page 136 More functions/services Step by Step Establish a connection to the system. Enter the station number (contact your service personnel). Wait for the continuous tone (if necessary, switch phone to tone dialing) and enter the internal number as- signed to you and the corresponding PIN. Enter the code (only required if programmed in the sys- tem).
-
Page 137: Using Functions In Isdn Via Code Dialing (Keypad Dialing)
Contact your network provider to find out which ISDN functions can be code-operated in your country. Siemens Enterprise Communications GmbH & Co. KG shall not be liable for damages/ costs which may be incurred by fraudulent activ- ities or remote operation (such as toll fraud). -
Page 138: Controlling Connected Computer Or Their Programs/Tel. Data Service
More functions/services Step by Step Controlling Connected Computer or Their Programs/Tel. Data Service If this function has been configured (contact your ser- vice personnel), you can control connected computers or programs running on them, such as hotel services or information systems, from your telephone. If this function has been configured (contact your ser- vice personnel), you can control connected computers or programs running on them, such as hotel services or... -
Page 139: Communicating With Pc Applications Over A Csta Interface
More functions/services Step by Step Communicating with PC applications over a CSTA interface If configured (contact your service personnel), you can use your phone to communicate with PC applications (CSTA = Computer Supported Telecommunications Applications). You send information to the application and receive information from the application, for example, via your phone display. -
Page 140: Controlling Relays (Only For Hipath 3000)
More functions/services Step by Step Controlling relays (only for HiPath 3000) If this function has been configured (contact your ser- vice personnel), you can use up to four relays to enable/ disable different devices (such as a door opener). Depending on how you program the relays, you can ac- tivate and deactivate them manually them or configure them to activate and deactivate automatically (after tim- eout). -
Page 141: Radio Paging (Not For U.s.)
More functions/services Step by Step Radio paging (not for U.S.) If radio paging equipment (PSE) is connected to your system (contact your service personnel), you can locate people via their pocket receivers. Pocket receivers signal a call request to the person you want to page. -
Page 142: Making Calls In The Team/Executive/Secretary
Making calls in the team/executive/secretary configuration Step by Step Making calls in the team/ executive/secretary configuration If configured (consult your service personnel), you belong to a team of subscribers with multiple lines (multi-line page 14). Your phone features trunk keys (MULAP keys) page 143. -
Page 143: Line Seizure
Making calls in the team/executive/secretary configuration Step by Step Line seizure Line seizure must be configured (consult your service personnel). If automatic line seizure is configured, a trunk is automatically assigned when you lift the hand- set or press the trunk key. Trunk keys The programmable sensor keys on multi-line phones function as trunk keys. -
Page 144: Answering Calls With The Trunk Keys
Making calls in the team/executive/secretary configuration Step by Step Answering calls with the trunk keys Prerequisite: You can see an incoming call on a trunk. if nec. Press the trunk key that is flashing quickly (only if Prime Line page 143 is not active). Lift the handset. -
Page 145: Making Calls On Multiple Lines Alternately
Making calls in the team/executive/secretary configuration Step by Step Making calls on multiple lines alternately Prerequisite: You are conducting a call via one of your group’s trunks. Another trunk key is flashing. Press the flashing trunk key. The first call party is on hold on the other trunk. -
Page 146: Direct Station Selection Key
Making calls in the team/executive/secretary configuration Step by Step Direct station selection key Your phone features a programmable sensor key config- ured for direct station selection for every team member. Meaning of LED displays on DSS keys Meaning of function key Team party not on a call. -
Page 147: Transferring A Call In Progress
Making calls in the team/executive/secretary configuration Step by Step Transferring a call in progress Press the DSS key and announce the call if necessary. Replace the handset. Press the key shown. Accepting a call for another team member Press the flashing DSS key or trunk key. Lift the handset. -
Page 148: Forwarding Calls On Trunks
Making calls in the team/executive/secretary configuration Step by Step Forwarding calls on trunks You can immediately forward internal or external calls to different internal or external telephones (destinations). (External destinations require special configuration in the system). Activating call forwarding for one trunk activates the function for all trunk keys assigned to this trunk in your group. - Page 149 Making calls in the team/executive/secretary configuration Step by Step Deactivating call forwarding Open the Program/Service menu page 42. Forward Line: Off Select and confirm the option shown. Press the required trunk key. Enter the required trunk number. If available. Press the "CFW MULAP" key. If you have activated call forwarding for a trunk, a special dial tone sounds when the line is seized.
-
Page 150: Transferring Calls Directly To The Executive Phone
Making calls in the team/executive/secretary configuration Step by Step Transferring calls directly to the executive phone Normally, all calls for the executive are audibly signaled only by the secretary phone. You can set audible signaling so calls are signaled only by the executive phone or by a second phone assigned to it. -
Page 151: Using Team Functions
Using team functions Step by Step Using team functions If configured (consult your service personnel), your tele- phone is part of a team. The team consists of internal phones that are able to use certain functions. Activating/deactivating a group call If configured (consult your service personnel), you be- long to one or more groups of stations, which can be reached via hunt group or group call station numbers. - Page 152 Using team functions Step by Step You belong to multiple groups or to one group with trunk keys (including executive/secretary configu- ration) Open the idle menu page 30. Leave group Select and confirm the option shown Join group select and confirm the option shown. Press the "Hunt group"...
-
Page 153: Accepting A Call For Another Member Of Your Team
Using team functions Step by Step Accepting a call for another member of your team You can use your own telephone to accept calls for oth- er telephones in your team, even while engaged in an ongoing call. To do this, contact your service personnel to find out if a pickup group has been configured. -
Page 154: Uniform Call Distribution (Ucd)
Using team functions Step by Step Uniform Call Distribution (UCD) If configured (consult your service personnel), you may belong to a group of stations (agents), to which calls are distributed. An incoming call is always assigned to the agent idle the longest. - Page 155 Using team functions Step by Step Requesting and activating a work time You can request/activate work time to ensure you have enough time to wrap up the last call. Your phone is ex- cluded from call distribution for a set period or until you log back on.
-
Page 156: Special Functions In The Lan
HiPath OpenOffice ME can not be operated in a HiPath 5000 environment. Leaving hunt group/group call Prerequisite: You are part of a hunt group/group call page 151 in another HiPath 2000/HiPath 3000/ HiPath OpenOffice EE. Open the idle menu page 30. -
Page 157: Setting Up "Follow Me" Call Forwarding
Open the idle menu page 30. DISA intern Select and confirm the option shown. (DISA) station number of your HiPath 2000/ HiPath 3000/HiPath OpenOffice EE. Confirm your entry. Enter the (DISA) station number of your phone. Confirm your entry. -
Page 158: Using Night Answer
Open the idle menu page 30. DISA intern Select and confirm the option shown. Enter the (DISA) station number of the HiPath 2000/ HiPath 3000/HiPath OpenOffice EE where the night an- swer phone is connected. Confirm your entry. Enter the (DISA) station number of the phone you are using to activate/deactivate night answer. -
Page 159: Ringing Group
Step by Step Ringing group You can have calls for your telephone signaled audibly at external telephones or at telephones in other HiPath 2000/HiPath 3000/HiPath OpenOffice EE com- munications platforms page 151. Saving, displaying, and deleting telephones for the ringing group Open the Program/Service menu page 42. -
Page 160: Controlling Relays (Only For Hipath 3000)
Special functions in the LAN Step by Step Controlling relays (only for HiPath 3000) If this feature is configured (contact your service person- nel), you can also control relays page 140 in other HiPath 3000 communications platforms. Open the idle menu page 30. -
Page 161: Opening A Door
Open the idle menu page 30. DISA intern Select and confirm the option shown. Enter the (DISA) station number of the HiPath 2000/ HiPath 3000/HiPath OpenOffice EE where you wish to control the relay. Confirm your entry. Enter the (DISA) station number of the phone you wish to use to control the relay. -
Page 162: Individual Phone Configuration
Individual phone configuration Step by Step Individual phone configuration Adjusting display settings Adjusting the display to a comfortable rea- ding angle You can swivel the display unit. Adjust the display unit so that you can clearly read the screen. Screensaver Activate a screensaver for the telephone idle state. - Page 163 Individual phone configuration Step by Step Automatic screensaver activation Set how long OpenStage should be idle before the screensaver automatically activates. z You can also configure this setting via the Web interface page 199. Press the key shown until the "Settings" tab is active. User Confirm.
- Page 164 Individual phone configuration Step by Step Screensaver fade-in time Set the speed at which the screensaver images change here (5 - 60 seconds). Press the key shown until the "Settings" tab is active. User Confirm. if nec. Enter and confirm the user password. Phone Select and confirm the option shown.
-
Page 165: Color Scheme
Individual phone configuration Step by Step Color scheme Select your preferred appearance for the menu display here. For sample display themes, see page 27. z You can also configure this setting via the Web interface page 199. Press the key shown until the "Settings" tab is active. User Confirm. -
Page 166: Lamp Brightness For Touchslider
Individual phone configuration Step by Step Lamp brightness for TouchSlider Adjust the brightness of the TouchSlider page 20 by choosing one of the six settings available. z You can also configure this setting via the Web interface page 199. Press the key shown until the "Settings" tab is active. User Confirm. -
Page 167: Set The Sensitivity Of The Touchguide
Individual phone configuration Step by Step Set the sensitivity of the TouchGuide Press the key shown until the "Settings" tab is active. User Select and confirm the option shown. if nec. Enter and confirm the user password. Phone Select and confirm the option shown. TouchGuide Select and confirm the option shown. -
Page 168: Contrast For The Openstage Key Module
Individual phone configuration Step by Step Contrast for the OpenStage Key Module If you have connected an OpenStage Key Module, you can adjust the key label contrast to suit your ambient lighting. z You can also configure this setting via the Web interface page 199. -
Page 169: Adjusting Audio Settings
Individual phone configuration Step by Step Adjusting audio settings Optimize the audio settings on your OpenStage for your environment and according to your personal require- ments. Volumes Use the TouchSlider to adjust the current volume settings page 20. You can preset different volumes for the following mi- crophones and signals in eight levels: •... -
Page 170: Room Character
Individual phone configuration Step by Step Room character Configuring the appropriate acoustic settings for your environment: • Normal • Echoing • Muffled z You can also configure this setting via the Web interface page 199. Press the key shown until the "Settings" tab is active. User Confirm. -
Page 171: Setting Headset Port Use
Individual phone configuration Step by Step Setting headset port use Here you set whether you are using a wired or cordless DECT headset. z You can also configure this setting via the Web interface page 199. Press the key shown until the "Settings" tab is active. User Confirm. -
Page 172: Ringtone
Individual phone configuration Step by Step Ringtone Select your preferred ringtone from the available audio files. To upload your own files in ".mp3" or ".wav" format, please contact your service personnel. z You can also configure this setting via the Web interface page 199. -
Page 173: Activating/Deactivating The Ringer
Individual phone configuration Step by Step Activating/deactivating the ringer You can see whether the function is activated or deacti- vated from the corresponding icon in the status bar on the display page 27. Hold down the key shown. Adjusting the volume during a call You are conducting a call. -
Page 174: Language For System Functions
Individual phone configuration Step by Step Language for system functions Open the Program/Service menu page 42. More features Select and confirm the option shown. Select language Confirm. Spanish Select the language you wish to use (such as "Spanish") and press the "OK" dialog key to confirm. -
Page 175: Configuring Bluetooth
Individual phone configuration Step by Step Configuring Bluetooth Bluetooth is only available on OpenStage 60/ 60 G/80/80 G when the function is activated by your service personnel. You can use the following description to prepare your OpenStage 60/60 G/80/80 G for Bluetooth connection with another Bluetooth device. - Page 176 Individual phone configuration Step by Step Discoverability Set whether your OpenStage should be discoverable for other Bluetooth devices. For more information, see page 187. Prerequisite: The "Bluetooth settings" page opens page 175. Select the "Discoverable" entry. The phone displays the current setting. Confirm.
-
Page 177: Connecting/Disconnecting A Bluetooth Device
Individual phone configuration Step by Step The PIN contains at least four alphanumeric characters. Prerequisite: The "Bluetooth settings" page opens page 175. Select the "Pairing password" entry. **** The phone displays the current setting. Confirm. if nec. Delete current entry. Enter and confirm the PIN. -
Page 178: Managing Bluetooth Devices
Individual phone configuration Step by Step Managing Bluetooth devices Linking manager list Once you have scanned the area for Bluetooth-enabled devices, you can link your OpenStage to another device page 187. Once linked, these devices are added to the list. Black list Once you have scanned the area for Bluetooth-enabled devices, you can add Bluetooth-enabled devices that... - Page 179 Individual phone configuration Step by Step Only for the linking manager list Enter and confirm the agreed PIN page 177. If the linking request is confirmed on the corresponding Bluetooth device and the password entered, the link is performed and the device is permanently entered in the list.
- Page 180 Individual phone configuration Step by Step Changing an entry name A Bluetooth device is entered in the list with the name set in the device. This is often the device type. You can change this name. Open the required list page 179.
-
Page 181: Tone And Indication With An Unsecured Voice Connection
Individual phone configuration Step by Step Tone and indication with an unsecured voice connection The pop-up menu which indicates an Unverschlüsselte Verbindung can be switched on and off with this option page 113). Prerequisite: The service personnel has activated the notification about unencrypted connections for this phone. -
Page 182: Context Menu
Individual phone configuration Step by Step Context menu Here you can define whether context menus page 32 should close automatically, and define the display duration. Closing automatically z You can also configure this setting via the Web interface page 199. Press the key shown until the "Settings"... -
Page 183: Setting The Automatic Display Duration
Individual phone configuration Step by Step Setting the automatic display duration Here you can define how long context menus should re- main open. z You can also configure this setting via the Web interface page 199. Press the key shown until the "Settings" tab is active. User Confirm. -
Page 184: Displaying Network Information
Individual phone configuration Step by Step Displaying network information Here you will find the information you need to access the Web interface page 197. You will also find real-time information on network acti- vity which could be important for debugging by the ad- ministrator. -
Page 185: Resetting User Data
Individual phone configuration Step by Step Resetting user data The following user-specific settings changed via the phone menu or the Web interface can be reset to facto- ry settings. • Display settings • Screensaver Personal images for the screensaver are delete and deleted default images are restored (admi- nistration e.g. -
Page 186: Phone Test
Individual phone configuration Step by Step Phone test To check the functionality of your phone, you can open the device test. One after another the LEDs of the func- tion keys, the display and the ringtone are tested. Prerequisite: The phone is in idle mode page 30. -
Page 187: Bluetooth
Bluetooth Step by Step Bluetooth Bluetooth is an open standard for high-performance technology and allows wireless communication be- tween PCs, PDAs, mobile telephones, etc. In contrast to infrared connections, Bluetooth does not require a visual contact for communication purposes and can be used over distances of up to 10 meters. To exchange data between Bluetooth-enabled devices, the devices need to undergo a once-off discovery pro- cedure. -
Page 188: Transferring Contacts
Bluetooth Step by Step Transferring contacts The Bluetooth function on your OpenStage allows you to transfer contacts in vCard format (file extension: .vcf) from other Bluetooth devices to your OpenStage and save them in the phonebook. You can also send phonebook entries as vCards to other Bluetooth-en- abled devices. -
Page 189: Sending A Vcard
Bluetooth Step by Step Sending a vCard Prerequisite: The Bluetooth connection is configured between your OpenStage and one other device page 175. A vCard file is saved on the OpenStage. In the phonebook ( page 100), select the entry you wish to send. -
Page 190: Using A Bluetooth Headset
Bluetooth Step by Step Using a Bluetooth headset You can use any commercial Bluetooth headset with your OpenStage 60/60 G/80/80 G. You can connect an approved Bluetooth headset to your OpenStage 60/ 60 G/80/80 G. Ask your service personnel about ap- proved headset types. -
Page 191: Data Backup To Usb Memory Stick
Data backup to USB memory stick Step by Step Data backup to USB memory stick You can save your OpenStage 60/60 G/80/80 G user settings and personal phonebook entries as files on a USB memory stick and download (restore) all or, where applicable, selected data to your or another OpenStage 60/60 G/80/80 G. -
Page 192: Saving User Data
Data backup to USB memory stick Step by Step Saving user data Prerequisite: The USB memory stick is correctly plugged in page 191. Press the key shown until the "Settings" tab is active. User Confirm. if nec. Enter and confirm the user password. Phone Select and confirm the option shown. -
Page 193: Restoring User Data
Data backup to USB memory stick Step by Step Restoring user data Selecting a backup Prerequisite: The USB memory stick is correctly plugged in page 191 and you have created at least one data backup page 192. Press the key shown until the "Settings" tab is active. User Confirm. -
Page 194: Restoring Selected User Data
Data backup to USB memory stick Step by Step Restoring selected user data This operation only overwrites data in "Restore" status with the selected backup. Prerequisite: You have selected a backup and opened the context menu page 193. Restore Confirm the option shown in the context menu. The "Restore {1}:"... -
Page 195: Checking Backups
Data backup to USB memory stick Step by Step Checking backups Check which backups are stored on the USB memory stick. Prerequisite: You have selected a backup and opened the context menu page 193. Full ID Select and confirm the option shown in the context menu. -
Page 196: Differing Display View In A Hipath 4000
In addition, display texts may differ from those described in this document according to the system configuration. The following table provides an overview: HiPath 2000/ HiPath 3000/ HiPath 4000 display Description... -
Page 197: Web Interface
Web interface Web interface You can configure a number of settings for your phone via the Web inter- face. Communication is via a secure HTTPS connection. User Pages All entries in the Web interface user menu can also be found in your phone’s user menu page 42. -
Page 198: Configuring Settings On The User Pages
Web interface Configuring settings on the User Pages Calling up the Web interface Open a Web browser on a LAN-based PC and enter the address provided in the "Phone Web Page" entry in the "Network information" page 184 menu. Example: https://192.168.1.22/ or https://[name of the phone] You will be prompted to configure a user password the first time you call up the Web interface... -
Page 199: Overview Of The Web Interface User Menu
Web interface Overview of the Web interface user menu Before you make changes via the Web interface, please study the button functions page 198. If necessary, go to the page referenc- es next to the menu entries below to view descriptions of the cor- responding parameters. -
Page 200: Fixing Problems
Fixing problems Step by Step Fixing problems Responding to error messages on the screen Possible cause: Invalid entry Station number is incorrect. Possible reaction: Enter correct station number. Possible cause: Not authorized Locked function selected. Possible reaction: Apply to service personnel for authorization for relevant function. -
Page 201: Contact Partner In The Case Of Problems
Fixing problems Step by Step Possible cause 1: Key affects other layer If "Clear other layer" appears on the menu: you tried to program a function or internal station num- ber with LED on a key that is already programmed on the second layer (for example, external station number). -
Page 202: Troubleshooting
Fixing problems Step by Step Troubleshooting Pressed key does not respond: Check if the key is stuck. Telephone does not ring: Check whether the "Do not disturb" function is activated on your telephone ("Do not disturb" appears on the screen page 27). -
Page 203: Index
Index Index Call forwarding type ........83 Call forwarding, activating call forwarding key ......... 86 Program/Service menu ......86 Call forwarding, deactivating Agents ............154 call forwarding key ......... 87 Answering machine ......... 133 Call lists ..........39, 106 Application tab .......... - Page 204 Index Dialing aid S0 bus ............69 General information ........12 Direct inward system access (DISA) ..135 Graphic display ........... 27 Direct station select ........93 call lists ..........39, 40 DISA ............135 icon indicating call status ...... 35 Display angle ..........
- Page 205 Index LAN telephony Parking a call .......... 156 ..........72 LDAP Personal identification number ............106 ....121 quick search Phone number directories .......... 107 ...... 100 Phone settings .......... 162 trunk keys Phonebook ..........143 ..........36 LED display LDAP ..........
- Page 206 Index Toggle/Connect .......... 54 TouchGuide ........... 15, 22 Safety precautions ........2 TouchSlider ..........20 Screensaver ..........162 Trace call ............ 118 Search contacts .......... 36 Transfer (call) ........55, 147 Second call Troubleshooting ........202 accepting ..........70 Trunk keys ..........
-
Page 207: Overview Of Functions And Codes
Overview of functions and codes Overview of functions and codes The following table lists all available functions, as shown on the display. If configured (con- tact your service personnel), functions can be activated interactively (select + confirm), via the Program/Service menu (select + confirm or enter a code) or with function keys.. - Page 208 Overview of functions and codes ... Interac- ... Via the ... With tively Program/Service a key Functions menu page 42 (=display) Code Directory 1=internal 2=LDAP DISA DISA intern Discreet Call DND on DND off Door opener on Door opener off DTMF dialing Forwarding on 1=all calls...
- Page 209 Overview of functions and codes ... Interac- ... Via the ... With tively Program/Service a key Functions menu page 42 (=display) Code Join group Leave group In hunt group Out of hunt group #85# Keypad dialing Lock all phones Lock phone Unlock phone Change PIN Mobile Login...
- Page 210 Overview of functions and codes ... Interac- ... Via the ... With tively Program/Service a key Functions menu page 42 (=display) Code Retrieve line Ring Transfer: On Ring Transfer: Off #502 Ringer cutoff on Ringer cutoff off Ringing group on Ringing group off Room monitor Select language...
- Page 211 Overview of functions and codes ... Interac- ... Via the ... With tively Program/Service a key Functions menu page 42 (=display) Code Log on Log off #401 Available Not available #402 Work on Work off #403 UCD night on UCD night off #404 Calls in queue Use speed dialing...
-
Page 212: Display Icons
Display icons Display icons Application tab Telephony interface page 35 Phonebooks page 36 Call lists page 39 Messages page 41 Menu page 42 Help function page 44 Status bar The ringtone is deactivated page 115 Operating data is sent to the server page 45 The "Do not disturb"... - Page 213 Display icons Phonebook entries Primary business number Secondary business number Mobile phone number Private phone number The phone number is not saved in the personal phonebook...
- Page 214 Hofmannstr. 51 80200 München Deutschland Siemens Enterprise Communications GmbH & Co. KG is a Trademark Licensee of Siemens AG Reference No: A31003-S2000-U109-10-7619 The information provided in this document contains merely general descriptions or char- acteristics of performance which in case of...
Need help?
Do you have a question about the HiPath 2000 and is the answer not in the manual?
Questions and answers