
Related Manuals for Digimerge DHU600 Series


Summary of Contents for Digimerge DHU600 Series
- Page 1 DIGITAL VIDEO SURVEILLANCE RECORDER REAL TIME, H.264 INSTRUCTION MANUAL English Version 2.0 DHU600 SERIES Right For Business ™ www.digimerge.com © Copyright 2010 Digimerge Technology Inc.
- Page 2 Thank you for purchasing this product. Digimerge is committed to providing our customers with a high quality, reliable security solution. This manual refers to the following model(s): • DHU600 (4/8/16 channel configurations) For more information on this product, firmware updates, and accessory products, please visit us at: www.digimerge.com...
-
Page 3: Important Safeguards
Important Safeguards In addition to the careful attention devoted to quality standards in the manufacturing process of your video product, safety is a major factor in the design of every instrument. However, safety is your responsibility too. This sheet lists important information that will help to assure your enjoyment and proper use of the video product and accessory equipment. -
Page 4: General Precautions
Service 13. Servicing - Do not attempt to service this video 19. Cleaning - Unplug the video product from the wall equipment yourself as opening or removing covers outlet before cleaning. Do not use liquid cleaners or may expose you to dangerous voltage or other aerosol cleaners. - Page 5 In order to improve the feature functions and quality of this product, the specifications are subject to change without notice from time to time. www.digimerge.com...
- Page 6 Features *16-channel model shown • Compression for analog camera: H.264 • Real-time recording speed of up to 240FPS at CIF • Dual Streaming of up to 120FPS at CIF / Recording of up to 120FPS at CIF • Mobile Viewing support •...
-
Page 7: Table Of Contents
TABLE OF CONTENTS Getting Started ..........1 Basic Setup . - Page 8 Archiving ........... . . 24 New Archiving .
- Page 9 Web Service ................. 43 IP Settings .
- Page 10 Changing Hardware Video Acceleration Type ........... . . 64 Monitoring Your Cameras .
- Page 11 How Do I Enable Port Forwarding? ........96 Appendix C: Setting Up DDNS Service .
-
Page 13: Getting Started
GETTING STARTED The system comes with the following components: DVI TO VGA ADAPTER REMOTE CONTROL DIGITAL VIDEO RECORDER MOUNTING KIT QUICK START GUIDE, POWER CABLE MANUAL, (ELECTRONIC MANUAL AND POWER ADAPTER HARD DRIVE SIZE, NUMBER OF CHANNELS, AND CAMERA CONFIGURATION MAY VARY BY MODEL. -
Page 14: Basic Setup
BASIC SETUP 1. CONNECT THE CAMERAS BNC IN a. Connect BNC cameras to the BNC IN ports on the rear panel. 2. CONNECT A MONITOR Figure 1.0 Connect BNC cameras to the system (*16-channel a. Connect up to three monitors to the shown). -
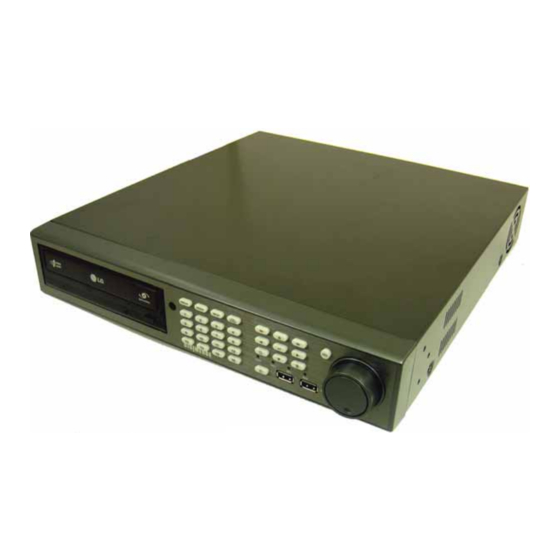
Page 15: Front Panel
FRONT PANEL Figure 2.0 Front panel (16-channel model shown; optical drive brand may not be as shown.) 1. Optical Drive: DVD-RW drive for data backup; drive can be replaced with an HDD if desired (not included; hard drive bay required) 2. - Page 16 Front Panel Front Panel (cont’d.) Figure 2.01 Front panel (16-channel model shown) 4. Playback Buttons: • : Increase reverse playback speed -1X,- 2X, -4X, -8X, -16X,- 32X, -64X • : Reverse playback • : Pause/play • : Forward playback • : Increase forward playback speed 1X, 2X, 4X, 8X, 16X, 32X, 64X •...
-
Page 17: Rear Panel
REAR PANEL Figure 2.2 Rear panel (16-channel model shown) 1. VIDEO IN : Camera input ports for BNC cameras; (16-channel configuration shown). 2. MONITOR: Composite output (top) to connect the system to a secondary monitor or DVR. • : Spot Monitor output (bottom) (Spot monitor only displays cameras, not system SPOT OUT menus). -
Page 18: Control Devices
CONTROL DEVICES Remote Control The remote control is the primary input device for the system. PWR: Press to power the system ON/OFF (password required). SETUP: Press to open the system menu. Channel buttons: Press to view individual channels in full-screen; press to input passwords; when entering camera titles, press for alpha-numeric characters. -
Page 19: Mouse Control
Mouse Control The mouse is an optional control device for the system. A mouse is not included with this system. NOTE: To connect a USB mouse: • Connect a USB mouse to the USB port on the front panel If using a PS/2 mouse (not included), a PS/2-to-USB NOTE: adapter (not included) is required 1. -
Page 20: Using The System
Using the System USING THE SYSTEM With the system properly connected, you can power on and begin using the system. Powering On The System To power on the system: 1. Press the POWER button on the remote control or front panel. After an initial loading sequence, the system displays a live split-screen mode. -
Page 21: On-Screen Display
Using the System On-Screen Display By default, the system launches with a live, split-screen view: Figure 4.2 Main system display (16-channel model shown) 1. Channel Title: Display the channel number or title. 2. Recording Status: Different icons represent different recording modes: Continuous, Motion, Schedule, and Panic. -
Page 22: Using The Status Bar
Using the System Using the Status Bar The Status Bar gives you access to the many modes and functions of the system. To open the Status Bar: • Press the SETUP button on the remote control or front panel • Move the mouse (not included) By default, login is required when opening menus on the system. -
Page 23: Changing Display Modes
Using the System Changing Display Modes The system has six different display modes as well as an Auto Sequence mode. 8-channel 6-channel Quad Full-Screen 16-channel Auto Sequence 9-channel (16-channel (Bottom-right square blacked models only) out on 8-channel models) Figure 5.2 Power/log off options To change display modes: 1. -
Page 24: Quick Menu (Mouse Only)
Using the System Quick Menu (Mouse Only) If using a mouse (not included), right-click any channel to open the Quick Menu. The Quick Menu allows for quick access to key functions, including Panic Recording, Playback and PTZ. To use the Quick Menu: 1. -
Page 25: Using The Jog Ring/Shuttle Wheel
Using the System • : Jump to end of clip • : Increase forward playback speed 1X, 2X, 4X, 8X, 16X, 32X, or 64X • X: Close mini-player 5. If you select "Go to..." the Time Selection window opens. Select the year, month, day, hour, minutes, and seconds and adjust by clicking the UP /DOWN arrows. -
Page 26: Zoom
Using the System Zoom Use the system’s built-in 8X digital zoom to get a closer look at images in full-screen (full-screen mode only). To use zoom: 1. From live viewing, select a channel to view in full-screen (press one of the number buttons on the remote control or front panel). -
Page 27: Ptz
Using the System Use the PTZ menu to control any PTZ cameras (not included) connected to your system. For details on connecting PTZ cameras, see “Appendix D: Connecting PTZ Cameras” on page 101. It is recommended to use a mouse (not included) with the PTZ control menu. NOTE: To open the PTZ menu: •... -
Page 28: Log
Using the System Use the Log file to view recent events on the system, as well as view a preview video of each of these events. Figure 10.0 Log menu with Preview window Log works with mouse only (not included). NOTE: To open the log file: 1. -
Page 29: Setting The Time
Setting the Time SETTING THE TIME It is highly recommended to set the time on the system before doing any recording. The time can be synchronized to a Network Time Server, or can be set manually. Figure 11.0 Time menu To set the date and time: 1. -
Page 30: Recording
Recording RECORDING By default, the system is set to record continuously at startup from any connected cameras. It is highly recommended to keep continuous recording on at all times. The system can perform Continuous Recording, Motion Recording, Continuous + Motion Recording, Alarm Recording, and Panic Recording. -
Page 31: Continuous + Motion Recording
Recording Continuous + Motion Recording The system records continuously from any connected cameras; when motion is detected, the system will record according to customizable motion recording parameters. Alarm Recording When an alarm input is triggered, the system will continue to record, but can apply unique recording parameters that you can set in the Alarm menu (Main Menu>Alarm). -
Page 32: Search
Search SEARCH View recorded video on the system using the Search menu. You can search by Time or by Event. To open the Search Menu: • Press the SEARCH button twice. If necessary, login using your user name and password. Time Search To search by Time: 1. -
Page 33: Event Search
Search Event Search To search by Event: 1. Select SEARCH BY EVENT and press ENTER. Figure 13.3 Search menu—Search by Event 2. Press the buttons and the ENTER button to select/deselect individual channels or select ALL. 3. Press the buttons and the ENTER button to select/deselect SETUP, MOTION, SMART (HDD events), SYSTEM, ALARM, V.LOSS, RECORD, or select ALL. -
Page 34: Playback
Playback PLAYBACK Playback Mode is accessed through the Search Menu. You can also open Quick Play mode from the Quick Menu (mouse only). By default, playback begins in split-screen mode (number of split-screen channels varies NOTE: by model). Figure 14.0 Playback (16-channel model shown) To open Playback mode: 1. -
Page 35: Archiving Video
Archiving Video You can backup video to an AVI archive list while in Playback Mode. To setup a video archive: 1. During playback, press the ARCHIVE button on the remote control or click The Archive Setup window opens. 2. Select TAG and press ENTER to open the Virtual Keyboard and enter a name/title for the video. -
Page 36: Archiving
Archiving ARCHIVING Use the Archiving menu to backup data to a USB flash drive, external USB HDD, or a blank DVD/ CD (not included). Only the ADMIN has authority to archive recorded data. NOTE: Before You Start • Connect a USB flash drive/external USB HDD to the system or insert a blank DVD/CD in the optical drive prior to archiving data New Archiving Tip! -
Page 37: Archiving Data
ARCHIVING DATA 7. Select QUERY and press ENTER. The system scans for recorded data based on Search for data using start and stop times and your selected criteria. The size of the then archive the data to a USB device or DVD/ archive data appears under "ARCHIVING INFO."... -
Page 38: Burning Data
Archiving BURNING DATA 6. Select START and press ENTER. The system will begin to extract data and then Copy/write video data to a USB device or blank write data to the drive or disc. This may CD/DVD. take several moments depending on the size of the recorded data. -
Page 39: Reserved Data Management
Archiving If you do not receive a success prompt, • LOG: Selected box indicates that a log was NOTE: please make sure you have applied a tag to applied to the archive data the archive file Reserved Data Management Use the Reserved Data Management menu to manage your archived AVI. -
Page 40: Deleting Files
Archiving If you select BURN, the archive data NOTE: will be burned/written to the drive/disc; if you select ERASE&BURN, the system will first erase any existing data on the USB device or CD/DVD-RW, and then burn the archive data. 7. Select START and press ENTER. The system will begin to extract data and then write data to the drive or disc. -
Page 41: Using The System Menu
Using the System Menu USING THE SYSTEM MENU To open System Setup: 1. Press the SETUP button. The Status Bar opens 2. Select MENU and press ENTER. The Setup window opens. Figure 16.0 Select SYSTEM SETUP 3. From the Setup window, select SYSTEM SETUP and press ENTER. If necessary, login using your user name and password (by default, user name: ADMIN;... -
Page 42: Camera
CAMERA 3. Select APPLY and press ENTER to save your settings or select CANCEL to restore Use the Camera menu to configure defaults. camera, color, PTZ and motion 4. Select CLOSE and press ENTER to exit. settings. Audio CAMERA SETUP The system can record from up to four audio channels. -
Page 43: Color Setup
Using the System Menu COLOR SETUP PTZ SETUP Use the Color Setup menu to adjust Use the PTZ Setup menu to configure any Brightness, Contrast, Tint, and Color for each connected PTZ cameras (not included). camera. Make sure your PTZ camera is NOTE: properly connected to the system prior to configuring PTZ options. -
Page 44: Motion Sensor
Using the System Menu 6. In the PTZ Property window, configure the 4. Select AREA SETUP and press ENTER. The following: Motion Area Grid opens. Use the Motion Area Grid to assign motion detection to all • AUTO FOCUS: Select ON/OFF or specific sectors of the the grid. -
Page 45: Display
Using the System Menu DISPLAY • LANGUAGE: Change the system language; select ENGLISH (default), ITALIAN, Configure the on-screen display SPANISH, THAILAND, JAPANESE, (OSD), monitor settings, Auto CHINESE(S), or CHINESE(T) Sequence, and Spot Out. 3. Select APPLY and press ENTER to save your settings or select CANCEL to restore defaults. -
Page 46: Sequence
Using the System Menu channel to display on-screen when an 2. Select ADD and press ENTER. The Add alarm is triggered window opens. • ALARM POP-UP DWELL: Set the time (in seconds) for the associated channel to remain on-screen when an alarm is triggered;... -
Page 47: Selecting A Sequence
Using the System Menu To configure the new sequence: 1. Under VIEW TYPE, select a screen configuration (single channel, quad, 6-split, 8-split, 9-split, 16-split) and press ENTER. 2. Select CONFIGURE and press ENTER. 3. Select a square on the grid and press ENTER. -
Page 48: Spot Out
Using the System Menu SPOT OUT 5. Select MODIFY and press ENTER. The Sequence window opens. Use the Spot Out menu to customize the spot outputs on the system. By default, the system assigns a 4-channel, full-screen sequence to each spot output: CH1~4, CH5~8, CH9~12, and CH13~16. -
Page 49: Sound
Using the System Menu SOUND 2. Under DIGITAL AUDIO RECEIVE, select ON/OFF to enable/disable the reception of Configure live audio, network audio, audio from a remote PC. and buzzer settings. 3. Select APPLY and press ENTER to save your settings or select CANCEL to restore Audio-capable cameras or NOTE: defaults. -
Page 50: System
Using the System Menu SYSTEM • D.S.T.: Select ON/OFF to enable/disable daylight savings time on the system Configure date and time, system 3. Select APPLY and press ENTER to save management settings, and control your settings or select CANCEL to restore device options. -
Page 51: System Name
HDD • IP Address: The network address of your system • MAC address: The physical address of your system on the network • DDNS Domain Name: Your Digimerge DDNS domain Digimerge DDNS registration NOTE: required. For details, see “Appendix C: Setting Up DDNS Service”... -
Page 52: System Data
Using the System Menu CONTROL DEVICE System Data You can save your system settings to a USB Use the Control Device menu to allow up to 254 flash drive for backup. DVRs to be controlled from the same keyboard. To save system data: Please refer to your instruction NOTE: 1. -
Page 53: User
Using the System Menu USER Password must be at least 4 NOTE: characters long. Configure user authorities and 4. Under GROUP, select ADMIN, MANAGER, logout options. or USER. USER MANAGEMENT 5. Select E-MAIL and press ENTER to open the Virtual Keyboard; enter the user’s Use the User Management menu to create new email address so they can receive email user IDs, edit passwords, and set email... -
Page 54: User Authority
Using the System Menu LOG OUT 5. Select APPLY and press ENTER to save your settings or select CANCEL to restore Use the Log Out menu to set Auto Logout and defaults. Duration times. 6. Select CLOSE and press ENTER to exit. USER AUTHORITY Use the User Authority menu to assign authorities/access to the "Manager"and... -
Page 55: Network
Using the System Menu NETWORK system remotely via Internet Explorer. To enable Web Service: Configure IP, DDNS, and email 1. Select the box next to WEB SERVICE and settings. press ENTER. 2. Select APPLY and press ENTER to save IP SETUP your settings or select CANCEL to restore Use the IP Setup menu to enable DHCP and defaults. -
Page 56: Enabling Auto Port Forwarding
2. Click on SYSTEM SETUP. Digimerge’s free DDNS service. For more 3. Under SYSTEM SETUP, select NETWORK. details on setting up a free Digimerge DDNS account, see “Appendix C: Setting Up DDNS 4. On RTSP SERVER PORT, click on Service” on page 97. -
Page 57: E-Mail
1. Select DDNS and press ENTER. server address. 2. Under DDNS, select ON/OFF and to 3. Select PORT (by default, 25) and press enable/disable Digimerge DDNS. ENTER to open the Virtual Keyboard and 3. Under DDNS SERVER, select enter the port number. -
Page 58: Event/Sensor
Using the System Menu ALARM INPUT EVENT/SENSOR Use the Alarm Input menu to configure Configure HDD events, alarm input/ external alarm devices (i.e. a door or window output, buzzer, and email sensor). notifications. HDD EVENT Use the HDD Event menu to allow the system to monitor the internal hard disk. -
Page 59: Alarm Output
Using the System Menu ALARM OUTPUT 7. Under HDD EVENT, select ON/OFF. If ON, an HDD event will trigger an alarm output. Use the Alarm Output menu to configure Action Settings behavior and action settings for an external alarm output device, such as a siren or light. Set event triggers for each channel. -
Page 60: Action Settings
Using the System Menu E-MAIL NOTIFICATION 4. Under MODE, select TRANSPARENT or LATCHED. Use the Email Notification menu to configure "Transparent" indicates the output is NOTE: behavior and action settings for email active only when the trigger criteria is notifications to remote users. present. -
Page 61: Disk Manage
Using the System Menu • MOTION: Select the box to enable the alarm ATTENTION: The OVERWRITE feature output when motion is detected on the must be ON for the Record Time Limit system feature to function. 2. Under FREQUENCY, select 0 MIN, 1 MIN, 5 MIN (default), 10 MIN, 15 MIN, 30 MIN, or 60 MIN. -
Page 62: Using The Recording Menu
Using the Recording Menu USING THE RECORDING MENU Use the Recording Menu (Record Setup) to set recording modes and configure recording schedules on the system. To open the Record Menu 1. Press the SETUP button. The Status Bar opens 2. Select MENU and press ENTER. The Setup window opens. Figure 26.0 Select RECORD SETUP 3. -
Page 63: Recording Operations
RECORDING OPERATIONS CONTINUOUS / MOTION RECORDING Use the Recording Operations menu to set the recording schedule frequency and set pre- and Use the Continuous/Motion Recording menu to post recording times. configure recording parameters for each camera, and apply continuous, motion, or continuous + motion recording to a schedule. - Page 64 Using the Recording Menu multiple blocks and then press ENTER. The Camera Parameters window opens. Figure 28.2 Error message due to negative frames remaining in the shared FPS pool • QUALITY: Select from LOW, STANDARD, HIGH, or HIGHEST (default) • AUDIO: Select ON/OFF for the desired channel(s) The system can record a maximum of NOTE:...
-
Page 65: Recording Schedule Activation
Using the Recording Menu Recording Schedule Activation Activate Continuous, Motion, or Continuous + Motion recording to selected channels according to the Time Interval Bar at the top of the window. To configure recording modes and set a recording schedule: 1. Select CONTINUOUS/MOTION RECORDING and press ENTER. -
Page 66: Alarm Recording
Using the Recording Menu In figure 28.6, all the time blocks are NOTE: orange because Continuous+Motion recording was applied to all time blocks. NONE (red): The system DOES NOT record. CONT (Continuous; sky blue): The system records continuously (default). MOTION (Motion; purple): The system only records when motion is detected from one of the connected cameras. -
Page 67: Alarm Schedule Activation
Using the Recording Menu • FPS: Select from 1, 2, 3, 7, 15, or 30 (default) To set an activate alarm recording: frames-per-second (real-time recording) 1. Select ALARM RECORDING and press from a shared pool of 240 FPS ENTER. 2. Select ACTIVATION and press ENTER. The •... -
Page 68: Panic Recording
Using the Recording Menu The selected blocks appear light 2. From the Camera Parameters window, NOTE: green to indicated alarm recording has now configure the following: been activated. • SIZE: Select from 352x240, 704x240, or 704x480 (default) 3. Select APPLY and press ENTER to save •... -
Page 69: Web Remote Viewer
WEB REMOTE VIEWER Web Remote Viewer is a remote surveillance software built into your DVR that allows for live viewing and playback. Web Remote Viewer does not need additional software to be installed on your system. Everything is accessed remotely. System Requirements Before using Web Remote Viewer, ensure your system meets or exceeds the following system requirements:... -
Page 70: Using Web Remote Viewer
By registering for a DDNS address, you can access your system from any computer with a web browser. Register for DDNS To register for a Digimerge DDNS account see “Appendix C: Setting Up DDNS Service” on page 97. Enable DDNS on your system Using Web Remote Viewer Locally •... - Page 71 Using Web Remote Viewer 4. Click Install when the security window opens. Figure 31.2 Internet Explorer Security Warning window. Click Install to continue. 5. Click the ActiveX toolbar when the main Web Remote Viewer window opens. Click Install ActiveX Control. Click the ActiveX tool bar;...
-
Page 72: The System Tabs
Using Web Remote Viewer • The Web Remote Viewer automatically detects and connects to your DVR after the ActiveX plug in installs. System Tabs Viewer window Configuration Menu Figure 31.5 Web Remote Viewer basic layout. The System Tabs The System tabs near the top of the screen has four tabs: Live, Search, Setup, Information. Click the tab to access its features. -
Page 73: Using The Navigation Bar
Using Web Remote Viewer Using The Navigation Bar The Navigation Bar allows you to view videos in several split screen modes, save videos, take snapshots of video, and print images of video. Print Next-window 4-channel view Save Full-screen Settings Volume 9-channel view Sequence view Audio input... -
Page 74: The Live Tab
Using Web Remote Viewer The Live Tab The Live tab allows you to view live, streaming video from your DVR. Channel Recording Name Mode Date Resolution Navigation Bar Figure 33.0 Live Tab, main view in single channel mode. Viewing Video In Different Modes To view video in different modes: •... -
Page 75: Enabling Audio During Viewing
Using Web Remote Viewer Enabling Audio During Viewing You must have a microphone installed onto your system before you can hear audio during remote viewing. To enable the audio source while viewing: • Click the to enable audio. Click again to disable audio Syncing Video Audio It is recommended to synchornize audio with the video (if audio is available). -
Page 76: Saving Video Clips
Using Web Remote Viewer 2. Click to open a directory tree, and select the desired save location. Saving Video Clips You can save a video clip of streaming video and audio from any channel. Video clips save into the save directory you specify. To save video from a channel: 1. -
Page 77: Monitoring Your Cameras
Using Web Remote Viewer Monitoring Your Cameras You can monitor all your cameras at a glance by using the Status tab (Figure 33.3). Figure 33.3 Monitor your cameras using the Status tab. The Status tab allows you to have a "bird’s eye view" of all the connected cameras. -
Page 78: Viewing An Event Log
Using Web Remote Viewer Viewing An Event Log Viewing an Event Log allows you to view a list of events that happened. For example, you may want to see if there were any system changes during the weekend. To view an event log: •... -
Page 79: The Search Tab
Using Web Remote Viewer The Search Tab The Search tab allows you to search video events on your DVR. Searching For A Video By Time You can narrow your searches by searching for events by time. To search for events by time: 1. -
Page 80: Searching For A Video By Event
Using Web Remote Viewer 4. Drag the vertical, blue bar left or right to scan through the video time frame. Drag blue search bar to scan through video time. Figure 34.4 Searching video by time. 5. Use the video playback toolbar underneath the video window to control video playback, and viewing modes. -
Page 81: Backing Up A Video
Using Web Remote Viewer 2. Under Event, select/de-select the criteria you want to search your video with. 3. Under Period, select the year, time, and date range you wish wish to search your video with. 4. Beside Search button, click the drop-down menu, and select whether you want to search the video Nearest or Farthest to the event. -
Page 82: The Setup Tab
3. Under Channel Select, select what channels you wish to back up. Select date and time range using the drop-down menus Select the channels you wish to back up. Figure 34.8 Backup menu. 4. Click Start to begin video backup. NOTE: If selecting multiple cameras to record, multiple files are created. -
Page 83: Configuring Camera Settings
Using Web Remote Viewer Configuring Camera Settings Setting Camera Name, Covert Settings and Camera Audio Input To set up camera properties: 1. Click the Setup Tab near the top of the window. The Camera settings window opens. Setup tab Figure 35.1 Camera Settings: Change camera title, enable/disable Covert recording mode, and enabling audio. -
Page 84: Adjusting Ptz Settings
Using Web Remote Viewer 2. Adjust Brightness, Contrast, Tint and Color by entering values between 0~100. • To apply the same settings across all cameras, enter all values beside All. 3. Click OK to save the settings. Adjusting PTZ Settings To adjust PTZ camera settings: 1. -
Page 85: Configuring Camera Motion Detection Settings
Using Web Remote Viewer Configuring Camera Motion Detection Settings Configuring motion settings on your camera allows you to tell the camera to trigger motion recording in a certain portion of the screen. To configure the camera motion recording settings: 1. Click the Motion sub-menu (Camera>Motion). The Motion window opens. Grid Window Sensitivity drop-down menu Channel Number Selection... -
Page 86: Configuring Display Settings
Using Web Remote Viewer 5. Click the Select All button to highlight the entire grid or; • Click the Reverse All button to reverse the grid area selection. • Click the Delete All button to delete all highlighted areas in the grid. 6. -
Page 87: Adjusting Video Monitoring Settings
Using Web Remote Viewer 8. Under the Motion Color drop-down menu, select the color the grid turns when the DVR detects motion. • Color choices are: Yellow, Blue, Green, Red. Adjusting Video Monitoring Settings To adjust Montior Settings: 1. Click the Monitor sub-menu (Display>Monitor). The Monitor Setting window opens. Figure 36.1 Monitor Setting window. -
Page 88: Adjusting Audio Settings
Using Web Remote Viewer 8. Under the Motion Pop-up Dwell drop-down menu, select the duration of the motion pop-up window. • Motion Pop-up Durations are:1 second, 2 seconds, 3 seconds, 5 seconds, 10 seconds, 15 seconds, 20 seconds, 30 seconds, 40 seconds, 60 seconds. 9. -
Page 89: Configuring System Settings
Using Web Remote Viewer Configuring System Settings Configuring Date and Time To configure your DVR’s date and time: 1. Click System on the navigation bar on the left. The Date/Time setting window opens. Figure 36.3 Date/Time setting window. 2. Under the Date Format drop-down menu, select the format you want the dates to display. •... -
Page 90: Changing Your Dvr's Name
Using Web Remote Viewer • Under System Information Setting, your DVR’s system information is displayed. Figure 36.5 System Information Setting window. Changing Your DVR’s Name To change your DVR’s name: 1. Click the Management sub-menu (System> Management). The System Information Setting window opens. -
Page 91: Changing Ptz Keyboard Settings
Using Web Remote Viewer Changing PTZ Keyboard Settings To change your PTZ Keyboard settings: 1. Click Control Device in the sub-menu (System>Control Device). The Control Device Setting window opens. Figure 36.7 Control Device Setting window. 2. Under the System ID drop-down menu, select an ID between 00~255. 3. -
Page 92: Setting Schedule Mode Duration
Using Web Remote Viewer Setting Schedule Mode Duration To set the duration of schedule mode: 1. Click Record on the navigation bar on the left. The Record Operation Setting window opens. 2. Under the Schedule Mode drop-down menu, select the duration you want to enable Schedule Mode for (Daily or Weekly). - Page 93 Using Web Remote Viewer Configuring the Activation Tab (Optional) Continuous Recording Motion Recording Continuous/Motion Recording None (no recording) In this example, the user configured channel 1 (CH1) with different recording types. Between 12:00AM and 6:00AM, motion recording (Mot) is enabled. Between 6:00AM and 12:00PM, no recording type (None) is selected.
-
Page 94: Configuring Alarm Recording Settings
Using Web Remote Viewer Configuring Alarm Recording Settings You can configure recording parameters for Alarm recording. When an alarm recording is triggered, these settings automatically activate. For example, in an area with high traffic, you may want to have higher details, and higher frame rates. In an area with less traffic, you may want less detail and slower frame rates. -
Page 95: Configuring Panic Recording Settings
Using Web Remote Viewer 4. Under the Frame Rate drop-down menu, select the desired frame rate for the specific channel. • Frame Rate choices (in FPS) are: 1, 2, 3, 7, 15, 30. • The far-right column, under FPS, shows you how many FPS you have remaining. 5. -
Page 96: Configuring User Settings
Using Web Remote Viewer Configuring User Settings Adding Users To The DVR Setting User types allows the administrator to grant access to multiple users. The admin can set user password and email notifications settings. To set user privileges on the DVR: 1. -
Page 97: Adjusting Log Out Settings
2. Under Manager, select what type of menus the manager account will have access to. • Setting choices are: Setup, PTZ, Search, Archiving, Web Viewer. 3. Under User, select what type of menus the user account will have access to. •... -
Page 98: Enabling Ddns On Your Dvr
4. In the User ID field, enter the User ID of your DVR. 5. In the Domain Name field, enter the sub-domain of your DDNS address. • For example if your DDNS address is tomsmith.ddns.digimerge.net, your sub-domain is tomsmith. 6. In the Password field, enter your DVR login password. -
Page 99: Configuring An E-Mail Server For The Dvr
2. De-select the Default Server checkbox to manually input your e-mail server information. • By default, the Default Server is left enabled.It is recommended to leave the Default Server on. • If you select the Default Server checkbox, the system uses the Digimerge e-mail server to send you notification e-mails. -
Page 100: Configuring Hdd Event Settings
Using Web Remote Viewer Configuring HDD Event Settings Your DVR’s hard drive can detect immenent failure. You can configure how often the hard drive monitors itself for failure. If the hard drive detects a failure, it sends out a notification e-mail. To configure your HDDs monitoring settings: 1. -
Page 101: Configuring Alarm Output Settings
2. Under the Operation drop-down menu, select ON or OFF to enable or disable alarm input on the particular channel. NOTE: To apply changes across all channels, use the ALL drop-down menu. Use the ALL tab to apply changes across all channels. Figure 38.1 Alarm Input Setting window. -
Page 102: Configuring Buzzer Out Settings
Using Web Remote Viewer 3. Under the Mode drop-down menu, select Latched or Transparent. • Latched alarms continually "beep" long after a camera detects motion. Transparent alarms "beep" only when there is motion. Once the camera does not detect motion, the "beeping" stops. -
Page 103: Configure E-Mail Notification
Using Web Remote Viewer Configure E-mail Notification To configure your e-mail notification settings: 1. Click the E-mail Notification sub-menu on the navigation bar on the left (Sensor>E-mail). The E-mail Notification Setting window opens. Figure 38.6 E-mail Notification Setting window. 2. Under the Notification drop-down menu, select ON to enable e-mail notification. 3. -
Page 104: Appendix A: System Specifications
Appendix A: System Specifications APPENDIX A: SYSTEM SPECIFICATIONS Specifications Model 4-Channel 8-Channel 16-Channel Operating System Linux Pentaplex Function Simultaneous Record/Playback/Network/Backup Video Compression H.264 Codec(DSP Based) Live Display Speed 120/100 fps 240/200 fps 480/400 fps Recording Speed 120/100 240/200 fps 240/200 fps fps(CIF), 120/ 100fps(2CIF) Video Input... -
Page 105: Playback Specifications
Up to 60fps @ 704x480 / Up to 50fps @ 704x576 704x576 As our products are subject to continuous improvement, Digimerge Technology Inc. and its subsidiaries reserve the right to modify product design, specifications, and prices without notice and without incurring any obligation. E&OE... -
Page 106: Appendix B: Setting Up Remote Viewing
2. Power on the system. 3. Press and hold the Enter button on the front panel to find your system's IP address. 4. Enable Port Forwarding on your router. 5. Setup an account at http://ddns.digimerge.net... -
Page 107: How Do I Find My Ip And Mac Addresses
Appendix B: Setting up Remote Viewing How Do I Find My IP and MAC addresses? The IP and MAC address of your system are necessary for DDNS setup. DDNS allows you to view and control your system from a remote location. Figure 39.1 DVR Status screen To find your IP and MAC addresses: 1. -
Page 108: How Do I Enable Port Forwarding
216.13.154.34 to DVR Internal IP 192.168.0.3:6400). The instructions found online in the Router Configuration Guides will assist you in the port forwarding configurations for a selection of different router models. Visit our Consumer Guides Support website at http://www.digimerge.com/ for more details. -
Page 109: Appendix C: Setting Up Ddns Service
APPENDIX C: SETTING UP DDNS SERVICE Digimerge offers a free DDNS service for use with your system. A DDNS account allows you to set up a web site address that points back to your local network. The following outlines how to set up your free DDNS account. -
Page 110: How Do I Enable Ddns On My System
"Fail". 9. Select CLOSE and press ENTER to exit. With DDNS entered on your system, you can access your DVR from a remote location by using DigiClient remote software or by entering the Digimerge DDNS domain name in your browser. -
Page 111: Networking Checklist
NOTE: Each router is different, so port forwarding settings vary by model. Please visit us on the web at www.digimerge.com for assistance with the latest types of routers. If your router is not listed, please refer to your router's manual or contact your router's manufacturer for assistance. - Page 112 5. Under USER ID, enter your DDNS user name. 6. Under DOMAIN NAME, enter only the first portion of your DDNS domain from the confirmation email. For example, if your domain name is tomsmith@ddns.digimerge.net, you only need to enter tomsmith in the text field.
-
Page 113: Appendix D: Connecting Ptz Cameras
Appendix D: Connecting PTZ Cameras APPENDIX D: CONNECTING PTZ CAMERAS You can connect RS-485 PTZ cameras (not included) to the PTZ Control Block on the rear panel of the system. VIDEO (BNC) D+ (TX+)/ D- (TX-) PTZ CAMERA (not included) Figure 40.0 Connecting a PTZ camera (not included) To install a PTZ Camera: 1. -
Page 114: Appendix E: Connecting Additional External Monitors
Appendix E: Connecting Additional External Monitors APPENDIX E: CONNECTING ADDITIONAL EXTERNAL MONITORS Along with VGA output, you can connect secondary monitors to the Monitor Out port (BNC) port on the rear panel of the system. NOTE: Monitor Out displays the exact on-screen display of the system. Use the Spot port (BNC) to use the Spot Out function. -
Page 115: Appendix F: Connecting Motion / Alarm Devices
Appendix F: Connecting Motion / Alarm Devices APPENDIX F: CONNECTING MOTION / ALARM DEVICES You can also connect external alarm input and alarm output devices to the system (i.e. motion sensors, door/window sensors). Use a motion detector or sensor to send a signal to the system to begin camera viewing and recording on the matching camera channel (when enabled in the Menu);... -
Page 116: Appendix G: Full Connectivity Diagram
Appendix G: Full Connectivity Diagram APPENDIX G: FULL CONNECTIVITY DIAGRAM The following diagram outlines a general set of connections available with the DVR. BNC CAMERAS* LINE OUT/AMPLIFIED SPEAKERS (Not Included) (Not Included) SELF-POWERED MICROPHONE DVI/VGA MONITOR (Not Included) (Not Included) SENSOR POWER (Not Included) -
Page 117: Appendix H: Replacing The Hard Drive
Appendix H: Replacing the Hard Drive APPENDIX H: REPLACING THE HARD DRIVE The system comes with a pre-installed 3.5" SATA hard drive. Make sure that the system is and the power cable has been disconnected before changing the hard drive. You can add a maximum of two hard drives. - Page 118 Appendix H: Replacing the Hard Drive 4. Remove the four black screws at the bottom of the mounting bracket(s). Keep these sets of screws separate. Figure 41.3 Unscrew the four black short screws on the hard drive bracket. 5. Carefully remove the mounting bracket from the housing. 6.
-
Page 119: Replacing The Hard Drive
Appendix H: Replacing the Hard Drive Replacing the Hard Drive To replace the hard drive: 1. Carefully place the new hard drive in the mounting bracket and secure with the four chrome screws. NOTE: Each mounting bracket can hold two HDDs (top and bottom). NOTE: The DVR includes a ONE (1) hard drive. -
Page 120: Formatting The Hard Drive
Appendix H: Replacing the Hard Drive Formatting the Hard Drive all data This step cannot : Formatting the HDD erases on the hard disk. ATTENTION be undone . System settings will not be erased. Figure 42.0 Disk Management menu To format the hard disk: 1. -
Page 121: Appendix I: Connecting Audio Devices
Appendix I: Connecting Audio Devices APPENDIX I: CONNECTING AUDIO DEVICES You can connect up to four audio capable cameras or self-powered microphones to the system. Use the Line Out port to connect the system to amplified speakers*. AUDIO CAPABLE CAMERAS (not included) SELF-POWERED MICROPHONE (not included) -
Page 122: Appendix J: Remote Viewing On Mobile Devices
Always check with your cell phone carrier on how your data plan works. Digimerge is not responsible for data plan fees that may result. You must enable DDNS on your DVR and set up a DDNS account before you can begin viewing video on your mobile device. -
Page 123: Viewing Your Dvr From Your 3G Blackberry
Appendix J: Remote Viewing On Mobile Devices 5. Touch the channel drop-down menu access a list of channels (Figure 44.1). Flick your finger on the channel list to scroll through. Channel drop-down menu. Figure 44.1 Channel list view. Note that Auto refers to the auto-refresh of images. Leave this option selected. - Page 124 Appendix J: Remote Viewing On Mobile Devices 2. Click the Start Live button to connect to your DVR. 3. Enter in your user name and password when the authentication window appears (Figure 44.2). Click OK. 4. Click the channel list drop-down menu to view a list of DVR channels. Close up view of channel list.
-
Page 125: Troubleshooting
Troubleshooting TROUBLESHOOTING When a malfunction occurs, it may not be serious and can be corrected easily. The following describes the most common problems and solutions. Please refer to the following before calling Digimerge Technical Support: Error Possible Causes Solutions • DVR is not receiving •... - Page 126 Troubleshooting Troubleshooting (cont’d.) Error Possible Causes Solutions Mouse not detected • Mouse cable is not firmly • Firmly connect the mouse cable to the USB port by system connected to the system on the front panel • Mouse is not connected to the system •...
Need help?
Do you have a question about the DHU600 Series and is the answer not in the manual?
Questions and answers