Digimerge DH100 Series Instruction Manual
Digimerge digital video surveillance recorder 4/8 h.264/ cms-dh / 3g mobile/ 240/240
Hide thumbs
Also See for DH100 Series:
- Instruction manual (140 pages) ,
- Quick setup manual (2 pages) ,
- Setup manual (2 pages)
Table of Contents
Advertisement
Quick Links
Advertisement
Table of Contents

Related Manuals for Digimerge DH100 Series


Summary of Contents for Digimerge DH100 Series
- Page 2 Thank you for purchasing this product. Digimerge is committed to providing our customers with a high quality, reliable security solution. This manual refers to the following models: • DH100 Series For more information on this product, firmware updates, and accessory products, please visit us at: www.digimerge.com...
-
Page 3: Important Safeguards
Important Safeguards In addition to the careful attention devoted to quality standards in the manufacturing process of your video product, safety is a major factor in the design of every instrument. However, safety is your responsibility too. This sheet lists important information that will help to assure your enjoyment and proper use of the video product and accessory equipment. -
Page 4: General Precautions
Service 13. Servicing - Do not attempt to service this video 19. Cleaning - Unplug the video product from the wall equipment yourself as opening or removing covers outlet before cleaning. Do not use liquid cleaners or may expose you to dangerous voltage or other aerosol cleaners. - Page 5 In order to improve the feature functions and quality of this product, the specifications are subject to change without notice from time to time. www.digimerge.com...
- Page 6 • PIP in Live mode: monitor two cameras at once, using picture-in-picture mode • D1 Real-time recording (4ch) • NTP/Time Zone (DST): Synchronize your DVR time with internet time server • Setup Time Zone for day light saving time *Please visit www.digimerge.com/Touch for information, firmware, and compatibility updates for mobile viewing...
-
Page 7: Table Of Contents
TABLE OF CONTENTS Getting Started ..........1 Basic Setup . - Page 8 EVENT SETUP ............28 Motion Setup .
- Page 9 Local Search ............58 Saving Video Files .
- Page 10 Appendix B: Setting up Remote Viewing ......99 Appendix C: Digimerge Auto Port Forwarding Wizard ....102 Appendix D: Setting Up DDNS Service .
-
Page 11: Getting Started
GETTING STARTED The system comes with the following components: DH100 DIGITAL VIDEO RECORDER POWER SUPPLY MOUSE REMOTE CONTROL INSTRUCTION MANUAL, QUICKSTART GUIDE, & SOFTWARE CD HARD DRIVE SIZE, NUMBER OF CHANNELS, AND CAMERA CONFIGURATION MAY VARY BY MODEL. PLEASE REFER TO YOUR PACKAGE FOR SPECIFIC CONTENT DETAILS. CHECK YOUR PACKAGE TO CONFIRM THAT YOU HAVE RECEIVED THE COMPLETE SYSTEM, INCLUDING ALL COMPONENTS SHOWN ABOVE. -
Page 12: Basic Setup
BASIC SETUP 1. Connect the cameras a. Connect BNC cameras to the BNC ports on the rear panel (Figure 1.0). 2. Connect a monitor a. Connect a VGA cable (not included) from the VGA Figure 1.0 Connect BNC cameras to the system port on the rear panel to the VGA port on your monitor (Figure 1.1) , OR b. -
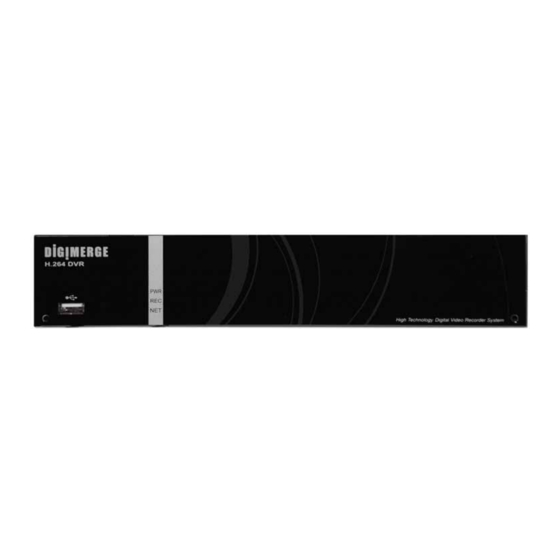
Page 13: Front Panel
FRONT PANEL 1. USB Port: Connect a USB mouse, or connect a USB flash drive for data backup, or for firmware upgrades. 2. IR receiver: IR receiver for the remote control. Keep the IR receiver clear from obstructions. If your remote does not respond to the DVR, ensure the IR receiver is not blocked by objects. 3. -
Page 14: Rear Panel
Rear Panel REAR PANEL Rear panel (8-channel model shown) : Alarm block to connect external alarm or motion devices (not included). ALARM IN • : Connection block for an RS422 PTZ camera (not included). RS422 : Port for 12V DC 3A power supply (included). DC 12V VIDEO OUT : Video output (BNC) to connect the system to a secondary monitor or DVR. -
Page 15: Remote Control
REMOTE CONTROL 1. LOCK: Press to lock / unlock the system. 2. ESC: Press to exit from system menus. 3. Navigation/Menu: Move cursor up within menus. During playback, press to play video in slow motion. Move cursor to Move cursor to the right within the left within menus. -
Page 16: Mouse Control
Mouse Control The mouse is the primary control device for the system. To connect a USB mouse: • Connect a USB mouse to the USB port on the front or rear panel. Left-Button • While in a split-screen display mode, double-click an individual channel to view it in full-screen. -
Page 17: Using The System
USING THE SYSTEM The default system password is 000000 To power the system ON/OFF: • Connect the power cable to the DC12V port to turn on the system. The system turns on automatically. • Disconnect the power cable from the DC12V port to turn off the system. DC12V power port Password By default, the login password is disabled. -
Page 18: On-Screen Display
Using the System On-Screen Display The system shows the following for all display views: 1. Quick Menu: Right-click to open the quick menu to the system. Shows the status of the channels. Channel Status Indicator ( • : Video loss / : Alarm Event / : Motion event 3. -
Page 19: About The Quick Menu
Using the System About the Quick Menu The Quick menu gives you access to the system’s key functions. To access the Quick Menu, right-click the screen during live view. Record On/Off Backup PTZ Control Main Menu Playback Search Setup Display Setup Full Screen View Pause Zoom... -
Page 20: Setting The Time
Using the System Setting the Time It is highly recommended to set the time on the system prior to doing any recording. To set the date and time: 1. In the main viewing mode, right-click to open the quick menu. Quick menu 2. -
Page 21: Multi-Screen Display
Using the System Multi-Screen Display The system can display channels in full-screen single channel, quad, and multi split-screen displays. 9-Channel split Quad Full-Screen (8-channel models only) To change the screen display: 1. Right-click to open the quick menu. 2. Click Full Screen ( ), Quad Display ( ), or 9 channel display ( ) (8 channel only). -
Page 22: Recording
RECORDING By default, the system is set to immediately record at startup from connected cameras. This is called continuous recording. It is highly recommended to keep continuous recording on at all times. The system can perform Continuous Recording, Event Recording, and Schedule Recording. However, the system can only perform one type of recording at a given time. -
Page 23: Motion
Recording Motion Motion Recording allows the DVR to mark video as an event. This allows you to search for motion recordings in the search menu. For example, if you enable motion recording, during event search, you can search for only the events that contain movement. When motion is detected by the camera, the motion icon appears. -
Page 24: Quick Playback
Quick Playback QUICK PLAYBACK The Quick Playback function allows you to playback recently recorded video starting from the beginning of the hour. For example, if the time is currently 1:33pm, when you start Quick playback, the playback begins at 1:00pm. To begin playback: 1. -
Page 25: Zoom
Zoom To zoom into a portion of the screen: 1. During playback, double-click on the channel you wish to zoom into, and click the Zoom button ( Zoom 2. Drag the square inside the viewfinder to change the area of view. 3. -
Page 26: Search
Search SEARCH Search for recorded video data on the system using the Time Search menu. To open the Time search menu: 1. Press the TIME SEARCH button on the remote control OR • Right-click in the main viewing window, and click Search Setup ( 2. - Page 27 Search 3. Beside "From" select the checkbox. Click the date field Date field From checkbox 4. In the calendar, enter the year, month, date, and time you wish to begin searching. Year Month Date Time 5. Right-click and click Yes to save your settings. 6.
-
Page 28: Time Search
Search Time Search Time Search allows you to search for video within a specified date and time. To perform a Time search: 1. Click Time Search. Time Search 2. Enter the year and month. Click the date you wish to search. The Time bar appears. Enter year and month Click the date 3. -
Page 29: File Search
Search File Search File search allows you to search for video files backed up to a USB device (i.e USB memory key). Prerequisite: • Back up video to a USB memory key. To perform a File Search: 1. Insert a USB memory key to the front panel of the system. Note that this USB key must contain video backed up from the system. - Page 30 Search Step 2: Back up the video 1. Right-click in the main viewing window, and click Backup ( Backup 2. Beside "From" and "To", click the date field and select the start and stop times you wish to back up. From and To date fields 3.
-
Page 31: Setting Up Sequencing
Setting up Sequencing SETTING UP SEQUENCING Sequencing allows you to view channels in a rotating interval. To enable sequence view: • Press the AUTO button on the remote control. The icon appears to indicate sequence view. The DVR begins sequence view in full screen view. •... -
Page 32: Setting Up Motion Recording
Setting up Motion Recording SETTING UP MOTION RECORDING Motion recording allows the system to mark events as motion recording. This allows you to search for footage that only has movement. Step 1: Configure the Schedule: 1. Right-click in the main viewing window and click Main Menu>Schedule Setup ( 2. - Page 33 Setting up Motion Recording Step 2: Enable Motion Recording 1. From the main menu, click Event Setup>Motion Setup. Event Setup 2. Click the channel number you wish to enable motion. 3. Select the Enable checkbox. Select channel number Select Enable 4.
-
Page 34: Configuring Holiday Setup
Setting up Motion Recording Configuring Holiday Setup Holiday Setup allows you to configure how the system should recording during "Holiday" modes. This is useful when you want to apply certain recording parameters for certain months. To configure Holiday recording mode: 1. -
Page 35: Display Setup Menu
Display Setup Menu DISPLAY SETUP MENU The Display Setup menu allows you to pause live video, enable Picture in Picture (PIP), Zoom, Auto Sequence, and lock the system. To configure the Display Setup menu: 1. Right-click in the main viewing window, and select Display Setup. Lock Pause Zoom... -
Page 36: Using The Main Menu
Using the Main Menu USING THE MAIN MENU To open the Main Menu: • Using the Remote Control: Press the MENU button. • Using the Mouse: Right-click in the main viewing window>Main Menu ( 1. Record Setup: Configure recording frame rate, quality, and hard drive recording mode. 2. -
Page 37: Record Setup
Using the Main Menu Quality & Frame Rate Setup RECORD SETUP To adjust the recording quality and frame Use the Record menu to configure rate: system recording settings. 1. Click the Quality & Frame Rate Setup button. To configure hard drive recording mode: 1. -
Page 38: Event Setup
Using the Main Menu EVENT SETUP • Motion Area Setup: Opens the Motion setup grid. Configure Motion or Sensor configuration. The Event Setup window has two menus • Configure the following: ---Motion Setup and Sensor Setup. Mask Mouse Selection • : Select the check box so that you can use the mouse cursor Motion Setup... -
Page 39: Sensor Setup
Using the Main Menu Sensor Setup The Sensor Setup window allows you to configure the sensor type, and the alarm duration. To configure Sensor Setup settings: 1. From the EVENT SETUP window, click Sensor Setup 2. Configure the following: • Alarm Duration (Seconds): Enter the duration the system alarm continues to activate after an event. -
Page 40: Schedule Setup
Using the Main Menu SCHEDULE SETUP • Dates: Select the dates you wish to enable scheduled recording or motion recording (Monday~Sunday). Configure recording schedule, and recording types. • Holiday: Select to enable holiday recording (holiday recording must be configured). 3. Right-click and click Yes to save your To configure the Schedule Setup settings: settings. -
Page 41: Camera Setup
Using the Main Menu CAMERA SETUP PTZ SETUP Configure camera color and Configure PTZ camera settings. brightness properties, and camera name. To configure the Camera Setup menu: To configure the PTZ setup menu: 1. Click on the channel number that the PTZ 1. -
Page 42: Ptz Control Details
Using the Main Menu PTZ Control Details • : Cancel all PTZ functions. • : Assign preset number. • : Go to preset. • : Save current position as a preset. • : Activate touring mode. • : Activate PIP (not supported on all cameras). -
Page 43: Network Setup
Using the Main Menu HTTP Setup NETWORK SETUP The HTTP Setup menu allows you to change Configure network, email the system port number, and video streaming notification, and DDNS options. quality during remote viewing. To configure the HTTP Setup menu: Configuring Network Type 1. -
Page 44: Ddns Setup
Using the Main Menu DDNS Setup The DDNS Setup window allows you to enter your Digimerge DDNS settings in the DVR. This Connecting to your system step is required for remote access. After you have port forwarded the required port, created a DDNS account, and enabled... - Page 45 Using the Main Menu • Sender E-mail: Enter the email that 3. Right-click and click Yes to save your appears to the receivers. settings. 4. Click the Receiver E-mail button. • Video Loss, Motion, Sensor: Select the type of events you want to receive. For 5.
-
Page 46: System Setup
Using the Main Menu SYSTEM SETUP Display Setup The Display Setup menu allows you to Configure the system display setup, configure system OSD settings, and Auto date and time, device setup, account Sequence duration. setup, SPOT monitor setup. To adjust the System Setup menu: To adjust the Display Setup settings: 1. -
Page 47: Date/Time Setup
Using the Main Menu Date/Time Setup 3. Right-click and click Yes to save your settings. Configure the system date and time using the Date/Time Setup menu. Changing the Time Zone To change the time zone: 1. Click Time Zone Setup. 2. -
Page 48: Device Setup
Using the Main Menu Device Setup • Relay: Select the events that will trigger the system relay (alarm block) to trigger when an event occurs (HDD Error, Video The device setup menu allows you to adjust Loss, Motion or Sensor event). system Buzzer, relay, and video output settings. -
Page 49: Account Setup
Using the Main Menu Account Setup To change the Admin password: 1. Under "Password", enter the current The Account Setup menu allows you to administrator password. configure user accounts, and change the admin password. Enter the old and new admin password 2. -
Page 50: Utilities
Using the Main Menu USB Initialization UTILITIES To format a USB drive: The Utility menu allows you to format hard drives, restore system WARNING: Formatting the USB drive defaults, upgrade the system firmware, and permanently erases all data. configure other system settings. 1. -
Page 51: Download Setup From Usb
Upgrading the system firmware Information To upgrade the system firmware: 1. Download the firmware from www.digimerge.com from the DH100’s product page. 2. Copy the firmware to a USB key. Ensure only the firmware is in the NOTE: USB key. - Page 52 Using the Main Menu...
-
Page 53: Cms-Dh Central Management Software
CMS-DH CENTRAL MANAGEMENT SOFTWARE CMS-DH is a central management software that allows you to view and manage up to 300 DH100 series DVRs. System Requirements Your system must meet the system requirements below: Minimum system requirements Recommended system requirements • Windows XP SP 1 •... -
Page 54: Installing Cms-Dh
1. Insert the software CD, and click the Install CSM-DH button. Follow the directions to download the CMS-DH software from Digimerge’s website. NOTE: You can also go to www.digimerge.com, and search under the DH100’s product page for the CMS-DH software. -
Page 55: Starting Cms-Dh
Starting CMS-DH To start CMS-DH: • Double-click the CMS-DH icon ( ) on the desktop. Adding a DVR from the local area network (LAN) Once you open CMS-DH, you can add a DVR. To add a DVR to CMS-DH: 1. Click Device. Device 2. - Page 56 CMS-DH Central Management Software 3. Click on the DVR you wish to add to CMS-DH, and then click Apply>OK. • The DVR appears on the left panel. Apply If you have changed the default password of the DVR, you must select the DVR from the list, then manually re-enter the new password in the Password field, and then click Apply and then OK.
- Page 57 Adding a DVR using a DDNS address If you have DVR systems that have DDNS set up, you can add them to CMS-DH. Prerequisites • Create a DDNS account. • Enter the DDNS information into the DVR locally. • Port forward the required port (default, port 80) to the router. To add a DVR using a DDNS address: 1.
- Page 58 4. Enter the following into the blank fields: • Name: Enter the DVR name of your choice. • IP/DDNS: Enter the DVR’s DDNS address (for example tomsmith.digimerge.net) • Port: Enter the DVR’s port number (by default, port 80) • User:Enter the DVR’s user name (by default, admin) •...
- Page 59 CMS-DH Central Management Software 6. Click the Offline button to connect to the DVR. Double-click the DVR icon to begin viewing. 1. Click the Offline button 2. Double-click DVR icon Final Result Once you have added the DVR, you can add multiple DVRs and view them in the tab. To switch DVR, click on the tabs near the top of the window.
-
Page 60: Adding A Virtual Dvr
Adding a Virtual DVR A virtual DVR allows you to add video sources from multiple DVRs, into one main window. Example In the example below, multiple video sources from two DVRs are grouped into the Virtual DVR. 7 8 9 DVR # 1 Video feed from DVR #1 A B C... - Page 61 CMS-DH Central Management Software 2. Double-click the virtual DVR icon in the tree menu on the left. Virtual DVR icon 3. Click the + symbol to expand the DVR menu tree. Click the + symbol to expand menu tree 4. Drag the desired camera into the Virtual DVR window. NOTE: You can drag the camera into any desired channel in the virtual DVR.
-
Page 62: Creating New Group Folders & Sub Folders
CMS-DH Central Management Software Creating New Group Folders & Sub folders Creating group folders and sub-folders helps you organize multiple DVRs. For example, you can create a new folder for each different DVR. To create group folders: 1. Right-click on the Group folder, then click New Group. New Group folder 2. -
Page 63: Configuring General System Settings
CMS-DH Central Management Software Configuring General System Settings To configure general system settings: 1. Open CMS-DH to access the Login window and then click Setup (Or, click File> Setup once you are logged in to CMS DH) Setup 2. Configure the following in the Setup menu: •... -
Page 64: Adding Users
Adding Users You can add multiple users to CMS-DH, specifying the DVR menus that each user is allowed to access. To add a new user: 1. Log in to CMS-DH. 2. Click File>CMS-DH Account. 3. Enter the following: • ID: Enter the desired user name. •... -
Page 65: Recording Video To The Hard Drive
Recording Video to the hard drive CMS-DH allows you to record video to your local hard drive. The amount of video that you can record depends on the size of your computer’s hard drive. To record video: 1. During live view, click the Rec button ( ). -
Page 66: Playing Back Recorded Video
Playing back recorded video The video is saved as a proprietary file that is playable only by CMS-DH. To play back previously recorded video files: 1. From the main window, click File>File Playback. 2. Click the Open button. Open button 3. -
Page 67: Remote Search
CMS-DH Central Management Software Remote Search Remote search allows you to search for archived video on the DVR. Note that only Normal Recording mode is supported for support search. Motion and Alarm search is not supported. Prerequisite • Ensure you are connected to the DVR that you wish to search from. To search for video: 1. -
Page 68: Video Playback Controls
CMS-DH Central Management Software Video Playback Controls Once the video begins to play, use the video controls to manipulate video playback. Use the playback controls to control video speed Select hour Select minute Video speed slider Local Search Local search allows you to search for video stored locally on the computer hard drive. Prerequisite Ensure you are connected to the DVR that you wish to search from. -
Page 69: Saving Video Files
2. To search for the video: a. Click to select the desired month. b. Select the date of the video. c. Select the hour. d. Select the minute Play button 3. Click the Play button to begin watching the video. Saving Video Files You can save the proprietary video files to your local hard drive from the Search menu. -
Page 70: Converting Video Files To Avi
Converting video files to AVI Converting proprietary .CMS video files to AVI allows you to play the video on a computer that does not have the CMS-DH software. Prerequisite • Make sure that you are in the Local Search menu (Right-click on the DVR, and click Local Search) To convert video files to .AVI: 1. -
Page 71: Schedule Backup
CMS-DH Central Management Software Schedule Backup You can schedule regular backup of video to your local hard drive. The schedule can be configured to back up 24 hours of video, or during a specified time only. Prerequisite • 3GB of hard drive space (backup will not function if there is less than 3GB) •... - Page 72 5. In the Minute drop-down menu, enter how many minutes the system should wait before recording. For example, if you enter 10 minutes, the system will backup video footage from 8:10 a.m to 9:10 a.m. 6. In the Hour drop-down menu, enter the time you wish to begin backup. For example, if you enter 5:00pm (05:00hr), the backup will start at 5:00pm, and end at 4:49am (the next day).
-
Page 73: Taking Screen Captures
CMS-DH Central Management Software Taking Screen Captures You can capture screen shots as JPeg or Bitmap images (JPG or BMP). To take a screen capture: 1. During live view, click Capture ( Click the Print button to print the image to a printer. 2. -
Page 74: Changing Viewing Modes
Changing viewing modes To change the viewing modes of CMS-DH: 1. Log in to CMS-DH, and connect to a DVR. 2. Click ( )to change the viewing mode (single-channel, quad-channel etc). Click to change viewing modes Sequencing If you monitor multiple DVRs, you can have each tab change continuously. This process is called sequencing. - Page 75 CMS-DH Central Management Software E-Map The E-Map feature allows you to visually map your cameras over a Jpeg image. Example Camera list From the camera list, you can drag Jpeg image of a house blueprint the camera icon over the Jpeg image Prerequisite •...
-
Page 76: E-Map Setup
2. Click File>Background. Locate the file you wish to import, and then click Open. 3. Drag the desired cameras from the camera list, over the image. TIP: You can also drag the DVR icon and E-MAP icon over the image. Drag Tip: To rotate the camera, right-click on the... -
Page 77: Viewing Video On E-Map
CMS-DH Central Management Software Viewing video on E-Map Once you have mapped your cameras on E-Map, you can view, and search channels from the E-Map directly. To view live video on E-Map: • Double-click on the desired camera icon to open live view. Live channel Configuring E-Map camera settings To configure E-Map camera settings:... -
Page 78: Zooming Into The E-Map
CMS-DH Central Management Software Zooming into the E-Map • To zoom into the E-Map, click the Zoom In / Zoom Out buttons ( Zoom In/ Zoom Out Removing camera icon in the E-Map • Select the camera icon in the e-map, and click the Remove Item button ( Remove Item Adding Multiple E-Maps To add multiple E-Maps:... -
Page 79: Viewing Dvr Health
CMS-DH Central Management Software Viewing DVR Health To view the status of the DVR: 1. Select the DVR on the menu tree on the left. 2. Click the Health button ( Closing windows To close open tabs: • Click the Close button, and select Close or Close All. Locking Windows •... -
Page 80: Dvr Log
CMS-DH Central Management Software DVR Log The DVR log allows you to check events that occurred in the DVR, such as hard drive malfunction, video loss, motion detection, and alarm settings. To access the DVR log: 1. Connect to the DVR that you wish to view the log from. 2. - Page 81 CMS-DH Central Management Software CMS-DH System Log The CMS-DH log allows you to view video events that occurred in the system (i.e motion and camera loss events). Prerequisite: • Ensure the DVR(s) are online and connected to CMS-DH To view the system log: 1.
-
Page 82: Setting Ptz Pre-Sets
CMS-DH Central Management Software To activate the PTZ control, click the PTZ button ( NOTE: You must select the channel that has a PTZ camera before using PTZ controls. Pan & Tilt Zoom In Zoom Out Focus In Focus Out Auto Focus Open Iris Auto Iris... -
Page 83: System Setup
CMS-DH Central Management Software System Setup To access the full system setup menu: 1. Right-click on the DVR you wish to configure. Setup 2. Click Setup from the sub-menu to access the full Setup menu. NOTE: The menu structure is identical to the menu structure on the local DVR. -
Page 84: Configuring Post Event Action Tab
CMS-DH Central Management Software Configuring Post Event Action Tab The Post Event Action tab allows your system to alert you when an alarm event triggers the DVR. For example, when the system detects motion from an input device, the computer speakers plays a sound to alert you. - Page 85 CMS-DH Central Management Software • Parameter: Select the desired alert sound you want the computer to play. Click here to configure the Command and Parameter settings 5. Click Apply and then OK to save your settings. 6. Under Alarm Output, right-click the light bulb icon, and click Control. 7.
-
Page 86: Setting Message Pop-Up Notifications
CMS-DH Central Management Software Setting message pop-up notifications You can configure CMS-DH to produce message pop-up windows when an event occurs. To configure CMS-DH to produce message pop-up events: 1. Expand the menu tree under the desired DVR that you wish to configure. 2. -
Page 87: Setting Video Pop-Up Notifications
CMS-DH Central Management Software Result When the camera detects motion, a pop-up window appears on the bottom-right corner of the screen to alert you. Setting Video pop-up notifications You can configure CMS-DH to produce video pop-up windows when an event occurs. To configure CMS-DH to produce video pop-up events: 1. - Page 88 CMS-DH Central Management Software 3. In the Events drop-down menu, select the type of event that will trigger CMS-DH to produce a pop-up window when an event is detected. 4. In the Device drop-down menu, select the name of your DVR. 5.
-
Page 89: Running Cms-Dh On Multiple Monitors
CMS-DH Central Management Software Running CMS-DH on multiple monitors CMS-DH can support a maximum of 8 monitors on a single system. Running 8 monitors is extremely resource intensive. The recommended system specifications is listed below. If your system does not meet the requirements below, you may experience slow system performance. Minimum system recommendations to run CMS-DH on multiple monitors •... -
Page 90: Remote Viewing On The Mac
• You must have a Digimerge DDNS address to log in remotely Step 1 of 2: Installing iDVR: 1. In the address bar, enter your system’s IP address or your Digimerge DDNS domain followed by :80 — for example, http://192.168.1.1:80 or http://tomsmith.digimerge.net:80 NOTE: You MUST include http:// in order to access your system. - Page 91 Remote Viewing on the Mac Step 2 of 2: Configure and launch iDVR 1. Double-click the iDVR icon to start the program. 2. Enter the following: • IP: Enter the local IP address of the DVR or DDNS address in full (i.e. tomsmith.digimergeddns.net).
-
Page 92: Remote Viewing On The Pc
• You must have a Digimerge DDNS address to log in remotely To view your system using Internet Explorer: 1. Open Internet Explorer. 2. In the address bar, enter your system’s IP address or your Digimerge DDNS domain followed by :80 — for example, http://192.168.1.1:80 or http://tomsmith.digimerge.net:80... - Page 93 Remote Viewing on the PC 5. Click the warning bar and select Install This Add-on for All Users on This Computer. 6. Click Install to continue. 7. Live viewing starts after the software installs. NOTE: The interface and functionality is identical to the local menu.
-
Page 94: Mobile Connectivity
The DH100 Series is compatible with the iPhone/iPad, Blackberry, and Android Devices. iPhone /iPad Digi iMobile DH100 is an iPhone/ iPad app that allows you to remotely view your DH100 series DVR. Compatible Devices • iPhone 3GS, iPhone 4, iPod Touch (3rd and 4th generation), iPad •... -
Page 95: Configuring Digi Imobile Dh100
2. Enter the following: • DVR Name: Enter the desired DVR name. • Host: Enter your DDNS address (i.e. tomsmith.digimerge.net) • Port: Enter your DVR’s port number (by default, port 80) • User Name: Enter your DVR’s user name (by default, admin) •... -
Page 96: Step 2 Of 2: Connect To Your Dvr
Mobile Connectivity Step 2 of 2: Connect to your DVR To connect to your DVR: 1. Tap the name of the DVR you wish to connect to. NOTE: To erase an account, swipe your finger across the name of the DVR you wish to delete. Next, tap the Delete button. -
Page 97: Controlling Ptz Cameras
Mobile Connectivity Controlling PTZ cameras To control connected PTZ cameras: 1. Select the channel that has the PTZ camera connected. 2. Tap the PTZ button ( Drag your finger to pan and tilt camera Focus Open iris Exit Set Preset Lock screen Go to Preset orientation... -
Page 98: Configuring The Relay Menu
Mobile Connectivity Configuring the Relay menu To open the alarm relay menu: 1. Tap the relay button ( Trigger button Select relay duration 2. Select the relay duration, and tap Trigger to activate the relay. Configuring Presets The PTZ preset menu allows you to store and go to PTZ presets. To set a preset: 1. -
Page 99: Android-Based Devices
Compatible Devices • Android OS (2.1 and above, touch screen models only) • Digimerge DH100 Series DVR Prerequisites • Port (or whichever port your system is using) must be port forwarded to your router •... -
Page 100: Configuring Digi Imobile Dh100
2. Enter the following: • DVR: Enter the desired DVR name. • Address: Enter your DDNS address (i.e. tomsmith.digimerge.net) • Port: Enter your DVR’s port number (by default, port 80) • User: Enter your DVR’s user name (by default, admin) •... -
Page 101: Digi Imobile Dh100 Features And Functions
Mobile Connectivity Digi iMobile DH100 features and functions Tap to change video streaming Tap to open login window method (h.264 recommended) Tap to change to quad view Tap to change channels... -
Page 102: Blackberry
NOTE: Compatible Devices • Blackberry 9000, 9700, 9800 • Blackberry Desktop Manager 4.6 and above • Digimerge DH100 Series DVR Prerequisites • Port (or whichever port your system is using) must be port forwarded to your router • You must create a DDNS account, and have the DDNS settings configured in your DVR •... - Page 103 Mobile Connectivity Enabling APN (Access Point Name) In order for the app to run, you must enable APN (Access Point Name) on your Blackberry. Contact your service provider for your Blackberry’s APN name. To enable APN: 1. Press the Menu button ( 2.
-
Page 104: Step 1 Of 3: Install The .Alx File To Your Blackberry
Step 1 of 3: Install the .alx file to your Blackberry To install Connection h.264 to your Blackberry: 1. Go to www.digimerge.com, and go to the DH100’s product page. Download the Blackberry remote app. 2. Extract the zip files to a folder. The zip file contains two files, one ending in .alx and one in .cod. -
Page 105: Step 3 Of 3: Log In To Your Dvr
Mobile Connectivity 3. Enter the following: • NAME: Enter the desired DVR name. • IP: Enter the DVR’s local IP address or DDNS address (i.e. tomsmith.digimergeddns.net) • PORT: Enter the DVR’s port number (by default, port 80). • ACCOUNT: Enter your DVR’s user name (by default, admin). •... -
Page 106: Functions And Features
Mobile Connectivity Functions and features Changing channels 1. During live view, press the Menu button ( ) to open the sub-menu. 2. Select Single, then select the desired channel. Viewing in full screen 1. During live view, press the Menu button ( ) to open the sub-menu. -
Page 107: Appendix A: System Specifications
Appendix A: System Specifications APPENDIX A: SYSTEM SPECIFICATIONS Description Specification Video IN/ Loop Out 4ch: 4 input, 8ch: 8 input Video Display 4ch: 1,4 Split, 8ch: 1,4,8 Split Monitor Out 1 ch Spot Out Audio In/Out 1 In/1 Out Video Compression H.264 hardware codec PIP Display Live Display... - Page 108 Power, REC, NET Power Adaptor Adaptor 12V, 3A Power Source As our products are subject to continuous improvement, Digimerge Technology Inc. and its subsidiaries reserve the right to modify product design, specifications, and prices without notice and without incurring any obligation. E&OE...
-
Page 109: Appendix B: Setting Up Remote Viewing
3. Press and hold the Enter button on the front panel to find your system's IP address. 4. Enable Port Forwarding on your router. Refer to the included Router Guide and Basics of Remote Video Access Guide for further assistance with your specific network setup and hardware. 5. Setup an account at http://ddns.digimerge.net... -
Page 110: How Do I Find My Ip And Mac Addresses
Appendix B: Setting up Remote Viewing How Do I Find My IP and MAC addresses? The IP and MAC address of your system are necessary for DDNS setup. DDNS allows you to view and control your system from a remote location. IP address &... -
Page 111: How Do I Enable Port Forwarding
216.13.154.34 to DVR Internal IP 192.168.0.3:80). The instructions found online in the Router Configuration Guides will assist you in the port forwarding configurations for a selection of different router models. Visit our Consumer Guides Support website at http://www.digimerge.com/ for more details. -
Page 112: Appendix C: Digimerge Auto Port Forwarding Wizard
Forwarding Wizard to port forward the required ports. Installation To install the Digimerge Auto Port Forwarding Wizard: 1. Insert the system’s software CD, and follow the instructions to launch the Digimerge Auto Port Forwarding Wizard software. • The installation window opens. - Page 113 Appendix C: Digimerge Auto Port Forwarding Wizard 5. Click the Next button and then click Finish to complete the software installation. Finish button 6. Double-click the Digimerge Auto Port Forwarding shortcut ( )from your desktop to start the program. Obtaining Your Router Model Number and Version On most routers, the model and version number can be found underneath the router, printed on a sticker.
- Page 114 1. Your router’s model number and version number 2. Your router’s user name and password 3. Your Digimerge device’s IP address 4. Your Digimerge device’s port numbers that require port forwarding Initial Startup: Select language 1. Click the Language drop-down menu and select a language (English, French, Spanish). Click the Start button to continue.
- Page 115 IP Enter port number 4. Under IP, enter the IP address of your Digimerge device. NOTE: The IP is usually found in the information window of your DVR. 5. Under Port, enter the DVR’s Web Port (by default, port 80).
- Page 116 Step 4: Test your connection 1. Click the Test Your Connection button. • Your system’s default browser opens and connects to your Digimerge device. NOTE: Ensure that Internet Explorer is your system’s default internet browser. NOTE: A window opens that prompts you to enter in your DVR’s user name and password (do not enter your DDNS log in information).
- Page 117 Appendix C: Digimerge Auto Port Forwarding Wizard • The "Possible 1st Router" refers to the router directly connected to your system. This is the router that requires the port forward information. • The "Possible 2nd Router" refers to the router immediate to the internet connection. This is the router that requires you to configure a DMZ host connection.
- Page 118 Appendix C: Digimerge Auto Port Forwarding Wizard Configuring a DMZ host connection Example • Connect to "Router 1" on your network (referred DMZ stands for Demilitarized Zone. Enabling a DMZ to as "Possible 1st Router" in the Auto Port IP on your router enables one of the routers to pass Forwarding Wizard).
-
Page 119: Appendix D: Setting Up Ddns Service
APPENDIX D: SETTING UP DDNS SERVICE Digimerge offers a free DDNS service for use with your DVR. A DDNS account allows you to set up a web site address that points back to your local network. The following outlines how to set up your free DDNS account. - Page 120 You will need this information for remote access to your system. Record your information below: Username: Domain name*: Password: * Only the first part of the Domain Name is required for setup on the system. For tomsmith.digimerge.net example, if the full domain name is , you only need to enter tomsmith on the system.
-
Page 121: How Do I Enable Ddns On My System
1. Open the MAIN MENU and click NETWORK SETUP>DDNS SETUP. 2. Select the Enable DDNS checkbox. 3. Under DDNS Server, select DIGIMERGE. 4. Enter the following: • DOMAIN NAME, enter only the first portion of your DDNS domain from the confirmation email. -
Page 122: Appendix E: Connecting Ptz Cameras
Appendix E: Connecting PTZ Cameras APPENDIX E: CONNECTING PTZ CAMERAS You can connect RS-422/485 PTZ cameras (not included) to the PTZ Control Block on the rear panel of the system. Connect to T+ and T- PTZ CAMERA (not included) Connecting a PTZ camera (not included) To install a PTZ Camera: 1. -
Page 123: Appendix F: Connecting An External Monitor
Appendix F: Connecting An External Monitor APPENDIX F: CONNECTING AN EXTERNAL MONITOR Use the Video port (BNC) on the rear panel of the system to use the Monitor Out function. Monitor Out displays the exact on-screen display of the system. NOTE: A BNC-to-RCA adapter (not included) is required to connect a monitor with RCA inputs. -
Page 124: Appendix G: Connecting Motion / Alarm Devices
Appendix G: Connecting Motion / Alarm Devices APPENDIX G: CONNECTING MOTION / ALARM DEVICES You can enable motion detection and alarm control from the Main Menu. You can also connect additional motion sensor devices to the system (i.e. motion sensors, door/window sensors). Use a motion detector or sensor to send a signal to the system to begin camera viewing and recording on the matching camera channel (when enabled in the Menu). -
Page 125: Appendix H: Full Connectivity Diagram
Appendix H: Full Connectivity Diagram APPENDIX H: FULL CONNECTIVITY DIAGRAM The following diagram outlines a general set of connections available with the DVR. VGA MONITOR (Not Included) AUDIO CAPABLE (Not Included) PTZ CAMERA CAMERA BNC CAMERAS* (Not Included) (Not Included) (Not Included) POWER LINE OUT/AMPLIFIED... -
Page 126: Appendix I: Replacing The Hard Drive
Appendix I: Replacing the Hard Drive APPENDIX I: REPLACING THE HARD DRIVE The system comes with a pre-installed 3.5" SATA hard drive. You can install up to one 1.5TB hard drive. NOTE: Make sure that the system is and the power cable has been disconnected before changing the hard drive. - Page 127 Appendix I: Replacing the Hard Drive 3. Carefully slide the cover away from the front panel and lift away from the housing. NOTE: Make sure the cover is clear of all ports and connectors on the rear panel. Slide cover 4.
-
Page 128: Replacing The Hard Drive
Appendix I: Replacing the Hard Drive Replacing the Hard Drive To replace the hard disk: 1. Place the new hard drive in the housing. Carefully flip the DVR over, with your hand clasping the hard drive. Secure the hard drive with the 4 silver screws from the bottom of the DVR. DVR Front 2. -
Page 129: Formatting The Hard Drive
Appendix I: Replacing the Hard Drive Formatting the Hard Drive After installing a new hard drive, you must format it before the system can recognize it. all data This step cannot : Formatting the HDD erases on the hard disk. ATTENTION be undone . -
Page 130: Appendix J: Using Listen-In Audio
Appendix J: Using Listen-in Audio APPENDIX J: USING LISTEN-IN AUDIO Listen-in audio allows you to listen to, and record live audio on the system. DVR* AUDIO CAPABLE CAMERAS (not included) LINE OUT / AMPLIFIED SPEAKERS (not included) *8-channel model shown. To enable listen-in audio: 1. -
Page 131: Troubleshooting
Troubleshooting TROUBLESHOOTING When a malfunction occurs, it may not be serious and can be corrected easily. The following describes the most common problems and solutions. Please refer to the following before calling Digimerge Technical Support: Error Possible Causes Solutions • DVR is not receiving •... - Page 132 Troubleshooting Troubleshooting (cont’d.) Error Possible Causes Solutions Mouse not detected • Mouse cable is not firmly • Firmly connect the mouse cable to the the system; by system connected to the system • Mouse is not connected to the system •...
- Page 133 • Ensure that you have created a DDNS account. • Incorrect DDNS URL • Ensure that you type the URL in full ie: http://tomsmith.digimerge.net:80. • DDNS not enabled on the • Ensure there are no spelling errors in the system URL.
- Page 134 Troubleshooting...
-
Page 135: Need Help
Right for Business Need Help? Need Help? Please make sure to visit our website www.digimerge.com to receive product updates and information. 3 Easy Ways To Contact Us Online: Pro duct s up p o r t is ava i l ab l e 24/ 7 in c lu d in g pro duct i nfor m ati o n , u s e r man u a ls , q u ic k start up gui de s a n d FAQ ’s at... - Page 136 Software & Consumables: All software, accompanying documentation and consumables (including but not limited to fuses and batteries) provided with or as part of the product are furnished AS IS, and are excluded from warranty coverage. Digimerge is not obligated to provide the end-user with a substitute product during the warranty period or at any time.
- Page 137 No claims or statements regarding the product, whether written or verbal, by salespeople, retailers, dealers or distributors, that are not contained in this limited warranty or in the owner's manual are authorized by Digimerge and do not modify or expand this warranty.
- Page 138 Guías de arranque rápido Actualizaciones del programa User Manuals Specification Sheets Firmware Upgrades Guides de l’utilisateur Fiches signalétiques Mises à jour du micro-logiciel Guías del usuario Fichas de especificaciones Actualizaciones del microprograma VISIT / VISITEZ / VISITE www.digimerge.com www.digimerge.com © Digimerge Technology Inc.
Need help?
Do you have a question about the DH100 Series and is the answer not in the manual?
Questions and answers