Table of Contents
Advertisement
Quick Links
U S E R G U I D E
AWH75
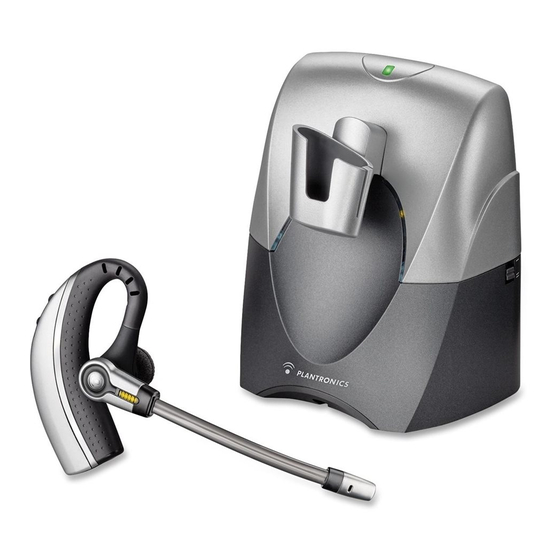
PROFESSIONAL HEADSET SYSTEM
© 2006 Plantronics, Inc. All rights reserved. Avaya and the Avaya Logo are trademarks of Avaya, Inc.
and may be registered in certain jurisdictions.
IntelliStand, SupraElite, and the voice tube clear color trade dress are trademarks or registered
trademarks of Plantronics, Inc.
Patents U.S. 5,210,791; 6,735,453; D469,756; D505,413; D512, 984; Australia 147229; France 651,857-
651,865; Germany 40108524.4; GB Regd.Des.No. 2104923 and Patents Pending
Printed in China
73870-01 (11.06)
Advertisement
Table of Contents
Troubleshooting

Subscribe to Our Youtube Channel
Related Manuals for Avaya AWH75


Summary of Contents for Avaya AWH75
- Page 1 AWH75 PROFESSIONAL HEADSET SYSTEM © 2006 Plantronics, Inc. All rights reserved. Avaya and the Avaya Logo are trademarks of Avaya, Inc. and may be registered in certain jurisdictions. IntelliStand, SupraElite, and the voice tube clear color trade dress are trademarks or registered trademarks of Plantronics, Inc.
- Page 2 Table of Contents Components Components Headset Setup 1–5 IntelliStand Charging Eartips Positioning Adjusting Fit Multi-shift Pairing Spare Voice Tube Making/Answering/Ending Calls Checking Compatibility Base Volume Headset Controls Base Indicator Lights Troubleshooting Subscription AC Charger System Reset Maintenance Voice Tube Replacement Battery Replacement Base Telephone Cord...
-
Page 3: Charging
Components Components Base - Underside View Base - Top View Speak Volume Front: Major Adjust Indicator Lights Handset Jack Talking (Green) Power (Red) AC Power Charging (Amber) Adapter Jack Accessory Jack Ring Detector Jack Charging Cradle Telephone Base Jack EU24/ADJ Telephone Configuration Dial Headset... - Page 4 Setup 1 Setup 2 with AVAYA 2420, 4610SW, 4620, 4620SW, with AVAYA 2410, 4630, 5410, 6416 D+M 4621SW, 4622SW, 4625SW 4630SW, 5420, and 6424 D+M telephones 5610 and 5620 telephones* Configuration Configuration dial set to 3 dial set to 1...
- Page 5 Setup 3 Setup 4 with AVAYA 8403, 8405, 8410D, 8411D, 8434 with AVAYA 9600 series telephones and telephones Configuration dial set to 1 Configuration dial set to 3...
-
Page 6: Positioning
Setup 5 Charging with other AVAYA telephones Caution: It is important for correct and safe operation that the base cord is installed into the proper jack of your telephone. Follow these instructions 1. Slide the headset into the charging carefully, especially if your telephone has two jacks where the handset was cradle. -
Page 7: Adjusting Fit
Adjusting Fit Making/Answering/Ending Calls Setup 1, 2, 3 & 4 NOTE: Depending on your preference, you can replace the pre-installed leatherette ear cushions with the included alternative foam cushions. 1. Adjust headband to fit. 2. Rotate voice tube until it is pointed towards your chin. Multi-shift Pairing To make a call, press call control button. -
Page 8: Making/Answering/Ending Calls
Making/Answering/Ending Calls Checking Compatibility NOTE: The compatibility setting of “1” is set at the factory to work with most phones. Setup 5 However, if you do not hear a dial tone, if either you or the recipient is having trouble hearing, or if you experience buzzing/hissing, please follow the directions below. - Page 9 Listening Volume Speaking Volume NOTE: Be sure to set your telephone’s volume at the mid range before adjusting the AWH75 volume. Minor Adjust Major Adjust Minor Adjust Major Adjust Push on the “+” and “–” buttons to adjust Use listening volume major adjust...
-
Page 10: Headset Controls
Headset Controls Base Indicator Lights Indicator Lights Talking/Muted (Green) Power (Red) Charging (Amber) Feature Action Tone Listening volume Press + to increase Ascending/descending minor adjust or – to decrease tones, 2 tones at limit Action Light Long press – key 3 mid tones = Mute Mute (3 seconds) -
Page 11: Troubleshooting
• Listening volume too high on phone. If your phone has a • Listening volume too high on phone. If your phone has a • Check that the AC charger is the model supplied by Avaya. • Check that the AC charger is the model supplied by Avaya. -
Page 12: Battery Replacement
Subscription Battery Replacement The headset and base unit are supplied subscribed to each other. However, if you wish The custom battery supplied should last 2– 3 years. When talk time decreases to use a replacement headset with the base unit, then the units must be re-subscribed. significantly, you should replace the battery. -
Page 13: Technical Assistance
Independent studies have shown that the internal wireless radio is safe for use by consumers. Visit www.avayaheadsets.com for more information. NOTE: Modifications not expressly approved by Avaya could void the user's authority to operate the equipment. - Page 14 Benutzerhandbuch Brugervejledning Guía del usuario Käyttöopas Guide de l’utilisateur Guida dell’utente Gebruikershandleiding Brukerhåndbok Manual do Utilizador Användarhandbok AWH75 PROFESSIONAL HEADSET SYSTEM PROFESSIONELLES HEADSET-SYSTEM PROFESSIONELT HEADSETSYSTEM SISTEMA PROFESIONAL DE AURICULARES AMMATTIKÄYTTÖÖN TARKOITETTU KUULOKEJÄRJESTELMÄSYSTEME D’OREILLETTE PROFESSIONNEL SISTEMA DI CUFFIE PROFESSIONALE PROFESSIONEEL HEADSETSYSTEEM PROFESJONELT HODESETTSYSTEM...
-
Page 15: Base Indicator Lights
Remplacement du tube vocal .....73 Spreekbuisje vervangen ......73 Austauschen des Akkus ......74 Acceso a Avaya UCC ........75 Remplacement de la batterie .....74 Batterijen vervangen ........74 Kontaktieren des Avaya Unified Accès à l’UCC Avaya ........76 Toegang tot de Avaya UCC ......76 Communication Center (UCC) .....75... - Page 16 Vedlikehold ..........73 Underhåll ............73 base Bytte talerør ..........73 Byta ut mikrofonarmen .......73 Bytte batteri ..........74 Byte av batteri ..........74 BAsisstAtion Få tilgang til Avaya UCC ......77 Åtkomst till Avaya UCC ........77 BAseenHed tuKiAsemA ÍNDIcE BAsisstAtion Componentes ..........5 Telephone cord BAseenHet Configuração 1–5 ........10...
- Page 17 Components Components base - TOP VIew Näkymä edestä arrière Merkkivalot Réglage secondaire du volume à BAsisstAtion – oBerseite l’émission Puhe (vihreä) BAseenHed - set frA oven Interrupteur IntelliStand ON/OFF (pour Virta (punainen) vistA superior de lA BAse automatiser le bouton de contrôle d’appel) Lataus (keltainen) tuKiAsemA –...
- Page 18 Components Components base - UNdeRsIde VIew HeadseT Tukiasema – näkymä pohjasta Kevytkuuloke Kuunteluvoimakkuus ja mykistys Puheäänen voimakkuuden suuret säädöt BAsisstAtion – unterseite AuriculAr Puhelunhallintapainike Luurin liitin BAseenHed - set nedefrA KevytKuuloKe Puheen merkkivalo Verkkolaiteliitin BAse: vistA inferior oreillette Ääniputki Liitin (lisävaruste) tuKiAsemA – näKymä poHjAstA AuricolAri Puhelun ilmoittimen liitin Oreillette...
-
Page 19: 46Xx And 56Xx Phones Require 1.8 Firmware Or Greater
setup 1 setup 2 A V A Y A 2410, 4630, 5410, 6416 D+M, einricHtung 1 einricHtung 2 6424 D+M instAllAtion 1 instAllAtion 2 A V A Y A 2420, 4610SW, 4620, 4620SW, configurAción 1 configurAción 2 4621SW, 4622SW, 4625SW 4630SW, Asennus 1 5420, 5610, 5620* Asennus 2 configurAtion 1 configurAtion 2 configurAzione 1 configurAzione 2 instAllAtie 1 instAllAtie 2 oppsett 1... - Page 20 4 setup 5 with other AVAYA telephones A V A Y A 9600 Gb CAUTION: It is important for correct and safe ATTENZIONE: per un funzionamento einricHtung 4 operation that the base cord is installed into corretto e sicuro, inserire il cavo della base instAllAtion 4 the proper jack of your telephone.
- Page 21 5 für Andere AvAyA-telefone instAllAtion 5 med Andre AvAyA-telefoner configurAción 5 con otros teléfonos AvAyA Asennus 5 muut AvAyA-puHelimet A B configurAtion 5 Avec les Autres télépHones AvAyA configurAzione 5 con Altri telefoni AvAyA IntelliStand™ off IntelliStand™ on instAllAtie 5 met Andere AvAyA-telefoons IntelliStand™...
- Page 22 Charging Charging CHaRGING ReCaRGa 1. Slide the headset into the charging cradle. 1. Coloque el auricular en la horquilla de RICaRICa CaRReGameNTO The earpiece with the microphone goes into carga. Asegúrese de que el auricular con 1. Far scorrere l’auricolare nel supporto di 1.
- Page 23 Positioning adjusting Fit adJUsTING FIT Note: Depending on your preference, you can replace the pre-installed leatherette ear cushions with the included alternative foam cushions. 1. Adjust headband to fit. 2. Rotate noise-cancelling microphone until it is pointed towards your chin. ReGOLazIONe NotA: a seconda delle proprie preferenze, è...
- Page 24 multi-shift Pairing multi-shift Pairing Enable UseaN LaITTeeN PaRILIITOs assOCIazIONe mULTIPLa Aktivieren puhelun soittaminen per eseguire una chiamata Aktiver 1. Nosta luuri pidikkeestä. Valintaäänen pitäisi 1. Sollevare la cornetta. La cornetta emette Activar Ota käyttöön kuulua luurista. (Jos ääntä ei kuulu, tarkista il segnale di centrale (in caso contrario, Activer laitteen yhteensopivuus sivulta 30).
- Page 25 multi-shift Pairing making/answering/ending Calls Enable Aktivieren Aktiver setup 1, 2, 3 & 4 FOReTaGe/besV aRe/ Activar aFsLUTTe OPKaLd Ota käyttöön (Konfiguration 1, 2, 3 og 4) Activer Attivato Hvis du vil foretage en opringning, skal du Inschakelen trykke på knappen til opkaldsstyring. Der Oder Activar Eller...
- Page 26 making/answering/ending Calls making/answering/ending Calls PasseR/PReNdRe/TeRmINeR RINGe / sV aRe På samTaLeR / setup 5 maKING/aNsweRING/eNdING (configurations 1, 2, 3 et 4) (setup 5 with optional Handset lifter) a VsLUTTe samTaLeR des aPPeLs CaLLs with Optional Handset Lifter (oppsett 1, 2, 3 og 4) Pour passer un appel, appuyez sur le bouton A.
- Page 27 making/answering/ending Calls making/answering/ending Calls setup 5 FOReTaGe/besV aRe/aFsLUTTe sOITTamINeN, V asTaamINeN eseCUzIONe/RIsPOsTa/TeRmINe (installation 5 – med håndsætløfter OPKaLd Ja PUHeLUN LOPeTTamINeN (configurazione 5 con deLLe CHIamaTe with Optional Handset Lifter (Asentaminen 5 – Kun käytössä on luuripidike /ekstraudstyr) dispositivo di risposta automatico opzionale) /lisävaruste) A.
-
Page 28: Checking Compatibility
making/answering/ending Calls Checking Compatibility RINGe / sV aRe På samTaLeR / Ringa/besvara/avsluta samtal (Konfiguration 5 med lurlyftare /tillval)) a VsLUTTe samTaLeR oppsett 5 med håndsettløfter som A. Kontrollera först att lurlyftaren är korrekt tilleggsutstyr) installerad. A. slik tester du at håndsettløfteren er stilt 1. - Page 29 Checking Compatibility Checking Compatibility yHTeeNsOPIVUUdeN VeRIFICa deLLa COmPaTIbILITà TaRKIsTamINeN NotA: per la maggior parte dei telefoni, l’impostazione di HUomAUtUs: Yhteensopivuuskytkimen tehdasasetuksena compatibilità predefinita è “1”. tuttavia, se non si riceve il on 1, jotta laite toimisi useimpien puhelinten kanssa. Jos segnale di centrale, se uno o entrambi degli interlocutori et kuitenkaan kuule valintaääntä, jos soittaja tai puhelun riscontrano problemi nella comunicazione o se vengono...
-
Page 30: Adjusting The Volume
Note: ensure you set your telephone’s volume at the mid susing, følger du retningslinjene nedenfor. range before adjusting the AwH75 volume. Justera konfigurationsväljaren på basenheten Juster telefonens konfigurasjonshjul på basen till läge 3 för följande telefoner: 2420, minor adjust til posisjon 3 for de følgende telefonene: 2420,... - Page 31 NotA: antes de ajustar el volumen del auricular HiNweis: stellen sie sicher, dass sie das BemærK: Kontroller, at volumen på telefonen AwH75, asegúrese de que el volumen del telefon auf eine angenehme Lautstärke er indstillet til middel, før du justerer volumen teléfono está...
- Page 32 NotA: accertarsi di impostare il volume del tukiaseman äänenvoimakkuuden säätämistä, de procéder au réglage du volume du AwH75. telefono su un livello medio prima di regolare il että puhelimen äänenvoimakkuus on asetettu volume di AwH75.
- Page 33 NotA: Certifique-se de que configura o volume telefoon eerst half open voordat u het volume til mellomområdet før du justerer volumet til do telefone para os valores médios antes de van de AwH75 aanpast. AwH75. ajustar o volume AwH75. fijnafstelling små...
- Page 34 Headset Controls se JUSTERA VOL YMEN Lyssningsvolym oBs! Kontrollera att du ställt in telefonens volym i mellanregistret innan du ställer in volymen på AwH75. finjustering Finjustera lyssningsvolymen genom att trycka på knapparna + och –. oBs! samtalsläget måste vara aktiverat för att Headset controls du ska kunna göra justeringar.
- Page 35 Headset Controls Headset Controls Knapper på headset Kevytkuulokkeen ohjaimet HAndling tone toimi näin äänimerKKi funKtion ominAisuus Lisää voimakkuutta painamalla Tryk på + for at øge eller – for at Stigende/faldende toner, Nousevat tai laskevat äänimerkit, enintään 2 Kuunteluvoimakkuuden painiketta +, vähennä painamalla Finindstilling af lyttevolumen reducere 2 toner ved grænse äänimerkkiä...
- Page 36 Headset Controls Headset Controls comandi della cuffia Hodesettkontroller HAndling tone Azione tono funKsjon funzione Trykk på + for å heve eller – for Stigende/synkende toner, Premere il pulsante + per Toni ascendenti/discendenti, 2 toni al Regolazione secondaria del Små justeringer av lyttevolum å...
- Page 37 Headset Controls Base Indicator Lights Headsetkontroller base Indicator Lights åtgärd funKtion Action Charging Fully charged Power Talking Muted ligHt Flashes amber Solid amber Solid red Solid green Flashes green Öka med + och minska med – Stigande/fallande toner, högst två toner Finjustering av lyssningsvolym Leuchtanzeigen an der Basisstation 3 medelhöga toner=sekretess på...
-
Page 38: System Reset
If the volume is still too • Check that the AC charger is the model supplied by Avaya. noise or sidetone. high, select another speaking volume major adjust setting. See page 33. - Page 39 • Drehen Sie das Mikrofon zu Ihrem Kinn. • Überprüfen Sie, ob Sie das von Avaya mitgelieferte Ladegerät verwenden. • Die Hörlautstärke ist zu hoch. Wenn Ihr Telefon über einen Lautstärkeregler verfügt, setzen Sie ihn herunter, bis die Verzerrung nicht mein Headset funktioniert •...
- Page 40 Se side 30. baggrunden. • Modtager en anden radiofrekvens. Ring til Avaya Headset Helpdesk for at • Du skal muligvis tilmelde headsettet til baseenheden igen. Se side 72. anskaffe et RF-filter.
- Page 41 • Se registran interferencias con otra frecuencia de radio. Póngase en escucha. Consulte la página 35. contacto con el servicio técnico de los teléfonos Avaya para adquirir un filtro • El ajuste del regulador de configuración no es válido para el teléfono.
- Page 42 • Laturi on kytketty autojohtoon. Kytke laturi kunnolla pistorasiaan. • Tarkista, että puhelin on liitetty tukiaseman puhelinjohtoliittimeen ja että puhelun taustalla surinaa. • Muun radiotaajuuden poiminen. Ota yhteys Avaya-kevytkuulokkeiden se on kunnolla paikallaan. asiakastukeen ja pyydä RF-suodatin. • Kevytkuuloke saattaa olla tukiaseman kuuluvuusalueen ulkopuolella.
- Page 43 • Dirigez le microphone vers votre menton. éteints. • Assurez-vous que vous utilisez le chargeur secteur fourni par Avaya. • Le volume d’écoute est trop élevé sur le téléphone. Si votre téléphone dispose d’un bouton de réglage du volume, abaissez le volume jusqu’à la mon oreillette ne fonctionne •...
- Page 44 Vedere pagina 37. • Accertarsi di utilizzare il caricabatterie CA fornito da Avaya. • Puntare il microfono verso il mento. • Il volume di ascolto del telefono è troppo alto. Se il telefono dispone di un l’auricolare non funziona...
- Page 45 • Richt de microfoon naar uw kin. • Controleer of de wisselstroomadapter het door Avaya geleverde model is. • Het luistervolume op de telefoon is te hoog. Indien uw telefoon een volumeregeling voor de telefoonhoorn heeft, verlaagt u het volume tot de mijn headset werkt niet •...
- Page 46 • Kontroller at håndsettet er koblet til baseenhetens håndsettkontakt og er bakgrunnen. • Jeg får inn en annen radiofrekvens. Ring kundesenteret for Avaya- skjøvet helt inn. hodesett for å få et RF-filter. • Hodesettet kan være utenfor rekkevidden til baseenheten. Flytt deg Batteriet gir betydelig Batteriet er dårlig.
- Page 47 • Aponte o microfone na direcção do seu queixo. • Certifique-se de que o carregador CA é o modelo fornecido pela Avaya. • Volume de audição do telefone demasiado alto. Se o telefone tiver controlo do volume, reduza-o até a distorção desaparecer.
- Page 48 Se sidan 40. • Kontrollera att laddaren är av den modell som tillhandahålls av Avaya. personer i andra änden hör • Laddaren är kopplad till ett grenuttag. Anslut laddaren direkt till ett Headsetet fungerar inte •...
- Page 49 system Reset system Reset zURüCKseTzeN des sysTems RéINITIaLIsaTION dU TILbaKesTILLING aV Um die standardeinstellungen nach fehlerhaften Vorgängen sysTème sysTemeT wiederherzustellen (siehe Abschnitt „Fehlerbehebung“), Pour retrouver une situation de fonctionnement Du kan gjenopprette noen feil ved å tilbakestille müssen sie möglicherweise das system zurücksetzen. normal après échec (consultez la section de systemet (se kapitlet om feilsøking).
- Page 50 subscription maintenance sUbsCRIPTION COLLeGameNTO maINTeNaNCe maNUTeNzIONe The headset and base unit are supplied L’auricolare e la base sono già collegati al 1. Replace voice tube every 6–9 months (voice 1. Sostituire il tubo vocale con una frequenza di subscribed to each other. However, if you wish momento dell’acquisto.
-
Page 51: Battery Replacement
When talk time decreases significantly, La durata della batteria in dotazione è di 2-3 AWH75 1. Connect the AWH75 wireless to the Avaya you should replace the battery. Call anni. Quando l’autonomia di conversazione si telephone. Follow the instructions in this user 1. - Page 52 1. Connectez le AWH75 sans fil au téléphone (UCC) a partir do auricular AWH75 Wireless Avaya. Suivez les instructions de ce guide de 1. Sluit de AWH75 Wireless aan op de Avaya- l’utilisateur. telefoon. Volg de aanwijzingen in deze 1. Ligue o AWH75 Wireless ao telefone handleiding.
- Page 54 © 2005–2006 Plantronics, Inc. All rights reserved. Avaya and the Avaya Logo are trademarks of Avaya, Inc. and may be registered in certain jurisdictions. IntelliStand and the voice tube clear color trade dress are trademarks or registered trademarks of Plantronics, Inc.
- Page 55 U S E R G U I D E AWH75N PROFESSIONAL HEADSET SYSTEM © 2007 Plantronics, Inc. All rights reserved. Avaya and the Avaya Logo are trademarks of Avaya, Inc. and may be registered in certain jurisdictions. IntelliStand is a trademark of Plantronics, Inc.
-
Page 56: Table Of Contents
Welcome Components This User Guide provides instructions on the setup and usage of the Avaya AWH75N Professional Headset System. Headset Before getting started, please review the safety booklet included in your package. For additional help, service or support information, refer to the product warranty card or visit www.avayaheadsets.com. -
Page 57: Components
Components Components Base - Underside View Base - Top View Speak Volume Front: Major Adjust Indicator Lights Handset Jack Talking (Green) Power (Red) AC Power Charging (Amber) Adapter Jack Accessory Jack Ring Detector Jack Charging Cradle Telephone Base Jack EU24/ADJ Telephone Configuration Dial Headset... - Page 58 Setup 1 Setup 2 with AVAYA 2420, 4610SW, 4620, 4620SW, 4621SW, 4622SW, 4625SW with AVAYA 2410, 4630, 5410, 6416 D+M and 6424 D+M telephones 4630SW, 5420, 5610 and 5620 telephones* Configuration Configuration dial set to 3 dial set to 1 *24xx and 54xx phones require 4.0 firmware or greater.
- Page 59 Setup 5 Setup 3 w/AVAYA 8403, 8405, 8410D, 8411D, 8434 telephones with other AVAYA telephones Warning: It is important for correct and safe operation that the base cord is installed into the proper jack of your telephone. Follow these instructions carefully, especially if your telephone has two jacks where the handset was attached.
-
Page 60: Positioning
Charging Adjusting Fit 1. Slide the headset into the charging cradle. The earpiece with the micro- phone goes into the cradle. 2. Gently press down on the the head- set to ensure that the headset is in the correct position. The amber charge indicator light on the base will flash while charging and will change to solid amber when fully... -
Page 61: Making/Answering/Ending Calls
Making/Answering/Ending Calls Making/Answering/Ending Calls Setup 5 Setup 1, 2, 3 & 4 with Optional Handset Lifter To make a call, press call control button. Dial tone should sound through headset First, test proper set up of the handset lifter. (If not, check compatibility—see Setup 1, 2, 3 & 4). Dial using the telephone keypad. 1. -
Page 62: Checking Compatibility
Checking Compatibility Listening Volume NOTE: The compatibility setting of “1” is set at the factory to work with most phones. NOTE: Be sure to set your telephone’s volume at the mid range before adjusting However, if you do not hear a dial tone, if either you or the recipient is having trouble hearing, the AWH75N volume. -
Page 63: Headset Controls
Speaking Volume Headset Controls Minor Adjust Major Adjust Feature Action Tone Use the speaking volume major adjust Use the speaking volume minor adjust control on the bottom of the base for control on the back of the base for Listening volume Press + to increase Ascending/descending large incremental adjustments. -
Page 64: Base Indicator Lights
• Check that the AC charger is securely connected to a Talking/Muted (Green) working wall outlet. • Check that the AC charger is the model supplied by Avaya. Power (Red) Charging (Amber) My headset does not work •... -
Page 65: Subscription
• AC charger is plugged into a power strip. Plug the AC buzz in the background. charger into the wall directly. • Picking up another radio frequency. Call the Avaya Headset Helpdesk for an RF filter. Battery talk time performance Battery is going bad. -
Page 66: Technical Assistance
Independent studies have shown that the internal wireless radio is safe for use by consumers. Visit www.avayaheadsets.com for more information. NOTE: Modifications not expressly approved by Avaya could void the user's authority to operate the equipment.
Need help?
Do you have a question about the AWH75 and is the answer not in the manual?
Questions and answers