
Related Manuals for Backyard Discovery Highlander 6010


Summary of Contents for Backyard Discovery Highlander 6010
-
Page 1: Assembly Instructions
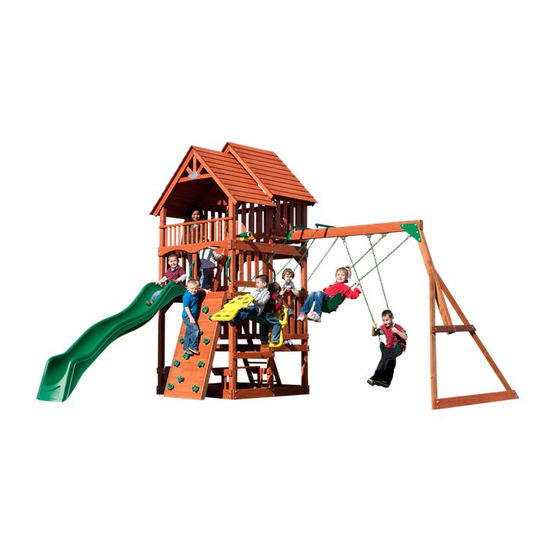
Owner’s Manual FAQ’s Assembly Instructions Warranty Information Highlander Wooden Playcenter - 2010 Model: 6010 Manufacturer: Backyard Discovery 3001 North Rouse Pittsburg, KS 66762 Made in China 6010 Highlander REV 09-1102... - Page 2 Title Page PS Rev. 01/28/2009 Tools Required for Installation: (These are the tools that are generally required fo r assembly of our playsets. These tools are not included in the playset purchase.) (Level 24”) (Open end Wrenches (Nut drivers ” & 7/16” ) ”...
- Page 3 Owner’s Manual Play Set Dear Customer: Please read entire booklet completely before beginning the assembly process. Equipment is recommended for use by children 3 to 10 years of age. Structures are not intended for public use. The Company does not warranty any of its residential structures subjected to commercial use such as: Daycare, Preschool, Nursery School, Recreational Park, or any similar Commercial Application.
-
Page 4: Positioning Your Playcenter
Owner’s Manual Play Set Please refer to the Assembly section of the Assembly Manual for Maximum Fall Height. Positioning Your Playcenter 1. The Playcenter is designed to be installed on a lev el surface by an Adult with an Adult helper. Place in a flat area of your yard to minimize ground preparation. -
Page 5: Operating Instructions
Owner’s Manual Play Set Operating Instructions: NOTE : Your children’s safety is our #1 concern. Observi ng the following statements and warnings reduces the likelihood of serious or fatal injury. Please review these safety rules regularly with your children. 1. This Playcenter is designed for specific number of occupants whose combined weight should not exceed a designated weight on the elevated floor or the swing area, the total Unit capacity is outlined in the assembly section of instruction manual. -
Page 6: Maintenance Instructions
Third Party Assembly: Customer may, in their sole discretion, elect to use a third party person or service to assemble this product. Backyard Discovery assumes no responsibility or liability for any charge incurred by the Customer for any assembly services’. - Page 7 Owner’s Manual Play Set APPENDIX A Information on Playground Surfacing Materials: The following information is from the United States Consumer Product Safety Commission's Information Sheet for playground surfacing material Also see the following website for additional information: www.cpsc.gov/cpscpub/pubs/323.html. X3. CONSUMER INFORMATION SHEET FOR PLAYGROUND SURFACING MATERIALS X3.1 The U.S.
- Page 8 Play Set Assembly Manual FAQs: 1. Does the area for the playset need to be level? Yes. Backyard Discovery recommends the playset be positioned on a flat level area for maximum safety and durability. The stakes provided should be used to secure it firmly to the ground.
- Page 9 11. The end beam is not straight up and down. Why not? This is normal. Backyard Discovery designs playsets this way to ensure the strongest structure possible. The slight angle adds strength and reduces rocking and twisting.
- Page 10 Highlander Model #6010 Assembly Requires Two Moderately Skilled People. If you need assistance with parts or have assembly questions, please call Customer Service 800-765-4138 Please read the entire instruction manual carefully before proceeding with the assembly or use of your new gym set. SAVE THIS MANUAL for future reference in the event that you need to contact us for assistance or replacement part information and ordering.
-
Page 11: General Information
26'-8 1/2" Back 61 7/8 28 7/16 89 1/4 Right Left 67 7/8 114 3/4 28 1/2 33'-6 1/2" 15'-10 1/2" 18 1/4 27 3/4 14'-8 1/2" Front Dimensions: General Information: Your set has been designed and engineered for children •... - Page 12 RIGHT LEFT FRONT PAGE 10 - PARTS LOCATOR...
- Page 13 RIGHT BACK LEFT PAGE 11 - PARTS LOCATOR...
- Page 14 PAGE 12 - WOODEN PARTS A1 - E4R...
- Page 15 PAGE 13 - WOODEN PARTS E5L - G8...
- Page 16 PAGE 14 - WOODEN PARTS H1 - H15...
- Page 17 PAGE 15 - WOODEN PARTS H16 - M6...
- Page 18 PAGE 16 - WOODEN PARTS M7 - R1...
- Page 19 PAGE 17 - WOODEN PARTS R2L - T1...
- Page 20 H100042 5/16 X 1 1/4" HEX HEAD BOLT H100043 H100044 5/16 X 1 3/4" 5/16 X 2" HEAD HEAD BOLT BOLT H100051 5/16 X 3-3/4" H100052 5/16 X 4" HEAD BOLT HEAD BOLT H100116 5/16 X 2-3/8" H100069 H100067 H100064 5/16 X 3"...
- Page 21 H100110 H100105 (5/16") Fender H100103 Lock Nut Washer Washer H100107 H100102 H100104 3/8" SAE 3/8" Flat 5/16" Flat H100108 Internal Washer Washer Tooth 5/16" Lock Internal Washer Tooth H100005 H100034 Lock WHA NUT BARREL 6mm Allen Bit Washer (5/16 x 1”) Not to Scale 6mm Allen Wrench H100022...
- Page 22 Y30-40G X11-CAY 2" x2" METAL 2 - GLIDER ARMS W/CHAIN BRACKET 1 -GLIDER SEAT 3 REQUIRED A100004 2" x 1.25 x 3.25"- 1/8” Thick METAL BRACKET 2 REQUIRED Y40-HD4 Y1-105G BAG OF 4 • SWING HANGER, LARGE X2-G • CARABINER, METAL TRIANGLE •...
- Page 23 ITEMS NEEDED HARDWARE NEEDED (2) G3 Floor Rail (22) 5/16 X 4" Hex Bolts (4) H11 Floor Rail (12) 5/16 X 2 3/8" Lag Screws (2) G2 Base Board (34) Fender Washers (2) B1 Front Tower Legs (34) Lock Washers (22) Spike T Nut (2) B2 Middle Tower Legs (2) B3 Back Tower Legs...
- Page 24 HARDWARE NEEDED ITEMS NEEDED (4) 5/16 X 4" Hex Bolts (1) G4 Wall Rail (12) 5/16 X 2 3/8 Lag Screws (3) G7 Floor Rails (16) Fender Washers (1) G6 Base Board (16) 5/16" Lock Washers (4) 5/16" Spike T Nut STEP 2 Attach G4 Wall Rail to B1 Front Tower Legs using 5/16”x 4”...
- Page 25 HARDWARE NEEDED ITEMS NEEDED (4) 5/16” x 4” Hex Bolt (1) G5 Wall Rail (4) 5/16” Spike Tee Nut (1) H4 Floor Rail (4) Fender Washers (4) 5/16” Lock Washer STEP 3 Attach G5 Wall Rail to B2 Middle Tower Legs between B2 and B1 Tower Legs using 5/16”x 4”...
- Page 26 ITEMS NEEDED HARDWARE NEEDED (6) 5/16” x 4” Hex Bolt (2) H5 Floor Rail (1) H6 Floor Rail (6) 5/16” Spike Tee Nut (6) Fender Washer (6) 5/16” Lock Washer STEP 4 Attach H5 Floor Rail to B2 Middle Tower Legs between B2 and B1 Tower Legs.
- Page 27 HARDWARE NEEDED ITEMS NEEDED (24) 5/16” x 2 3/8” Lag Screw (8) E6 Deck Braces (4) ¼” x 1” Phillips Truss Head Bolt (4) Y41 Ground Stakes (4) ¼” Phillips Barrel Nut (24) Fender Washer (28) 5/16” Lock Washer (8) 5/16” Flat Washer STEP 5 (when using Lag Screws make sure to pilot drill with 3/16”...
- Page 28 HARDWARE NEEDED ITEMS NEEDED (8) 2 ½” Wood Screws (2) H7 Floor Joists (172) 1 ½” Wood Screws (4) SC1 Floor Boards (15) M3 Floor Boards (15) M6 Floor Boards (1) N2 Floor Boards (1) N4 Floor Boards STEP 6 Attach H7 Floor Joists to H11 Floor Rails using 2-1/2”...
- Page 29 HARDWARE NEEDED ITEMS NEEDED (12) 5/16” x 4” hex Bolt (2) B6 Porch Roof Supports (12) 5/16” Spike Tee Nut (2) B5 Club House Legs (12) Fender Washer (2) B4 Club House Legs (12) 5/16” Lock Washer STEP 7 Attach B6 Porch Roof Supports to G3 and G4 Floor Rails above B1 Front Tower Legs with 5/16”x 4”...
- Page 30 HARDWARE NEEDED ITEMS NEEDED (4) 2 ½” Wood Screw (1) H7 Floor Joist (86) 1 ½” Wood Screw (2) SC1 Floor Boards (15) M3 Floor Boards (1) N2 Floor Board STEP 8 Secure H7 Floor Joist to G3 Floor Rails with 2-1/2” Wood Screws.
- Page 31 ITEMS NEEDED HARDWARE NEEDED (1) H1 Wall Rail (2) 5/16” x 3 ¾” Hex Bolt (1) H2 Wall Rail (4) 5/16' x 4” Hex Bolt (2) H9 Front Porch Rafter (2) 5/16” X 2 Hex Bolt (2) H10 Back Porch Rafter (8) 5/16”...
- Page 32 ITEMS NEEDED HARDWARE NEEDED (15) 1 ¼” Wood Screws (1) N8 Gable Board (1) N3 Gable Board (2) N9 Gable Board (1) K1 Gable Moon STEP 10 Flush N8 Gable Board with peak of H9 Rafters and fasten with 1-1/4” Wood Screws (per diagram). Position N3 Gable Board Flat against bottom of N8 and secure to Rafters with 1-1/4”...
- Page 33 HARDWARE NEEDED ITEMS NEEDED (80) 1 ½” Wood Screws (10) R2L Roof Board (4) 1 ¼” Wood Screws (10) R2R Roof Board (1) N10 Gable Board STEP 11 Attach N10 Gable Board to peak of H10 Rafters with 1-1/4” Wood Screws. Attach R2R Front Right Porch Roof Board flush with H10 Rafter and with a 1-1/2”...
- Page 34 HARDWARE NEEDED ITEMS NEEDED (4) 5/16” x 2” Hex Bolt (4) H8 Club House Rafters (4) 5/16” Spike Tee Nut (1) N10 Gable Board (4) Fender Washer (1) N8 Gable Board (4) 5/16”Lock Washer (1) N3 Gable Board (19) 1 ¼” Wood Screws (2) N9 Gable Board (1) K1 Gable Moon STEP 12...
- Page 35 ITEMS NEEDED HARDWARE NEEDED (20) R1 Roof Boards (8) 5/16” x 2” Lag Screws (4) M5 Wall Rails (8) Fender Washer (8) 5/16” Lock Washer (80) 1 ½” Wood Screw STEP 13 Attach a R1 Roof Board to peak of H8 Rafters with a 1-1/2” overhang on each end with 1-1/2”...
- Page 36 HARDWARE NEEDED ITEMS NEEDED (7) 5/16” x 2” Lag Screw (1) M7 Wall Rail (8) Fender Washer (1) M2 Wall Board (8) 5/16” Lock Washer (1) M1 Wall Rail (1) ¼” x 1” Phillips Truss Head Bolt (2) M5 Wall Rail (1) ¼”...
- Page 37 ITEMS NEEDED HARDWARE NEEDED (1) Y30-40G L Bracket (1) H3 Wall Rail (1) H13 Wall Rail (1) ¼” x ¾” Phillips Truss Head Bolt (1) M4 Wall Rail (1) ¼” x 1” Phillips Truss Head Bolt (2) ¼” Phillips Barrel Nut (2) 5/16”...
- Page 38 ITEMS NEEDED HARDWARE NEEDED (1) G8 Swing Beam Mount (8) 5/16” Spike Tee Nut (4) 5/16” x 4” Hex Bolt (4) Fender Washer (4) 5/16” Lock Washer STEP 17 Begin by inserting four (4) 5/16” Spike T-Nuts into G8 Swing Beam Mount (per diagram). Then attach to B4 Clubhouse Legs on right side of structure with 5/16”x 4”...
- Page 39 ITEMS NEEDED HARDWARE NEEDED (1) M1 Wall Rail (8) 5/16” x 2” Lag Screw (3) M5 Wall Rail (8) Fender Washer (8) 5/16” Lock Washer STEP 18 (Pilot drill with 3/16” drill bit when using Lag Screws) Attach M1 Wall Rail to B4 and B5 Club House Legs with 5/16”x 2”...
- Page 40 HARDWARE NEEDED ITEMS NEEDED (1) Y30-40G L Bracket (1) H14 Top Wall Rail (1) 5/16” x 2” Hex Bolt (1) M5 Wall Rail (1) 5/16” x 1 ¾” Hex Bolt (2) 5/16 Spike Tee Nut (2) ¼” Phillips Barrel Nut (1) ¼”...
- Page 41 ITEMS NEEDED HARDWARE NEEDED (1) H16 Front Wall Rail (1) Y30-40G L Bracket (1) 5/16” x 2” Hex Bolt (1) 5/16” Spike Tee Nut (2) ¼” Phillips Barrel Nut (1) ¼” x 1” Phillips Truss Head Bolt (1) ¼” x ¾” Phillips Truss Head Bolt (3) Fender Washer (3) 5/16”...
- Page 42 HARDWARE NEEDED ITEMS NEEDED (2) 1 ¼” Wood Screws (1) N1 Wall Rail STEP 21 Attach N1 Wall Rail to inside H8 Club House Rafter 3” up from H2 Wall Rail with 1-1/4” Wood Screws. 3” PAGE 40...
- Page 43 HARDWARE NEEDED ITEMS NEEDED (5) 1 ½” Wood Screw (1) T1 Picnic Table Support (2) 5/16” x 2” Lag Screw (1) M5 Wall Rail (2) Fender Washer (2) 5/16” Lock Washer STEP 22 ( Pilot drill with 3/16” drill bit when using Lag Screws ) Attach T1 Picnic Table Support flush with bottom of H6 Floor Rail and 18-1/4”...
- Page 44 HARDWARE NEEDED ITEMS NEEDED (12) 5/16” x 2” Hex Bolt (1) H15 Picnic Table Support (4) 5/16” x 2 3/8” Lag Screw (1) H17 Picnic Table Top Support (8) 5/16” x 1 ½” Lag Screw (4) H19 Picnic Table Seat Legs (12) 5/16”...
- Page 45 ITEMS NEEDED HARDWARE NEEDED (2) H21 Picnic Table Support (35) 1 ¼” Wood Screws (4) H12 Picnic Table Seats (20) 1 ½” Wood Screws (7) M8 Picnic Table Boards (2) 2” Wood Screws (1) N6 Picnic Table Support STEP 24 Attach H21 Picnic Table Supports to H15 with 2”...
- Page 46 ITEMS NEEDED HARDWARE NEEDED (12) M9 Wall Boards (128) 1 ¼” Wood Screws (20) M10 Wall Boards STEP 25 Attach M9 Wall Boards to inside of Wall Rails on left, right and Back Walls 3” apart and 1-1/2” up from M5 and M4 Rail with 1-1/4”...
- Page 47 ITEMS NEEDED HARDWARE NEEDED (1) O1 Wall Rail (30) 1 ¼” Wood Screws (14) O3 Wall Boards STEP 26 Measure Up 11-1/4” from Top of G4 Wall Rail and bottom of O1 Wall Rail and attach to B1 Front Tower Legs with 1-1/4” Wood Screws.
- Page 48 HARDWARE NEEDED ITEMS NEEDED (80) 1 ¼” Wood Screws (20) M9 Wall Boards STEP 27 Attach four M9 Wall Boards to Wall Rails at Left and Right and eight to Back and four more to inside Back Walls. Flush at Bottom of Rails and 3” apart with 1-1/4” Wood Screws. Right Side And Inside Back Wall Not Visible 3”...
- Page 49 ITEMS NEEDED HARDWARE NEEDED (1) SC2 Rock Wall Board (26) Fender Washer (1) O2 Rock Wall Spacer (3) 1 ¼” Wood Screws (24) ¼” Phillips Barrel Nut (5) L3 Rock Wall Boards (4) L1 Rock Wall Boards (1) E3L Rock Wall Rail (56) 1 ½”...
- Page 50 ITEMS NEEDED HARDWARE NEEDED (8) 3/8” x 5 ¾” Hex Bolts (1) 3/8” x 6 1/2” Hex Bolt (9) 3/8” Flat Washer (4) 5/16” x 5” WHA Bolt (1) A1 Swing Beam (2) Glider Supports (Y25G) (9) 3/8” Lock Washer (4) 5/16”...
- Page 51 ITEMS NEEDED HARDWARE NEEDED (4) Glider Caps X14 (4) 5/16” Lock Nuts (4) Bushings Y28-G4 (4) 5/16” x 1 ¼” Hex Bolts (4) Swing Hangers Z1 (8) Fender Washer (4) 5/16” Lock Washer STEP 30 Attach Swing Beam assembly to G8 Swing Beam Mount using 5/16”x 1-1/4” Hex Bolt, 5/16” Lock Washers and Fender Washers into Spike T-Nuts installed in earlier step.
- Page 52 HARDWARE NEEDED ITEMS NEEDED (24) 2” Wood Screw (1) E4L Entry Ladder Rail (2) 1 ¼” Wood Screw (1) E4R Entry Ladder Rail (6) 5/16” x 2” Lag Screw (2) E5L Entry Ladder Rail (6) Fender Washer (2) E5R Entry Ladder Rail (6) 5/16”...
- Page 53 HARDWARE NEEDED ITEMS NEEDED (8) 5/16” x 1 ½” Lag Screw (8) Y10-16.5G (8) ¼” Phillips Barrel Nut (8) ¼” x ¾” Phillips Truss Head Bolt (16) Fender Washer (16) 5/16” Lock Washer STEP 32 Attach Y10-16.5G Metal Grips to H16 Front Wall Rail (Figure 1) using ”x ”...
- Page 54 HARDWARE NEEDED ITEMS NEEDED (1) 5/16” x 1 ½” Lag Screw (1) Steering Wheel 5137-1 (1) 5/16” Flat Washer (1) Telescope 5147-1 (2) 1 ½” Wood Screw STEP 33 Installing the Steering Wheel and Telescope you may prefer to relocate, but this is where we installed for reference.
- Page 55 ITEMS NEEDED HARDWARE NEEDED (2) Swing Seats (2) 5/16” x 5 ¾” Hex Bolts (8) Quick Links (2 Bags of 4) ZQLB1 (4) Fender Washer (4) 57” Chains Y60-57G (2) 5/16” Lock Nut (4) 62” Chains Y60-62G (4) Carabiner (1) Ships Wheel Glider (1) Seat, (2) Ends X11-Cay (4) Plastic Safety Tubes STEP 34 Assemble Glider using 5/16”x 5-3/4”...
- Page 56 HARDWARE NEEDED (2) ¼” x 1” Phillips Truss Head Bolt ITEMS NEEDED (3) ¼” x 1” Step Bolts (1) O4 Slide Board (5) ¼” Phillips Barrel Nut (1) 10' Slide (7) Fender Washer (1) ID Plate Y50-LTP (5) 5/16” Lock Washer (2) Ground Stakes Y41 (2) 1 ¼”...
-
Page 57: Limited Warranty
Backyard Botanical, Adventure Playsets, and Leisure Time Products. Backyard Discovery warrants that this product is free from defect in materials and workmanship for a period of one (1) year from the original date of purchase. This one (1) year warranty covers all parts including wood, hardware, and accessories. All wood carries a five (5) year pro-rated warranty against rot and decay. - Page 58 Backyard Botanical, Adventure Playsets, y Leisure Time Products. Backyard Discovery garantiza que este producto no tiene defectos de material ni de mano de obra durante el período de un (1) año a partir de la fecha original de compra. Esta garantía de un (1) año ampara todas las piezas incluyendo la madera, los herrajes, y accesorios.
Need help?
Do you have a question about the Highlander 6010 and is the answer not in the manual?
Questions and answers