Advertisement
Quick Links
MANUFACTURED BY:
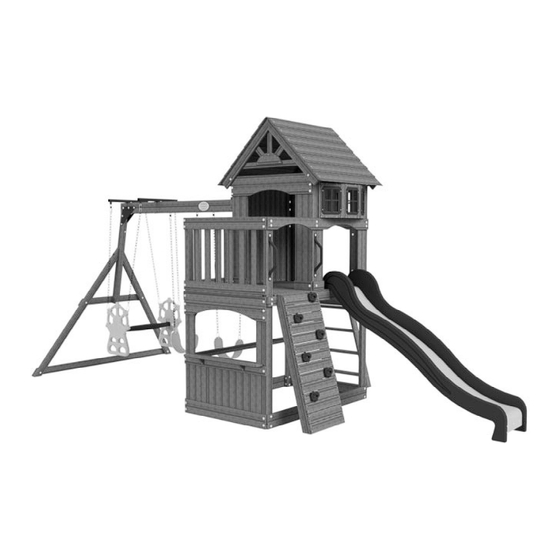
Wooden Swing Set
Backyard Discovery
3305 Airport Drive
Pittsburg, KS 66762
Model # 65210
Owner's Manual & Assembly Instructions
800-856-4445
average 2 person assembly time
assembly time may vary based on skill level
For the most up to date assembly manual,
to register your set, or to order replacement parts please visit
www.backyarddiscovery.com
SAVE THIS ASSEMBLY MANUAL FOR FUTURE REFERENCE IN THE EVENT THAT
YOU NEED TO ORDER REPLACEMENT PARTS.
Advertisement

Subscribe to Our Youtube Channel
Related Manuals for Backyard Discovery Atlantis 65210


Summary of Contents for Backyard Discovery Atlantis 65210
- Page 1 MANUFACTURED BY: Wooden Swing Set Backyard Discovery 3305 Airport Drive Pittsburg, KS 66762 Model # 65210 Owner's Manual & Assembly Instructions 800-856-4445 average 2 person assembly time assembly time may vary based on skill level For the most up to date assembly manual, to register your set, or to order replacement parts please visit www.backyarddiscovery.com...
- Page 2 With Go Configure, we bring you 18 years of experience right to your doorstep. We service a wide array of indoor and outdoor recreation products that most consumers don’t have the time or ability to deliver & install themselves. We do the heavy lifting, so you don’t have to! •...
- Page 3 STOP PARE Missing A Part? CALL US BEFORE GOING BACK TO THE STORE! The store where you made your purchase does not stock parts for this item. If you have assembly questions or if you need parts, whether they are missing or damaged Call Toll-Free Help Line or visit www.
- Page 4 Owner’s Manual Play Set Please read entire booklet completely before beginning the assembly process. Equipment is recommended for use by . Structures are : This Symbol points out important safety instructions which, if not followed, could endanger the personal safety of yourself and your children and/or damage your property. You MUST read and follow all instructions in this manual before attempting to use this playcenter.
- Page 5 Owner’s Manual Play Set 1. The Playcenter is designed to be installed on a level surface . Place in a flat area of your yard to minimize ground preparation. 2. Choose a level location for the equipment. This can reduce the likelihood of the play set tipping over and loose-fill surfacing material washing away during heavy rains.
- Page 6 Owner’s Manual Play Set Critical Heights in feet (m) of Tested Materials Wood Chips 7' (2.13m) 10' (3.05m) 11' (3.35m) 10' (3.05m) Double-Shredded bark mulch 6' (1.83m) 10' (3.05m) 11' (3.35m) 7' (2.13m) Engineered Wood Fibers 6' (1.83m) 7' (2.13m) >12' (3.66m) 6' (1.83m) Fine Sand...
- Page 7 Owner’s Manual Play Set 18. Verify that any suspended climbing ropes, chain, or cable are secured at both ends and that they cannot be looped back on it. 19. Instruct children to attach items to the playground equipment that are not specifically designed for use with the equipment, such as, but not limited to, jump ropes, clothesline, pet leashes, cables and chain as they may cause a strangulation hazard.
- Page 8 Customer may, in their sole discretion, elect to use a third party person or service to assemble this product. Backyard Discovery assumes no responsibility or liability for any charge incurred by the Customer for any assembly services’.
- Page 9 Owner’s Manual Play Set The following information is from the also see the following website for additional information: Rev5/09/12...
- Page 10 Owner’s Manual Play Set Rev5/09/12...
- Page 11 The stakes provided should be used to secure it firmly to the ground. 2. What size area is recommended for the playset? Backyard Discovery recommends at least a 6’ (six foot) perimeter around and above the playset for maximum safety. 3. What age range is appropriate for the playsets? Backyard Discovery playsets are recommended for children ages 3 –...
- Page 12 11. The end beam is not straight up and down. Why not? This is normal. Backyard Discovery designs playsets this way to ensure the strongest structure possible. The slight angle adds strength and reduces rocking and twisting.
-
Page 13: Tools Required For Installation
Tools Required for Installation: (These are the tools that are generally required for assembly of our outdoor products. These tools are not included with the outdoor product purchase.) - Page 14 Basic Setup Dimensions Place the set on level ground, not less than 6 ft [2 m] from any structure or obstruction such as a fence, garage, house, overhanging branches, laundry lines, or electrical wires. Important Assembly Notes Safe play height: 15'-3 1/2" [4.7 m] Maximum fall height: 6'-4 1/2"...
-
Page 15: Parts Identification
Parts Identification Wood Components... - Page 16 Parts Identification Wood Components...
- Page 17 Parts Identification Wood Components...
- Page 18 Parts Identification Wood Components...
- Page 19 Parts Identification Wood Components...
- Page 20 Parts Identification Hardware...
- Page 21 Parts Identification Hardware...
- Page 22 Parts Identification Hardware...
- Page 23 Parts Identification...
- Page 24 Parts Identification...
- Page 28 8 FOOT SLIDE ASSEMBLY PHASE 1 TRANSFER HOLES ON THE BOARD THROUGH THE SLIDE BED AS SHOWN BELOW. USE A 3/8" DRILL BIT. ATTACH SLIDE BRACE TO SLIDE USING HARDWARE SHOWN. DESCRIPTION SLIDE BRACE BOLT WH 5/16x1/2 T - NUT 5/16 SLIDE BED 8' YELLOW BOLT WH 5/16x1/2 SLIDE BED 8' YELLOW...
- Page 29 8 FOOT SLIDE ASSEMBLY PHASE 2 PLACE 1 SLIDE RAIL ON A FLAT SURFACE AND BEGIN INSERTING SLIDE BED AT THE BOTTOM OF THE SLIDE RAIL (FIG. 1). PUT SLIDE SUPPORT BOTTOM INTO THE SUPPORT POCKET AT THE BOTTOM OF THE RAIL AND HAVE A HELPER BEND THE SLIDE BED TOWARDS THE TOP OF THE SLIDE AND INSERT THE BED INTO THE SLIDE CAVITY.
- Page 48 FINGER GRIP UPWARDS GREEN HC ROCK #1...
- Page 50 STEP 29 ATTACH VERTICAL ID PLATE A4M01150 TO ' ' USING (4) - H100360 - SCREW PPH 4X1/2, AS SHOWN.
- Page 52 CAPTAINS GLIDER Notes Assemble using hardware as shown. CHAIN GREEN 45" WASHER FLAT 8x27 QUICK LINK NUT LOCK 5/16 BOLT WH 5/16x5-3/4 CAPTAINS GLIDER ARM YELLOW GLIDER SEAT DARK GREEN...
- Page 53 Anchoring Instructions...
- Page 54 Limited Warranty. In addition, Backyard Discovery will replace any parts within the first 30 days from date of purchase found to be missing from or damaged in the original packaging.
Need help?
Do you have a question about the Atlantis 65210 and is the answer not in the manual?
Questions and answers