Polycom 5020 User Manual
Hide thumbs
Also See for 5020:
- User manual (88 pages) ,
- Quick manual (77 pages) ,
- Quick start manual (4 pages)

Related Manuals for Polycom 5020


Summary of Contents for Polycom 5020
-
Page 1: User Guide
KIRK 5020 Handset User Guide VoIPon www.voipon.co.uk sales@voipon.co.uk Tel: +44 (0)1245 808195 Fax: +44 (0)1245 808299... - Page 2 Congratulations on your new 5020 Handset Your new handset will provide you with the greatest possible degree of flex- ibility and mobility due to high battery capacity, practical weight, size and design. STOP! Charge your handset 14 - 16 hours prior to...
-
Page 3: Table Of Contents
About Your 5020 Handset ........ - Page 4 7.1.1 Phone Book 28 7.1.2 Call Register 28 7.1.3 Messages 28 7.1.4 MSF Function 29 7.1.5 External Services 29 7.1.6 Status 29 7.1.7 Settings 29 7.2 List of Menu Functions ........... . . 30 Phone Book .
- Page 5 10.6.2 Reading a Short Message 48 10.6.3 Reading a Call Back Message 48 10.7 Replying a Message ............48 10.7.1 Reply Using an Empty Screen 48 10.7.2 Reply in Continuation of Original Text 49 10.7.3 Reply Using a Template 49...
- Page 6 13.5.2 Removing a Login 64 13.5.3 Creating a Login 65 13.5.4 Selecting Login Automatically 65 13.6 Time & Date ............66 13.6.1 Choose Time Format 66 13.6.2 Set Time 66 13.6.3 Choose Date Format 66...
-
Page 7: Getting Started
1 Getting Started Read all information in this section before you use your handset. 1.1 Handset Information Ensure that the adapter voltage is the same as the electrical outlet Danger: voltage.The handset uses radio signals and does not guarantee a connection in all circumstances. -
Page 8: Charger Information
1.2 Charger Information Two types of chargers can be used for the handset. An ordinary charger and a USB charger. The USB charger supports a PC phone book management program, provided for the system administrator. Location Type Part Number Ordinary charger 84642472 Countries outside the USA Ordinary charger... -
Page 9: Installing Battery
5020 Handset. Do not use these batteries with other products. These batteries were designed specifically for use with the 5020 Handset and the 5020 charger ONLY. Improper use of the batteries may result in explosion and fire hazard. Do not do anything that would cause the battery to short circuit. -
Page 10: Charging Battery
4 Press back cover back in locked position (when you hear a click the back cover is in position). Note: The product label, including the CE logo, can be found in the battery compartment. 1.5 Charging Battery When charging battery for the first time, it is necessary to leave handset in charger for 14-16 hours for the battery to be fully charged. -
Page 11: Battery Capacity
If the handset is turned on when charging, the display shows the blue charging icon in the status bar. The charging icon is replaced by the green fully charged icon , when the battery is fully charged (when hand- set is removed from charger, the charging icon disappears). The handset will not vibrate. -
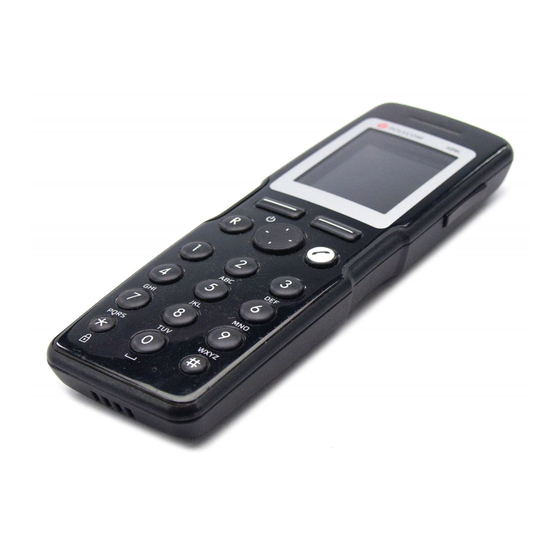
Page 12: About Your 5020 Handset
2 About Your 5020 Handset Headset Connector Volume Control Adjusts speaker volume. Display Shows call information, handset status icons and guides you through option menus. Microphone VoIPon www.voipon.co.uk sales@voipon.co.uk Tel: +44 (0)1245 808195 Fax: +44 (0)1245 808299... - Page 13 Left Softkey On hook Enters main menu. (idle) Confirms choices in menu. On hook is the term Turns handset off with a long (three used when second) key press. handset is in standby mode. Off hook Mutes microphone. (active) Off hook is the term used when handset is in...
-
Page 14: Handset Display
Keypad Lock/Unlock On hook Locks/unlocks keypad (Menu + (idle) 2.1 Handset Display Status Bar Display Center Softkey Text The display is divided in three parts: Status bar, Display center and Soft- key Text (see figure above). The types of information shown in Status bar when: •... -
Page 15: Status Icons
The types of information shown in Softkey text when: Menu Shortcut • on hook (idle) - display shows Menu : Menu gives access to the different functions of the handset. For more information about the content of the menu, refer to “Using the Menu”... -
Page 16: Display Backlight
The telephone icon will appear when the handset is off hook or a call is connected. The envelope icon will appear when you receive a message. The charging icon will appear when the handset is placed in charger. The fully charged icon will appear when the battery is fully charged. -
Page 17: Navigating Handset
You can disable the backlight to save power, refer to “Turning Backlight Off” on page 59 for more information. 2.2 Navigating Handset The main part of the functions of the handset are grouped into different menus. In the following sections you will find a description of how to navi- gate these menus. -
Page 18: Entering Main Menu
2.2.1 Entering Main Menu Menu • To enter main menu press left softkey to activate 2.2.2 Scrolling in Menus • When in menu, press top or bottom of navigation key to scroll up and down in menu. 2.2.3 Confirming Choices •... -
Page 19: Shortcuts
2.2.8 Shortcuts The handset contains two types of shortcuts: • Personal shortcuts Personal shortcuts consist of functions you have chosen to add to a list of shortcuts. The list is assigned to the right softkey. • Predefined shortcuts Predefined shortcuts are unchangeable and assigned to different keys on the handset. - Page 20 2.2.8.2 Predefined Shortcuts Predefined shortcuts are unchangeable and assigned to different keys. In the following you will find a list of predefined shortcuts and a description of how to access and use them. Call list: While on hook, press left side of navigation key to enter call list. Incoming calls are illustrated with green arrows Outgoing calls are illustrated with blue arrows Missed calls are illustrated with red arrows...
-
Page 21: Basic Handset Options
3 Basic Handset Options 3.1 Turning Handset On/Off To turn handset on: • Press left softkey to turn on handset. To turn handset off: 1 Press left softkey until the question ‘Turn off?’ appears in display. 2 Press to confirm. Note: When you turn handset off, all content of call register and settings of time and date are deleted if the subscribed system does not resend the information to the handset. -
Page 22: Making Calls
4 Making Calls The handset must be subscribed and registered to make a call. For more information about subscribing, refer to “Creating a Login” on page For internal calls, dial extension number. Contact your system administrator for a list of these extension numbers. For external calls, dial external code (or line pool code) to access an exter- nal line, then dial external number. -
Page 23: Dial From Call List
7 The display icon appears until call is connected. 8 Press again to terminate the call. Note: For more information about using your phone book, refer to “Phone Book” on page 4.4 Dial from Call List Call list shows up to 40 of your latest incoming, outgoing and missed calls. When memory of call list is full, the handset will automatically erase the old- est call when a new call is received in call list. -
Page 24: Redial
4.6 Redial Menu 1 Press to enter main menu. Call register Select 2 Scroll to and press Outgoing calls Select 3 Scroll to and press 4 Scroll to the desired name or number and press 4.7 Speed Dial If you have assigned a number to one of the speed-dialing keys 0-9, do the following: •... -
Page 25: Answering Calls
5 Answering Calls The handset must be subscribed and registered to answer a call. For more information about subscribing, refer to “Creating a Login” on page When handset rings, display shows the icon for incoming calls and the caller information appears below if supported by the subscribed system. •... -
Page 26: Redirect A Call
5.4 Redirect a Call Note: Redirecting a call is system dependent. If supported by the subscribed system, do the following: 1 While on a call, press 2 Dial number of the person you want to redirect the call to and press . -
Page 27: During Calls
6 During Calls When you are on a call, you have three options as described in the follow- ing. Two of the options concern whether you want to make parts of a call public or personal. It is possible to turn both of these options on at the same time. -
Page 28: Using The Menu
7 Using the Menu The handset offers a range of functions that are grouped into menus. The main menu consists of seven menus: Phone Book, Call Register, Messages, MSF Function, External Services, Status and Settings. For more information about accessing and navigating the menu, refer to “Navigating Handset”... -
Page 29: Msf Function
For more information about reading, writing and sending messages, refer to “Messages” on page 7.1.4 MSF Function MSF Function is a special function based on MSF (Message Service Func- tion). The function requires special software in the main system. 7.1.5 External Services External Services are features placed in the main system, and only available if the handset is subscribed to a KIRK solution. -
Page 30: List Of Menu Functions
7.2 List of Menu Functions In the following you will find a list of the different menu functions. The list gives a quick overview where to find the desired function of the handset. Phone Book 1 Find name 2 Add name/number 3 Speed dial 4 Delete Call Register... - Page 31 Settings 1 Ringing volume 2 Ringing tone 3 Alerting volume 4 Vibrator 5 Silent mode 6 Auto key lock 7 Backlight 8 Auto answer 9 Out of range Advanced Settings 1 Language 2 Any key answer 3 Headset 4 Long Key 5 Login 6 Time &...
-
Page 32: Phone Book
8 Phone Book You can store numbers and names in your phone book. The phone book can store up to 250 names with four numbers each. A max- imum of 24 digits, including spaces, is allowed for each number. Names are sorted alphabetically starting with their first character. -
Page 33: Dialing Contact From Phone Book
4 To find a name you can: • Scroll until you reach the desired name. To scroll through the names quickly press the navigation key continuously. • Use quick search by pressing the first letter(s) (max. 5 letters) of the desired name (refer to “Using the Alphanumeric Keyboard”... -
Page 34: Adding New Number
8.2.4 Adding New Number You can add a new number to a contact in phone book at any time. It is possible to add up to four numbers to each contact. Menu 1 Press to enter main menu. Phone Book Select 2 Scroll to and press... -
Page 35: Deleting Number
4 To find a name you can: • Scroll until you reach the desired name. To scroll through the names quickly press the navigation key continuously. • Use quick search by pressing the first letter(s) (max. 5 letters) of the desired name (refer to “Using the Alphanumeric Keyboard”... -
Page 36: Deleting Speed Dial
8.2.7 Deleting Speed Dial Use this function to delete a speed dial number, or replace it with a new speed dial when necessary. For more information about replacing a speed dial, refer to “Adding to Speed Dial” on page Menu 1 Press to enter main menu. -
Page 37: Adding New Contact
8.3 Adding New Contact Use the add name/number function when you want to add a new contact to phone book. Note: It is possible to add up to four numbers to a contact. Menu 1 Press to enter main menu. Phone Book Select 2 Scroll to... -
Page 38: Call Register
9 Call Register The call register menu can store up to 40 of your incoming, outgoing and missed calls. Call register is divided into lists of: incoming calls, outgoing calls and missed calls. If memory of call register is full, the handset will automatically erase the oldest call when a new call is received in call register. -
Page 39: Deleting An Incoming Call From List
Options 5 Press Add to phone book Select 6 Scroll to and press 7 Write the name of the contact using the digits 0-9 (refer to “Using the Save Alphanumeric Keyboard” on page 32) and press 9.1.3 Deleting an Incoming Call from List Menu 1 Press to enter main menu. -
Page 40: Adding An Outgoing Call To Phone Book
9.2.2 Adding an Outgoing Call to Phone Book If you have made a call and the number is not in phone book, it is possible to add it to phone book from the outgoing call list. Menu 1 Press to enter main menu. Call Register Select 2 Scroll to... -
Page 41: Viewing List Of Missed Calls
9.3.1 Viewing List of Missed Calls Menu 1 Press to enter main menu. 2 Scroll to Call Register and press Select Missed Calls Select 3 Scroll to and press 9.3.2 Adding a Missed Call to Phone Book If you have a missed call and the number is not in phone book, it is possible to add it to phone book from the missed call list. -
Page 42: Deleting All Incoming Calls
9.4.1 Deleting All Incoming Calls Menu 1 Press to enter main menu. 2 Scroll to Call Register and press Select Delete Select 3 Scroll to and press Incoming calls Select 4 Scroll to and press 5 Press to empty list. Note: If you only want to delete a single incoming call, see “Deleting an Incoming Call from List”... -
Page 43: Messages
10 Messages If supported by the subscribed system, you can write, send and receive messages from the messages menu. You write messages using the alpha- numeric keyboard. For more information, refer to “Using the Alphanumeric Keyboard” on page All messages are automatically stored in inbox or outbox. The inbox is a list of all received messages, while outbox is a list of all sent messages. -
Page 44: Clearing Text Field
Options Send 6 Press and scroll to Select Search 7 Press and then press to find the receiver 8 To find a name you can: • Scroll until you reach the desired name. To scroll through the names quickly press the navigation key continuously. •... -
Page 45: Saving A New Message As A Template
10.3 Saving a New Message as a Template After writing a message you can save it as a template for later use. Menu 1 Press to enter main menu. Messages Select 2 Scroll to and press New message Select 3 Scroll to and press Options 4 Write a message and press... -
Page 46: Sending Messages Using Templates
10.5 Sending Messages Using Templates You can create up to 10 templates in relation to the kind of message you often need to send. To create a new template, refer to “Saving a New Mes- sage as a Template” on page 45 “Saving a Received Message as a Tem- plate”... -
Page 47: Reading A Message
10.6 Reading a Message In addition to the messages for general use as described in this chapter, you can receive other types of messages. These types of messages cannot be sent from your handset, but are sent from an external application. The external applications may vary from system to system. -
Page 48: Reading A Short Message
10.6.2 Reading a Short Message The envelope icon and the text message appear in the display, when you receive a short message. To delete the short message: • Press 10.6.3 Reading a Call Back Message The envelope icon , text message and contact information appear in the display, when you receive a call back message. -
Page 49: Reply In Continuation Of Original Text
10.7.2 Reply in Continuation of Original Text Note: Original text refers to the received text message. 1 Press Menu to enter main menu. Messages Select 2 Scroll to and press Inbox Select 3 Scroll to and press Select. 4 Scroll to the desired received message and press Options 5 Press Reply... -
Page 50: Forwarding A Message
10.8 Forwarding a Message If you want to forward a message to a contact, do the following: Menu 1 Press to enter main menu. Messages Select 2 Scroll to and press Inbox Select 3 Scroll to and press Select 4 Scroll to the desired received message and press Options 5 Press 6 Scroll to... -
Page 51: Erasing A Single Template
10.10 Erasing a Single Template Use this function to delete a template, or replace the template with a new template when the memory is full. For more information about replacing a template, refer to “Saving a New Message as a Template” on page Menu 1 Press to enter main menu. -
Page 52: Erase All Messages From Inbox
10.13 Erase All Messages from Inbox Use this function to erase all messages from inbox. Menu 1 Press to enter main menu. Messages Select 2 Scroll to and press Erase messages Select 3 Scroll to and press Inbox Select 4 Scroll to and press 5 Press to erase all messages from inbox. -
Page 53: Status
11 Status The status menu provides an overview of some of the handset settings and works as a shortcut to these making it easy to change the settings accord- ing to your needs. The status menu also provide information about battery capacity. -
Page 54: Battery
11.4 Battery The battery function shows remaining battery capacity. The indication on the display is not necessarily an exact reflection of the remaining speech time, but only an indication of the voltage on the battery. To check remaining battery capacity: Menu 1 Press to enter main menu. -
Page 55: Settings
12 Settings The setting menu offers you the opportunity to customize the handset according to your needs. The settings can be changed at any time. The set- ting menu consists of: ringing volume, ringing tone, alerting volume, vibra- tor, silent mode, auto key lock, backlight, auto answer, out of range and advanced settings. -
Page 56: Alerting Volume
12.3 Alerting Volume Alerts are short beeps that appear when: • You receive a new message. • You send a message. • The handset is moving out of range. • The handset is out of range. • The battery capacity is low. •... -
Page 57: Silent Mode
12.5 Silent Mode When silent mode is turned on, the handset will not ring when a call arrives. However, you will still be able to see the arriving call in the display. To turn silent mode on/off: Menu 1 Press to enter main menu. -
Page 58: Auto Key Lock
12.6 Auto Key Lock Use auto key lock to prevent keys from being accidentally pressed. With auto keylock turned on the handset will automatically lock keypad Menu after 30 seconds. To manually lock/unlock keypad, press followed by To turn auto key lock on/off: Menu 1 Press to enter main menu. -
Page 59: Turning Backlight Off
12.7.2 Turning Backlight Off Turning display backlight off when handset is in standby mode will save bat- tery power. Menu 1 Press to enter main menu. Settings Select 2 Scroll to and press 3 Scroll to Backlight and press Select Change 4 Scroll to and press... -
Page 60: Changing Settings Of Auto Answer
12.8.1 Changing Settings of Auto Answer When auto answer is turned on, you can select different situations where to use auto answer. Settings of auto answer are: • Lift from charg. When turned on, the handset automatically goes off hook when removed from charger. -
Page 61: Changing Settings Of Out Of Range
To turn out of range on/off: Menu 1 Press to enter main menu. Settings Select 2 Scroll to and press Out of range Select 3 Scroll to and press Change 4 Scroll to and press 12.9.1 Changing Settings of Out of Range The handset offers two types of out of range alerts: •... -
Page 62: Advanced Settings
13 Advanced Settings In the setting menu it is also possible to define the following advanced set- tings: language, any key answer, headset, long key, login and time and date. 13.1 Language There are 10 predefined languages in the handset: English, Spanish, French, German, Dutch, Czech, Italian, Danish, Norwegian and Swedish. -
Page 63: Adjusting Volume Of Headset
Menu 1 Press to enter main menu. Settings Select 2 Scroll to and press Advanced Select 3 Scroll to and press Headset Select 4 Scroll to and press Alert on Alert off Change 5 Scroll to and press 13.3.2 Adjusting Volume of Headset Menu 1 Press to enter main menu. -
Page 64: Login
13.5 Login Before you can use the registered handset it is necessary to subscribe the handset to a system (login). The handset can be subscribed to up to 10 dif- ferent systems. To subscribe to a system, refer to “Creating a Login” on page 13.5.1 Selecting a Login If you want to change to another system manually, do the following:... -
Page 65: Creating A Login
13.5.3 Creating a Login To create a login, the system must allow subscriptions to be made. Some systems also require an Authentication Code (AC). If more than one system currently permits subscription, you will need to know the ID of the system to which you want to subscribe. -
Page 66: Time & Date
13.6 Time & Date Note: When you turn off the handset, the settings of time are deleted if the subscribed system does not resend the information to the handset. 13.6.1 Choose Time Format Menu 1 Press to enter main menu. Settings Select 2 Scroll to... -
Page 67: Set Date
13.6.4 Set Date Menu 1 Press to enter main menu. 2 Scroll to Settings and press Select Advanced Select 3 Scroll to and press Time & date Select 4 Scroll to and press Change date Select 5 Scroll to and press Change 6 Scroll to desired date format and press 7 Place cursor on the digit, you want to change. -
Page 68: General Information
14 General Information 14.1 Troubleshooting The handset freezes. Remove and replace battery pack. Press left softkey to turn on the handset. EMC: The handset does not ring. Silent mode Check whether is turned Create Login The handset cannot find a system ID at Check whether the system is set to allow subscriptions. -
Page 69: Technical Specification
Operating temperature: 0-40 Air pressure: Normal atmosphere condition 14.2.3 International Regulatory and Product Information This KIRK 5020 Handset has been marked with the CE mark. This mark indicates compliance with EEC Directives 89/336/EEC, 73/23/EEC 1999/5/ EC. A full copy of the Declaration of conformity can be obtained from Polycom Ltd, 270 Bath Road, Slough, Berkshire, SL1 4DX, UK. - Page 70 Kirk 5020 Handset è conforme ai requisiti [Italian]: essenziali ed alle altre disposizioni pertinenti stabilite dalla direttiva 1999/5/CE. Hér með lýsir Polycom (UK) Ltd yfir því að Kirk 5020 Íslenska Handset er í samræmi við grunnkröfur og aðrar (Icelandic): kröfur, sem gerðar eru í...
- Page 71 Šiuo Polycom (UK) Ltd deklaruoja, kad šis Kirk 5020 Lietuviu Handset atitinka esminius reikalavimus ir kitas [Lithuanian]: 1999/5/EB Direktyvos nuostatas. Hierbij verklaart Polycom (UK) Ltd dat het toestel Nederlands Kirk 5020 Handset in overeenstemming is met de [Dutch]: essentiële eisen en de andere relevante bepalingen van richtlijn 1999/5/EG.
- Page 72 Explosive Device Proximity Warning Warning Do not operate your wireless network device near unshielded blasting caps or in an explosive environment unless the device has been modified to be especially qualified for such use. Gebruik dit draadloos netwerkapparaat alleen in de buurt van onbeschermde ontstekers of in Waarschuwing een omgeving met explosieven indien het apparaat speciaal is aangepast om aan de...
- Page 73 No utilizar un aparato de la red sin cable cerca de un detonador que no esté protegido ni ¡Advertencia! tampoco en un entorno explosivo a menos que el aparato haya sido modificado con ese fin. Använd inte den trådlösa nätverksenheten i närheten av oskyddade tändhattar eller i en Varning! explosiv miljö...
-
Page 74: Important Safety Instructions
14.2.4 Important Safety Instructions Note: Only relevant to 1.9 GHz products. Before using your telephone equipment, you should always follow basic safety instruction to reduce the risk of fire, electrical shock and injury to persons, and damage to property. 1. Read and understand all instructions 2. - Page 75 14.2.4.1 Intrinsic safety Do not use the handset in conditions where there is a danger of electrically ignited explosions. Exposure to sunlight, heat and moisture Do not expose the cordless phone to direct sunlight for long periods. Keep the cordless phone away from excessive heat and moisture. Spare parts and accessories Use only approved spare parts and accessories.
- Page 76 EMC:CAUTIONS: Users should not attempt to make such connections themselves, but should contact the appropriate electric inspection authority, or electrician, as appropriate. If your telephone equipment causes harm to the telephone network, the telephone company may ask you to disconnect the system from the line until the problem has been corrected or they may discontinue your service temporarily.
- Page 77 IC Note: Operation is subject to the following two conditions: (1) This device may not cause interference, and (2) this device must accept any interference, including interference that may cause undesired operation of the device. The Term “IC“: before the certification/registration number only signifies that the Industry Canada technical specifications were met.
- Page 78 ©2007 Polycom, Inc. All rights reserved. Specifications subject to change without notice. Polycom Headquarters: 4750 Willow Road Pleasanton CA 94588 (T) KIRK telecom ApS: Langmarksvej 34 DK-8700 Horsens Tel. +45 7560 2850 Fax +45 7560 2851 kirk@kirktelecom.com www.kirktelecom.com 14158600-HD ED3 VoIPon www.voipon.co.uk...
Need help?
Do you have a question about the 5020 and is the answer not in the manual?
Questions and answers