
Related Manuals for RCA 2111


Summary of Contents for RCA 2111
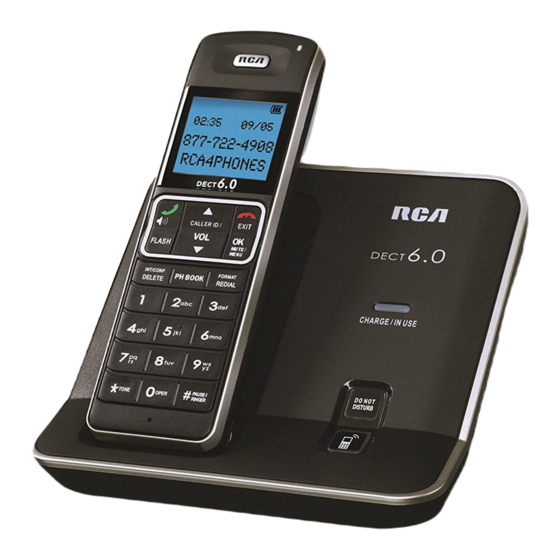
- Page 1 DECT 6.0 Multi-Handset Speakerphone User’s Guide Please read this manual before operating product for the first time. Visit the RCA web site at www.rca4phones.com Model 2111 / 2111-2 / 2111-3 / 2111-4...
-
Page 2: Equipment Approval Information
Equipment Approval Information Your telephone equipment is approved for connection to the Public Switched Telephone Network and is in compliance with parts 15 and 68, FCC Rules and Regulations and the Technical Requirements for Telephone Terminal Equipment published by ACTA. 1 Notification to the Local Telephone Company On the bottom of this equipment is a label indicating, among other information, the US number and Ringer Equivalence Number (REN) for... -
Page 3: Interference Information
2 Rights of the Telephone Company Should your equipment cause trouble on your line which may harm the telephone network, the telephone company shall, where practicable, notify you that temporary discontinuance of service may be required. Where prior notice is not practicable and the circumstances warrant such action, the telephone company may temporarily discontinue service immediately. -
Page 4: Hearing Aid Compatibility (Hac)
• Reorient or relocate and increase the separation between the telecommunications equipment and receiving antenna. • Connect the telecommunications equipment into an outlet on a circuit different from that to which the receiving antenna is connected. If these measures do not eliminate the interference, please consult your dealer or an experienced radio/television technician for additional suggestions. -
Page 5: Table Of Contents
Table of Contents Equipment Approval Information..2 Visual Indicators.........20 Interference Information......3 Base..............20 Hearing Aid Compatibility (HAC)....4 Handset ............20 FCC RF Radiation Exposure VMWI / Visual Ringer Indicator on Statement ............4 Handset ............20 Information for DECT Product ....4 Speakerphone Operation.....20 Introduction............7 Making a Call..........21 Parts Checklist ..........7 Answering Calls..........21 Before You Begin .........7... - Page 6 Add Records..........29 Battery Safety Precautions.......31 Inserting a Pause in the Dialing Display Messages..........31 Sequence.............29 Warranty Assistance........33 Edit Records..........30 Limited Warranty...........34 Delete Records...........30 Dialing a Number from Internal Memory............30 Changing the Battery......30...
-
Page 7: Introduction
Industry Canada (I.C.) Notice This product meets the applicable Industry Canada technical specifications. Le présent materiel est conforme aux specifications techniques applicables d'Industrie Canada.” The Ringer Equivalence Number is an indication of the maximum number of terminals allowed to be connected to a telephone interface. The termination on an interface may consist of any combination of devices subject only to the requirement that the sum of the Ringer Equivalence Numbers of all the devices does not exceed five. -
Page 8: Parts Checklist
Handset Pedstal For Model 2111-2 there will be ONE additional handset, charge cradle, battery pack and cover. For Model 2111-3 there will be TWO additional handsets, charge cradles, battery packs and covers. For Model 2111-4 there will be THREE additional handsets, charge cradles, battery packs and covers. -
Page 9: Installation
Installation Wall plate Digital Security System Your cordless phone uses a digital security Modular system to protect against false ringing, telephone unauthorized access, and charges to your line jack phone line. INSTALLATION NOTE: Some cordless telephones operate at frequencies that may cause or receive interference with nearby TVs, microwave oven, and VCRs. -
Page 10: Base Layout
Base Layout charge- in use (indicator) do not disturb (button find (button) -
Page 12: Installing The Phone
Installing the Phone Installing the Handset Battery NOTE: You must connect the handset battery before use. CAUTION: To reduce the risk of fire or personal injury, use only the approved Nickel metal Hydride battery(Ni-MH) (Brand name: SANIK, Model name:2SN-AAA55H-S-J1, Capacity: 2.4V/550mAh;... -
Page 13: Wall Mounting The Phone
4. Place the handset in the base cradle. The charge/in use indicator turns on, verifying the battery is charging. Allow the phone to charge for 16 hours prior to first use. If you don’t properly charge the phone, battery performance is compromised. CAUTION: To reduce risk of personal injury, fire, or damage use only the power adaptor (Manufacturer: ESL,Type: IA5060, 120Vac/6Vdc/500mA;... -
Page 14: Programming The Telephone
Slip the mounting holes of the base (on bottom of unit ) over the wall plate posts and slide the base down until the phone is firmly in place. Programming the Telephone Standby Screen The handset displays the handset number and user name or 3:46PM Programming Functions The system uses a menu structure to give you access to all of the built-in... -
Page 15: Alarm Clock
Use the touch tone pad to enter the handset name/number to be monitored. NOTE: When this phone system is expanded (up to 4 handsets by purchase of optional Model 2110 handset with recharge cradle), handsets are named HANDSET 1, HANDSET 2, HANDSET 3 and so on respectively. -
Page 16: Initial Setup
Initial Setup Make sure your phone is OFF (not in TALK mode). 2. Press the mute/menu OK button to go to the main menu. Press caller ID-volume ( or ) button to scroll to INITIAL SETUP. Press the mute/menu OK button to confirm and you may program the following items: Handset Name, Date and Time, Area Code, Tone/Pulse, Language, Auto Talk, Registration, Deregistration. -
Page 17: Area Code
SET TIME sub-menu. Use the number keys to enter the current hour and minute, then use the caller ID-volume ( or ) to select AM or PM. 5. Press the mute/menu OK button to save your selection. You will hear a confirmation tone and the current time shows in the display. -
Page 18: Auto Talk
confirmation tone and the screen displays the selected language. Auto Talk When this function is ON, during an external call, you may lift the handset to answer a call immediately without pressing any buttons. To end a call, put the handset back on the base cradle directly. From the Initial Setup Menu: 1. -
Page 19: De-Registration
De-Registration De-registration cancels registration. During the de-registration process, keep the handset near the base. From the Initial Setup Menu: 1. Press the caller ID-volume ( or ) button to scroll to the DEREGISTRATION sub-menu. 2. Press the mute/menu OK button to enter the menu. The screen displays YES NO. -
Page 20: Sound Setup
4. Release the find button. 5. Press and release the find button on the base once. All handsets are de-registered and the screen displays HANDSET NEEDS REGISTRATION. Sound Setup Make sure your phone is OFF (not in TALK mode). 2. Press the mute/menu OK button to go to the main menu. Press caller ID-volume (... -
Page 21: Key Tone
Key Tone From the Sound Setup Menu: 1. Press the caller ID-volume ( or ) button to scroll to the KEY TONE sub-menu. 2. Press mute/menu OK button to enter the menu. The screen displays > ON OFF. Use caller ID-volume ( or ) button to scroll to your selection. 4. -
Page 22: Telephone Operation
2. Press the mute/menu OK button to enter the menu. The screen displays YES NO. The default setting is NO. Use the caller ID-volume ( or ) button to move the cursor to YES or NO. NOTE: If you choose YES all the settings in the programmable menu are returned to factory default setting. -
Page 23: Making A Call
Making a Call 1. Press the TALK/SPEAKER button. Dial the desired number. - OR - Dial the number first, and then press the TALK/SPEAKER button. - OR - Press the caller ID-volume ( or ) button to select the desired record, and then press the TALK/SPEAKER button. -
Page 24: Flash/Call Waiting
4. Press #pause/ringer button again to save and display the new selection for a few seconds. Flash/Call Waiting If you subscribe to the combined Call Waiting Caller ID service from your local telephone company, you will receive Caller ID information (if available) on Call Waiting calls. -
Page 25: Mute
1. Press the find button on the base. All handsets beep for two minutes, and each handset's screen displays FIND HANDSET. To cancel the page, press the find button on the base, or press the TALK/SPEAKER button or the END button on each handset. Mute To have a private, off-line conversation, use the MUTE feature. -
Page 26: Advanced Intercom Features
NOTES: a) If the user has not entered the paged handset number within a few seconds, the handset displays a paged handset number list (i.e. Handset 2, Handset 3, Handset 4) if Handset 1 is paging the handset . b) Even if the handset has not been registered with all 4 handsets, the paging list displays all handset numbers. -
Page 27: Two-Way Calling
NOTE: Before you intercom/page another handset , you must decide whether you want to create a two-way or a three-way conversation. Two-Way Calling During an external call, press the delete/int/conf button, and use the touch-tone pad to enter the handset number to put an external line on hold. -
Page 29: Storing Cid Records
Reviewing CID Records As calls are received and stored, the display is updated to let you know how many calls have been received. To scroll CID records: Make sure the phone is OFF (not in TALK mode). 2. Press the caller ID-volume () button to review the newest CID record. 3. -
Page 30: Deleting A Cid Record
3. Press the mute/menu OK button to display ENTER NAME and then follow “ADD RECORDS in Phonebook section” procedures from Step 3 to Step 7 to store the number. NOTE: Press the END button once to keep the previous setting (making no changes) and return to the menu. -
Page 31: Review Records
Review Records Make sure the phone is OFF (not in TALK mode). 2. Press the mute/menu OK button to go to main menu. Use the caller ID-volume ( or ) button to scroll to PHONE BOOK. 4. Press the mute/menu OK button to access the phonebook submenu. Use the caller ID-volume (... -
Page 32: Inserting A Pause In The Dialing Sequence
Inserting a Pause in the Dialing Sequence (of a Stored Number) Press the #pause/ringer button on the handset’s touch-tone pad to insert a delay in dialing sequence when a pause is needed to wait for a dial tone (for example, after you dial 9 for an outside line, or to wait for a computer access tone.) Each pause counts as one digit in the dialing sequence. -
Page 33: Changing The Battery
Changing the Battery CAUTION: To reduce the risk of fire or personal injury, use only the approved Nickel-metal Hydride battery (Ni-MH), which is compatible with this unit . Make sure the telephone is OFF (not in TALK mode) before yo u replace the battery. - Page 34 DELETE CALL ID? Prompt asking if you want to erase the CID record showing on the display. DELETE? Prompt asking if you want to erase one of the 50 records stored in the phone’s memory. END OF LIST Indicates that there is no additional information in CID memory.
-
Page 35: Warranty Assistance
OUT OF RANGE May indicate handset is too far away from the base or that the power has been interrupted. Move closer and check connections. PAGING or PAGING FROM Someone pressed the page button on the base or delete/int/conf button on the handset . -
Page 36: Limited Warranty
Please do not send products to this address as it only adds delays in service and may result in lost or damaged product. This PO BOX is for written communication only. If the equipment is causing harm to the telephone network, the telephone company may require that you disconnect the equipment until the problem is resolved. - Page 37 shipping your product via a traceable carrier, as we are not responsible for lost , mis-directed or damaged shipments. You may want to write the date shipped, carrier and tracking number here: • Upon receipt of your product we will validate your product is under warranty and if determined your product is warranty eligible, we will ship to you a new or, at our option, a refurbished exchange unit of same or similar model.
- Page 38 . Product registration is not required for warranty coverage but does allow us to contact you should it be necessary. Visit the RCA web site at www.rca4phones.com Please do not send any products to the Indianapolis address listed in this manual or on the carton.
Need help?
Do you have a question about the 2111 and is the answer not in the manual?
Questions and answers