
Related Manuals for RCA 25252


Summary of Contents for RCA 25252
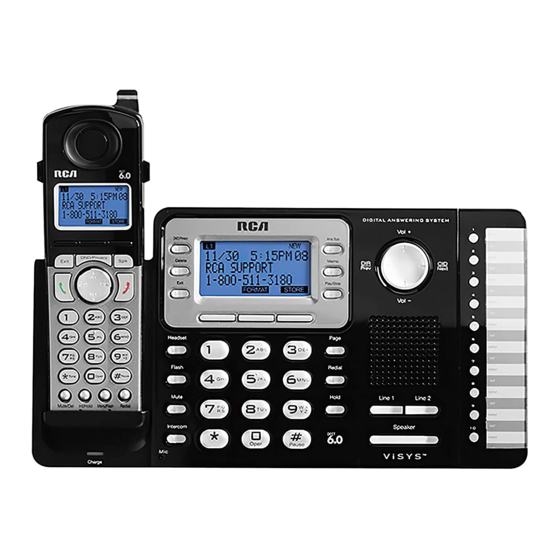
- Page 1 DECT 6.0 2-Line Cordless Intercom Speakerphone with Digital Answering System User’s Guide...
-
Page 2: Quipment Pproval Nformation
Important Information Equipment Approval Information Your telephone equipment is approved for connection to the Public Switched Telephone Network and is in compliance with parts 15 and 68, FCC Rules and Regulations and the Technical Requirements for Telephone Terminal Equipment published by ACTA. 1 Notification to the Local Telephone Company On the bottom of this equipment is a label indicating, among other information, the US number and Ringer Equivalence Number (REN) for... -
Page 3: Nterference Nformation
Important Information 2 Rights of the Telephone Company Should your equipment cause trouble on your line which may harm the telephone network, the telephone company shall, where practicable, notify you that temporary discontinuance of service may be required. Where prior notice is not practicable and the circumstances warrant such action, the telephone company may temporarily discontinue service immediately. -
Page 4: Adiation Xposure Tatement Nformation For Dect P Roduct
Important Information Warning: The changes or modifications not expressly approved by the party responsible for compliance could void the user’s authority to operate the equipment. Licensing Licensed under US Patent 6,427,009. Hearing Aid Compatibility This telephone system meets FCC standards for Hearing Aid Compatibility. FCC RF Radiation Exposure Statement This equipment complies with FCC RF radiation exposure limits set forth for an uncontrolled environment. -
Page 5: Table Of Contents
Table of Contents ....2 ...........21 quipmEnt pprovAl nformAtion FFice ......3 ........22 ntErfErEncE nformAtion ourS ..........4 .........22 icEnsing Fter ourS ......4 ..........23 EAring ompAtibility elay fcc rf r ..4 .........23 AdiAtion xposurE tAtEmEnt eSSage ength dEct p .... - Page 6 Table of Contents ID (CID) ........31 ........38 ALLER RASING ESSAGES CID R ..31 O ERASE A MESSAGE WHILE IT IS PLAYING ECEIVING AND TORING ECORDS CID R ......31 ..38 O ERASE A MESSAGE AFTER IT PLAYING EVIEWING ECORDS CID R AVING A ECORD TO HONE...
-
Page 8: Nstallation
Connections & Setup Installation Digital Security System Your cordless phone uses a digital security system to protect against false ringing, unauthorized access, and charges to your phone line. INSTALLATION NOTE: Some cordless telephones operate at frequencies that may cause or receive interference with nearby TVs, microwave ovens, and VCRs. -
Page 9: Handset Layout
Connections & Setup Handset Layout Visual Indicator 3 Soft keys display DND/Privacy (button) (Speaker button) Headset Jack Exit (button) (button) VOL +/- (buttons) (button) (button) Talk #Pause (button) (button) Redial (button) * Tone (button) Mute/Del (button) Int/Hold (button) Menu/Flash (button) -
Page 10: Ase
Connections & Setup Base Layout... -
Page 11: Nstalling The Hone
the Telefield NA Inc. approved Nickel-metal Hydride (Ni-MH) battery model T-T104(GP, 2.4V, 500mAh) , which is compatible with this unit. Class ( Classe ) 2 Power source... - Page 13 Connections & Setup 4. If you want to mount the telephone on the wall, you can plug the 2 lines such as the below drawing; Line 2 Line 1 -OR- Line 2 Line 1 -OR- Line 1 + 2...
-
Page 14: B P Rogramming The P Hone
Answering SYS., Voice Mail... -
Page 15: Date/Time
Programming the Telephone Area Code (base only), Registration (handset only), De-Registration (base only), 2nd Call Alert (both base and handset), Handset Name (handset only), Update HS List (base only). Add Headset (base only) Date/Time From the Phone Setting Menu: 1. Press the VOL (- or +) button to scroll to Date/Time. 2. -
Page 16: Uto Nswer Ntercom Applicable For Base And Handset )
Programming the Telephone Auto Answer Intercom (applicable for base and handset) If it is set to on, this handset or base will auto answer the intercom call when it receives an intercom call. From the Phone Setting Menu: 1. Press the VOL (- or +) button to scroll to Auto Answer Int. 2. -
Page 17: Register/De-Register
“Press “REG” to initiate registration” in the handset. Add Headset (only applicable for base) NOTE: This wireless headset option is only compatible with the RCA 25065RE1, 25265RE2 and 25270RE3 headsets. From the Phone Setting Menu: 1. -
Page 18: Nd C All A Lert
Programming the Telephone 2nd Call Alert If it is set to On, you will hear the alert tone when you are in conversation and there is an incoming call from another line. From the Phone Setting Menu: 1. Press the VOL (- or +) button to scroll to 2ND Call Alert. 2. -
Page 19: Contrast
Programming the Telephone Language From the Display Setting Menu: 1. Press the VOL (- or +) button to scroll to the Language. 2. Press SELECT soft key. 3. Use the VOL (- or +) button to select English, Francais or Espanol. The default setting is English. -
Page 20: Tone
Programming the Telephone 2. Press SELECT soft key. 3. Use the VOL (- or +) button to select Line1 or line2, press Select softkey to confirm,then use VOL(- or +) to scroll to your selection. The default setting is VOL 3. 4. -
Page 21: On/Off Status
Programming the Telephone On/Off Status This is used to set the answering system On or Off for each telephone line individually. From the Answering System Menu: 1. Press the VOL (- or +) button to scroll to the On/Off Status. 2. -
Page 22: Et Ork Ours
Programming the Telephone Set Work Hours This will allow you to program the start time for the working hour. From the Answering System Menu: 1. Press the VOL (- or +) button to scroll to the Set Work Hours. 2. Press SELECT soft key. 3. -
Page 23: Ing Elay
Programming the Telephone Ring Delay This feature lets you select the number of times you want the phone to ring before the answering system answers a call. From the Answering System Menu: 1. Press the VOL (- or +) button to scroll to the Ring Delay. 2. -
Page 24: Emote Assword
Telephone Operation Remote Password You can access the answering system from a tone dialing telephone in another (remote) location. The security code is required for remote access, and it prevents unauthorized access to your answering system. From the Answering System Menu: 1. -
Page 25: M Aking C Alls With The P Re - Dialing
CAUTION: For servicing or replacement, you can purchase a suitable headset through service centre or retailer shop. Note: Although this device will accept a variety of standard 2.5mm telephone headsets, RCA does not guarantee compatibility with 3rd party devices. Performance may vary depending on the quality of the headset. -
Page 26: S Witching B Etween The
Telephone Operation For the base: 1. Press the Speaker button to answer the call in speakerphone mode, -OR- 2. Press the corresponding Line button to answer the call in speakerphone mode, -OR- 3. Press the Headset button to answer the call in headset mode. 4. -
Page 27: Do Not Disturb
Telephone Operation Do Not Disturb This feature is set at individual telephones to disable (silence) an incoming ring signal, intercom ring. When there is an incoming call or an intercom call, the status indicators function as normal but the phone will not ring. 1. -
Page 28: S Toring A R Edial R
Telephone Operation NOTE: If you do not select a Line button, the line is automatically seized and the number is dialed accordingly. Storing a Redial Record in Phone Book 1. Make sure the phone is OFF (not in Talk mode). 2. -
Page 29: And H Eadset V Olume
Telephone Operation Speakerphone, Handset, and Headset Volume While the phone is in use, during the desired mode, press the VOL (+ or -) buttons until you reach a comfortable listening level. The phone stores the setting after the last button pressed. Hold In Talk mode, press the Hold button to hold the line. -
Page 30: Page
Intercom Calls 3. The originating caller can then press the CONF soft key shown on the display to initiate a conference. Since Line 1 and 2 are both on hold, the user will be prompted to select Line 1, Line 2 or Both to conference with. -
Page 31: Caller Id (Cid)
Caller ID Caller ID (CID) IMPORTANT: In order to use this unit’s Caller ID features, you must subscribe to either the standard Name/Number Caller ID Service or Call Waiting Caller ID Service. To know who is calling while you are on the phone, you must subscribe to Call Waiting Caller ID Service. -
Page 32: Saving Acid Record To
Caller ID Saving a CID Record to Phone Book Memory 1. While viewing a CID record, press the STORE soft key. 2. The name shows in the display. You can edit it. After editing, press the SAVE soft key. 3. The number shows in the display. You can edit it. After editing, press the SAVE soft key. -
Page 33: F You Did Not Program Area Code
Memory Number of digits Explanation Example 7-digits: 7-digit telephone number (i.e.555-5555) 10-digits: 3-digit area code +7-digit telephone (i.e.425-555-5555) number 11-digits: long distance code 1 (i.e. 1-425-555-5555) +3-digit area code +7-digit telephone number 4. To dial the displayed number, select a Line or press Talk, Spk, or Headset button. -
Page 34: Storing Record In One -T
Memory 7. Use VOL (- or +) button to scroll to the selection and press SELECT soft key to complete. NOTE: If “Memory full” shows in the display, you should delete one or more unnecessary records and repeat above steps to continue the call record storage. -
Page 35: Copying A Phonebook Record
Memory 5. Press SELECT soft key to complete. NOTE: Press the BACK soft key to keep the previous setting (making no changes). Copying a Phonebook Record You can copy one phone book record or the whole phone book from the handset extension to the base or from the base to desired handset extension. -
Page 36: Dialing A Phone Book Record
Answering System Operation Dialing a Phone Book Record Dial a phone book record while in Talk mode: 1. Make sure the phone is ON (in Talk mode) by pressing the Talk, Spk button, or selecting a Line. 2. Press the DIR button to access the phone book. 3. -
Page 37: Memo Record
Answering System Operation NOTE: Your unit will record a message up to the maximum length of time you set as long as the caller continues speaking. To save recording capacity, your unit will automatically stop recording after 7 seconds of silence or if there is a steady dial tone for 7 seconds. -
Page 38: Remote Acces From Remote Party
Answering System Operation During each message playback, it shows the current message information on the screen. If the message playback is a stored incoming message, it shows the message’s CID, including Date/Time, Name and Number. If it is a memo, only Display memo and Date/Time. During each message playback, you can press the CID/Next button to skip to the current message OR press the DIR/Prev button to replay the message. -
Page 39: Emote Access From Remote Pemory Full
the Telefield NA Inc. approved Nickel-metal Hydride (Ni-MH) battery model T-T104, which is compatible with this unit. -
Page 40: Other Information
Other Information Display Messages The following messages show the status of the phone, provides Caller ID information, or helps you set up and use your phone. DELETE ALL? Prompt asking if you want to erase all records. DELETE? Prompt asking if you want to erase the current record. ENTER NAME Prompt telling you to enter a name. -
Page 41: Roubleshooting Uide
Other Information Troubleshooting Guide Telephone Solutions No dial tone • Check or repeat installation steps: Make sure the base power cord is connected to a working electrical outlet. Make sure the telephone line cord is connected to the base and the wall jack. -
Page 42: Aller Id Solutions
Other Information Caller ID Solutions No Display • Charge the battery (for 14 hours). Or replace the battery. • Make sure the unit is connected to a non-switched electrical outlet. Disconnect the power adaptor from the base and reconnect it. No Caller ID •... -
Page 43: Auses Of Poor Reception
Other Information Causes of Poor Reception • Aluminum siding. • Foil backing on insulation. • Heating ducts and other metal construction that can shield radio signals. • You ’re too close to appliances such as microwaves, stoves, computers, etc. • Atmospheric conditions, such as strong storms. •... - Page 45 • Contact RCA Customer Care at (800) 511-3180. Our representatives will help you troubleshoot and diagnose the problem. As you may be asked to disconnect your RCA telephone from it's power source, you must call from another telephone. If the issue cannot be resolved by our Customer Care Team, you will be issued an RMA (Return Merchandise Authorization) number and be given instructions on how to submit your proof-of-purchase paperwork and where to send your defective merchandise.
- Page 46 TELEFIELD NA INC. TELEFIELD NA INC. OREGON How state law relates to this warranty: • Some states do not allow the exclusion nor limitation of incidental or consequential damages, or limitations on how long an implied warranty lasts so the above limitations or exclusions may not apply to you. •...
- Page 47 Index 2nd Call Alert Display Setting 3-way conference call by an Do Not Disturb intercom call 3-way conference call with two lines Editing a Phone Book Record 4-way conference call (Line 1 + Equipment Approval Information Line 2 + 2 extension) Erasing Messages Adding Phone Book Entries Answering a Call...
-
Page 48: P Arts C Hecklist
Index Making Call in the Speakerphone Saving a CID Record to Phone Book Mode Memory Making Calls in the Speakerphone Set After Hours Mode Set Office Time Making Calls with the Cordless Set OGA Handset Set Work Hours Making Calls with the Optional Sound Setting Headset Speakerphone, Handset, and Headset... -
Page 49: Answering A Call
Index 2nd Call Alert Display Setting 3-way conference call by an Do Not Disturb intercom call 3-way conference call with two Editing a Phone Book Record lines 4-way conference call (Line 1 + Equipment Approval Information Line 2 + 2 extension) Erasing Messages Adding Phone Book Entries Answering a Call... - Page 50 Visit the RCA web site at: www.rca4business.com Please do not send any products to the Oregon address listed in this 25252 T0000107 (Rev. 0 E) 10-52...
Need help?
Do you have a question about the 25252 and is the answer not in the manual?
Questions and answers