Table of Contents
Advertisement
Quick Links
Download this manual
See also:
Owner's Manual
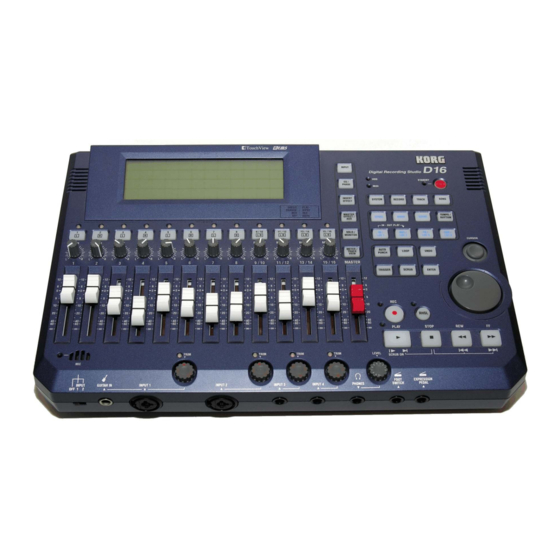
Digital Recording Studio
Working with the D16:
D16 Guide
3
3
4
4
4
5
5
6
6
7
7
8
8
9
9
10
10
11
13
14
14
14
18
19
19
20
Advertisement
Table of Contents

Related Manuals for Korg D16


Summary of Contents for Korg D16
-
Page 1: Table Of Contents
Mode / Function Overview Audio Monitoring Connections How to Select and Listen to the Demo Songs Demo Song Track Listings Quick Tour of a D16 Demo Song Scene Memory Mode Meter / Track View Mode Pan / Balance Controls and Channel Pairing Feature... - Page 2 KORG D16 Guide Recording and Editing Basics: Create and Rename a New Song Basic Recording Recording with EQ On-Input Working with the Undo / Redo Function Working with the Manual Punch-In / Out Function Storing Locate Points Auto Punch In / Out Recording...
-
Page 3: Mode / Function Overview
Digital Recording Studio Mode / Function Overview Audio connections: Use the MASTER L / R outputs when connecting the D16 to a stereo monitor system. Recording sources and monitoring for this guide: You'll be recording with an external microphone for some of the exercises in this guide. -
Page 4: Demo Song Track Listings
Overview the SCENE MEMORY mode: PITCH: The D16 features 100 -Scene Memory for "snapshot" automation of channel faders, pan and EQ settings and effect send levels! Each of the demo songs has a Scene stored. When you select a demo song, the SCENE key will light and the original mix settings will be recalled. -
Page 5: Meter / Track View Mode
1. As the song continues to play, adjust the PAN controls for tracks 1-8 to set new pan settings for each track. PITCH: The D16 features a Channel Pairing function to simultaneously - control adjacent channels for controlling Track Status, Pan, EQ, Aux and Effect send settings as well as Channel fader position! -
Page 6: Eq Mode
You can edit any of the preset effect programs, then store your edits to 128 user effect programs! Plus, many of the effects like wah and delay can be controlled in realtime using the D16's exclusive Expression Pedal input! -
Page 7: Master Effect Mode
CD-ready mastering - here you can choose from 32 preset effects, and store any edits to one of 32 user locations! Note: The D16 demo songs already include applied Master and Final Effects. You can view them by pressing the MASTER EFFECT / AUX key, followed by the MASTER and FINAL effect tabs. -
Page 8: Monitor Function
1. Press the Monitor tab in the display, and then press the Level button in the display. PITCH: The D16 features Monitor Cue level and pan settings for all 16 tracks. You can dial-in your own separate mix, without affecting the mix routed to the Master outputs! -
Page 9: Tuner / Microphone Function
1. Press the TEMPO/RHYTHM key to view this page. PITCH: The D16 provides you with the "ultimate metronome" - the drum patterns in memory provide a great tempo "guide" for many musical genres. You can create up to 200 tempo map events per song, and even record the patterns to tracks! Note: More "hands-on work with the METRONOME function later in this guide. -
Page 10: Analog Inputs
1. Press the INPUT key. Here you can set front and rear panel inputs to specific channels, and apply EQ on input for tracks 1-16. PITCH: The D16's digital mixing environment makes it easy for you to route external sources to any channel - instantly! -
Page 11: Punch-In / Out Function
KORG D16 Guide Overview the PUNCH IN / OUT functions: PITCH: The Manual and Auto Punch In/Out functions let you re-record specific sections seamlessly! Manual - Punch In/Out on a selected track is easily accomplished by pressing the REC key or a footswitch during playback - to instantly enter record mode. - Page 12 This way you can then edit your tracks in units of measures or synchronize the D16 to external MIDI devices! Use MIDI to automate D16 functions: Besides using MIDI to synchronize the D16 to other devices, it can be used to control the effects in real time, and change scenes via MIDI program change messages! Program Play function:...
-
Page 13: Demo Basics
Use the SUB INPUTS to send external audio directly to the Master bus: Assign any analog inputs as Sub Inputs, and run the audio from your sequencer - in sync - direct to the D16's Master bus, or record a guitar final pass, along with the internal tracks -direct to your mastering deck! Use... -
Page 14: Muting / Un-Muting Specific Tracks
EQ settings, the EQ parameters will reset to their originally - stored Scene values. Later, as you become more-proficient with the D16, you can copy demo songs to new locations, disable scene memory and un-protect your copied demo songs - allowing you to create and edit your own mixes and scenes. - Page 15 KORG D16 Guide 4. Press the PlayTrack radio button, then press OK (You'll be applying an insert effect to a playback track). 5. Press the Popup Button just above the InsEff2 tab in the display: 6. Press to highlight the Off value - to the left of the 1 box (insert effect 1).
- Page 16 KORG D16 Guide Here's a suggested insert effect you can apply to another track in song "I001 Alone": Track: 6 Instrument: Guitar2 Insert Effect: I075 Compressor / Amp Simulator Remember: You'll need to assign this track to another insert effect first! Use the previous steps for insert effect assignment, using the graphic examples below: 1.
- Page 17 KORG D16 Guide Here are a few more examples that could be used to apply insert effects on playback - in additional demo songs: Song: I001 Alone Track: 4 Instrument: Elec Guitar Insert Effect: I081 Exciter / Compressor Song: I002 Clarity...
-
Page 18: The "Big Effects Picture
From Inserts to Masters to Final Effect - you're ready to master your music to CD - and you don't need a room full of equipment to do it, because the D16 does it all !!! -
Page 19: Working With The Scrub Function
KORG D16 Guide Work with the SCRUB function: 1. If you've been editing effects previous to this point in the tour, make sure to exit the effect parameter pages by pressing OK in the display, then press the SONG key to return to the main page - Song I001: Alone. -
Page 20: Working With The Metronome And Rhythm Patterns
Note: If the D16 you're working with is connected to audio monitors via the MASTER outputs, the solo function will not work until you press the Solo To Master Out button in the lower-right of the display, after selecting a track to solo. -
Page 21: Recording And Editing Basics
1. Press the SONG key, followed by the SongSel tab in the display. 2. Press the New button in the display, followed by the OK button. The D16 will automatically select the next-available empty song location (IXXX : NEW SONG). -
Page 22: Basic Recording
KORG D16 Guide Basic Recording To get started, you'll use the new song you just created, and record basic tracks. For the following exercises, you'll need a lo - impedance microphone and headphones. You can use an electric guitar or another mono output instrument if you like;... - Page 23 TIP: Connect keyboards and MIDI gear to the D16 rear panel inputs, use the front panel inputs for gear you may need to change-out on occasion. Leave the MIDI gear connected permanently to the rear inputs. As you create new tracks, simply assign any input to any channel in the Input Assign page.
-
Page 24: Recording With Eq On-Input
8 VIRTUAL TRACKS per track, record on each, then pick your favorite - a great feature of the D16! Virtual tracks will be covered soon… - but for now, take a close look at another great D16 feature…... -
Page 25: Working With The Undo / Redo Function
D16! The previous example shows you the basics about UNDO / REDO. When you spend some more time with the D16 - especially in track and Note: You'll find more information about the Undo function on pages 10 and 73 in the D16 owner's manual. -
Page 26: Working With The Manual Punch-In / Out Function
There's nothing more frustrating than making a mistake midway in a track, and then having no other means to correct it, other than to re-record an entire new take. The D16 easily - solves this issue with Manual and Auto Punch In and Out! Manual Punch In - Out: -Lets you Punch In - Out "on - the - fly". -
Page 27: Storing Locate Points
KORG D16 Guide Storing Locate Points Locate points are used to: - Instantly-move to a registered time location - Loop playback in / out points - Set in / out points for auto-punch recording - Specify locations for track editing... - Page 28 Note: You can store and recall LOCATE points while the song is running - just press the STORE key, followed by any of the 4 LOC keys. There’s a lot more to learn about Locate points - check out the D16 owner's manual (Page 70). For now, continue with this guide, and try some "Auto-Punching"…...
-
Page 29: Auto Punch In / Out Recording
2. Press the REC key, then press the PLAY key, and record - your new vocal track will be inserted between the IN and OUT points. The D16 will stop recording and continue playback for two measures following the Punch-Out location, then playback will stop, and the Counter will reset to measure 001.01.000. (The Post-Roll time is already set to two measures - more on this "RolTime"... -
Page 30: Storing Mark Points
Auto Punch In - Out procedures. You can also view the Wave data of the track you're working with on this page, to set even more accurate In - Out points. See the D16 owner's manual (page 71) for more information. -
Page 31: Working With Scene Memory
- Scenes can also be changed via MIDI program change messages! Note: The D16 provides Scene Filtering so that you can select whether or not any of the above functions get stored in a Scene. See the owner's manual (page 65) for more information. - Page 32 KORG D16 Guide Playback the song and adjust mixer settings: 1. Press the SONG key, then restart the song from the beginning (hold the STOP key and press the REW key once, then press the PLAY key), and work with the Channel Faders and Balance Knobs until you are satisfied with the overall mix.
- Page 33 KORG D16 Guide Note: You can store Scenes during playback and recording too! Plus, you can automate Scene changes via MIDI! For more information, check out page 65 in the D16 owner's manual. Playback your song, complete with Scenes: 1. Reset your song to the beginning (Hold the STOP key and press the REW key once).
- Page 34 KORG D16 Guide Check out the MixView tab: 1. Press the MixView tab in the display. The currently - selected Scene's Fader and Pan settings are displayed. You can't change mix settings or Scenes by pressing objects and rotating the DIAL on this page or on by using the front panel controls - this is just a quick way to view the selected Scene's mix…...
-
Page 35: Loop Recording And Playback
Note: When you power off the D16, hold down the POWER key for a few seconds, until the display prompts you with "Power Off: Are You Sure?” Then press "Yes" to power-off. The D16 will Auto-Save any work you've done to that point - before it powers-down. -
Page 36: Copying And Un-Protecting A Demo Song
Copy a demo song to a new location: 1. Press the SONG key, then press the SelSong tab in the display. 2. Rotate the DIAL to the left, until song I001: Alone appears in the display, and those famous Korg Inc. words "NowSongLoading" appear briefly. - Page 37 KORG D16 Guide Rename the copied song: 1. Press the Rename button in the display. 2. Press the > button five times, to reach the first empty space following Alone. 3. Using the A../ a.. button (toggle to select upper and lower case), DIAL, and the > button to move through the name field, and input the following characters: l >...
-
Page 38: Setting In / Out Points
Tip: By using the WAVE and SCRUB functions, you can be more precise in locating IN and OUT points to set for Loop Playback (and Loop Recording). You can register IN and OUT Points while the D16 is stopped or during playback, first by using the STORE and IN / OUT keys, and then by "fine-tuning" the loop points with the WAVE and SCRUB functions. -
Page 39: Working With Virtual Tracks
2. Press the OK button in the display to create a new song. 3. Lower the MASTER Fader and Channel Faders to their minimum positions. 4. Connect a lo-impedance microphone to the D16 INPUT 1 XLR connector, and center the Track 1 PAN control. - Page 40 KORG D16 Guide 7. Press the METER / TRACK VIEW key, then set your input gain while speaking into the mic, by adjusting the INPUT 1 TRIM knob and watching the TRIM LED to avoid input clipping. 8. Set the Pre Fader view in the display - press the Popup button in the upper-left of the display, and press to highlight PreFdr, followed by pressing the OK button in the display.
-
Page 41: Track Bouncing
KORG D16 Guide Track Bouncing: The D16 features a number of ways to bounce multiple tracks, including a 14-2 function (bounce up to 14 tracks down to two tracks), plus the ability to bounce 16 tracks down to two currently selected tracks. Best of all, the D16 provides an "exclusive" feature: A "16-2"... - Page 42 KORG D16 Guide Bounce 2 Tracks to Tracks 15 / 16: You'll be using one of Track 1's Virtual tracks, plus the audio you just recorded on Track 2 for the following steps… 1. Press the RECORD key (to the left of the TRACK key), then press the RecMode tab in the display.
-
Page 43: Perform A Virtual 16-2 Mixdown
KORG D16 Guide Perform a Virtual 16-2 Mixdown: For the next exercise, you'll copy a factory demo song to a new song location, then bounce all 16 tracks of audio down to 2 Virtual tracks… Copy a demo song to a new location: 1. - Page 44 Note: The previous step is very important - if you leave the setting at "Current", and continue the Bounce procedure, you'll bounce all 16 tracks and overwrite the two existing record tracks! For Virtual mixdowns, always select Virtual tracks as the destination tracks! (See page 21 in the D16 owner's manual) Select ALL tracks as Virtual tracks "a": 1.
- Page 45 5. When you're finished auditioning the mixdown, press the STOP key, then press the IN / LOC1 key to locate to measure 001.01.000. Note: You can use the SOLO function to listen to Tracks 1 and 2 - see the D16 owner's manual (page 84) for more information.
-
Page 46: Working With The Effects
Just remember that the "a" Virtual tracks are the original audio tracks! See the D16 owner's manual (pages 19, 22 and 52) for more information on Virtual tracking and Bouncing. TIP: You can record an additional "live" source to the destination bounce tracks as you are mixing down to your Virtual tracks! See the D16 owner's manual (page 21) for more information. - Page 47 KORG D16 Guide Familiarize yourself with the Demo Song: For the following exercise, you'll copy the demo song: I001: Alone to a new song location… Here's a Track Chart of the instruments that were used to record the song: Song:...
- Page 48 KORG D16 Guide Note that the SCENE key is lit - Fader and Pan / Balance positions, as well as Master Effect send levels and Master / Final Effect numbers have been stored in this song, with the SCENE memory function. You can override the Scene by working with the Faders, Pan / Balance controls, etc.
-
Page 49: Working With The Insert Effects - Assigning And Routing
KORG D16 Guide Work with the Lead Guitar Track: 1. Lower all the Channel Faders to their minimum positions, then press the PLAY key to restart the song. 2. Press the METER / TRACK VIEW key to view the Post Fader mix and…... - Page 50 KORG D16 Guide A better understanding of the D16 Insert Effect Routing… There are four configurations available in the Select Effect Type menu: 1in2outx2: Primarily Guitar and Bass Chains of 3-5 effects each - For Insert Effect assignment as you record ONLY - good for mono-in / stereo-out sources...
- Page 51 - Work with additional Effect Type configurations in recording and playback assignments. Note: For more information on Insert Effects, see pages 29-32 and page 79 in the D16 owner's manual.
-
Page 52: Working With The Master Effects
KORG D16 Guide Working with the Master Effects Two Master Effect processors can be used simultaneously, with individual send levels for each channel! - Used mainly for ambient processing of the overall mix - 32 Preset programs plus 32 user programs available! You'll use the currently selected song "Alone"... -
Page 53: Working With The Final Effect
The Final Effect is an independent processor with 32 preset and 32 user effect programs available. Its at the end of the effect routing scheme in the D16, and is used for "mastering" and dynamics applications. During mixdown you can use a Final Effect to "polish" your mix as you master your work to external DAT, MD or CD. - Page 54 Note: Please be aware that any custom effect programming or new song data could be lost when new data is loaded into the D16. Use the backup / copy procedures to save your User effects and song data to external drives (see page 43 in the D16 owner's manual)
-
Page 55: Metronome And Rhythm Pattern Applications
KORG D16 Guide Metronome and Pattern Applications The following section deals with using the metronome and built-in PCM rhythm patterns in a recording application. Recording sources and monitoring for this section: If possible, use a guitar, bass or keyboard as the recording source for the following exercises. -
Page 56: Work With The Tempo / Rhythm Function
Tip: A complete listing of the rhythm patterns in memory, including length and original tempo can be found on page 114 in the D16 owner’s manual. Note: You can mute and un-mute the metronome / rhythm pattern playback by pressing the Mute button in... -
Page 57: Record A Rhythm Pattern To Stereo Tracks
KORG D16 Guide Record on Track 1 while listening to the metronome / rhythm pattern: 1. After you’ve selected the desired pattern and set your levels (make sure that Track 1 is record-enabled), press the REC key (the REC and PLAY keys LED’s will flash). -
Page 58: Work With The Tempo Map Function
KORG D16 Guide Record the pattern: 1. Press the REC key, then press the PLAY key, and record the pattern to Tracks 15/16 for about 8 measures. Press the STOP key when you’ve finished recording. 2. Press the IN/LOC1 key to locate to the song beginning. - Page 59 For more information, see the D16 owner’s manual pages 40 and 68. Tip: D16 tempo can be recorded and controlled in two more ways: MIDI Clock and Tap Tempo. Recording MIDI clock data lets you synchronize the D16 to external MIDI devices, and created a tempo map in the D16 allows precise sync when an external MIDI sequence contains tempo changes.
-
Page 60: Song And Track Editing
KORG D16 Guide Song and Track Editing The following section overviews edit functions, and provides quick steps for various song and track editing procedures. To access the display pages that contain these edit functions, press the SONG TRACK keys, followed by the... -
Page 61: Track Editing
KORG D16 Guide Track Editing Copy Track: Copies recorded track data from one region to another. You can copy single or multiple tracks with this function, and input how many times you want the selected region to be copied. You could use this function when you want to copy a recorded drum or bass groove repeatedly –... - Page 62 KORG D16 Guide Reverse Track: This procedure lets you select the IN and OUT time for a region of audio, and then places a reversed copy of the selected region in the TO location. You can select a track or multiple tracks to be reversed –...
-
Page 63: Additional References
KORG D16 Guide Note: For more information on Song and Track editing, see the D16 owner’s manual pages 36 and 38. Additional D16 Owner’s Manual References: Syncing the D16 to a MIDI Sequencer Recording MIDI Clock from and External Sequencer...
Need help?
Do you have a question about the D16 and is the answer not in the manual?
Questions and answers