Advertisement
Table of Contents
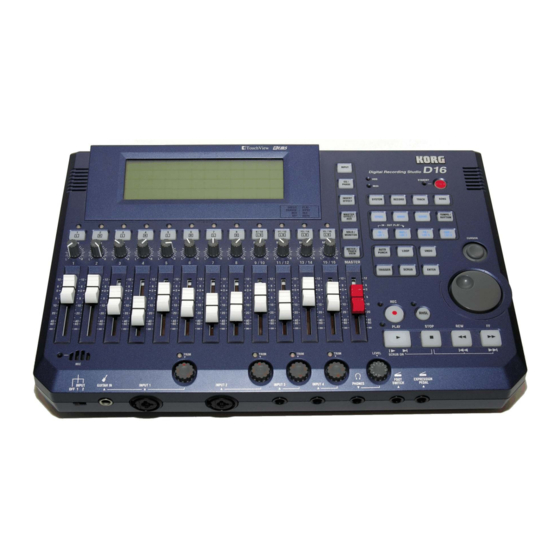
Korg D16 Internal Hard Disc Drive Upgrade
Note :
I a c c e p t n o re s p o n s ib ility fo r a n y d a m a g e th a t m a y b e c a u s e d b y p e rfo rm in g th e fo llo w in g
o p e ra tio n . It is n o t a n a p p ro v e d K o rg m o d ific a tio n a n d is p e rfo rm e d e n tire ly a t y o u r o w n ris k .
You will need:
•
#2 crosshead (Posidriv) screwdriver
7
"
•
11m m ( /
) socket-spanner or point-nosed pliers, to rem ove 'Value Dial' retaining nut
16
•
sm all jeweler's screwdriver or hook, to rem ove knobs
•
hand towel (or sim ilar), to 'cushion' the work surface
•
grounding strap, to elim inate static electricity
•
sm all container, to keep sm all parts safe whilst working
Place the hand towel on the work-top, so that the top panel of the D16 is not scratched when it is inverted.
You should take norm al anti-static precautions, eg. have a grounding strap connected between your wrist
and an earthed (grounded) contact.
Ensure you will not be disturbed, especially by children or pets.
W hen you are ready ............
Rem ove the input trim and the headphone level
knobs. They all just pull off but you m ay need to prise
them with a sm all jeweler's screwdriver or sm all hook.
© am gard.net 2002 - (& v2.1 2004)
page 1
Advertisement
Table of Contents

Related Manuals for Korg D16


Summary of Contents for Korg D16
- Page 1 Place the hand towel on the work-top, so that the top panel of the D16 is not scratched when it is inverted. You should take norm al anti-static precautions, eg. have a grounding strap connected between your wrist and an earthed (grounded) contact.
- Page 2 ) socket-spanner or by careful use of point-nosed pliers. Now turn the D16 over, being careful not to dam age the finish to the top of the case, especially to the raised display surround. The case is held together with 5 cross-head screws, arrowed. Unscrew them and keep them safe along with the other sm all parts already rem oved.
- Page 3 Note: The cable marked ‘X’ is not a standard Korg fitting. This wire is a result of performing the ‘Aux Send Modification’...
- Page 4 Rem ove these screws and then slide the drive out of its connector. The original drive in m y D16 had two sm all pieces of adhesive fabric wrapped at the connector end. These form sm all, thin insulating shim s which should be transferred to the new drive if possible.
- Page 5 Value Dial nut and knob, and finally the input trim and headphone level knobs. W hen you power-up the D16 it will ask whether you would like to Initialize the new drive - answer ‘Yes’ and the drive is configured by the D16 in a few seconds.
Need help?
Do you have a question about the D16 and is the answer not in the manual?
Questions and answers