Sony Ipela PCS-XG55 Integration Manual
Hd visual communication system
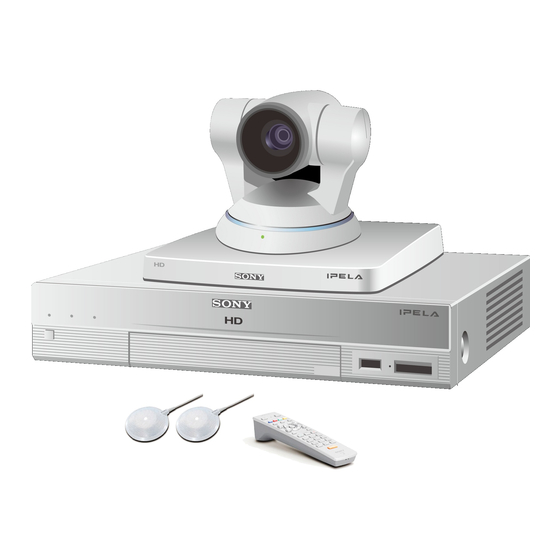
Hide thumbs
Also See for Ipela PCS-XG55:
- Quick connection manual (2 pages) ,
- Operating instructions manual (282 pages) ,
- User manual (96 pages)

Related Manuals for Sony Ipela PCS-XG55


Summary of Contents for Sony Ipela PCS-XG55
- Page 1 HD VISUAL COMMUNICATION SYSTEM PCS-XG80 PCS-XG80S PCS-XG55 PCS-XG55S SYSTEM INTEGRATION MANUAL 1st Edition (Revised 1) Version 2.0 and Later (PCS-XG80) Version 2.1 and Later (PCS-XG55)
- Page 2 ! WARNING This manual is intended for qualifi ed service personnel only. To reduce the risk of electric shock, fi re or injury, do not perform any servicing other than that contained in the operating instructions unless you are qualifi ed to do so. Refer all servicing to qualifi...
-
Page 3: Table Of Contents
Table of Contents 1. Installation 3. Maintenance 1-1. Layout Information for PCS-XG Series Models ..... 1-3 3-1. Firmware Update ............. 3-1 1-1-1. Simple Connection ..........1-3 3-1-1. Firmware Update by Using WEB Control ..... 3-2 1-1-2. Camera Connection..........1-4 3-1-2. Firmware Update by Using Memory Stick .... -
Page 5: Installation
Section 1 Installation This section describes the typical system connections. Refer to the Operating Instructions supplied with the PCS-XG Series models. The difference between PCS-XG80/XG80S and PCS-XG55/XG55S is described in Section 1-3. This system integration manual defi nes and uses words as below. (See below Fig.) “PCS-XG Series models”... - Page 6 Installation Flowchart Preparation at <Refer to “1-1. Layout information for PCS-XG Series models”> location of installation Unpacking <Refer to “1-1-1. Simple Connection”> Check of supplied accessories <Refer to “3-8. Replacing the Batteries”> System connections <Refer to “1-2. System Connections”> Turn on the power to the system <Refer to “2-1-1.
-
Page 7: Layout Information For Pcs-Xg Series Models
1-1. Layout Information for PCS-XG Series Models 1-1-1. Simple Connection Making a “simple connection” To start video conferencing by making a “simple connection”, connect the cables to the green connectors, as shown below. Supplied Supplied cable Supplied Rear panel Supplied Not supplied Supplied cable Not supplied... -
Page 8: Camera Connection
1-1-2. Camera Connection Shooting range of camera unit Be sure to position the camera and microphone appropriately in your video conferencing room. represents the shooting area of the camera when the zoom has been extended fully. indicates the shooting area of the camera when the angling function is fully utilized. Use the measurements shown below as a guide for the layout of your video conferencing room. - Page 9 Location and function of camera parts Front Rear POWER/STANDBY VISCA OUT TERMINAL 1 Lens This is a 10-magnifi cation optical zoom lens. 2 POWER/STANDBY indicator 3 TERMINAL connector Connect to the CAMERA connector on the PCS-XG Series main unit. 4 Receiver of the RF Remote Commander The Remote Commander and the PCS-XG Series main unit are paired at the factory.
- Page 10 Camera cable length . The PCSA-CXG80 is provided with a 3 m (10 ft.) camera cable as standard. . If you need to extend the camera cable, refer to “Camera connector pin assignments/cable wiring,” shown below. The camera cable line, corresponding to pin numbers 1 to 6, must be made up using coaxial cable (75 Z). For pin numbers 1 to 6 and 9, the characteristics, structure, and line gauge must be as shown below.
- Page 11 MIC(A1/A3) 1(R) 2(L) DC 19.5V AUDIO 1 IN AUDIO OUT REC OUT 1-EXT-2 (PLUG IN POWER) Breakout cable is separately required. (For detail, contact your local Sony Sales Office/Service Center.) EVI-HD1 Breakout cable Shell AWG#28 AWG#28 AWG#28 AWG#26 AWG#26 to PCS-XG Series...
- Page 12 1-EXT-2 AUDIO 1 IN AUDIO OUT REC OUT 1-EXT-2 (PLUG IN POWER) (PLUG IN POWER) Breakout cable is separately required. (For detail, contact your local Sony Sales Office/Service Center.) Breakout Breakout cable cable BRC-H700 BRC-Z700 1 2 3 4 5 6 7 8 9...
- Page 13 Connecting PCSA-CG70 as 1st camera When using the PCSA-CG70 as the 1st camera, use the camera cable provided with the camera and connect this cable to the PCS-XG Series main unit. When using a camera other than PCSA-CXG80, you should not set the “RF Remote Control Reception” to “Camera”.
-
Page 14: Microphone Connection
1-1-3. Microphone Connection The PCS-A1 and PCSA-A3 microphones can be connected to the input of the PCS-XG Series main unit. In PCS-XG80/XG80S, the PCSA-A7 can also be used as the input. Up to two PCS-A1 and PCSA-A3 microphones, and up to 80 PCSA-A7 microphones (PCS-XG80/XG80S only, cascaded connection 40 + cascaded connection 40) can be connected. - Page 15 Case2 PCS-A1 x 2 Microphone Suggested number 10 to 14 persons Input audio mode (microphone) Monaural Output audio mode (loud speaker) Stereo Setup menu confi guration Communication: Audio mode MPEG4 Audio 1: Audio Input Audio 1: Input select (MIC) MIC (A1/A3) Audio 1: Input Mode Monaural...
- Page 16 PCSA-A7 microphone layout (PCS-XG80/XG80S only) Be particularly careful when setting up the PCSA-A7 microphones, referring to the layout shown below. Position the PCSA-A7 microphone at least 1.5 m (5 ft.) from the loud speaker. Otherwise echo is likely to be a problem. PCS-XG80/XG80S Loud speaker PCSA-A7...
-
Page 17: Audio Specifi Cations And Settings
1-1-4. Audio Specifi cations and Settings Audio and microphone input/output signal specifi cation PCS-XG Series main unit rear panel CAMERA S VIDEO IN RGB IN RGB OUT HDMI OUT ISDN UNIT AUX CONTROL EC-MIC(A7) MIC(A1/A3) 1(R) 2(L) DC 19.5V AUDIO 1 IN AUDIO OUT REC OUT 1-EXT-2... - Page 18 Notice of external microphone usage For PCS-XG55 main unit, AUDIO 1 IN connector is not equipped and AUDIO 2 IN connector is named to AUDIO IN connector. If you connect external microphones with “AUDIO 1 IN” or “AUDIO 2 IN”, you need to use Mic Mixer and adjust its output level to line level, and this output should be inputted to “AUDIO 1 IN”...
- Page 19 Setting the audio mode and determining the current mode The following table shows the relationship between the “Audio mode” setting under the Communication Mode menu, confi gured for each terminal at the transmission and reception sides, as well as the negotiated mode.
- Page 20 Audio output delay setting Using the Lip Sync function closely synchronizes the audio and video signals. Even with the Lip Sync function, however, there still may be a slight time lag, but this can be eliminated by setting a value in “Audio Output Delay Setting”.
- Page 21 Reversed MIC inputs function This function allows you to select whether to transmit the audio input from the microphone with right and left reversed to a remote party. Due to the reversed audio, participants at the remote site can match the right and left of the camera image and the audio.
- Page 22 Right and left not reversed (Setting of “Audio Input” = AUX) AUDIO 1 IN, AUDIO 2 IN Camera Loud Speaker Loud Speaker PCS-XG Series Not reversed main unit Sender side Transmitting Receiver side PCS-XG Series main unit Monitor Loud Speaker Loud Speaker For PCS-XG55 main unit, AUDIO 1 IN connector is not equipped and AUDIO 2 IN connector is named to AUDIO IN connector.
-
Page 23: Echo Canceller
1-1-5. Echo Canceller Stereo echo canceller’s learning principle When there is only one sound source, the stereo echo canceller cannot learn four different echo paths, because: . The balance of the volume from each of the L and R channels is constant. . -
Page 24: Monitor Connection
Echo canceller function for multipoint connection For a multipoint connection, the stereo echo canceller function cannot be used because monaural audio signals are collected. When a multipoint connection is established, the system automatically switches to the monaural echo canceller function. 1-1-6. -
Page 25: Pen Tablet
Notes on monitor connections and settings . When you wish to use an HDMI monitor, it must have a 1080i INPUT connection. A monitor without the 1080i INPUT connection cannot display the menu. . When you are using a 60-Hz monitor but the “Video1 → Frequency” is set to “50 Hz”, the menu cannot be displayed on the monitor and you cannot perform any menu operations. -
Page 26: Remote Commander And Pairing
1-1-8. Remote Commander and Pairing RF (Radio Frequency) Remote Commander The supplied Remote Commander controls the main unit (or its Camera Unit) by using the radio frequen- cy of 2.4 GHz. The remote commander can be paired with either the main unit or its Camera Unit, such that this remote commander will not accidentally operate another main unit or its Camera Unit. - Page 27 Pairing Procedures To pair the main unit or Camera with the Remote Commander again, follow the procedure below. 1. Turn on the main unit. 2. Under “General 1” of the General setup menu, set “RF Remote Control Reception” to “System” or “Camera”. PRESENTATION I/O button Refer to “RF Remote Control Reception”...
-
Page 28: Two Serial Ports On Pcs-Xg Series Main Unit
1-1-9. Two Serial Ports on PCS-XG Series Main Unit Rear and front ports Unlike previous models, the PCS-XG Series main unit has two serial ports. One is on the front of the main unit and is intended for maintenance. The other is on the rear and is for external control. The baud rates and the locations of the ports are as shown below. - Page 29 Serial connector pin assignment 2 ..Recieve Data (RxD) 3 ..Transmit Data (TxD) 5 ..Signal GND RS-232C RX Buffer RS-232C TX Buffer D-sub 9pin male PCS-XG Series main unit side 1-25 PCS-XG80...
-
Page 30: System Connections
1-2. System Connections This section describes the typical system connections. . Be sure to turn off all the equipments before making any connections. . Do not connect/disconnect the camera cable, interface cable, or pen tablet with the power on. Doing so may damage the Camera Unit, main unit or ISDN Unit. -
Page 31: Pcs-Xg Series Models Connection Using Sip
. When connecting your system via a SIP, use the 1 (LAN1) connector in PCS-XG80/XG80S and use connector in PCS-XG55/XG55S. Connection to a SIP server through the 2 (LAN2) connector is not available. . The REC OUT jack is used to make an audio recording of a communication. This is not used during regular communication. -
Page 32: System Connection Via An Isdn
1-2-3. System Connection via an ISDN PCSA-CXG80 HD Camera Unit PCS-A1 microphone ISDN UNIT (Commercially available) to TERMINAL Interface cable VISCA OUT TERMINAL PCSA-B384S (supplied Camera cable (supplied to TERMINAL with ISDN with the Camera Unit) UNIT) to ISDN 1-3 PCSA-B768S to ISDN to CAMERA... -
Page 33: System Confi Guration Using Two Ip Connections (Pcs-Xg80/Xg80S Only)
1-2-4. System Confi guration Using Two IP Connections (PCS-XG80/XG80S only) Set “Line I/F → Use LAN2” of the setting menu to “On”. This allows you to: Connect your system to two networks using the 1 (LAN1) and 2 (LAN2) connectors. For example, you can use the 1 connector to connect to a private network in your company and the 2 connector to connect to the Internet outside your company. -
Page 34: Ipv6
1-2-5. IPv6 This equipment supports the next-generation Internet Protocol version 6 (IPv6). For details, refer to the operating instructions supplied with the PCS-XG Series models. The functions of the system are restricted as follows when using Internet Protocol IPv6. . SNMP Trap Destination . - Page 35 System confi guration via an ISDN for multipoint (Main terminal: PCS-XG80/XG80S only) You need to connect the optional PCSA-B384S or PCSA-B768S ISDN Unit especially designed for use with this system and to install the optional PCSA-MCG80 HD MCU software. It cannot be installed in PCS-XG55/XG55S. This allows you to have a multipoint HD visual communication among up to six sites over ISDN.
- Page 36 System confi guration via a LAN and ISDN for multipoint (Main terminal: PCS-XG80/XG80S only) You must connect the optional PCSA-B384S or PCSA-B768S ISDN unit, which is designed for use with this system. Installing the PCSA-MCG80 HD MCU software on two HD visual Communication Systems enables you to connect to up to 10 sites via mixed LAN and ISDN lines.
-
Page 37: Multipoint Connection (Screen Display) (Main Terminal: Pcs-Xg80/Xg80S Only)
1-2-7. Multipoint Connection (Screen Display) (Main terminal: PCS-XG80/XG80S only) PCS-XG55/XG55S is available only as a sub-terminal. When a multipoint connection is established, the video displayed on each terminal will be as shown below. The total bandwidth of the main terminal is automatically limited to 7 Mbps when all of the following conditions are true. - Page 38 Basic connection (PCS-XG80/XG55 only over IP connection, VA mode) (Main terminal: PCS-XG80 only) Broadcasted by Main-terminal 512 x 288 WCIF 1280 x 720 HD 720HD Broadcaster Main terminal 10 Mbps Sub-terminal 2 Mbps 2 Mbps 2 Mbps 2 Mbps 2 Mbps 720HD 720HD 720HD...
- Page 39 Cascaded connection (PCS-XG80/XG55 only over IP connection, VA mode) (Main terminal: PCS-XG80 only) Broadcasted by Main-terminal 10 Mbps 10 Mbps 512 x 288 WCIF Broadcaster WCIF WCIF 2 Mbps Sub-terminal Main Main terminal terminal 2 Mbps 2 Mbps 2 Mbps 2 Mbps Sub-terminal 2 Mbps...
- Page 40 When a terminal over ISDN joins (PCS-XG80/XG55, CP mode) (Main terminal: PCS-XG80 only) 512 x 288 WCIF 1280 x 720 HD 720HD Main terminal 10 Mbps Sub-terminal 2.5 Mbps 2.5 Mbps 2.5 Mbps 2.5 Mbps 720HD 720HD 720HD 720HD When a terminal connected over ISDN joins the conference 512 x 288 WCIF 1280 x 720 HD...
- Page 41 When a terminal over IP joins at a low-bit rate (PCS-XG80/XG55 only over IP, CP mode) (Main terminal: PCS-XG80 only) 512 x 288 WCIF 1280 x 720 HD 720HD Main terminal 10 Mbps Sub-terminal 2.5 Mbps 2.5 Mbps 2.5 Mbps 2.5 Mbps 720HD 720HD...
- Page 42 When an SD model joins (PCS-XG80/XG55 + PCS-G50 only over IP, CP mode) (Main terminal: PCS-XG80 only) 512 x 288 WCIF 1280 x 720 HD 720HD Main terminal 10 Mbps Sub-terminal 2.5 Mbps 2.5 Mbps 2.5 Mbps 2.5 Mbps 720HD 720HD 720HD 720HD...
- Page 43 When PCS-HG90 joins (PCS-XG80/XG55 + PCS-HG90 only over IP connection) (Main terminal: PCS-XG80 only) 512 x 288 WCIF 1280 x 720 HD 720HD Main terminal 10 Mbps 3.3 Mbps Sub-terminal 3.3 Mbps 3.3 Mbps 720HD 720HD 720HD When PCS-HG90 joins 512 x 288 WCIF 1280 x 720 HD Main terminal...
- Page 44 When an additional SD model joins the conference (PCS-XG80/XG55 + PCS-HG90 + PCS-G50 only over IP connection) (Main terminal: PCS-XG80 only) When SD terminal joins Main terminal PCS-G50 Sub-terminal 4 Mbps 819 kbps 819 kbps PCS-HG90 Voice 819 kbps Voice terminal 819 kbps MPEG4-AAC VO: Voice only...
-
Page 45: To Connect A Video Equipment For Input
1-2-8. To Connect a Video Equipment for Input The PCS-XG Series models allows you to send the picture and sound output from the connected equip- ment such as a VCR to a remote party. The PCS-XG80 main unit has two video inputs and the PCS-XG55 main unit has one video input. One is S VIDEO IN (PCS-XG80/XG80S only) and the other is YPbPr IN. -
Page 46: Difference Between Pcs-Xg80/Xg80S And Pcs-Xg55/Xg55S
1-3. Difference between PCS-XG80/XG80S and PCS-XG55/XG55S Difference in function/attachment Difference PCS-XG80/XG80S PCS-XG55/XG55S 1080i mode Supported Not supported Built-in MCU function Supported (Option) Not supported Dual network Supported Not supported Maximum usable band 10 Mbps 4 Mbps S VIDEO input Supported Not supported Echo-cancelling microphone input Supported... -
Page 47: Setup/Alignment And Video Mode
Section 2 Setup/Alignment and Video Mode 2-1. Turning the System On/Off With regard to Turning the System On/Off, refer to the Operating Instructions supplied with the unit together. 2-1-1. Turning On the System During the system boot up sequence, the display monitor is as below. It takes about 90 seconds. -
Page 48: Initial Setup And Other Setup
2-2. Initial Setup and Other Setup 2-2-1. Setup of Your First Time Power-On When you turn on the PCS-XG Series main unit for the fi rst time and the self-diagnosis is fi nished, the setup wizard appears on the monitor screen. Register your local system settings with the setup wizard using the Remote Commander. - Page 49 To set the region and clock 1. Use the [(]/[)]/[&]/[*] button on the Remote Commander to select “Set Region and Clock” in the setup wizard, then press the [ENTER] button. 2. Set the region and clock items. Select the region: Select the country or region where the system is used.
- Page 50 “To set up video output” and “To set up video input” as shown below are not appeared in the Initial Setup Wizard, but it is better to setup these settings fi rst according to your layout. To set up video output The Video setup menu is used to set up video output.
- Page 51 To set up video input PCS-XG Series main unit has several video inputs. The Communication System allows you to send picture and sound from the connected equipment such as a VCR to a remote party. For example, HD movie camera with YPbPr output should be connected with YPbPr input of front side on PCS-XG Series models.
-
Page 52: Other Setup
2-2-2. Other Setup Other Setup described in this section does not appear in Initial Setup Wizard, but these settings are PCS- XG Series models unique settings. These are explained as below. 1080i Mode (PCS-XG80/XG80S only) Transmission and reception of the picture in 1080i mode is available only for connection via LAN. When 1080i mode is set to “On”, a remote party’s 1080i mode must be set to “On”. - Page 53 To set up audio input and echo canceller m . PCSA-A7 microphone can not be used for PCS-XG55 main unit. . For PCS-XG55 main unit, AUDIO 1 IN connector is not equipped and AUDIO 2 IN con- nector is named to AUDIO IN connector. When using a PCS-A1, PCSA-A3, or PCSA-A7 microphone and inputting them through a microphone mixer to the AUDIO 1 IN or AUDIO 2 IN input connectors, set “Setup →...
- Page 54 RF Remote Control Reception This allows you to select the receiver of the RF signal from the supplied PCS-RF1 Remote Commander. To set up RF Remote Control Reception, “Setup → General1 → RF Remote Control Reception”. System: Receives the RF signal with the receiver on the PCS-XG Series main unit. Camera: Receives the RF signal with the receiver on the PCSA-CXG80 Camera Unit.
-
Page 55: Video Mode And Bandwidth
2-3. Video Mode and Bandwidth 2-3-1. 1080i Mode (PCS-XG80/XG80S only) The PCS-XG80/80S can transmit and receive high-resolution (1920 pixels x 1080 lines), 60 fi elds/sec video pictures in 1080i mode. Full screen display HD 1080i 1080i Single stream LAN 1 ALERT LAN 2 ALERT LAN 1 ALERT LAN 2 ALERT... -
Page 56: P And Other Mode
2-3-2. 720P and Other Mode In other than 1080i mode, the minimum bit rate necessary to realize the desired resolution and frame rate obeys the Bit Rate Performance Matrix, shown below. Frame rate shown below shows the maximum one at negotiation. Actually determined resolution/frame rate may change depending on the audio codec selected. - Page 57 H.320 H.264 mode (Ver. 2.04 and higher) AUTO Resolution Priority Frame Rate Priority Setting Setting Setting Resolution AUTO W4CIF W432P WCIF AUTO Bit Rate (bps) Frame Rate AUTO AUTO 768k 720P/15 W4CIF/ W432P/ WCIF/ WCIF/ WCIF/ 512k WCIF/30 WCIF/ 256k WCIF/ WCIF/ WCIF/...
-
Page 58: Important Information About Installation And Setting Of Connection Using Ip Line Of Two Networks (Pcs-Xg80/Xg80S Only)
2-4. Important Information About Installation and Setting of Connection Using IP Line of Two Networks (PCS-XG80/XG80S only) Important information regarding installation/settings When using the dual network feature, install and set up LAN port 1 for the local area network and LAN port 2 for the global network (Figure 1). - Page 59 The settings described below are recommended for the Answer Setup menu in order to prevent unwanted connections from the global network side during a meeting (Figure 4). . Set “Auto Answer” to “Off” (Initial setting: On). . Set “Reject Answer” to “On” (Initial setting: Off) *1: Available only when the HD MCU software PCSA-MCG80 (available separately) is installed.
-
Page 61: Maintenance
Section 3 Maintenance 3-1. Firmware Update The fi rmware update is performed by rewriting the fi rmware using the update fi le (bellinixxxxx.upd for PCS-XG80/XG80S, Lbellinixxxx.upd for PCS-XG55/XG55S, hereafter referred to as UPD fi le). There are three methods to write the update fi le as follows. The update by using FTP is not supported in this model. -
Page 62: Firmware Update By Using Web Control
Windows XP or Windows Vista . UPD fi le (bellinixxxxx.upd for PCS-XG80/XG80S, Lbellinixxxxx.upd for PCS-XG55/XG55S) For obtaining this fi le, please contact your local Sony Sales Offi ce/Service Center. . WEB browser: Internet Explorer 5.0 or later (Version 6.0 recommended) . - Page 63 4. Click [Setup] in the upper area of the window, and click [Version|Up] in the lower left area of the window. PCS-XG80...
- Page 64 5. Click the [Reference] button and select the UPD fi le stored in step 1. Then, click the [Open] button. PCS-XG80...
- Page 65 6. Click the [Upload] button. The UPD fi le is uploaded to this unit. 7. After the upload complete message is displayed, close the Web browser. PCS-XG80...
-
Page 66: Firmware Update By Using Memory Stick
Required equipment . UPD fi le (bellinixxxxx.upd for PCS-XG80/XG80S, Lbellinixxxxx.upd for PCS-XG55/XG55S) n To obtain this fi le, contact your local Sony Sales Offi ce/Service Center. . Memory Stick: Memory Stick PRO or PRO Duo, 512 MB or more PCS-XG80... - Page 67 Memory Stick. Insert Memory Stick into the . For the writing of firmware in Memory Memory Stick slot of this unit. Stick, please contact your local Sony Sales Office/ Service Center. Memory Stick Turn on the power. This unit is started.
-
Page 68: Firmware Update By Using Service Menu
Required equipment . UPD fi le (bellinixxxxx.upd for PCS-XG80/XG80S, Lbellinixxxxx.upd for PCS-XG55/XG55S) For obtaining this fi le, please contact your local Sony Sales Offi ce/Service Center. . Memory Stick: Memory Stick PRO or PRO Duo, 512 MB or more Procedure 1. - Page 69 4. Click the “Save/load menu” → “Load of application”. The update of PCS-XG Series models is preformed. (Approximately 12 minutes) The communication status lamp (PCS-XG80 main unit)/ON LINE lamp (PCS-XG55 main unit) is lit and the progress status (%) of fi le writing is displayed. ON LINE lamp (PCS-XG55 main unit) Communication status lamp (PCS-XG80 main unit) After the writing is completed, the system is restarted.
-
Page 70: Upgrading Using Ftp (No Support)
5. Depending on the version (new or old), the communication status lamp (PCS-XG80 main unit)/ON LINE lamp (PCS-XG55 main unit) is lit, and then the writing to the internal block and the update of peripheral equipment are performed. 6. After the update is completed, the home menu is displayed. 7. -
Page 71: Confi Rmation Procedure Of Local Terminal Operation Using Self-Loop
3-3. Confi rmation Procedure of Local Terminal Operation Using Self-Loop If you dial to “**” instead of inputting “IP address”, you can dial yourself (self-loop). A self-loop which is the loopback in the codec of the main unit, can be used for checking the codec operation and the image without connecting to any remote party. - Page 72 3. Use the [(]/[)]/[&]/[*] button on the Remote Commander to select “Connect” in the Home menu, then press the [ENTER] button, or press the [CONNECT] button on the Remote Commander. 4. Select the number entry fi eld using the [(]/[)] buttons and enter (asterisk) button twice on the remote commander.
-
Page 73: Description On Status Menu
3-4. Description on Status Menu Before and during communication, we can check the communication mode status and line status. 3-4-1. Network Routing Check Before connecting a remote system, you can check the network routing to assure smooth connection with the system. Open the “Network Routing Check” menu of the “Machine Status” menu on the local system that performs the routing check, then set the necessary items on the menu. -
Page 74: Communication Mode Status
3-4-2. Communication Mode Status 1. With regard to how to access the Machine Status, refer to Section 3-4-4. 2. Use the button on the Remote Commander to select “Communication Mode Status”, and then press the [ENTER] button. “Communication mode” menu is displayed. 7 8 9 The items below are shown both in the columns for “(Encode)”... -
Page 75: Lan Line Status
3-4-3. LAN Line Status This shows the information of bitrate and packetloss and shows recovered packets by QoS. 1. With regard to how to access the Machine Status, refer to Section 3-4-4. 2. Use the button on the Remote Commander to select “LAN Line Status”, and then press the [ENTER] button. -
Page 76: Machine Information
3-4-4. Machine Information You can confi rm the software version and optional software status and MAC address and IP address, etc. by Machine information. 1. Press the [TOOLS] button on the Remote Commander. Or, select “Tools” from the home menu using the [(]/[)]/[&]/[*] button, then press the ENTER button. - Page 77 3. Use the [(]/[)] button on the Remote Commander to select “Machine Information”, then press the [ENTER] button. The Machine Information menu appears. 4. Press the [Next] button, then next page appears. 3-17 PCS-XG80...
-
Page 78: Peripheral Status
3-4-5. Peripheral Status 1. Using the [(]/[(] buttons on the Remote Commander, select the “Peripheral Status”, and then press the [ENTER] button. The “Peripheral Status” menu appears. 1 Video Input: Displays the input video name. 2 Audio Input (MIC): Displays microphone input name. 3 Audio Input (AUX): Displays the external audio input name. -
Page 79: Description On Service Menu
3-5. Description on Service Menu Service Menu is for service use as shown below. You can input command and load/save Phone Book and Setup and save several kinds of logs. 3-5-1. Displaying the Service Menu 1. Use the [(]/[)]/[&]/[*] button to select “Home” in the Setup menu, then press “7” then “2” on the Remote Commander. -
Page 80: Description On Service Menu
3-5-2. Description on Service Menu Command Menu Command: Enter an executable command. When entering two or more commands, separate each with a space. Service commands are listed in the table below. Clear Phone Book: Use to clear the phone book data which is stored in the main unit. Clear Setup: Use to clear the setup data which is stored in the main unit. - Page 81 Service Command Description Ver. Ver. Ver. Ver. Ver. Ver. 2.04 (XG80)/ 2.03 2.01 2.00 1.03 1.02 2.1 (XG55) (XG80) (XG80) (XG80) (XG80) (XG80) AACLD Removes AAC-LD transmission controls for some connections. ALPHAnn Menu translucent change (nn = 01 - 99, default 86) This service command has priority over standard setup from GUI.
- Page 82 Save/Load Menu Save Phone Book: Use to save the phone book data to Memory Stick. Save Setup: Use to save the setup data to Memory Stick. Load Phone Book: Use to load the phone book data in Memory Stick Load Setup: Use to load the setup data which is stored in Memory Stick to the main unit.
-
Page 83: How To Take Logs
3-6. How to Take Logs 3-6-1. Supported Logs PCS-XG Series models supports several kind of logs. Operation Log is newly supported in the PCS-XG80/XG80S. The relation between supported log and the way of taking log is shown below. Service Menu telnet Serial (MemoryStick) - Page 84 Getting the System Log via the Web Interface Before starting the web interface, refer to steps 2 and 3 in “3-1-1. Firmware Update by Using WEB Control”, or refer to the operating instructions supplied with the PCS-XG Series models. Open the web page and then select “Download” in the left column. Then, click “Download” to the right of “Save System Log”.
-
Page 85: Operation Log
Getting the system log via telnet/SSH To get the system log by telnet/SSH, input “pcslog” as the login name and password. The system log that is collected during operation will be displayed. 3-6-3. Operation Log Operation log is a record of operation made by remote commander, external command, and cgi command (Web interface). -
Page 86: Call Log
3-6-4. Call Log Call log is the same format as current model as shown below. The example of Call Log is as shown below. Call Log start_date_str end_date_str duration inccal_mode mcu_mode addr_name number 06-02-2008 09:56:09 6-02-2008 10:14:01 10 DIALOUT(GUI) 192.168.03 The call log is got via the Service Menu or the web interface. -
Page 87: Network Trouble Check
3-7. Network Trouble Check 3-7-1. Test Procedure Start Packet Loss Step 1 Check loss? Capture network Step 2 packets No Problem Check the packet Step 3 capture log. loss? Check the difference in the sequence number between Step 4 Packet losses occurred the Sender and Receiver. -
Page 88: Description Of Each Test
3-7-2. Description of Each Test Step 1: Checking for lost packets Check whether packet loss has occurred by referring to the PCS-XG Series models log. The procedure and an explanation of how to read the log are given below. If packet loss is detected in the line having the string “OPLOG” of the log, go to Step 2. When no packets have been lost, this indicates that there is no problem in the network or PCS-XG Series main unit. - Page 89 Step 2: Capturing Network Packets Capture network packets by using packet capturing software that helps you to determine where the packet losses occur. The checking procedure is described in Step 3 and the subsequent steps. Preparations: Connect a mirroring switch between the PCS-XG Series main unit and the network switch, and then connect a PC for packet capture to the monitor port of the mirroring switch.
- Page 90 Step 4: Checking for differences in the sequence numbers Confi rm whether there are any packets that exist on the sender side but which are lost on the receiver side. This can be checked by comparing the sender-side log with the receiver-side log. If there are any differ- ences between the two logs, then it can be deduced that the packet loss occurs in the network.
- Page 91 Fig.3 Comparing sender-side log with receiver-side log 3-31 PCS-XG80...
-
Page 92: Replacing The Batteries
3-8. Replacing the Batteries Most of the operations with the PCS-XG Series models can be controlled with the supplied Remote Commander. When the batteries are exhausted, the LED indicator does not light if you press any button and the Remote Commander does not function properly.
Need help?
Do you have a question about the Ipela PCS-XG55 and is the answer not in the manual?
Questions and answers