
Related Manuals for NEC SuperScript 1450


Summary of Contents for NEC SuperScript 1450
- Page 1 S U P E R S C R I P T 1 4 5 0 S U P E R S C R I P T 1 4 5 0 USER’S GUIDE May, 2000 703-A0445-001...
- Page 2 The NEC Technologies product(s) discussed in this document are warranted in accordance with the terms of the Limited Copyright 2000 Warranty Statement accompanying each product.
-
Page 3: Table Of Contents
Software for Windows NT 4.0 27 Installing the Software 27 INTRODUCTION 7 Removing Printer Software 27 Overview 7 Software for the Macintosh 27 SuperScript 1450 Highlights 7 Software Requirements 28 Printer Options 7 Hardware Requirements 28 System Requirements 8 Installing the Software 28... - Page 4 Replacing the Toner Cartridge 64 Help From Your Dealer 91 Cleaning the Printer 65 NEC Technical Support 91 Moving the Printer 66 How to Contact NEC 91 PRINTER OPTIONS 69 Ordering Supplies 92 Overview 69 NEC Warranty and Service 93...
- Page 5 Software for Windows NT 4.0 103 Installing the Software 103 Removing Printer Software 103 Software for the Macintosh 103 Software Requirements 104 Hardware Requirements 104 Installing the Software 104 SAFETY INFORMATION 107 Laser Safety 107 CDRH Regulations 107 Ozone Emission 107 FCC Statement 108 THE STATUS MONITOR 109...
-
Page 7: Introduction
2nd Cassette combine to hold 1,200 sheets of paper. configuration, and that your system is configured and The SuperScript 1450 and 1450N has been designed to operating properly. support all major personal computer operating systems, ®... -
Page 8: System Requirements
System Requirements 1450/1450N UPER CRIPT Your SuperScript 1450 or 1450N printer and software can EATURES operate using the following minimum system configurations. The features of the SuperScript 1400 Series printer give you Windows Operating System many ways to customize your print jobs. These include: •... -
Page 9: Status Monitor
(The Energy Star emblem does not represent EPA endorsement of any product or service.) As an ENERGY STAR partner, NEC has determined that this product meets the ENERGY STAR guidelines for energy efficiency. - Page 10 Chapter 1, Introduction...
-
Page 11: Getting Started
CHAPTER 2 • Do not block or cover the vent on the left side of the printer. GETTING STARTED • Unless otherwise indicated in this guide, do not attempt to repair or modify the printer yourself. • Read the installation instructions carefully before you plug in your printer, and follow all warnings. -
Page 12: Unpacking
Make sure all items are included in your box (see the list NPACKING on the next page). Follow these steps to safely unpack the printer. Remove any packing tape from the printer. 1. Open the top cover of the packing box and remove the Remove the 550-sheet Tray from the printer and remove Accessory Kit, QuickStart Guide, Toner Cartridge, and any packing tape (C). -
Page 13: Checking Printer Contents
Take a moment to verify that the following items were If any items are missing or damaged, contact the store where included in your printer box. you purchased the printer. • SuperScript 1450 or 1450N Printer • 550-sheet Cassette (already installed in printer) • QuickStart Guide •... -
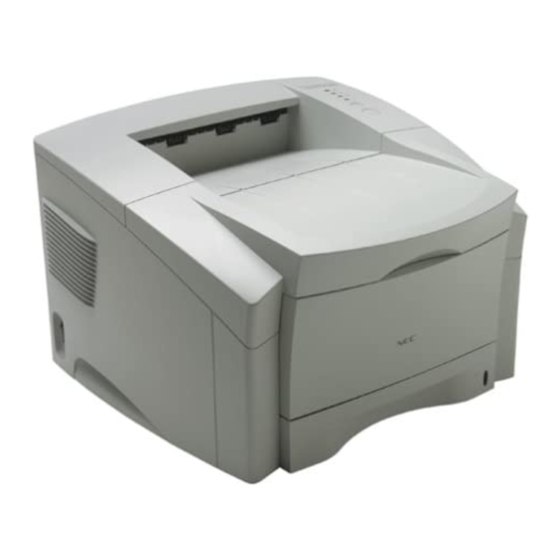
Page 14: Identifying Printer Parts
• Back Label—contains the printer’s serial number Use the illustrations on the facing page to identify standard necessary for warranty registration. parts for the SuperScript 1450 or 1450N. • Back Cover—serves as an output tray when opened. Front View •... - Page 15 Important Printer Parts FRONT VIEW with the Optional 550-sheet 2nd Cassette FRONT VIEW 1450 Model Main Output Tray Top Cover Operator Panel Multipurpose Tray (Tray 1) Hand Grip 550-sheet Cassette (Tray 2) Paper Level Indicator 550-sheet 2nd Cassette (Tray 3) BACK INTERNAL VIEW BACK VIEW Fuser Unit...
-
Page 16: Installing The Toner Cartridge
(F). Please shake the Toner Cartridge thoroughly to NSTALLING THE ONER ARTRIDGE loosen and distribute the toner inside, which may have 1. Lift the Top Cover settled during storage. Remove the Toner Cartridge from its bag (C). Do not open the shutter or touch the shiny green material on the Caution! To prevent damage from light, keep the underside of the Toner Cartridge. - Page 17 Notice that the slots on both sides are curved (H). Grasp the handle and gently guide the Toner Cartridge into the printer (I). 9. The Toner Cartridge will click into place (J). 10. Close the Top Cover (K). Installing the Toner Cartridge...
-
Page 18: Loading The 550-Sheet Cassette
550- Make sure the paper stack is flat and that it fits under the OADING SHEET ASSETTE metal tab (D). The 550-sheet Cassette (Tray 2) can hold up to 550 sheets of note: To adjust tray for different paper sizes, see page medium weight paper—letter size (U.S.), legal, folio or A4. - Page 19 You can fill the tray up to the Paper Limit Line on the 7. The Paper Level Indicator will show how much paper is Back Paper Guide of the tray (E). is left in the tray (G). Slide the tray back into the printer (F). Directions for adjusting the paper tray size are in the following section, “Changing Paper Sizes.”...
-
Page 20: Changing Paper Sizes
3. After loading media print-side down, pinch the Side HANGING APER IZES Guide and slide it until it slightly touches the media (C). To adjust for different paper lengths pinch the metal tab 4. If necessary, pinch and adjust the Back Corner Guide as on the Back Paper Guide (A). -
Page 21: Connecting The Printer Locally
RINTER OCALLY parallel connector on your computer (B). To connect the SuperScript 1450 printer locally with a parallel Connect the Power Cord to the back of the printer. Plug connection, we recommend using an IEEE 1284-compliant the other end of the Power Cord into a properly bidirectional parallel cable that is no more than 6 feet in grounded outlet (C). -
Page 22: Connecting The Printer With Usb
Connect the Power Cord to the back of the printer. Plug ONNECTING THE RINTER the other end of the Power Cord into a properly grounded outlet (C). If you have a USB (Universal Serial Bus) port enabled on note: Do not turn on your computer until you have your computer, and if your computer is running Windows 98 successfully printed out a Settings Page. -
Page 23: Printing A Settings
RINTING A ETTINGS the Go/Continue button for 4 seconds (B). When you You are now ready to print out a SuperScript 1450(N) release the button, the Settings Page will print. Settings Page. This page confirms that your printer is working properly. It contains information about your printer’s settings. - Page 24 Chapter 2, Getting Started...
-
Page 25: Installing The Software
CHAPTER 3 NSTALLING THE OFTWARE Place the “SuperScript 1450 Solutions CD” in your CD INSTALLING ROM drive. THE SOFTWARE note: If the Windows New Hardware Found dialog box appears during installation, click Cancel. VERVIEW Installing printer software from the SuperScript 1450 Solutions CD is quick and easy. - Page 26 Web is that you will be installing the from your PC to a networked SuperScript printer. You very latest printer drivers from NEC. The disadvantage will choose your network printer ports. is that the install may be interrupted or slowed down by Custom: Use this if you want to choose individual items your Internet provider.
-
Page 27: Removing Printer Software
To use the Windows PostScript printer driver, the OFTWARE FOR THE ACINTOSH NEC PostScript Level 2 Upgrade Kit (Order No. 1802) must This section describes the hardware and software be installed into the printer. See Chapter 8, “Printer requirements for Macintosh computers, and how to install Options, ”... -
Page 28: Software Requirements
PostScript language, the SuperScript 1450 must be 7. Click Create to setup the printer. When created, the NEC upgraded with the PostScript Level 3 Upgrade Kit. SuperScript 1450 icon will appear on the desktop. - Page 29 Software for the Macintosh...
- Page 30 Chapter 3, Installing the Software...
-
Page 31: The Operator Panel
CHAPTER 4 PERATOR ANEL UTTONS The printer has two buttons, Go/Continue and Cancel. Use THE OPERATOR PANEL these buttons to cancel a print job, reset the printer, print a Settings page, or clean the Fuser Unit. The table shown on this page shows what you can do when you press either button. -
Page 32: Operator Panel Lights
PERATOR ANEL IGHTS Buttons Function The four lights, or LEDs, on the Operator Panel have the Factory Default Reset following functionality. During power-up, press and hold down the Go/ Function Continue and Cancel buttons simultaneously. The Error LED (red light) indicates various errors •... -
Page 33: Operator Panel Light Messages
Operator Panel Light Messages Mode Message The Operator Panel lights, or LEDs, indicate the status of Processing Job/Warming Up your printer. The Ready LED blinks fast when the printer is Light Status Legend printing a page or is receiving data. Light off The Ready LED also blinks fast when the Light On... - Page 34 Mode Message Mode Message Paper Jam Internal Error There is a paper jam in the printer. Check the The printer detects an internal error (i.e., Status Monitor on your screen for jam location. memory link crash). All four LEDs blink sequentially and fast. Paper Size Error Engine Error The printer detects a paper size mismatch.
-
Page 35: Using Print Media
This chapter tells you what kinds of paper and other media because it has a casual look and feel. can be used with the SuperScript 1450 and 1450N printers. It Size: Use a paper size that fits easily within the paper explains how to properly load paper in the different trays so tray. -
Page 36: Printing To The Output Trays
Use the Face-up Output tray for smaller media like envelopes RINTING TO THE UTPUT RAYS and heavier media like postcards. The printer will always The printer has two output trays: the Main Output tray, print to the Face-up Output tray if it is open. Media comes located on top, and the Face-up Output tray located in back. -
Page 37: Using The Face-Up Output Tray
note: The capacity of the Face-up Output tray is the SING THE UTPUT same as Tray 1 for any given media. Do not over load the Here’s how to use the Face-up Output tray: tray! Open the Back Cover as shown (A). 10. -
Page 38: Using Tray 1: The Multipurpose Tray
Load media face up. SING ULTIPURPOSE 1. From your software application, select Tray 1. Also select the paper size and type (see page xx). Tray 1 also known as the Multipurpose tray is located in front 2. Open Tray 1 as shown (A). of the printer. - Page 39 Place stack against left edge of tray and adjust the Width Guide until it lightly touches the stack (H). Load paper print side up. After printing, push tray extender in (I). Close Tray 1 (J). Do not exceed the limit mark on inside of guide! Width Guide note: Close the Multipurpose...
-
Page 40: Printing Manually
3. Select Manual Tray in the Paper Source area of your RINTING ANUALLY software application Select print from your screen. You can print manually from the Multipurpose tray as long The Manual light on the Operator Panel will start as you select Manual Tray for your paper source. Manually blinking (D). -
Page 41: Printing Envelopes
Load envelopes flap side down against the left tray edge RINTING NVELOPES (D). The stamp area is on the left side of the envelope and You can print envelopes from any tray. Shown below are it enters Tray 1 first. directions for printing envelopes from Tray 1 (Multipurpose Adjust the Width Guide to the envelope stack (E). -
Page 42: Printing Labels
already removed (A). Do not “over print” label sheets RINTING ABELS (B). Follow these guidelines when printing label sheets from the Open and extend Tray 1 (Multipurpose Tray). SuperScript1450 or 1450N printer. Load and align a stack of label sheets in Tray 1 (C). Print labels as you would paper from Tray 1 (Multipurpose Open and extend the Face-up Output Tray (D). -
Page 43: Printing On Transparencies
• Use transparencies in letter or A4 size only. RINTING ON RANSPARENCIES • Transparencies must be able to withstand temperatures Keep the following considerations in mind before you print of 392°F (200°C) for at least 0.1 second. on transparencies: • Keep the paper path clean. -
Page 44: Printing On Letterhead
Follow these directions: RINTING ON ETTERHEAD You can print on letterhead stationary or preprinted forms 1. Load letterhead stationary or other preprinted paper into from any of the input trays. Keep the following Tray 1 printed side up (A). considerations in mind: 2. -
Page 45: Printing On Card Stock
Follow these directions: RINTING ON TOCK You can print on card stock, postcards, index cards, or other Open and extend Tray 1 and the Face-up Output Tray custom sized media from the Multipurpose Tray (Tray 1). See (A). page xx for specific sizes. Keep the following considerations Load material into Tray 1 with the side-to-be-printed in mind: facing up (B). - Page 46 Chapter 5, Using Print Media...
-
Page 47: Printer Tasks
CHAPTER 6 Take advantage of the PRINTER TASKS SuperScript 1400 Series useful printer task features... VERVIEW Learn to use the SuperScript 1400 Series printer to its full N-up Printing potential. This chapter shows you how to accomplish such tasks as: •... -
Page 48: Basic Document Printing
tabs for your SuperScript 1400 Series driver. ASIC OCUMENT RINTING 5. If necessary, click the Paper tab to display the settings The following directions show general steps for printing shown below. this tab contains options for setting basic from various Windows applications. the exact steps for paper handling (C). -
Page 49: Accessing Printer Properties
Click on the other tabs to access other features. When you CCESSING RINTER ROPERTIES change a setting, click OK until you see the Print dialog The settings you change from your application remain in box again. effect while you are using the current application. To make Click OK in the Print dialog box to start printing. -
Page 50: Canceling A Print Job
ANCELING A RINT AVING ONER There are two ways to stop a SuperScript 1400 Series print You can choose to use less toner by adjusting toner usage job, either from the Operator Panel or from the Printer folder. from the printer driver. This feature is especially useful for printing drafts. -
Page 51: Manual Duplexing
magazine (B). Choose Flip on Short Edge if you want the ANUAL UPLEXING binding orientation along the top edge of the paper as in You can print on both sides of the paper from the a calendar (C). Multipurpose Tray (Tray 1). The paper must go through the Select the Print Instruction Sheet box. - Page 52 Duplex Printing (Continued) Collect the printed pages and straighten the stack. Consult the Instruction Sheet that printed or see below for how to reload Tray 1 (D). 9. You are prompted to reinsert the paper into Tray 1 (E). note: If you are printing to the Face-up Output Tray, the last page will be on top of the stack.
-
Page 53: N-Up Printing
Select the number of pages you want to print per sheet in RINTING the Pages per Sheet drop-down menu (B). The N-up printing feature allows you to print multiple Click Print Page Borders if you want to print a border reduced-size pages on one sheet of paper. -
Page 54: Booklet Printing
to help you reinsert the pages correctly;. When you pick one OOKLET RINTING of the booklet sizes in on of your Windows programs, the Booklet printing allows you to print a double-sided driver will do what is needed to print a booklet, including document and arrange the pages into a booklet. - Page 55 When your booklet printing setup is complete, click OK. pages will look similar to the drawing below (D). 9. Flip but do not rearrange the stack of printed pages and note: Although you can print a booklet simply by straighten them before loading them back into the selecting a booklet paper size in your application, it is Multipurpose Tray.
-
Page 56: First Page Printing
IRST RINTING CALE RINTING There will be times when you may want to use a different This feature allows you to scale your print job to any selected paper, such as a company letterhead, as the first page for paper size regardless of the digital document size. This is your document. -
Page 57: Poster Printing
To determine the scaling factor (B), select 2X2, 3X3, 4X4, OSTER RINTING or Custom. Poster printing allows you to print a single-page document For example, if you select 2X2, the output will be onto 4,9, or 16 sheets of paper, which can be taped together to automatically stretched to cover four physical pages (C). -
Page 58: Printing Watermarks
the preview window (A). RINTING ATERMARKS 2. Click OK and print your document. The watermark feature allows you to print text “underneath” or in the background of a document. Examples of watermark note: None To stop printing a watermark, choose in the text could be Draft or Confidential printed diagonally across drop-down menu. -
Page 59: Using Page Overlays
In the Create Overlay dialog box, type a name of up to SING VERLAYS eight letters in the file name box. Select the destination An overlay is text or graphics stored in your computer as a path if necessary (the default is C:\FORMOVER). special file format that can be printed on any given Click OK and you will see the name in the Overlays list. - Page 60 If the desired overlay file does not appear, click the Load Answering Yes to the message box means that the Overlay button and select the overlay file. selected overlay will be printed with your document. If you have stored the overlay file you want to use into an Answering No to the message box cancels overlay external source, you can also load the file when you printing.
-
Page 61: Setting Graphic Properties
print job contains photo or bitmap images. The default ETTING RAPHIC ROPERTIES selection is Text. This feature is grayed out when values Use the following options to adjust the print quality for your other than 1200 dpi (fast printing) are selected. specific printing projects. - Page 62 Chapter 6, Printer Tasks...
-
Page 63: Maintaining Your Printer
VERVIEW • Do not use alcohol-based cleaners on the printer exterior. The SuperScript 1450 and 1450N printers are designed for They may damage the plastic case. easy use and maintenance.This chapter explains basic •... -
Page 64: Replacing The Toner Cartridge
4. Shake the Toner Cartridge thoroughly, as shown (D), then rock the Toner Cartridge forward and back several The SuperScript 1450(N) Toner Cartridge that came with times (E). your printer will print approximately 3,000 pages before it Insert the new Toner Cartridge (F). -
Page 65: Cleaning The Printer
Using a soft lint-free cloth, gently wipe the internal toner LEANING THE RINTER cartridge area (C). Clean the printer about every month. A thorough cleaning Re-insert the Toner Cartridge (D). consists of wiping out the inside Toner Cartridge area and Close the Top Cover (E). -
Page 66: Moving The Printer
3. If applicable, remove the printer from the 550-sheet 2nd OVING THE RINTER Cassette and place it on a sturdy surface or cart Refer Follow the procedure below when moving the printer. to page xx and reverse directions. Turn off the printer (A). If you are shipping your printer, repack it in its original packaging and box. - Page 67 Moving the Printer...
- Page 68 Chapter 7, Printer Maintenance...
-
Page 69: Printer Options
Printer Options 500-sheet 2nd Cassette Order Number: 20-140 VERVIEW There are six available options for upgrading your SuperScript 1450 and 1450N printer to help meet your printing needs and requirements. PostScript Level 3 Upgrade Kit • 550-sheet 2nd Cassette Order Number: 1802 •... -
Page 70: Installing The 500-Sheet 2Nd Cassette
5. Keeping the printer level, lift the printer up and onto the NSTALLING THE 500-sheet Cassette as shown (B). 500- SHEET ASSETTE Reconnect all cables. (Order No.1801) 7. Turn on the printer (C). 8. Assure “READY” appears on the Operator Panel display. The optional 500-sheet 2nd Cassette can be used for increasing the overall paper capacity of the printer and for 9. -
Page 71: Accessing The Printer Controller Board
To access the Controller Board: CCESSING Turn off the printer. RINTER ONTROLLER OARD Pull out the 500-sheet Cassette tray (A). The printer Controller Board manages and controls all 3. Disconnect all cables from printer. printer functions. It is also the place where all the upgrade kits, described later in this chapter, are installed. -
Page 72: Printer Memory Upgrade
2. Position the printer so you have access to the controller board. The SuperScript 1450 model printer comes with 4MB of 3. Figure shows the controller board and the location of memory, and can be upgraded to 68MB using 70ns, or faster, expansion slots used for printer memory. -
Page 73: Postscript Level 2 Upgrade
Position the SIMM into the slot so that the notch is at the CRIPT EVEL PGRADE bottom (C). (Order No. 1802) Snap the SIMM into position (D). Install the PostScript Level 2 Upgrade for computers that 7. Use the procedure in Step 1 as guide to replace printer must send their print jobs as PostScript files. - Page 74 Chapter 8, Printer Options...
-
Page 75: Troubleshooting
Check the power switch and the power source. Printer selects media from the wrong paper source. The printer is not Select SuperScript 1450 or SuperScript Possible Cause Solution selected as the default 1450N as your default printer. - Page 76 Printers. An incorrect output Media such as thick paper should not be set incorrectly. • Right-click the SuperScript 1450 printer method is being used. printed using the Main Output Tray. Use the icon Face-up Output Tray instead. •...
-
Page 77: Error Messages
RROR ESSAGES The text is wrong, garbled, or incomplete. Operator Panel Error Messages Possible Cause Solution When the printer experiences an error, the Operator Panel The operating system is If printing from Windows (any version), exit to will indicate the error messages by the LEDs. Find the light malfunctioning. - Page 78 Mode Message Mode Message Paper Out Manual Feed Tray Cover Open/No Toner Cartridge • The Multipurpose Tray (Tray 1) is empty and must The printer has the cover open, or no toner cartridge. be refilled with paper. • Check that the printer Top Cover and Face-up Output Cover are closed properly.
-
Page 79: Print Quality Problems
If the whole page is blank, the Toner Here are some suggestions for maintaining the highest print Cartridge may either be defective or out of quality from your NEC SuperScript 1450 laser printer. toner. • The Toner Cartridge may be out of toner. - Page 80 Problem Solution Problem Solution Blurred Image If the print appears blurred: Smeared Image If the page is easily smeared: • Make sure only recommended paper is • Clean the inside of the printer. used. • Check the paper type and quality. •...
- Page 81 Problem Solution Problem Solution Blank Areas If blank or faded areas appear randomly on Damaged Print If the page is torn: the page: • Check the paper type and quality. • The Toner Cartridge may be defective. • Make sure you are using only new Remove the cartridge and check for undamaged paper.
- Page 82 Problem Solution Problem Solution Misformed If the text characters are improperly formed Gray Background If the amount of background toner shading and produce: becomes unacceptable, the procedures Characters • A hollow image, the paper stock may be below may help to clear the condition: too slick.
-
Page 83: Paper Jam Problems
• Do not remove the paper tray while print jobs are in process. SuperScript 1450/1450N Paper Path • Flex, fan, and straighten the paper before loading it. • Do not load stacks of labels or transparencies in the... -
Page 84: Clearing Paper Jams
Clearing Paper Jams Paper Jams in the Input Area Follow these suggestions when attempting to clear paper 1. Slide out the paper tray to expose the jammed paper jams. Remove any misfed paper by pulling out by the visible edge from the tray. Make sure that all of the paper is •... -
Page 85: Paper Jams In The Engine Area
Paper Jams in the Engine Area Carefully lift up the guide feed Gently pull the paper toward you to remove it from the note: Paper jams in this area may result in loose toner printer on the page. If you get any toner on your clothes, wash 5. -
Page 86: Paper Jams In The Output Area
Paper Jams in the Output Area handle on the right end of the exit roller, and then pull the roller in the direction of the arrow note: Paper jams in this area may result in loose toner 5. Remove the jammed paper on the page. -
Page 87: Paper Jams In The Auxiliary Tray
Paper Jams in the Auxiliary Tray If you see the jammed paper in the Auxiliary Tray, gently pull the paper out (D). Carefully pull the upper paper tray half way out of the Gently remove any jammed paper from the front of the printer Auxiliary Tray If you see the jammed paper, gently remove the paper... -
Page 88: Common Windows Problems
From the Start menu, select Settings, correct network. Select Network or and Printers. AppleTalk Control Panel from Control • Right-click on the SuperScript 1450 Panels in the Apple menu and then printer icon and select Properties. choose the correct network. •... - Page 89 Printing Errors Selecting an Alternate PPD Problem Possible Cause and Solution Problem Solution note: If you manually select a You cannot use the Background Printing has not been selected. The PPD does not computer while the • For LaserWriter 8.3, turn Background appear in the Chooser.
-
Page 90: Common Postscript Problems
OMMON CRIPT ROBLEMS Problem Possible Cause Solution The following situations are PostScript language specific and A PS error page Print job may not • Make sure that the print job may occur when several printer languages are being used. be PS. is a PS job. -
Page 91: Customer Service
How to reach NEC Technical Support for assistance How to Contact NEC • How to order supplies and printer options There are a number of ways to contact NEC or receive information about technical issues, products, and services. • How to obtain NEC service contracts •... -
Page 92: Ordering Supplies
You can e-mail your questions to NEC. NEC will respond To order printing supplies, contact your SuperScript 1400 within three business days. Send e-mail messages to: Series dealer. You can also call 800-632-2326 to locate the NEC tech-support@nectech.com supplies dealer nearest you or purchase supplies directly from NEC. -
Page 93: Nec Warranty And Service
The first one is where you must return your product for Warranty Period repair or replacement. The second one, is where NEC will Labor is warranted for one (1) year from the date of the first ship a replacement product without receiving the original consumer purchase. -
Page 94: Warranty Support
United States or software, the application, customer data, and operator Canada. control of the system, among other factors. While NEC TECHNOLOGIES, INC. Products are considered to be NECTECH requires that you provide the original bill of sale compatible with many systems, the specific functional... -
Page 95: Printer Specifications
• IEEE 1284-compliant parallel • PERATING PECIFICATIONS • 10/100Base-TX Ethernet (for the SuperScript 1450N model or the SuperScript 1450 with the Network Print speed Interface Upgrade Kit) Letter: 12 sheets/minute Power Requirements Print method 100 - 127VAC, 50/60Hz ± 3Hz... - Page 96 • Laser Safety CDRH Class 1 Clearance Space • Energy Star Compliant Front: 13.8" (350mm–enough space so that trays can be removed) Toner Cartridge life expectancy Back: 12.6" (320mm–enough space to allow opening of Life expectancy of the high capacity replacement SuperScript the Back Cover) 1400 Series Toner Cartridge is 6,000 pages.
-
Page 97: Media Specifications
Tray 1 and Tray 3 are different (see Chapter Use the following general guidelines for purchasing paper 6 for instructions.) and other media for your NEC SuperScript 1400 Series printer. Your printer supports a wide variety of print media, Designate Thick paper in the printer driver when including printing envelopes made from paper heavier than 24 lb. - Page 98 note: Paper Sizes and Capacity The exact number of envelopes or other media supported in the trays depends upon the thickness of the The standard 550-Sheet Cassette (Tray 2) holds 550 sheets of paper. Not all paper sizes listed are supported by all 16 to 28-pound (105 g/m ) paper.
- Page 99 Table A -2: Standard 550-Sheet Cassette Paper Type Size U.S. Letter 8 1/2" x 11" (215.9 mm x 279.4 mm) U.S. Legal 8.5" x 14" (215.9 mm x 355.6 mm) Executive 10.5" x 7.25" (266.7 mm x 184.2 mm) Folio 8.5"...
- Page 100 Table A -4: Envelopes to Use in the Multipurpose Tray (Tray 1) and 550-sheet 2nd Cassette (Tray 3) Only Envelope Weight Size COM 10 20—28 lb 4 1/8" x 9 1/2" (104.8 mm x 241.3 mm) Monarch 20—28 lb 3 7/8" x 7 1/2" (98.4 mm x 190.5 mm) 110 mm x 220 mm 80 g/m 162 mm x 229 mm...
-
Page 101: The Remote Control Panel
APPENDIX B NSTALLING THE OFTWARE Place the “SuperScript 1450 Solutions CD” in your CD THE REMOTE CONTROL ROM drive. PANEL note: If the Windows New Hardware Found dialog box appears during installation, click Cancel. VERVIEW Still need to write this! - Page 102 Web is that you will be installing the from your PC to a networked SuperScript printer. You very latest printer drivers from NEC. The disadvantage will choose your network printer ports. is that the install may be interrupted or slowed down by Custom: Use this if you want to choose individual items your Internet provider.
-
Page 103: Removing Printer Software
To use the Windows PostScript printer driver, the OFTWARE FOR THE ACINTOSH NEC PostScript Level 2 Upgrade Kit (Order No. 1802) must This section describes the hardware and software be installed into the printer. See Chapter 8, “Printer requirements for Macintosh computers, and how to install Options, ”... -
Page 104: Software Requirements
RDER be installed. If you plan on connecting your Macintosh to the printer • The NEC SuperScript 1800 PPD must be installed. through a network, the 10/100Base-TX Network Interface Kit must be installed in the printer. Hardware Requirements Hardware requirements are categorized into requirements Installing the Software for the Macintosh and requirements for the printer. - Page 105 LaserWriter and the NEC SuperScript 1800 will appear in the right pane of the window. Click Create to setup the printer. When created, the NEC SuperScript 1800 icon will appear on the desktop. Close the Chooser window. Software for the Macintosh...
- Page 106 Appendix B, The Remote Control Panel...
-
Page 107: Safety Information
(while the coronas are energized). This chapter provides safety information and product UL Standards for Ozone specifications for the SuperScript 1450 printer. As you The only existing standard for ozone emissions has been operate your printer, please be aware of the following safety established by Underwriters Laboratory (UL). -
Page 108: Fcc Statement
Use a shielded and properly grounded I/O cable to ensure compliance of this unit to the specified limits of the rules. If your printer is the NEC SuperScript 1450N model or if you have installed the optional Network Interface Card (NIC), the printer meets the requirements of FCC Class A when connected to an Ethernet cable. -
Page 109: The Status Monitor
Computers running Windows 95 or 98 can use the Cover Open Assure the Top Cover is SuperScript 1450 Status Monitor for monitoring the or Install Cartridge completely closed or insert operational state of the printer. The table in this appendix toner cartridge. - Page 110 Displayed Image Status Message Corrective Action Displayed Image Status Message Corrective Action Tray 1 Empty Fill Tray 1 (Multipurpose Insert Tray 3 Assure Tray 3 (500-sheet Tray) with paper. 2nd Cassette) is completely inserted in the printer. Paper Mismatch in Configure the Operator Invalid Cartridge Replace existing toner...
- Page 111 Index (Preliminary) face-up output tray 14, 37 Numerics FCC 108 10/100Base-TX 7, 8 fuser unit 14 500-sheet Cassette 12 paper sizes 18 hardware requirements 8 550-sheet Cassette heavy paper 97 loading paper 18 humidity 95 accessory kit 13 IEEE 1284 bidirectional parallel cable 21 installing box contents 13 software for Macintosh 27, 103...
- Page 112 multipurpose tray 14, 38 printable area 96 printer noise level 96 capacity 7 cleaning inside 65 operator panel 14 clearance space 11 options dimensions 95 Optional 500-sheet Cassette 70 location 11 PostScript Level 2 Upgrade 73 moving 66 printer memory 72 repair 93 output trays 36 safety 11...
- Page 113 serial number 14 Windows service contracts 93 system requirements 8 settings page 23 shipping the printer 66 software 25, 101 specifications 95 Status Monitor Messages 109 SuperScript 1800 highlights 7, 75 SuperScript 1800N 8 supplies ordering 92 system requirements 8 technical support 91 service contracts 93 toner cartridge...
Need help?
Do you have a question about the SuperScript 1450 and is the answer not in the manual?
Questions and answers