Table of Contents
Advertisement
Quick Links
Advertisement
Table of Contents

Subscribe to Our Youtube Channel
Related Manuals for NEC SuperScript 1400


Summary of Contents for NEC SuperScript 1400
- Page 1 S U P E R S C R I P T 1 4 0 0 USER’S GUIDE June, 2000...
- Page 2 Copyright 2000 The NEC Technologies product(s) discussed in this document NEC Technologies, Inc. are warranted in accordance with the terms of the Limited 1250 N. Arlington Heights Rd.
-
Page 3: Table Of Contents
Installing the Software Software for Windows 95/98/2000 Ch. 1 INTRODUCTION Installing Software for Windows 95/98/2000 Overview Removing Printer Software SuperScript 1400 Highlights Software for Windows NT 4.0 Added Paper Capacity Installing the Software System Requirements Removing Printer Software Hardware Requirements... - Page 4 Creating a New Overlay Ordering Supplies Using a Page Overlay NEC Warranty and Service Setting Graphic Properties NEC Service Contracts Ch. 7 MAINTAINING YOUR PRINTER SuperScript 1400 Series Printer Limited Warranty83 Overview Warranty Period Precautions Warranty Coverage Internal Maintenance Warranty Support...
- Page 5 Appendix D SAFETY INFORMATION Laser Safety CDRH Regulations Ozone Emission FCC Statement Index...
- Page 6 SuperScript 1400 — User’s Guide...
-
Page 7: Ch. 1 Introduction
It delivers high resolution results perfect for presentations and reports. The Manual Feed Tray, 270-sheet Cassette, and optional 550-sheet 2nd Cassette combine to hold 820 sheets of paper. The SuperScript 1400 has been designed to support all major ® personal computer operating systems, including: Windows ®... -
Page 8: System Requirements
1400 F UPER CRIPT EATURES Your SuperScript 1400 printer and software can operate using SuperScript 1400 printer features give you many ways to the following minimum system configurations. customize your print jobs. To take advantage of these features you need to become familiar with the SuperScript Windows Operating System 1400 Series printer driver. -
Page 9: Status Monitor
(The Energy Star emblem does not represent EPA endorsement of any product or service.) As an ENERGY STAR partner, NEC has determined that this product meets the ENERGY STAR guidelines for energy efficiency. - Page 10 Chapter 1, Introduction...
-
Page 11: Ch. 2 Getting Started
• After initial setup, keep this User’s Guide and This chapter tells you how to safely set up your printer and SuperScript 1400 CD handy for future referencing. begin printing right away. Included are instructions for • The fuser area, under the Top and Back Covers is very •... -
Page 12: Unpacking
CD and ServiceXpress are included), the Toner Cartridge, Save the printer box and all packing materials that and the Power Cord (A). came with your SuperScript 1400 printer in case you Carefully lift the printer out of the box. Use the hand need to ship it later. -
Page 13: Checking Printer Contents
• QuickStart Guide HECKING RINTER ONTENTS including NEC SuperScript 1400 Series Solutions CD Take a moment to verify that the following items were and ServiceXpress information included in your printer box. • Power Cord • SuperScript 1400 Printer • Toner Cartridge •... -
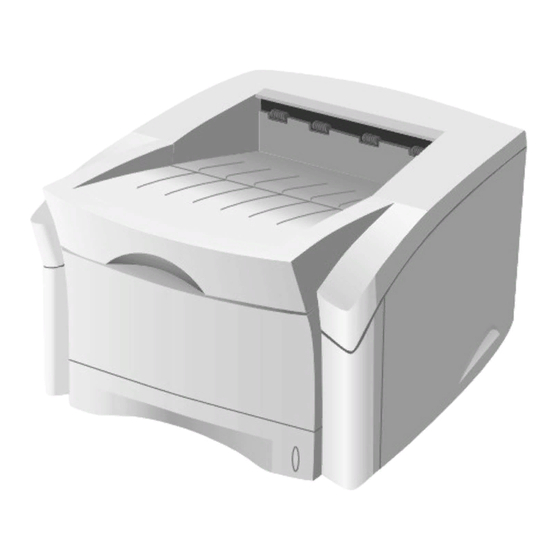
Page 14: Identifying Printer Parts
Interface Panel—contains the Controller Board ports Use the illustrations on the facing page to identify standard including a parallel port and a USB port. parts for the SuperScript 1400. • Back Cover—acts as the Face-up Output Tray when Front View opened out. - Page 15 Important Printer Parts FRONT VIEW with Optional 550-sheet 2nd Cassette FRONT VIEW 1400 Model Main Output Tray Operator Panel Top Cover Manual Feed Tray (Tray 1) Hand Grip 270-sheet Cassette (Tray 2) Paper Level Indicator 550-sheet 2nd Cassette (Tray 3) BACK INTERNAL VIEW BACK VIEW Fuser Unit...
-
Page 16: Installing The Toner Cartridge
3. Hold the cartridge horizontally and shake as shown NSTALLING THE ONER ARTRIDGE about 10 times (D). Lift the Top Cover Rock Toner Cartridge forward and back several times Remove the Toner Cartridge from its bag (C). Do not loosening and distributing any toner that may have open the shutter or touch the shiny green material on the settled during storage. - Page 17 7. Notice that the slots on both sides are curved (H). Grasp the handle and gently guide the Toner Cartridge into the printer (I). note: During installation the shutter that covers the The Toner Cartridge will click into place (J). green shiny material of the OPC unit will flip up on the 10.
-
Page 18: Loading The 270-Sheet Cassette
270- Load paper print-side down (C). OADING SHEET ASSETTE Make sure the paper stack is flat and that it fits under the The 270-sheet Cassette (Tray 2) can hold up to 270 sheets of metal tab in the corner of the tray (D). medium weight paper—letter size (U.S.), legal, folio or A4. - Page 19 You can fill the tray up to the Paper Limit Line on the WARNING! When sliding the tray into the printer, do side of the tray (E). not place your hand on the tray opening in back. Place Slide the tray back into the printer (F). Directions for your hand on the top of the printer as shown below.
-
Page 20: Changing Paper Sizes
2. Slide the Back Paper Guide so that the pointer matches HANGING APER IZES the desired size indicated on the bottom of the tray. Follow these directions if you need to change paper sizes in 3. Load the paper in the tray print-side down (B). the 270-sheet cassette (Tray 2). -
Page 21: For Legal And Folio Paper Sizes
For Legal and Folio Paper Sizes Pinch the tab on the Back Paper Guide and slide it so that the pointer matches the desired size indicated on the To adjust for these different paper sizes, place the empty bottom of the tray (B). cassette tray on a level surface. -
Page 22: Connecting The Printer Using The Parallel Cable16
ABLE 4. Connect the Power Cord to the back of the printer. Plug To connect the SuperScript 1400 printer we recommend using the other end of the Power Cord into a properly an IEEE 1284-compliant bidirectional parallel cable that is no grounded outlet (C). -
Page 23: Connecting The Printer Using The Usb Cable
USB C ABLE Plug the other end of the cable into the appropriate USB To connect the SuperScript 1400 printer we recommend using connector on your computer (B). a certified USB cable. Connect the Power Cord to the rear of the printer. Plug... -
Page 24: Printing A Configuration Sheet
HEET on (A). All the Operator Panel lights will cycle on. You are now ready to print out a SuperScript 1400 2. When only the Ready light remains on, press and hold Configuration Sheet. This page confirms that your printer is the Go/Continue button until the LED lights cycle 2 working properly. -
Page 25: The Software
Close all applications on your computer, then choose Easy Local Install or Custom Install. The SuperScript 1400 printer cannot take an internal Network Interface Card. OFTWARE INDOWS The NEC SuperScript 1400 Series Solutions CD contains the following software for Windows users. • Quick Reference Videos •... - Page 26 PC. CD or from the Web server. Custom Install: Use this if you want to separately install items such as NEC Status Monitor or Acrobat Reader 4.0. note: The advantage of installing from the Web is that you will be installing the very latest printer driver from NEC.
-
Page 27: Software For Windows 95/98/2000
To remove the printer driver: be installed either by an Easy Local Install or by a Custom Install. The Easy Local Install will install the SuperScript 1400 Click the Windows Start button and select Programs. Printer Driver, the Status Computer option, and the User’s Select NEC SuperScript 1400. -
Page 28: Removing Printer Software
From the desktop, double-click My Computer to open Installing the Software the My Computer window. Software installation involves installing the SuperScript 1400 3. Double-click the NEC SuperScript 1400 icon to start the Printer Driver. installer. Installing the SuperScript 1400 As an alternative, right mouse button click on NEC... - Page 29 From the left pane of the Chooser window, select the NEC 1400 Series icon and NEC 1400 Series will appear in the right pane of the window. 8. Close the Chooser window. 9. The NEC 1400 Series icon will be placed on your desktop. Software for the Macintosh...
- Page 30 Chapter 3, Installing the Software...
-
Page 31: Ch. 4 The Operator Panel
VERVIEW functionality. This chapter describes how to interpret and use the SuperScript 1400’s Operator Panel. Most printer tasks can be accomplished through the printer driver software but in some cases it is more convenient to use the Operator Panel. For example, you can cancel a print job by simply pressing the Cancel button. -
Page 32: Operator Panel Lights
PERATOR ANEL IGHTS Buttons Function The four lights, or LEDs, on the Operator Panel have the Factory Default Reset following functionality. During power-up, press and hold down the Go/ Function Continue and Cancel buttons simultaneously. The Error LED (red light) indicates various error •... -
Page 33: Operator Panel Light Messages
Operator Panel Light Messages Mode Message The Operator Panel lights, or LEDs, indicate the status of Processing Job/Warming Up your printer. The Ready LED blinks fast when the printer is Light Status Legend printing a page or is receiving data. Light off The Ready LED also blinks fast when the Light On... - Page 34 Mode Message Mode Message Paper Jam Internal Error The Paper LED is lit and the Error LED is All four LEDs blink sequentially and fast. blinking. The printer detects an internal error (i.e., There is a paper jam in the printer. Check the memory link crash).
-
Page 35: Ch. 5 Using Print Media
This chapter explains the kinds of paper and other media that Size: Use a paper size that fits easily within the paper can be used with the SuperScript 1400 printer. It explains tray. how to properly load paper in the different trays so that the Weight: Your printer supports the following paper best possible print results are achieved. -
Page 36: Printing To The Output Trays
Use the Face-up Output Tray for smaller media like RINTING TO THE UTPUT RAYS envelopes and heavier media like postcards. The printer will The printer has two output trays: the Main Output Tray, always print to the Face-up Output Tray if it is open. Media located on top, and the Face-up Output tray located in back. -
Page 37: Using The Face-Up Output Tray
Pull the tray extender out for longer paper (B). SING THE UTPUT 3. The Back Cover now functions as the Face-up Output Here’s how to use the Face-up Output Tray: Tray (C). Open the Back Cover as shown (A). The Back Cover is also used as the Face-up Output Tray Using the Face-up Output Tray... - Page 38 note: note: The Face-up Output Tray will continue to collect The capacity of the Face-up Output Tray can only printed media until you close it. Media will then print to hold small amounts of any given media. Do not over load the Main Output Tray on top of the printer.
-
Page 39: Using Tray 1: The Manual Feed Tray
Load only one size or type of media one at a time face up. SING ANUAL From your software application, select Tray 1. Also select the paper size and type in the printer driver. Tray 1, also known as the Manual Feed Tray, is located in Open Tray 1 as shown (A). - Page 40 Place sheet against left edge of tray and adjust the Width 7. After printing, push the tray extender in (C). Guide until it lightly touches the stack (A). Load paper 8. After printing, close Tray 1 (D). print side up. note: Do not load more than one sheet of paper into Tray 1 (Manual Feed Tray)
-
Page 41: Printing Manually
Load media in Tray 1 (Manual Feed Tray) print side up RINTING ANUALLY (A). You can print manually from Tray 1 as long as you select Tray Adjust the Width Guide so that it lightly touches the side 1 (Manual) for your paper source in the driver. Manual of the stack (B). - Page 42 Select Tray 1 (Manual) in the Paper Source area of the 5. After one page has printed, the Manual Feed light will print setup dialog box (C). Select print from your screen. start blinking again prompting you to feed the next sheet. The Manual light on the Operator Panel will start 6.
-
Page 43: Printing Envelopes
Load one envelope flap side down against the left tray RINTING NVELOPES edge (C). The stamp area is on the left side of the You can print envelopes from Tray 1 (Manual Feed tray). envelope and it enters Tray 1 first. Follow the directions below. - Page 44 Configure the paper source, type and size in your After printing, close Tray 1 (F). application (E). Windows 98 Macintosh Chapter 5, Using Print Media...
-
Page 45: Printing Labels
Open Tray 1 (Manual Feed Tray). Follow these guidelines when printing label sheets from the Align a label sheet in Tray 1 (C). SuperScript 1400 printer. Open the Face-up Output Tray (D). Print labels as you would print paper from Tray 1 (Manual Configure the paper source, type, and label sheet size in... -
Page 46: Printing On Transparencies
• Transparencies must be able to withstand temperatures RINTING ON RANSPARENCIES of 392°F (200°C) for at least 0.1 second. Keep the following considerations in mind before you print • Keep the paper path clean. Transparencies are especially on transparencies: sensitive to dirt. If shadows appear on the sheets, clean •... -
Page 47: Printing On Letterhead
Follow these directions: RINTING ON ETTERHEAD You can print on letterhead stationary or preprinted forms Load letterhead stationary or other preprinted paper into from any of the input trays. Keep the following Tray 1 printed side up one sheet at a time. considerations in mind: Or load into Tray 2 or 3 printed side down (B). -
Page 48: Printing On Card Stock
Follow these directions: RINTING ON TOCK You can print on card stock, postcards, index cards, or other 5. Open Tray 1 (Manual Feed Tray) (A). custom sized media from the Tray 1 (Manual Feed Tray). See 6. Open Face-up Output Tray (B). page 88 for specific sizes. -
Page 49: Ch. 6 Printer Tasks
Take advantage of the PRINTER TASKS SuperScript 1400 Series useful printer task features... VERVIEW Learn to use the SuperScript 1400 Series printer to its full N-up Printing potential. This chapter shows you how to accomplish such tasks as: • Basic document printing Fit to Page •... -
Page 50: Basic Document Printing
4. The Properties window appears containing the various The following directions show general steps for printing tabs for your SuperScript 1400 Series driver. from various Windows applications. The exact steps for 5. If necessary, click the Paper tab to display the screen printing a document may vary depending on the program below. -
Page 51: Accessing Printer Properties
Printer the printer driver accessed from the folder. Be 3. Select the SuperScript 1400 Series (B). careful not to change the same print settings you changed in the application to a different setting in the printer driver. 4. Right-click the mouse button and select Properties (C). -
Page 52: Canceling A Print Job
ANCELING A RINT 1. From the Windows Start button, select Settings, then There are two ways to stop a SuperScript 1400 Series print Printers (B). job, either from the Operator Panel or from the Printer folder. 2. The Printers window opens. Double-click SuperScript Canceling a Job From the Operator Panel 1400 Series. -
Page 53: Saving Toner
1. From your software application, access the printer AVING ONER Properties window and select the Print Quality tab (A). You can choose to use less toner by adjusting Toner Usage In the Toner Usage area, select Save Toner from the from the printer driver. -
Page 54: Manual Duplex Printing
orientation along the left edge of the paper as in a ANUAL UPLEX RINTING magazine (B). Choose Flip on Short Edge if you want the You can print on both sides of the paper from the Tray 1 binding orientation along the top edge of the paper as in (Manual Feed Tray). - Page 55 note: Duplex Printing (Continued) If you are printing to the Face-up Output Tray, the last page will be on top of the stack. Do not rearrange the Collect the printed pages and straighten the stack. pages. The printer knows the stacking order and will print Consult the Instruction Sheet that printed or use the the corresponding side for each page.
-
Page 56: N-Up Printing
1. Set up basic paper handling parameters such as paper RINTING orientation, source, and size from the Paper tab in the The N-up printing (proof printing) feature allows you to Properties window. print multiple reduced-size pages on one sheet of paper. You 2. -
Page 57: Booklet Printing
When you use booklet printing, the select paper orientation, source, size, and type, see page SuperScript 1400 printer driver prints the pages in the correct order so that all you need to do is fold the printed pages in Click on the Job Finishing tab and select Booklet half and staple. - Page 58 When your booklet printing setup is complete, click OK. on whether you are printing to the Main Output Tray or the Face-up Output Tray. note: Although you can print a booklet simply by selecting a booklet paper size in your application, it is 8.
-
Page 59: First Page Printing
Booklet Printing (Continued) Open the Properties window and click on the Paper tab. In the Paper Source Selection area select Different paper 10. You will be prompted to re-insert the pages into Tray 1 source for first pages and set up paper size, paper (Manual Feed Tray) (F). -
Page 60: Scale Printing
Click the Job Finishing tab and then Scale Printing... in CALE RINTING the Layout Options area and select Fit to Page In the This feature allows you to scale your print job to any selected Scale Printing dialog box (A). paper size regardless of the digital format of the document. -
Page 61: Poster Printing
4. To determine the scaling factor (B), select 2X2, 3X3, 4X4, OSTER RINTING 5X5, or 6X6. Poster printing allows you to print a single-page document As an example, if you select 2X2, the output will onto 4, 9, 16, 25, or 36 sheets of paper, which can be taped automatically be distributed to completely cover four together to form a poster-size document. -
Page 62: Printing Watermarks
Click OK and print your document (B). RINTING ATERMARKS note: None To stop printing a watermark, choose in the The watermark feature allows you to print text “underneath” drop-down menu. or in the background of a document. Examples of watermark text could be “Draft”... -
Page 63: Using Page Overlays
3. In the Create Page Overlay dialog box, type a name of up SING VERLAYS to eight letters in the file name box. Select the destination An overlay is text or graphics stored in your computer as a path if necessary (the default is C:\FORMOVER) (B). special file format that can be printed on any given Click OK. - Page 64 6. If necessary, click the Query Page Overlay (H). If this box Overlay Printing (Continued) is checked, a message box will appear each time you If the desired overlay file does not appear, click the Load submit a document for printing asking you to confirm Overlay button and select the overlay file (F).
-
Page 65: Setting Graphic Properties
print job contains photos, halftones, or bitmap images. ETTING RAPHIC ROPERTIES The default selection is Text. This feature is grayed out Use the following options to adjust the print quality for your when values other than 1200 dpi are selected. specific printing projects. - Page 66 Chapter 6, Printer Tasks...
-
Page 67: Ch. 7 Maintaining Your Printer
VERVIEW • Do not use alcohol-based cleaners on the printer exterior. The SuperScript 1400 printer is designed for easy use and They may damage the plastic case. maintenance.This chapter explains basic maintenance and •... -
Page 68: Replacing The Toner Cartridge
Remove the new Toner Cartridge from its bag and put it on a level surface. Pull the tape tab straight out (C). The SuperScript 1400 Toner Cartridge that came with your Insert the new Toner Cartridge (F). printer will print approximately 3,000 pages (5% page Close the Top Cover. -
Page 69: Cleaning The Printer
Using a soft lint-free cloth, gently wipe the internal toner LEANING THE RINTER cartridge area and lens (C). Clean the printer about every month. A thorough cleaning Re-insert the Toner Cartridge (D). consists of wiping out the inside Toner Cartridge area and Close the Top Cover (E). -
Page 70: Moving The Printer
3. If applicable, remove the printer from the 550-sheet 2nd OVING THE RINTER Cassette and place it on a sturdy surface or cart (C). Refer Follow the procedure below when moving the printer. to page 91 and reverse directions. Turn off the printer (A). If you are shipping your printer, repack it in its original packaging and box. -
Page 71: Ch. 8 Troubleshooting
Check the power switch and the power If the printer selects from the wrong paper source LEDs are not lit. source. The printer is not Select the NEC SuperScript 1400 Series Possible Cause Solution selected as the default icon as your default printer. - Page 72 Spooling Setting may be then Printers. paper is being used. required by the printer. set incorrectly. • Right-click the NEC SuperScript 1400 An incorrect output Media such as thick paper should not be Series printer icon method is being used.
-
Page 73: Error Messages
Light blinking Possible Cause Solution Mode Message The Toner Cartridge is Replace with a new NEC SuperScript 1400 defective or out of toner. Series Toner Cartridge. Power Off The sealing tape may • Remove the Toner Cartridge and pull out... - Page 74 Mode Message Mode Message Paper Out-Manual Feed Cover Open/No Toner Cartridge • The Manual Feed Tray (Tray 1) is empty. You must The printer’s Top Cover is open or there is no Toner feed paper to it one sheet at a time. Cartridge.
-
Page 75: Print Quality Problems
If the whole page is blank: Here are some suggestions for maintaining the highest print • The Toner Cartridge may be out of toner. quality from your NEC SuperScript 1400 laser printer. Replace the Toner Cartridge if necessary. • The Toner Cartridge may be defective. - Page 76 Problem Solution Problem Solution Blurred Image If the print appears blurred: Smeared Image If the page is easily smeared: • Make sure only recommended paper is • Clean the inside of the printer. used. • Check the paper type and quality. •...
- Page 77 Problem Solution Problem Solution Blank Areas If blank or faded areas appear randomly on Damaged Print If the page is torn: the page: • Check the paper type and quality. • The Toner Cartridge may be defective. • Make sure you are using only new Remove the cartridge and check for undamaged paper.
- Page 78 Problem Solution Problem Solution Fogged If fogging occurs on transparencies: Page Skew If the page prints at an unplanned angle: • Select Transparency in the printer driver. • Check the paper type and quality. Transparency See page 40. • Make sure that the paper or other media is loaded correctly and the guides are not too tight or too loose against the paper stack.
-
Page 79: Paper Jam Problems
APER ROBLEMS Problem Solution This section explains how to prevent and remove paper jams. Background Background scatter results from bits of toner There are several things you can do to prevent paper jams. distributed on the printed page: Scatter • The paper may be too damp. Try printing Tips for Avoiding Paper Jams on a different batch of paper. -
Page 80: Understanding The Paper Path
Understanding the Paper Path SuperScript 1400 Paper Path The following illustration shows the printer’s various paper paths. Understanding this path will help you locate paper Output Area jams. The paper is picked up from the Manual Feed Tray (Tray 1), the 270-sheet Cassette Tray (Tray 2), or the optional... -
Page 81: Clearing Paper Jams
Clearing Paper Jams Paper Jams in the Input Area Follow these suggestions when attempting to clear paper Slide out the paper tray to expose the jammed paper (A). jams. 2. Remove the jammed paper from the tray (B). If the paper is jammed in the paper feed area and cannot be easily •... -
Page 82: Paper Jams In The Engine Area
Paper Jams in the Engine Area 5. Re-install the Toner Cartridge (E). Open the Top Cover (A). note: If the Toner Cartridge is difficult to re-install, make 2. Remove the Toner Cartridge (B). If you need to leave the sure the Feed Guide has been flipped back down into Toner Cartridge out for longer than a few minutes, cover position. -
Page 83: Paper Jams In The Output Area
Paper Jams in the Output Area. 5. Remove the jammed paper (E). Replace the exit roller (F). Make sure the right end of the If the paper is visible from the Main Output Tray, roller clicks in place. If the handle is not closed carefully pull it (A). -
Page 84: Paper Jams In The 550-Sheet 2Nd Cassette (Tray 3)78
Paper Jams in the 550-sheet 2nd Cassette 4. If you see the jammed paper in Tray 3, gently pull the paper out (D). (Tray 3) Gently remove any jammed paper from the front of Tray Carefully pull Tray 2 half way out of the printer (A). 3 (E). -
Page 85: Common Windows Problems
USB cable.* Printers. If your Mac does not have a USB port, third-party • Right-click on the NEC SuperScript 1400 USB add-in cards are available. These cards may Series printer icon and select Properties. need additional software to run. Go to http:// •... - Page 86 Chapter 8, Troubleshooting...
-
Page 87: Ch. 9 Customer Service
How to reach NEC Technical Support for assistance How to Contact NEC • How to order supplies and printer options There are a number of ways to contact NEC or receive information about technical issues, products, and services. • How to obtain NEC service contracts •... -
Page 88: Ordering Supplies
You can e-mail your questions to NEC. NEC will respond To order printing supplies, contact your SuperScript 1400 within three business days. Send e-mail messages to: Series dealer. You can also call 800-632-2326 to locate the NEC tech-support@nectech.com. supplies dealer nearest you or purchase supplies directly from NEC at www.nectech.com. -
Page 89: Nec Warranty And Service
1400 S ARRANTY AND ERVICE UPER CRIPT ERIES Your SuperScript 1400 Series printer comes with a one-year RINTER IMITED ARRANTY exchange warranty. The complete warranty is provided NEC TECHNOLOGIES, INC. (hereinafter NECTECH) below. All repair requests must be prequalified by calling warrants this Product to be free from defects in material and NEC Product Support at 800-632-4650. -
Page 90: Warranty Support
United States or software, the application, customer data, and operator Canada. control of the system, among other factors. While NEC TECHNOLOGIES, INC. Products are considered to be NECTECH requires that you provide the original bill of sale compatible with many systems, the specific functional... -
Page 91: Appendix Aprinter Specifications
UL 1950D3 • CSA C22.2 950D3 Printer Language Emulations • FCC part 15, subpart B, Class B SuperScript 1400 Series Printer Driver • Laser Safety CDRH Class 1 Automatic Jam Recovery • ENERGY STAR Compliant Automatically reprints jammed pages when enabled... - Page 92 Toner Cartridge life expectancy Clearance Space Life expectancy of the high capacity replacement SuperScript Front: 19" (482.6mm–enough space so that trays can be 1400 Series Toner Cartridge is 6,000 pages (5% page coverage, removed) letter size). Back: 12.6" (320mm–enough space to allow opening of Life expectancy of the Toner Cartridge that shipped with the Back Cover) your printer is 3,000 pages (5% page coverage, letter size).
-
Page 93: Media Specifications
Use the following general guidelines for purchasing paper Adhesive Labels: Only use adhesive labels that are and other media for your NEC SuperScript 1400 Series recommended for use in laser printers. You can use letter printer. Your printer supports a wide variety of print media, or A4 sizes. - Page 94 The minimum size that the Manual Feed Tray supports is 3.8 Paper Sizes and Capacity inches by 5.8 inches. The maximum size it supports is 8.5 The standard 270-Sheet Cassette (Tray 2) holds 270 sheets of inches by 14 inches. 20 pound paper.
- Page 95 Table A -2: Standard 270-Sheet Cassette (Tray 2) Paper Type Size U.S. Letter 8.5" x 11" (215.9 mm x 279.4 mm) U.S. Legal 8.5" x 14" (215.9 mm x 355.6 mm) Executive 10.5" x 7.25" (266.7 mm x 184.2 mm) Folio 8.5"...
- Page 96 Table A -4: Envelopes to Use in the Manual Feed Tray (Tray 1) and 550-sheet 2nd Cassette (Tray 3) Only Envelope Weight Size COM 10 20—28 lb 4 1/8" x 9 1/2" (104.8 mm x 241.3 mm) Monarch 20—28 lb 3 7/8"...
-
Page 97: The 550-Sheet 2Nd Cassette
Increase the productivity of your printer with the addition of Make sure there is plenty of room around and above the the SuperScript 1400 Series 550-sheet 2nd Cassette (order No. printer to work. Remove the 550-sheet 2nd Cassette from 1401). - Page 98 Lift the printer up and align it over the Feeder Unit. Push down the metal plate in the bottom of Tray 3 (G). Keeping it level, lower it into place on the tabs and connector (D). Directions continued on next page. Re-connect all cables, then turn the printer ON (E).
- Page 99 If loading paper make sure the Tension Lever on the left 11. Lift the tab on the top of Side Guide 1 and slide it to the front of the cassette tray is released into the hole under paper size indicated on the tray bottom (L). Match the the slot (H).
- Page 100 12. Load paper or envelopes into Tray 3 (M). Do not exceed 15. Confirm the installation by printing a Configuration the paper limit mark on the inside of the tray. Sheet. From the Ready state, press and hold the Go/ Continue button for 4 seconds (P).
-
Page 101: Appendix Cthe Status Monitor
Easy Install during your initial installation. But it can be loaded anytime from the Ready None SuperScript 1400 Series Solutions CD. note: The Status Monitor cannot be used to monitor printers connected through a network or serial connection. - Page 102 Displayed Status Corrective Displayed Status Corrective Image Message Action Image Message Action Paper Needed in Fill Tray 1 (Multipurpose Paper Size Error in Refill Tray 2 (270-sheet Tray 1 Tray) with paper. Tray 2 Cassette) with the specified paper. Paper Needed in Fill Tray 2 (standard 270- Paper Size Error in Refill Tray 3 (550-sheet...
- Page 103 Displayed Status Corrective Image Message Action Check Printer Cable There is or Power miscommunication between the computer and the printer. Possible causes: • Printer is not powered on • Incorrect cabling • Printer’s parallel cable does not support bi- directional communication...
- Page 104 Appendix C, The Status Monitor...
-
Page 105: Safety Information
(while the coronas are energized). This chapter provides safety information and product UL Standards for Ozone specifications for the SuperScript 1400 printer. As you The only existing standard for ozone emissions has been operate your printer, please be aware of the following safety established by Underwriters Laboratory (UL). -
Page 106: Fcc Statement
However, there is no guarantee that interference will not U.S. Responsible Party: NEC Technologies, Inc. occur in a particular installation. If this equipment does cause 1250 N. Arlington Heights Road, Address:... -
Page 107: Index
Macintosh printer software cancelling a print job fuser unit macintosh problems card stock Macintosh problems, common CD, SuperScript 1400 Series general printing problems 65, 66 main output tray Solutions Go/continue button manual duplex printing CDRH regulations... - Page 108 n-up printing parallel port letterhead stationary parallel printer cable manual duplexing 2, 16 port, parallel manually online port, USB n-up Online message poster printing poster operator panel power consumption scale factory default reset power requirements transparencies internal cleaning sheet power switch watermarks operator panel buttons precautions...
- Page 109 Windows 95/98 printer software Status Monitor Messages installing SuperScript 1400 removing highlights Windows 95/98/2000 printer SuperScript 1400 Series Solutions software Windows NT 4.0 printer software supplies support ordering Windows problems system requirements Windows software technical support...
Need help?
Do you have a question about the SuperScript 1400 and is the answer not in the manual?
Questions and answers