Icom IC-2300H Instruction Manual
Hide thumbs
Also See for IC-2300H:
- Instructions (2 pages) ,
- Instructions (2 pages) ,
- Service manual addendum (42 pages)
Table of Contents
Advertisement
Quick Links
Previous view
About this Instruction Manual (PDF format)
These Instruction Manual describe the details of the IC-2300H's features. And, this PDF formatted manual provides
you with convenient functions, as follows.
Move to the previously read page.
Click [Previous view] at the left top on an each page, to
move back to the previously read page.
Shows a term description
When the mouse cursor is moved over a term which
is highlighted in yellow, the description of term is dis-
played.
The screen shots at the right column, correspond to
the operating instructions and procedures shows both
setting and operating example.
Shows the location of keys
When the cursor is moved over a term with a red un-
derline, a red circle appears around the appropriate
key(s) on the fi gure of HM-133V.
Example: When the cursor is moved over [CLR]
the description, a red circle appears around
the appropriate key(s).
INTRODUCTION
Previous view
10
POCKET BEEP AND TONE SQUELCH
Tone scan
By monitoring a signal that is being operated with the
pocket beep, tone or DTCS Squelch function turned
ON, you can determine the tone frequency or DTCS
code necessary to open the squelch.
q Set the channel to be checked for a tone frequency
or code.
w Push [TONE] several times to select the tone type
to be checked.
• One of the icons " ," " " or " " appear.
e Hold down [T-SCAN] (TONE) for 1 second to start
the tone scan.
• Rotate [DIAL] to change the scanning direction.
r When the CTCSS tone frequency or DTCS code is
detected, the squelch opens and the detected tone
frequency is temporarily programmed into the mem-
ory or Call channel.
• The scan pauses when a CTCSS tone frequency or
DTCS code is detected.
• The detected CTCSS tone frequency or DTCS code
is used for the tone encoder or decoder, depending
on the tone condition or type selected in step w.
- No icon : Cannot be used for operation.
- " "
- " "+" " : DTCS tone encoder
- " "
- " "
t Push [V/MH z] to cancel the scan.
Using the HM-133V
z Set the channel to be checked for a tone frequency.
x Select the tone type to be checked.
• Push [FUNC]
er tone; [TSQL]
DTCS squelch.
c Push [FUNC]
tone scan.
v When the tone frequency is matched, the squelch
opens and the tone frequency is programmed into
the selected memory or Call channel.
b Push [CLR]
in
42
[i.e.]: Checking for the tone frequency on the
145.680 MHz.
DIGITAL PRIO AO BUSY
MUTE
NAR
MID
LOW
LOCK
ANM
DUP
T-SCAN
S ET
MONI
LOW
scan
Push [TONE] one or more times to select the tone type.
DIGITAL PRIO AO BUSY
MUTE
NAR
MID
LOW
LOCK
ANM
DUP
S ET
MONI
LOW
Hold down [T-SCAN] (TONE) for 1 second.
DIGITAL PRIO AO BUSY
MUTE
NAR
MID
LOW
LOCK
ANM
DUP
S ET
MONI
LOW
DIGITAL PRIO AO BUSY
MUTE
NAR
: CTCSS tone encoder
MID
LOW
LOCK
ANM
DUP
T-SCAN
S ET
MONI
LOW
During CTCSS tone scan
: CTCSS tone encoder/decoder
: DTCS tone encoder/decoder
[i.e.]: Checking for the tone frequency on the
145.680 MHz.
then push; [TONE]
for repeat-
DIGITAL PRIO AO BUSY
MUTE
for tone squelch; [DTCS]
for
NAR
MID
LOW
LOCK
ANM
DUP
S ET
MONI
LOW
then [T-SCAN]
to start the
Push
then
MUTE
NAR
MID
LOW
LOCK
ANM
DUP
S ET
MONI
LOW
to cancel the scan.
Push
then
DIGITAL PRIO AO BUSY
MUTE
NAR
MID
LOW
LOCK
ANM
DUP
S ET
MONI
LOW
DIGITAL PRIO AO BUSY
MUTE
NAR
MID
LOW
LOCK
ANM
DUP
S ET
MONI
LOW
During CTCSS tone scan
PRIO
SCAN
TONE
M/CALL
V/MHz
Appears
T-SCAN
PRIO
SCAN
TONE
M/CALL
V/MHz
T-SCAN
PRIO
SCAN
TONE
M/CALL
V/MHz
PRIO
SCAN
TONE
M/CALL
V/MHz
T-SCAN
PRIO
SCAN
TONE
M/CALL
V/MHz
to select the tone type.
Appears
DIGITAL PRIO AO BUSY
T-SCAN
PRIO
SCAN
TONE
M/CALL
V/MHz
.
T-SCAN
PRIO
SCAN
TONE
M/CALL
V/MHz
T-SCAN
PRIO
SCAN
TONE
M/CALL
V/MHz
Advertisement
Table of Contents

Subscribe to Our Youtube Channel
Related Manuals for Icom IC-2300H


Summary of Contents for Icom IC-2300H
- Page 1 Previous view INTRODUCTION About this Instruction Manual (PDF format) These Instruction Manual describe the details of the IC-2300H’s features. And, this PDF formatted manual provides you with convenient functions, as follows. Move to the previously read page. Click [Previous view] at the left top on an each page, to Previous view move back to the previously read page.
-
Page 2: Functions And Features
Previous view INTRODUCTION ® ® Functions and features of Adobe Reader ® ® The following functions and features can be used with Adobe Reader • Keyword search Click “Find (Ctrl+F)” or “Advanced • Find screen Search (Shift+Ctrl+F)” in the Edit menu to open the search screen. - Page 3 INSTRUCTION MANUAL QUICK REFERENCE GUIDE PANEL DESCRIPTION FM TRANSCEIVER SETTING A FREQUENCY BASIC OPERATION REPEATER SETTING MEMORY OPERATION CALL CHANNEL OPERATION SCAN OPERATION PRIORITY WATCH DTMF MEMORY ENCODER 10 POCKET BEEP AND TONE SQUELCH 11 OTHER FUNCTIONS This device complies with Part 15 of the FCC Rules. Operation is subject to the following two conditions: (1) this device may not cause harmful interference, and (2) this device must accept any interference 12 SPECIFICATIONS...
-
Page 4: Foreword
• Connect the equipment into an outlet on a circuit dif- Icom, Icom Inc. and the Icom logo are registered trademarks of Icom ferent from that to which the receiver is connected. Incorporated (Japan) in Japan, the United States, the United King- •... - Page 5 Icom transceiver. RadioFrequency (RF) energy. Extreme caution should be ob- Icom is not responsible for the destruction or damage to an Icom served when operating this device. If you have any questions transceiver in the event the Icom transceiver is used with equip- regarding RF exposure and safety standards, please refer to the ment that is not manufactured or approved by Icom.
-
Page 6: Table Of Contents
Previous view TABLE OF CONTENTS FOREWORD ..................i 10 POCKET BEEP AND TONE SQUELCH ......... 39–42 ■ Pocket beep operation ............... 39 IMPORTANT ..................i ■ Tone/DTCS squelch operation ........... 41 EXPLICIT DEFINITIONS ............... i ■ Tone scan ................... 42 SUPPLIED ACCESSORIES .............. -
Page 7: Quick Reference Guide
DC power sheet supply 13.8 V Spring washer to an − IMPORTANT! outlet Detailed installation notes for Icom mobile transceiv- ers are available. Contact your Icom dealer or dis- Fuses tributor. 20 A − black (See page 55 for fuse replacement.) -
Page 8: Antenna Installation
Previous view QUICK REFERENCE GUIDE D Antenna installation D Connecting the microphone • Antenna location Connect the microphone to the eight-pin modular sock- To obtain maximum performance from the transceiver, et on the front panel of the transceiver. select a high-quality antenna and mount it in a good location. -
Page 9: Your Fi Rst Contact
■ Your fi rst contact ■ Repeater operation 1. Setting duplex Now that you have your IC-2300H installed in your car or shack, you are probably excited to get on the air. We Hold down [DUP] (LOW) for 1 second several times to would like to take you through a few basic operation select minus duplex or plus duplex. -
Page 10: Programming Memory Channels
Previous view QUICK REFERENCE GUIDE ■ Programming memory channels The IC-2300H has a total of 207 memory channels for storing often used operating frequencies, repeater set- tings, and so on. Memories include 6 scan edges and 1 Call channel. 1. Setting the frequency In the VFO mode, set the desired operating frequency, repeater, tone and tuning steps, and so on. -
Page 11: Panel Description
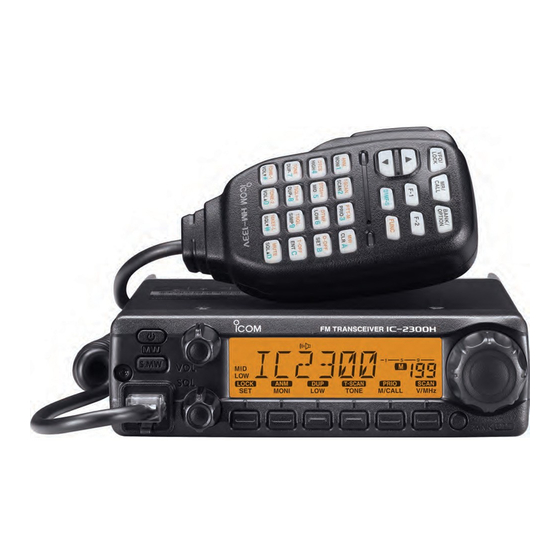
Previous view PANEL DESCRIPTION ■ Front panel Function display (p. 2) S.MW BANK i OUTPUT POWER•DUPLEX KEY [LOW DUP] q POWER KEY [ ] ➥ Push to select the output power. (p. 11) Hold down for 1 second to turn power ON or OFF. ➥... -
Page 12: Function Display
Previous view PANEL DESCRIPTION ■ Function display q FREQUENCY READOUT !1 BUSY ICON (p. 8) ➥ Appears when receiving a signal, or the squelch is Shows the operating frequency, channel name, Set mode contents, and so on. open. ➥ Blinks while the monitor function is turned ON. •... -
Page 13: Rear Panel
Previous view PANEL DESCRIPTION ■ Rear panel q ANTENNA CONNECTOR [ANT] e SPEAKER JACK [SP] Connect a 4 Ω speaker here. Connect a 50 Ω antenna with a PL-259 connector, through a 50 Ω coaxial cable. • Audio output power is more than 3.5 W. w POWER RECEPTACLE [DC13.8V] Connect a 13.8 V DC ±15% power source with the supplied DC power cable. -
Page 14: Microphone Keypad
Previous view PANEL DESCRIPTION ■ Microphone keypad FUNCTION SECONDARY FUNCTION ( +key) OTHER FUNCTION Opens and closes the squelch. (p. 8) Turns the channel names or number display ON After pushing [DTMF-S] , transmits or OFF, in the memory mode. (p. 21) the appropriate DTMF code. -
Page 15: Setting A Frequency
➥ Hold down [ ] for 1 second to turn the power ON or OFF. Hold down [ ] for 1 second. D VFO mode selection The IC-2300H has 2 basic operating modes; VFO mode Push [V/MHz] Push [M/CALL] and memory mode. to select the VFO mode. -
Page 16: Tuning Step Selection
Previous view SETTING A FREQUENCY ■ Tuning step selection The tuning step is the smallest selectable frequency increment you can set the operating frequency. The fol- lowing tuning steps are selectable. • 5 kHz • 6.25 kHz • 10 kHz • 12.5 kHz • 15 kHz •... -
Page 17: Lock Functions
Previous view SETTING A FREQUENCY ■ Lock functions Use the Lock function to prevent accidental channel changes and unnecessary function access. The IC- 2300H has two different lock functions. D Lock function This function electronically locks [DIAL] and the key- pad. -
Page 18: Basic Operation
Previous view BASIC OPERATION ■ Receiving q Hold down [ ] for 1 second to turn ON the power. w Rotate [VOL] to adjust the audio level. ➥ Push [MONI] to open the squelch, and then rotate [VOL] to adjust the audio level. e Set the squelch level. -
Page 19: Audio Mute Function
Previous view BASIC OPERATION ■ Audio mute function Using the HM-133V This function temporarily mutes the audio without dis- turbing the volume setting. ➥ Push [FUNC] then [MUTE] to mute the au- Push then dio. DIGITAL PRIO AO BUSY Appears MUTE •... -
Page 20: Transmitting
fl ow. When excessive current fl ow is detected, the circuit automatically reduces the transmit output power to approximately 25 watts. The IC-2300H has a thermal detector circuit too, which protects the power amplifi er from excessive heat. As the temperature increases, the circuit automatically re- duces the transmit output power to approximately 10 to 20 watts. -
Page 21: Selecting Output Power
Previous view BASIC OPERATION ■ Selecting output power The IC-2300H has 4* output power levels to suit your operating requirements. Lower output powers during short-distance communications may reduce the pos- sibility of interference to other stations and will reduce current consumption. -
Page 22: Accessing A Repeater
Previous view BASIC OPERATION ■ Accessing a repeater [i.e.]: Select the minus duplex mode, and then turn ON the subaudible tone encoder. q Set the receive frequency (repeater output frequen- Appears. cy). (p. 5) • For only USA versions: Push [DUP] (LOW) DIGITAL PRIO AO BUSY MUTE to select the duplex mode. -
Page 23: Subaudible Tones
Previous view BASIC OPERATION ■ Subaudible tones (Encoder function) D Subaudible tones q Select the channel that you want to set the subaudible Setting the tone frequency tone to, such as the VFO, memory or Call channel. DIGITAL PRIO AO BUSY MUTE •... -
Page 24: Basic Operation
Previous view BASIC OPERATION D DTMF tones Using the HM-133V z When “d” is displayed in the 100 MHz digit, fi rst can- cel the DTMF memory encoder. (p. 37) x Push [DTMF-S] , and then push the keys of the desired DTMF digits. -
Page 25: Repeater Setting
Previous view REPEATER SETTING ■ Frequency Offset When communicating through a repeater, the transmit frequency is shifted up or down from the receive fre- quency. q Push [SET] to enter the Set mode. DIGITAL PRIO AO BUSY w Push [SET] or [MONI] until the “±” icon and the fre- MUTE quency offset appear. -
Page 26: Reversed Duplex Function
Previous view REPEATER OPERATION ■ Reversed Duplex function When the reversed duplex function is ON, the receive frequency shifts. (The transmit frequency shifts in normal duplex An example receive and transmit frequency is mode.) shown in the table below with the following settings: Input frequency : 145.30 MHz Offset direction : –... -
Page 27: Memory Operation
Previous view MEMORY OPERATION ■ General description [i.e.]: Programming 145.870 MHz into memory chan- nel 20 via the front panel. The transceiver has 207 memory channels including 6 Push [V/MHz]. scan edge memory channels (3 pairs), and 1 Call chan- DIGITAL PRIO AO BUSY MUTE nel. -
Page 28: Memory Channel Selection
Previous view MEMORY OPERATION ■ Memory channel selection Using the tuning dial q Push [M/CALL] once or twice to select the memory [i.e.]: Selecting memory channel 2. mode. Push [M/CALL] to select the memory mode. • The “ ” icon appears. Appears DIGITAL PRIO AO BUSY w Rotate [DIAL] to select the desired memory channel. -
Page 29: Copying Memory Contents
Previous view MEMORY OPERATION ■ Copying memory contents This function copies a memory channel’s contents to the VFO, another memory or Call channel. This function is useful when searching for signals around the memory channel frequency, and for easy recalling the frequency offset, subaudible tone frequency, and so on. - Page 30 Previous view MEMORY OPERATION D Memory/Call channel➪Call/memory channel [i.e.]: Copying memory channel 30 contents to chan- q Select the memory or Call channel to be copied. nel 31. w Push [S.MW]. Select the memory channel. • The “ ” icon and “– –” indication blink. DIGITAL PRIO AO BUSY e Rotate [DIAL] to select the target memory channel.
-
Page 31: Programming Channel Names
Previous view MEMORY OPERATION ■ Programming channel names Each memory channel and the Call channel can be programmed with an alphanumeric channel name, for easy recognition. Names can be a maximum of 6 char- acters— see the table to the right, for the selectable (”) characters. -
Page 32: Memory Clearing
Previous view MEMORY OPERATION ■ Memory clearing [i.e.]: Clearing memory channel 20. Push [V/MHz] to select the VFO mode. Contents of programmed memories can be cleared DIGITAL PRIO AO BUSY MUTE (blanked). LOCK T-SCAN PRIO SCAN S ET MONI TONE M/CALL V/MHz q Push [V/MH z] to select the VFO mode. -
Page 33: Memory Bank Setting
Previous view MEMORY OPERATION ■ Memory bank setting [i.e.]: Setting memory channel 1 to bank “A." q Push [M/CALL] to select the memory mode, and then rotate [DIAL] to select the desired memory Push [SET]. channel. DIGITAL PRIO AO BUSY MUTE w Push [SET] to enter the Set mode. -
Page 34: Memory Bank Selection
Previous view MEMORY OPERATION ■ Memory bank selection The IC-2300H has a total of 10 banks (A to J). Regular [i.e.]: Selecting the memory bank “A." memory channels; 0 to 199, and scan edges; 1A to 3B Push [BANK] to select the memory bank mode. -
Page 35: Transferring Bank Links
Previous view MEMORY OPERATION ■ Transferring bank links [i.e.]: Transferring the link of bank A to bank C. Push [BANK] to select the memory bank mode. The link between a memory channels and it's assigned DIGITAL PRIO AO BUSY MUTE bank can be transferred to another bank. -
Page 36: Erasing Bank Links
Previous view MEMORY OPERATION ■ Erasing bank links [i.e.]: Erasing the link of bank “A." Push [BANK] to select the memory bank mode The link between a memory channel and it's assigned DIGITAL PRIO AO BUSY MUTE bank can be erased. LOCK T-SCAN PRIO... -
Page 37: Call Channel Operation
Previous view CALL CHANNEL OPERATION ■ Call channel selection ➥ Push [M/CALL] once or twice to select the Call Push [M/CALL] once or twice to select the Call channel. channel. DIGITAL PRIO AO BUSY MUTE • “C” appears instead of a memory channel number. •... -
Page 38: Programming A Call Channel
Previous view CALL CHANNEL OPERATION ■ Programming a Call channel [i.e.]: Programming 145.120 MHz into the Call channel. Push [V/MHz] to select the VFO mode. Operating frequency, duplex setting, subaudible tone DIGITAL PRIO AO BUSY MUTE setting (tone encoder or tone squelch ON/OFF and LOCK T-SCAN PRIO... -
Page 39: Scan Operation
Previous view SCAN OPERATION ■ Scan types There are 3 scan types and 4 resume conditions to suit Scanning automatically searches for signals making it your operating needs. easier to locate new stations for contact or listening pur- poses. FULL SCAN Repeatedly scans all fre- PROGRAMMED SCAN Repeatedly scans between... -
Page 40: Scan Start/Stop
Previous view SCAN OPERATION ■ Scan start/stop [i.e.]: Starting a memory scan. Push [M/CALL]. Preparation DIGITAL PRIO AO BUSY MUTE If desired, set the scan resume option (p. 33), program LOCK T-SCAN PRIO SCAN the scan edges (p. 31), program 2 or more memory S ET MONI TONE... -
Page 41: Scan Edges Programming
Previous view SCAN OPERATION ■ Scan edges programming [i.e.]: Programming 145.300 MHz into scan edge 1A. Push [V/MHz]. Scan edges can be programmed in the same manner DIGITAL PRIO AO BUSY MUTE as memory channels. Scan edges are programmed LOCK T-SCAN PRIO SCAN... -
Page 42: Skip Channel Setting
Previous view SCAN OPERATION ■ Skip channel setting [i.e.]: Setting memory channel 20 as the skip channel. Push [SET] to enter the Set mode. The memory skip function speeds up scanning by not DIGITAL PRIO AO BUSY MUTE scanning those memory channels set as skip channels. Set skip channels as follows. -
Page 43: Scan Resume Function
Previous view SCAN OPERATION ■ Scan Resume function Various pause and timer options can be selected with the Scan Resume function. The selected resume op- tion is also used for Priority Watch. (p. 35) q Push [SET] to enter the Set mode. w Push [SET] or [MONI] until “SCT”... -
Page 44: Priority Watch
Previous view PRIORITY WATCH ■ Priority Watch types IC-2300H has three types of Priority Watch, to suit your MEMORY CHANNEL WATCH needs. You can transmit on the VFO frequency, even While operating on a VFO 5 seconds while Priority Watch is functioning. -
Page 45: Priority Watch Operation
Previous view PRIORITY WATCH ■ Priority watch operation [i.e.]: The memory channel watch on memory channel 20. Push [M/CALL]. q Select the VFO mode, and then set the operating DIGITAL PRIO AO BUSY MUTE frequency. w Set the watching channel. PRIO SCAN LOCK... -
Page 46: Dtmf Memory Encoder
“d4.” DTMF codes are used for autopatching, controlling Hold down [OPT] (BANK) for 1 second. other equipment, and so on. IC-2300H has up to 16 DIGITAL PRIO AO BUSY MUTE DTMF memory channels (d0–dF) for up to 24 digits often-used DTMF codes . -
Page 47: Transmitting A Dtmf Code
Previous view DTMF MEMORY ENCODER ■ Transmitting a DTMF code [i.e.]: Transmitting the DTMF code in the DTMF mem- ory channel “d4.” Automatic transmission (DTMF memory) Hold down [OPT] (BANK) for 1 second. q Hold down [OPT] (BANK) for 1 second to enter the DIGITAL PRIO AO BUSY MUTE Option Set mode. -
Page 48: Dtmf Tx Speed
Previous view DTMF MEMORY ENCODER ■ DTMF TX speed The transmitting speed of DTMF code can be set to ac- commodate your operating needs. q Hold down [ ] for 1 second to turn OFF the power. w While holding down [LOCK] (SET) and [ ] for 1 second, to turn ON the power to enter the Initial Set mode. -
Page 49: Pocket Beep And Tone Squelch
Previous view POCKET BEEP AND TONE SQUELCH ■ Pocket beep operation This function uses subaudible tones as calling, and can Push [SET] to enter the Set mode. be used as a “common pager” to inform you that some- DIGITAL PRIO AO BUSY MUTE one has called while you were away from the trans- LOCK... - Page 50 183.5 199.5 225.7 254.1 NOTE: IC-2300H has 50 tone frequencies and their spacing is consequently narrow, compared to units hav- ing 38 tones. Therefore, some tone frequencies may re- ceive interference from adjacent tone frequencies. D Calling a waiting station using pocket beep A subaudible tone matched with the station’s CTCSS...
-
Page 51: Tone/Dtcs Squelch Operation
Previous view POCKET BEEP AND TONE SQUELCH ■ Tone/DTCS squelch operation The tone squelch or DTCS squelch opens when a sig- Push [SET] to enter the Set mode. nal with the same pre-programmed subaudible tone or DIGITAL PRIO AO BUSY MUTE DTCS code is received. -
Page 52: Tone Scan
Previous view POCKET BEEP AND TONE SQUELCH ■ Tone scan By monitoring a signal that is being operated with the pocket beep, tone or DTCS Squelch function turned ON, you can determine the tone frequency or DTCS code necessary to open the squelch. q Set the channel to be checked for a tone frequency [i.e.]: Checking for the tone frequency on the or code. -
Page 53: Other Functions
Previous view OTHER FUNCTIONS ■ Set mode • Set mode operation Using the HM-133V q Push [SET] to enter the Set mode. z Push [SET] to enter the Set mode. w Push [SET] or [MONI] to select the desired item. x Push [SET] or [ENT] , to select the desired... - Page 54 Previous view OTHER FUNCTIONS ■ Set mode (continued) † Appears only when accessing the Set mode from the memory mode. • Display color Select the display backlight color. p. 46 : [MONI] S ET MONI : [SET] • Display contrast Adjust the LCD contrast.
-
Page 55: Tuning Step
Previous view OTHER FUNCTIONS Repeater tone Tuning step Select the subaudible tone needed to access the re- Set the VFO tuning step to 5, 6.25, 10, 12.5, 15, 20, 25, peater. A total of 50 tone frequencies (67.0–254.1 Hz) 30 or 50 kHz. (default: Depending on the versions) are selectable. -
Page 56: Display Color
Previous view OTHER FUNCTIONS Memory bank link function Display color The transceiver has 10 banks, A to J. Regular memory Select the display backlight color from Amber (default), channels 0 to 199, and scan edge channels 1A to 3B, Yellow or Green. can be assigned into the desired bank for easy memory DIGITAL PRIO AO BUSY DIGITAL PRIO AO BUSY... -
Page 57: Initial Set Mode
Previous view OTHER FUNCTIONS ■ Initial Set mode The Initial Set mode is accessed at power ON, and allows you to set seldom-changed settings. In this way, you can “customize” the transceiver to suit your preference and operating style. Entering the Initial Set mode q While holding down [SET], hold down [ ] for 1 sec- ond to enter the Initial Set mode. -
Page 58: Squelch Delay
Previous view OTHER FUNCTIONS Key-touch beep Repeater lockout Turn the confi rmation beeps ON (default) or OFF. Set the transmission lockout (temporary transmission inhibit) capability. DIGITAL PRIO AO BUSY MUTE • OF : No lockout is activated. (default) • RP : The repeater lockout is turned ON. PRIO LOCK T-SCAN... -
Page 59: D Dtmf Speed
Previous view OTHER FUNCTIONS Tone burst Turn the Tone Burst function ON or OFF. • OF : When you transmit a signal that superimposes the CTCSS tone or subaudible tone, the squelch tail noise may be audible on the RX side. •... -
Page 60: Weather Channel Operation
Previous view OTHER FUNCTIONS ■ Weather channel operation Only USA versions Weather channel selection q Push [M/CALL] several times to select the weather DIGITAL PRIO AO BUSY MUTE Weather channel number channel group. w Rotate [DIAL] to select the desired weather chan- LOCK T-SCAN PRIO... -
Page 61: Microphone Keys
Previous view OTHER FUNCTIONS ■ Microphone keys [F-1] and [F-2] on the supplied HM-133V memorize the transceiver settings. The [UP] and [DOWN] keys on the standard or optional mi- crophone (other than the HM-133V) can be assigned func- tions like the function keys on the transceiver’s front panel. [F-1] and [F-2] keys on HM-133V The following functions can be assigned to the micro- phone's [F-1]... -
Page 62: Partial Reset
Previous view OTHER FUNCTIONS ■ Partial reset If you want to reset the VFO frequency, VFO settings and Set mode items to their default values, without clearing the memory contents, you can do a partial reset of the transceiver's CPU. ➥... -
Page 63: Data Cloning
Previous view OTHER FUNCTIONS ■ Data cloning Cloning allows you to quickly and easily transfer the programmed contents from one transceiver to another, or data from a personal computer to a transceiver, us- ing the optional CS-2300H CLONING SOFTWARE D Cloning between two transceivers q Connect the master and sub-transceivers using the OPC-474 cloning cable through the speaker jack. -
Page 64: Specifications
Previous view SPECIFICATIONS M GENERAL M TRANSMITTER • Modulation system : Variable reactance frequency mod. • Frequency coverage (unit: MHz) • Output power (approximately) : Tx: 144–148/Rx: 136–174* Export, China Tx: 136–174*/Rx: 136–174* USA, Export, China Taiwan Korea Taiwan, Korea Tx/Rx: 144–146 65 W 24 W... -
Page 65: Maintenance
Previous view MAINTENANCE ■ Troubleshooting If your transceiver seems to be malfunctioning, please check the followings before sending it to the service center. PROBLEM POSSIBLE CAUSE SOLUTION REF. No power comes on. • Power connector has a poor contact. • Check the connector pins. p. - Page 66 A-6966-1EX-w Printed in Japan 2011–2012 Icom Inc. © 1-1-32 Kamiminami, Hirano-ku, Osaka 547-0003, Japan...
Need help?
Do you have a question about the IC-2300H and is the answer not in the manual?
Questions and answers