Table of Contents
Advertisement
Quick Links
Advertisement
Table of Contents

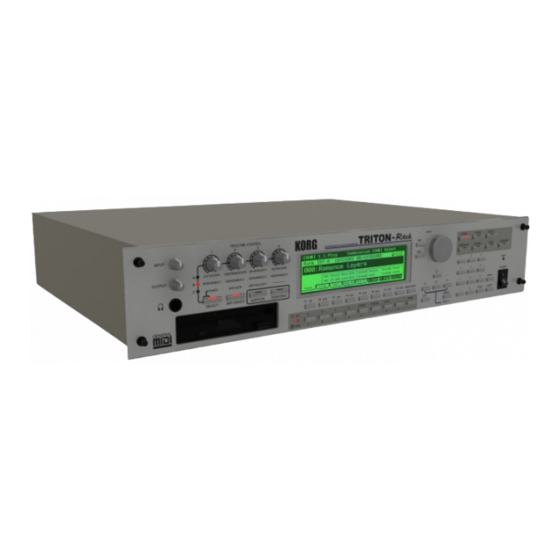
Related Manuals for Korg Triton-Rack


Summary of Contents for Korg Triton-Rack
- Page 2 DAT or CD etc., you must obtain per- • Be careful not to let metal objects get into the mission for use. Please be aware that Korg will accept equipment. If something does slip into the no responsibility for any copyright violations which equipment, unplug the AC/AC power supply may occur through your use of this product.
-
Page 3: The Owner's Manuals And How To Use Them
Thank you for purchasing the Korg TRITON-Rack expandable HI module/sampler . To ensure trouble-free enjoyment, please read this manual carefully and use the instrument as directed. About this manual Conventions in this manual Abbreviations for the manuals BG, PG, VNL References to the manuals included with the TRITON- The owner’s manuals and how to use... -
Page 4: Table Of Contents
Table of Contents About this manual ......iii Simple combination editing ....27 The owner’s manuals and how to use them . - Page 5 More about Alternate Modulation ... . 50 How Sampling mode is organized... . 66 In Sampling mode ..... . 66 Combination mode .
- Page 6 Synchronization with an external sequencer in Program, Combination, or Multi mode ..93 Effects settings ......94 Effects in each mode .
-
Page 7: Introduction
GM2 compatibility. When the separately sold EXB- MOSS option is installed, 128 programs for the HI (Hyper Integrated) synthesis system Korg MOSS tone generator will also be available. The HI (Hyper Integrated) synthesis system is a PCM You can use a wide range of editing parameters,... - Page 8 produced by a program. You can also make settings 100 user patterns. that include external tone generators. When you execute the Time Slice function of Sampling mode, a drum phrase or similar sample will be divided With the factory settings, 512 user combinations into beats, and simultaneously a corresponding pattern suitable for a wide range of styles are preloaded in will be created and assigned to RPPR.
-
Page 9: Overview Of The Modes
MFX 1 copying etc. Program Program TRACK 2 TRACK 10 IFX 2 MFX 2 • Korg format sample data can be loaded and saved. Program TRACK 11 Program TRACK 3 IFX 3 AKAI, AIFF, and WAVE format sample data can Program... -
Page 10: Front And Rear Panel
Front and rear panel Front panel 1...10 22, 23 17, 18 12...16 19...21 24...27 1. [INPUT] knob This knob adjusts the input level of the AUDIO INPUT 1 and 2 jacks. 2. [OUTPUT] knob This knob adjusts the volume of the AUDIO OUT- PUT (MAIN) L/MONO and R jacks, as well as the headphone jack. - Page 11 12. [F1 ], [F2 ], [F3 ], [F4 C-mode 2/10 3/11 4/12 ], [F6 ], [F7 ], [F8 5/13 6/14 7/15 8/16 [1] TEMPO: keys Controls the tempo of the arpeggiator or of the Multi mode RPPR. Function [F1]–[F8] keys [2] ARP-GATE: These keys select the tabs that are displayed in Controls the gate time (note duration) of the...
- Page 12 19. CURSOR keys [ ], [ ], [ ], [ [D], [E], [F], [G], or [H] keys will select the EXB-A – (E-A), EXB-B (E-B), EXB-C (E-C), EXB-D (E-D), Use these keys to select different parameters on EXB-E (E-E), EXB-F (E-F), EXB-G (E-G), and EXB- screen.
-
Page 13: Rear Panel
24. Numeric keys [0], [1], [2], [3], [4], [5], Rear panel [6], [7], [8], [9] [–] key 1. AC power supply connector (~AC9V) [./HOLD] key Connect this to the included AC/AC power sup- [ENTER] key ply. Use these keys to numerically input a parameter After connecting the power supply cable to the value. - Page 14 The MIC/LINE level select switch ([MIC/LINE] By connecting this to the DIGITAL IN jack of an switch) and the level adjustment knob ([INPUT] ADAT Optical format compatible mixer, amp, or knob) allow you to use a wide range of external recorder etc., you can send the audio signal output audio sources, from mic level to line level.
-
Page 15: Objects And Functions In The Lcd Screen
f: Function buttons Objects and functions in the LCD screen By pressing the function key [F1]–[F8] nearest this button, you can turn various functions on/off. a: Current page d: Edit cell e: Check box SW1 and SW2 in Program, Combination, Multi, or Sampling modes. - Page 16 Dialog boxes Page menu When you select a utility menu command etc., a In Combination, Program, Multi, Sampling, or dialog box will open. Global modes, pressing the [MENU] key will dis- Use the cursor keys [ ], [ ], [ ], [ ] to select play a list of the pages in that mode.
-
Page 17: Setup
Setup... -
Page 18: Connecting Audio Equipment Etc
If you wish to use the AUDIO OUTPUT (INDIVID- Connecting audio equipment etc. UAL) 1–4 jacks of the TRITON-Rack, we recommend that you use a mixer. Connections must be made with the power turned If you playback the TRITON-Rack through your off. -
Page 19: Connecting Audio Input Devices
Headphones Connecting MIDI equipment When using headphones, plug them into the head- phones jack located on the front panel. The TRITON-Rack produces sound when it receives MIDI messages from another MIDI device such as a MIDI keyboard or sequencer (computer). Headphone Use a MIDI cable to make these connections. -
Page 20: Connecting A Sequencer (Computer)
* Echo Back is a function by which data received at Connecting a sequencer (computer) MIDI IN is re-transmitted without change from MIDI OUT. Computer Basic settings for using the TRITON-Rack as the MIDI interface MIDI OUT (multi-port) MIDI IN MIDI tone generator for monitoring and playback when recording on an external sequencer or com- MIDI IN... -
Page 21: Turning The Power On/Off
• When using a Sampling mode utility menu Turning the power on/off command (“Move Sample,” “Move MS,” “Conv. To Prog,” “Time Slice” etc.) to simultaneously modify programs or drum kits. Before you turn on the power, make sure that the desired connections have been made as described in “Setup”... -
Page 22: Listening To The Demo Songs
Listening to the demo songs Here’s how to listen to the demo songs of the TRITON- Rack. 1 Press the [DEMO/SNG] key. (LED lit) You will enter the Demo/Song, Play page. 2 In “Demo Song Select,” select a demo song. Use the [ ], [ ], [... -
Page 23: Quick Start
Quick Start... -
Page 24: Playing From A Midi Keyboard (Program, Combination Mode)
With the factory settings, the Audition function Playing from a MIDI key- can be used only on the preloaded programs of banks INT-A–INT-D. and the preset programs G, board (Program, Combina- g(1)–g(d). tion mode) Selecting a program bank In Program mode you can select and play programs When you wish to play the TRITON-Rack from a MIDI from banks INT-A–g(d) and EXB-A–EXB-H. -
Page 25: Listening To The Sound Of A Combination
Other ways to select programs or combinations 2. Listening to the sound of a combina- tion Selecting by category Programs or combinations can be selected from sixteen 1 Press the [COMBI] key. (LED lit) categories. With the factory settings, these are organized by instru- You will enter Combination mode. - Page 26 When you adjust the cutoff frequency of the filter, the When the arpeggiator is running, it is effective to use brightness of the sound will change. The effect will this in conjunction with the C-mode [ARP-GATE] knob depend on the settings of the program parameters, but to control the arpeggiated notes.
-
Page 27: Using The Arpeggiator While You Play
Settings using controllers 4. Using the arpeggiator while you Arpeggiator on/off play Each time you press the [ARP ON/OFF] key, the arpeggiator will be switched on/off. The arpeggiator is a function that automatically gener- ates arpeggios (broken chords). Most arpeggiators pro- When this is on, the LED will light, and playing the duce an arpeggio when you play a chord on the keyboard of a connected MIDI instrument will start... - Page 28 Sounding an arpeggio in the order of the pitches in the The knob setting is saved when you write the pro- chord you played gram. You can select whether the notes of the arpeggio will You can control the effect by simultaneously be sounded in the order of the pitches in the chord you adjusting the A-mode [EG-RELEASE] knob.
- Page 29 Using the arpeggiator as you play in Combi- nation mode In Combination mode the TRITON-Rack provides dual arpeggiators, allowing you to run two arpeggio pat- terns simultaneously. 1 Press the [COMBI] key to enter Combination mode, and select a combination. ( p.19 “2. Listen- ing to the sound of a combination”) As you select various combinations, you will notice that the [ARP ON/OFF] key LED will light for some...
-
Page 30: Playing With A Computer/Sequencer (Multi Mode)
4) Use the [VALUE] dial or the [INC], [DEC] keys to Playing with a computer/ select the template multi that you wish to load. For this example, let’s select P00: Pop/Ballade. sequencer (Multi mode) 5) Press the [F8] (“OK”) key to load the template. Use Multi mode when you want the TRITON-Rack to simultaneously play multiple tracks of musical data sent from your computer/sequencer. -
Page 31: Controlling Tracks From Your Computer/ Sequencer
With the initial settings, tracks 1–16 correspond to Using the RPPR (Realtime Pattern MIDI channels 1–16; i.e., track 1 receives MIDI chan- nel 1, and track 2 receives MIDI channel 2, etc. Play/Recording) function The Multi mode of the TRITON-Rack provides an 2. -
Page 32: Simple Program Editing
000: FEVER will be displayed. Simple program editing Program sounds can be modified and created in PROG 2.1: Ed-Basic–7.3: Ed-MasterFx. However, you can also use the “Performance Editor” to perform simple edit- ing in PROG 1.1: Play Perform. Edit page as well. 3 Make sure that the RPPR check box is checked. -
Page 33: Realtime Controls
OSC Balance Simple combination editing Adjusts the level balance between oscillators 1 and 2. For programs whose “Mode (Oscillator Mode)” A combination is a set of multiple (up to eight) pro- (PROG 2.1: Ed-Basic, Prog Basic page) setting is grams, and allows you to create complex sounds that Single, oscillator 2 will not sound. - Page 34 For this example, select I-A003: Legato Strings. This Use the [VALUE] dial, the [INC], [DEC] keys, or is a layered combination with piano and rich numeric keys [0]–[9] and the [ENTER] key to strings. Make sure that the [INT/EXB] LED is dark. change the value.
-
Page 35: Listening To Sampled Sounds
3 Set the channel of the transmitting MIDI device to Listening to sampled sounds match the global MIDI channel. With the factory settings, the global MIDI channel is Here’s how to load demo multisample data and play it set to channel 1. Set the transmitting MIDI device to back in Sampling mode. -
Page 36: Assign Samples To A Multisample
Connect your external audio device and Manual sampling make input settings There are two ways to record a sample: manual and auto. In this example we will use manual sampling. 7 Press the [F2] (“Rec.”) key to access the Recording page. -
Page 37: Make Loop Settings
3 Press the [F6] (“CREATE”) key to create another 1 Select 3.1: Loop Edit. index. Press the [MENU] key to open the page menu, and Currently selected index/Total press the [F3] key. Press the [F8] (“Open”) key. Index1 Index2 number of indexes 2 Select “Index”... -
Page 38: Convert To A Program
Press the [F8] (“UTILITY”) key to access the utility 4. Convert to a program menu, and press the [F7] key to select “Grid.” Press the [F8] (“OK”) key. The following dialog box will appear. Next we will convert the samples and multisample to a program. -
Page 39: Basic Functions
Basic functions... -
Page 40: Basic Operation Of The Triton-Rack
Basic operation of the TRITON-Rack In Disk mode there is only one page, so the page Selecting modes, pages and tabs; menu will not appear. setting parameters 3 Press the function key [F1]–[F7] that is nearest the page you wish to select. If multiple pages are assigned to one function key, press the same key to move the cursor downward. -
Page 41: Selecting Parameters
[COMPARE] key 3. Selecting parameters Use this key when you wish to compare an edited pro- gram or combination sound with the un-edited origi- Use the [ ], [ ], [ ], [ ] cursor keys to select the nal (i.e., the sound that is written into memory). parameter that you wish to edit. -
Page 42: Saving Data
Saving data Saving to external media (floppy disk etc.) Types of data that can be saved The following data can be saved on external media (floppy disk etc.). If the separately sold EXB-SCSI On the TRITON-Rack, there are three ways to save option is installed, this data can also be saved on high- data: writing to internal memory, saving on external capacity media such as a hard disk etc. -
Page 43: Writing To Internal Memory
The screen shown is for Program mode Writing to internal memory Memory protect 2 In “Category,” specify the category of the program/ To prevent programs, combinations, multis, drum kits combination. and user arpeggio patterns from being overwritten accidentally, the TRITON-Rack provides a Memory If the category you specify here is for a program, Protect setting that prohibits writing to memory. - Page 44 The function buttons will have the following functions. Assigning a name (Rename) Clear: Erase all text. Del (Delete): Delete the character at the cursor loca- You can modify the name of an edited program, combi- tion. nation, multi, drum kit, user arpeggio pattern, multi- Ins (Insert): Insert a space at the cursor location.
-
Page 45: Writing Global Settings, User Drum Kits, And User Arpeggio Patterns
Using the [WRITE] key to write Writing global settings, user drum kits, 1 In the following pages, press the [WRITE] key. A dialog box will appear. and user arpeggio patterns Global settings: GLOBAL 1.1–4.1 The settings you edit in Global mode can be written User drum kits: GLOBAL 5.1 into internal memory. -
Page 46: Saving On External Media
6 Select the “Save All” utility. Saving on external media For details on the data that can be saved on external media (floppy disk etc.) ( p.36 “Types of data that can be saved”). The user patterns or RPPR settings of Multi mode Press the [F8] (“UTILITY”) key to access the utility and the multisamples and samples of Sampling menu. -
Page 47: Midi Data Dump
1) Make sure that you have a sufficient number of Other ways to save floppy disks, and press the [F8] (“OK”) key. Sav- ing will begin. In addition to “Save All,” the Utility menu commands 2) When the disk is full, the following dialog box include “Save PCG”... -
Page 48: Restoring The Factory Settings
Restoring the factory settings Loading the preloaded data and 2. Loading the demo songs demo songs Here’s how to restore the demo song data played in the DEMO/SNG page to the factory settings. When you load this data, the multi data in Multi 1. -
Page 49: Program Mode
Program mode In Program mode you can select and edit programs. Basic program editing Program mode consists of pages 1.1: Play–7.3: Ed–Mas- terFX. In 1.1: Play you can select and play programs. You can With the factory settings, the TRITON-Rack’s INT-A– also edit the sound in simple ways, and make arpeg- INT-D contain preloaded programs. -
Page 50: Oscillator Settings 2.1: Ed-Basic
Basic (Prog Basic) page The three elements of sound Sound can be broken down into three elements: pitch, tone, and volume. On the TRITON-Rack, these elements correspond to the Pitch, Filter, and Amplifier settings of the program. In other words you would adjust the Pitch settings to modify the pitch, the Filter settings to modify the tone, Mode (Oscillator Mode) and the Amplifier settings to modify the volume. -
Page 51: Controller Settings 2.2: Ed-Ctrl
1 Specify different multisamples for “High Multi- (It is easy to create programs using samples that sample” and “Low Multisample.” were recorded in Sampling mode, or multisamples/ samples that were loaded in Disk mode.) 2 Specify a velocity value for “Velocity SW L H.” •... -
Page 52: Filter Settings 4.1: Ed-Filter1, 4.2: Ed-Filter2
OSC1 page “Intensity (AMS Intensity)” specifies the depth of vibrato that will be applied by the LFO when AMS (Alternate Modulation Source) is operated. For exam- ple if “AMS (LFO1 AMS)” is set to AfterT and you set an appropriate value for “Intensity (AMS Intensity),” vibrato will be applied when you apply pressure to the keyboard of a connected MIDI instrument or when MIDI aftertouch messages are received. - Page 53 Resonance The TRITON-Rack provides Filter 1 for OSC1 and Fil- ter 2 for OSC2. For each of these filters, you can select When “Resonance” is set to a higher value, the over- from two types (Low Pass Resonance or Low Pass & tones in the region of the cutoff frequency will be High Pass).
-
Page 54: Amplifier Settings 5.1: Ed-Amp1, 5.2: Ed-Amp2
lfoMod (LFO Mod.) page Piano Organ Volume Volume Indicates settings that allow the LFO to produce cyclic Volume remains constant Volume decays gradually until note is released changes in tone (a “wah” effect). Intensity: “to A (LFO1 Int. to A)” and “to B (LFO1 Int. to B)”... -
Page 55: Lfo Settings 5.3: Ed-Lfos
keyboard. With a negative (–) value, the volume Filter1, 4.2: Ed-Filter2, 5.1: Ed-Amp1, and 5.2: Ed- will decrease as you play lower on the keyboard. Amp2 pages. • When Ramp “High” has a positive (+) value, the volume will increase as you play higher on the keyboard. -
Page 56: More About Alternate Modulation
More about Alternate Modulation Alternate Modulation is a type of modulation that can be used to control various aspects of the sound. AMS (Alternate Modulation Source) refers to any of the numerous sources that can control alternate modu- lation, and includes controllers such as the realtime controller that you physically operate, incoming MIDI data, as well as modulators such as the EG or LFO. -
Page 57: Combination Mode
Combination mode In Combination mode you select and play combina- If a program being edited in Program mode is used tions and edit them. in a combination, it will sound according to the set- Combination mode consists of pages 1.1: Play–7.3: Ed– tings being edited. -
Page 58: Timbre 1-8 Program, Pan And Volume
Layer, split, and velocity switch The Compare function Within a combination, you can use keyboard location When 2.1: Ed–Basic–7.3: Ed–MasterFX are displayed, and velocity to change the program that sounds. The you can press the [COMPARE] key to make the LED programs assigned to each timbre can sound in three light. -
Page 59: Controller Settings 2.2: Ed-Ctrl
Volume Bank(EX2) MSB, Bank(EX2) LSB Adjusts the volume of each timbre. This setting is valid when “Status” is set to EX2. It spec- Create the overall sound by adjusting the volume bal- ifies the Bank Select message that will be transmitted ance between timbres. -
Page 60: Note Timing And Scale Settings
Timbres 2 and 3 create a layer. Timbre 1 and timbres 2/ Adjusting the BPM of multisamples or samples cre- 3 are split between the B3 and C4 note numbers. ated in Sampling mode Strings Timbre 3 Timbre 2 Brass If a timbre program uses multisamples or samples that Timbre 1 Piano... -
Page 61: Midi Filter Settings 4.1: Ed-Midi Filter1- 4.4: Ed-Midi Filter4
shows an example of a velocity switched combination For example if you selected a bass program for timbre 1 in velocity will switch between timbres 1 and 2 to play and a piano program for timbre 2 to create a split-type different programs. -
Page 62: Multi Mode
Multi mode In Multi mode the TRITON-Rack functions as a MIDI the keyboard and controllers of a connected MIDI multi-timbral tone generator that receives multiple instrument (including the various MIDI control tracks of musical data from an external MIDI sequencer events) is recorded in realtime, and step recording and plays them. -
Page 63: The Oganization Of Multi Mode
settings, effect settings etc.) of the TRITON-Rack can • Utility menu commands other than those listed in be loaded. “Operations for which Compare can be used” • .SNG data saved on the TRITON/TRITON pro/ TRITON proX (keyboard models) Parameter settings of the TRITON-Rack that are The oganization of Multi mode shared with the keyboard models and user pattern data can be loaded. -
Page 64: Multi Settings
Each pattern consists of musical data for one track. It is Multi settings not possible to create patterns that contain multiple tracks. These patterns are used by the RPPR function. Program, pan, and volume settings for The RPPR (Realtime Pattern Play/Recording) function: each track 1–16 1.1: Play... -
Page 65: Controller Settings 2.2: Controller
Pitch page Controller settings 2.2: Controller Transpose, Detune (BPM Adj.) For each multi, specify the functions for the B-mode of For each track, specify the pitch of the program. ( PG the REALTIME CONTROLS knobs [1]–[4] and for p.55) “SW1” and “SW2.” ( p.100, PG p.53, 213, 214) Note timing and scale settings Status, MIDI channel, and note mode 3.2: Param2... -
Page 66: Pattern And Rppr Settings
Recording on a pattern Pattern and RPPR settings 5.1: RPPR Here you can record and play user patterns, and make Your performance on the keyboard of a connected RPPR settings. Refer to the subsequent sections MIDI instrument and/or the controllers of the TRI- “Recording a pattern,”... - Page 67 5 Use the “Pattern Parameter” utility to specify the Realtime quantize “Resolution” number of measures in the pattern and its time sig- nature. The TRITON-Rack provides a realtime quantize “Res- olution” setting (step 7) that lets you correct the tim- ing of performance data recorded using realtime recording.
-
Page 68: Step Recording On A Track Or Pattern
Recording controllers such as the REALTIME CON- Step recording on a track or pattern TROLS To step record on a pattern, use the 5.1: RPPR, Pattern Although you may operate controllers etc. to record Utility “Step Recording (Loop).” control data in a pattern, you should restore the control For details on step recording on a pattern, refer to PG data to its normal value within the pattern. -
Page 69: Rppr (Realtime Pattern Play/Recording) Function
5 Check the “Assign” check box. RPPR (Realtime Pattern Play/ You can make assignments for keys C#2–C8. Keys C2 and below are used for stopping the pattern Recording) function playback, and cannot be assigned. 6 Select the pattern that will playback when you For details on the RPPR function, refer to “Playing with press the key selected in step 4. -
Page 70: Rppr Playback
etc. to match the MIDI channel of the track you wish RPPR playback to play. Also set the “Control Track” to match the track you wish to play. Here’s how you can use the RPPR function to perform For example you might assign backing patterns in the 1.1: Play, Multi page. -
Page 71: Sampling Mode
AIFF or WAVE format sample data can eliminate this problem and create natural-sounding be loaded. (Once data has been loaded into the loops. TRITON-Rack, it will all be treated as Korg format sample data.) Link (with Crossfade) Sample data created on the TRITON-Rack can be... -
Page 72: How Sampling Mode Is Organized
• The grid function displays a BPM-based grid on How Sampling mode is organized the waveform display, helping you to create loops or make waveform edits that match the desired BPM. • Each multisample allows you to create up to 128 indices. -
Page 73: Samples And Multisamples
The higher the sampling frequency is, the closer to the record one sample per octave, and assign each of these original analog signal the waveform in memory will samples to an index (keyboard area). All of the instru- mental sounds in the TRITON-Rack’s internal preset ROM multisamples are constructed in this way. -
Page 74: Sampling
Be aware that when you change the setting from Sampling Off to L/R or IFX1–5, the volume level in the AUDIO OUTPUT L/MONO and R jacks and in the headphones may rise excessively. “Input 1” controls the AUDIO INPUT 1 jack, and Preparations for sampling “Input 2”... -
Page 75: Manual Sampling
Using an insert effect Immediately after the power is turned on, 000: NewMS______000 will be created automatically. The TRITON-Rack’s insert effects can be applied to the Use the numeric keys [0]–[9] to input the multisam- sound that is being input from the AUDIO INPUT 1 ple number that you wish to record, and press the and 2 jacks, allowing you to record a sample with [ENTER] key. -
Page 76: Auto Sampling
“Connections and settings for a stereo source,” the L 9 Press the [F4] (“REC”) key. and R meters will move. 0 Press the [F5] (“START”) key. Use the “Recording Level [dB]” slider to adjust the When the input signal exceeds the “Threshold” level. -
Page 77: Loop Settings
Immediately after the power is turned on, “Pstn Loop settings (Position)” will be R (Right), “Range (Zone Range)” will be 012(Keys), and “Orig.K (Original Key Position)” will be Btm (Bottom), so that With the default settings after the power is turned on, indexes will be created as shown below. -
Page 78: The Grid Display
before the first waveform, “LpS (Loop Start)” is set Check “Grid,” set “Resolution” as desired, and immediately before the second waveform, and “E press the [F8] (“OK”) key. The dotted grid lines will (End)” is set as desired. appear. S (Start) LpS (Loop Start) E (End) By using the ZOOM ([F4] key–[F7] key) you can... -
Page 79: Sample (Waveform Data) Editing
Sample (waveform data) editing A note on saving samples In the dialog boxes of some Utility menu, there is a Editing the waveform data of the sample is done in 2.1: “Save to No.” setting that lets you specify the sample number to which the edited sample will be saved. -
Page 80: Multisample Editing
Adj.” to set the loop interval to a desired BPM Multisample editing value ( PG p.102). Editing a multisample is accomplished with a number of operations i.e. creating indexes for the multisample Converting a multisample to a and assigning a sample to each index, editing opera- program tions such as deleting, copying, and inserting indexes, and detailed settings such as sample level and pitch for... -
Page 81: Using Time Slice To Divide A Sample, And Playing It In Multi Mode Rppr
Press the [F8] (“OK”) key. The Set Sample Tempo Using Time Slice to divide a sam- dialog box will appear. ple, and playing it in Multi mode RPPR Time Slice is a function that detects the attack of the 4 Specify the number of quarter-note beats in the kick or snare etc. - Page 82 7 Next use “SMPL” to select the 100 BPM rhythm •5.1: RPPR, RPPR KEY: D2, Assign: On, Pattern: loop sample. User U01, Track: 02 (set in step After making sure that RPPR is turned on, play C#2 and D2 on the keyboard of the connected MIDI instrument, and the time-sliced samples will play back at the tempo specified by “...
-
Page 83: Global Mode
Global mode In Global mode you can make settings that affect the Creating a drum kit entire TRITON-Rack, such as user scales, category names, drum kits, and user arpeggio patterns ( PG p.107). This chapter will describe the procedure for editing a About drum kits drum kit. -
Page 84: Editing A Drum Kit
best to first select a drum kit program in Program 5 Use “Assign” to specify whether a drum sample mode, and then do your editing in Global mode. will be assigned to the note number. If this is checked, a drum sample will be assigned to that note number. - Page 85 If you wish to use the settings of another “KEY,” select the “Copy Key Setup” utility. 0 Select the Voice/Mixer page in GLOBAL 5.1: DKit. A Set the “Excl Group.” The “Excl Group” setting is used when you wish to group drumsamples of the same type.
-
Page 86: Disk Mode
Disk mode External SCSI storage media (when the sep- How Disk mode is organized arately sold EXB-SCSI option is installed) If the separately sold EXB-SCSI option is installed, the In Disk mode you can use floppy disks or a connected TRITON-Rack can save data on external SCSI media external SCSI device (if the separately sold EXB-SCSI is (maximum 4 GB) such as a hard disk, Zip, Jaz, ORB, or... -
Page 87: Loading Data
When you load a .PCG file, the data in the internal Loading data memory of the TRITON-Rack will be overwritten with the data of that .PCG file (programs, combi- nations, drum kits, user arpeggio patterns, global settings). If you wish to keep the data that is cur- Types of data that can be loaded rently in internal memory, you must execute “Save All”... - Page 88 specified load destination bank. Global setting data When you load PRELOAD.PCG, any data that you will not be loaded. had written previously will be overwritten and If you set “.PCG Contents” to Bank I-A, and set lost. If you do not want to lose your data, you must “To”...
-
Page 89: Saving Data
EXB-PCM04: • Load the EXB-PCM01 file for bank C of the TRITON keyboard model into bank E-A. “.PCG Contents”: Bank I-C, “To”: Bank E-D • Load the EXB-PCM02 file for bank C of the “Load C_BANK.SNG too”: On (checked) TRITON keyboard model into bank E-B. “.SNG Allocation”: Append •... -
Page 90: Formatting Media
Floppy disk write protect • .WAVE files, .AIFF files Samples you created in Sampling mode can be Floppy disks have a small write protect hole that can be exported and saved as .WAVE files or .AIFF files. used to prevent data from being erased or rewritten accidentally. -
Page 91: Arpeggiator Settings
Arpeggiator settings P000: UP This chapter describes the procedure for making arpeg- giator settings in each mode. For details on the arpeg- giator function, refer to “4. Using the arpeggiator while you play” ( p.21). Arpeggiator settings for a program P001: DOWN DOWN Arpeggiator on/off... - Page 92 U200 (E–A) – U327 (E–H) If this is unchecked, the arpeggio will be sounded in With the factory settings, these do not contain pat- the order in which the notes were played on the con- terns. nected MIDI instrument (Off). If certain separately sold EXB-PCM series option Sort boards are installed and the included disk is loaded,...
-
Page 93: Linking The Arpeggiator To A Program
“Vel Btm,” “Vel Top”: The arpeggiator will operate Arpeggiator settings when you play notes with a velocity (playing strength) that is within the specified range. Notes played with a velocity outside this range will be 1 Select COMBI 2.1: Ed-Prog/Mix, Prog page. sounded normally, without regard to the arpeggia- Select programs for the timbres that you wish to use. -
Page 94: Linking The Arpeggiator To The Combination
You can use keyboard ranges or playing velocity to arpeggiator A. Since the “Status” of T7 is Off, it operate the arpeggiator, or to switch between arpeg- will not sound. giators A and B. By setting the COMBI 3.3: Ed-Key •... -
Page 95: Creating An User Arpeggio Pattern
If a blank pattern is selected, playing the keyboard Creating an user arpeggio pat- will not start an arpeggio. Although preset arpeg- gio patterns P000–P004 can be selected, they can- tern not be edited. When you edit a user arpeggio pattern, the changes will have an effect anytime that this pat- About user arpeggio patterns tern is used in Program, Combination, or Multi. -
Page 96: Creating Example Pattern
• Tone: At each step, a chord consisting of up to “Gt (Gate)”: Specify the length of the arpeggio note 12 tones (Tone No. 00–11) can be sounded. for each step. With a setting of LGT, the note will To input tones, select “Step (Step No.)” and then continue sounding either until the next note of the use numeric keys [0]–[9], [–], and [./HOLD] to same tone or until the end of the pattern. - Page 97 Drum pattern 3 Set “Step (Step No.)” to 03, and press the [0] key. Set “Ptch (Pitch Offset)” to +00. You can use the arpeggiator to play a rhythm pattern by using “Fixed Note” with a drum program. 4 Set “Step (Step No.)” to 04, and press the [0] key. Set “Ptch (Pitch Offset)”...
-
Page 98: Dual Arpeggiator Editing
4 Input the kick (Tone00). If you have moved from Combination mode, the arpeg- gio pattern selected by the combination will be affected Set “Step (Step No.)” to 01, and press the [0] key. Then set “Step (Step No.)” to 05, and press the [0] by your editing. -
Page 99: About Arpeggiator Synchronization
About arpeggiator synchroniza- Synchronization with an external sequencer in Program, Combination, tion or Multi mode The note timing of the arpeggiator will depend on the setting of its “Key Sync.” check box. When “ (Tempo) ” is set to EXT (GLOBAL 2.1: MIDI, “MIDI Clock”), the arpeggiator will synchronize to If this is checked, the arpeggiator will begin operating MIDI Clock or Start messages etc. -
Page 100: Effects Settings
Effects settings The effect section of the TRITON-Rack provides five Effects in each mode insert effects, two master effects, one master EQ (ste- reo 3-band EQ), and a mixer that controls the routing of these components. In Program mode, insert effects can be used as part of You can choose from 102 types of full-digital effects for the sound-creating process, in the same way that the each insert effect, and from 89 types for each master... -
Page 101: Routing Settings And Effect Settings
(PROG 7.2: Ed-Insert FX, Setup page) after the sig- Routing settings and effect set- nal has passed through the insert effects. tings Insert effects 4 Select the PROG 7.2: Ed-InsertFX, Setup page. The insert effects, master effects, and master EQ have the same structure in all modes, but the routing set- tings will determine how the oscillators of a program or the timbres of a combination or track of a song will... -
Page 102: Effect Settings In Combination, And Multi Modes
Master effects Effect settings in Combination, and The input levels to the master effects are set by the Multi modes “Send Level 1, 2” (step 3 or 8). If “Send Level 1, 2” are zero, the master effects will not apply. “Send Level 1”... -
Page 103: Effect Settings In Sampling Mode
Insert effects Effect settings for the AUDIO INPUT Here you can select the effects for each IFX1–IFX5, adjust the “Pan (CC#8)” setting that follows each insert Even in modes other than Sampling mode, the TRI- effect, and specify “BUS Select,” “S1 (Send1(MFX1)),” TON-Rack’s effects can be applied to the external audio and “S2 (Send2(MFX2)).”... -
Page 104: About Dynamic Modulation (Dmod)
Using the Dmod function to vary the feedback If “BUS (IFX/Indiv.) Select” is set to IFX1–5, this is set by “Send Level 1” and “Send Level 2” (Insert Fx level by operating “SW1” ([F6] key) tab) after the sound has passed through the insert 5 In the PROG 2.2: Ed-Ctrl, Controls page, set the effects. -
Page 105: Other Functions
Other functions Tuning to another instrument/ Adjusting the way in which veloc- Transposing ity or after touch will affect the volume or tone When you play the TRITON-Rack together with other instruments, or along with music on a CD or tape, you You can adjust the way in which changes in velocity or may need to adjust the tuning so that the pitch after touch will affect the volume or tone. -
Page 106: Changing The Scale
In this case, you will normally select SW1 Changing the scale Mod.(CC#80) and SW2 Mod.(CC#81). For an example in which the “SW1” is specified as an You can specify the scale for each program, for each effect dynamic modulation source for a program and timbre in a combination, or for each track of a multi. -
Page 107: Adjusting The Contrast (Brightness) Of The Lcd Screen
Adjusting the contrast (brightness) of the LCD screen Use the GLOBAL 1.1: System, Preference page “LCD Contrast” to make adjustments. Using the TRITON-Rack as a data filer MIDI exclusive data transmitted from an external device can be received by the TRITON-Rack and saved on a floppy disk (the Data Filer function). -
Page 109: Appendices
Appendices Audio In page, and make sure that “Input1 Level,” Troubleshooting “Input1 BUS Select,” “Input2 Level” and “Input2 BUS Select” are set correctly. ( p.97) • If sound is still not input even after you have set If you experience problems, refer to the relevant item “Input 1 Level,”... - Page 110 Combinations or multis do not sound correctly TRITON-Rack is in pattern recording/play or after data was loaded recording-standby mode. • SMPL 1.1: Recording, the “REC” or “START/ • In the dialog box when saving the data, did you STOP” button may have been pressed, so that the check the check boxes for each item that you TRITON-Rack is in sampling-standby or sampling wanted to save? ( p.40)
- Page 111 Can’t save data to a floppy disk • Is the floppy disk inserted correctly? • Is the floppy disk formatted? • Is the write protect hole of the floppy disk covered, so that it is in the “write permit” position? Correctly insert a 3.5 inch 2HD or 2DD floppy disk (with its write protect hole covered) into the disk drive, and perform the save operation once again.
-
Page 112: Specifications And Options
Time Slice, Time Stretch, and various other editing (240 64 pixel LCD display) functions Mode keys: Able to load AIFF, WAVE, AKAI (S1000/3000), Korg [COMBI], [PROG], [MULTI], [SAMPLING], [GLO- format sample data can be loaded BAL], [DISK] Sample data can be exported in AIFF or WAVE for-... -
Page 113: Options
[OUTPUT] level knob (for AUDIO OUTPUT Options (MAIN) L/MONO, R, HEADPHONE) Audio inputs Expansion boards AUDIO INPUT 1, 2 EXB-MOSS DSP Synthesizer Board LEVEL [MIC/LINE] switch, [INPUT] knob EXB-SCSI SCSI Interface Board Input impedance 10 [k ] EXB-DI Digital Interface Board Nominal level LINE +4 [dBu]... -
Page 114: Midi Implementation Chart
*3: LSB, MSB = 00, 00: Pitch Bend Range; 01,00: Fine tune; 02,00: Coarse Tune *4: In addition to Korg exclusive messages, GM System On, Master Volume, Master Balance, Master Fine Tune, and Master Coarse Tune are supported. *5: No corresponding controllers in the Remarks column; transmitted by Realtime Controls knobs 1–4 B-assign or by seq. (Pattern, Audition, Demo) data. -
Page 115: Index
Index Numerics 10’s Hold 19 Bank 5, 35, 37, 40, 81 Edit Buffer 38 Combination 19, 53 12 dB/oct low pass filter and 12 dB/ Edit cell 9 Multi 25, 59 oct high pass filter 47 Effect 94, 99 Program 18, 44 EG 46, 48 Sampling 103 Amp EG (Amplifier EG) 48... - Page 116 Keyboard crossfade 52 Multi 2, 3, 10, 13, 24, 34, 56, 74, 75, Keyboard input 35 Quantize 61 Multi timbre 24, 56 Keyboard Track 47, 48 Multisample 29, 31, 38, 40, 44, 54, .KMP file 41, 80, 83 67, 70, 73, 74, 77, 83 .KSC file 29, 32, 41, 80, 81, 83 Realtime control 20, 27, 56, 98 Convert 32...
- Page 117 “SW1”, “SW2“ 9, 20, 45, 98, 100 Swing 86 [WRITE] 7, 37, 39, 103 Synchronize 93 Write 20, 21, 22, 26, 27, 36, 37, 39, 78, System exclusive data 36, 83 System exclusive message 57 Zero crosses 72 Tab 9, 34 ZOOM 72 Template Multi 24, 58, 61 Tempo 5, 21, 49, 61, 75, 85, 87, 98...
- Page 118 These products are warranted by the KORG distributor only in each country. Any KORG product not sold with a warranty card or carrying a serial number disqualifies the product sold from the manufacturer’s/distributor’s warranty and liability. This requirement is for your own protection and safety.
Need help?
Do you have a question about the Triton-Rack and is the answer not in the manual?
Questions and answers