Table of Contents

Related Manuals for Intel ISP4400 - Server Platform - 0 MB RAM


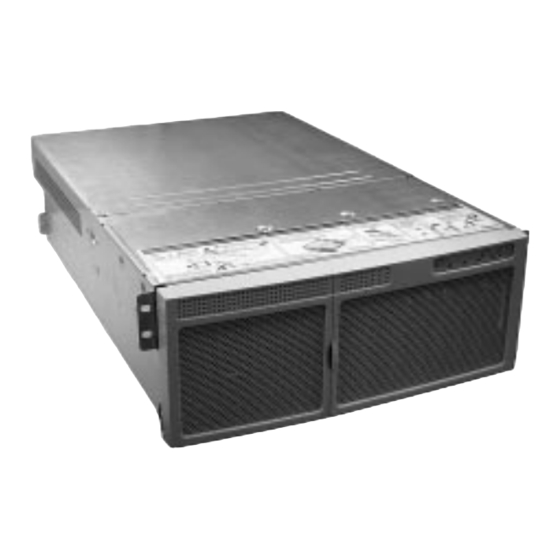
Summary of Contents for Intel ISP4400 - Server Platform - 0 MB RAM
- Page 1 SRKA4/ISP4400 Server System Quick Start Guide Order Number: A07927-003 How to do basic set-up, boot from the configuration software CD, install the optional slide rail kit or center-mount kit, and access the product guide from the CD.
- Page 2 Intel. Intel Corporation (Intel) makes no warranty of any kind with regard to this material, including, but not limited to, the implied warranties of merchantability and fitness for a particular purpose. Intel assumes no responsibility for any errors that may appear in this document.
-
Page 3: Table Of Contents
Contents Warnings and Cautions ......................6 Safety and Regulatory Requirements ................... 7 Unpack and Inspect the Server .................... 7 Select Site ..........................8 Space Requirements ....................8 General Site Criteria ....................9 Mounting the SRKA4 Server System in a Rack ..............9 Equipment Rack Precautions.................. - Page 4 Product Guides........................36 Using the Acrobat .PDF Files..................36 Copying Configuration Software to Diskettes..............36 4 Quick Start Guide...
- Page 5 WARNINGS : Before operating this server, read the warnings ARNINGS beginning on page 6. : To avoid personal injury when unpacking the server, VOID INJURY use only a mechanical assist unit to lift it off the shipping pallet. The minimum server configuration weighs 26 kg (57 lbs); the maximum weighs 40 kg (88 lbs).
-
Page 6: Warnings And Cautions
Warnings and Cautions Read and adhere to all warnings, cautions, and notes in this guide and the documents supplied with the chassis, power supply, baseboard, and accessories. If the instructions for the chassis, base board, and power supply are inconsistent with these instructions or the instructions for accessories, contact the supplier to find out how you can ensure that the server meets safety and regulatory requirements. -
Page 7: Safety And Regulatory Requirements
Place the server components on a grounded, static-free surface. Use a conductive foam pad if available but not the component wrapper. Do not slide the components over any surface. COOLING AND AIRFLOW: For proper cooling and airflow, always install the chassis access cover before turning on the system. Operating the system without the cover in place can cause overheating and damage to system components. -
Page 8: Select Site
Select Site When selecting the site, make sure that you understand Space requirements for the SRKA4 MP server system General site criteria Space Requirements The space requirements for the SRKA4 MP server system are specified in the following table. Table 1. SRKA4 MP Server Physical Specifications Specification Rack Mode Only... -
Page 9: General Site Criteria
General Site Criteria The server operates reliably within normal office environmental limits. Select a site that meets these criteria: Near a properly earthed, grounded, three-pronged power outlet In the United States and Canada: a NEMA 6-15R outlet for 100-120 V and for 200-240 V. In other geographic areas: a properly earthed, grounded outlet in accordance with the local electrical authorities and electrical code of the region. -
Page 10: Equipment Rack Precautions
Equipment Rack Precautions WARNINGS : You are responsible for installing an POWER DISCONNECT AC power disconnect for the entire rack unit. This main disconnect must be readily accessible, and it must be labeled as controlling power to the entire unit, not just to the server(s). : To avoid the potential for an ROUNDING THE RACK INSTALLATION electrical shock hazard, you must include a third wire safety grounding... -
Page 11: Slide Rail Kit
Slide Rail Kit WARNING Avoid injury: To avoid personal injury when unpacking the server, use only a mechanical assist unit to lift it off the shipping pallet. The minimum server configuration weighs 26 kg (57 lbs); the maximum weighs 40 kg (88 lbs). Do not attempt to lift or move the server by the handles on the power supplies. - Page 12 The inner member has a safety latch shown in Figure 4. Without fully extending the slide assembly, you can move the server in and out from the rack. When the slide assembly is fully extended, this latch locks the assembly in the fully extended position. When you depress the latch, you can release the inner member from the rest of the slide assembly.
-
Page 13: Prepare The Slide Assemblies
Prepare the Slide Assemblies 1. Remove the slide assemblies from the kit. 2. Orient the slide assembly so that the inside of the inner member is facing up and the safety latch is visible. 3. Fully extend the telescoping slide assembly until the intermediate member hits the safety latch on the inner member. -
Page 14: Attach Eia Rail Brackets
Attach EIA Rail Brackets NOTE Mounting holes in the vertical rails of equipment racks are commonly spaced in a 5/8 x 5/8 x 1/2-inch sequence. Perform the following steps carefully; brackets must be mounted with precision to allow room for the next server you install in a rack. - Page 15 4. Place a screw in the holes from inside the intermediate member and tighten with a washer and lock nut. The correct alignment of the screw, washer, lock nut, bracket, and slide assembly is shown in Figure 7. OM09984 Figure 7. Correct Alignment of Screw, Washer, Nut, Bracket, and Slide Assembly at the Front Extended slide rail The slide rail assembly extended so that the screw hole in the outer member...
- Page 16 Attach Rear Bracket 1. Remove four #8-32 x 1/2 long pan-head screws, four washers, and four lock nuts from the kit. 2. Extend the intermediate member out from outer member so that you have complete access to the rear part of the outer member. Item B in Figure 9 on page 17 shows in what direction you must extend the intermediate member.
- Page 17 6. Place screws in two of the three holes from inside the intermediate member and loosely tighten with a washer and lock nut. The correct alignment of the screw, washer, lock nut, bracket, and slide assembly is shown in Figure 9. OMO9985 Figure 9.
-
Page 18: Attach The Slide Assembly To The Rack
Attach the Slide Assembly to the Rack 1. Obtain at least four screws from your own inventory. 2. Select the holes you are going to use on the rack. 3. Align the holes on one of the front brackets with the holes you selected on the rack. The holes are noted by "A"... -
Page 19: Install Handles
Install Handles The handles attach to the chassis. As an option, you can also attach the handles to the rack. 1. Make sure that you pull the chassis out of the rack until the safety latch snaps into place. 2. As shown in Figure 11, align the inside top and bottom handles with the top and bottom holes of the chassis. -
Page 20: Center-Mount Kit
Center-mount Kit WARNING : To avoid personal injury when unpacking the server, VOID INJURY use only a mechanical assist unit to lift it off the shipping pallet. The minimum server configuration weighs 26 kg (57 lbs); the maximum weighs 40 kg (88 lbs). Do not attempt to lift or move the server by the handles on the power supplies. -
Page 21: Attach Eia Rail Brackets To The Rack
Attach EIA Rail Brackets to the Rack 1. Separate the brackets labeled FR/RL from the brackets labeled FL/RR. 2. Decide what side of the rack is the "front" side of the rack. 3. Place one of the brackets labeled FR/RL on the front right side of the rack as shown in Figure 12. - Page 22 9. Place one of the brackets labeled FR/RL on the rear left side of the rack as shown in Figure 14. 10. Make sure that the holes in the bracket are aligned with the holes in the rack, and that the top of the bracket is aligned with the top of the front left bracket already attached to the rack.
-
Page 23: Secure The Chassis To The Eia Brackets
Secure the Chassis to the EIA Brackets 1. Slide the back of the SRKA4 server system into the rack from the front as shown in Figure 15. The lip on the chassis is noted by "A" in Figure 15, rests on the brackets. OM09992 Figure 15. -
Page 24: Attach The Front Bezel To The Chassis
Attach the Front Bezel to the Chassis The front bezel attaches to and protects the front of the server. 1. Make sure that you pull the chassis out of the rack until the safety latch snaps into place. 2. Place the front bezel over the front of the chassis. The edge of the bezel should line up with the front edges of the chassis. -
Page 25: Connect Monitor, Keyboard, Mouse
EMI information: For information about complying with electromagnetic interference regulations, see “Electromagnetic Compatibility” in the SRKA4/ISP4400 Server System Product Guide. To view or print a Product Guide: See "Product Guides" on page 34. Connect Monitor, Keyboard, Mouse CAUTION Unplug the server. Before connecting external devices, make sure the server is not plugged in, or equipment could be damaged. -
Page 26: Chassis Front Controls And Indicators
Chassis Front Controls and Indicators OM09997 Figure 18. Front Panel Controls and Indicators Power On/Off button: When activated by momentary contact while the system is off, this button turns the power subsystem on. If the system is in sleep state, activating the button by momentary contact brings the system out of sleep state. -
Page 27: Turn On Video Monitor And Server
Turn on Video Monitor and Server 1. Make sure all external devices, such as a monitor, keyboard, and mouse, have been connected. 2. If present, remove drive protection card from the diskette drive. 3. Turn on the video monitor. 4. Plug the female end of the server AC power cord into the input receptacle on the back of the chassis. -
Page 28: Changing The Bios Setup
NOTE The SRKA4 server system is shipped with the diskette drive set as the first boot device. Therefore, the server tries to boot from a diskette rather than from the CD-ROM, regardless of whether there is a CD in the CD-ROM. If you want to set the CD-ROM as the first boot device for this boot only, press <Esc>. -
Page 29: Booting From Cd
Booting from CD OM09998 Figure 19. 5.25-inch CD-ROM Device (top), .5-inch Slim-line CD-ROM Drive (bottom) Open/close push-button switch CD tray, CD with label side up CAUTION, handle CD only by the edges Handle the CD by its inner and outer edges. Do not touch the side without the label (the data side). -
Page 30: Changing The Boot Device Priority Temporarily
NOTE The server was shipped with the diskette drive set as the first boot device. The server will, therefore, try to boot from diskette rather than from the CD-ROM. Even with the CD in the drive, the server might continue to display “Operating System Not Found”. -
Page 31: Changing The Boot Device Priority Permanently
Changing the Boot Device Priority Permanently You can change the boot device permanently. Until you change the boot device priority again via this instruction set, the boot device priority does not change. 1. Quickly press the <F2> key. A prompt may or may not appear. After a few bootup tests complete, the main BIOS Setup screen appears. -
Page 32: Running The Scsi Select Utility
Running the SCSI Select Utility 1. When this message appears on the video monitor: Press <Ctrl><A> for SCSISelect(TM) Utility! 2. Press <Ctrl+A> to run the utility. When the main menu for the host adapter appears, choose the adapter that you want to configure—each SCSI bus accepts up to 15 devices. Use the following keys to navigate through the menus and submenus. -
Page 33: Configuring The Adaptec Aic-7899 Scsi Adapter
Configuring the Adaptec AIC-7899 SCSI Adapter The Adaptec AIC-7899 SCSI adapter has two busses. Select the bus from the following menu. Table 5. Main Menu Menu Item Menu Option You have an AIC-7899 adapter in your system. Move Bus:Device:Channel the cursor to the bus:device:channel of the one to be 01:06:A configured and press <Enter>. -
Page 34: Device Drivers
Product Guides The server software kit contains two product guides: the SKA4 Baseboard Product Guide and the SRKA4/ISP4400 Server System Product Guide. The SKA4 Baseboard Product Guide contains information about the baseboard only and does not include any information specific to the SRKA4 MP server system. -
Page 35: Quick Start Guide
SSU and DPC Utilities The server software kit contains many utilities, including System Setup Utility (SSU) and the Direct Platform Control (DPC) console. The SSU can be run locally and remotely through a network or modem. The SSU provides a graphical user interface (GUI) over an extensible framework for server configuration. -
Page 36: Service Partition (Optional)
It is highly recommended that you install the service partition before installing the operating system. See the Service Partition section in the Installation Guide for the Intel Server Control for more information. This document is included in the country kit for your system.
Need help?
Do you have a question about the ISP4400 - Server Platform - 0 MB RAM and is the answer not in the manual?
Questions and answers