Intel ISP1100 Installation Manual
Scsi cable option kit for internet server
Hide thumbs
Also See for ISP1100:
- Product manual (81 pages) ,
- Quick start manual (32 pages) ,
- Installation manual (20 pages)
Advertisement
Quick Links
Advertisement

Related Manuals for Intel ISP1100


Summary of Contents for Intel ISP1100
- Page 1 SCSI Cable Option Kit Installation Guide for Intel ISP1100 Internet Server ®...
- Page 2 Intel. Intel Corporation (Intel) makes no warranty of any kind with regard to this material, including, but not limited to, the implied warranties of merchantability and fitness for a particular purpose.
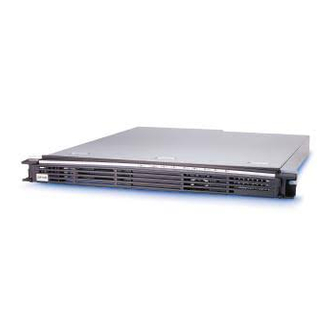
- Page 3 This document explains how to install the SCSI cable kit, which is used with third- party SCSI adapters in the Intel ISP1100 Internet Server. It assumes the system is configured for IDE and contains either a 3.5” floppy drive or a slimline CD-ROM/ floppy drive assembly.
- Page 4 Slide the cover back and out from under the edge of the server’s front panel. When the cover is free of the front panel, use the notch (B) in the cover to lift the cover off the chassis. OM09745 Intel ISP1100 Internet Server SCSI Cable Kit...
- Page 5 Remove the two screws (A) from the retention bracket (B), and remove the retention bracket. Grasp the riser card at each end (C) and gently rock and lift until the riser releases from the server board connector. OM09772 Intel ISP1100 Internet Server SCSI Cable Kit...
- Page 6 Install the SCSI Card Plug the SCSI card (A) in the left slot (B) of the riser card (C). OMO9778 Set the riser assembly aside for now. Intel ISP1100 Internet Server SCSI Cable Kit...
- Page 7 When the drive is clear of the chassis, disconnect the power (D) and data cables (E) from the back of the drive. OM09764 Intel ISP1100 Internet Server SCSI Cable Kit...
- Page 8 For each IDE hard drive: Remove the four screws (A) that attach the mounting bracket (B) to the drive. There are two screws on each side. Lift the drive from the mounting bracket. OM09765 Intel ISP1100 Internet Server SCSI Cable Kit...
- Page 9 IDE drive in the bracket. Note: Do not overtighten the screws. The bracket sides can bend inward, which can affect the alignment of the bracket tabs with the slots in the chassis. OM09766 Intel ISP1100 Internet Server SCSI Cable Kit...
- Page 10 Remove the three screws (A) that hold the drive in the chassis. Lift the back of the drive at an angle and disconnect the power (B) and data cables (C). Remove the drive from the bay and set it aside. OMO9771 Intel ISP1100 Internet Server SCSI Cable Kit...
- Page 11 • Lift the back of the drive at an angle and unlock the connector tabs (D). • Disconnect the data cable (E) and power cable (F). • Remove the drive from the bay and set it aside. OM09769A Intel ISP1100 Internet Server SCSI Cable Kit...
- Page 12 (not perpendicular) to the head of the retention bracket (B). • Gently slide the cable from under the retention bracket, being careful not to scrape it against the retention bracket. Remove the cable from the chassis. OMO9773_R Intel ISP1100 Internet Server SCSI Cable Kit...
- Page 13 • Gently slide the cable under the retention bracket, being careful not to scrape it against the retention bracket. Make sure the cable is not on top of the PEM nut (E). OMO9777_R Intel ISP1100 Internet Server SCSI Cable Kit...
- Page 14 • Make sure the SCSI cable underneath the bracket isn’t caught between the right bracket hole and the right snaptop standoff. • Press down the bracket until it snaps onto the snaptop standoffs. • Connect the power cable (D) to the drive. Intel ISP1100 Internet Server SCSI Cable Kit...
- Page 15 Repeat step 1 to install the second SCSI hard drive in the right bay. Note: Make sure the SCSI terminator (E) is seated properly between the two hard drives and is not pinched between the lower-inner screws from each drive. OMO9776 Intel ISP1100 Internet Server SCSI Cable Kit...
- Page 16 Determine which connector to use on the SCSI card. If the connector is located toward the rear of the server (A), you may have to “relax” the accordion (B). Hold the riser with the SCSI card (C) attached above the server board’s PCI connector. Intel ISP1100 Internet Server SCSI Cable Kit...
- Page 17 Connect the SCSI cable’s connector to the appropriate connector on the SCSI card. OMO9798A Intel ISP1100 Internet Server SCSI Cable Kit...
- Page 18 Fasten the retention bracket (B) to the server back panel with two screws (C). Note: If there’s slack left in the SCSI cable, fold the slack into an accordion (D). This prevents potential airflow problems. OMO9799_R Intel ISP1100 Internet Server SCSI Cable Kit...
- Page 19 Fasten the drive in the chassis with three screws (D). Note: Before you fasten the drive in the chassis, make sure the data cables are tucked smoothly under the drive and are not crimped. OMO9767A Intel ISP1100 Internet Server SCSI Cable Kit...
- Page 20 • Holding the cable in place, press the brown tab (E) back down into the connector. Note: The slimline floppy drive uses one cable for both power and data. Intel ISP1100 Internet Server SCSI Cable Kit...
- Page 21 Make sure the data cables are tucked smoothly under the drives and are not crimped. Fasten the slimline drives to chassis with three screws (F). OMO9767B Intel ISP1100 Internet Server SCSI Cable Kit...
- Page 22 Slide the cover forward until the recessed edge (A) is all the way under the edge of the front panel. Fasten the cover with a screw (B). OM09752 Intel ISP1100 Internet Server SCSI Cable Kit...
- Page 23 Intel ISP1100 Internet Server SCSI Cable Kit...
- Page 24 Document Number: A16589-001...
Need help?
Do you have a question about the ISP1100 and is the answer not in the manual?
Questions and answers