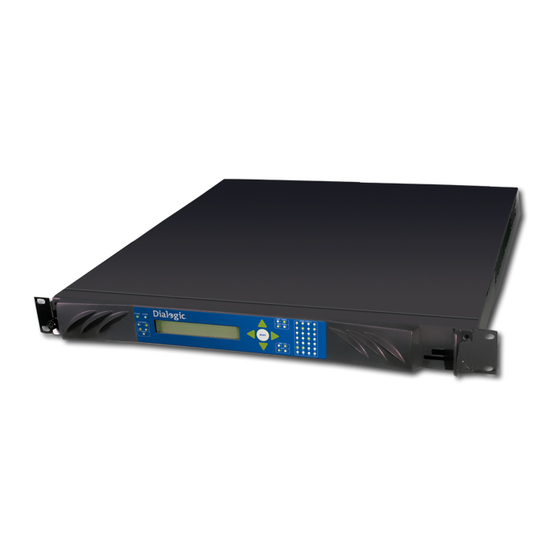
Dialogic IMG 1004 Installation And Setup Manual
Dialogic integrated media gateways installation and setup guide
Hide thumbs
Also See for IMG 1004:
- Quick start manual (10 pages) ,
- Quick start manual (10 pages) ,
- Quick start manual (8 pages)

Related Manuals for Dialogic IMG 1004


Summary of Contents for Dialogic IMG 1004
- Page 1 Dialogic IMG 1010/1004 ® Integrated Media Gateways Installation and Setup Guide Release 10.3.x / 10.5.x...
- Page 2 All contents of this document are furnished for informational use only and are subject to change without notice and do not represent a commitment on the part of Dialogic Corporation or its subsidiaries (“Dialogic”). Reasonable effort is made to ensure the accuracy of the information contained in the document.
- Page 3 Dialogic. Such permission may only be granted by Dialogic’s legal department at 9800 Cavendish Blvd., 5th Floor, Montreal, Quebec, Canada H4M 2V9. Any authorized use of Dialogic's trademarks will be subject to full respect of the trademark guidelines published by Dialogic from time to time and any use of Dialogic’s trademarks requires proper acknowledgement.
- Page 4 Dialogic's prior written approval or by causes beyond the control of Dialogic, including, but not limited to, power or air conditioning failure, acts of God, improper interface with other units, or malfunction of any equipment or software used with the Dialogic product(s).
- Page 5 When used herein, the term “IMG 1010” refers to the “Dialogic 1010 Integrated Media Gateway” product. When used herein, the term “IMG 1004” refers to the “Dialogic 1004 Integrated Media Gateway” product. When used herein, the general term “IMG” refers collectively or ...
-
Page 7: Table Of Contents
Table Of Contents IMG 1010 - Introduction ...1 Overview of Installation and Setup - IMG 1010 ...1 Items Required for Installation - IMG 1010...2 Sample Network Scenario - IMG 1010...3 Licensing - IMG 1010...4 IMG 1010 - Hardware Installation...9 Hardware Installation Task Summary - IMG 1010...9 Site Preparation - IMG 1010 ... - Page 8 Recommended Linux Configuration and OS Settings ... 145 IP Security for IMG and GCEMS... 148 Downloading System Software Using Boot File on an SD Card - IMG 1004... 151 Downloading System Software From an SD Card - IMG 1004... 154 Distributing System Software Using an SD Card - IMG 1004 ...
-
Page 9: Img 1010 - Introduction
Topic Location: IMG 1010-Installation and Setup Guide > IMG 1010-Introduction The Installation and Setup Guide will discuss the procedures for unpacking your Dialogic IMG 1010 Integrated Media Gateway and Dialogic ® Management System server from the box to the point at which you can begin to configure the IMG 1010 using the ClientView GUI. -
Page 10: Items Required For Installation - Img 1010
Topic Location: IMG 1010-Installation and Setup Guide > IMG 1010-Introduction The table below describes the items required for an IMG 1010 and GCEMS Server installation. Certain models of the GCEMS Server purchased through your Dialogic supplier have software installed, as indicated. -
Page 11: Sample Network Scenario - Img 1010
IMG 1010 - Introduction Sample Network Scenario - IMG 1010 Topic Location: IMG 1010-Installation and Setup Guide > IMG 1010-Introduction The following is an example of a basic network scenario that you can use to get started with your IMG 1010. For other options, see Network Interface Scenarios in the On-line Help. -
Page 12: Licensing - Img 1010
The IMG 1010 and various components require a license to be operated or enabled. The licenses are generated by Dialogic and are distributed with the software supplied with the IMG 1010. Each license will unlock different functionality and the licenses are sold in different increments to address different customer needs. -
Page 13: Evaluation License
Evaluation License Evaluation licenses expire after a specified number of days. If you are using an Evaluation License, the License Expiration Info field indicates the date/time that the license will expire, as shown below. If you are not using an Evaluation License, the field will say "Does not expire". - Page 14 SS7_Base The SS7 base license will need to be loaded if SS7 is going to be used. SS7_ISUP (CICS) Up to 768 Ports can be licensed on the IMG 1010. See Table Below. SS7_LINK Up to 64 links can be licensed. They are licensed in 2 link pairs. Up to 768 ports can be licensed for CAS channels.
- Page 15 The IMG 1010 supports up to 64 links. The links are licensed in 2 link increments from 2 all the way up to 64. * Using the AMR-NB resource in connection with a Dialogic® product does not grant the right to practice the AMR-NB standard. To seek a patent license agreement to practice the standard, contact the VoiceAge Corporation at http://www.voiceage.com/licensing.php.
-
Page 17: Img 1010 - Hardware Installation
IMG 1010 - Hardware Installation Hardware Installation Task Summary - IMG 1010 Topic Location: IMG 1010-Installation and Setup Guide > IMG 1010-Hardware Installation Click on links below to perform each of the following steps. 1. Prepare the site that IMG 1010 will be installed. Prepare Site 2. -
Page 18: Site Preparation - Img 1010
Site Preparation - IMG 1010 Topic Location: IMG 1010-Installation and Setup Guide > IMG 1010-Hardware Installation Ensure that the following requirements are met before you begin installation. Important: Any variances from the mutually agreed upon site preparation details (such as power cabling, network cabling, equipment room readiness) may affect installation scheduling. -
Page 19: Electrostatic Discharge Protection
Mounting The IMG 1010 can be mounted in a 19-inch rack. The mounting brackets can be mounted at either the front or the middle of the chassis. Power Connecting AC Power Connecting DC Power Electromagnetic Interference Electromagnetic Interference (EMI) is a type of radiation that can hinder your system. Keep the following in mind when selecting cables: ... -
Page 20: Unpacking - Img 1010
Unpacking - IMG 1010 Topic Location: IMG 1010-Installation and Setup Guide > IMG 1010-Hardware Installation Retain all shipping materials in case you need to either relocate or re-ship the unit in the future. Use the packing materials to return the unit to the supplier; otherwise you may be charged for any damage that may occur during shipment. -
Page 21: Rack Mounting - Img 1010
Rack Mounting - IMG 1010 Topic Location: IMG 1010-Installation and Setup Guide > IMG 1010-Hardware Installation Overview The IMG 1010 is shipped with the tray and docking station mated together for easy mounting. When mounting the chassis, follow these guidelines: Do not obstruct air flow to the front or the side vent holes towards the rear of ... -
Page 22: Required Tools And Hardware
19" Rack Mounting Procedure: 1. Remove the brackets from the front mount position. 2. Position the mounting brackets to the desired position. 3. Align the holes on the mounting bracket ears to the mounting holes on the rack. 4. Secure with screws. Required Tools and Hardware The following customer-supplied tools and hardware are needed to mount the unit. - Page 23 4. Attach 23" brackets to the Bracket Mounts using screws provided. Required Tools and Hardware 23" Bracket Kit includes 4 brackets and 2 screws. The 23" rack mounting option can be ordered directly from Dialogic. Phillips head screwdriver Next Task...
-
Page 24: Surface Mounting - Img 1010
Surface Mounting - IMG 1010 Topic Location: IMG 1010-Installation and Setup Guide > IMG 1010-Hardware Installation Mounting Guidelines When mounting the chassis, follow these guidelines: Do not obstruct air flow to the front or the side vent holes towards the rear of ... -
Page 25: Connecting Ac Power - Img 1010
Connecting AC Power - IMG 1010 Topic Location: IMG 1010-Installation and Setup Guide > IMG 1010-Hardware Installation Related Topic AC Power Information (in On-line Help) Overview The IMG 1010 supports an AC power option to support domestic and international customers. The AC power module is located at the rear of the docking station. The AC receptacle connects to an internal power supply that supplies DC voltages to the motherboard. -
Page 26: Other Considerations
Installation and Setup AC Power Module The AC power docking station provides an AC input power module with an integrated fuse, power switch, and standard three position female AC input connector. This connector allows the docking station to interface with all variations of AC outlets by simply using a standard power cable with a compatible outlet plug. -
Page 27: Power Specifications
When connecting -48 Volts to the IMG 1010 follow the table and diagram below 14 AWG Machine Tool Blue = -48 volts Wire (MTW) volt return DC Power Module Plugs Dialogic Supplied Operating Range -40 - to -60 vDC White = -48... -
Page 28: Single Power Source
Single Power Source: The DC power module shown below is located at the rear of the docking station. Internally the output of the DC power module connects to a panel-mounted connector via a cable assembly. This connector mates with a DC-to-DC 12 V DC power supply connector on the tray. DC Connections: Complete the following steps to connect a single power source to the DC power module. -
Page 29: Redundant Power Source
Redundant Power Source: A second power source can be added to the chassis for power redundancy. The secondary source serves as backup to the primary source (power supply). DC Connections Complete the following steps to connect a redundant power source to the chassis 1. -
Page 30: Connecting Dc Power To Ground
1. 14-16 AWG machine tool wire (MTW) (green/yellow) 2. # 10 solderless crimp with two-hole mounting option to connect to grounding lug (Dialogic-supplied). See Diagram below for mounting. Procedure Complete the following steps to connect the IMG 1010 chassis to earth ground. -
Page 31: Connecting Ethernet And Tdm Cables - Img 1010
Connecting Ethernet and TDM Cables - IMG 1010 Topic Location: IMG 1010-Installation and Setup Guide > IMG 1010-Hardware Installation CAUTION: Routers or switches connected to the IMG 1010 should be configured for 100Mbit and Auto-negotiation. Disabling auto-negotiation may result in packet loss. Also, broadcast propagation between ports must be enabled to allow BootP. -
Page 32: Timing - Img 1010
Installation and Setup Timing - IMG 1010 Topic Location: IMG 1010-Installation and Setup Guide > IMG 1010-Hardware Installation Timing Before connecting the IMG 1010 to a network, it must be synchronized to a T1/E1 loop timing source such as a T1 or E1 span. The IMG 1010 will allow four different loop timing clock sources to be connected to various inputs on the rear of the unit. -
Page 33: Cabling For Redundancy - Img 1010
IMG 1010 - Hardware Installation Cabling for Redundancy - IMG 1010 Topic Location: IMG 1010-Installation and Setup Guide > IMG 1010-Hardware Installation The following topics show cabling for various redundancy scenarios. Redundant Control Redundant Data Redundant Signaling Redundant SS7... -
Page 34: Redundant Control - Img 1010
Redundant Control - IMG 1010 Topic Location: IMG 1010-Installation and Setup Guide > IMG 1010-Hardware Installation The following illustration shows the cabling for redundant control for Network Management. 1. The Ctrl 0 and Ctrl1 ports are used for communication between the Linux Server (GCEMS) and the IMG 1010. -
Page 35: Redundant Data - Img 1010
Redundant Data - IMG 1010 Topic Location: IMG 1010-Installation and Setup Guide > IMG 1010-Hardware Installation The following illustration shows the cabling for redundant data. 1. The DATA0 and DATA1 ports are used for communication between the IMG 1010 and the IP network. ... -
Page 36: Redundant Signaling - Img 1010
Redundant Signaling - IMG 1010 Topic Location: IMG 1010-Installation and Setup Guide > IMG 1010-Hardware Installation The following illustration shows the cabling for redundant VoIP signaling. 1. The SIG0 and SIG1 ports are used for communication between the IMG 1010 and the IP network. -
Page 37: Redundant Ss7 Signaling - Img 1010
IMG 1010 - Hardware Installation Redundant SS7 Signaling - IMG 1010 Topic Location: IMG 1010-Installation and Setup Guide > IMG 1010-Hardware Installation The following illustration shows the cabling for redundant SS7 signaling. -
Page 39: Img 1010 - Linux Red Hat Installation
Topic Location: IMG 1010-Installation and Setup Guide > IMG1010-Linux Red Hat Installation -or- IMG 1004-Installation and Setup Guide > IMG1004-Linux Red Hat Installation Before You Begin Install Operating System Software per manufacturer's instructions. Below is a procedure on installing Red Hat Enterprise Linux. The procedure should be used as a guideline to installing the Linux OS. - Page 40 11. Root password will be configured next. Dialogic recommends that the root password be set to excel2. If support is needed then the Dialogic Support team will need this password if it is not given the default value of excel2.
- Page 41 17. Once system is updated with all packages installation of GCEMS and configuring of all Linux services needed will be performed. See either IMG 1010-Software Installation and Setup -or- IMG 1004-Software Installation and Setup (Dependent on which model being configured) for information on how to accomplish this.
-
Page 42: Dell Server Configuration Details
Topic Location: IMG 1010-Installation and Setup Guide > IMG1010-Linux Red Hat Installation - or- IMG 1004-Installation and Setup Guide > IMG1004-Linux Red Hat Installation NOTE: The Dell 860 Pentium D server in table below is to be used on configurations with 4 or less IMG Nodes. -
Page 43: Recommended Linux Configuration And Os Settings
Topic Location: IMG 1010-Installation and Setup Guide > IMG1010-Linux Red Hat Installation -or- IMG 1004-Installation and Setup Guide > IMG1004-Linux Red Hat Installation Partitioning The tables below display the partitioning configured on the Dell Servers that can be purchased as an option when purchasing the IMG. There are two tables shown below. -
Page 44: Linux Packages
Linux Packages At the very least install the packages in the table below. It is recommended that when installing Linux that the choice to select all packages be chosen. This will install all Linux Packages and will use approximately 7 Gigabytes of Hard Drive space Desktops X Windows SYSTEMS GNOME DESKTOP ENVIRONMENT KDE DESKTOP... - Page 45 Not Required The following Linux Services are not required. For superior IMG performance, it is advisable not to run them. During Linux Configuration, uncheck the corresponding boxes if they are checked. Set for all run levels (3, 4, and 5) apmd ...
-
Page 47: Img 1010 - Software Installation And Setup
Verify the latest IMG 1010 system software file has been acquired. This file is on the software supplied or can be downloaded after logging in to the Dialogic Technical Support Website. http://www.dialogic.com/support and selecting Software Downloads BBS. (You must have login access to both the support site and the BBS site in order to be able to download software) ... -
Page 48: Miscellaneous Information
Miscellaneous Information NOTE: If you purchased your server through Dialogic or IMG 1010 supplier the software should already be installed along with all services. If this is the case then setting IP addresses and retrieving the latest version of software is needed and most steps below can be avoided. -
Page 49: Configuring The Linux User - (Excelsw)
Topic Location: IMG 1010-Installation and Setup Guide > IMG 1010-Software Installation and Setup IMG 1004-Installation and Setup Guide > IMG 1004-Software Installation and Setup 1. To create a new user named excelsw follow instructions below. Go to Red Hat Applications Main Menu >> System Settings >> Users and Groups Enter root password excel2 when prompted The User Manager screen will appear. -
Page 50: Installing Gcems Software
Topic Location: IMG 1010-Installation and Setup Guide > IMG 1010-Software Installation and Setup IMG 1004-Installation and Setup Guide > IMG 1004-Software Installation and Setup Follow procedure below to install the IMG software on to the GCEMS Server. The IMG User Interfaces, ClientView, EventView, and AdminView can be installed either on the same PC or on a separate PC from which the GCEMS software is located. - Page 51 SK_LIB_DIR=/opt/cantata/IMG/GateControlEMS and LD_LIBRARY_PATH:/opt/cantata/IMG/GateControlEMS/lib (Software 10.3.3 - 10.5.0) SK_LIB_DIR=/opt/dialogic/IMG/GateControlEMS and LD_LIBRARY_PATH:/opt/dialogic/IMG/GateControlEMS/lib (Software 10.5.1 9. Use FTP to transfer your IMG license to the license folder. Login as user excelsw and put the license file <chassis serial number>-<date>.cfg into one the following directory: /opt/cantata/common/license (Software 10.3.x to 10.5.0)
-
Page 52: Gcems Installation Script
GCEMS Installation Script Topic Location: IMG 1010-Installation and Setup Guide > IMG 1010-Software Installation and Setup IMG 1004-Installation and Setup Guide > IMG 1004-Software Installation and Setup Script (Installing IMG GCEMS Software) [root@img2-dtran ftpBuilds]# ./IMG_10.3.3.229.bin Preparing to install... Extracting the JRE from the installer archive... - Page 53 ================================================================= ============== Introduction ------------ InstallAnywhere will guide you through the installation of Dialogic ClientView 10.3.3.229. It is strongly recommended that you quit all programs before continuing with this installation. Respond to each prompt to proceed to the next step in the installation. If you want to change something on a previous step, type 'back'.
-
Page 54: Installation And Setup
Installation and Setup installing the User Interfaces. For this installation to work properly, these variables must be set. These variables include the following: SK_PRODUCT - to determine which Cantata product is running SK_PRODUCT_HELP - to determine which Cantata help should be used PATH - to find the correct version of JAVA ********************************************************************** **********************************************************************... -
Page 55: Folders And Files Created During Installation
Folders and Files Created During Installation Topic Location: IMG 1010-Installation and Setup Guide > IMG 1010-Software Installation and Setup IMG 1004-Installation and Setup Guide > IMG 1004-Software Installation and Setup Directory Structure After installation of IMG and IMGUserInterface software onto the GCEMS server, the following folders are created. - Page 56 /opt/cantata (dialogic)/common directory backup During each day, files are generated in the IMG under multiple folders that show the status of the IMG. Files such as log files, stat files, and configuration change files just to name a few are stored in the backup folder. Each day at approximately 12:30 am, the backup folder directory is zipped up and sent to the zipfiles folder.
- Page 57 This folder stores the dictionary and dictionary.cantata files. These file are needed when configuring a Radius Server for use in Authentication and Accounting of Calls coming into the IMG. The dictionary.cantata file contains Dialogic-specific VSA’s for Accounting and Authentication. mrtg_bin This folder contains the perl scripts that will retrieve the data from the stats folder.
- Page 58 Installation and Setup opt/cantata (dialogic)/installs directory This folder contains a subfolder for each version of GCEMS and ClientView software you have downloaded. It also contains the following utilities that allow you to change or delete the running version of GCEMS: ChangeGCEMSVersion -->...
-
Page 59: Configure Gcems And Start Linux Services - Img 1010
Configure GCEMS and Start Linux Services - IMG 1010 Topic Location: IMG 1010-Installation and Setup Guide > IMG 1010-Software Installation and Setup Before You Begin: The IMG 1010 should be unpacked, mounted, and connected power to the GCEMS server. See the manufacturer's instructions for installation procedures. - Page 60 1. Go to one of the following directories depending on the software version being used. See Below. /opt/cantata/common/osconfig (Software 10.3.x to 10.5.0) /opt/dialogic/common/osconfig (Software 10.5.1 +) 2. Transfer the script lnimg to /home/excelsw/ftpBuilds. 3. From the /home/excelsw/ftpBuilds directory, run the lnimg script $./lnimg...
-
Page 61: Create Dhcpd.conf File
IMG 3. The following is the response after all prompts are complete: dhcpd.conf created with 1 IMG's configured... 4. The file will be created in the /opt/cantata (dialogic)/common/osconfig directory. 5. Move the file to the /etc directory (mv dhcpd.conf /etc) - Page 62 Create the ntp.conf file. 1. As a Super User Create the ntp.conf file. Go to /opt/cantata/common/osconfig (Software 10.3.x to 10.5.0) /opt/dialogic/common/osconfig (Software 10.5.1 +) 2. Run the ntp configuration script: #./xlntp 3. Enter IP Address and Subnet mask when prompted as appropriate for your configuration.
- Page 63 The file is located at: /opt/cantata/common/cron/usercron (Software 10.3.x to 10.5.0) /opt/dialogic/common/cron/usercron (Software 10.5.1 This crontab runs automatically when the GCEMS is started, and stopped when the GCEMS is stopped. To stop a service, comment it out or delete it from the file and...
-
Page 64: Downloading System Software - Img 1010
Topic Location: IMG 1010-Installation and Setup Guide > IMG 1010-Software Installation and Setup IMG 1004-Installation and Setup Guide > IMG 1004-Software Installation and Setup Procedure: 1. Once all services are running and the IMG 1010 software build is available and installed on GCEMS server, power on the unit by toggling the power switch on the rear Power Module to 1(ON). - Page 65 Diagram The following illustration shows the transfer of IMG 1010 System Software using FTP from an FTP server to each IMG 1010 with a local BootP Server. Next Task Starting GateControl EMS...
-
Page 66: Related Topics
Topic Location: IMG 1010-Installation and Setup Guide > IMG 1010-Software Installation and Setup -or- IMG 1004-Installation and Setup Guide > IMG 1004-Software Installation and Setup Overview: The procedure below will explain how to start the GCEMS application. At this point, the files IMG_10.5.x.xxx.bin and IMGUserInterface_10.5.x.xxx.bin files have been... - Page 67 2. If however the GCEMS had already been controlling the IMG(s) there will be a system.cfg file located in /opt/cantata/common/config (Software 10.3.x - 10.5.0) /opt/dialogic/common/config (Software 10.5.1 and the start script will ask "Would you like to begin a new configuration?" See screen capture below.
- Page 68 2. To start the GCEMS processes through Telnet or Terminal, go to: /opt/cantata/IMG/GateControlEMS/bin (Software 10.3.3 to 10.5.0) /opt/dialogic/IMG/GateControlEMS/bin (Software 10.5.1 folder. In each you can find the StartGCEMS file. Execute the following command. $ ./StartGCEMS 3. At this point GCEMS will begin the starting process. All the screen captures above apply when starting GCEMS through telnet or terminal program.
-
Page 69: Starting Clientview
Topic Location: IMG 1010-Installation and Setup Guide > IMG 1010-Software Installation and Setup IMG 1004-Installation and Setup Guide > IMG 1004-Software Installation and Setup NOTE: EventView will start automatically when you start ClientView. To start ClientView and connect to the IMG and perform the following steps: 1. - Page 70 Installation and Setup Restarting EventView If EventView is closed and you would like to restart it, you can do so from the menu-bar in ClientView select Tools > Launch EventView.
-
Page 71: Configuring Remote Desktop
IMG 1004-Installation and Setup Guide > IMG 1004-Software Installation and Setup Dialogic Technical Support uses VNC to allow its support engineers the ability to work on customer issues. Not being able to access ClientView to see what the customer is seeing can limit the ability of Dialogic Technical Support to provide input or even diagnose issues. - Page 72 4. To start VNC server, enter the following command below. If this is the first time you are starting VNC you will be asked for a password. Enter excelsw for password. Below is the command to start VNC server $ vncserver :1 5.
-
Page 73: Troubleshooting
Troubleshooting: Use this troubleshooting section to try and diagnose any problems that could arise Scenario 1: PROBLEM: 1. When Connecting to VNC server through VNC Viewer the following screen appears: SOLUTION: This is an indication that the VNC Server was initially started as a root or super user and you are trying to connect using the excelsw password. - Page 74 Scenario 2: PROBLEM: 2. Cannot logon to VNC server through VNC Viewer. Get unable to connect to host error message SOLUTION:1 A. Is vncserver :1 running? i.Logon to GCEMS and as an excelsw user enter the following command and verify vncserver is running $ps -ef|grep vnc ii.If vncserver is not running, enter following command to start vncserver $vncserver :1...
-
Page 75: Miscellaneous Information
Verify that runlevels 3 4 and 5 are all on by entering the following command $/sbin/chkconfig vncserver --list vncserver 0:off vncserver will now start on a reboot of GCEMS Miscellaneous Information Shared Connection With RealVNC, two people can connect to the same GCEMS and both can have monitor/configure access. - Page 76 Helpful Commands: The following commands can be accomplished as an excelsw user Command: $ vncserver :1 $ vncserver -kill :1 $ ps -ef|grep vnc $ /sbin/service vncserver status $ /sbin/chkconfig vncserver --list The following commands can be accomplished as a root user Command: # /sbin/service vncserver restart # /sbin/service vncserver stop...
-
Page 77: Selecting/De-Selecting Linux Services
Topic Location: IMG 1010-Installation and Setup Guide > IMG 1010-Software Installation and Setup IMG 1004-Installation and Setup Guide > IMG 1004-Software Installation and Setup 1. A service such as dhcpd can be started or stopped using the Service Configuration screen. To stop or start a service, login as Super User. -
Page 78: Installing Clientview For Windows
Topic Location: IMG 1010-Installation and Setup Guide > IMG 1010-Software Installation and Setup IMG 1004-Installation and Setup Guide > IMG 1004-Software Installation and Setup Note on Re-installation If you are re-installing ClientView, make sure that you close ClientView and stop any IMG processes that are running. -
Page 79: Setting Host Flags
Topic Location: IMG 1010-Installation and Setup Guide > IMG 1010-Software Installation and Setup IMG 1004-Installation and Setup Guide > IMG 1004-Software Installation and Setup The following diagram shows the Host flag settings in the dhcpd.conf file located in /etc and the bootup.cfg located on the SD card. - Page 80 GSM - FR Dynamic G.726-32/G.721 Static G.726-32/G.721 Dynamic Calculating the BootFlag: The boot flag is calculated by adding values above based on desired system attributes. If system is used for T1 only --> Add 0 If system is used for E1 only --> Add 2 Boot If booting from an FTP Server -->...
-
Page 81: Sample Dhcpd.conf File - Img 1010
Modify the lines in bold according to your particular network settings. ################################################################# # File: dhcpd.conf # Generated by: xldhcp Revision: 1.2 # Dialogic Corporation, Inc. 05/16/06_16:21:23 # Cantata Support @ 508-862-3366 techsupport@Cantata.com ################################################################# ddns-update-style ad-hoc; # which logfile group... log to /var/log/messages LogFile = messages;... -
Page 82: Assigning Clientview Users
Either double click on the AdminView icon on Linux Server desktop or if using a terminal go to one of the following directories. opt/cantata/IMG/GateControlEMS/bin (Software 10.3.3 to 10.5.0) opt/dialogic/IMG/GateControlEMS/bin (Software 10.5.1 +) b. Execute the following command to start AdminView from Terminal Window $./AdminView c. -
Page 83: Changing Or Deleting Gcems And User Interface
Topic Location: IMG 1010-Installation and Setup Guide > IMG 1010-Software Installation and Setup IMG 1004-Installation and Setup Guide > IMG 1004-Software Installation and Setup Changing GCEMS and User Interface Version To change to a different version of GCEMS and ClientView/EventView, use the script... -
Page 84: Ip Security For Img And Gcems
Topic Location: IMG 1010-Installation and Setup Guide > IMG 1010-Software Installation and Setup IMG 1004-Installation and Setup Guide > IMG 1004-Software Installation and Setup To protested against denial of service attacks, the GCEMS (Linux server) and IMG Control IP can be placed behind a firewall for security. Should remote access to the GCEMS server be needed, a NAT, VPN, or other secure solution can be used for access to the server from the public internet. - Page 85 Connection from Remote Clientview to GCEMS GUI for Configuration & Provisioning Purpose Internal SS7 communication between IMGs Connection from Local support personnel Dialogic technical support Local support personnel Dialogic technical support Local support personnel Remote ClientView...
-
Page 87: Downloading System Software Using Boot File On An Sd Card - Img 1010
IMG 1010 - SD Card Downloading System Software Using Boot File on an SD Card - IMG 1010 Topic Location: IMG 1010-Installation and Setup Guide > IMG 1010-SD Card A BootP server is used to configure the following: IMG CTRL IP address ... - Page 88 STEPS: 1. Insert the SD Card into an SD Writer connected to a PC. 2. On the SD Card is a file named bootup.cfg. Open this file. 3. Below is what the SD Card bootup.cfg information should look like. ################################################# ##### ################################################# #####...
- Page 89 4. Any line beginning with the # symbol is a comment and is not processed by the IMG. Below is the information the user will edit for use in their network yiaddr --> IP Address of the IMG being loaded ...
-
Page 90: Downloading Img System Software From An Sd Card - Img 1010
Downloading IMG System Software From an SD Card - IMG 1010 Topic Location: IMG 1010-Installation and Setup Guide > IMG 1010-SD Card Overview of SD Card If the IMG 1010 does not have access to an FTP server, then the IMG 1010 System Software and IP information can be loaded through the use of an SD Card. - Page 91 4. Below is what the SD Card bootup.cfg information will look like. ################################################# ################################################# # INSTRUCTIONS #1. Edit values as required, as described below. # Change IP Address, Subnet Mask, and Gateway IP Address to the actual #values for the IMG.
- Page 92 yiaddr --> IP Address of the IMG 1010 being loaded subnetmask --> Subnet mask of the IMG 1010 being loaded giaddr --> IP Address of the Gateway connected to the IMG 1010 file --> System Software Filename. If loading software from SD Card then this is the filename of the software being loaded.
-
Page 93: Distributing System Software Using An Sd Card - Img 1010
IMG 1010 - SD Card Distributing System Software Using an SD Card - IMG 1010 Topic Location: IMG 1010-Installation and Setup Guide > IMG 1010-SD Card If you have remote IMG 1010's that cannot obtain a System Software upgrade using FTP or BootP, you can transfer the file to multiple SD cards and distribute the SD cards to each remote site. -
Page 94: Default Bootup.cfg Configuration File - Img 1010
Installation and Setup Default bootup.cfg Configuration File - IMG 1010 Topic Location: IMG 1010-Installation and Setup Guide > IMG 1010-SD Card # INSTRUCTIONS #1. Edit values as required, as described below. # Change IP Address, Subnet Mask, and Gateway IP Address to the actual values for the IMG 1010. -
Page 95: Sd Card Remote Provisioning - Img 1010
SD Card Remote Provisioning - IMG 1010 Topic Location: IMG 1010-Installation and Setup Guide > IMG 1010-SD Card Overview This feature provides a means for installing new versions of system software to IMG 1010 located at remote sites with no BOOTP server, by allowing remote access to the SD card on the IMG 1010. - Page 96 3. If someone has FTP'd to the IMG 1010 the "FTP Connection Status" field and the "Remote IP Address" field will update. See screen capture below. Notice the Remote IP address field. This is the IP address of the PC that the user is FTP'ing from.
- Page 97 5. Modify the "file=" line on the bootup.cfg file just transferred. Verify the changes to this file are correct. Below is the line in the bootup.cfg file that will need to be edited. # System Software Filename file=img1010_ver1050137_id0101.bin to new software build. Ex: ver1050140) 6.
-
Page 99: Img 1004 - Introduction
IMG 1004 - Introduction Overview of Installation and Setup - IMG 1004 Topic Location: IMG 1004-Installation and Setup Guide > IMG 1004-Introduction This Installation and Setup Guide will discuss the procedures for unpacking your Dialogic IMG 1004 Integrated Media Gateway and Dialogic ®... -
Page 100: Items Required For Installation - Img 1004
Items Required for Installation - IMG 1004 Topic Location: IMG 1004-Installation and Setup Guide > IMG 1004-Introduction This topic describes the items required for the IMG 1004 and GCEMS Server installation. Certain models of the GCEMS Server purchased through your IMG 1004 supplier have software installed as indicated below. -
Page 101: Sample Network Scenario - Img 1004
IMG 1004 - Introduction Sample Network Scenario - IMG 1004 Topic Location: IMG 1004-Installation and Setup Guide > IMG 1004-Introduction The following is an example of a basic network scenario that you can use to get started with your IMG 1004. -
Page 102: File Format
3. Right-click IMG License Info and select Commit. 4. The License Info pane appears. Click the Download Node License button. 5. The license will now get sent to the IMG 1004. The license Info pane now displays the new license specifications. - Page 103 Node license will allow GCEMS to communicate with the IMG 1004 ® TDM_Port There are a total of 128 TDM ports on the IMG 1004. (4 E1 and 4 T1) Table 1 below displays the increments that the licenses are created. SS7_Base The SS7 base license will need to be loaded if SS7 is going to be used.
- Page 104 1024 port increments. SS7 Links (Software 10.5.1 + only) The IMG 1004 supports up to 4 links. The links are licensed in 2 link increments. * Using the AMR-NB resource in connection with a Dialogic the right to practice the AMR-NB standard. To seek a patent license agreement to practice the standard, contact the VoiceAge Corporation at http://www.voiceage.com/licensing.php.
-
Page 105: Img 1004 - Hardware Installation
IMG 1004 - Site Preparation 2. Unpack IMG 1004 from shipping box. IMG 1004-Unpacking 3. Mount the IMG 1004 in one of the two scenarios listed below. IMG 1004 - Rack Mounting IMG 1004 - Surface Mounting 4. Connect Power IMG 1004 - Connecting AC Power 5. -
Page 106: Site Preparation - Img 1004
There are no spacing requirements. Mounting The IMG 1004 can be mounted in a 19-inch rack. The mounting brackets can be mounted at either the front or the rear of the IMG 1004 chassis. If mounting multiple IMG 1004's in a rack, ensure that ... - Page 107 Electromagnetic Interference (EMI) is a type of radiation that can hinder your system. Keep the following in mind when selecting cables: Dialogic requires that all cabling with the exception of the power cord be shielded. Shielded cable will prevent outside electrical interference and will drain off any induced current.
-
Page 108: Unpacking - Img 1004
Procedure The IMG 1004 and supplied items are shipped in a single container. Carefully unpack the unit as described below. 1. Open the container and remove the packing list. -
Page 109: Rack Mounting The Img 1004
Procedure 1. Position the mounting brackets on the side of the IMG 1004 in either the front or rear of chassis and secure with supplied screws. 2. Align the holes on the mounting bracket ears to the mounting holes on the rack. -
Page 110: Surface Mounting - Img 1004
Surface Mounting - IMG 1004 Topic Location: IMG 1004-Installation and Setup Guide > IMG 1004-Hardware Installation Mounting Guidelines When mounting the chassis, follow these guidelines: Do not obstruct air flow to the front or rear vent holes on the unit. -
Page 111: Ac Power Specifications
AC Power Specifications Topic Location: Hardware Reference > Power The AC input power must conform to the following specifications: IMG 1004 120-240 V AC, 60-50 Hz, 1A-.5A Power Range 90 to 240 V AC... -
Page 112: Connecting Ac Power - Img 1004
6 wire cable assembly. Warnings/Cautions Ensure the AC power module switch is set to O (Off) prior to connecting the IMG 1004 to the AC power source. Procedure Complete the following steps to connect AC power to the chassis. -
Page 113: Connecting Ethernet And Tdm Cables - Img 1004
Data (RTP for SIP and H.323) The IMG 1004 supports a variety of scenarios for designing your IP network. In the example below the Network Management is connected to the CTRL port and the media stream will interface with the DATA Port. The connections can be on the same subnet or separated into two separate subnets. -
Page 114: Timing - Img 1004
Bearer Span Ports 0 and 1. For Timing pinouts see IMG 1004-RJ48 Connector Pinouts NOTE: The IMG 1004 cannot time off an atomic clock or similar. The TDM inputs on the rear of the unit will only accept a loop timing clock source... -
Page 115: Img 1004 - Software Installation And Setup
Installation and Setup Overview on Downloading Software to IMG 1004 The IMG 1004 can get its software load in one of a three different ways. 1. Software is loaded through use of an FTP server. The Linux Server that is setup for use with GCEMS can also be setup to use as an FTP server. -
Page 116: Before You Begin
IMG 1004 chassis. Verify the latest IMG 1004 system software file has been acquired. This file is on the software discs supplied or can be downloaded after logging in to the Dialogic Technical Support website. - Page 117 6. Once GCEMS is started the ClientView will need to be started. See ClientView on how to start the ClientView application. 7. Once ClientView is started and you can configure the IMG 1004 the next step is to configure the GCEMS so that you can get remote access. See Remote Desktop for information on configuring and running RealVNC remote access.
-
Page 118: Summary Of Software Installation And Setup Tasks - Img 1004
Summary of Software Installation and Setup Tasks - IMG 1004 Topic Location: IMG1004-Installation and Setup Guide > IMG 1004-Software Installation and Setup 1. Install Linux on the GateControl EMS Server 2. Configure System Services 3. Install Linux Patches (if required) 4. -
Page 119: Configuring The Linux User - (Excelsw)
Topic Location: IMG 1010-Installation and Setup Guide > IMG 1010-Software Installation and Setup IMG 1004-Installation and Setup Guide > IMG 1004-Software Installation and Setup 1. To create a new user named excelsw follow instructions below. a. Go to Red Hat Applications Main Menu >> System Settings >> Users and Groups b. -
Page 120: Installing Gcems Software
Topic Location: IMG 1010-Installation and Setup Guide > IMG 1010-Software Installation and Setup IMG 1004-Installation and Setup Guide > IMG 1004-Software Installation and Setup Follow procedure below to install the IMG software on to the GCEMS Server. The IMG User Interfaces, ClientView, EventView, and AdminView can be installed either on the same PC or on a separate PC from which the GCEMS software is located. - Page 121 SK_LIB_DIR=/opt/cantata/IMG/GateControlEMS and LD_LIBRARY_PATH:/opt/cantata/IMG/GateControlEMS/lib (Software 10.3.3 - 10.5.0) SK_LIB_DIR=/opt/dialogic/IMG/GateControlEMS and LD_LIBRARY_PATH:/opt/dialogic/IMG/GateControlEMS/lib (Software 10.5.1 9. Use FTP to transfer your IMG license to the license folder. Login as user excelsw and put the license file <chassis serial number>-<date>.cfg into one the following directory: /opt/cantata/common/license (Software 10.3.x to 10.5.0)
-
Page 122: Gcems Installation Script
GCEMS Installation Script Topic Location: IMG 1010-Installation and Setup Guide > IMG 1010-Software Installation and Setup IMG 1004-Installation and Setup Guide > IMG 1004-Software Installation and Setup Script (Installing IMG GCEMS Software) [root@img2-dtran ftpBuilds]# ./IMG_10.3.3.229.bin Preparing to install... Extracting the JRE from the installer archive... - Page 123 ================================================================= ============== Introduction ------------ InstallAnywhere will guide you through the installation of Dialogic ClientView 10.3.3.229. It is strongly recommended that you quit all programs before continuing with this installation. Respond to each prompt to proceed to the next step in the installation. If you want to change something on a previous step, type 'back'.
- Page 124 Installation and Setup SK_PRODUCT_HELP - to determine which Cantata help should be used PATH - to find the correct version of JAVA ********************************************************************** ********************************************************************** To properly run this product, you must LOG OUT AND BACK IN to set up your environment. ********************************************************************** ********************************************************************** Press "Enter"...
-
Page 125: Directory Structure
Folders and Files Created During Installation Topic Location: IMG 1010-Installation and Setup Guide > IMG 1010-Software Installation and Setup IMG 1004-Installation and Setup Guide > IMG 1004-Software Installation and Setup Directory Structure After installation of IMG and IMGUserInterface software onto the GCEMS server, the following folders are created. - Page 126 /opt/cantata (dialogic)/common directory backup During each day, files are generated in the IMG under multiple folders that show the status of the IMG. Files such as log files, stat files, and configuration change files just to name a few are stored in the backup folder.
- Page 127 This folder stores the dictionary and dictionary.cantata files. These file are needed when configuring a Radius Server for use in Authentication and Accounting of Calls coming into the IMG. The dictionary.cantata file contains Dialogic-specific VSA’s for Accounting and Authentication. mrtg_bin This folder contains the perl scripts that will retrieve the data from the stats folder.
-
Page 128: Configure Gcems And Start Linux Services - Img 1004
IMG 1004-Installation and Setup Guide > IMG 1004-Software Installation and Setup Before You Begin: The IMG 1004 should be unpacked, mounted, and connected power to the GCEMS server. See the manufacturer's instructions for installation procedures. The GateControl EMS software must be installed. See ... - Page 129 1. Go to one of the following directories depending on the software version being used. See Below. /opt/cantata/common/osconfig (Software 10.3.x to 10.5.0) /opt/dialogic/common/osconfig (Software 10.5.1 +) 2. Transfer the script lnimg to /home/excelsw/ftpBuilds. 3. From the /home/excelsw/ftpBuilds directory, run the lnimg script $./lnimg...
- Page 130 IMG 3. The following is the response after all prompts are complete: dhcpd.conf created with 1 IMG's configured... 4. The file will be created in the /opt/cantata (dialogic)/common/osconfig directory. 5. Move the file to the /etc directory (mv dhcpd.conf /etc)
- Page 131 #/sbin/chkconfig ntp --list (Verify that runlevels 3,4, and 5 are all on.) 5. Once these services are running and the IMG software build is available the software can be downloaded. See IMG 1004-Downloading System Software (Start the nfs service) (Configure nfs service to restart after a reboot of GCEMS)
- Page 132 /opt/cantata/common/cron/usercron (Software 10.3.x to 10.5.0) /opt/dialogic/common/cron/usercron (Software 10.5.1 This crontab runs automatically when the GCEMS is started, and stopped when the GCEMS is stopped. To stop a service, comment it out or delete it from the file and then start the GCEMS...
-
Page 133: Img 1004 - Downloading System Software - Img1004
Status Status Software Complete 3. If the above steps do not happen and the IMG 1004 will not load software see the Troubleshooting section below. Troubleshooting If the software load does not transfer to the IMG 1004, check the following: ... - Page 134 Installation and Setup Diagram The following illustration shows the transfer of IMG 1004 System Software using FTP from an FTP server to each IMG with a local BootP Server. Next Task: Starting GateControl EMS...
-
Page 135: Starting Gatecontrol Ems
IMG 1010-Installation and Setup Guide > IMG 1010-Software Installation and Setup -or- IMG 1004-Installation and Setup Guide > IMG 1004-Software Installation and Setup Overview: The procedure below will explain how to start the GCEMS application. At this point, the files IMG_10.5.x.xxx.bin and IMGUserInterface_10.5.x.xxx.bin files have been transferred to the... - Page 136 2. If however the GCEMS had already been controlling the IMG(s) there will be a system.cfg file located in /opt/cantata/common/config (Software 10.3.x - 10.5.0) /opt/dialogic/common/config (Software 10.5.1 and the start script will ask "Would you like to begin a new configuration?" See screen capture below.
- Page 137 2. To start the GCEMS processes through Telnet or Terminal, go to: /opt/cantata/IMG/GateControlEMS/bin (Software 10.3.3 to 10.5.0) /opt/dialogic/IMG/GateControlEMS/bin (Software 10.5.1 folder. In each you can find the StartGCEMS file. Execute the following command. $ ./StartGCEMS 3. At this point GCEMS will begin the starting process. All the screen captures above apply when starting GCEMS through telnet or terminal program.
-
Page 138: Starting Clientview
Topic Location: IMG 1010-Installation and Setup Guide > IMG 1010-Software Installation and Setup IMG 1004-Installation and Setup Guide > IMG 1004-Software Installation and Setup NOTE: EventView will start automatically when you start ClientView. To start ClientView and connect to the IMG and perform the following steps: 1. - Page 139 5. You are now connected to the GCEMS Server and are ready to use ClientView. To access the On-line Help for detailed configuration information go to the Help Menu within ClientView and select Open Help. Restarting EventView If EventView is closed and you would like to restart it, you can do so from the menu-bar in ClientView select Tools >...
-
Page 140: Configuring Remote Desktop
For more information on VNC, see Linux (VNC server) If the GCEMS server has been purchased from Dialogic, you can allow remote access to your GateControl EMS Server by performing the following procedure. If you have installed Linux on your own server, then install VNC and perform this procedure. - Page 141 Loading/Running VNC on PC running Windows® Operating System The VNC Client is installed on a separate PC. Below is how to install on a PC running Windows operating system 1. Download a copy of the VNC client viewer to your PC from the site: http://www.realvnc.com/download.html 2.
- Page 142 Troubleshooting: Use this troubleshooting section to try and diagnose any problems that could arise Scenario 1: PROBLEM: 1. When Connecting to VNC server through VNC Viewer the following screen appears: SOLUTION: This is an indication that the VNC Server was initially started as a root or super user and you are trying to connect using the excelsw password.
- Page 143 Scenario 2: PROBLEM: 2. Cannot logon to VNC server through VNC Viewer. Get unable to connect to host error message SOLUTION:1 A. Is vncserver :1 running? i. Logon to GCEMS and as an excelsw user enter the following command and verify vncserver is running $ps -ef|grep vnc ii.
- Page 144 Miscellaneous Information Shared Connection With RealVNC, two people can connect to the same GCEMS and both can have monitor/configure access. This gives the support personnel the ability to configure a system while the customer watches on their PC. To be able to accomplish this both users must enable this option on the VNC Viewer application.
-
Page 145: Selecting/De-Selecting Linux Services
Topic Location: IMG 1010-Installation and Setup Guide > IMG 1010-Software Installation and Setup IMG 1004-Installation and Setup Guide > IMG 1004-Software Installation and Setup 1. A service such as dhcpd can be started or stopped using the Service Configuration screen. To stop or start a service, login as Super User. -
Page 146: Installing Clientview For Windows
Topic Location: IMG 1010-Installation and Setup Guide > IMG 1010-Software Installation and Setup IMG 1004-Installation and Setup Guide > IMG 1004-Software Installation and Setup Note on Re-installation If you are re-installing ClientView, make sure that you close ClientView and stop any IMG processes that are running. -
Page 147: Setting Host Flags
Topic Location: IMG 1010-Installation and Setup Guide > IMG 1010-Software Installation and Setup IMG 1004-Installation and Setup Guide > IMG 1004-Software Installation and Setup The following diagram shows the Host flag settings in the dhcpd.conf file located in /etc and the bootup.cfg located on the SD card. - Page 148 Installation and Setup Calculating the BootFlag: The boot flag is calculated by adding values above based on desired system attributes. If system is used for T1 only --> Add 0 If system is used for E1 only --> Add 2 Boot If booting from an FTP Server -->...
-
Page 149: Sample Dhcpd.conf File - Img 1004
Sample dhcpd.conf File - IMG 1004 Topic Location: IMG1004-Installation and Setup Guide > IMG 1004-Software Installation and Setup The following is a sample dhcpd.conf file. If you do not have access to the xldhcp script, you must modify this file manually. Modify the lines in bold according to your particular network settings. -
Page 150: Assigning Clientview Users
Either double click on the AdminView icon on Linux Server desktop or if using a terminal go to one of the following directories. opt/cantata/IMG/GateControlEMS/bin (Software 10.3.3 to 10.5.0) opt/dialogic/IMG/GateControlEMS/bin (Software 10.5.1 +) b. Execute the following command to start AdminView from Terminal Window $./AdminView Login as an Administrator by using the UserID and Password shown below. -
Page 151: More Information
IMG 1004 - Software Installation and Setup Help For a list of commands, type help More Information For more detailed information on Administering User Privileges, see Administering User Privileges in the On-line Help. -
Page 152: Changing Or Deleting Gcems And User Interface
Topic Location: IMG 1010-Installation and Setup Guide > IMG 1010-Software Installation and Setup IMG 1004-Installation and Setup Guide > IMG 1004-Software Installation and Setup Changing GCEMS and User Interface Version To change to a different version of GCEMS and ClientView/EventView, use the script... -
Page 153: Recommended Linux Configuration And Os Settings
Topic Location: IMG 1010-Installation and Setup Guide > IMG1010-Linux Red Hat Installation -or- IMG 1004-Installation and Setup Guide > IMG1004-Linux Red Hat Installation Partitioning The tables below display the partitioning configured on the Dell Servers that can be purchased as an option when purchasing the IMG. There are two tables shown below. The first is for customers using Linux Red Hat Enterprise 3.0 or 4.0 The second table is for customers using... - Page 154 Linux Packages At the very least install the packages in the table below. It is recommended that when installing Linux that the choice to select all packages be chosen. This will install all Linux Packages and will use approximately 7 Gigabytes of Hard Drive space Desktops X Windows SYSTEMS GNOME DESKTOP ENVIRONMENT...
- Page 155 Not Required The following Linux Services are not required. For superior IMG performance, it is advisable not to run them. During Linux Configuration, uncheck the corresponding boxes if they are checked. Set for all run levels (3, 4, and 5) apmd ...
-
Page 156: Ip Security For Img And Gcems
Topic Location: IMG 1010-Installation and Setup Guide > IMG 1010-Software Installation and Setup IMG 1004-Installation and Setup Guide > IMG 1004-Software Installation and Setup To protested against denial of service attacks, the GCEMS (Linux server) and IMG Control IP can be placed behind a firewall for security. Should remote access to the GCEMS server be needed, a NAT, VPN, or other secure solution can be used for access to the server from the public internet. - Page 157 Mount uses the port returned in the PortMap response NFS uses port 2049 Purpose Connection from Remote access to Local support GCEMS server personnel Dialogic technical support Remote access to Local support GCEMS server personnel Dialogic technical ...
-
Page 159: Downloading System Software Using Boot File On An Sd Card - Img 1004
If a BootP server is not available but a remote FTP Server is available, the SD card can be used to configure the boot parameters so the IMG 1004 can retrieve the system software from the remote FTP Server. See Diagram Below. - Page 160 Steps 1. Insert the SD Card into an SD Writer connected to a PC. 2. On the SD Card is a file named bootup.cfg. Open this file. 3. Below is what the SD Card bootup.cfg information should look like. ################################################# ################################################# # INSTRUCTIONS #1.
- Page 161 4. Any line beginning with the # symbol is a comment and is not processed by the IMG 1004. Below is the information the user will edit for use in its network yiaddr --> IP Address of the IMG 1004 being loaded ...
-
Page 162: Downloading System Software From An Sd Card - Img 1004
Topic Location: IMG 1004-Installation and Setup Guide > IMG 1004-SD Card If the IMG 1004 does not have access to an FTP server, then the IMG 1004 System Software and IP information can be loaded through the use of an SD Card. The SD Card is a small memory card much like the memory cards used in digital cameras and other devices. - Page 163 4. Below is what the SD Card bootup.cfg information will look like. ################################################# ################################################# # INSTRUCTIONS #1. Edit values as required, as described below. # Change IP Address, Subnet Mask, and Gateway IP Address to the actual #values for the IMG.
- Page 164 10. Save the bootup.cfg file. 11. Remove the SD card from the SD Writer. 12. Insert the SD card into the SD slot on the Front Panel of the IMG 1004. 13. Power-up the IMG 1004. 14. The IMG 1004 will go through a diagnostic check and then load software. See Front Panel Status LEDs 1004 for more information on the boot process.
-
Page 165: Distributing System Software Using An Sd Card - Img 1004
Topic Location: IMG 1004-Installation and Setup Guide > IMG 1004-SD Card If you have remote IMG 1004's that cannot obtain a System Software upgrade using FTP or BootP, you can transfer the file to multiple SD cards and distribute the SD cards to each remote site. -
Page 166: Default Bootup.cfg Configuration File - Img 1004
Default bootup.cfg Configuration File - IMG 1004 Topic Location: IMG 1004-Installation and Setup Guide > IMG 1004-SD Card # INSTRUCTIONS #1. Edit values as required, as described below. # Change IP Address, Subnet Mask, and Gateway IP Address to the actual values for the IMG 1004. -
Page 167: Sd Card Remote Provisioning - Img 1004
SD Card. A new feature which has been implemented in software build 10.5.0 provisions the IMG 1004 as an FTP server instead of just an FTP client. This will give the user the ability to transfer files to and from the SD Card using the FTP utility. The FTP server functionality is disabled by default and would need to be enabled through ClientView in order for the remote provisioning to work. - Page 168 Notice the Remote IP address field. This is the IP address of the PC that the user is FTP'ing from. 4. At this point, files can be FTP'd to and from the IMG 1004. Below is an example of using FTP to change the version of software loaded on the...
- Page 169 SD card. This can be accomplished using the rename command in ftp. See Below ftp> rename bootup.cfg bootup_old.cfg 6. Transfer the new bootup.cfg file to the IMG 1004. Transfer this file as Ascii text. ftp> ascii (Set to transfer an ascii text file) ftp>...
Need help?
Do you have a question about the IMG 1004 and is the answer not in the manual?
Questions and answers