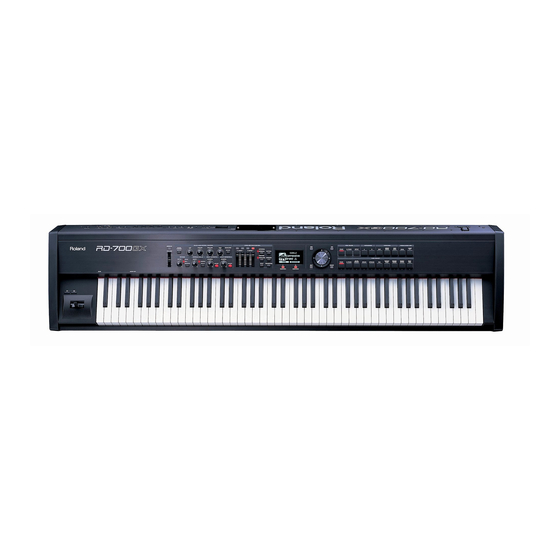
Roland RD-700GX Owner's Manual
Roland rd-700gx: user guide
Hide thumbs
Also See for RD-700GX:
- Midi implementation manual (15 pages) ,
- Owner's manual (6 pages) ,
- Turbostart (2 pages)
Table of Contents
Advertisement
Quick Links
Advertisement
Table of Contents

Related Manuals for Roland RD-700GX


Summary of Contents for Roland RD-700GX
-
Page 3: Important Safety Instructions
The manual should be saved and kept on hand as a convenient reference. Copyright © 2008 ROLAND CORPORATION All rights reserved. No part of this publication may be reproduced in any form without the written permission of ROLAND CORPORATION. -
Page 4: Using The Unit Safely
Connect mains plug of this model to a mains socket When using the unit with a stand recommended by outlet with a safety grounding connection. Roland, the stand must be carefully placed so it is level and sure to remain stable. If not using a .................. - Page 5 USING THE UNIT SAFELY Do not insert foreign objects Do not use a CD-ROM in an audio CD player or DVD player Never allow foreign objects (flammable objects, coins, wires, etc.) to enter this device. If you attempt to play back a CD-ROM in a conventional This can cause short circuits or other malfunctions.
- Page 6 ......................101c If there is a possibility of lightning strike, This (RD-700GX) for use only with Roland stand KS- disconnect the power cord from the AC outlet 12 or KS-18Z. Use with other stand is capable of resulting in instability causing possible injury.
-
Page 7: Important Notes
Important Notes Power Supply Care 401a • Do not connect this device to the same electrical outlet as • For everyday cleaning wipe the unit with a soft, dry cloth or an inverter-controlled device such as a refrigerator, one that has been slightly dampened with water. To remove microwave oven, or air conditioner, or a device that stubborn dirt, use a cloth impregnated with a mild, non- contains an electric motor. - Page 8 • Do not touch or scratch the recording surface of a CD. Doing so may render the data unreadable. If a CD * GS ( ) is a registered trademark of Roland becomes soiled, clean it using a commercially available CD cleaner.
- Page 9 Here’s what’s amazing about the The RD-700GX shows its power in live performance The RD-700GX features the PHA II ivory-feel keyboard. Its ability to absorb moisture means that your fingers will be less likely to slip during your performance, reducing the possibility of accidental notes.
- Page 10 You can also install separately sold expansion boards to widen your selection of sounds. Since the RD-700GX lets you simultaneously use up to three MIDI OUT ports, you can use it as a master keyboard, taking advantage of its sliders or connected pedals.
-
Page 11: Table Of Contents
Rear Panel ...........................20 Getting Ready......................21 Placing the RD-700GX on a Stand.....................21 Connecting the Power Cord......................22 Connecting the External Equipment to RD-700GX ................23 Connecting Pedals ........................24 Turning the Power On and Off ......................25 Turning On the Power......................25 Turning Off the Power......................26 Adjusting the Volume ........................26... - Page 12 Selecting the Audio File Set ....................73 Changing the Audio File Settings ....................74 Performing with Audio Files that are Built Into the RD-700GX ............75 Adjusting the Volume of the Audio Key ..................76 Making Detailed Settings for the ONE TOUCH Tones ..........77 Making Detailed Settings for the Piano Tones (Piano Designer) .............77...
- Page 13 Changing the Sound’s Response to Strong Playing (Dynamics)............79 Changing the Sound’s Response to Soft Playing (Sound Lift) ............79 Changing the Key Touch (Key Touch) ..................79 Making Fine Adjustments to the Keyboard Touch (Key Touch Offset)..........79 Setting a Constant Volume Level in Response to the Playing Force (Velocity) .........80 Changing the Timing of Sounds in Response to the Velocity (Velocity Delay Sensitivity)....80 Changing the Touch Sensitivity According to the Key Range (Velocity Keyfollow Sensitivity) ...80 Changing How Volume Responds to Your Dynamics (Key Touch Mode)........80...
- Page 14 (Velocity Range/Sensitivity/Max)....................93 Assigning Internal Parts to INTERNAL Zone (Part Assign)............93 Turning the Controllers in Each Zone On and Off..............93 Using the RD-700GX As a Master Keyboard ............94 What’s MIDI? ..........................94 About MIDI Connectors......................94 Connecting to External MIDI Sound Generators ................95 Adjusting the Volume of Each Zone (EXTERNAL Zone) .................96...
- Page 15 Changing the Clock (Timing) Source (Clock Source) ..............109 Transmitting Synchronization Messages (Clock Out) ..............110 Using Program Change Messages to Switch Setups (SETUP Control Channel)......110 Setting the Device ID Number (Device ID)................110 Selecting the USB Driver (USB Driver) ..................110 Switching the USB Memory Mode (USB Memory Mode) ............110 Selecting the USB MIDI Thru Switch (USB MIDI Thru Switch) .............110 Selecting the Function of the MIDI THRU/OUT 3 Connector (MIDI OUT3 Mode) ......110 Switching the Pedal’s Polarity (Damper/FC1/FC2 Polarity) ............111...
- Page 16 Switching Setups.........................140 Connecting to Your Computer ................141 Connecting to a Computer via the USB MIDI Connector............141 Switching USB Drivers ......................142 Changing the USB Memory Setting ..................142 Using the RD-700GX as a USB MIDI Interface (USB MIDI Thru Sw) ..........142...
- Page 17 Installing the Wave Expansion Board..............143 Cautions When Installing an Wave Expansion Board ..............143 Installing SRX Series Boards ....................143 Checking the Installed Wave Expansion Boards..............144 Installation de la carte d’extension Wave (French language for Canadian Safety Standard) ....145 Precautions lors de l’installation de la carte d’extension Wave..........145 Installer les cartes de serie SRX .....................145 Verification des cartes d’extension audio apres installation ............146 Appendices...
-
Page 18: Panel Descriptions
(p. 116). MID] knob / [HIGH MID] knob / [HIGH] knob). [EXTERNAL/INTERNAL] Button EQUALIZER [ON/OFF] Button Puts the RD-700GX in control of the external MIDI sound Turns the equalizer on/off (p. 51). generator (p. 98). [RHYTHM] Button REVERB, CHORUS/DELAY, MULTI-EFFECTS 1, Switches Rhythm on/off (p. - Page 19 Panel Descriptions [ARPEGGIO] Button [EXIT/SHIFT] Button Switches Arpeggiator on/off (p. 54). Pressed to return to a previous screen or to cancel a procedure that is in progress. [SPLIT] Button Additionally, you can easily call up Edit screens for related This button selects “Split mode,” whereby the keyboard is parameters for the following functions by holding down this divided into two regions, allowing you to play separate button while pressing buttons, turning knobs, or operating...
-
Page 20: Rear Panel
PEDAL Jacks (DAMPER, FC1, FC2) Connecting the pedal switch (DP series) provided with the RD-700GX to the DAMPER jack allows you to use the switch as a damper pedal. With a pedal connected to the FC1 or FC2 jack, you can then assign a variety of functions to the pedal (p. -
Page 21: Getting Ready
Getting Ready Placing the RD-700GX on a Stand If you place the RD-700GX on a stand, you must use the KS-12 or KS-18Z (sold separately). When placing the RD-700GX on the KS-12 or KS-18Z, place it in the position shown below. -
Page 22: Connecting The Power Cord
Is the volume level of the RD-700GX or connected amp turned all the way down? Is the power to the RD-700GX or connected amp turned off? Connect supplied power cord to the AC Inlet of the RD-700GX, and plug the other end into an AC outlet. -
Page 23: Connecting The External Equipment To Rd-700Gx
Connecting the External Equipment to RD-700GX The RD-700GX is not equipped with an amplifier or speakers. In order to produce sound, you need to hook up audio equipment such as a monitor speaker or a stereo set, or use headphones. -
Page 24: Connecting Pedals
Is the volume level of the RD-700GX or connected amp turned all the way down? Is the power to the RD-700GX or connected amp turned off? Connect supplied power cord to the AC Inlet of the RD-700GX, and plug the other end into an AC outlet. -
Page 25: Turning The Power On And Off
Also completely turn down the volume of any connected audio device and other equipment. fig.00-09 Press the upper portion of the [POWER ON] switch on the back of the RD-700GX to turn on the power. The unit is powered up, and the display’s backlighting comes on. -
Page 26: Turning Off The Power
Also completely turn down the volume of any connected audio device and other equipment. Turn off the power to connected external devices. Press the lower portion of the [POWER ON] switch on the back of the RD-700GX. The power is switched off. -
Page 27: Using The Usb Memory
Rear Panel Carefully insert the USB memory all the way in—until it is firmly in place. If you’re using new USB memory, you must first initialize (format) it on the RD-700GX. For details, refer to “Formatting Memory (Format)” (p. 125). -
Page 28: Overview Of The Rd-700Gx
Basic Organization of the Units of Sound RD-700GX When using the RD-700GX, you will notice that a variety of different categories come into play when working with sounds. The RD-700GX can be divided into two sections: a controller What follows is a simple explanation of each sound category. -
Page 29: Basic Operation
When the ONE TOUCH [PIANO] button or ONE TOUCH [E. returns you to the Tone screen or Tone Wheel Screen. PIANO] button is pressed, setting the RD-700GX to the optimal fig.00-G05g status for Piano or E. Piano performances, this screen is displayed (p. -
Page 30: Special Indications
Overview of the RD-700GX Song Screen Special Indications Pressing the [SONG] button switches the RD-700GX to this screen. Indication Explanation Here you can select and play songs (p. 58). You can also connect USB memory (sold separately) to the A mark is displayed to the right of the tone... -
Page 31: About The Function Buttons
Overview of the RD-700GX About the Function Buttons About the Cursor Buttons fig.00-G07p fig.00-G08p [EDIT] Button By pressing the [EDIT] button to make the indicator light, you can enter “Edit mode.” In Edit mode you can make detailed The Cursor buttons are used for switching screens, and for settings for various functions (p. -
Page 32: Editing A Value
Overview of the RD-700GX Editing a Value When changing settings values, you can use the [DEC] and [INC] buttons, VALUE dial, or the TONE SELECT buttons (numeric keys). fig.00-G12p [DEC] Button, [INC] Button TONE SELECT Buttons (Numeric Keys) Pressing the [INC] button increases the value, and the [DEC] When the [NUM LOCK] button is on (lit), numerical values can button decreases it. -
Page 33: Listening To The Demo (Demo Play)
Listening to the Demo (DEMO PLAY) Here’s how to listen to these demo songs. The RD-700GX features the internal demo songs that exhibit the special capabilities of the instrument. Song Name Composer Copyright Macho Blues John Maul © 2008 Roland Corporation... - Page 34 Regardless of whether the song is playing or stopped, pressing the ONE TOUCH [PIANO] button or ONE TOUCH [E. PIANO] button ends the demo and returns the previous screen to the display. The RD-700GX’s keyboard will not produce sound while the demo songs are playing. NOTE...
-
Page 35: Performance
(p. 78). With the RD-700GX, you can also make more detailed settings to make the sound even better match your favorite piano performances. You can store a total of six settings configurations, three each to the ONE TOUCH [PIANO] button and ONE TOUCH [E. -
Page 36: Performing With A Variety Of Tones
Performance Performing with a Variety of Tones The RD-700GX comes with a many built-in Tones. Each one of these individual sounds is called a “tone.” Tones are assigned to the TONE SELECT buttons according to the tone category selected. Try selecting and performing with a number of different tones. -
Page 37: Specifying The Tone Number To Select A Tone ([Num Lock] Button)
Performance Tones selected with the [RHY/GM2] button are registered in the following order: “Rhythm Sets,” “GM2 Rhythm Sets,” and “GM2 Tones.” Refer to the “Rhythm Set List” NOTE (p. 192). Specifying the Tone Number to Select a Tone ([NUM LOCK] Button) Each individual tone has a different tone number. - Page 38 Performance Playing a Rhythm Set Among the tones that can be selected with the TONE SELECT buttons are Rhythm Sets, which are collections of a variety of percussion instrument sounds and special sound effects. Here’s how to select a Rhythm Set and play percussion sounds. Display the TONE screen.
-
Page 39: Selecting Wave Expansion Board Tones
For more on the wave expansion board tone lists, refer to “Patch List” (for RD-700) and “Rhythm Set List” (for RD-700) in the SRX Series Owner’s Manuals. However, some of the tone names may be displayed differently on the RD-700GX. Refer to “Wave Expansion Board Tone Name Correspondence Table” (p. 40). - Page 40 Rhythm Set List to the last Patch number in the Patch List. Wave Expansion Board Tone Name Correspondence Table The RD-700GX displays certain SRX Series tone names as shown below. There may be displayed differently from Owner’s Manuals of SRX series.
-
Page 41: Playing Multiple Tones With The Keyboard
Performance Playing Multiple Tones with the Keyboard The RD-700GX features four Internal zones (UPPER 1, UPPER 2, LOWER 1, and LOWER 2), and one tone can be assigned to each of these zones. You can perform using combinations of tones by turning each zone on or off. You can have multiple tones layered together at the same time, and even have different tones played in the left and right parts of the keyboard. - Page 42 Performance Pressing Two TONE SELECT buttons Simultaneously * Keep the [NUM LOCK] button off when carrying out this operation. Even without pressing the ZONE SWITCH buttons, you can layer two tones by pressing two TONE SELECT buttons simultaneously. For example, if you want to layer a piano sound with strings, together press both the [PIANO] button and the [STRINGS] button.
-
Page 43: Playing Different Tones In Two Different Sections Of The Keyboard ([Split] Button)
Performance Playing Different Tones in Two Different Sections of the Keyboard ([SPLIT] Button) Such a division of the keyboard into right- and left-hand sections is called a “Split,” and the key where the division takes place is called the “Split Point.” While in Split mode, a sound played in the right side is called an “UPPER part,”... - Page 44 Performance Changing the Keyboard’s Split Point You can change the point at which the keyboard is divided (the Split Point) in Split mode. Hold down the [SPLIT] button for several seconds. A screen such as the following appears, and the current value of the setting is displayed. fig.Q1-18g Hold down the [SPLIT] button and press a key.
-
Page 45: Changing The Tone For A Zone
Performance Changing the Tone for a Zone fig.Q1-20p Press the [EXIT/SHIFT] button several times to access the Tone screen. Use the Cursor [ ] buttons to select the zone whose tone you want to change. Use the TONE SELECT buttons to select the tone category, and then use the [DEC] [INC] buttons or the VALUE dial to select a tone. -
Page 46: Adjusting The Volume Level For Individual Zones (Zone Switch/Zone Level Slider)
Adjusting the Volume Level for Individual Zones (ZONE SWITCH/ZONE LEVEL Slider) With the RD-700GX, each of the parts that is performed using the internal sound generator is referred to as an INTERNAL Zone. For each zone (UPPER 1, UPPER 2, LOWER 1, LOWER 2), you can use the ZONE SWITCH and ZONE LEVEL slider to turn the sound on/off and adjust its volume. -
Page 47: Transposing The Key Of The Keyboard ([Transpose] Button)
Performance Transposing the Key of the Keyboard ([TRANSPOSE] Button) You can transpose performances without changing the keys you are playing, as well as change the pitch by an octave. This feature is called “Transpose.” This is a convenient feature to use when you want to match the pitch of the keyboard performance to a vocalist’s pitch, or perform using the printed music for trumpets or other transposed instruments. -
Page 48: Adding Reverberation To The Sound ([Reverb] Button)
Performance Adding Reverberation to the Sound ([REVERB] Button) The RD-700GX can apply a reverb effect to the notes you play on the keyboard. Applying reverb adds pleasing reverberation to what you play, so it sounds almost as if you were playing in a concert hall. -
Page 49: Adding Breadth To The Sound ([Chorus/Delay] Button)
Performance Adding Breadth to the Sound ([CHORUS/DELAY] Button) You can apply a chorus and delay effect to the notes you play on the keyboard. By adding the chorus and delay effect, you can give the sound greater dimension, with more fatness and breadth. fig.Q1-25cho Press the [CHORUS/DELAY] button. -
Page 50: Changing The Sound's Pitch In Real Time (Pitch Bend/Modulation Lever)
Sounds may become distorted with certain tones. NOTE You can set the RD-700GX so that the settings of the sound control are not changed when you change Setups (p. 65). Refer to “Preventing Sound Control Settings from Being Switched (Sound Control Mode)” (p. 107). -
Page 51: Adjusting The Levels Of Each Frequency Range ([Equalizer] Button)
Adjusting the Levels of Each Frequency Range ([EQUALIZER] Button) The RD-700GX is equipped with a four-band equalizer. You can use the EQUALIZER [LOW] knob, [LOW MID] knob, [HIGH MID] knob, and [HIGH] knob to adjust the level of each frequency range. - Page 52 To turn the equalizer off, press the EQUALIZER [ON/OFF] button, extinguishing its indicator. You can set the RD-700GX so that the equalizer settings are not changed when you change Setups (p. 65). Refer to “Preventing Equalizer Settings from Being Switched (EQ Mode)”...
-
Page 53: Disabling The Button (Panel Lock)
Performance Disabling the Button (Panel Lock) Once Panel Lock is engaged, all buttons (except for the VOLUME slider, [DISPLAY CONTRAST] knob, Pitch Bend/Modulation lever, Pedals, ONE TOUCH [PIANO] button, ONE TOUCH [E. PIANO] button, and [EXIT/SHIFT] button) will not function. This prevents settings from being changed inadvertently on stage or in other such situations. -
Page 54: Using The Convenient Functions In Performances
Using the Convenient Functions in Performances Playing Arpeggios ([ARPEGGIO] Button) The RD-700GX can automatically produce arpeggios based on the notes you hold down. fig.Q2-01p Press the [ARPEGGIO] button, getting the indicator to flash. Press a key A0–B3. The arpeggio starts, with the notes being played in the sequence the keys were pressed. -
Page 55: Changing The Arpeggio Style
Using the Convenient Functions in Performances Changing the Arpeggio Style You can select the way an arpeggio is played (the style) to match a variety of different musical genres. Press the [ARPEGGIO] button, getting the indicator to light. In the Tone screen, press the Cursor [ ] button to access the Rhythm/Arpeggio screen. Press the Cursor [ ] button to move the cursor to “ARP.”... -
Page 56: Playing Rhythm ([Rhythm] Button)
Using the Convenient Functions in Performances Playing Rhythm ([RHYTHM] Button) The RD-700GX features internal drum patterns complementing Jazz, Rock, and other various musical genres. These drum patterns are referred to as “Rhythms.” You can perform using Rhythms combined with various functions, for example performing arpeggios while a Rhythm is playing. -
Page 57: Changing The Rhythm Pattern
Using the Convenient Functions in Performances Changing the Rhythm Pattern You can select the way a Rhythm is played (the pattern) to match a variety of different musical genres. Press the Cursor [ ] button to go to the Rhythm/Arpeggio screen. fig.02-06g Press the [RHYTHM] button to make the button indicator light. -
Page 58: Playing The Songs ([Song] Button)
If you want to connect a commercially available CD drive and play a song from CD, refer to the owner’s manual of your CD drive. CD drive models that have been verified to operate correctly with the RD-700GX are listed on the Roland website (www.roland.com). -
Page 59: Selecting The Song
Pressing the button toggles the selection between “USB” (songs in USB memory) and “INT” (songs in internal memory). Type Explanation Songs in the RD-700GX’s internal memory Songs in USB memory connected to the USB MEMORY connector Songs on a CD in a CD drive connected to the USB MEMORY connector Press the Cursor [ ] button to move the cursor to Song number, use the [DEC] [INC] buttons or the VALUE dial to select a song. -
Page 60: Changing Song Tempos
Song Name Composer Copyright Macho Blues John Maul © 2008 Roland Corporation Changing Song Tempos In the SONG screen, press the Cursor [ ] button to move the cursor to the tempo indication in the top line of the screen. -
Page 61: Applying Effects To The Sound (Multi-Effects)
Using the Convenient Functions in Performances Applying Effects to the Sound (MULTI-EFFECTS) In addition to chorus (p. 49) and reverb (p. 48), the RD-700GX also allows you to apply “multi-effects” to sounds. Multi-effects provides a collection of 124 different effects, such as distortion and rotary, from which you can choose. -
Page 62: Simulating The Creation Of Organ Tones (Tone Wheel Mode)
Using the Convenient Functions in Performances Simulating the Creation of Organ Tones (Tone Wheel Mode) When any of the “TW-Organ 1–10” Tones is selected for any of the INTERNAL Zone (UPPER 1, UPPER 2, LOWER 1, LOWER 2), you can perform in “Tone Wheel mode,” in which the creation of organ sounds is simulated. -
Page 63: Changing The Undulation Of The Organ Tone (Rotary Effect)
Using the Convenient Functions in Performances The following Tone Wheel screen appears. This Tone Wheel screen appears only when a Tone Wheel Tone is selected for one of the Zone in the Tone screen. fig.Q2-12g When the ZONE LEVEL sliders are moved, the harmonic bars move in the display, and the tone changes. -
Page 64: Changing The Zone Level Slider Feet Assignments (Harmonic Bar)
Using the Convenient Functions in Performances Changing the ZONE LEVEL Slider Feet Assignments (Harmonic Bar) You can change the Feet assigned to each of the ZONE LEVEL sliders used in Tone Wheel mode. Press the [EDIT] button, getting the indicator to light. The Edit Menu screen appears. -
Page 65: Selecting Stored Settings ([Setup] Button)
Using the Convenient Functions in Performances Selecting Stored Settings ([SETUP] Button) The RD-700GX’s INTERNAL ZONE (p. 28) and EXTERNAL ZONE (p. 28) tone settings, effect settings, and other such settings are collectively referred to as a “Setup.” Once you’ve stored your preferred settings, and settings for the songs to be performed as a Setup, you can then switch whole groups of settings during a performance just by switching Setups. -
Page 66: Registering The Setups You Like (Favorite Setups)
Hold down the [F1] button and press the TONE SELECT button for the registration destination. The Setup is registered to the button that is pressed. Settings registered in the RD-700GX are not deleted even when the power is turned off. -
Page 67: Storing Settings To Setups ([Setup Write] Button)
If you want to use the changed content as a new Setup, use the following procedure to save the settings to a Setup. You can also change the name of a Setup. You can store 100 Setups on the RD-700GX. fig.Q2-19p Press the [SETUP WRITE] button, getting the indicator to light. - Page 68 Using the Convenient Functions in Performances Select the save-destination Setup number, either by using the [DEC] [INC] buttons or the VALUE dial. When using the TONE SELECT buttons to input Setup numbers, press the [ENTER] button afterwards to set the number. fig.Q2-22g When you have finished determining the save destination and the name for the new Setup, press the [ENTER] button or the [F1 (WRITE)] button.
- Page 69 Using the Convenient Functions in Performances Setup <000> (PIANO SETUP) When you press the ONE TOUCH [PIANO] button or ONE TOUCH [E. PIANO] button to access the Tone screen, and then press the Cursor [ ] button to access the Setup screen, SETUP <000>...
-
Page 70: Performing With Audio Files (Audio Key)
Using the Convenient Functions in Performances Performing with Audio Files (Audio Key) The RD-700GX lets you play audio files saved on USB memory (sold separately) while you perform. This is called the “Audio Key” function. The Audio Key function lets you assign an audio file to each key B 0–B1, and play those audio files by pressing the corresponding key. - Page 71 Using the Convenient Functions in Performances Indication Explanation One-shot Now When you press the key, the audio file will play only once. The audio file will play immediately when you press the key. One-shot Wait When you press the key, the audio file will play only once. With this setting, pressing the key while another audio file is playing will reserve the audio file to be played next.
- Page 72 “Audio Key Utility 2 Quick Guide” (separate document). If no USB memory (sold separately) containing audio files is connected to the RD- 700GX, you’ll be able to play audio files that are built into the RD-700GX (see the section that follows).
-
Page 73: Selecting The Audio File Set
Use the [DEC] [INC] buttons or the VALUE dial to select an audio file set, and press the [F2 (LOAD)] button. The file will be loaded into the RD-700GX, and a screen like the following will appear. If USB memory containing an audio file set is not connected when you turn on the... -
Page 74: Changing The Audio File Settings
As described in “Selecting the Audio File Set” (on the preceding page), load the audio file set that you want to edit. The audio file set will be loaded into the RD-700GX, and a screen like the following will appear. Press the [F2 (EDIT)] button. -
Page 75: Performing With Audio Files That Are Built Into The Rd-700Gx
RD-700GX. Even if you’re using the audio file set that’s built into the RD-700GX, you can change the settings of the audio files assigned to the keys, and change the settings that specify how the audio files will be repeated (p. -
Page 76: Adjusting The Volume Of The Audio Key
Playing back an MP3 file or changing the playback tempo of an audio file places a significant processing burden on the RD-700GX, and in some cases may cause it to be unable to completely process all of the performance data from the keyboard. -
Page 77: Making Detailed Settings For The One Touch Tones
Selecting the Piano Sound settings are switched to their status at the time the NOTE RD-700GX’s power was turned on. This chooses the piano Tone to be selected when the ONE Store any arrangements of settings that you want TOUCH [PIANO] button is pressed. -
Page 78: Changing The Amount Of Reverb Effect (Reverb Amount)
Making Detailed Settings for the ONE TOUCH Tones Changing the Amount of Reverb Effect Adjusting the Resonance of the Aliquot (Reverb Amount) Strings (Duplex Scale) Adjusts the depth of the Reverb effect. This adjusts the sound of the sympathetically vibrating aliquot strings on an acoustic piano. -
Page 79: Adjusting The Sound Of The Hammer Strike (Hammer Noise)
Making Detailed Settings for the ONE TOUCH Tones The tonal change will still be great even if you NOTE Adjusting the Sound of the Hammer change this value. Strike (Hammer Noise) Changing the Key Touch (Key Touch) This adjusts the sound of the hammer striking the string of an acoustic piano. -
Page 80: Setting A Constant Volume Level In Response To The Playing Force (Velocity)
Making Detailed Settings for the ONE TOUCH Tones that value. Parameter Value Key Touch Mode MODE1, MODE2 Setting a Constant Volume Level in If you choose mode 2, the volume (velocity) will Response to the Playing Force change more smoothly in response to your (Velocity) keyboard playing dynamics. -
Page 81: Adjusting Resonance When The Damper Pedal Is Depressed (Sympathetic Resonance)
Making Detailed Settings for the ONE TOUCH Tones Adjusting Resonance when the Restore the Settings to Initial Damper Pedal is Depressed Conditions (Initialize) (Sympathetic Resonance) This restores the One Touch Piano settings to their initial conditions. You can adjust this resonance when the damper pedal is depressed (Sympathetic Resonance). -
Page 82: Making Detailed Settings For The E. Piano Tones (E. Piano Designer)
Press the [ENTER] button to save the settings. If you want (E. Piano Designer) to cancel, press the [EXIT/SHIFT] button. When you finish making settings, press the The RD-700GX contains a SuperNATURAL E. Piano sound [EXIT/SHIFT] button. generator. You are returned to the ONE TOUCH E. PIANO screen. -
Page 83: Adjusting The Thickness Of The Sound (Bar Angle)
Parameter Value Description bars and pickups. Adjusting this value from 0 The RD-700GX can simulate this aspect of the system. toward the negative side will Equivalent tonal changes can also be produced for E. Pianos -10–0– produce a heavier character, Bell that don’t use tone bars. -
Page 84: Adjusting The Hum Noise (Hum Noise)
Making Detailed Settings for the ONE TOUCH Tones Adjusting the Hum Noise (HUM Noise) Selecting an Effect (Effect Type) This adjusts the amount of hum and other noise that leaks into You can apply effects that are tuned specifically for the E. piano. The available parameters will depend on the effect you select. - Page 85 Making Detailed Settings for the ONE TOUCH Tones COMPRESSOR Parameter Value Description D100:0W– Volume balance between the direct Balance D0:100W sound (D) and the flanger sound (W) Parameter Value Description Level 0–127 Output Level This sets the time it takes until the level Attack 0–127 is compressed after the input exceeds...
-
Page 86: Selecting The Type Of Amp (Amp Type)
Making Detailed Settings for the ONE TOUCH Tones Parameter Value Description Selecting the Type of Amp (AMP Type) Specifies the duty cycle of the LFO waveform used to apply tremolo. Increasing this value will increase the This switches the amp of the E. Piano. By changing the Tremolo Duty -10–+10 duty cycle of the LFO waveform for the... -
Page 87: Adjusting The Keyboard Touch Response (Key Touch Edit)
Making Detailed Settings for the ONE TOUCH Tones WURLY Adjusting the Keyboard Touch This combines REED EP with a variation of it, reproducing a Response (Key Touch Edit) typical E. piano sound of the '60s. Parameter Value Description You can adjust the way in which the keyboard responds to Amount of boost/cut for the high- Treble -50–+50... -
Page 88: Making Detailed Settings For Tones
Making Detailed Settings for Tones Settings for tones of a wave expansion board (SRX Making Tone Settings series) can’t be saved in the TONE INFO screen. If NOTE you want to save these settings, save them as a (TONE INFO) Setup (p. -
Page 89: Selecting The Part And The Tone To Be Set (Part/Tone)
(p. 118) and Chorus (p. 118) effects described later. The Reverb/Chorus Amount of the MFX Src The RD-700GX lets you apply two multi-effects to the tones. Zone part will apply to parts assigned to the The two multi-effects are connected in series. -
Page 90: Controlling The Multi-Effect Parameters In Real Time (Mfx 1/2 Control)
Making Detailed Settings for Tones Controlling the Multi-Effect Parameters Creating Smooth Pitch Changes in Real Time (MFX 1/2 Control) (Portamento Switch/Portamento Time) You can use the MULTI EFFECTS 1 [CONTROL] knob and Portamento is a function that causes the pitch to change MULTI EFFECTS 2 [CONTROL] knob to control multi-effect smoothly from one note to the next note played. -
Page 91: Changing Tone Elements (Attack Time/Release Time/Cutoff/Resonance/Decay Time)
You can perform operations like Split with the INTERNAL Zone Cutoff: Adjusts how much the filter is opened. very simply using the RD-700GX’s keyboard (p. 43), and you Resonance: Emphasizes the overtones in the region of the can make more detailed settings for the Zone as well. -
Page 92: Selecting The Tone (Tone)
Making Detailed Settings for Tones Selecting the Tone (Tone) Setting the Key Range for Each Zone (Key Range) This indicates the tone that is assigned to the zone. You can select tone using the TONE SELECT buttons. When the [SPLIT] button is pressed in normal performance conditions, the key range is divided at the Split Point, and you Parameter Value... -
Page 93: Setting The Change In Volume According To The Force Used To Play The Keyboard (Velocity Range/Sensitivity/Max)
Making Detailed Settings for Tones Setting the Change in Volume Turning the Controllers in Each Zone According to the Force Used to Play On and Off the Keyboard These settings determine whether the pedals connected to (Velocity Range/Sensitivity/Max) each PEDAL jack (DAMPER, FC1, FC2), the Modulation lever, the Pitch Bend lever, the sliders, and the [S1] [S2] buttons are This setting determines how the volume changes in response to used to control the Parts (ON), or not (OFF). -
Page 94: Using The Rd-700Gx As A Master Keyboard
Using the RD-700GX As a Master Keyboard By connecting an external MIDI device to the MIDI OUT connector on the RD-700GX’s rear panel, you can then control the external MIDI device with the RD-700GX. Normally, the RD-700GX will transmit note messages from the MIDI OUT connector, but if you press the [EXTERNAL/INTERNAL] button so the “EXTERNAL”... -
Page 95: Connecting To External Midi Sound Generators
Using the RD-700GX As a Master Keyboard Connecting to External MIDI Sound Generators MIDI sound module etc. V-LINK-compatible Computer video equipment. connector MIDI IN connector MIDI OUT connector connector RD-700GX Use a USB Cable no longer than 5 meters. NOTE... -
Page 96: Adjusting The Volume Of Each Zone (External Zone)
Using the RD-700GX As a Master Keyboard Adjusting the Volume of Each Zone (EXTERNAL Zone) fig.Q3-08pe ZONE LEVEL Slider ZONE SWITCH “EXTERNAL” Indicator is lit When the “EXTERNAL” indicator is lit, you can use the ZONE SWITCH and ZONE LEVEL sliders to control the EXTERNAL Zone in the same way as with the INTERNAL Zone (p. -
Page 97: Selecting The Midi Connector To Use For Output (Midi Out Port)
LW2 (LOWER 2) If the System Edit parameter MIDI OUT3 Port Setting (p. 110) is set to “THRU,” the performance data from the RD-700GX will not be transmitted from the MIDI OUT 3 NOTE connector; instead, the performance data received at the MIDI IN connector will be... -
Page 98: Setting The Midi Transmit Channel (Midi Out Channel)
Transmit channel and the Receive channel for each of the external MIDI sound generator’s Parts. Sounds is produced when the MIDI channels for the sending device (the RD-700GX) and the receiving device (the external MIDI sound generator) are set to the same MIDI channel. -
Page 99: Selecting Sounds On An External Midi Device (Msb/Lsb/Pc)
Selecting Sounds on an External MIDI Device (MSB/LSB/PC) To switch the tones of an external MIDI device, the program number and the MSB/LSB of the Bank Select message are entered as numerical values on the RD-700GX. Press the [EXTERNAL/INTERNAL] button so the “EXTERNAL” indicator is lit. -
Page 100: Detailed Settings For Transmitted Parts (External)
Similarly, more of the sound will originate at the right if the value of R is increased. When set to 0, the sound is heard as The RD-700GX is set to control the external MIDI coming from the center. devices. -
Page 101: Setting The Transposition For Each Individual Zone (Transpose)
Using the RD-700GX As a Master Keyboard Setting the Transposition for Each Changing the Range That Plays in Individual Zone (Transpose) Response to the Velocity (Velocity Range) You can perform with each zone transposed to a different pitch. This specifies the lower limit (LWR) and upper limit (UPR) of the... -
Page 102: Changing Tone Elements (Atk/Dcy/Rel/Cof/Res)
Using the RD-700GX As a Master Keyboard Changing Tone Elements Smoothly Changing the Pitch (ATK/DCY/REL/COF/RES) (Portamento) You can make changes in tones by adjusting the settings of the Portamento is a function that causes the pitch to change following five elements. -
Page 103: Changing The Pitch (Coarse Tune/Fine Tune)
Using the RD-700GX As a Master Keyboard Changing the Pitch Turning Each Controller On and Off (Coarse Tune/Fine Tune) These settings determine whether the external MIDI device is controlled (ON), or not (OFF) by the pedals connected to each Here you can adjust the pitch of the tone. -
Page 104: Detailed Settings For Each Function ([Edit] Button)
RD-700GX when you press the [F1 (WRITE)] button in an edit screen. known as “editing.” When the [EDIT] button is pressed and the indicator is lit, the RD-700GX switches to “Edit mode.” • 0. System You can save edited settings to Setups. - Page 105 Detailed Settings for Each Function ([EDIT] Button) FC1 Pedal Assign p. 115 Rhythm FC2 Pedal Assign p. 115 Tempo p. 129 S1 Assign p. 116 Rhythm Volume p. 129 S2 Assign p. 116 Rhythm Pattern p. 129 2. Control Control 1 Knob Assign p.
-
Page 106: Making System Settings (System)
Making System Settings (System) [F1(WRITE)] button. Settings saved in the RD- 700GX are not deleted even when the power is turned off. However, following settings are not Functions that affect the RD-700GX’s overall operating memorized. environment are called “System functions.” Device ID→p. 110 How to Make Settings Tuning to Other Instruments’... -
Page 107: Preventing Sound Control Settings From Being Switched (Sound Control Mode)
Detailed Settings for Each Function ([EDIT] Button) Preventing Sound Control Settings Preventing Pedal Settings from Being from Being Switched Switched (Pedal Mode) (Sound Control Mode) Pedal settings (p. 115) can be stored for each Setup (p. 65). This setting determines whether or not the pedal settings are You can store different Sound Control settings (p. -
Page 108: Preventing The [S1] [S2] Buttons From Being Switched (S1/S2 Mode)
Detailed Settings for Each Function ([EDIT] Button) Function/Parameter Setting Preventing the [S1] [S2] buttons from Parameter Value Changed Being Switched (S1/S2 Mode) The tempo will be modified 102: to the interval at which you TAP TEMPO The settings of the [S1] [S2] buttons can be stored for each press the pedal. -
Page 109: Retaining The Current Tone Even When Tones Are Switched (Tone Remain)
MIDI device. Parameter Value Description Synchronized to the internal clock The RD-700GX’s clock (tempo) will be used. You’ll be able to specify the tempo on the RD-700GX. In a screen where the tempo is shown, press the Cursor button to... -
Page 110: Transmitting Synchronization Messages (Clock Out)
Using Program Change Messages to (USB MIDI Thru Switch) Switch Setups (SETUP Control Channel) Refer to the “Using the RD-700GX as a USB MIDI Interface You can switch the RD-700GX’s Setups with MIDI messages (USB MIDI Thru Sw)” (p. 142) from an external MIDI device. -
Page 111: Switching The Pedal's Polarity (Damper/Fc1/Fc2 Polarity)
If you select “16PART,” the keyboard part you yourself play can use the same part as the song data, meaning that you can If you are using a Roland pedal (that has no polarity switch), specify program changes or bank selections within the song set this parameter to STANDARD. -
Page 112: Switching Between Reception Of Gm/Gm2 System On And Gs Reset (Rx Gm/Gm2 System On, Rx Gs Reset)
Detailed Settings for Each Function ([EDIT] Button) Parameter Value Description Switching Between Reception of GM/ Just (Minor) GM2 System On and GS Reset The scales of the major and minor just intonations are (Rx GM/GM2 System ON, Rx GS JUST MIN different. -
Page 113: Setting The Keyboard Touch (Key Touch)
Detailed Settings for Each Function ([EDIT] Button) Setting the Keyboard Touch Changing the Key Touch (Key Touch) (Key Touch) The setting below allows you to adjust the response you get from the keyboard when you finger the keys. You can make advanced settings for the touch used for the Parameter Value Description... -
Page 114: Setting A Constant Volume Level In Response To The Playing Force (Velocity)
Detailed Settings for Each Function ([EDIT] Button) Pedal and MULTI-EFFECTS Setting a Constant Volume Level in Response to the Playing Force [CONTROL] Knob Settings (Velocity) (Control) This sets the sound to play at a fixed volume, regardless of the strength used to play the keyboard (the velocity). You can change the functions assigned to the pedals, [S1] [S2] buttons, MULTI- EFFECTS 1 [CONTROL] knob, Parameter... -
Page 115: Assigning Functions To Pedals (Fc1/Fc2 Pedal Assign)
Detailed Settings for Each Function ([EDIT] Button) Function/ Assigning Functions to Pedals Parameter Value Parameter Setting Changed (FC1/FC2 Pedal Assign) 108: Turns multi-effect 2 (p. 61) MFX 2 SW on/off for the current zone. This setting determines the function of the pedal switches (such Adjusting the amount of the as the optional DP series) or expression pedals (such as the 109:... -
Page 116: Assigning Functions To The [S1] [S2] Buttons (S1/S2 Assign)
Detailed Settings for Each Function ([EDIT] Button) Assigning Functions to the [S1] [S2] Changing the MULTI-EFFECT 1 Buttons (S1/S2 Assign) [CONTROL] Knob/MULTI-EFFECT 2 [CONTROL] Knob Settings This setting determines the function of the [S1] and [S2] (Control 1/2 Knob Assign) buttons. -
Page 117: Setting The Multi-Effects, Reverb, And Chorus Effects (Effects)
(Effects) Use the [DEC] [INC] buttons or the VALUE dial to set the value. The RD-700GX contains effects processors: two multi-effects, When you have finished making the settings, chorus, and reverb. Settings can be made separately for each press the [EDIT] button, extinguishing its effects processor. -
Page 118: Making Reverb Settings
Detailed Settings for Each Function ([EDIT] Button) Making Reverb Settings Setting Chorus and Delay Reverb adds the reverberation characteristics of halls or Chorus adds depth and spaciousness to the sound. You can auditoriums. Six different types are offered, so you can select select whether to use this as a chorus effect or a delay effect. -
Page 119: Making The Sound Control Settings (Sound Control)
[EDIT] button, extinguishing its fig.05-02g indicator. You are returned to the Tone screen. Settings saved in the RD-700GX are not deleted even when the power is turned off. Selecting the Type of Compressor Press the Cursor [ ] buttons to select “4.Sound Control.”... -
Page 120: Detailed Settings Of Compressor
RD-700GX is called a “Setup File.” 800 [Hz] and midrange (MID). This Setup file can be saved in the RD-700GX’s internal memory or on USB memory (sold separately) connected to the This sets the frequency 2000, 2500, 3150, separating the high- USB MEMORY connector. -
Page 121: Calling Up Setup Files (Load Setup File)
Detailed Settings for Each Function ([EDIT] Button) Calling Up Setup Files Value Description The data will be stored in the RD-700GX’s (Load SETUP File) internal memory. The data will be stored on USB memory Here’s how to load a previously saved Setup file. -
Page 122: Deleting A Setup File (Delete Setup File)
SHIFT] button. Press the [ENTER] button once again to load the Setup file. The Setup file is loaded into the RD-700GX. Be sure never to turn off the power while the load NOTE is in progress. Press the [F1 (MEDIA)] button to select the... -
Page 123: Copying A Setup File (Copy Setup File)
Copying a Setup File (Copy SETUP File) copy. If you do not want to copy the file, press the [EXIT/ You can copy a Setup file from the RD-700GX’s internal SHIFT] button. memory to USB memory (sold separately). If you choose “ALL,” all Setup files will be copied. -
Page 124: Deleting A Song (Delete Song File)
Copying a Song (Copy SONG File) Press the Cursor [ ] buttons to select You can copy a song file from the RD-700GX’s internal “5.File,” then press the [ENTER] button. memory to USB memory (sold separately). The Edit screen appears. -
Page 125: Formatting Memory (Format)
USB memory for use Copy from the RD-700GX's internal memory INT→USB with RD-700GX. to USB memory. USB memory cannot be used with the RD-700GX unless it is Copy from USB memory to the RD-700GX’s USB→INT formatted suitably for the RD-700GX. internal memory. -
Page 126: Setting Midi Receive Parts (Part Parameter)
Setting MIDI Receive Parts The confirmation message appears. (Part Parameter) The sixteen Parts played by the RD-700GX’s internal sound generator are referred to as “Internal Parts.” When connecting an external MIDI device to a sequencer or other device, by assigning the Receive channel to an Internal... -
Page 127: Selecting The Part And Tone To Be Set (Part/Tone)
64. When using MIDI messages from an external MIDI device to play the RD-700GX, set the Receive channels for each of the RD-700GX’s parts so they’re matched up with the channels Preventing Parts from Being Played that’ll be used for transmission by the external MIDI device. -
Page 128: Setting Reception And Blocking Of Midi Messages From External Midi Controllers
Setting Reception and Blocking of MIDI Messages from External MIDI Controllers Settings (Rhythm/Arpeggio) You can change the RD-700GX’s tones by reception of MIDI How to Make Settings messages generated through the actions of modulation levers, pedals, knobs, and other such external MIDI devices controls. -
Page 129: Making The Rhythm Settings
Specify the tempo of the Rhythm. You can select Tones other than Rhythm Sets. The RD-700GX has only one tempo setting. Once When this setting is changed, the Part 10 Tone you change the setting, the tempo indicated in the also changes. - Page 130 Detailed Settings for Each Function ([EDIT] Button) Changing the Beat Syncopation Making the Sound More Staccato or (Rhythm/Arpeggio Grid) Legato (Rhythm/Arpeggio Duration) This sets the minimum value of the notes comprising Rhythms This sets the duration of the sound. You can make it more and arpeggios and adjusts the amount of swing (None/ staccato (short and clipped), or legato, so notes are played Weak/Strong).
-
Page 131: Making Arpeggio Settings
The notes are played one by one in This sets the speed of the arpeggio. sequence from the highest of the The RD-700GX has one tempo setting. You can DOWN pressed keys. The notes for both the lowest and (L&H) - Page 132 Detailed Settings for Each Function ([EDIT] Button) Selecting the Zone for the Arpeggio Changing the Octave Range in Arpeggio Style (Arpeggio Octave Range) Performance (Arpeggio Zone) Sets the key range in octaves over which arpeggio will take This sets the zone to be used for the arpeggio performance place.
-
Page 133: About V-Link
Connection Examples The Edit Menu screen appears. As an example, we will use a Setup in which the RD-700GX is connected to the motion dive.tokyo Performance Package. Use a MIDI cable to connect the RD-700GX’s MIDI OUT connector to the MIDI IN connector of the Edirol MD-P1. -
Page 134: Detailed Settings Of V-Link
NOTE Note output Local ON/OFF V-LINK Tx Channel This setting determines whether or not the RD-700GX’s sounds are played when a key within the range set with Key Range is This selects the MIDI channel used in outputting messages. pressed. -
Page 135: Other Functions (Utility)
Detailed Settings for Each Function ([EDIT] Button) Other Functions (Utility) Parameter Value Description When you play back a Utility includes functions for sending data to external MIDI song, only one song will ONE SONG play; playback will stop at sequencers and other devices and for restoring the settings to the end of that song. -
Page 136: Restoring The Settings To The Factory Condition (Factory Reset)
“9.Utility.” Condition (Factory Reset) Press the [ENTER] button to display the Edit screen. The settings stored in the RD-700GX can be returned to their factory settings. fig.05-29g Executing “Factory Reset All” results in deletion of the Setups (p. 65). If you want to keep the recorded NOTE content, save the Setup file to your USB memory (p. -
Page 137: Factory Reset Current
Detailed Settings for Each Function ([EDIT] Button) Factory Reset Current Factory Reset All Press the [ENTER] button. Press the [ENTER] button. A screen like the one shown below appears. A screen like the one shown below appears. Selecting “000” as the Setup initializes the ONE Press the [ENTER] button. -
Page 138: Connecting External Midi Devices
MIDI Sequencer When using the Rec Mode function, you can get the most suitable settings for recording the RD-700GX’s data to an Now, try using an external sequencer to record your music external sequencer, without having to make all the Part and onto multiple tracks, and then play back the recorded channel settings. -
Page 139: Recording The Performance
“Transmitting Setup Data to an External MIDI Device (Bulk Dump)” (p. 135). Keyboard Controller Section Perform on the RD-700GX. RD-700GX When the performance is finished, stop recording In this case, the data sent over two paths, i.e., the data sent with the external sequencer. -
Page 140: Playing The Rd-700Gx's Internal Sound Generator From An External Midi Device
RD-700GX allows you to switch Setups and Tones. MIDI IN Switching Setups The MIDI messages transmitted by the external MIDI device will be received by the RD-700GX to select Setups as shown in RD-700GX the following table. Before starting the connection procedure, make... -
Page 141: Connecting To Your Computer
USB connector of your computer, you’ll be able to do the driver. For details, refer to “Switching USB Drivers” (p. 142). following things. • Use the RD-700GX to play SMF music files played back The correct driver and the installation procedure will depend by MIDI-compatible software. -
Page 142: Switching Usb Drivers
Turn the power off, then on again. Interface (USB MIDI Thru Sw) If the RD-700GX is connected to your computer, performance data from a MIDI device connected to the RD-700GX’s MIDI IN connector can be sent to your computer. Parameter... -
Page 143: Installing The Wave Expansion Board
Installing SRX Series Boards However, some of the tone names may be displayed differently on the RD-700GX. Check 40page as you refer to the tone names. Install the Wave Expansion Boards after removing the rear panel cover.
Need help?
Do you have a question about the RD-700GX and is the answer not in the manual?
Questions and answers