Table of Contents
Advertisement
Quick Links
Owner's Manual
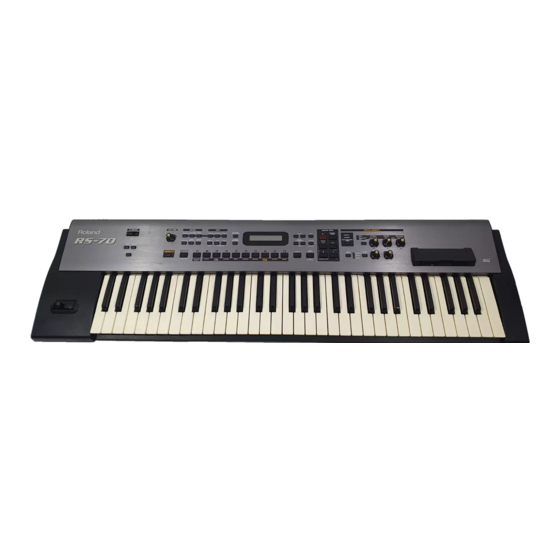
Thank you, and congratulations on your choice of the Roland RS-70.
201a
Before using this unit, carefully read the sections entitled: "USING THE UNIT SAFELY"
(p. 2– 3) and "IMPORTANT NOTES" (p. 4–5). These sections provide important infor-
mation concerning the proper operation of the unit. Additionally, in order to feel assured
that you have gained a good grasp of every feature provided by your new unit, Owner's
manual should be read in its entirety. The manual should be saved and kept on hand as a
convenient reference.
202
Copyright © 2003 ROLAND CORPORATION
All rights reserved. No part of this publication may be reproduced in any form without
the written permission of ROLAND CORPORATION.
Advertisement
Table of Contents

Related Manuals for Roland RS-70


Summary of Contents for Roland RS-70
- Page 1 Owner’s Manual Thank you, and congratulations on your choice of the Roland RS-70. 201a Before using this unit, carefully read the sections entitled: “USING THE UNIT SAFELY” (p. 2– 3) and “IMPORTANT NOTES” (p. 4–5). These sections provide important infor- mation concerning the proper operation of the unit.
- Page 2 (except when this manual provides different voltage, so their use could result in specific instructions directing you to do so). Refer damage, malfunction, or electric shock. all servicing to your retailer, the nearest Roland ......................Service Center, or an authorized Roland 008e •...
- Page 3 • Immediately turn the power off, remove the AC outlet or this unit. adaptor from the outlet, and request servicing by ......................your retailer, the nearest Roland Service Center, or 103b • Any accumulation of dust between the AC an authorized Roland distributor, as listed on the adaptor and the power outlet can result in poor “Information”...
-
Page 4: Important Notes
Such noise could occur when receiving or initi- memory once it has been lost. Roland Corporation ating a call, or while conversing. Should you experience assumes no liability concerning such loss of data. -
Page 5: Handling Floppy Disks
Before Using Floppy Disks • The identification label should be firmly affixed to the disk. Should the label come loose while the disk is in the Handling the Floppy Disk Drive drive, it may be difficult to remove the disk. •... -
Page 6: Table Of Contents
Panel descriptions ................12 Front panel..............................12 Rear panel ..............................16 Getting ready..................17 Connecting the RS-70 to external equipment ..................17 Turning on/off the power........................18 Adjusting the display contrast (LCD CONTRAST) ................19 Reset to default factory settings (Factory Reset) ......20 Listening to the demo songs ...............21... - Page 7 Contents Advanced Use ......49 Overview of the RS-70 ................50 How the instrument is organized ......................50 Basic structure..........................50 Classification of RS-70 sound types ....................... 50 Effects ................................. 51 Sequencer..............................51 Number of voices ............................. 51 About memory............................52 Temporary memory........................
- Page 8 Contents Using the sequencer to create patterns (Pattern mode) ....66 Playing patterns ............................66 Selecting a pattern to play back ....................66 Selecting pattern numbers ......................66 Switching patterns during playback ..................66 Muting a part (Track Mute) ......................67 Selecting a sound (patch) for each part..................
- Page 9 Playing back an SMF file ........................119 Disk-related functions (Disk Utility) ....................119 Loading a file from disk into the RS-70 (LOAD) ..............119 Saving data on disk (SAVE)....................... 120 Preparing a disk for use by the RS-70 (FORMAT) ..............121 Creating a duplicate disk (BACKUP)..................
- Page 10 Contents Using the RS-70 as a General MIDI/General MIDI 2 system-compatible sound module... 135 Playing back General MIDI/General MIDI 2 music data ............. 135 Synchronizing images to an RS-70 performance (V-LINK) ............. 136 What is V-LINK? ......................... 136 Connection examples........................136 Using V-LINK..........................
-
Page 11: Main Features
Quick and easy sound editing Compact and easy to carry To edit the sounds (patches) of the RS-70, you simply choose from The RS-70 is compact, light, and easy to carry. It’s an instrument the wide range of “tones” (pre-programmed instrumental sounds) with great sounds and professional-level functionality that can be and edit them. -
Page 12: Panel Descriptions
Others [SYSTEM] button [VOLUME] knob This button accesses settings that affect the entire RS-70, such as tuning, display contrast, and MIDI message reception. Adjusts the overall volume that is output from the rear panel OUTPUT jacks and PHONES jack (p. 18). - Page 13 Panel descriptions fig.04-01.r [WRITE] / [DISK] button WRITE: Saves patch/pattern/song settings or system settings. [NUMERIC] / [AUDITION] button DISK: By holding down [SHIFT] and pressing this button, you NUMERIC: When this button is lit, the direct access buttons will can make settings related to the floppy disk (p. 119). function as a numeric keypad.
- Page 14 Panel descriptions PAGE/CURSOR [ ] (Backward) button JUMP [ ] buttons Press this to “rewind” a pattern or song. If you hold down this button as you press [ ], the pattern or song will “rewind” faster. PAGE/CURSOR: Use these buttons to move between pages or to Or, if you hold down [SHIFT] while using this button, the value will move the cursor (p.
-
Page 15: Floppy Disk Drive
Panel descriptions • If balance/LFO is selected (BALANCE/LFO indicator lit) [BALANCE] knob Adjusts the LOWER and UPPER volume balance (p. 30). [LFO RATE] knob Adjusts the rate of the LFO effect, such as vibrato (p. 31). [LFO DEPTH] knob Adjusts the depth of the LFO effect, such as vibrato (p. 31). [KEY MODE] button Switches the Key Modes (p. -
Page 16: Rear Panel
If you are unsure of These jacks output stereo (L/R) audio signals to your amp or mixer. the connection method, contact the nearest Roland Service Center, or an For mono output, use the L jack. -
Page 17: Getting Ready
Getting ready Connecting the RS-70 to external equipment The RS-70 does not contain an amp or speaker. You’ll need to listen to it through powered monitors, a mixer and connected monitors, a stereo system, or through • To prevent malfunction headphones. -
Page 18: Turning On/Off The Power
• Is the AC adapter correctly connected to the RS-70? devices in the wrong order, you risk causing Press the power switch on the rear panel of the RS-70 to turn on the power. malfunction and/or fig.q01-02 damage to speakers and other devices. -
Page 19: Adjusting The Display Contrast (Lcd Contrast)
Turning off the power Before you turn off the power, make sure of the following points. • Are the volume controls of the RS-70 and the other connected equipment turned to the minimum position? • Have you saved the sounds or other data you’ve created? (p. 59, p. 64, p. 82, p. -
Page 20: Reset To Default Factory Settings (Factory Reset)
Reset to default factory settings (Factory Reset) This restores all data in the RS-70 to the factory-set condition (Factory Reset). fig.q02-01 4, 5 If there is important data you’ve created that’s stored Be sure not to turn off the power while Factory Reset is being performed. -
Page 21: Listening To The Demo Songs
• No data for the music that is played will be output from MIDI OUT. Demo songs list The RS-70 comes with 3 demos. TightPocket / Ken Suzuki Roland Corporation Crystal Vision / Adrian Scott ... - Page 22 Memo...
-
Page 23: Quick Start
Quick Start... -
Page 24: Try Out The Sounds
(p. 57). ■ Selecting a patch by category The RS-70 allows you to rapidly select and call up a patch by specifying the type of patch. All the patches are organized into 10 category groups. Button Category... - Page 25 Try out the sounds fig.q04-02 Press [PATCH] so it is lit and you are in Patch mode. Use [0]–[9] to specify the category group of the patch you want to select. The rhythm sets are included in [0] (p. 26). Use VALUE [-]/[+] to select sounds within the category group.
-
Page 26: Selecting Patches While Listening To Phrases (Patch Audition)
Select patches as described in Selecting a patch by category (p. 24). Press [EXIT] to stop the patch audition. Selecting a rhythm set The RS-70 provides rhythm sets that let you play different percussion instrument sounds or special effects from each key. fig.q04-04 Press [PATCH] so it is lit and you are in Patch mode. -
Page 27: Playing Arpeggios (Phrase/Arpeggio)
Arpeggio function lets you produce an arpeggio simply by holding down a chord, and is also a convenient way to input a performance into the Quick Sequencer. Since the RS-70 provides arpeggio templates that are suitable for the various sounds you select, you can produce appropriate arpeggios immediately. -
Page 28: Playing A Chord At The Touch Of A Finger (Multi-Chord Memory)
Chord Memory is a function that lets you play a chord simply by touching just one key to which a “Chord Form” has been registered. On the RS-70 you can register different chord forms to each key and save these chord forms as sets (multi-chord memory) and recall them when desired. -
Page 29: Switching Chord Sets
Try out the sounds ■ Switching chord sets Then, try to change chord sets. fig.q04-10 Use VALUE [-]/[+] to select a Chord Set. The user chord set appears after the preset chord sets. When you press [EXIT], the Multi-chord Memory function will remain on and you will return to the previous screen. -
Page 30: Applying Various Effects To The Sound
Changing the tone with the knobs (Patch Modify) Using the five panel knobs, you can change the tone in real time. On the RS-70, each patch consists of two tones; the upper tone and the lower tone Patch Modify applies +/- (p. -
Page 31: Vibrato And Wah Effects (Lfo)
Applying various effects to the sound ■ Vibrato and Wah effects (LFO) The LFO, short for “low frequency oscillator,” makes changes to the sound in periodic fashion. Changing the pitch with the LFO produces the “vibrato effect,” and by changing the filter cutoff frequency with the LFO, you get what is called the “wah effect.”... -
Page 32: Changing The Sound's Volume (Envelope)
Applying various effects to the sound ■ Changing the sound’s volume (ENVELOPE) The volume continues to change from the time a key is pressed to when it is released. The “envelope” is the curve A: Attack Time: The time from when the keyboard is pressed until the maximum that shows how the volume tonal change is reached. -
Page 33: Changing The Brightness Of The Sound And Adding Special Qualities (Cutoff/Resonance)
■ Changing the brightness of the sound and adding special qualities (CUTOFF/RESONANCE) The sound generator section of the RS-70 contains a filter that can cut or boost specific frequency regions of the sound. [CUTOFF] specifies the frequency (cutoff frequency) at which the filter will begin to modify the sound, and [RESONANCE] boosts the region near the cutoff frequency to add a distinctive character to the sound. -
Page 34: Using A Pedal To Modify The Sound
This is also convenient in a situation below. When playing sounds outside the keyboard’s range While the RS-70 features a 61-key keyboard, with some songs you may want to play notes even higher or lower. Also, when playing a Rhythm Set etc., there may be percussion instruments that the RS-70’s keyboard is not able to access. -
Page 35: Moving The Key Range In Half-Steps (Transpose)
Applying various effects to the sound Moving the key range in half-steps (TRANSPOSE) This function moves the key range in half-step units. This is convenient in situations like the ones below. When matching the vocalist’s register Sometimes melodies may extend outside a vocalist’s register. Therefore, if you want to perform with the song changed to a different key, you can play the song in a new key while still using the same fingering as before. -
Page 36: Effects That Can Be Used With The D Beam Controller
Applying various effects to the sound While playing the keyboard to produce sound, place your hand over the D Beam, and slowly move it up and down. An effect will be applied to the sound, depending on the function that is assigned to the D Beam controller. - Page 37 Applying various effects to the sound ASSIGNABLE Specifies a function controlled by the D Beam controller. Use VALUE [-]/[+] and select one of the following functions. Value Tx CC# Function/Parameter Changed MODULATION CC01 Vibrato Effect PORTA TIME CC05 Portamento Time (p. 58) VOLUME CC07 Level...
-
Page 38: Adjusting The Sensitivity Of The D Beam Controllers (D Beam Sens)
Applying various effects to the sound ■ Adjusting the sensitivity of the D Beam controllers (D BEAM SENS) The sensitivity of the D Beam controller will change depending on the amount of light in the vicinity of the unit. If it does not function as you expect, adjust the sensitivity as appropriate for the brightness of your location. -
Page 39: Using The Rs-70 Effects
Applying various effects to the sound Using the RS-70 effects Three separate effects are always available in the RS-70. You can independently edit each effect’s settings. Multi-Effects The RS-70 contains 47 different multi-effects, including distortion and a rotary speaker simulation. -
Page 40: Using The Sequencer To Create A Pattern
Creating a new pattern based on a preset rhythm pattern The RS-70 lets you save 256 user patterns (001–256). The first 128 of these (001–128) are already occupied by preset patterns. (You can also edit and overwrite them as user patterns.) Preset patterns 010–119 consist only of rhythm sounds. -
Page 41: Set The Tempo
Using the sequencer to create a pattern 2. Set the tempo fig.q06-22 When you have selected a rhythm pattern, you can specify the tempo. Press [TAP TEMPO] so it is lit. The current tempo of the pattern will be displayed. You can also set the tempo fig.q06-02_40 by tapping [TAP TEMPO]... -
Page 42: Recording Standby
Using the sequencer to create a pattern You can only select patches from the category that is assigned to the part you are recording. If you want to use a patch from another category, you must assign that category to the part to be recorded. You can hold down [SHIFT] and use PAGE/CURSOR . - Page 43 Using the sequencer to create a pattern 5. Begin recording Finally, you are ready to begin recording. You can sound the metronome Press [ ] to begin recording. while recording (p. 125). Recording will begin as specified by the Count In setting (p. 71). When the recording starts,[ ] will light.
-
Page 44: Stop Recording
Using the sequencer to create a pattern Press [ ] in the recording state. ] will blink, and you will be in the recording rehearsal state. fig.q06-04_40 Press [8]. The button will light, and part 8 will be selected. Selecting a part (p. 54) Use VALUE [-]/[+] to select your favorite patch. - Page 45 12. Saving your pattern fig.q06-27 A pattern you create will be lost when you turn off the power of the RS-70 unless you have saved it. When you have created a pattern that you like, be sure to save it.
-
Page 46: Creating A Pattern From Scratch (Pattern Initialize)
Using the sequencer to create a pattern Creating a pattern from scratch (Pattern Initialize) fig.q06-26 5, 6 If you want to create a pattern completely from scratch (i.e., without using a preset pattern), you must first create a blank pattern by initializing a pattern. Be aware that when you initialize a pattern (including a preset pattern;... -
Page 47: Playing Along With Smf Data (Smf Player Mode)
Insert the disk that contains the SMF files into the disk drive. While holding down [SHIFT], press [TAP TEMPO]. [SONG] will blink and the RS-70 will be in SMF Player mode. If no song title has been And the song titles of the SMF files on the floppy disk will be displayed. - Page 48 Memo...
-
Page 49: Advanced Use
Advanced Use... -
Page 50: Overview Of The Rs-70
Tones Playback On the RS-70, the tones are the smallest unit of sound. However, it is Sound Quick Sequencer Generator not possible to play a tone by itself. The patch is the unit of sound... -
Page 51: Effects
The “current part” is the part that will sound when you play the keyboard; this is the part that your recording and editing will affect. The RS-70 has a total of sixteen parts. For details on how to switch the current part, refer to “Selecting a part” (p. 54). -
Page 52: About Memory
An image of all data stored in the user area can be stored by the them and then store the modified data in rewritable memory. RS-70 on a floppy disk in a single file with an extension of “.RSU” (p. 120). If you load the saved “.RSU” file back into the RS-70, all settings of the entire RS-70 will return to the state they were in when the file was saved. -
Page 53: Basic Operation Of The Rs-70
The underlined area When you turn on the power, the RS-70 will start up in Patch mode. (cursor) in the screen will blink to indicate that you may edit that From other modes, you can press [PATCH] to enter this mode. -
Page 54: Assigning A Name
Inputting numbers and modify the characters. numerals Press [ On the RS-70, you can select a patch/pattern number or input a The cursor moves to the next digit. numerical value by using VALUE [-]/[+], or by using [NUMERIC] Use VALUE [-] / [+] to [0]–[9] to input the value directly. -
Page 55: Creating A Patch (Patch Mode)
Creating a patch (Patch mode) How to make the patch settings To create a sound (patch) of your own on the RS-70, you will start with one of the existing patches (preset patches), and edit it to create the desired sound. A sound you create can be saved as one of Including the parameters that can be controlled from the panel, a 128 user patches. -
Page 56: Making Settings That Apply To The Entire Patch (Patch Common Parameters)
Creating a patch (Patch mode) Selecting patch parameters Making settings that apply to the entire patch (Patch Common fig.r03-06 parameters) PATCH COMMON You can edit the following Patch Common parameters. Name (Patch Name) [SHIFT] [SHIFT] PAGE/ PAGE/ You can change the name of the patch. PAGE/ PAGE/ CURSOR [... -
Page 57: Making Settings For An Individual Tone (Patch Tone Parameters)
Creating a patch (Patch mode) Split Arp Active Exp Sw (Active Expression Switch) When “Key Mode” (p. 56) is set to SPLIT, this specifies which tone Turns the active expression effect (p. 36) on/off. will be affected by the arpeggiator. VALUE VALUE OFF:... -
Page 58: Fine Tune
Each original tone With higher settings of this value, loud sounds can be produced in the RS-70 has its own filter settings, but you can use patch editing even when you play the keys softly. With lower settings of this to modify these. -
Page 59: Saving A Patch
Adjusting the attack or decay of the sound 3. Edit the patch. (Envelope) Each original tone of the RS-70 includes envelope settings, but you “Changing the tone with the knobs (Patch Modify)” (p. 30) can use patch editing to apply relative adjustments to these settings. -
Page 60: Convenient Functions For Patch Editing (Patch Utility)
Patch categories editing (Patch Utility) On the RS-70, a patch you edit can be named and saved in the desired category of sounds (User Patch). Saving an edited patch in the appropriate category will make it easier for you to find the patch Patch Utility provides various functions that you will find when needed. -
Page 61: Initializing The Parameters Of A Patch (Patch Initialize)
Creating a patch (Patch mode) Initializing the parameters of a patch Copying MFX, CHORUS, or REVERB effect settings (PATCH INITIALIZE) 1. Press [PATCH] so it lights and you are in Patch mode. This operation initializes the currently selected patch settings. Select the copy-destination patch. -
Page 62: Transmitting Patch/Rhythm Settings From The Midi Out Connector (Xfer To Midi)
Creating a patch (Patch mode) Transmitting patch/rhythm settings from the MIDI OUT connector (XFER to MIDI) You can transmit the settings of any patch from the MIDI OUT connector. This function can be used to save patch settings on an external sequencer. -
Page 63: Creating A Rhythm Set (Patch Mode)
The range that can be edited on the RS-70 and by sound editing Selecting rhythm set parameters software is A0–C8. Some rhythm sets place rhythm tones outside this range. These tones cannot be edited. -
Page 64: Saving A Rhythm Set (User Rhythm Set)
Creating a rhythm set (Patch mode) Convenient functions for • Specifying the amount of signal sent to the effect rhythm set editing (Rhythm Set Chorus Send Lvl (Chorus Send Level) Utility) Sets the level of the signal sent to chorus for each tone. VALUE: 0–127 Rhythm Set Utility provides functions that you will find convenient... -
Page 65: Initializing The Settings Of A Specific Rhythm Tone (Rhy Initialize)
Creating a rhythm set (Patch mode) Initializing the settings of a specific Erasing a rhythm set you saved rhythm tone (RHY INITIALIZE) (RHY REMOVE) This operation initializes the rhythm tone parameters (p. 63) to the This operation erases the specified user rhythm set. When you erase state of the preset rhythm tone before its parameters were edited. -
Page 66: Using The Sequencer To Create Patterns (Pattern Mode)
Using the sequencer to create patterns (Pattern mode) Selecting a pattern to play back The Quick Sequencer (QUICK SEQ) built into the RS-70 makes it easy to loop-record over preset rhythms or your own original 1. Press [PATTERN] so it is lit and you are in Pattern mode. -
Page 67: Muting A Part (Track Mute)
Unlit: There is no playback data. Standard tempo The RS-70 has a total of sixteen parts. An optimal tempo is already set for each pattern. This is called To switch the play/mute status of parts 11–16, hold down the “standard tempo.” Regardless of whether the pattern is [SHIFT] and press [1]–[6]. - Page 68 Viewing a list of just the user patches fig.r06-11_40 Using the above procedure, you can listen consecutively to all the built-in sounds of the RS-70 without pressing a category select button. Among the user patches organized into category 1. While in the recording state, press [ ] again.
- Page 69 Using the sequencer to create patterns (Pattern mode) Erasing unwanted data while you To select the parts 11–16, hold down [SHIFT] and press [1]–[6] (p. 54). record (Realtime Erase) 3. Press [ If you make a mistake while recording, you can erase the incorrect At this time the display will be as follows, but actual recording data while you continue to record.
-
Page 70: Undo/Redo The Previous Recording Operation
Using the sequencer to create patterns (Pattern mode) Undo/redo the previous recording How to select recording parameters operation fig.r06-19 If you are not satisfied with the previous realtime-recording, you can REC MODE return to the state prior to recording (Undo), or cancel (Redo) the Undo operation you executed. -
Page 71: Count In
0–100 (%) Shuf Resolution (Shuffle Resolution) Clock is the smallest unit used to indicate time. On the RS-70, Make this setting when you are using Shuffle Quantize. Specifies the time is expressed in terms of 96 clocks per quarter note. For note value used for quantization. -
Page 72: Recording With The Phrase/Arpeggio Function
OFF, ON SysEx (System Exclusive) 2. Press [0]–[9] to select a template that produces arpeggios These are events that make settings specifically for the RS-70, such as similar to what you want to create. specifying the sound and tonal character. -
Page 73: Motif (Arpeggio Motif)
Using the sequencer to create patterns (Pattern mode) Motif (Arpeggio Motif) 4. Use PAGE/CURSOR [ ] to move the cursor, and use VALUE [-]/[+] to specify the value. Sets the order in which notes of the chord will sound. For details on the types and values of the parameters, refer to the VALUE following section “User template parameter list”... -
Page 74: Using Chord Memory To Record
Using the sequencer to create patterns (Pattern mode) Creating an original chord set Hold (Arpeggio Hold Switch) (User Chord Set) Switch between Hold On/Hold Off for the Arpeggiator performance. 1. Press [CHORD MEMORY] so it is lit. Value: OFF, ON 2. -
Page 75: Recording Notes One At A Time (Step Recording)
Using the sequencer to create patterns (Pattern mode) Recording notes one at a time 3. Recording (Step Recording) 1. Press [ ] to begin recording. 2. Use VALUE [+]/[-] to set “Step.” Step recording is the method in which individual notes are input one by one. -
Page 76: Inputting Various Types Of Notes
Polyphonic aftertouch is data transmitted independently from each key to indicate the force with which each key is being pressed down after it is played. Since the RS-70 is not able to transmit polyphonic aftertouch, these events cannot be recorded from the RS-70’s keyboard. -
Page 77: Editing The Music Data
SYS-EX (System Exclusive messages) You can hold down [SHIFT] and use PAGE/CURSOR [ These are events unique to the RS-70. If the entire message cannot be ] to move the cursor to the beginning or end of the exclusive shown on one line, a “... -
Page 78: Selecting The Types Of Music Data For Viewing (View Filter)
Using the sequencer to create patterns (Pattern mode) Selecting the types of music data PitchBend: Pitch Bend for viewing (View Filter) Tune: Tune Request SysEx (Default): System Exclusive You can specify the types of music data that will be displayed. Since SysEx (GM-ON): System Exclusive (GM-ON) you can specify that only certain events will be displayed, this lets... -
Page 79: Editing The Settings Of A Pattern
Voice Rsv 1–16 (Voice Reserve 1–16) This setting cannot be changed while the pattern is playing. The sound generator of the RS-70 can produce up to 64 notes (voices) End Tempo (Pattern End Tempo) simultaneously. If data is received that attempts to play more than this number of voices, notes will be dropped out. -
Page 80: Editing The Effect Settings Of A Pattern
Specifies the curve of tempo change. Value: RND, L63–0–63R fig.r06-54a Receive Ch (Receive Channel) When you select a pattern, the RS-70 will operate as a sixteen-part LINEAR CURVE1 CURVE2 MIDI multitimbral sound module. This parameter specifies the MIDI VALUE receive channel for each part. -
Page 81: Scale Tune
Using the sequencer to create patterns (Pattern mode) Scale Tune Editing the scale tune settings (SCALE TUNE) fig.r06-54d_40 The Scale Tune function lets you use a variety of tunings. For each note C–B, you can specify the pitch in units of one cent (1/100th of a You can specify a different tuning (Scale Tune setting) for each part. -
Page 82: Editing The Effect Settings For Each Part Of The Pattern (Pattern Part Effect)
Using the sequencer to create patterns (Pattern mode) Editing the effect settings for each 2. Press [ENTER]. part of the pattern (Pattern Part If you have edited patches for some parts, the following message will appear. Effect) fig.r06-55a_40 1. Press [PATTERN] so it is lit and you are in Pattern mode. 2. -
Page 83: Convenient Functions For Pattern Editing (Pattern Utility)
Using the sequencer to create patterns (Pattern mode) Convenient functions for Erasing unwanted performance data (PTN ERASE) pattern editing (Pattern Utility) This operation erases all or part of the performance data from a Pattern Utility provides various functions that you will find pattern. -
Page 84: Deleting Unwanted Measures (Ptn Delete)
Using the sequencer to create patterns (Pattern mode) Deleting unwanted measures Grid Resolution (PTN DELETE) Make this setting when you are using Grid Quantize. Specify the quantization interval in terms of a note value. Select the shortest note fig.r06-59_40 value that will occur in the range to which Grid Quantize will be applied. -
Page 85: Inserting Blank Measures (Ptn Insert)
Using the sequencer to create patterns (Pattern mode) Meas (Measure) Mode Sets the range of measures you wish to copy. Specifies the copy mode. VALUE VALUE Meas: Specifies the measure at which copying is to begin. If REPLACE: Music data in the copy destination will be erased you select “SETUP,”... -
Page 86: Modifying The Velocity Of Notes (Ptn Chg Vel)
Using the sequencer to create patterns (Pattern mode) Note MAGNIFY: Set this parameter if increases or decreases in velocity variations are desired. For less velocity Specifies the range of notes that will be transposed. variation, use settings of “99%” or less. For more C-1–G 9 Value: velocity variation, set it to “101%”... -
Page 87: Shifting Pattern Data Forward And Back (Ptn Shift Clk)
Using the sequencer to create patterns (Pattern mode) Event BIAS: Adds or subtracts a certain gate time value to/from the gate times in the specified region. For example, if Specifies the type of music data to be shifted in time. you set BIAS to “-30,”... -
Page 88: Initializing The Parameters Of A Pattern (Ptn Init)
Using the sequencer to create patterns (Pattern mode) 5. Press [ENTER]. C.AFT: Channel Aftertouch fig.r06-27 Pitch Bend BEND: Value Specifies how much the data will be thinned. If you are thinning data A screen will appear in which you can convert the data into a in which rapid changes occur, use higher settings for this parameter. -
Page 89: Copying Parameters From A Pattern (Ptn Prm Copy)
Using the sequencer to create patterns (Pattern mode) Copying parameters from a pattern 5. Press [ENTER]. (PTN PRM COPY) Settings made for each part of the pattern will be copied to the current pattern. This operation copies the settings of a specified pattern to the current When the display indicates “COMPLETED,”... -
Page 90: Transmitting Pattern Settings From The Midi Out Connector (Xfer To Midi)
If you want to save all You can also perform the FACTORY RESET operation from Pattern of the pattern data including the music data, use the RS-70’s disk Utility. drive to save the data on a floppy disk. -
Page 91: Adding Effects
(rhythm set) or pattern. The On/Off settings for each Effect affect the RS-70 as a whole (i.e., • In Patch mode, effects will be applied according to the are system settings). This setting remains stored in memory even settings of each patch. -
Page 92: The Effect Signal Path
Adding effects The effect signal path The following figure shows the path followed by the effects signals. fig.r08-03.e Pattern Mode (Patch) Tone Tone MFX Multi-FX Part MFX MFX Send MFX Send Level to Cho Level to Rev Chorus Tone Cho Part Cho Send Level Send Level... -
Page 93: Making Effects Settings
Adding effects Making effects settings Selecting effect parameters Select multi-effect, chorus, or reverb parameters as shown below. fig.r08-08.e Master Effect Switch PAGE/ PAGE/ CURSOR [ CURSOR [ [SHIFT] [SHIFT] PAGE/ PAGE/ CURSOR [ CURSOR [ PAGE/ PAGE/ CURSOR [ CURSOR [ PAGE/ PAGE/ CURSOR [... -
Page 94: Setting Multi-Effects Parameters
Adding effects 1. Press [EFFECTS] so it is lit. LIMITER (p. 98) The on/off state of each effect (multi-effect, chorus, reverb) will HEXA-CHORUS (p. 98) be displayed. TREMOLO CHO (p. 98) fig.r08-04_40 SPACE-D (p. 99) St CHORUS (p. 99) St FLANGER (p. -
Page 95: Send Lvl To Cho
Ctrl 1, 2 (Multi-Effects Control 1, 2) Level # 0–127 Adjusts the output level. On the RS-70, certain multi-effect parameters can be assigned to the modulation lever, knobs, pedal or D Beam. Of the parameters 02: OVERDRIVE explained in Multi-effect parameters, the assignable parameters are marked with a “#”... - Page 96 Adding effects 03: DISTORTION 05: SPECTRUM This effect produces a more intense distortion than Overdrive. Spectrum is a type of filter which modifies the timbre by boosting or cutting the level at specific frequencies. fig.MFX-03 L in L out It is similar to an equalizer, but has 8 frequency points fixed at Pan L 2-Band locations most suitable for adding character to the sound.
- Page 97 Adding effects 07: AUTO WAH Parameter Value Description Speed # SLOW, FAST Simultaneously switch the rota- The Auto Wah cyclically controls a filter to create cyclic change in tional speed of the low frequen- timbre. cy rotor and high frequency fig.MFX-07 rotor.
- Page 98 Adding effects 10: LIMITER Parameter Value Description Pan Dev 0–20 Adjusts the difference in stereo The limiter compresses signals that exceed a specified volume level, location between each chorus preventing distortion from occurring. sound. fig.MFX-10 With a setting of 0, all chorus L in L out sounds will be in the center.
- Page 99 Adding effects 13: SPACE-D Parameter Value Description Rate # 0.05–10.00 [Hz] Adjusts the rate of modulation. Space-D is a multiple chorus that applies two-phase modulation in Depth 0–127 Adjusts the depth of modula- stereo. It gives no impression of modulation, but produces a tion.
- Page 100 Adding effects 17: St DELAY (Stereo Delay) Parameter Value Description Balance D100:0W– Adjusts the volume balance be- This is a stereo delay. D0:100W tween the direct sound and the When Feedback Mode is NORMAL: flanger sound. With a setting of D100:0W only fig.MFX-17a the direct sound will be output, Balance D...
- Page 101 Adding effects 19: MOD DELAY (Modulation Delay) Parameter Value Description HF Damp 200–8000 [Hz], Adjusts the frequency above This effect adds modulation to the delayed sound, producing an BYPASS which sound fed back to the ef- effect similar to a flanger. fect will be cut.
- Page 102 Adding effects Parameter Value Description Parameter Value Description Low Gain -15– +15 [dB] Adjusts the gain of the low fre- Balance # D100:0W– Adjusts the volume balance be- quency. D0:100W tween the direct sound and the delay sound. High Gain -15–...
- Page 103 Adding effects Parameter Value Description Parameter Value Description HF Damp 200–8000 [Hz], Adjusts the frequency above Balance D100:0W– Adjusts the volume balance be- BYPASS which sound fed back to the ef- D0:100W tween the direct sound and the fect will be cut. delay sound.
- Page 104 Adding effects 25: REVERB Parameter Value Description Level Balance A100:0B– Adjusts the volume balance be- The Reverb effect adds reverberation to the sound, simulating an A0:100B tween the Pitch Shift A and Pitch acoustic space. Shift B sounds. fig.MFX-25 Balance D100:0W–...
- Page 105 Adding effects 26: GATED REVERB Parameter Value Description Cho Delay 0.0–100 [ms] Adjusts the time delay from Gate Reverb is a special type of reverb in which the reverberant when the direct sound begins sound is cut off before its natural length. until the chorus sound is heard.
- Page 106 Adding effects 30: DIST>CHORUS Parameter Value Description → Flg Balance # D100:0W– Adjusts the volume balance be- (Distortion Chorus) D0:100W tween the overdrive sound that is sent through the flanger and This effect connects distortion and chorus in series. The parameters the overdrive sound that is not are essentially the same as “27: OD>CHORUS,”...
- Page 107 Adding effects fig.MFX-33 Parameter Value Description L in L out Enhancer Flg Feedback -98– +98 [%] Adjusts the proportion (%) of Balance D the flanger sound that is fed Balance W back into the effect. Chorus Negative (-) settings will invert Balance W the phase.
- Page 108 Adding effects → 36: CHORUS>DELAY 37: FLG>DELAY (Flanger Delay) This effect connects a chorus and a delay unit in series. This effect connects a flanger and a delay in series. fig.MFX-36 fig.MFX-37 Balance D Balance D L in L out L in L out Balance D...
- Page 109 Adding effects 38: CHO>FLANGER 39: CHORUS/DELAY → (Chorus Flanger) This effect connects a chorus and a delay in parallel. The parameters are the same as for “36: CHORUS>DELAY.” However, the Dly This effect connects a chorus and a flanger in series. Balance parameter adjusts the volume balance between the direct fig.MFX-38 sound and the delay sound.
- Page 110 Adding effects 44: TREMOLO Parameter Value Description Low Gain -15– +15 [dB] Adjusts the gain of the low fre- Tremolo cyclically modulates the volume to add tremolo effect to the quency. sound. High Gain -15– +15 [dB] Adjusts the gain of the high fre- fig.MFX-44 quency.
- Page 111 Adding effects 45: AUTO PAN Parameter Value Description The Auto Pan effect cyclically modulates the stereo location of the Type TYPE1–TYPE6 Selects one of the six available sound. types for the number of delay fig.MFX-45 sounds heard in time “A” in the diagram below.
-
Page 112: Making Chorus Settings
Adding effects Making chorus settings Parameter Value Description Mod Wave TRI, SQR, SIN, TRI: The sound will be cut by a Regardless of the mode, only one type of chorus can be used SAW1/ 2 triangle wave. simultaneously. SQR: The sound will be cut by a There are eight types of chorus. -
Page 113: Making Reverb Settings
Adding effects Depth (Chorus Depth) Time (Reverb Time) Sets the depth at which the chorus sound is modulated. Higher Sets the time over which the reverberation will continue. Higher values result in deeper modulation. values result in longer reverberation. 0–127 0–127 Value: Value:... -
Page 114: Connecting Patterns To Create A Song (Song Mode)
2. Select the song number (01–99) that you want to play. 3. Press [ ] to play back a song. The RS-70 has a total of sixteen parts. fig.r09-02a.e To switch the play/mute status of parts 11–16, hold down [SHIFT] current step number and press [1]–[6]. -
Page 115: Set The Song Tempo
Creating a song Saving a song On the RS-70, you create a song by inputting the playback order of When you have recorded/edited a song, use the following patterns one at a time. -
Page 116: Editing Song Settings
Connecting patterns to create a song (Song mode) Editing song settings Convenient functions for song editing (Song Utility) You can assign a name to a song you create, and specify whether the song will loop when it is played. Song Utility provides various functions that you will find convenient when editing songs, such as copying or initializing a song. -
Page 117: Copying A Song (Song Copy)
Connecting patterns to create a song (Song mode) 5. Specifies the location where the step is to be inserted. 7. Press PAGE/CURSOR [ Use PAGE/CURSOR [ ] to move the cursor, and use Use VALUE [-]/[+] to specify the copy-destination step of the VALUE [-]/[+] to specify the value. -
Page 118: Erasing A User Song You Saved (Song Remove)
Connecting patterns to create a song (Song mode) Erasing a user song you saved (SONG REMOVE) This operation erases the specified user song. Although you can select a song that has been erased, nothing will play back. 1. Press [SONG] so it is lit and you are in Song mode. 2. -
Page 119: Using The Floppy Disk Drive
If you save a From data that was saved using "Type:ALL" (p. 120), here's how you pattern created on the RS-70 as a Standard MIDI File, you can can load just the specified patch(es) or rhythm set(s) into the RS-70's use many devices to play your song. -
Page 120: Saving Data On Disk (Save)
Data cannot be saved to the master disks of Standard MIDI File starting at the number you specified as the load destination. releases, etc. from Roland. If you decide to cancel, press [EXIT]. 1. Insert a disk into the floppy disk drive. -
Page 121: Preparing A Disk For Use By The Rs-70 (Format)
] to select “2:SAVE.” fig.r11-13_40 (FORMAT) This function initializes (formats) a disk so that RS-70 data can be saved to it. Before a new disk or a disk used on another device can be 4. Press [ENTER]. used on the RS-70, it must be formatted on the RS-70. -
Page 122: Creating A Duplicate Disk (Backup)
Use this function to delete unwanted files from disk. into the RS-70. 6. When the data has been read, the display will indicate “Set Master disks of Standard MIDI Files releases, etc. from Roland Destination Disk.” Insert the copy-destination disk into the cannot be deleted. -
Page 123: Renaming A File (Rename)
This function changes the name of a file. File name extensions cannot be changed. Files on the master disks of the Standard MIDI File releases, etc. from Roland cannot be renamed. 1. Insert a disk into the floppy disk drive. 2. Press [WRITE] while holding down [SHIFT]. -
Page 124: Settings Common To All Modes (System Function)
Settings common to all modes (System Function) Selecting system setting parameters Settings that affect the entire operating environment of the RS-70, such as tuning and MIDI message reception, are referred to as fig.r12-02 system functions. This section explains how to make settings for... -
Page 125: Functions Of The System Parameters
(keyboard, pitch bend/modulation lever, knobs, buttons, D Beam controller, pedal, and so on); or not disconnected (ON). Normally, this is left “ON”, but if you wish to use the RS-70’s keyboard and controllers to control only external sound modules, set it to “OFF.”... -
Page 126: Settings Related To Controllers (Controller)
Settings common to all modes (System Function) Settings related to controllers Pedal (Pedal Control Assign) (CONTROLLER) This specifies the function of the pedal connected to the CONTROL PEDAL jack. Mod (Modulation Assign) VALUE You can use the modulation lever to apply the following effects In addition to the items listed in Modulation Assign, you can use the other than vibrato. -
Page 127: Settings Related To Midi And Usb (Midi&Usb)
VALUE: 17–32 Soft Thru (Soft Through Switch) If this is set to 1–16, the RS-70 will transmit MIDI messages (program change/bank select) on that channel when the pattern The Thru function re-transmits all messages received at the MIDI IN is switched. -
Page 128: Checking Memory Usage Status (Memory Info)
VALUE: VALUE: -64–+63 The modified settings will become effective after you save the SYSTEM function (p. 124) and switch the power to the RS-70 off, then on again. Checking memory usage status (MEMORY INFO) Indicates how much data is stored in the memory. You cannot change this value here. -
Page 129: Performing With An External Midi Device
Performing with an external MIDI device About MIDI Example: Set the RS-70 to send on Channel 1 and Channel 2, then set sound MIDI (Musical Instrument Digital Interface) is a standard module A to receive only Channel 1, and sound module B to receive only Channel 2. -
Page 130: Using The Rs-70 To Play An External Midi Sound Module
MIDI sound module This message transmits whatever motion is made by the Pitch Bend lever. By connecting the RS-70 to an external MIDI sound module with a Aftertouch MIDI cable and setting the channels, the external MIDI module can be used to produce sound when you play the RS-70’s keyboard. -
Page 131: Set The Keyboard Transmit Channel
RS-70 in Patch mode. Next, try playing the RS-70 from an external MIDI device. * If you are using the RS-70 in Pattern mode, the part and channel numbers will be the same unless you change the settings. -
Page 132: Setting The Patch Receive Channel
Patch mode. you to switch patches and rhythm sets. * If you are using the RS-70 in Pattern mode, the part and channel 1. Transmit a value for the Bank Select MSB (controller number numbers will be the same unless you change the settings. -
Page 133: Using An External Midi Controller To Change The Rs-70'S Tones
4. As described in “Turning on the power” (p. 18), turn on the * If your sequencer does not have a Thru function, set the RS-70’s Local power of each device. Control to ON. -
Page 134: Recording
For example, assign Tones to each Part as shown below. * If your sequencer does not have a Thru function, set the RS-70’s Local Control to ON. Drums:... -
Page 135: Playing Together With The Playback Of A Recorded Performance
MIDI 2 music data You can play the RS-70’s keyboard along with a previous Be sure to note the following when playing back General MIDI or performance by playing while the recorded material is played back. -
Page 136: Synchronizing Images To An Rs-70 Performance (V-Link)
The V-LINK function will always be OFF when you turn on the speed along with the music playback speed. power. In order to use V-LINK with the RS-70 and Edirol DV-7PR, you will need to make connections using an Edirol UM1/UM-1S (sold separately). Connection examples Use a UM-1 to connect the RS-70’s MIDI OUT connector to the DV-... -
Page 137: V-Link Functions That The Rs-70 Can Control And Midi Messages
V-LINK functions that the RS-70 can control and MIDI messages With the factory settings, the RS-70 assigns the following functions to each controller, allowing you to control V-LINK compatible video equipment. For some controllers, you can change the function assignments. -
Page 138: Reso (Resonance)
1. Press [V-LINK] while holding down [SHIFT]. Value Clip01–Clip32 OFF, ON The RS-70 does not support the Edirol DV-7PR’s dual stream mode. Speed Range Specifies the amount by which the image playback speed can change when you operate the pitch bend lever. A value of “1” is normal speed playback. -
Page 139: Performing With A Computer
Performing with a computer If you are using music software running on a computer, you can use the computer to operate the RS-70’s controls. Not only can you create and play back song data, you can also have Tones switch automatically. -
Page 140: Windows Xp Users
Performing with a computer Windows XP users If you are using Windows With the RS-70 disconnected, start up Windows. XP Professional, you must Disconnect all USB cables except for a USB keyboard and USB mouse (if used). log on using a user name with an administrative Open the System Properties dialog box. - Page 141 1. With the RS-70’s power switch turned off, connect it to the AC adaptor. 2. Plug the AC adaptor into an AC power outlet. 3. Use the USB cable to connect the RS-70 to your computer. Set the RS-70’s power switch to the ON position.
- Page 142 Performing with a computer fig.Win-07.e Make sure that the “Model” field indicates “Roland RS-70,” and click [Next]. Driver installation will begin. If in step 4 the “What action do you want Windows to take?” setting was not set to “Ignore,” a “Hardware Installation” dialog box will appear.
- Page 143 Performing with a computer fig.Win-12.e The Found New Hardware wizard will appear. Make sure that the display indicates “Roland RS-70,” and click [Finish]. Wait until “Found New Hardware” appears near the taskbar. When driver installation has been completed, the System Setting Change dialog box will appear.
-
Page 144: Windows 2000 Users
Performing with a computer Windows 2000 users With the RS-70 disconnected, start up Windows. Disconnect all USB cables except for a USB keyboard and USB mouse (if used). Log on to Windows as a user with administrative privileges (such as Administrator). - Page 145 3.Use the USB cable to connect the RS-70 to your computer. This unit is equipped with protection circuit. A brief Set the RS-70’s power switch to the ON position. interval (a few seconds) after power up is required before the unit will operate normally.
- Page 146 Specify the drive name of your CD-ROM drive. fig.Win-21.e The “Found New Hardware Wizard” may be displayed. Verify that “Roland RS-70” is displayed, and click [Finish]. The System Settings Change dialog box may appear. Click [Yes]. Windows will restart automatically.
-
Page 147: Windows Me/98 Users
This unit is equipped with outlet. a protection circuit. A brief 3. Use the USB cable to connect the RS-70 to your computer. interval (a few seconds) after power up is required Set the RS-70’s power switch to the ON position. -
Page 148: Settings And Checking
The New Hardware Found dialog box will appear. In the “Copy files from” area, type “E:\Win98\RS-70” and click [OK]. If the New Hardware * The drive name “E:” may be different for Found dialog box does not your system. Specify the drive name of your appear, re-install the driver CD-ROM drive. -
Page 149: Windows 98 Users
For MIDI music playback, click the located at the right of [Preferred device] (or in Windows XP, [Default device]), and select the Roland RS-70. Click [OK] to complete the settings. The settings are completed. Windows 98 users Open Control Panel. -
Page 150: Deleting The Usb Midi Driver
Performing with a computer Deleting the USB MIDI driver If you were not able to install the RS-70 driver according to the procedure, or if you are unable to use the RS-70 even after installing the driver, you must delete the driver. -
Page 151: Installing & Setup The Driver (Macintosh)
A “driver” is software that transfers data between the RS-70 and application software running on your computer, when your computer and the RS-70 are connected by a USB cable. The driver sends data from your application to the RS-70, and from the RS-70 to your application. -
Page 152: Installing The Rs-70 Driver
Disconnect the RS-70 from the Macintosh before you perform the installation. view OMS_2.3_Mac.pdf. If the power of the RS-70 is turned on, a message like the following will appear when The latest version of Adobe the Macintosh is started up. Perform the steps described below as appropriate for the Acrobat Reader can be message that is displayed. -
Page 153: Oms Settings
OMS settings Connect the RS-70. To prevent malfunction 1. With the RS-70’s power switch turned off, connect it to the AC adaptor. and/or damage to speakers 2. Plug the AC adaptor into an AC power outlet. or other devices, always 3. - Page 154 After you have finished the above check, quit OMS Setup. volume of your RS-70 This completes driver settings. before continuing. This completes connections for the RS-70 and Macintosh, and installation of the MIDI driver. Now, MIDI data can be input and output (recorded and played).
-
Page 155: Connecting With Midi Cables
MIDI cable Installing the included editor software To help you get more out of your RS-70, it comes with RS Editor software. Use RS Editor to freely create your own original sounds. Detailed instructions on installing the software can be found in the online manual contained on the RS Editor CD-ROM. - Page 156 Memo...
-
Page 157: Appendix
Appendix... -
Page 158: Troubleshooting
(p. 130). problem persists, consult your dealer or local Roland Service Station. • If using an external MIDI device to sound the RS-70, each Part’s reception channel needs to be set so it matches the channels that * If any sort of message is being displayed on the screen during an will be used for transmission by the external MIDI device (p. -
Page 159: General Midi
1 clock (p. 87). Are the Multi-Effects Source setting correct? (p. The RS-70 contains some patches that are intended for live playing in Patch mode; these include tones that use four voices for each note, or Is the Clock Source set to “MIDI?”... - Page 160 MIDI device. Certain MIDI devices you may have Some types of sequencer software may not allow Soft Thru (i.e., data connected may not send the MIDI clock to the RS-70 except received at the MIDI IN connector is not sent from the MIDI OUT during recording or playback.
- Page 161 • If your computer or USB hub has two or more USB connectors, drive? and you connect the RS-70 to a USB connector to which the RS- The software cannot be installed from a networked CD-ROM 70 has never been connected before, the “Unknown device”...
- Page 162 • Was the driver installed correctly? • Is the RS-70 connected correctly? In order for you to play back MIDI data via the RS-70, the driver Make sure that the USB connector of your computer is connected must be installed. For installation and settings, refer to to the RS-70 by a USB cable.
- Page 163 If this occurs, click [OK] and exit the other applications. • Was the driver installed correctly? In order for you to play back MIDI data via the RS-70, the driver must be installed. For installation and settings, refer to “Installing & setup the driver (Macintosh)” (p. 151).
-
Page 164: Error Messages/Messages
Check that USB cable is not broken or pulled out. has a short. No File There is no file that the RS-70 can use. (Note: This will — be displayed if there is no file with an extension of RSU or MID.) Disk Not Ready A disk is not inserted in the disk drive. -
Page 165: Parameter List
Parameter list Patch parameters Patches Patch Common parameters (p. 56) Parameters Value Name Patch Name space, A–Z, a–z, 0–9, ! “ # $ % & ‘ ( ) * + , - . / : ; < = > ? @ [ ¥... - Page 166 Parameter list Patch Effects parameters * The same parameters are also provided for Rhythm sets. Parameters Value Multi-effects group Type Multi-effects Type 00 THROUGH–47 FBK RIPPER Multi-effects Parameters The number of parameters varies depending on the Multi-effects Type. Refer to “Setting multi-effects pa- rameters”...
-
Page 167: Pattern Parameters
Parameter list Pattern parameters Pattern Common parameters (p. 79) Parameters Value Name Pattern Name space, A–Z, a–z, 0–9, ! “ # $ % & ‘ ( ) * + , - . / : ; < = > ? @ [ ¥... - Page 168 Parameter list Song parameters (p. 116) Parameters Value Name Song Name space, A–Z, a–z, 0–9, ! “ # $ % & ‘ ( ) * + , - . / : ; < = > ? @ [ ¥ ] ^ _ ` { | } Loop Switch Song Loop Switch OFF, ON...
-
Page 169: Original Tone List
Original Tone List Name Voice Name Voice Name Voice Name Voice Name Voice 0001 Piano 1 0071 Glockenspiel 0141 Guinguette 0211 Slap Bass 1 0281 Vls Pizz 0002 Piano 1w 0072 Music Box 0142 Nylon-str.Gt 0212 Unison Slap 0282 Vls Pizz St. 0003 European Pf 0073... - Page 170 Original Tone List Name Voice Name Voice Name Voice Name Voice Name Voice 0351 Female Oohs1 0421 St.Orch Brs2 0491 RS Flute 2 0561 WindSyn Lead 0631 Vox Pad 0352 Female Oohs2 0422 St.Orch Brs3 0492 RS Flute 3 0562 RS SawLead 2 0632 Bowed Glass...
- Page 171 Original Tone List Name Voice Name Voice Name Voice Name Voice Name Voice 0701 Shamisen 2 0771 TablaBayaSet 0841 HipHopKick 2 0911 TR808 Rim 0981 CajonRoll Hi 0702 Time Vault 0772 TablaBaya 1 0842 Dance Kick 0912 RS Snap 0982 CajonRoll Lo 0703 Koto...
-
Page 172: Patch List
Patch List [1] PIANO [2] KBD & ORG NAME Cate- Patch Select GM2 Patch Select Voice NAME Cate- Patch Select GM2 Patch Select Voice gory Mode gory Mode MSB = 87 MSB = 121 MSB = 87 MSB = 121 Pf01 RS Grand SPLIT... - Page 173 Patch List NAME Cate- Patch Select GM2 Patch Select Voice NAME Cate- Patch Select GM2 Patch Select Voice gory Mode gory Mode MSB = 87 MSB = 121 MSB = 87 MSB = 121 Ky73 Tubular-bell SINGLE Gt44 Jazz Gt. SINGLE Ky74 Church Bell...
- Page 174 Patch List NAME Cate- Patch Select GM2 Patch Select Voice NAME Cate- Patch Select GM2 Patch Select Voice gory Mode gory Mode MSB = 87 MSB = 121 MSB = 87 MSB = 121 Or48 Dist Hit SINGLE Wr16 Singing Bell SINGLE Or49 Thin Beef...
- Page 175 Patch List NAME Cate- Patch Select GM2 Patch Select Voice NAME Cate- Patch Select GM2 Patch Select Voice gory Mode gory Mode MSB = 87 MSB = 121 MSB = 87 MSB = 121 Br45 Dist SqrBrs SINGLE Vo33 OB2 Pad 2 SINGLE Br46 JP Saw Brs...
- Page 176 Patch List NAME Cate- Patch Select GM2 Patch Select Voice NAME Cate- Patch Select GM2 Patch Select Voice gory Mode gory Mode MSB = 87 MSB = 121 MSB = 87 MSB = 121 Sy07 Porta Saw Ld DUAL Sy81 Chiffer Lead SINGLE Sy08...
- Page 177 Patch List NAME Cate- Patch Select GM2 Patch Select Voice NAME Cate- Patch Select GM2 Patch Select Voice gory Mode gory Mode MSB = 87 MSB = 121 MSB = 87 MSB = 121 Bs54 RS SynBass 3 SINGLE Rh66 Door SINGLE Bs55...
-
Page 178: Rhythm Set List
----- ----- [EXC]: Percussion sound of the same number will not be heard at the same time. PC: Program Number Rh01–Rh05: MSB=086, LSB=064 * The range that can be edited on the RS-70 and by sound editing software is A0–C8. - Page 179 ----- ----- [EXC]: Percussion sound of the same number will not be heard at the same time. PC: Program Number Rh06–Rh10: MSB=086, LSB=064 * The range that can be edited on the RS-70 and by sound editing software is A0–C8.
- Page 180 ----- ----- [EXC]: Percussion sound of the same number will not be heard at the same time. PC: Program Number Rh11–Rh20: MSB=086, LSB=064 * The range that can be edited on the RS-70 and by sound editing software is A0–C8.
- Page 181 Rhythm Set List Rh16:Perc Menu Rh17:Vox&ClapMenu Rh18:Fx Menu Rh19:Menu 1 Rh20:Menu 2 (PC:016) (PC:017) (PC:018) (PC:019) (PC:020) Voice Voice Voice Voice Voice ----- ----- ----- ----- Taiko Surdo Mute [EXC1] ----- ----- ----- ----- Surdo Open [EXC1] ----- ----- RS Kick 1 ----- Dholak 1 [EXC2]...
- Page 182 [EXC]: Percussion sound of the same number will not be heard at the same time. PC: Program Number Rh16–Rh21: MSB=086, LSB=064 Rh22–Rh25: MSB=120, LSB=000 * The range that can be edited on the RS-70 and by sound editing software is A0–C8.
- Page 183 ----- ----- [EXC]: Percussion sound of the same number will not be heard at the same time. PC: Program Number Rh26–Rh30: MSB=120, LSB=000 * The range that can be edited on the RS-70 and by sound editing software is A0–C8.
-
Page 184: Pattern List
Pattern List Pattern Name Pattern Name Pattern Name Pattern Name Sample Patterns Pop 24(Vari) Techno 1 Hip Hop 8 (Pop Sample, Rock Sam- Pop 25(Vari) Techno 2 Hip Hop 9 ple, Funk Sample, Jazz Rock 1 Techno 3 Hip Hop 10 Sample, LoungeSample, Rock 2 Techno 4... - Page 185 Arpeggio Template List Category Button Name Category Button Name Category Button Name Category Button Name Orchestra Orch Phr 1 Ac.Brass Brass Phr 1 Soft Lead Soft Ld Phr1 Drums Fill Phr 1 Orch Phr 2 Brass Phr 2 Soft Ld Phr2 Fill Phr 2 Orch Phr 3 Brass Phr 3...
-
Page 186: Arpeggio Style List
Arpeggio Style List Name Variation Name Variation Name Variation Name Variation Note Values * 1/16 Sync1-3 A.Gt Backing Ac&E.Bass 1/8 Basic 1 1/16 Sync1-4 E.Gt Phr Synth Bs 1/8 Basic 2 1/16 Sync2-1 E.Gt Backing Drum Phr 1/8 Basic 3 1/16 Sync2-2 D.Gt Phr Perc Phr... - Page 187 Multi-chord Set List 7. Trad Min 1 11. Jazz Min 1 15. 5th Stack Assign Chord Name Constituent Notes of Assign Chord Name Constituent Notes of Assign Chord Name Constituent Notes of Chord Forms Chord Forms Chord Forms C3, D#4, G4, C5 C-7(11) C3, A#3, D#4, F4 C4, G4...
-
Page 188: Midi Implementation Chart
MIDI implementation chart SYNTHESIZER Date : April. 1, 2003 Model RS-70 Sound Generator Section Version : 1.00 Transmitted Recognized Function... Remarks Basic Default 1–16 1–16 Channel Changed 1–16 1–16 Default Mode 3 Mode 3 Mode Messages Mode 3, 4 (M = 1) - Page 189 * A separate publication titled “MIDI Implementation” is also available. It provides complete details concerning the way MIDI has been implemented on this unit. If you should require this publication (such as when you intend to carry out byte-level programming), please contact the nearest Roland Service Center...
-
Page 190: Specifications
* 12 chord forms can be assigned to each set. Original Tones: 1,024 Phrase/Arpeggio Patches: 768 (RS-70 original: 512, General MIDI 2: 256) Templates: 342 Rhythm Sets: 30 (RS-70 Original: 21, General MIDI 2: 9) User Templates: 8 User Memory Styles (Variations): 473 User Styles: 8... -
Page 191: Index
Index Control Change ............130 Accent Rate (Arpeggio Accent Rate) ......73 CONTROLLER ............126 Active Exp Sw (Active Expression Switch) ....57 COPY ................78 ACTIVE EXPRESS (Active Expression) ..... 36 Count In ................71 Aftertouch ..............130 Ctrl 1, 2 (Multi-Effects Control 1, 2) ......95 All Reset ................ - Page 192 Index Format ................121 MIDI ................129 MIDI&USB ..............127 MIDI-USB Thru ............127 GENERAL ..............125 Minus-one performance ..........47 General MIDI ..............11 General MIDI 2 .............. 11 ........138 V-LINK Setup Parameters Grid Resolution ............. 71 Mod (Modulation Assign) .......... 126 Grid Strength ..............
- Page 193 Index Patch Modify ..............30 PunchIn ................71 Patch parameters ............55 PunchOut ................ 71 PATCH PRM COPY ............60 PATCH REMOVE ............61 Qtz Mode (Quantize Mode) ......... 71 Patch Rx Ch (Patch Receive Channel) ...... 127 QUICK SEQ (Quick Sequencer) ......40, 66 PATCH SCALE ............
- Page 194 Index Rx Bank Sel (Receive Bank Select Switch) ....127 Tone Pan ................. 57 Rx Prog Chg (Receive Program Change Switch) ..127 Tones ................50 Rx Sys Exc (Receive System Exclusive Switch) ..127 Track Mute .............. 67 Pattern Mode ..............
- Page 195 For EU Countries This product complies with the requirements of European Directive 89/336/EEC. For the USA FEDERAL COMMUNICATIONS COMMISSION RADIO FREQUENCY INTERFERENCE STATEMENT This equipment has been tested and found to comply with the limits for a Class B digital device, pursuant to Part 15 of the FCC Rules.
- Page 196 Information When you need repair service, call your nearest Roland Service Center or authorized Roland distributor in your country as shown below. MALAYSIA EL SALVADOR IRELAND IRAN AFRICA AFRICA BENTLEY MUSIC SDN BHD OMNI MUSIC Roland Ireland MOCO, INC. G2 Calmount Park, Calmount 140 &...
Need help?
Do you have a question about the RS-70 and is the answer not in the manual?
Questions and answers