Table of Contents
Advertisement
Quick Links
LightSwitch Jeweller User manual
Updated June 13, 2023
LightSwitch Jeweller is a smart touch light switch. For indoor installation.
LightSwitch can replace any mechanical or touch switch: the product line
includes one-gang, two-gang, and two-way versions. Devices can be combined
by installing several switches next to each other in one frame.
LightSwitch is installed without changing the electrical wiring of the object. The
device does not require a neutral wire and works only from the supply phase.
The switch features a standard European form factor (55).
The list of compatible hubs and range extenders is
available here
.
LightSwitch operates as part of the Ajax system and connects to the hub via the
Jeweller secure radio communication protocol. The communication range is up
to 1,100 meters without obstacles.
Buy LightSwitch
Advertisement
Table of Contents

Related Manuals for AJAX LightSwitch Jeweller


Summary of Contents for AJAX LightSwitch Jeweller
- Page 1 The list of compatible hubs and range extenders is available here LightSwitch operates as part of the Ajax system and connects to the hub via the Jeweller secure radio communication protocol. The communication range is up to 1,100 meters without obstacles.
- Page 2 Design LightSwitch is a prefabricated smart light switch. All switch elements are purchased separately. Elements are connected mechanically without the use of tools. There are two LightSwitch formats in the Ajax product line: single and combined. Single switch A single LightSwitch consists of two elements: a LightCore relay and a SoloButton touch-sensitive panel.
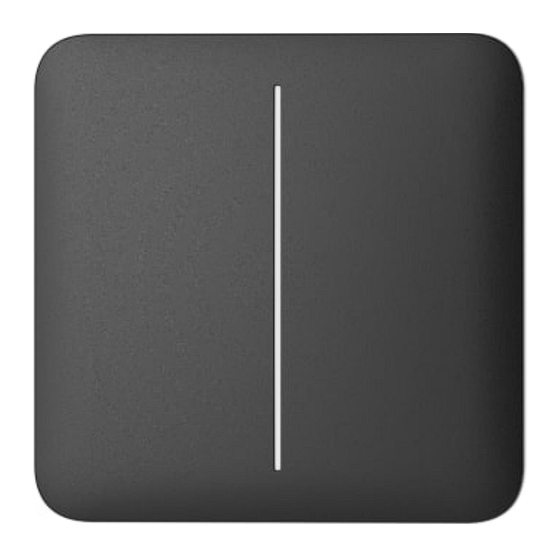
- Page 3 The product line includes 8 button colours for switches. In the switch settings in Ajax apps, the colour of LightSwitch can be selected. The colour in the app does not necessarily have to match the colour of the installed button.
-
Page 4: Functional Elements
Functional elements Relay LightCore (1-gang) LightCore (2-gang) LightCore (2-way) Touch-sensitive panels Ensure that any stickers have been removed from the touch panel before installing it on the LightCore. This is necessary for correct LED indication of the device. SoloButton (1-gang / 2-way) SoloButton (2-gang) CenterButton (1-gang / 2-way) -
Page 5: Operating Principle
SideButton (2-gang) Frames Frame (2 seats) Frame (3 seats) Frame (4 seats) Operating principle 00:00 00:14 LightSwitch Jeweller is a smart touch light switch. It controls the lighting in three ways: manually, through smartphone and PC apps, and using Automation... - Page 6 If necessary, a PRO or user with administrator rights can disable the backlight in Ajax apps The product line of devices includes 1-gang, 2-gang, and 2-way light switches: 1-gang — control one lighting line (one lamp).
-
Page 7: Manual Control
The entire LightSwitch panel is touch sensitive. Therefore, the lighting can be controlled by pressing or reaching any part of the touch-sensitive panel with a hand. Remote control Control via the app LightSwitch can be used to control lighting manually and remotely through Ajax apps... - Page 8 Press the switch in LightSwitch eld in the Devices menu in the Ajax app, and the state of the switch contacts will change to the opposite; lighting will be switched off or on. This way, system users can remotely control the lighting. For example, switch on the light in the room in advance before entering the room.
- Page 9 Automation scenarios 00:00 00:07 Scenarios help automate security and reduce the number of routine actions. For example, set the lights to switch on by the schedule or when disarming the security system. LightSwitch supports the following types of scenarios: By alarm. By arming/disarming.
-
Page 10: Operation Modes
More about scenarios Operation modes LightSwitch can operate in one of two modes: bistable or pulse. The operating mode is set by a user with admin or PRO rights in Ajax apps in the device settings By default, LightSwitch works in bistable mode. When controlling the lighting, it switches on or off. - Page 11 (up to 5 W), the system will notify the users of the Ajax system. In this case, it is necessary to replace the lighting device with a similar one with higher capacity or to connect a bundled capacitor in parallel with the lighting device.
- Page 12 The protocol involves regular polling of system devices by the hub at intervals of 12 to 300 seconds (depending on the Jeweller or Jeweller/Fibra settings) to monitor communication with all devices and shows their statuses in the Ajax apps. More about Jeweller...
-
Page 13: Selecting The Installation Site
The addressability of Ajax devices allows sending to PRO Desktop or to CMS not only events but also the type of the device, its assigned name, security group, and room. The list of transmitted parameters may vary depending on the selected communication protocol with the CMS. -
Page 14: Installation
The signal strength is indicated by the icon in the Devices menu. The signal strength is also indicated in the switch states. Signal strength value: Three bars — excellent signal strength. Two bars — good signal strength. One bar — low signal strength. Stable operation is not guaranteed. Crossed out icon —... - Page 15 Only a quali ed electrician or installer should install LightSwitch. Do not switch on power at the switches before installing the touch-sensitive panels. Also, do not try to register the device before installing the touch-sensitive panel, as it contains antennas necessary for communication with the hub.
- Page 16 Installation of switch Installation of 2-way switch 2-way LightSwitch with a third-party mechanical switch Two 2-way LightSwitch switches Two 2-way LightSwitch switches with a third-party intermediate switch Adding to the system Before adding a device 1. Install the Ajax app...
-
Page 17: Connecting To The Hub
4. Make sure that the hub is on and has Internet access via Ethernet, Wi-Fi, and/or mobile network. This can be done in the Ajax app or by looking at the LED indicator of the hub: it should light up white or green. -
Page 18: Functionality Testing
If the maximum number of devices is added to the hub, when you try to add the switch in the Ajax app, you will get a noti cation about exceeding the device limit. The number of devices that can be connected to the hub depends on the... - Page 19 4. Go to Settings 5. Select Jeweller Signal Strength Test. 6. Run and perform the test using the prompts in the app. Icons Icons display some of LightSwitch states. Icons can be checked in the Ajax app in the Devices tab. Icon...
- Page 20 States The states include information about the switch and its operating parameters. LightSwitch states can be seen in an Ajax app. To see them: 1. Open the Ajax app. 2. Select the hub if you have several of them or if using a PRO app.
- Page 21 4. Select LightSwitch in the list. Parameter Meaning Clicking on opens a list of switch malfunctions. Malfunction The eld is displayed only if a malfunction is detected. Signal strength between the switch and the hub (or the range extender) via the Jeweller channel. Recommended values: 2–3 bars.
- Page 22 On — the button/buttons are locked. The switch will not respond to button/buttons touch. Off — the button/buttons are not locked. The switch will respond to button/buttons touch. The status of the switch frame backlight is displayed as follows: On — the LED frame is backlit when the Backlight switch is off.
- Page 23 Settings To change the switch settings in the Ajax app: 1. Open the Ajax app. 2. Select the hub if you have several of them or using a PRO app. 3. Go to the Devices tab.
- Page 24 To change the switch name, click on the text eld. The name can contain up to 12 Cyrillic characters or up to 24 Latin symbols. Virtual room to which LightSwitch is assigned. To change the room, click on the eld. Room The room name is displayed in the text of SMS and events feed noti cations.
- Page 25 (or range extender) to select the optimal installation site. Learn more User Guide Opens the switch User Manual in the Ajax app. Permanent Deactivation Allows to deactivate the device without removing it from the system. Two options are available: No —...
-
Page 26: Led Indication
When the light is on, the frame is not backlit. The backlight is not bright, so it will not disturb users even if the device is installed near a bed. The backlight can be turned off in the Ajax app if necessary. - Page 27 When a device identi es a fault (for example, there is no connection with the hub), the Ajax app displays a fault counter in the device eld. All malfunctions are shown in switch states . Fields with malfunctions will be highlighted in red.
- Page 28 LightSwitch may lose connection with the hub for the following reasons: Power is no longer supplied. The touch-sensitive panel has been removed (it has antennas on it, which are necessary for communication with the hub or range extender). The lighting device is faulty (for example, the incandescent lamp burned out).
-
Page 29: Maintenance
LightSwitch is a prefabricated smart light switch. All parts are purchased separately. Warranty The warranty for the products of the Limited Liability Company “Ajax Systems Manufacturing” is valid for 2 years after purchase. If the device does not operate properly, we recommend contacting support service rst, as in most cases, technical issues can be resolved remotely. - Page 30 Subscribe to the newsletter about safe life. No spam Email Subscribe...
Need help?
Do you have a question about the LightSwitch Jeweller and is the answer not in the manual?
Questions and answers